
The baseboard is a fundamental part of any model rail layout, but how do you go about building one? DAVE LOWERY explains how to get started building your own baseboard.
Once you’ve decided you want to build your own model railway, and you’ve spent the time doodling plans for tracks and layouts, it’s time to think about a reliable baseboard.
A good baseboard is essential for a good layout. It forms the foundations for your track and, if it’s not right, your layout will be plagued by poor running. Therefore, we have to get it straight and true. We have to make it resilient to fluctuations in temperature and - if it’s going to be portable - reasonably easy to move from one place to another without the need for a forklift truck.
For this project, I have used a traditional 2in by 1in softwood frame. For the baseboard top I’ve chosen the tried-and-trusted Sundeala board. This comes in pre-cut 4ft by 2ft sheets, and you can find it at hobby and craft stores, and some builders’ merchants, such as Jewson and Travis Perkins. These are all readily available materials that can be carried home in a small car, with only a few bits sticking out of the sunroof!
Quality is important
I have to say that most of the softwood on offer in DIY outlets today is pretty awful and is really only slightly better than balsa wood! If your budget can stretch to it, I recommend you invest in higher quality materials from a reputable timber merchant.
Take a set square and tape measure with you when buying timber, so that you can check that the material has been planed to a square edge and that the lengths and widths are true. Most wood is now sold in metric sizes, so an imperial measure will help if you need to make conversions to good old feet and inches!
What tools will you need?
You’ll need a basic array of tools for this project and, while I use power tools, ordinary hand tools will do the job just as well. A set square and a good tenon saw are essential, as is a drill and bits. A Stanley knife, a sharpened pencil and screwdrivers (or power driver) are also essential tools. A jigsaw with a fresh blade is a welcome luxury. You’ll also need a tube of PVA wood glue and a selection of screws.
Find out more in Model Rail
Every month, Model Rail magazine is packed full of the latest new model reviews, expert 'how to' projects and inspirational layouts. Whether you want to know how to build the best baseboard or which layout to choose, you’ll find everything you need in our pages. Why not subscribe, and get the mag delivered straight to your door every month?
There's loads to fire your imagination, with great track plans you can build and inspiration from the real railway, not to mention Model Rail's exclusive range of model locomotives.
HOW TO DO IT: BUILD A BASEBOARD
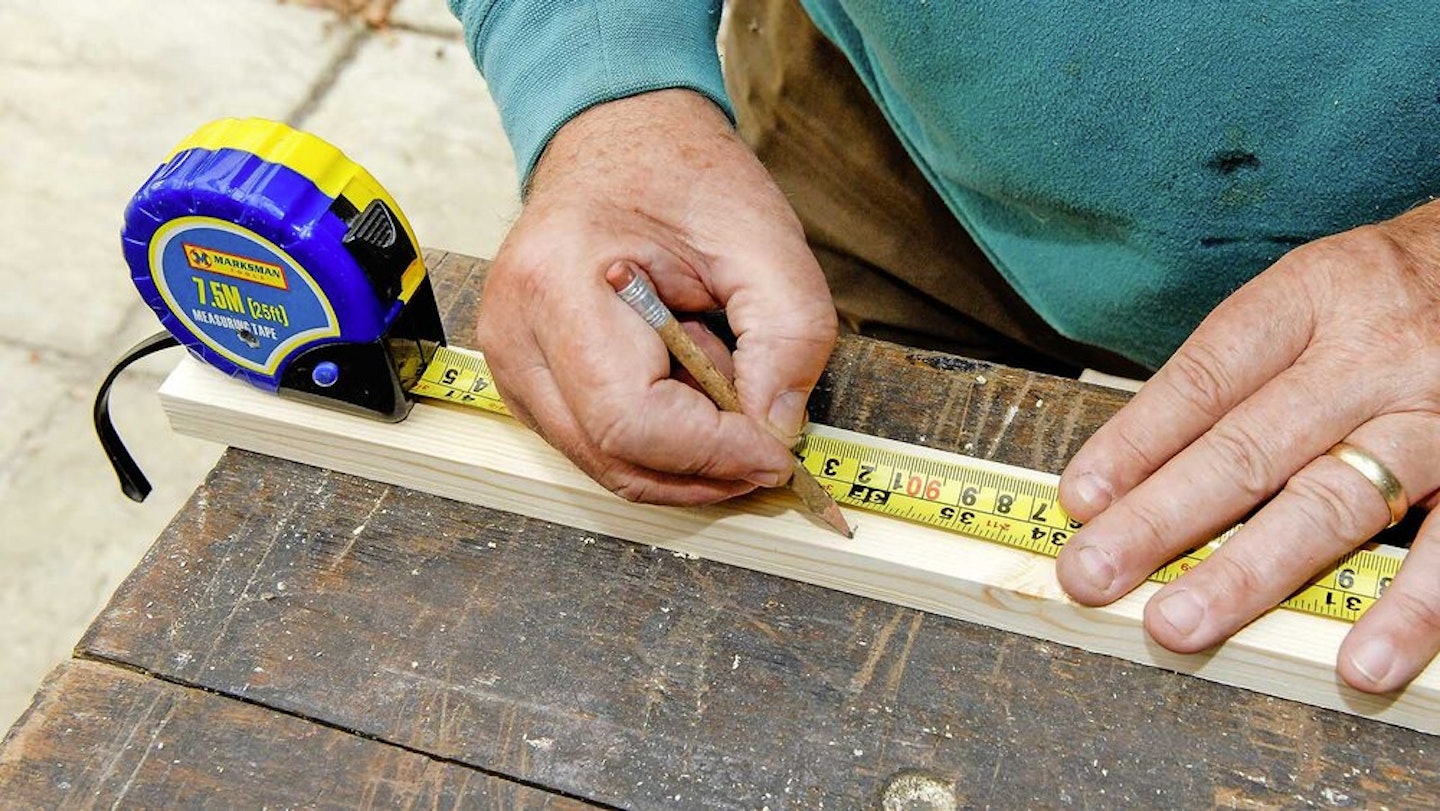
- Using the tape measure, carefully mark off exactly the length of wood required. Be sure to use a nice sharp pencil for a fine and clearly visible line.
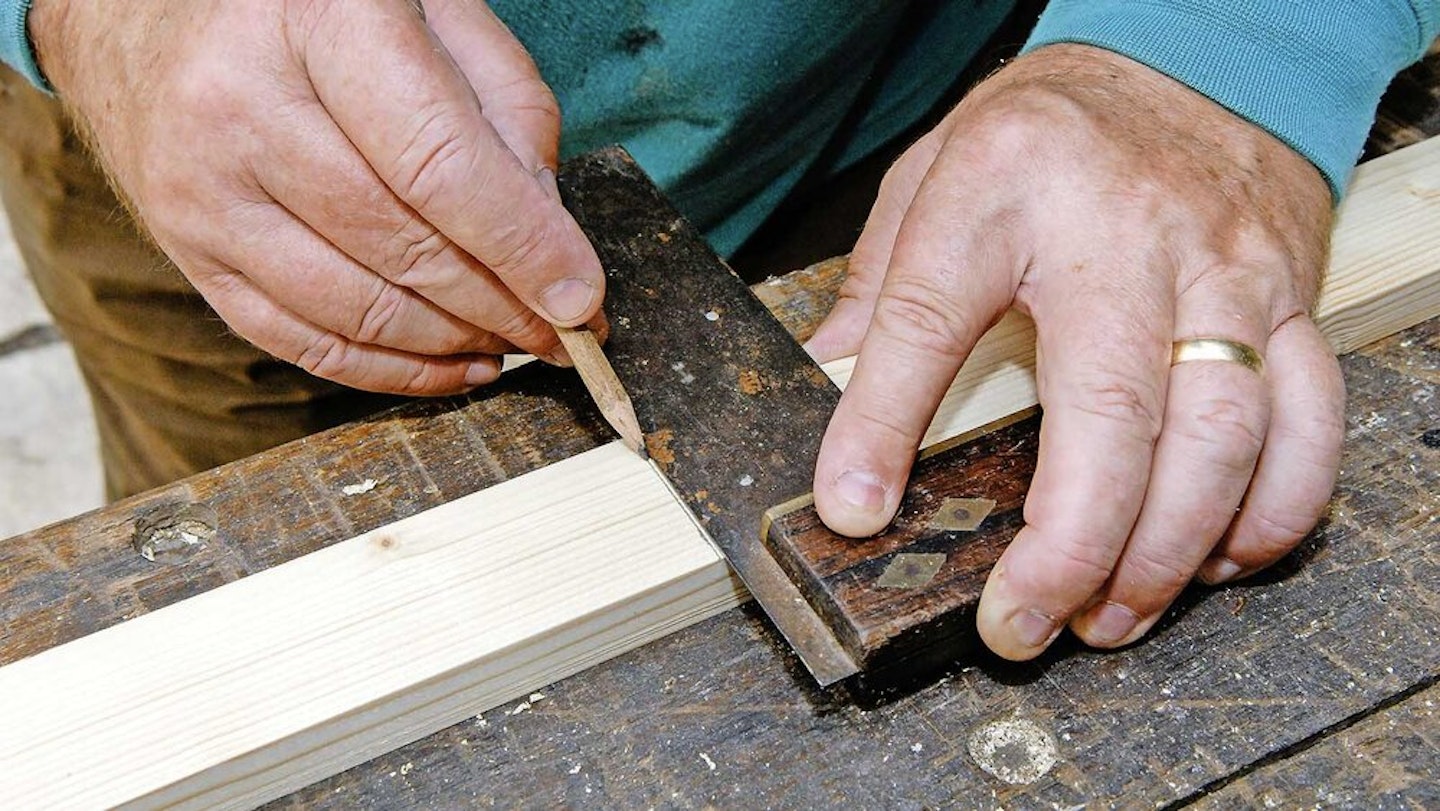
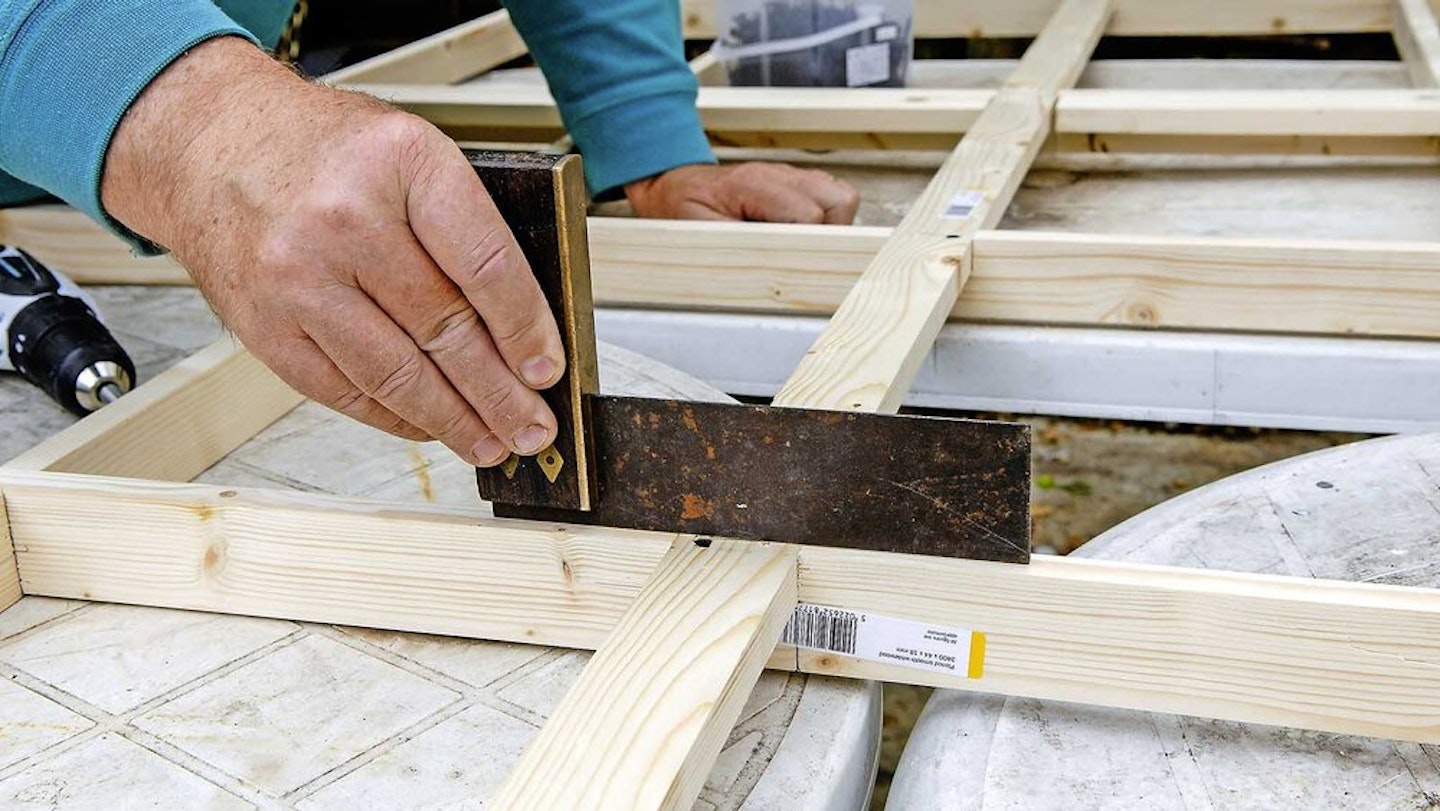
- An essential tool is a carpenter’s set square. Not only is it useful for plumb lines, but also for making sure the joints are square during assembly.
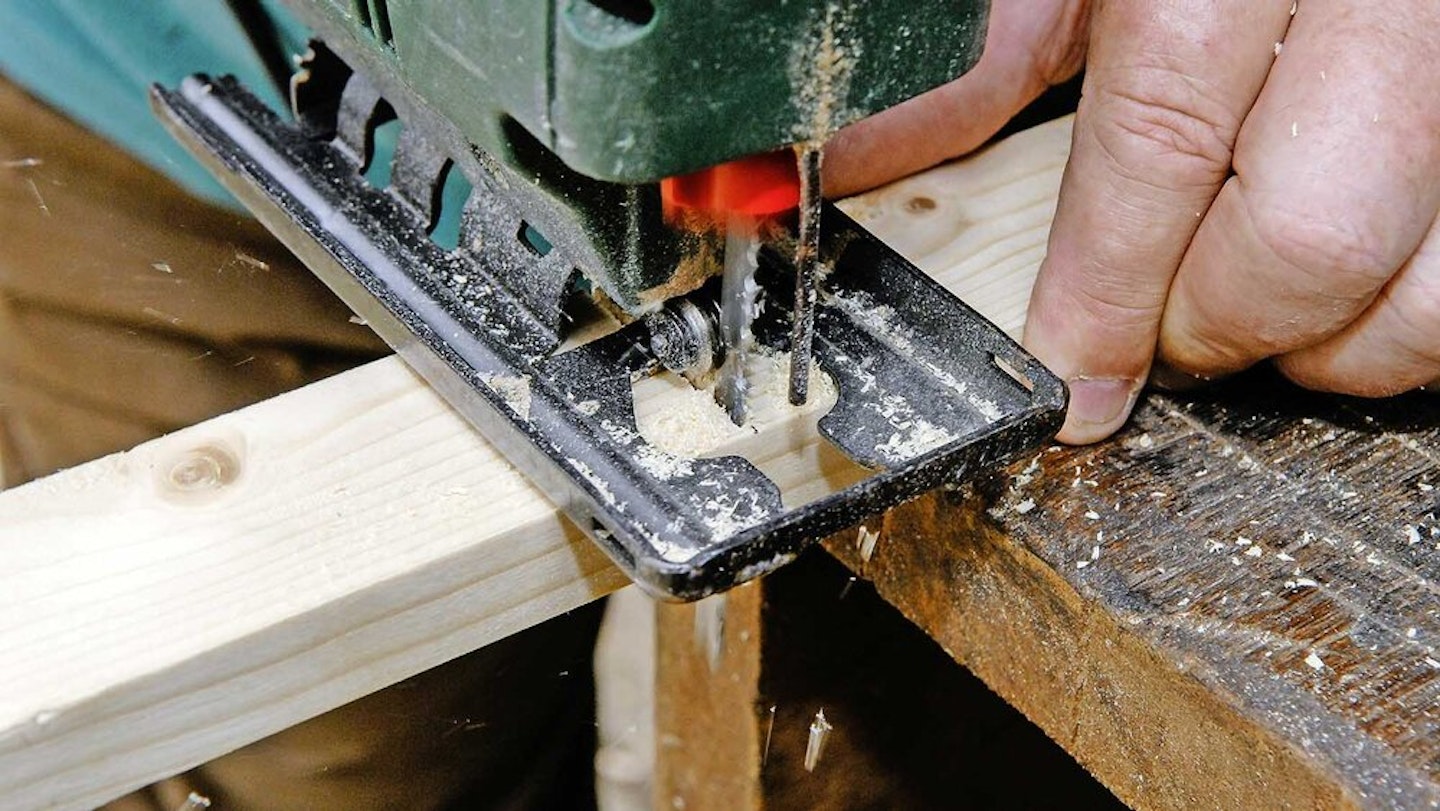
- When you cut the wood, ensure that you work to the outside of your pencil line, not along the centre. I use a jigsaw for speed...
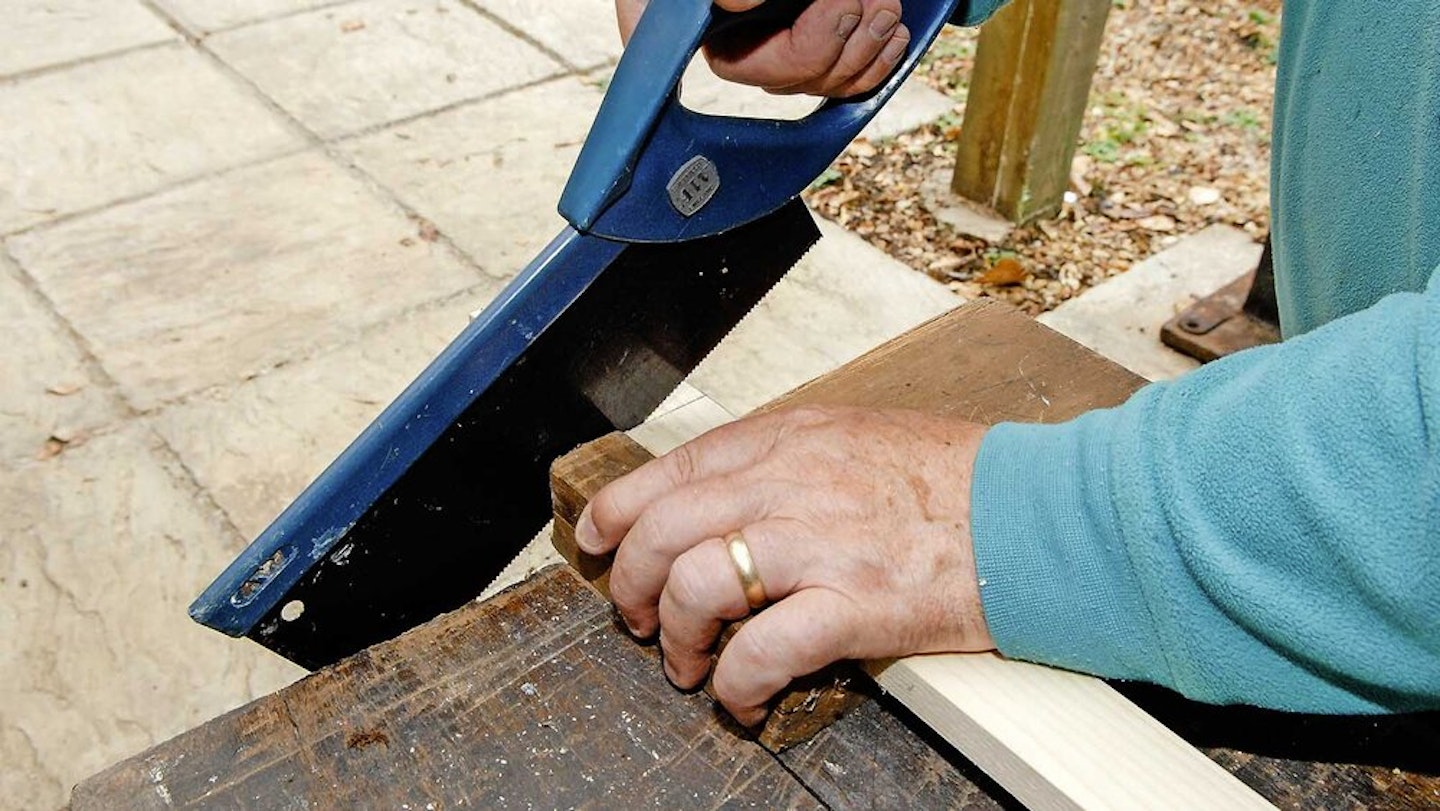
- ...but a trusty tenon saw does the job just as well. Hold the wood in a bench hook or vice and keep your arm straight and your body in line with the cut for best results.
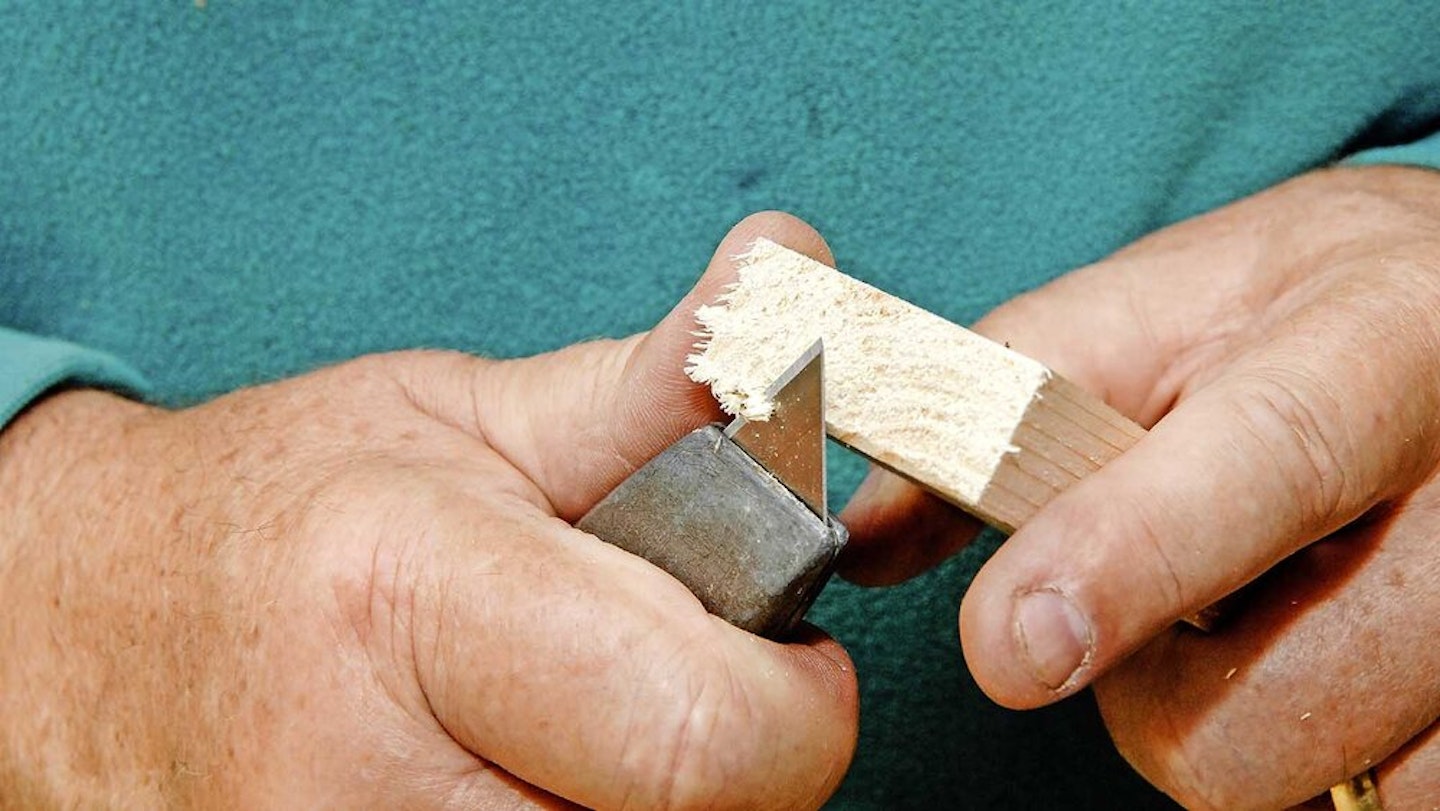
- Always keep the wood tidy: do one cut at a time. After cutting, there will be a ragged edge that can be cleaned up with a Stanley knife, used carefully of course!
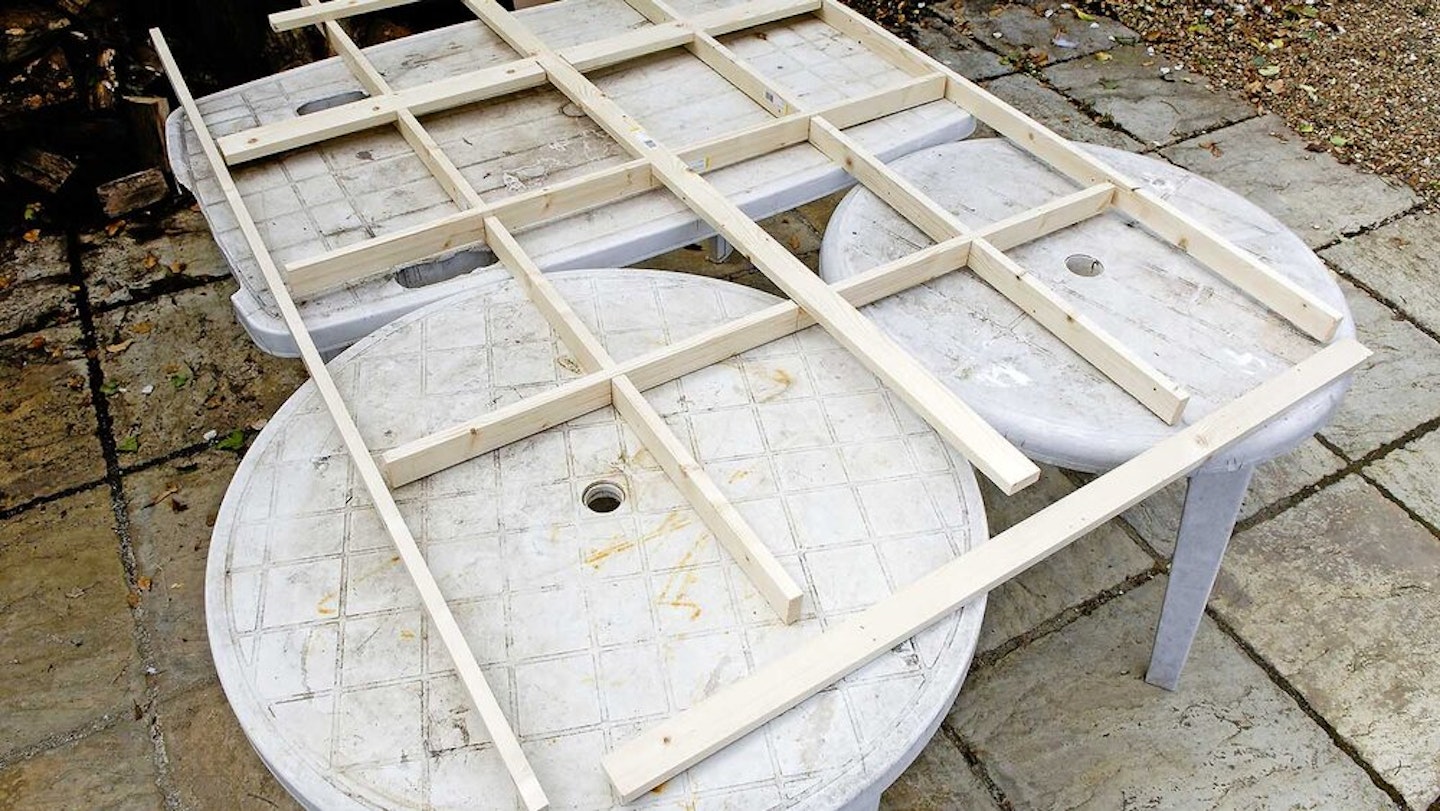
- Lay out the wood as you cut it, placing each part into the relevant position. This is where my plastic garden tables come in handy.
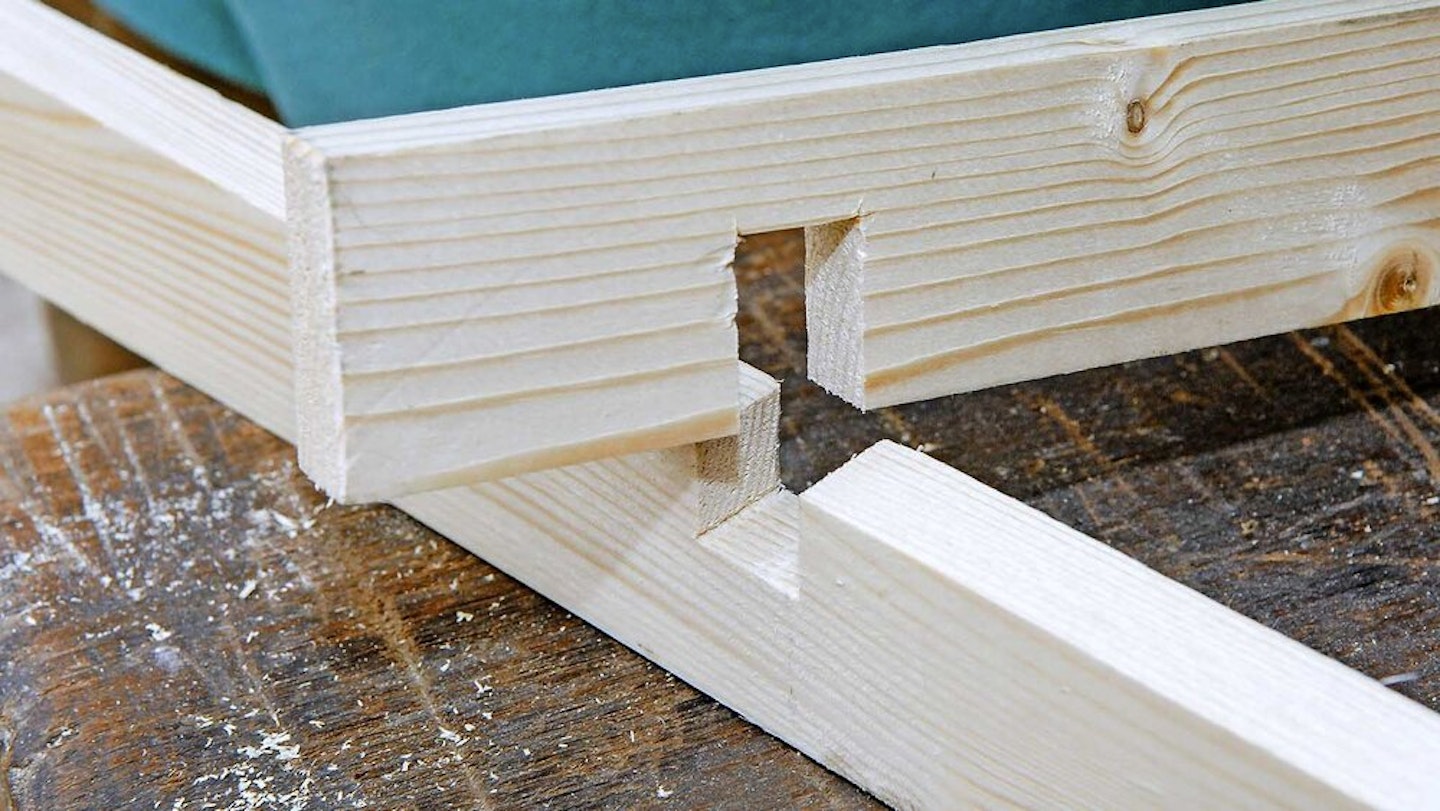
- Where the various cross-members intersect with the main spars, they’ll need to be slotted to provide a strong joint.
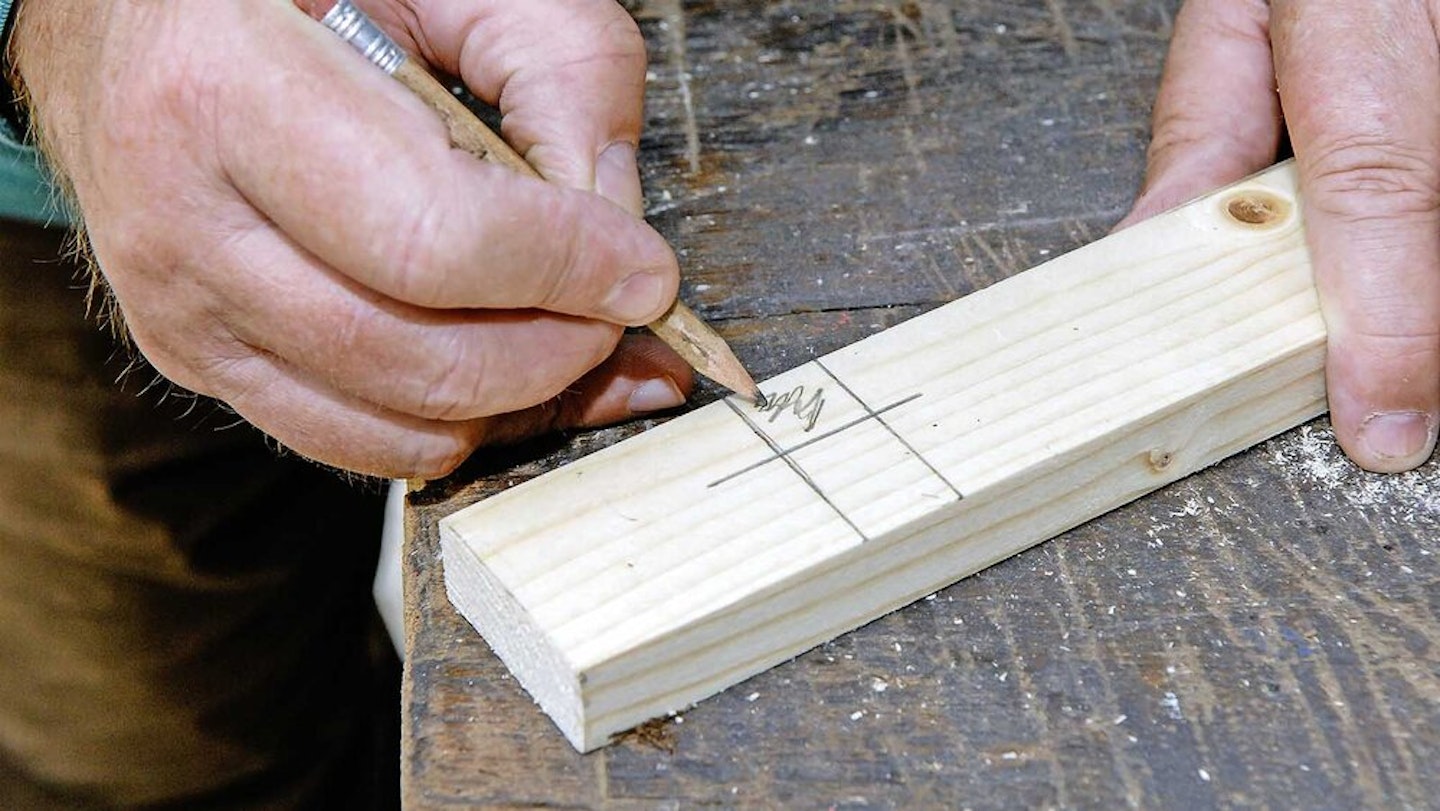
- Mark out the joint locations with the set square. Identify clearly which is the area of waste to be cut away.
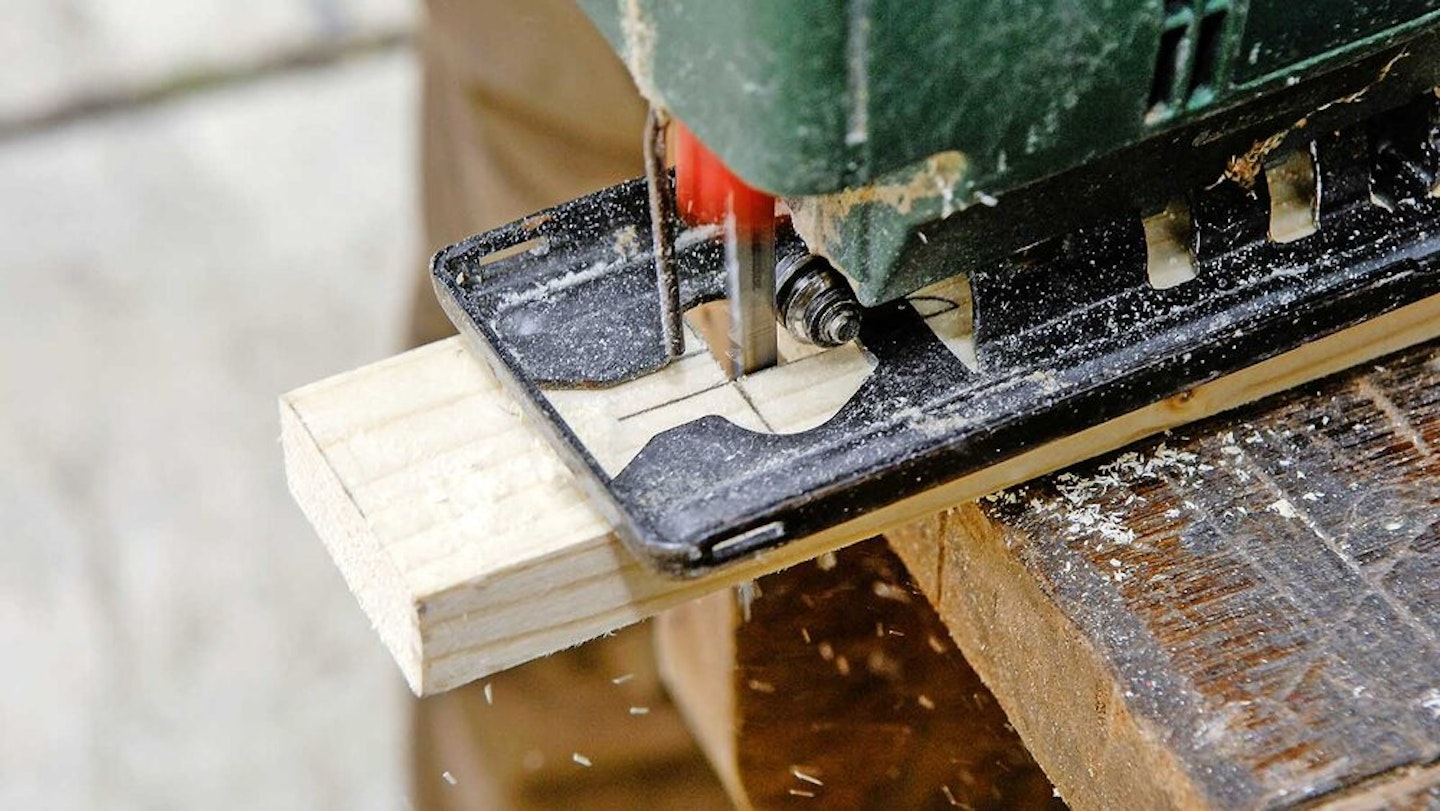
- The jigsaw makes light work of cutting slots, although the bottom face will need nibbling away gradually, with care. Alternatively, you can use the tenon saw to cut the outer slots and the chisel to remove the rest.
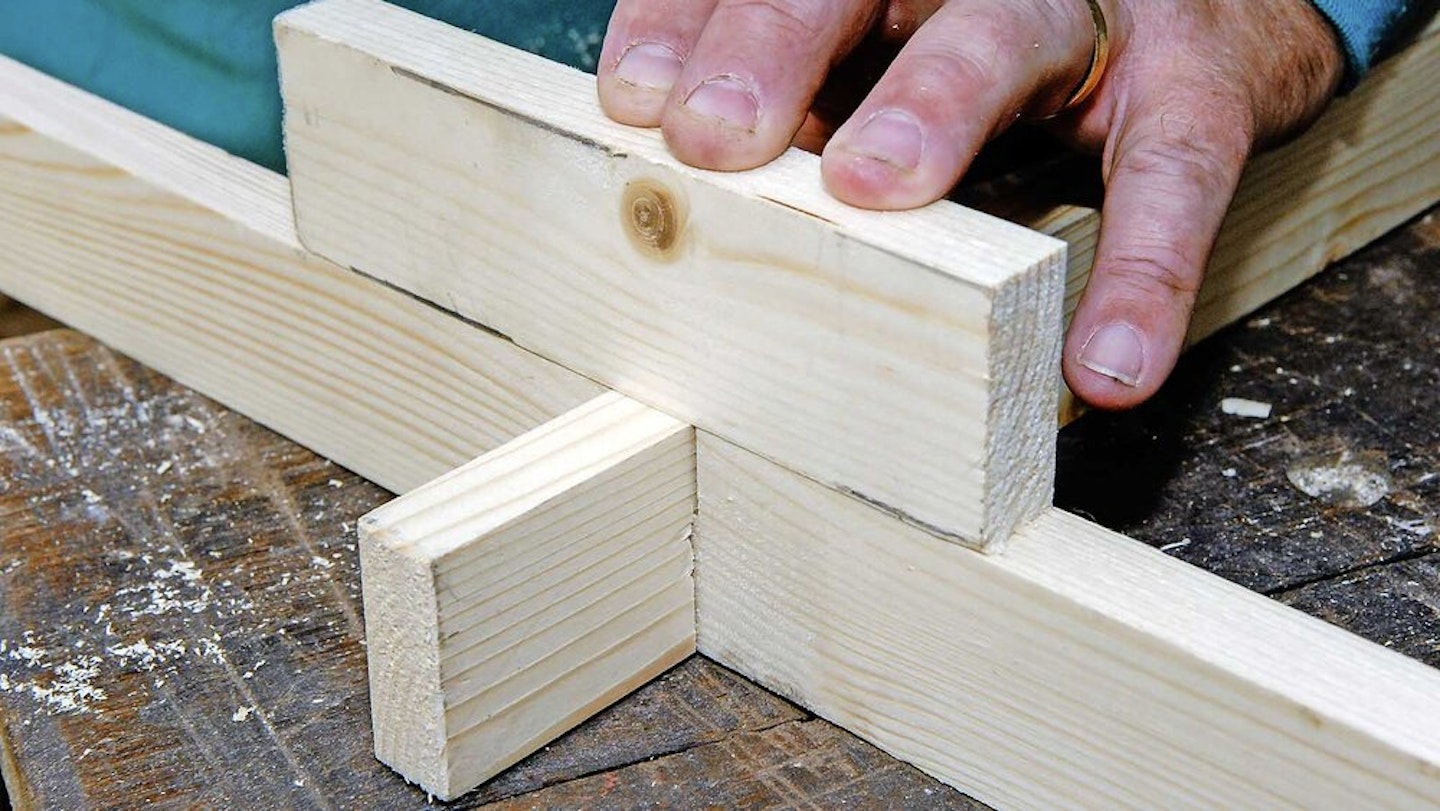
- Be sure to check the joint is good by placing a piece of wood across the top of the joint to see if it’s flat.
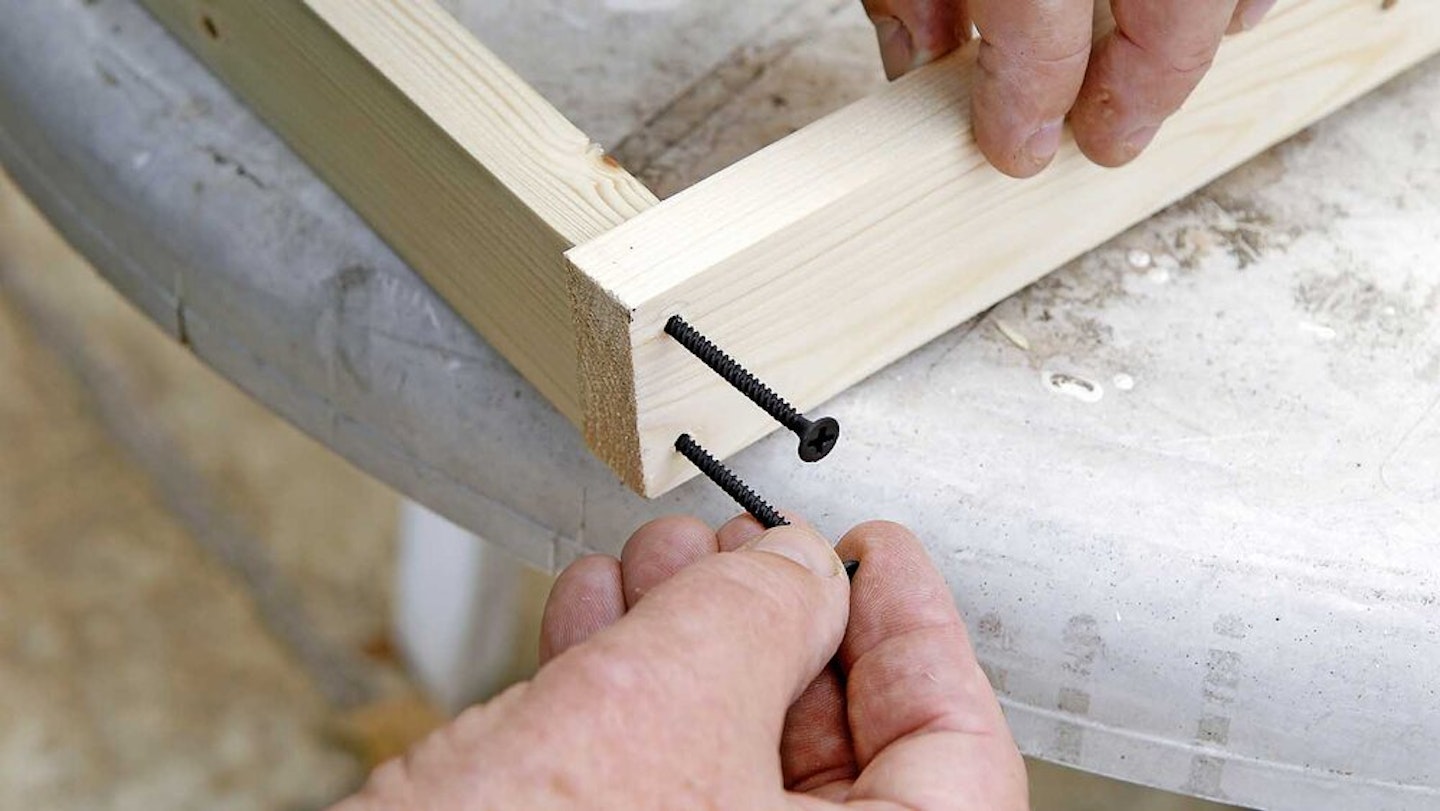
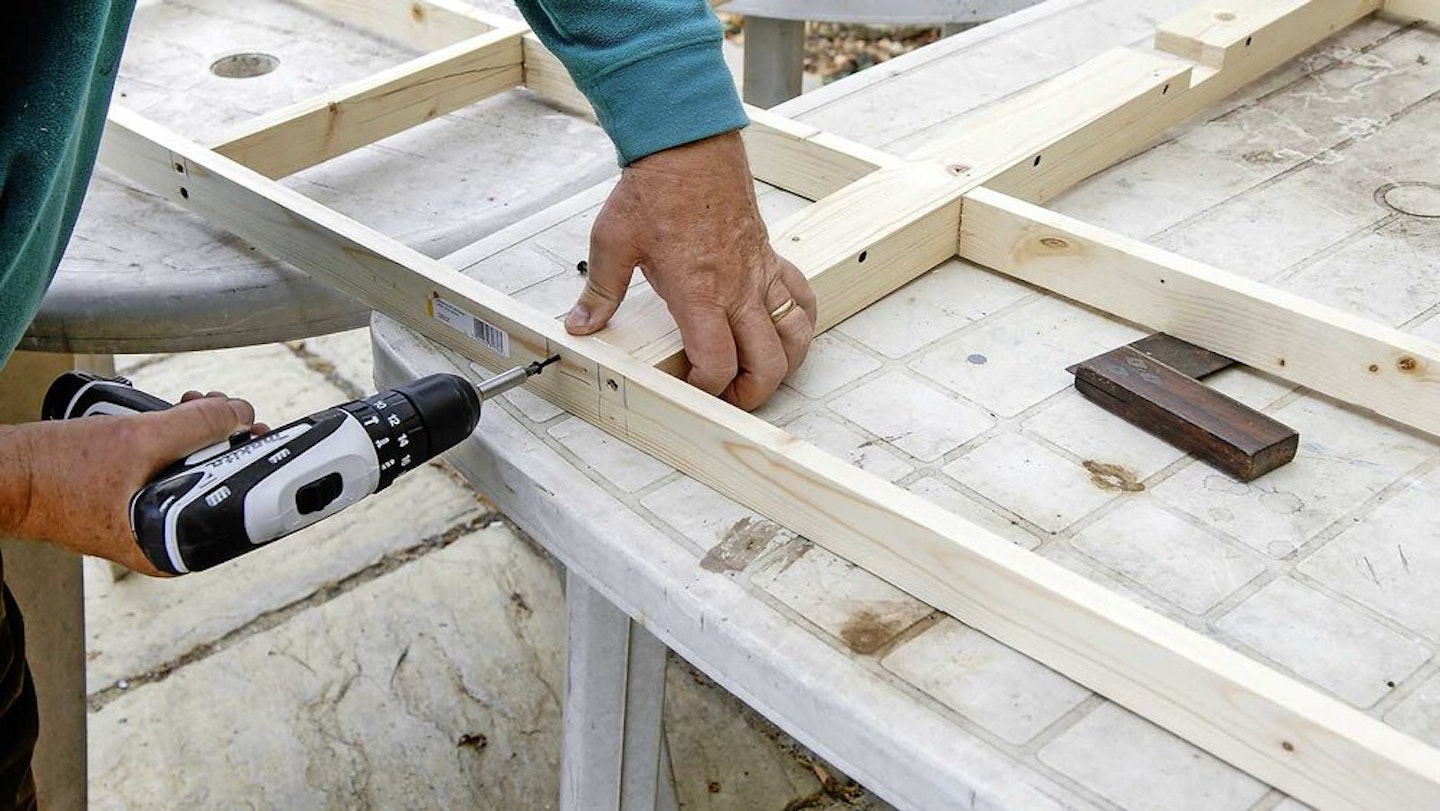
- Pre-drill and countersink the holes in all the pieces that need to be joined together and lightly tighten the screws.
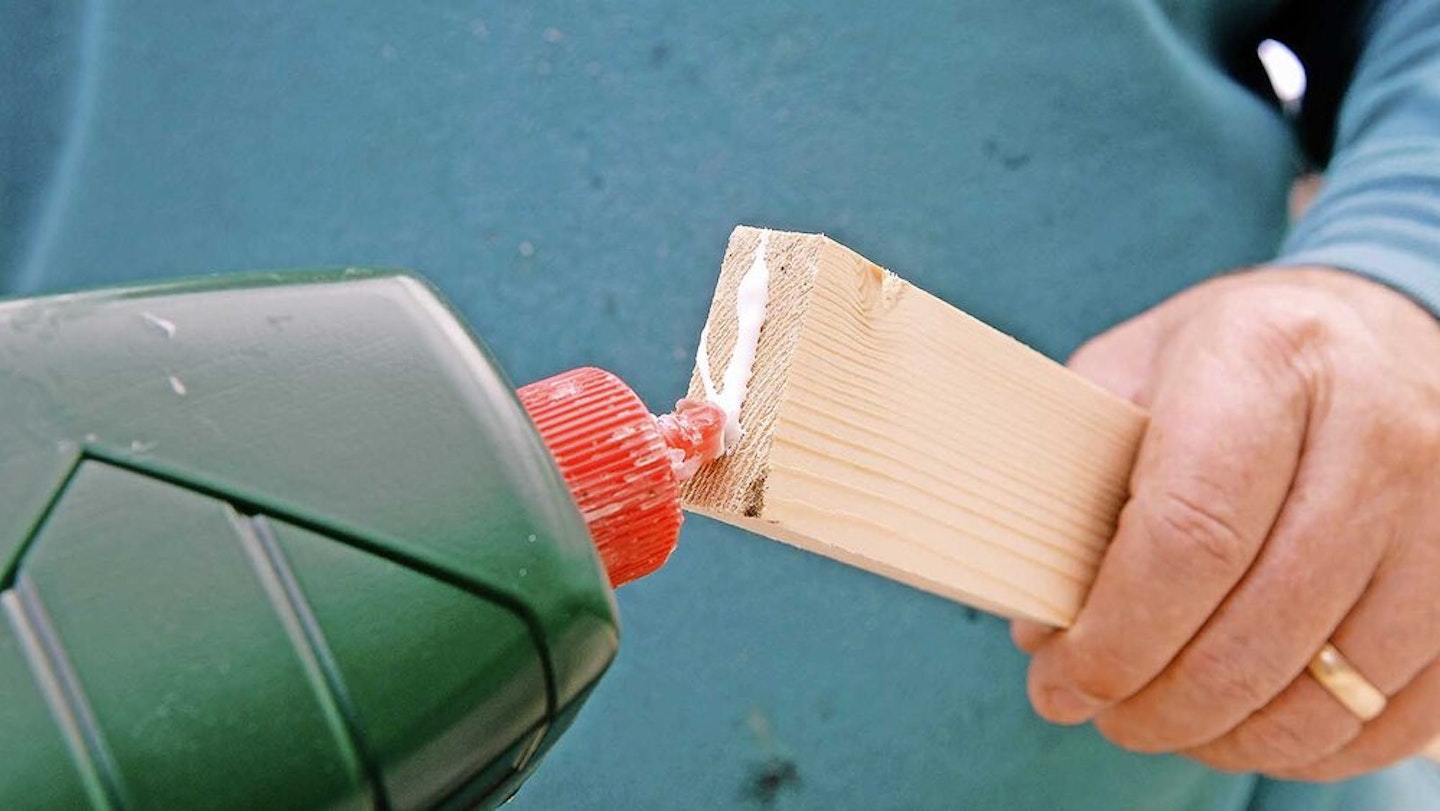
- Starting at one of the outer corners, load up the end of a cross-member with glue - a thin fillet is enough.
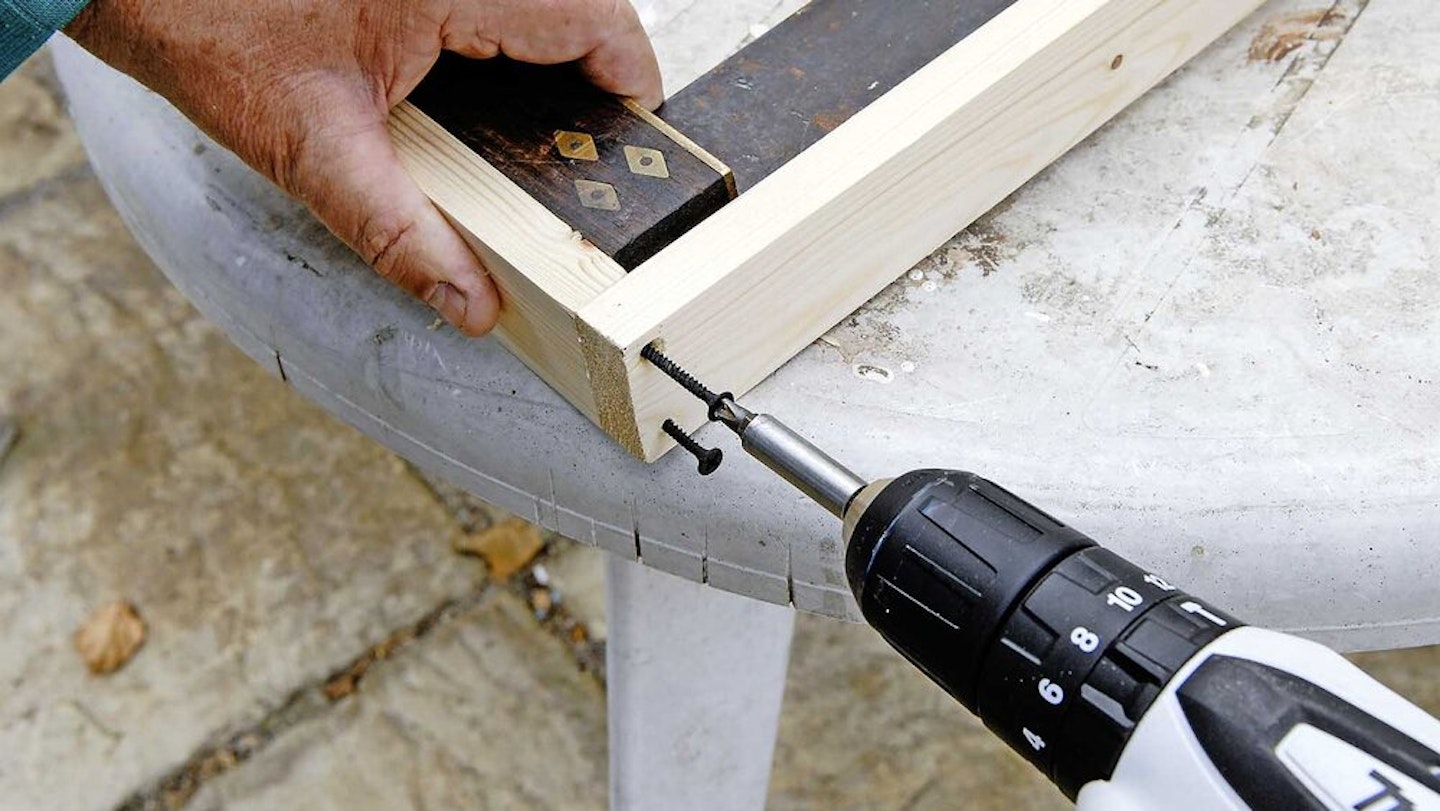
- Using the square held hard against the joint, power the screws home slowly, one at a time, until the joint is solid.
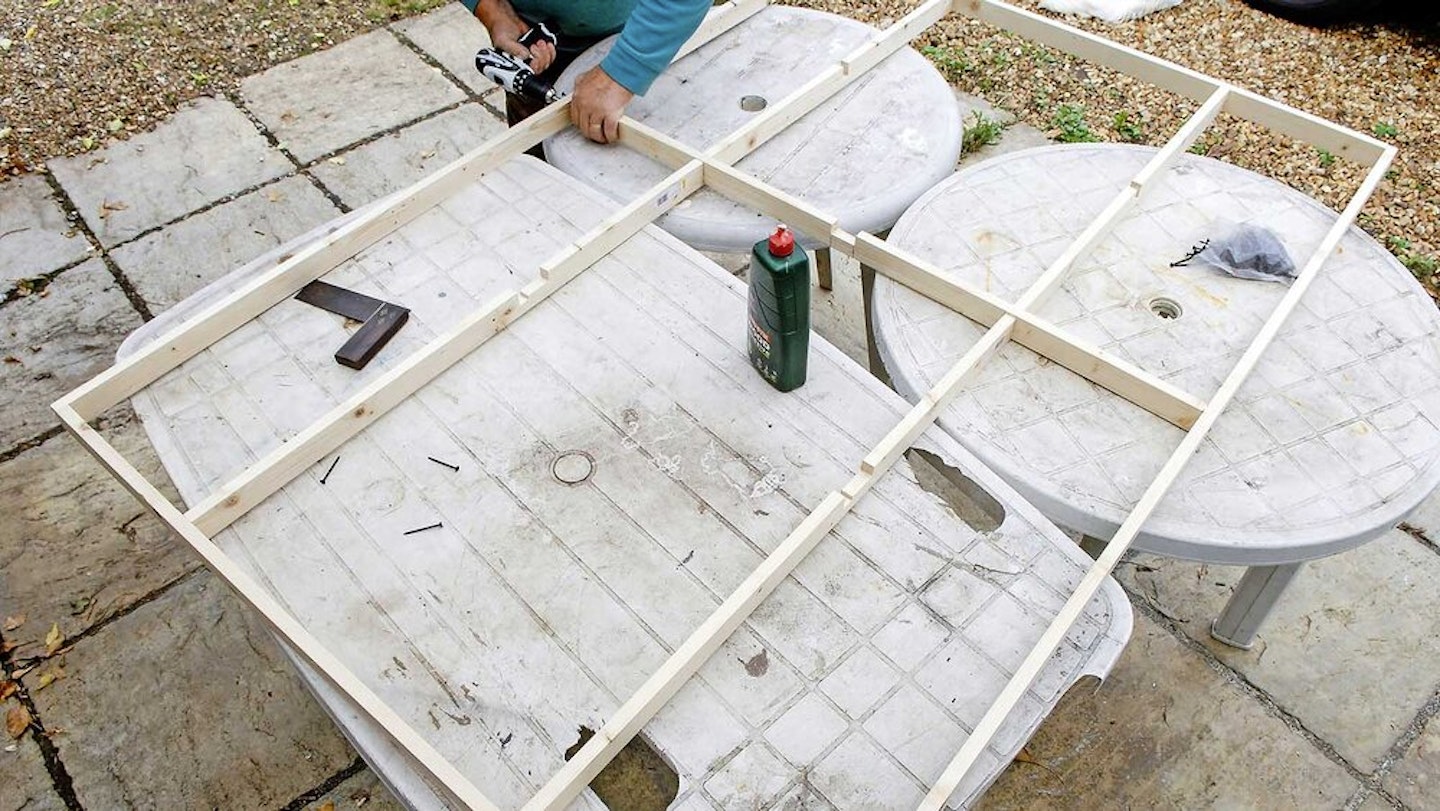
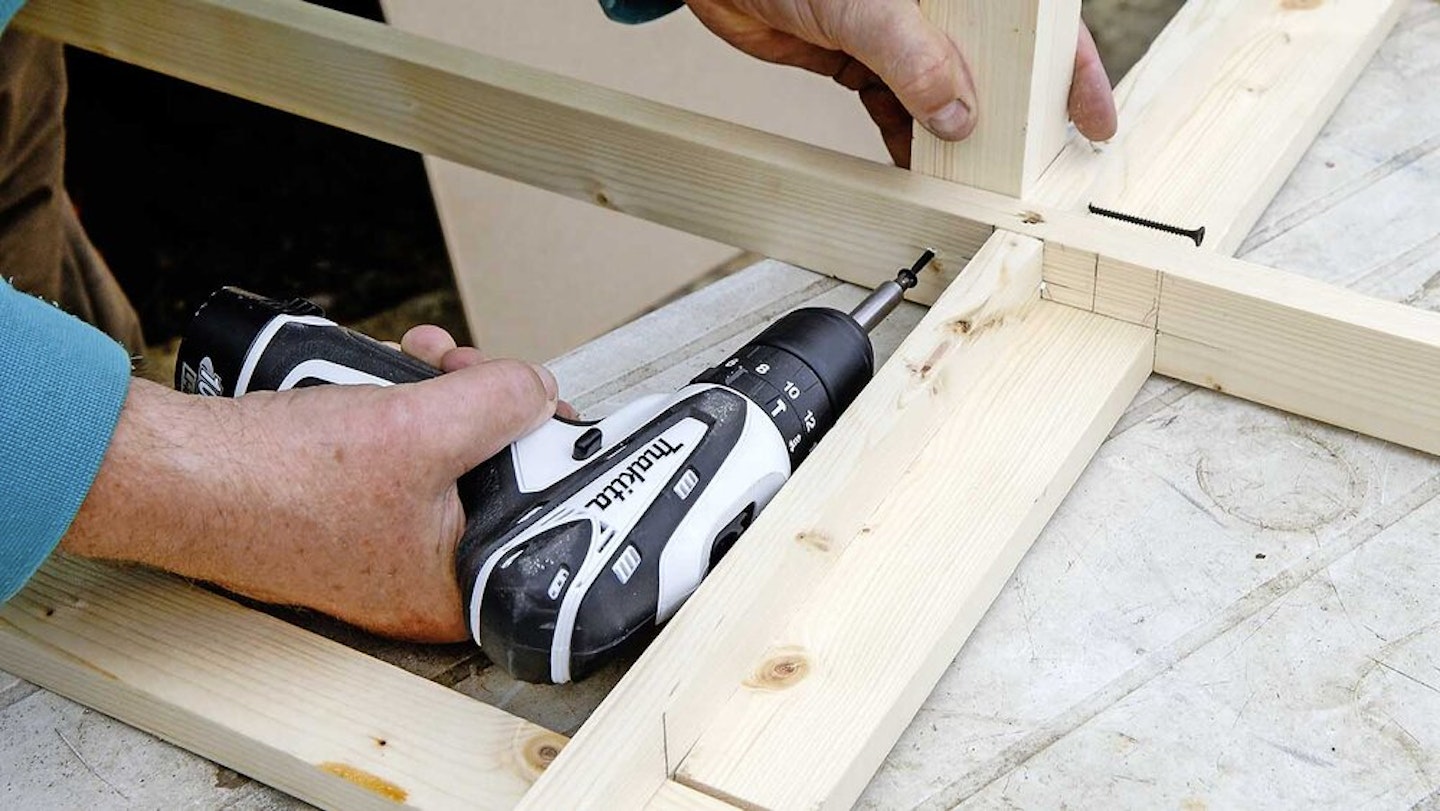
- Start to build up the main spars and then make them intersect with the cross-members.
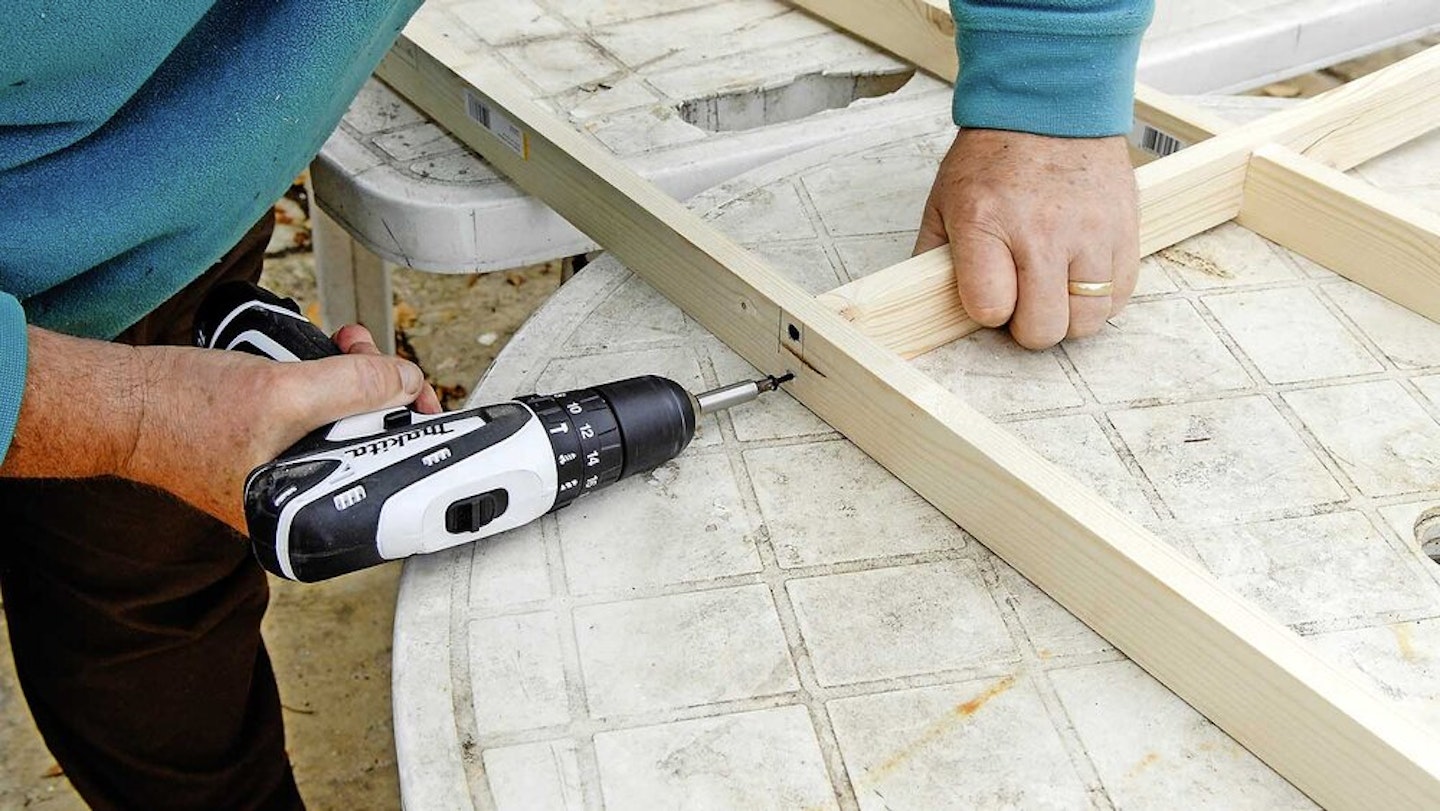
- Again, at each joint, add glue, affix screws and use the square at the joint, making sure it’s all square while the screws are driven home.
- Down the centre of the frame is a piece of 2in by 1in timber, laid on its wider face. This provides a larger surface area where the Sundeala sheets are joined, ensuring a strong and reliable construction.
- Similarly, another piece of 2in by 1in is laid flat on at 90 degrees to the main spar, two thirds of the way down in order to support the piece of Sundeala going across the top of the frame.
- The legs can now be installed. They measure 39in long to give a good working height and are secured by screws through two parts of the frame.
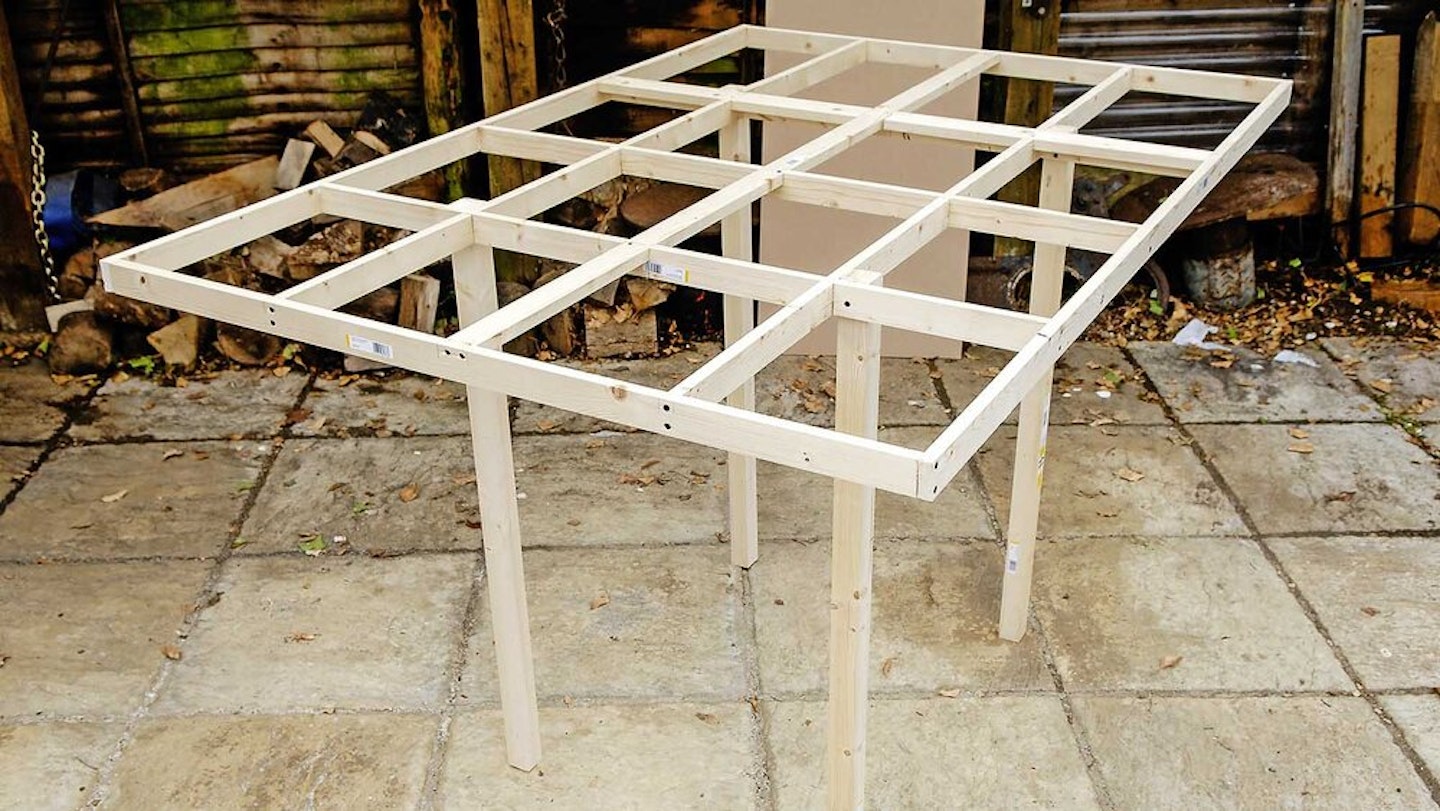
- With the four legs fitted, the framework can be stood up to check for height. If it’s too high, the legs can be trimmed. Too low and you’ll have to start again!
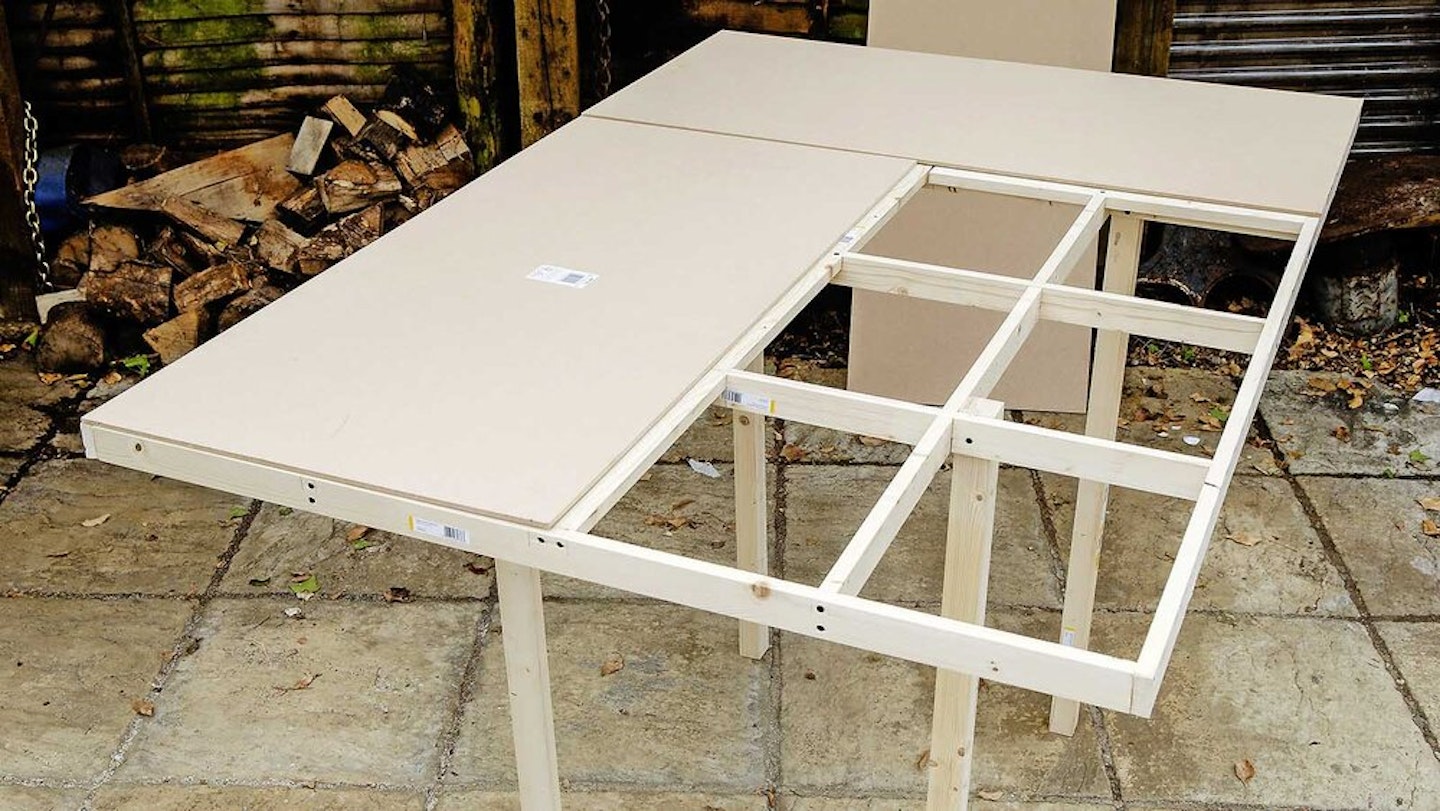
- The Sundeala boards can now be placed onto the framework. Two side by side and one across the top.
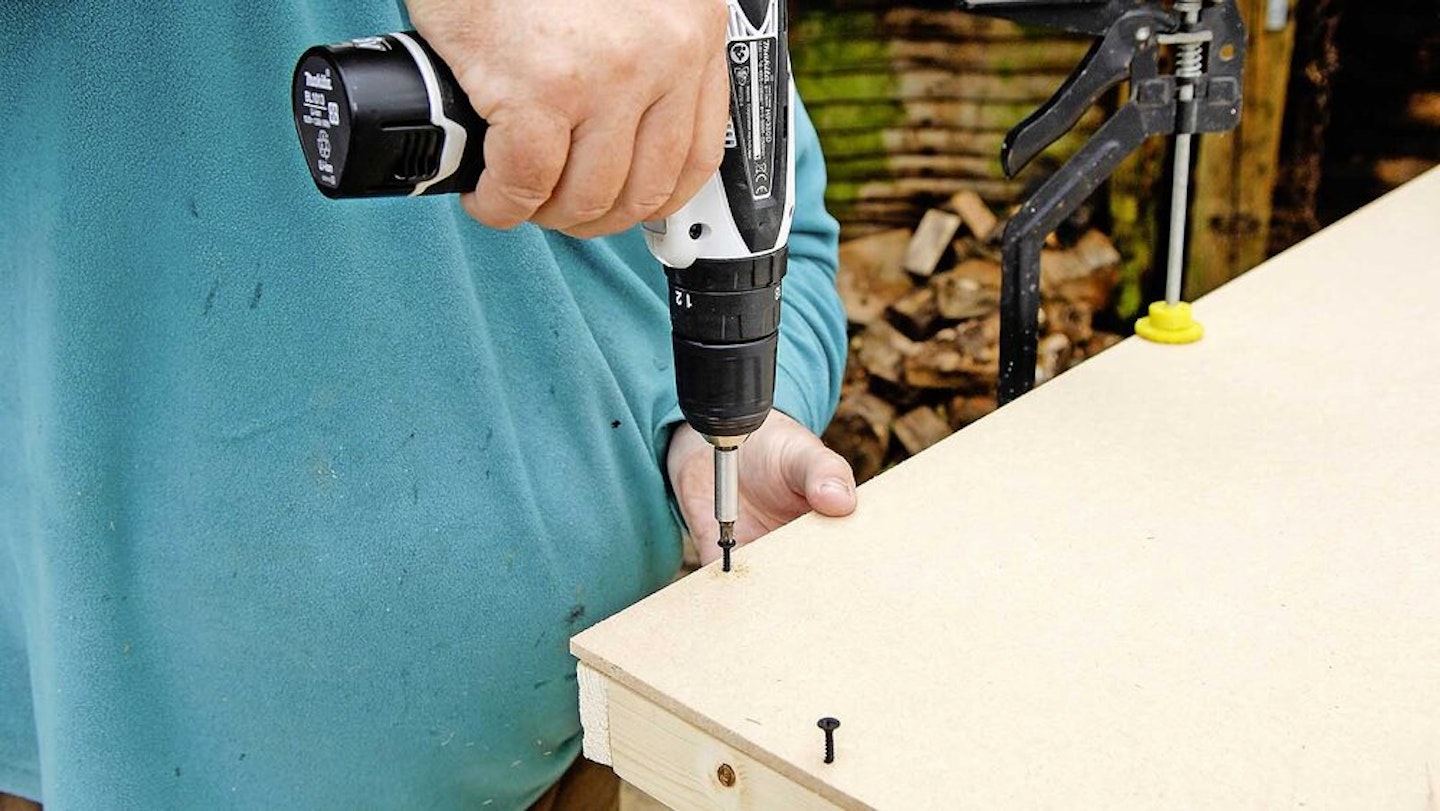
- Once you’re happy that the boards and framework are square, drill holes in the Sundeala boards, apply PVA glue to the frame and secure with screws.
The right legs
Taking the trestle leg method a little further, you can secure it to the framework with hinges. This will allow the legs to fold up or down - ideal for an exhibition layout. A folding cross-stay, again hinged, will lock the legs in position.
Adjustable feet will compensate for uneven floors, enabling the layout to be levelled and secured by simply screwing the feet up or down. These are available from hardware stores or www.screwfix.com
Subscribe to Model Rail
For more great guides on what to build and how to build them, subscribe to Model Rail and get the magazine delivered right to your door! Having the magazine delivered saves you time that can be better spend with your model trains - and, it’ll save you money.