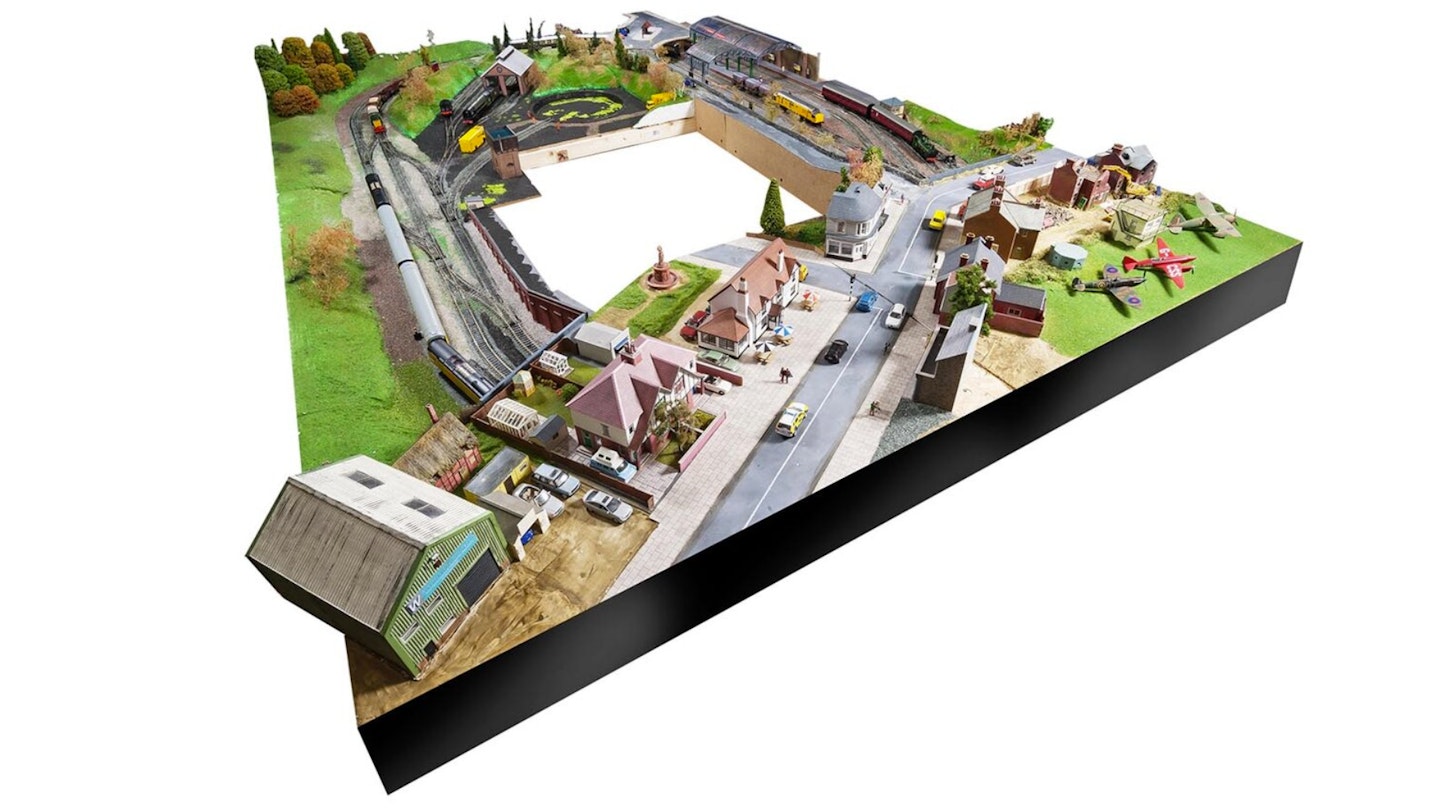
Scenery will make or break the look of your model rail layout. Unlike the real world, we build the railway first and then add the landscape.
The best layouts make the railway look as though it has been built through the land, rather than being a flat board with some grass sprinkled on top.
There are several different ways to construct landscapes, thanks to innovative thinking from the scenic manufacturers. What follows here though is the ‘traditional’ method of scenery construction - it’s arguably still the best and, at the end of the day, the most fun!
Before you start
It’s all too easy to rush into scenery construction, and spending some time planning will pay dividends. So, before you start work, consider the following questions:
How big will the scenic area on your layout be? The bigger the scenic area, the stronger the supports for the scenery will need to be.
Is your layout portable or permanent? If the layout is to be moved around, the scenery will need to be light - but also strong enough to withstand a few inevitable knocks.
What will your layout depict? Remember that anything you add on top of the scenery will add weight. Buildings, rocks and even trees will be heavier than vast tracts of open fields.
Do you need removable sections of scenery to provide access to tunnels and storage yards? If so, these sections will need to be made carefully in order not to leave an obvious ‘gap’ in the landscape.
The contours
The basic profile of your landscape will be made from intermediate ‘formers’. You can make these from timber board, thick card or blocks of expanded polystyrene.
Place the formers at approximately 15cm intervals and fix them to the baseboard using PVA woodworking adhesive or with a hot glue gun.
With the contour formers in place, the next stage is to fill the space between them. Alternatively, materials such as chicken wire, or aluminium mesh used for car body repairs can be spread over the formers. The other option is to create a web of masking tape or strips of card.
Either way, what you now have is a foundation for the plaster-impregnated bandage. This product has been used for scenery building for generations and is available from dozens of manufacturers, including Mod-Roc, Geoscenics, Peco and others.
Subscribe to Model Rail for more practical advice
Every month, Model Rail magazine brings you features and advice on how to get the best out of your hobby. Subscribe and save both time and money – today, you can subscribe and get a free Soldering Iron!
Building and covering landscape

To the right is a piece of white hard foam that has not been shaped. To the left is the embankment that has been shaped and treated with one layer of static grass fibres.
First, cut in the hard foam using a Woodland Scenics Foam Knife. It has a blade that is 5cm long - very useful for cutting through deep pieces of hard foam. Cutting through foam pieces with the foam knife is easy if the blade is sharp. It is always worth having a few spare new blades in stock when you commence a project.
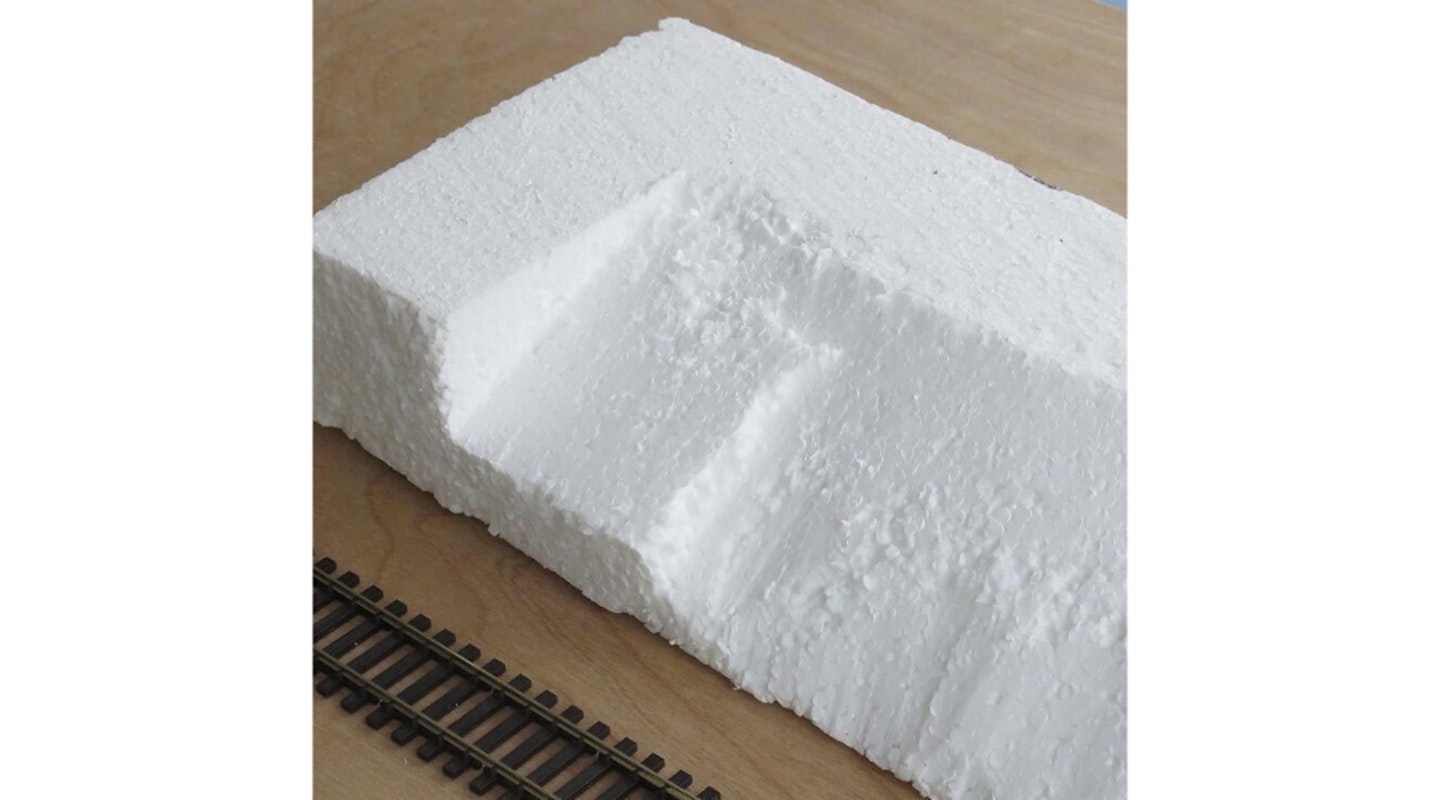
The left-hand side of the block of hard foam is shaped as it comes when you buy it. The middle section is after a first cut to remove the corner. The section on the right is after a second cut, bringing the foam to ground level.
Drag the surform tool lightly across the surface of the hard foam to remove any unrealistic jagged edges. It’s a messy job that will need a vacuum cleaner to suck up all the small bits of foam afterwards.
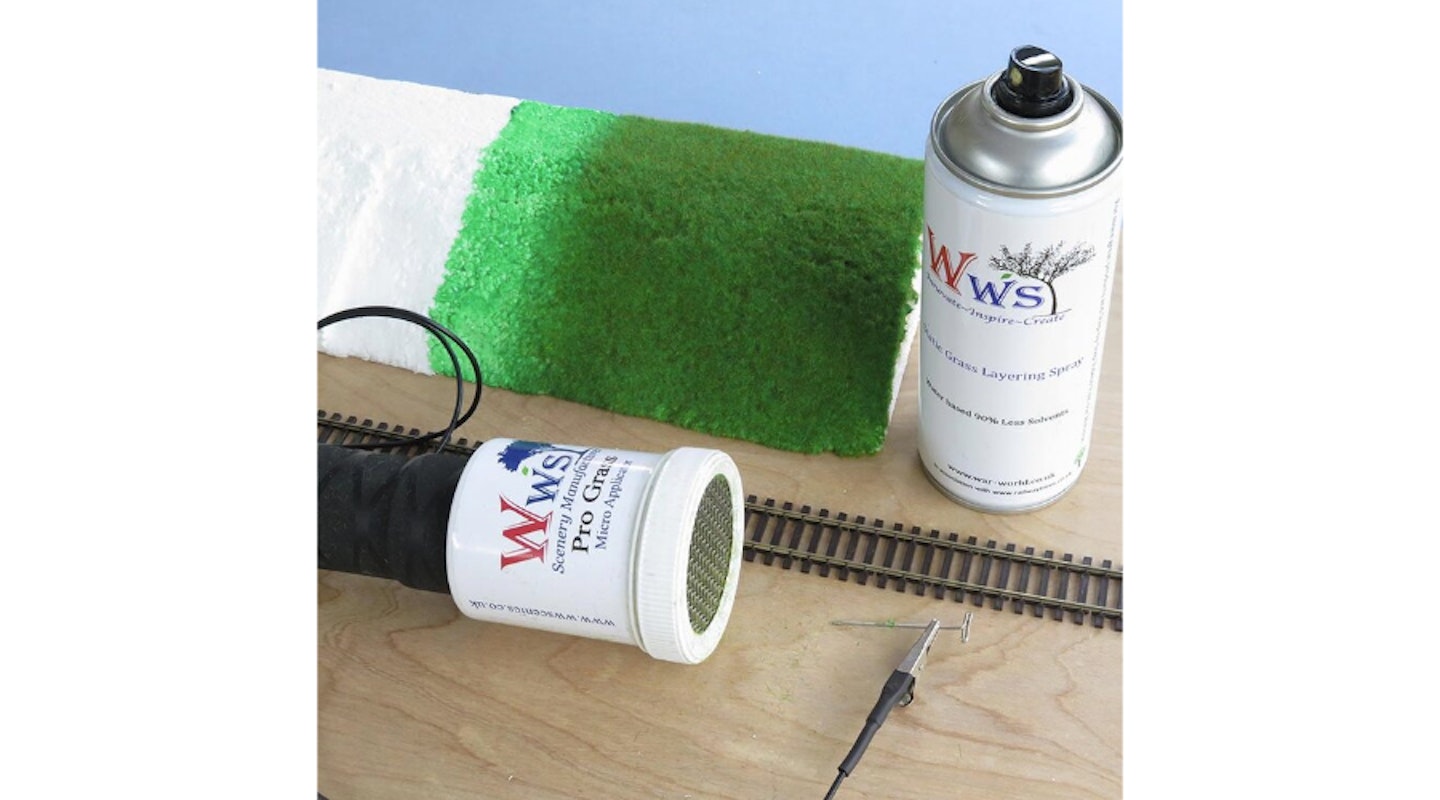
A great shortcut is mixing PVA glue with green acrylic paint to cover the white foam. In one move you can paint the landscape and add the static grass fibres.

To the left is the mixed paint and glue. To the right is the new Micro Pro Grass electrostatic grass planting tool by WW Scenics. The Foam Nail (‘T Pin’) must be pushed into the foam to complete the electrical circuit.
BUY NOW: Pro Grass Micro Flock Applicator, £65.99, amazon.co.uk
Paint the white foam with a wide brush. By pushing the Woodland Scenics ‘T Pin’ into the foam and attaching the clip to the Pro Grass Micro tool, the electrical current flows between the tool and the landscape, creating the charge that makes the fibres stand upright.
We experimented with the WW Scenics Pro Grass Micro Applicator. It worked just fine on short and medium length grass fibres. It is very comfortable to hold, well made and robust.
The section after being treated with grass fibres. The ground is still rather uneven but a second coat of fibres will remedy this. WWS Layering Spray lets you add a second layer of fibres on top of the first before the glue dries.

In each issue we cover every stage of the hobby, from buying a first model train set right through to museum standard fine-scale modelling. Model Rail magazine is full of helpful tips, advice on model train layouts, details on model train sets, step-by-step articles and more! Choose the right subscription option for you and get instant digital access to the latest issue.