Track laying is one of the most fundamental tasks for any railway modeller. DAVE LOWERY and GEORGE DENT offer a range of tips on how to get it right first time.
If you’re starting out with modelling, you might find laying the track impossible. But take time, use a few simple tools, and the task can become straightforward. Follow this simple guide, and there’s no reason why your track can’t look like a well manicured main line.
Well laid permanent way is essential for reliable operation, whether using prefabricated sections - colloquially known as ‘Setrack’ after Peco’s popular range - flexible or hand-built finescale track. Keeping everything flat and level without distortion is crucial, and careless use of track pins can look unsightly and lead to uneven rail alignment.
Underlay
Laying track directly on to the baseboard top and securing it with ballast and adhesive will give you a realistic, loud ‘clickity-clack’ noise as the trains pass over rail joints and points, which may be just what you want to hear. However, there are modellers who prefer smooth running trains that quietly glide along and for that we need cork!
Whatever cork products you choose, the sheets will need cutting to match your trackplan, allowing a few millimetres extra on each side of the tracks and cutting the edges to a chamfer to help with forming the ballast shoulders later.
Rolls of thin cork underlay are available from model shops, while a thicker alternative – great for ‘OO’ and ‘O’ – is cork floor tiles.
Cut the cork tiles with a chamfered edge to help form the ballast shoulders later.
Other alternatives are the integral track systems from the likes of Tillig, that include a plastic ‘ballast’ backing. It allows every section of track to be simply coupled together.
There’s also the option of a pre-coloured and textured foam ballast underlay from manufacturers such as Hornby and Peco. Moulded to accept the sleepers of commercial track products, it can be laid in seconds with no need for painting or ballasting. However, according to the label on some products, the foam will deteriorate after about 20 years.
How to cut rails
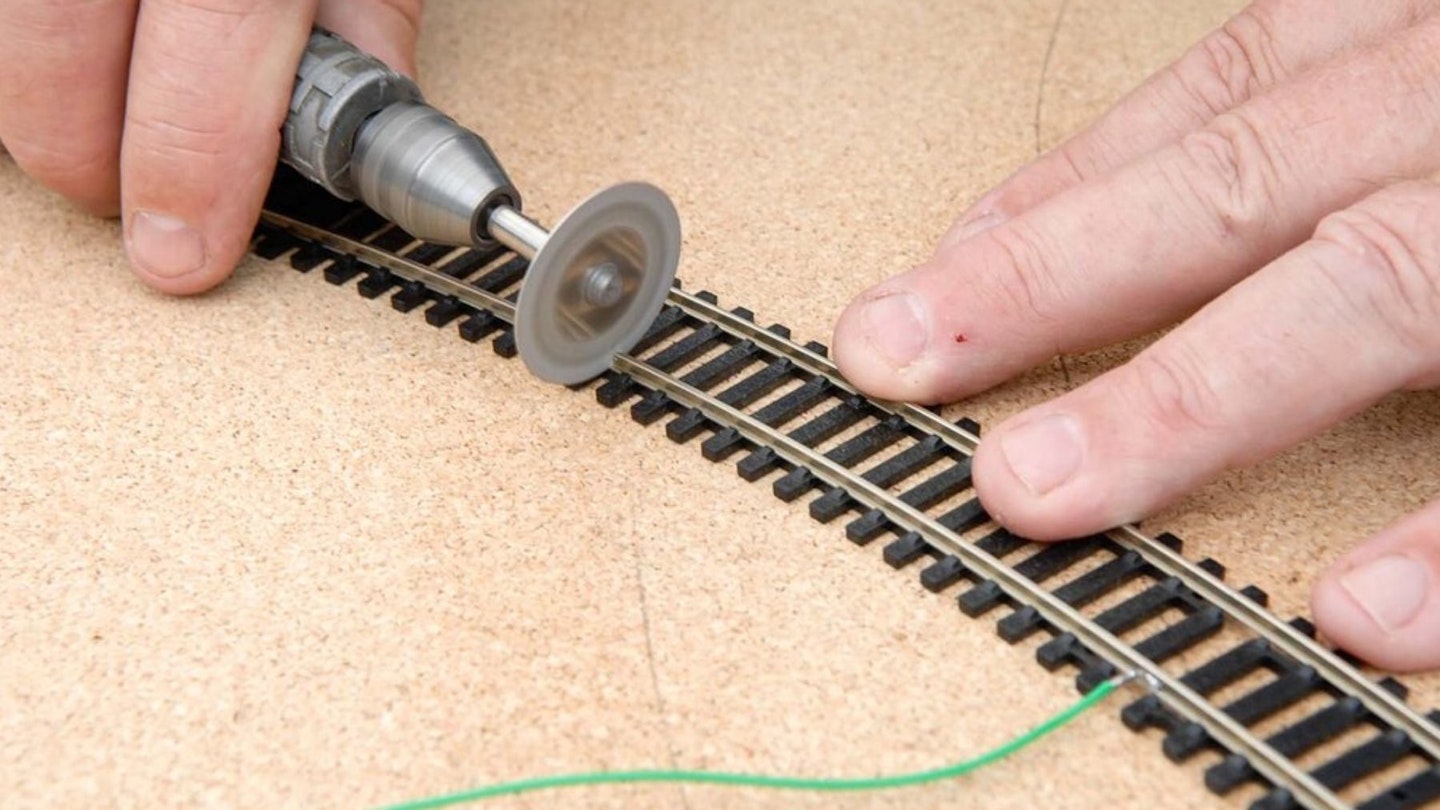
There are various tools for cutting rails, ranging from a humble junior hacksaw to a set of handheld shears, such as those offered by Xuron and DCCconcepts. Dave’s preference is a 28mm slitting disc with a diamond-impregnated blade, available from S&M Tools, mounted in a small electric drill. Whatever you use, check the cut is clean and use a file and abrasives to remove any burrs and scratches on the railheads.
Buy: Xuron 170-II Micro-Shear Flush Cutter, £10.99, amazon.co.uk
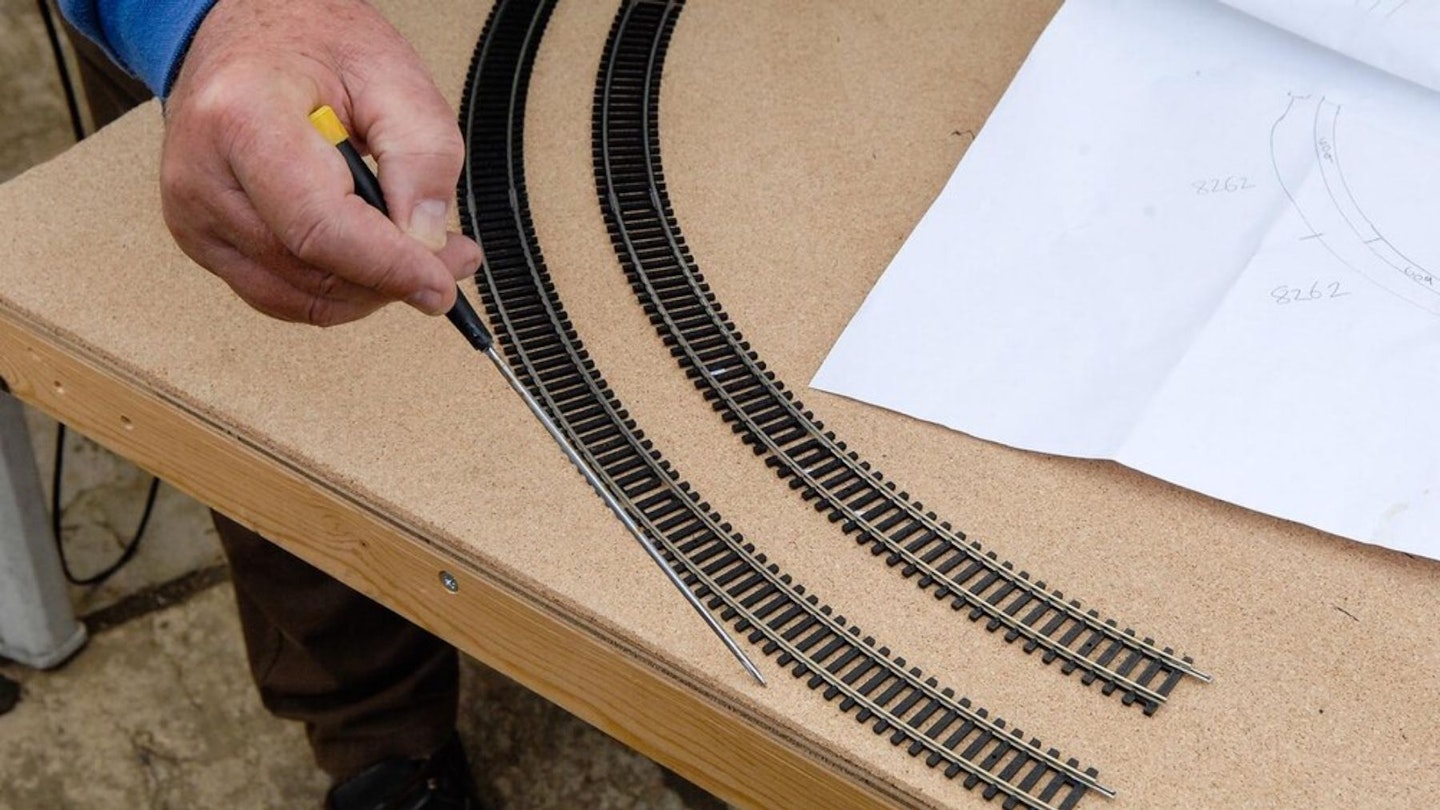
Flexible track can be used to give smoother, gentler curves than commercial set track but needs to be cut to take the fishplate joiners.
When using shears, keep the open edge of the jaws to the waste side and the tool perpendicular to the rails for a clean, square cut. In most cases, the sleeper webbing can also be cut at the same time.
The rail edges will require a light dressing with a needle file, ensuring that no burrs remain that will hinder the joiners.
How to make the connections
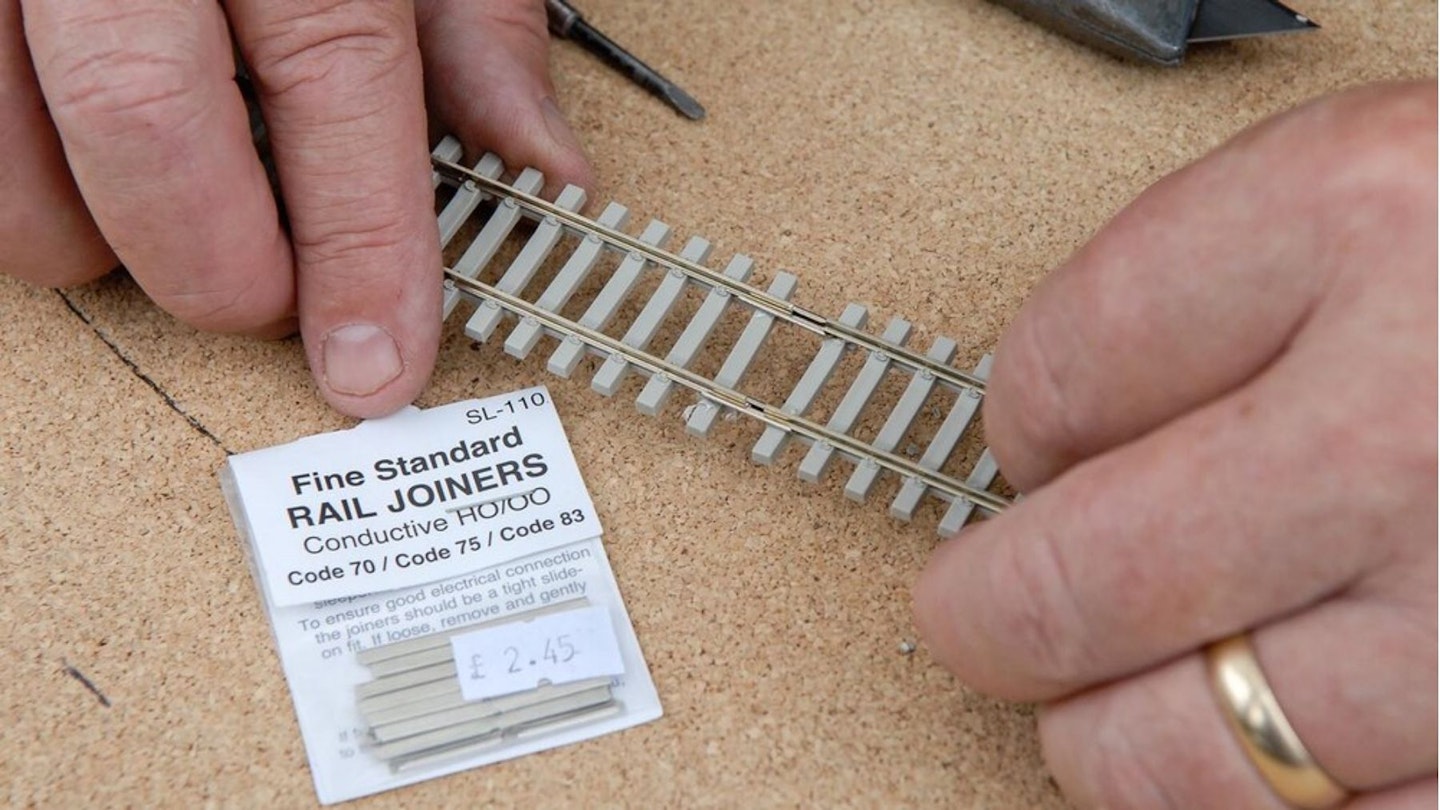
Fishplates are needed to join the lengths of track together. They may be ready fitted to sectional track such as Peco Setrack, but for flexible track and points you’ll need to buy packs of fishplates separately. To make a good, neat joint, it’s best to remove one or two moulded chairs from the sleepers, thus allowing the fishplate to slide into place without pushing the rails upwards.
Buy: Peco ST-301 Setrack Radius 2 Starter Track Set, £71.40, amazon.co.uk
After cutting the track to length, the plastic chairs from the end sleeper will need cutting away to give the fishplate joiners adequate clearance. Watch your fingers!
Make sure you choose the right fishplates to match your rails, taking note of the rail code. Press a fishplate on to alternate rails on the two sections and gently push them together.
It’s easy to misalign the rails and fishplates, especially on small-scale track, so take a good look to see that the rails are level.
After joining sections of track, always run a couple of items of rolling stock over the joint to test for a smooth ride.
A large gap will appear between the sleepers at the rail joint. However, pairs of sleepers can be cut to fit beneath the rails and joiners. Secure them to the track bed with glue once all of the track has been laid and tested.
Peco ‘O’ gauge track can be joined quickly as the sleepers seldom need modifying. A stronger set of cutting shears is needed, however, or a junior hacksaw employed to trim the rails.
How to fix it
The track will need to be secured to the baseboard somehow, with the most common means being fine track pins, tapped home gently with a small hammer.
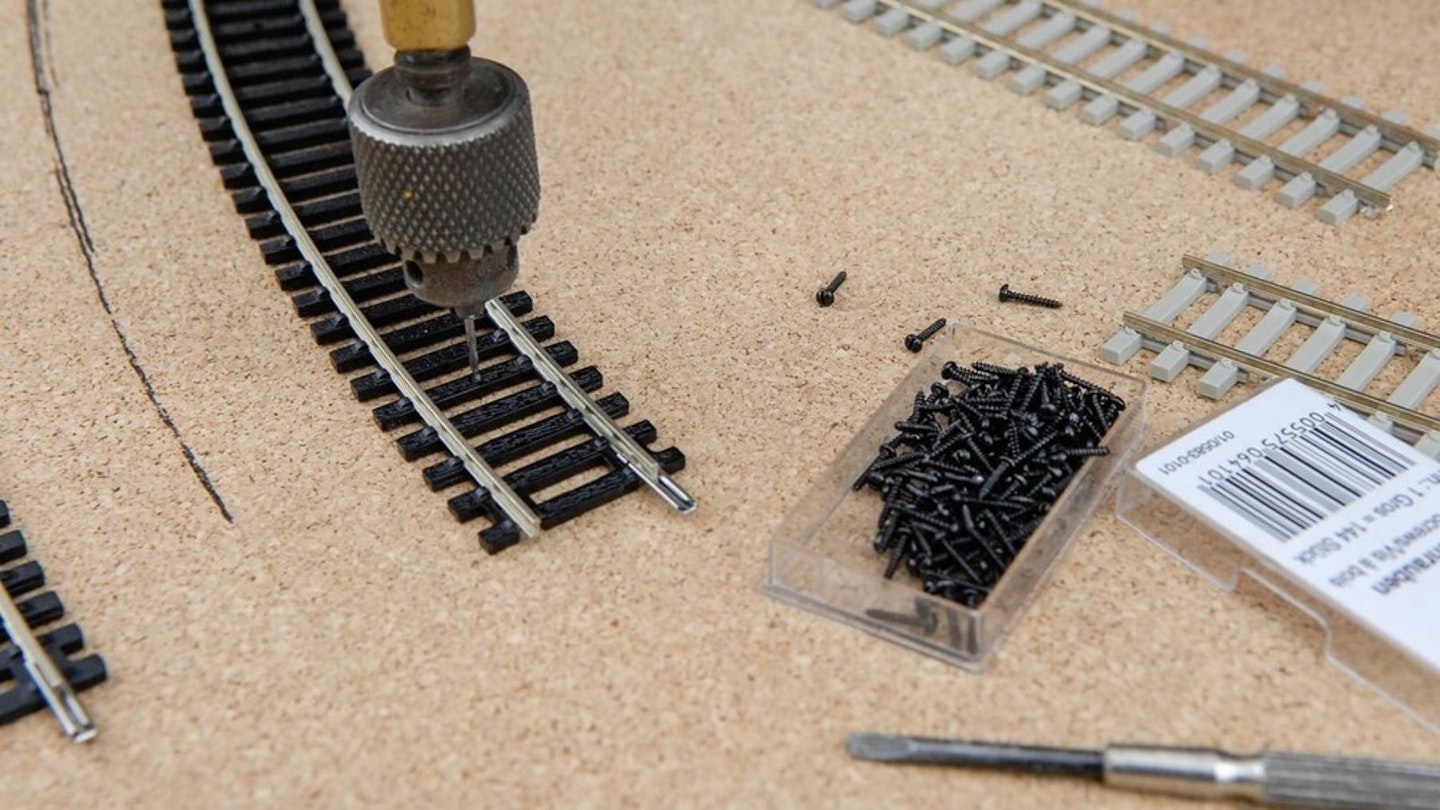
Sectional track often has small holes moulded into some of the sleepers for the pins to pass through, but flexible track and points often do not, so a pilot hole needs to be drilled first. You can pin the track every eight to ten inches or so on straight sections, although curves will require more pins spaced closer together in order to maintain the desired geometry.
If you intend to ballast your track, there’s no need to drive the pins all the way home, leaving them standing slightly proud of the sleepers slightly. They can then be removed once the ballast and adhesive has cured fully.
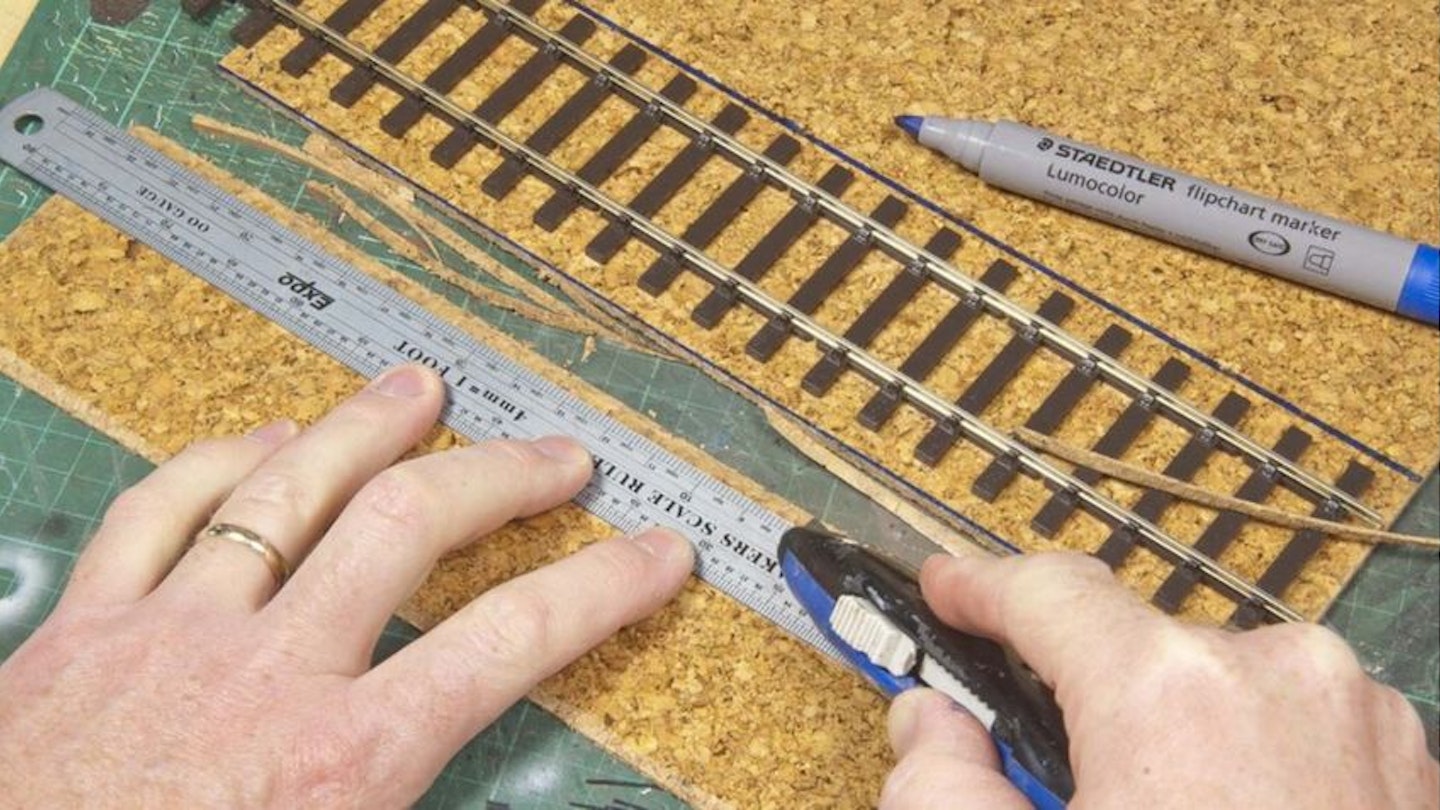
To get your track nice and straight, draw long lines on the underlay or lay the rails alongside a steel rule; this also helps when installing and aligning points.
A tiny jeweller’s hammer is best suited for working with smaller scale track. Hold the pin with pliers to avoid damaging the rails.
In most cases, the pins need only be inserted temporarily and removed after the ballast has been secured with glue. In this case, the pins are partially tapped home and bent over to press down on the sleepers and allow clearance for stock to run over the track during testing.
Notice board pins are a handy means of positioning any size of track during laying operations, allowing for adjustments to be made to the alignment. Once ballasted and glued, the pins can be removed easily.
As an alternative to track pins, Fleishmann offers packs of small screws. Again, a pilot hole is required, but the screws offer a more resilient bond with the baseboard.
How to lay a curved track
Try to avoid laying track too near the edge of the baseboard, especially where curved sections are concerned. Not only will it resemble a train set, but also it encourages your models to jump off the layout: see an edge and off they pop!
Try moving the tracks inboard as much as possible to give you more clearance and space in which to add scenery.
When using flexible track, avoid making joints at the point where the curve begins. It’s best to add joints on straight sections wherever possible.
Abrupt changes in curvature at rail joints will put pressure on the fishplates and can lead to derailments.
Clearance issues
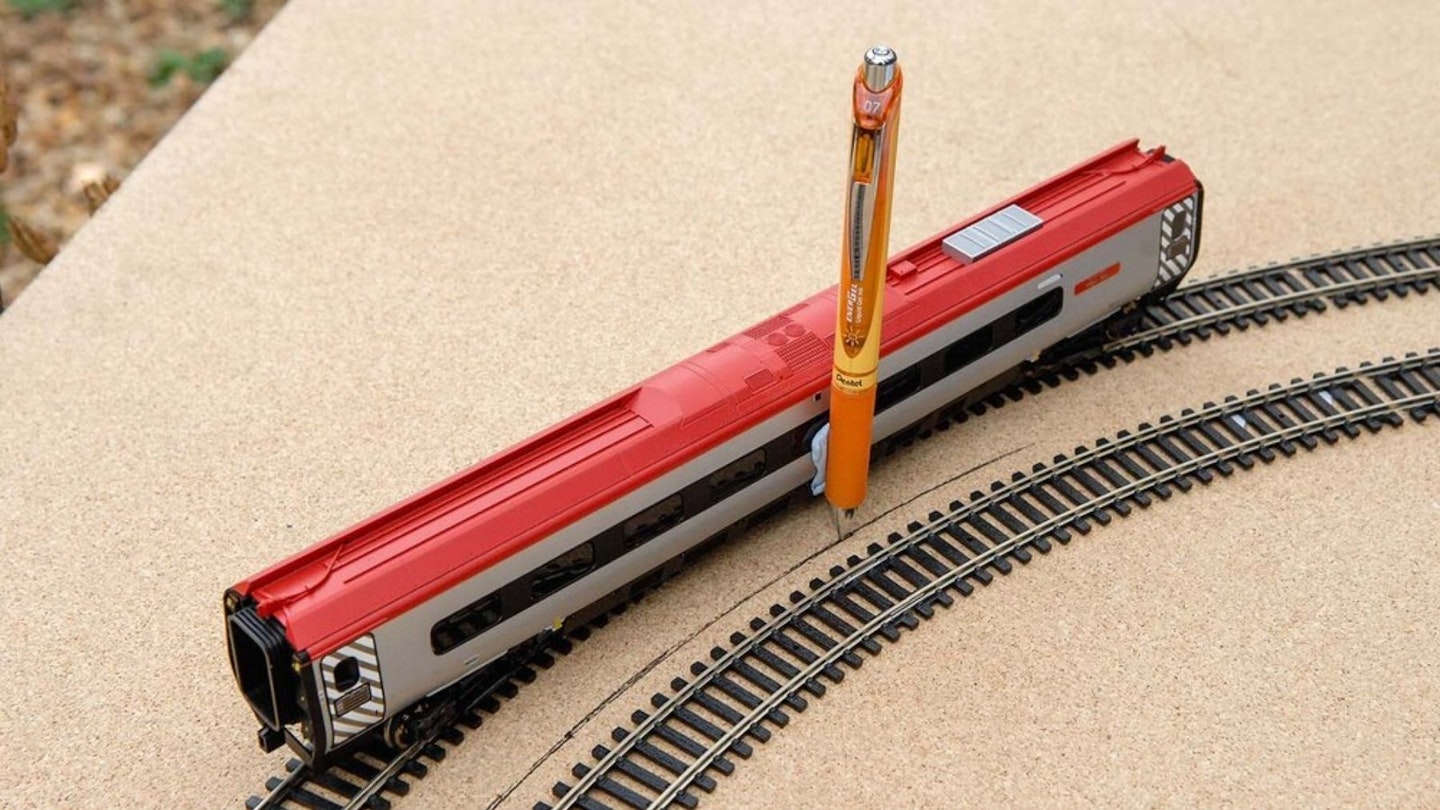
When setting out double track curves, you can use a simple method to eliminate the chance of trains striking each other as they swing around the corners, especially when running long bogie vehicles.
Place your longest carriage on the outside track and lightly tack a pen to the centre of the coach. Push it around the curve so that the pen marks the baseboard.
Repeat with the pen fixed to one end of the same carriage now on the inside track. If the lines do not meet then the rails are far enough apart. If they touch or overlap, they’re too close.
Make any adjustments to the track spacing before fixing with pins or miniature screws. Double-checking with a long carriage on both tracks won’t hurt.
Peco produces a range of plastic track gauges to make it easy to space multiple tracks on straight and curved sections. But you can also make your own from scrap card.

In each issue we cover every stage of the hobby, from buying a first model train set right through to museum standard fine-scale modelling. Model Rail magazine is full of helpful tips, advice on model train layouts, details on model train sets, step-by-step articles and more! Choose the right subscription option for you and get instant digital access to the latest issue.