
Workshop
Dave Lowery gives us a taste of what’s involved in the assembly of a modern ‘O’ gauge metal wagon kit.
PHOTOGRAHY: DAVE LOWERY

With the big manufacturers flooding the market with high-specification locomotives and rolling stock, the ‘modelling gap’ is really at an all-time high. The ‘gap’, I should explain, is the difference between those who make models and those who buy them.
In the old days, many of us got going in modelling by improving ready-to-run models which, at the time, were pretty basic. But the act of fitting wire handrails and other etched metal detail parts, in place of bulky plastic mouldings, allowed us to build useful skills and experience with precision tools, as well as experience of soldering and painting techniques. While it was a minor inconvenience, we didn’t think much of having to cut off a plastic chimney and fitting a new – and more accurate – metal version.
With modellers now spending hundreds of pounds on new locomotive models, who has the bottle to take a hacksaw and start cutting it up? And do they need modifying anyway? Where has all the fun gone?!
Seriously though, I’m not the only one who worries about a lack of traditional practical modelling skills among fellow hobbyists, especially younger generations. While they may be whizzes at DCC and computer control, I do think some modellers are missing out on the challenge and reward of building kits, especially rolling stock subjects.
Making that first jump into building a kit can be quite a big deal. However, plastic wagon kits are an excellent place to start, while some whitemetal kits can be glued together with epoxy, contact and cyanoacrylate adhesives. But an etched brass kit can be especially daunting.
And that’s where Model Rail magazine, with its range of step-by-step modelling projects, really comes into its own. We have several kit-building features currently in the works, across various scales and materials, which will be appearing occasionally in the Workbench section.
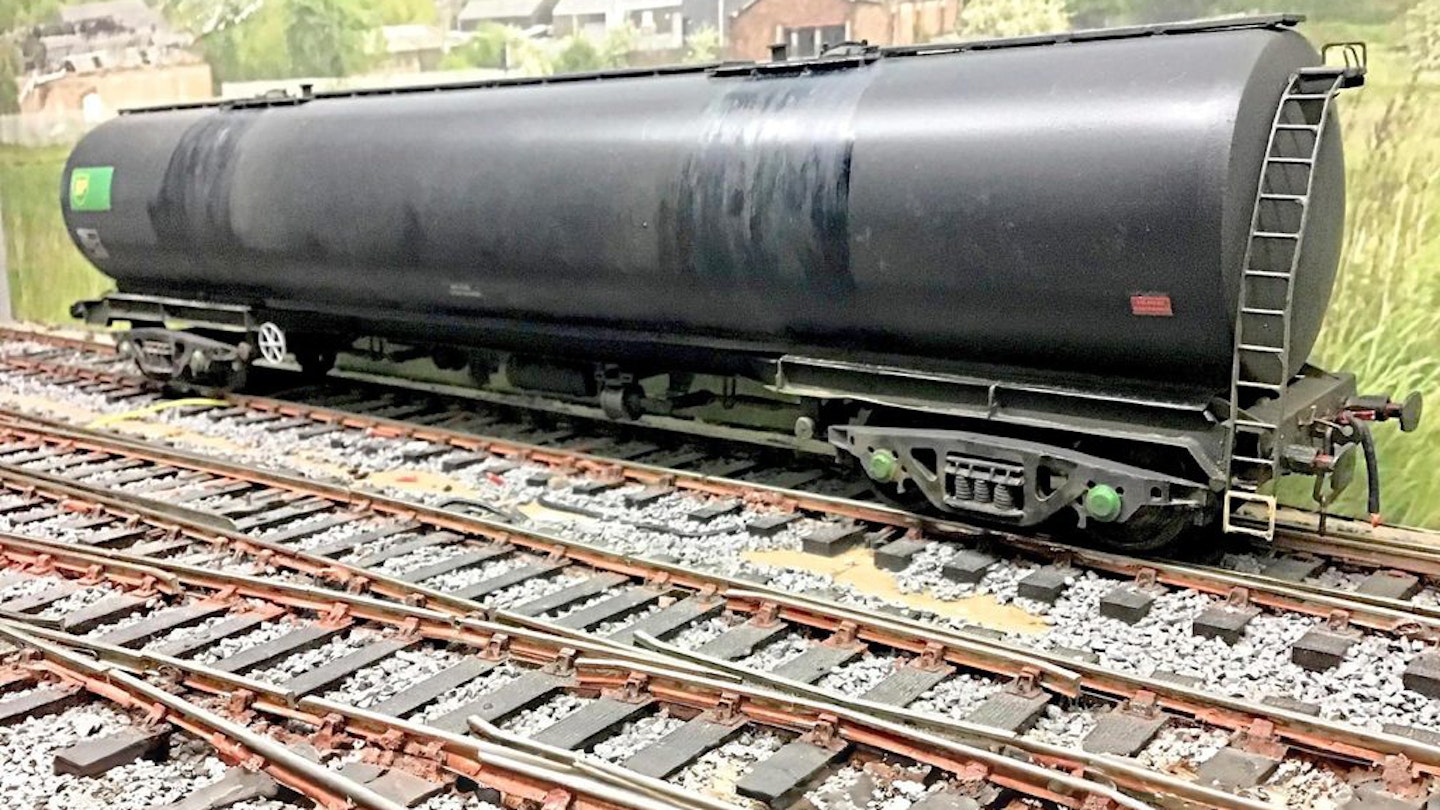
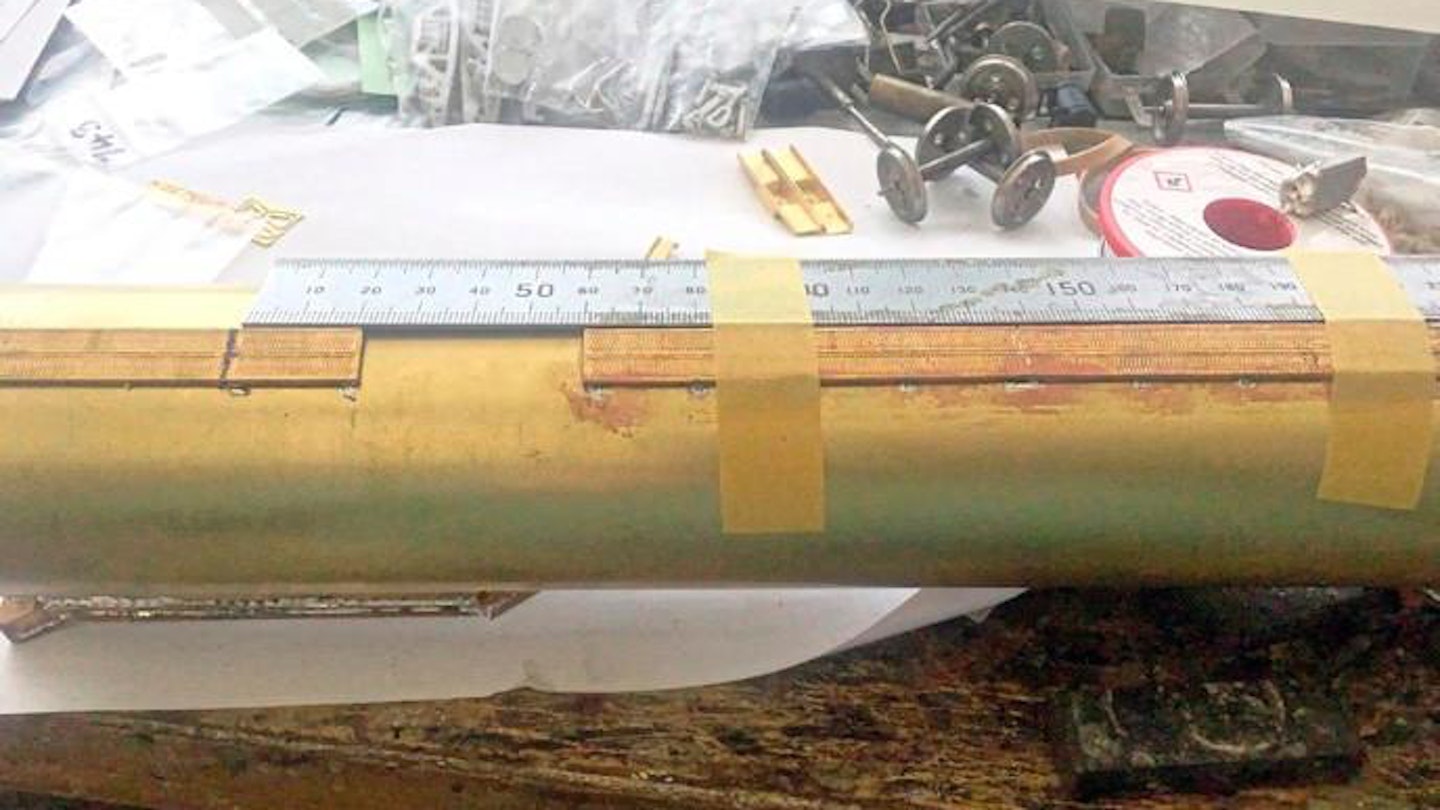
As a taster of what may be involved in a typical metal wagon kit, here’s an overview of how I built a TEA 100ton bogie tank wagon, using a PRMRP kit. As it is ‘O’ gauge, the various etched and cast bits are nice and big, so they not only show up well in the photographs, but they’re easier to handle too.
The various techniques employed here are applicable to all manner of kit-building tasks, as well as other aspects of the model railway hobby. Soldering is a prime example, being a skill that’s much more straightforward than many people think, and one that opens many possibilities.
Naturally, nobody starts off with a huge suite of tools that make the job easier – they’re usually acquired along the way. There are lots of fancy implements to spend your money on if you like, but there are also plenty of cheaper, simpler alternatives.
One thing that is essential, however, is a decent soldering iron with enough power to get the workpiece up to the necessary temperature to form reliable solder joints. A tool with a 50 Watt rating should suffice for many tasks, although a more powerful version (80 Watt perhaps) is better for working on larger components. Furthermore, a temperature-controlled iron also offers up the chance to work with different materials and solder grades, including whitemetal parts. A modest investment on a good iron set-up at the outset should provide a lifetime of use.
We’ll go into more detail about tools, soldering and materials in a future issue. For now though, let’s get building…
What you will need
SHOPPING LIST
◆ Model: PRMRP TEA 100ton tank wagon kit
Price: £85.00
Availability: PR Model Railway Products
Tel: 07807 225801
Web: www.prmrp.com
TOOLS
◆ Stout knife and blades
◆ Files
◆ Pliers
◆ Metal snips
◆ Steel rule
◆ Set square
◆ Abrasives
◆ Soldering iron and equipment
STEP BY STEP
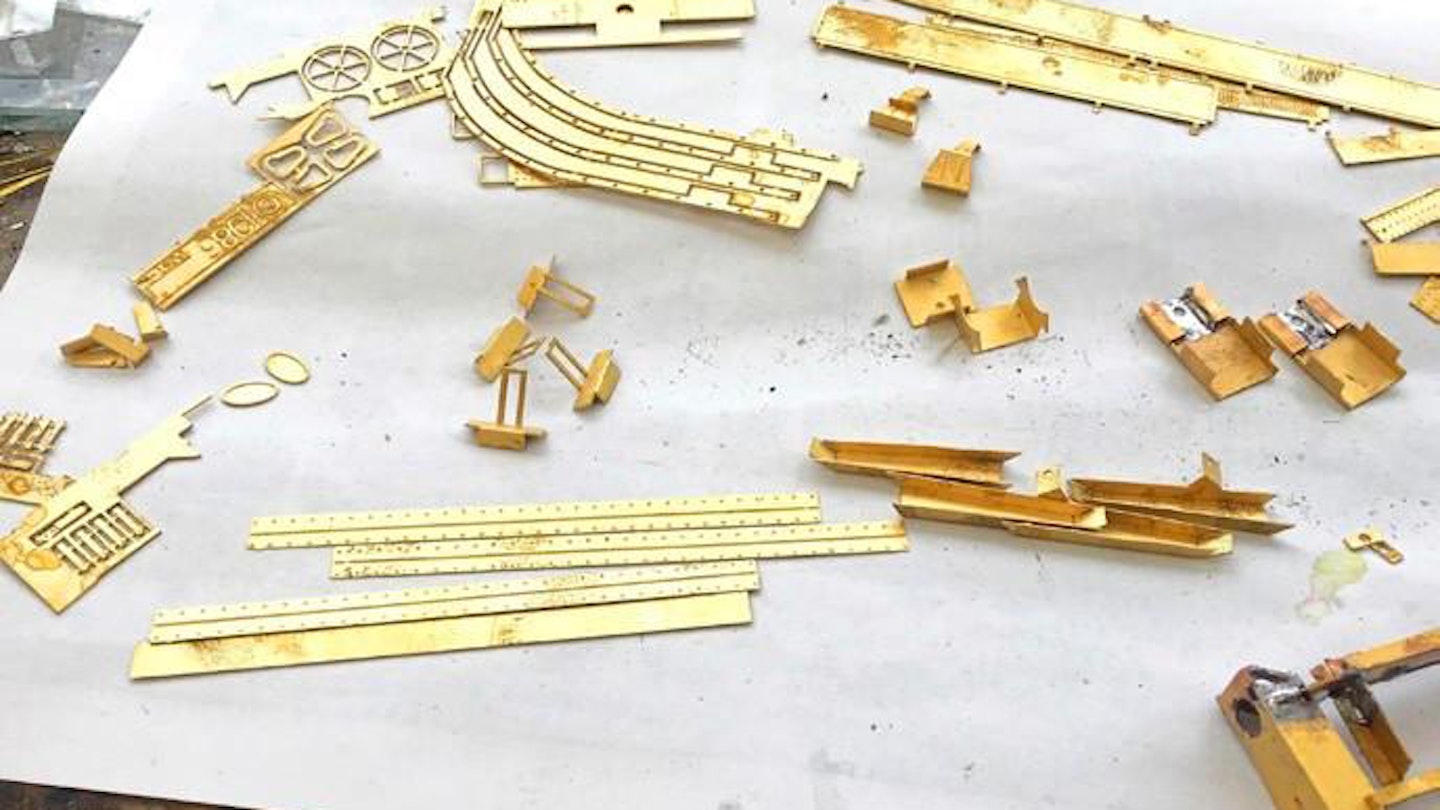
1 The PRMRP kit consists of etched brass and cast whitemetal components. Take your time cutting out the parts from the fret, preferably with snips or a stout knife over a piece of wood. Clean away any burrs with a fine file.
2 The next stage is to form the brass components into the required profile, paying close attention to the instructions. In nearly all cases, the half-etched fold lines should be on the inside of the bend, allowing the brass to fold more easily.
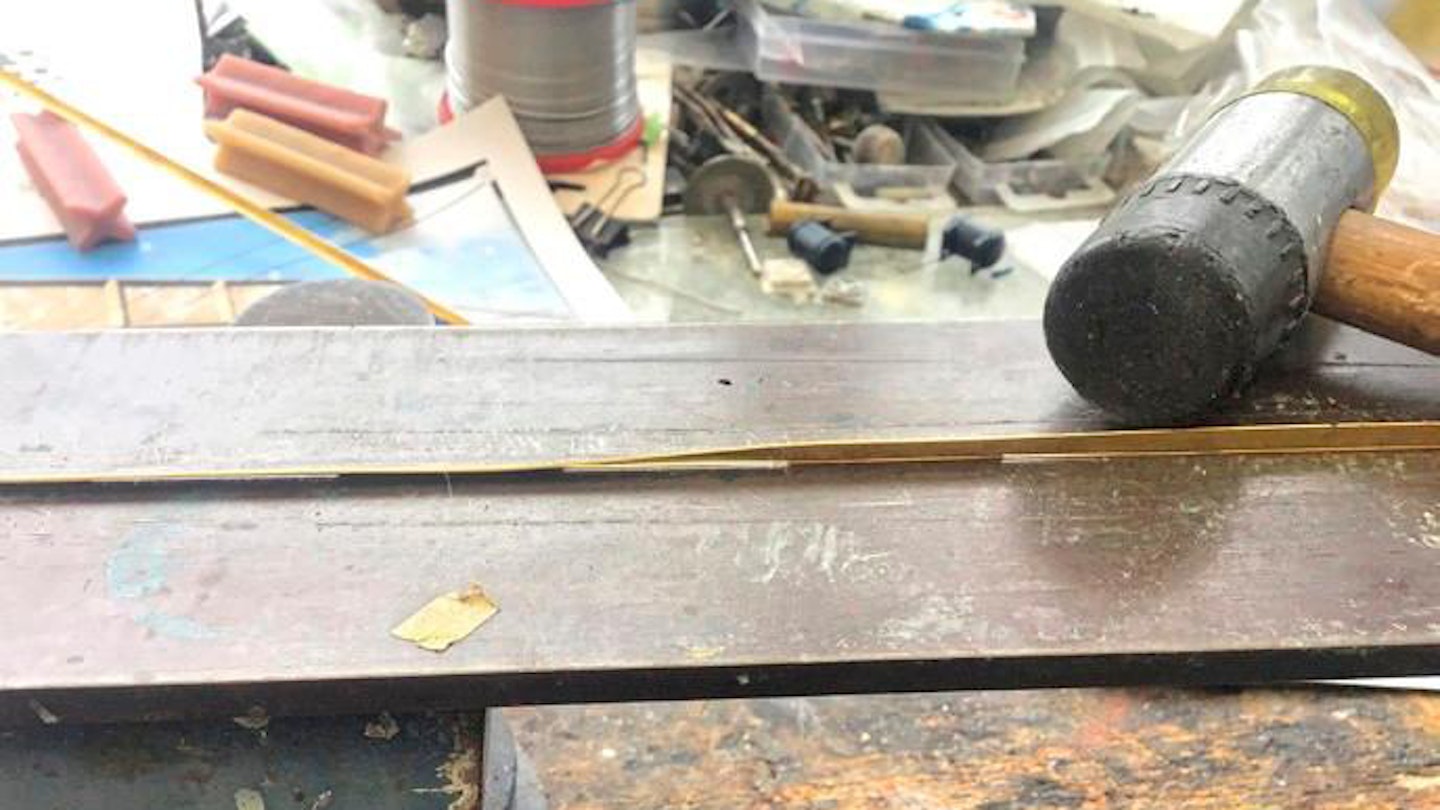
3 This set of metal bending bars take care of folding job, but the parts still need finishing off with flat-nose pliers, which can be used if you don’t have bending tools. Work slowly along the piece making sure there is no twist.
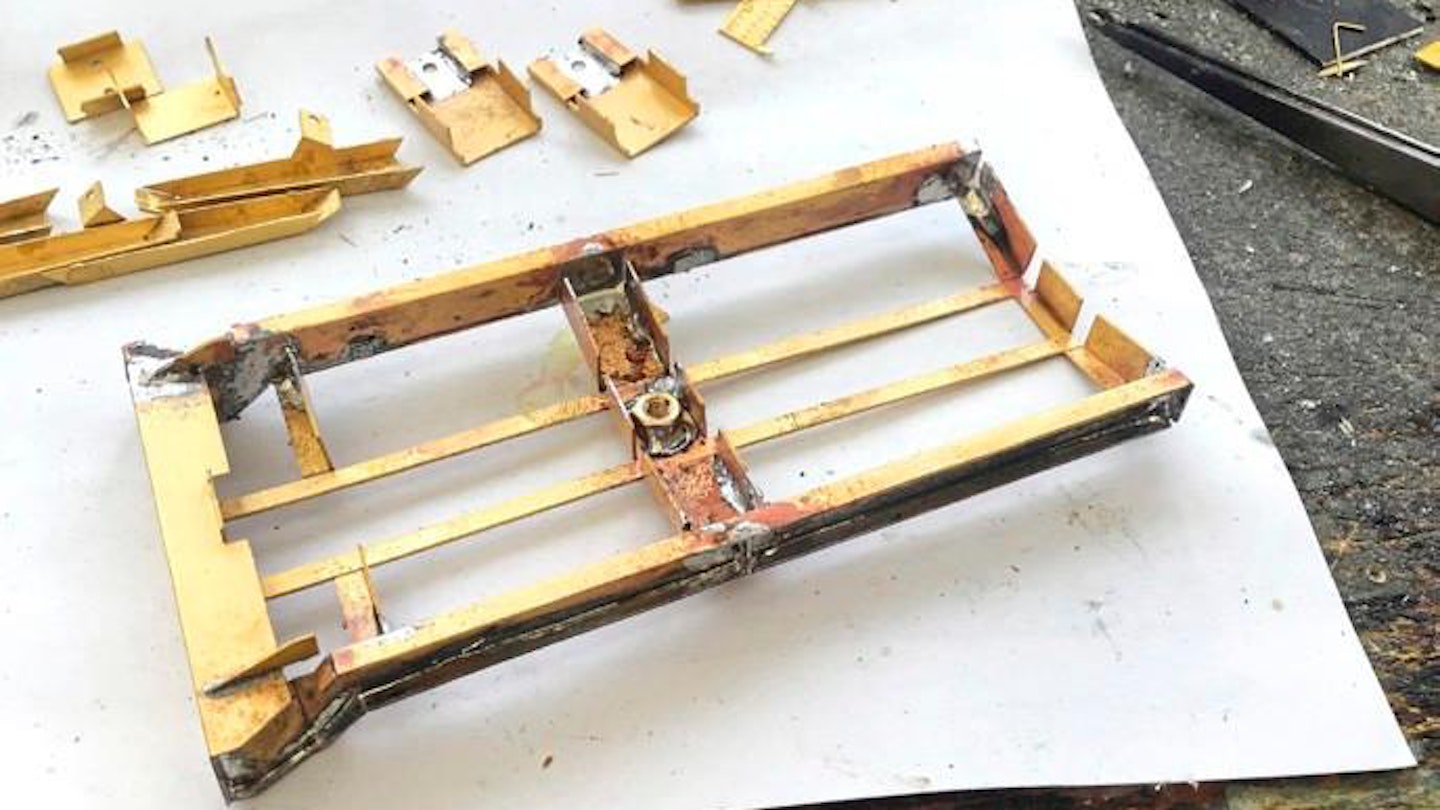
4 Having formed the long chassis frames, there are plenty of smaller sub-assemblies to tackle. Always take time to ensure parts are folded exactly square, checking with a set square. This ensures accurate joins.
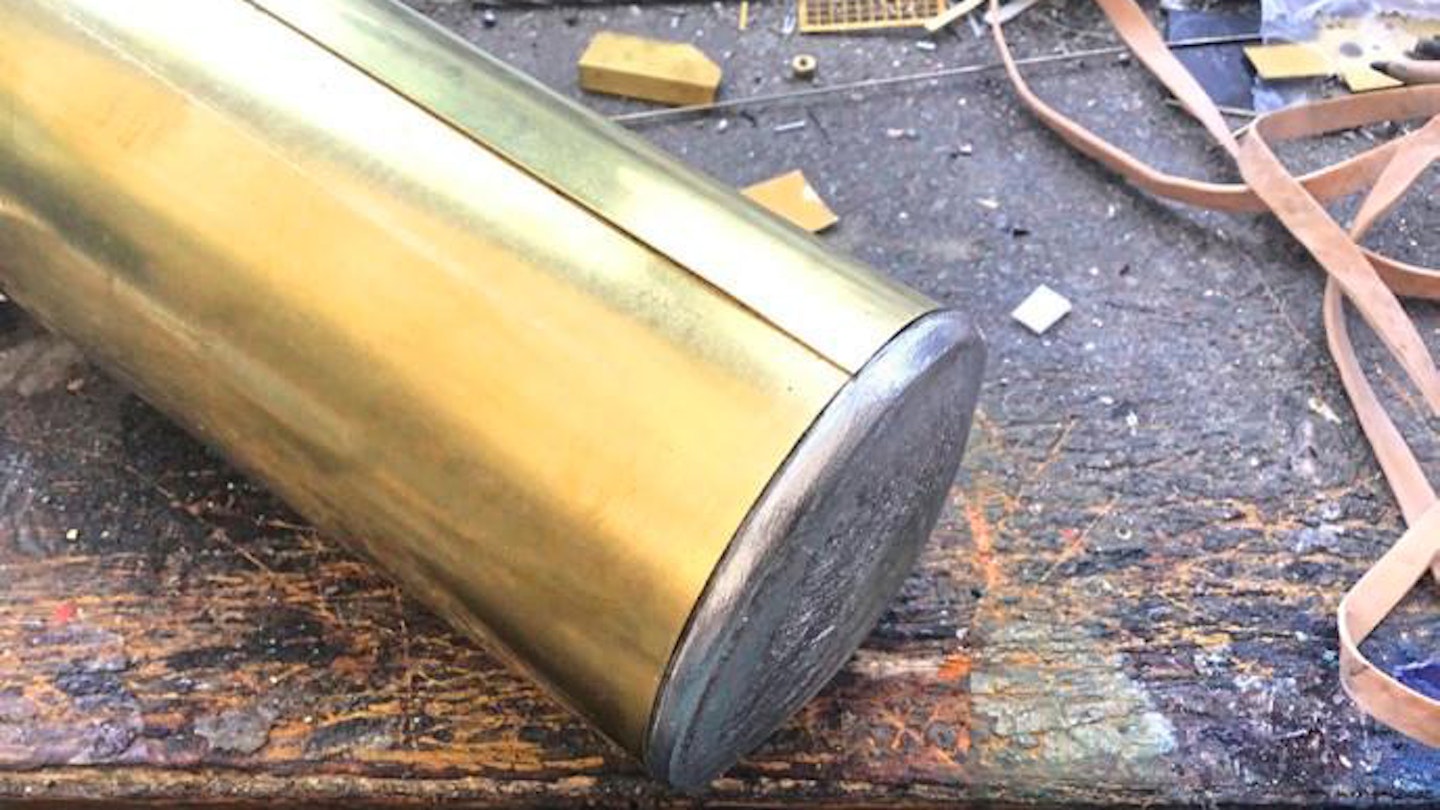
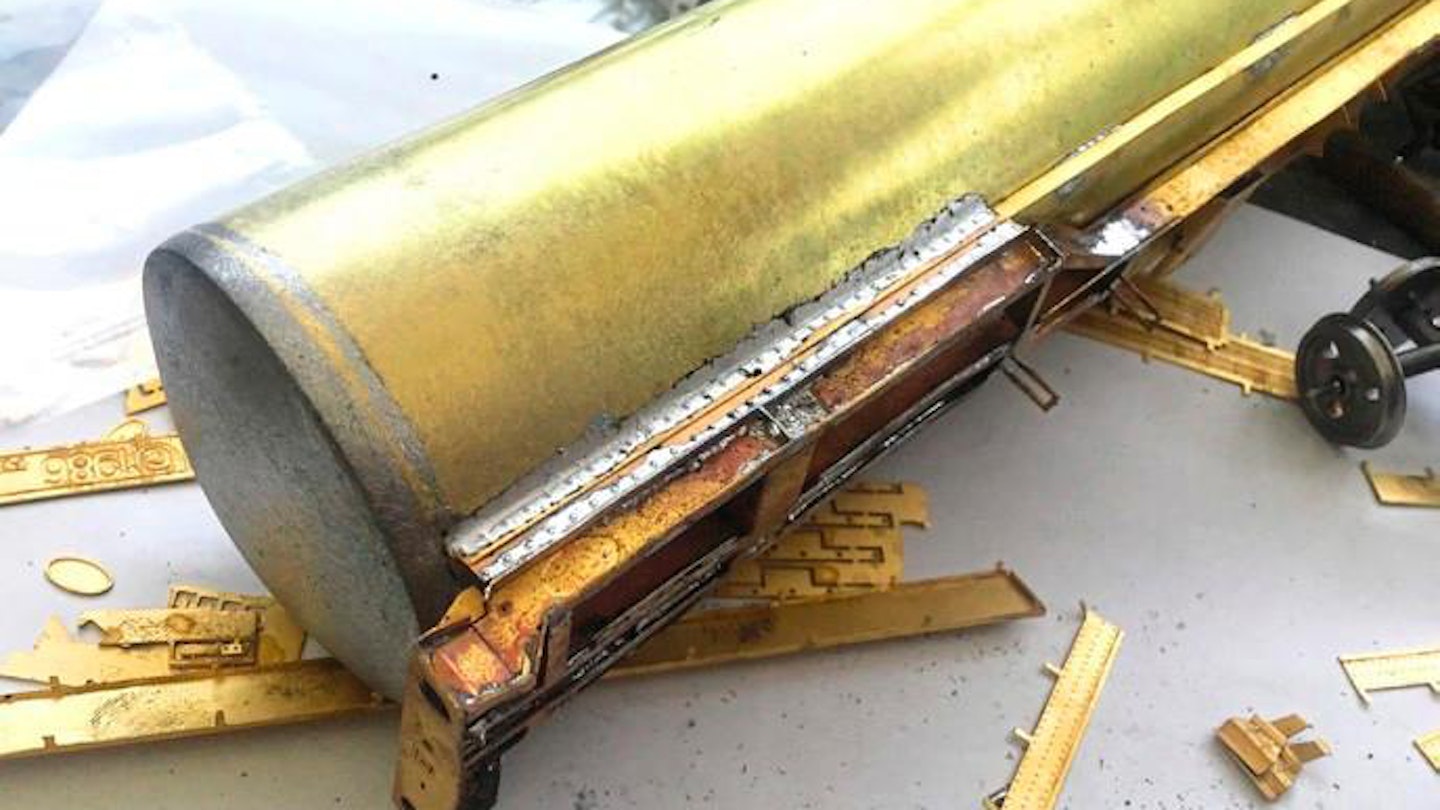
5 The sheet provided for the tank barrel comes partially rolled, but it needs to be formed into a tighter diameter to allow the seams to meet (see panel on page 63). Check the profile by test-fitting the cast ends into place.
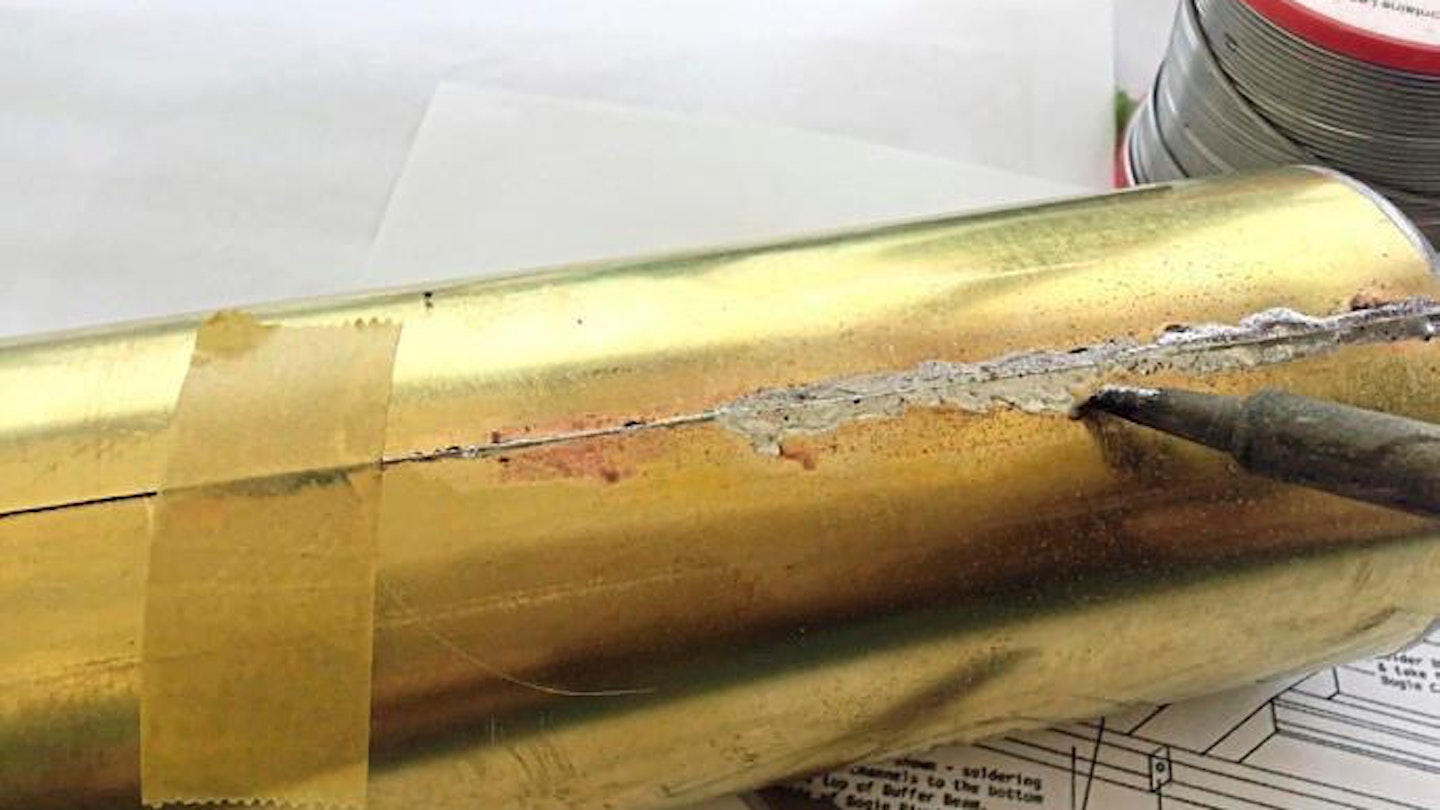
6 When you’re happy with the barrel, the seam can be held with a strip of tape while soldering. Work outwards from the centre or from one end to the other, using flux and plenty of heat to ensure the solder flows into the joint.
7 Clean away flux residue from inside the cylinder before fixing the end castings in place. A low-temperature soldering iron and special solder is essential for bonding whitemetal parts, as the material has a low melting point.
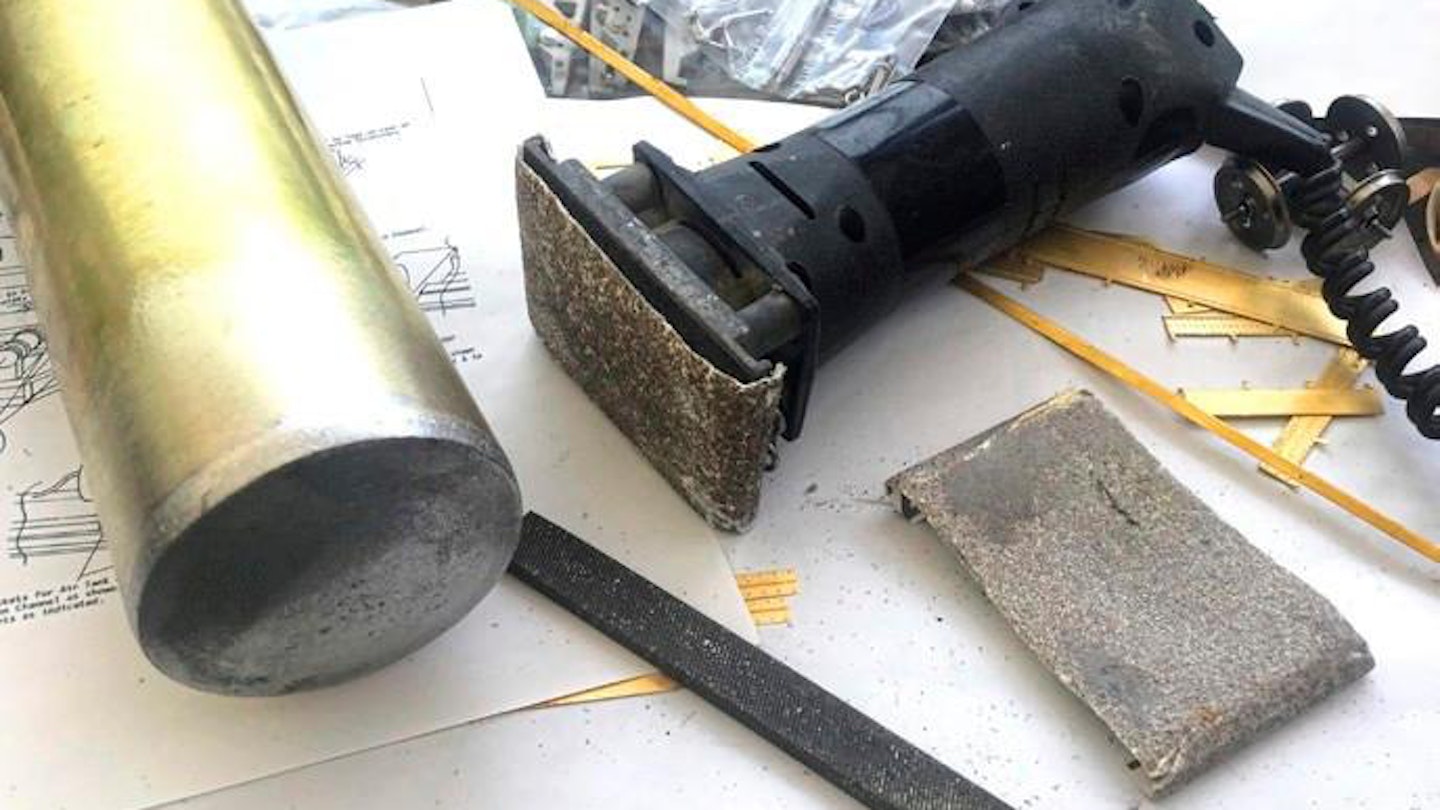
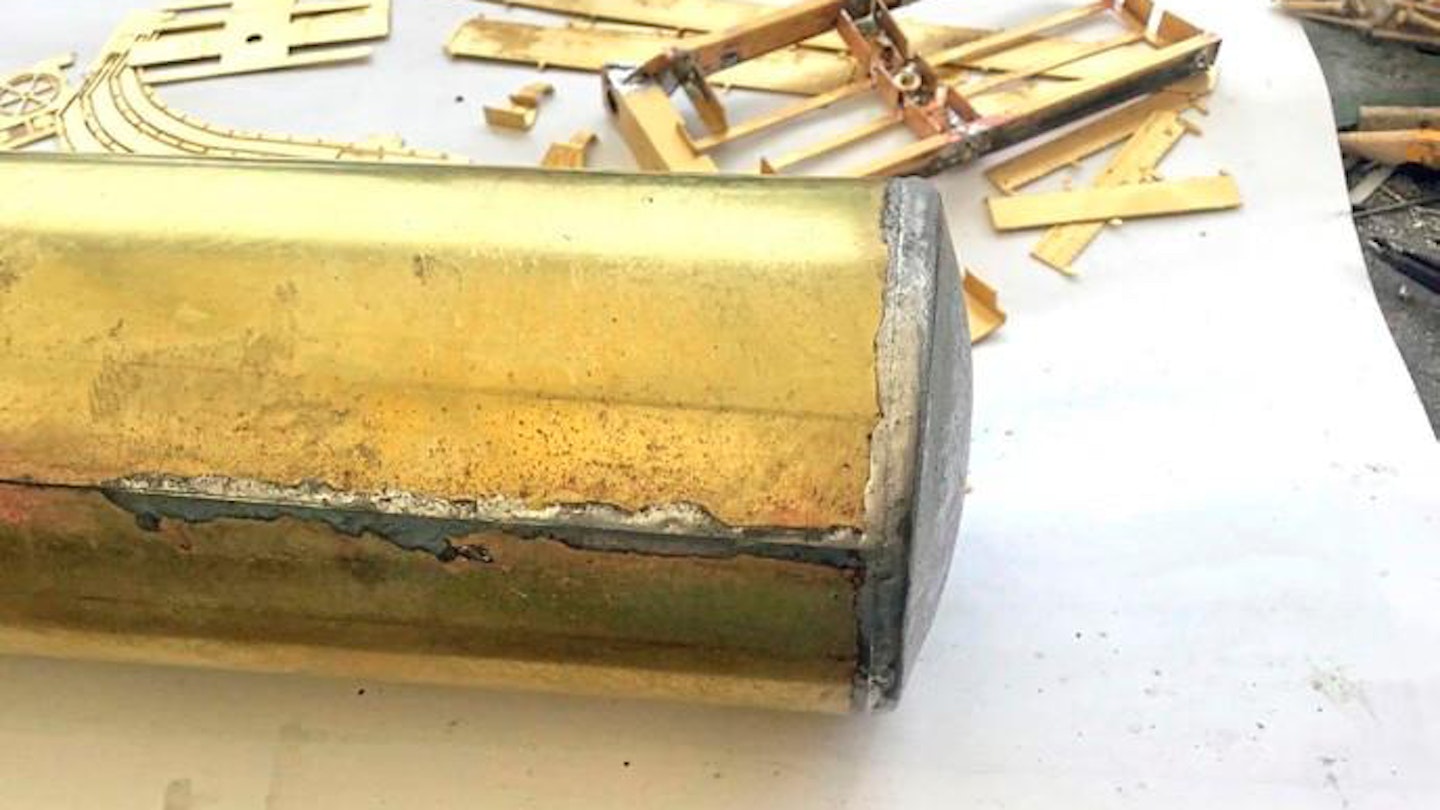
8 Tidy up soldered seams with a broad file and/ or emery paper. A hand power sander is helpful, tackling the excess material quicker and producing a smooth finish. Look out for gaps, apply filler, then sand again when dry.
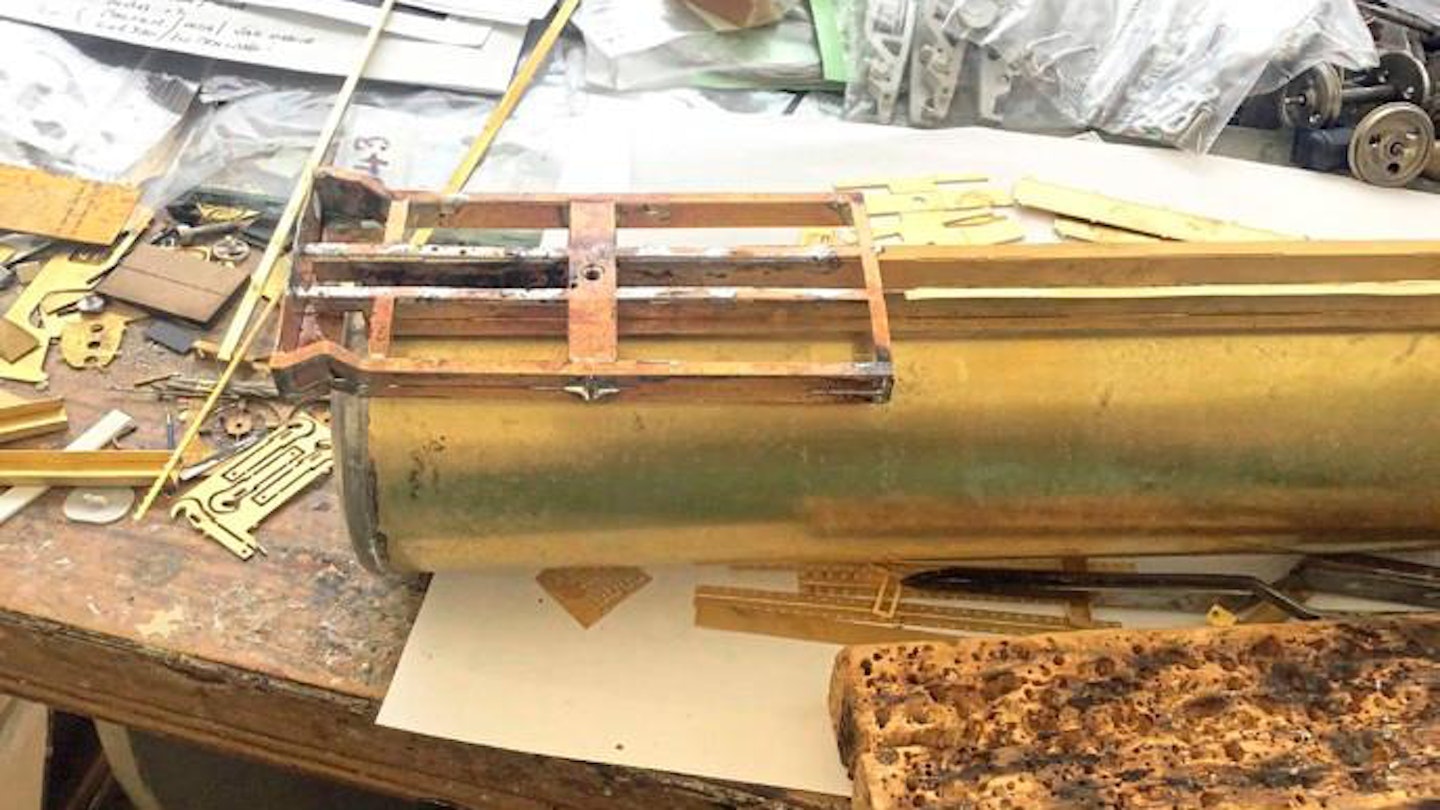
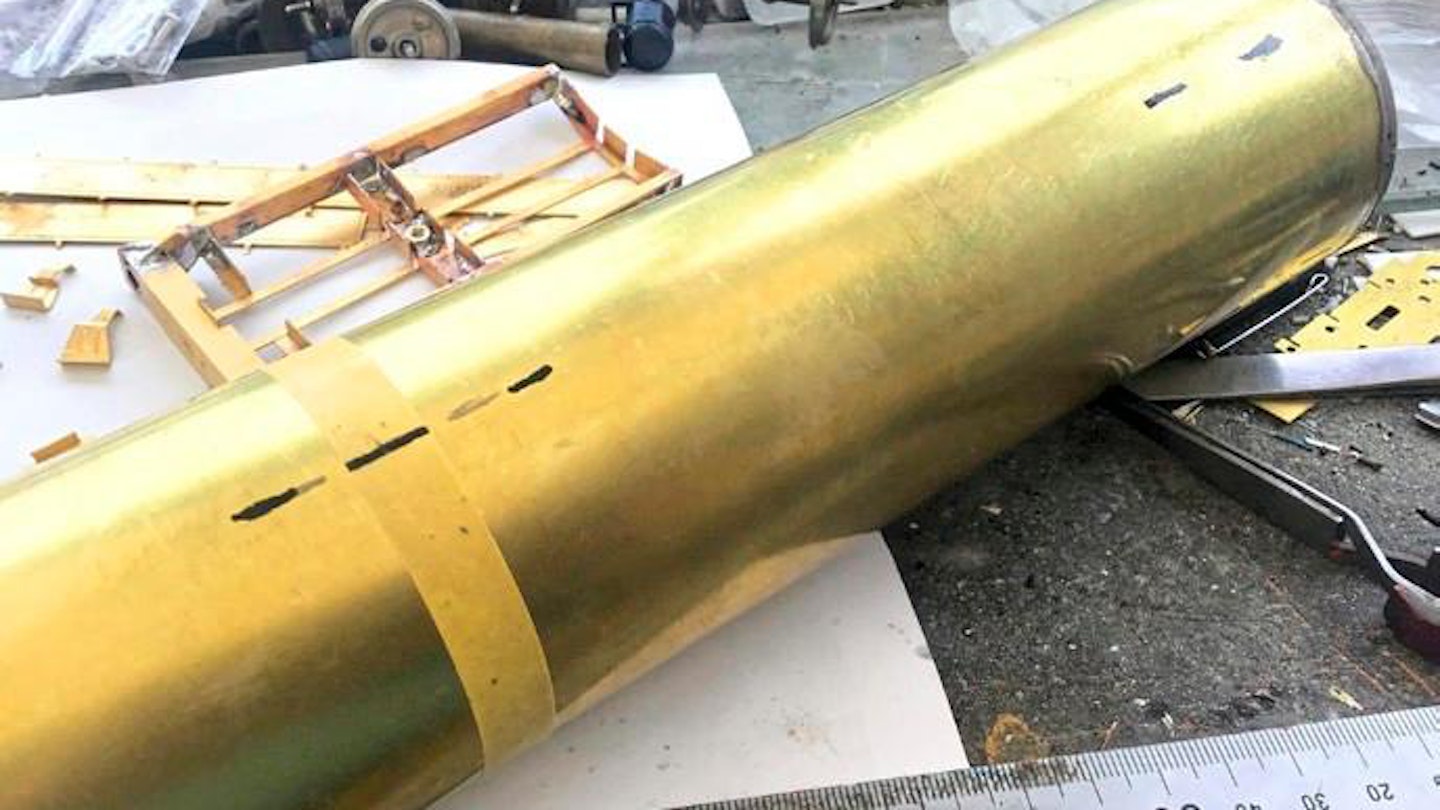
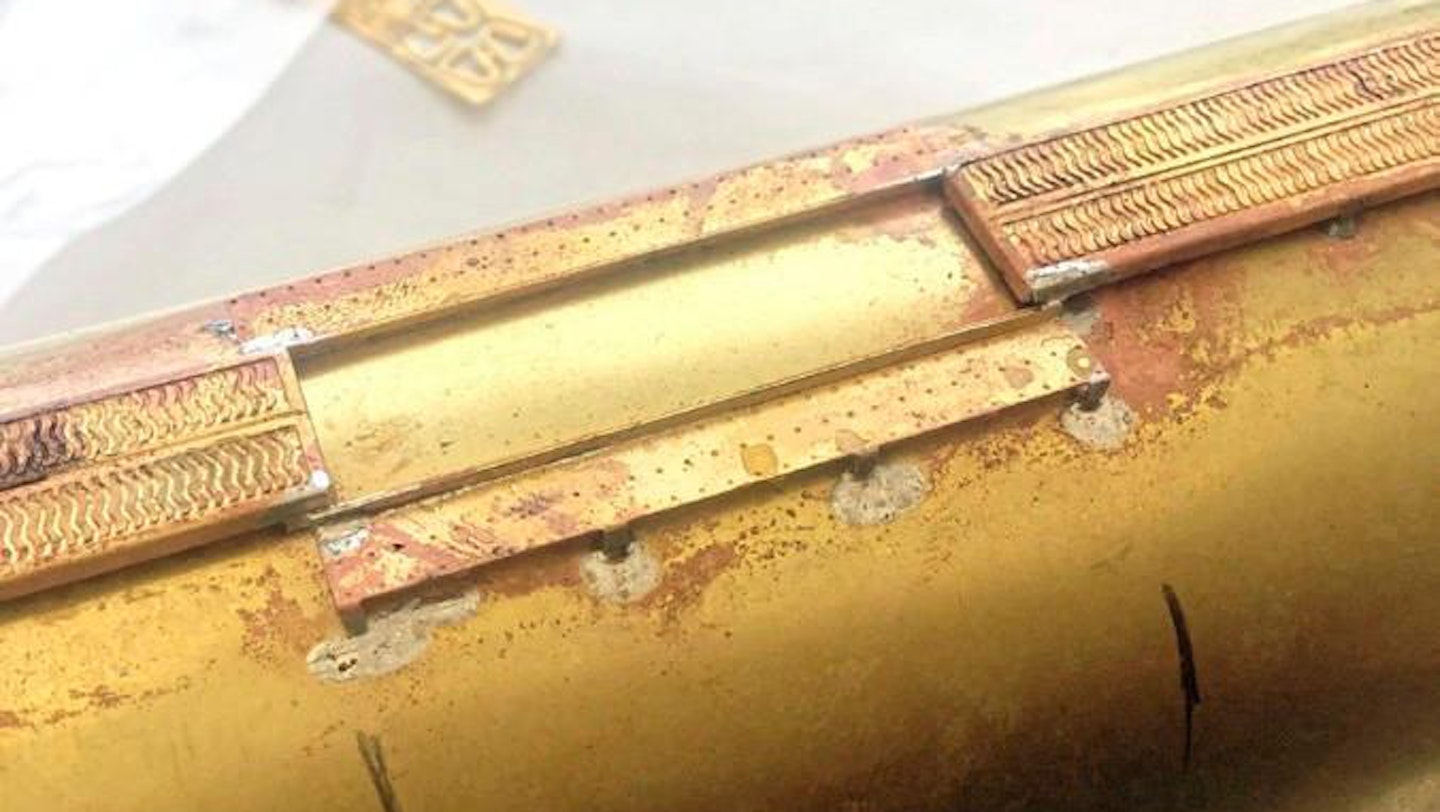
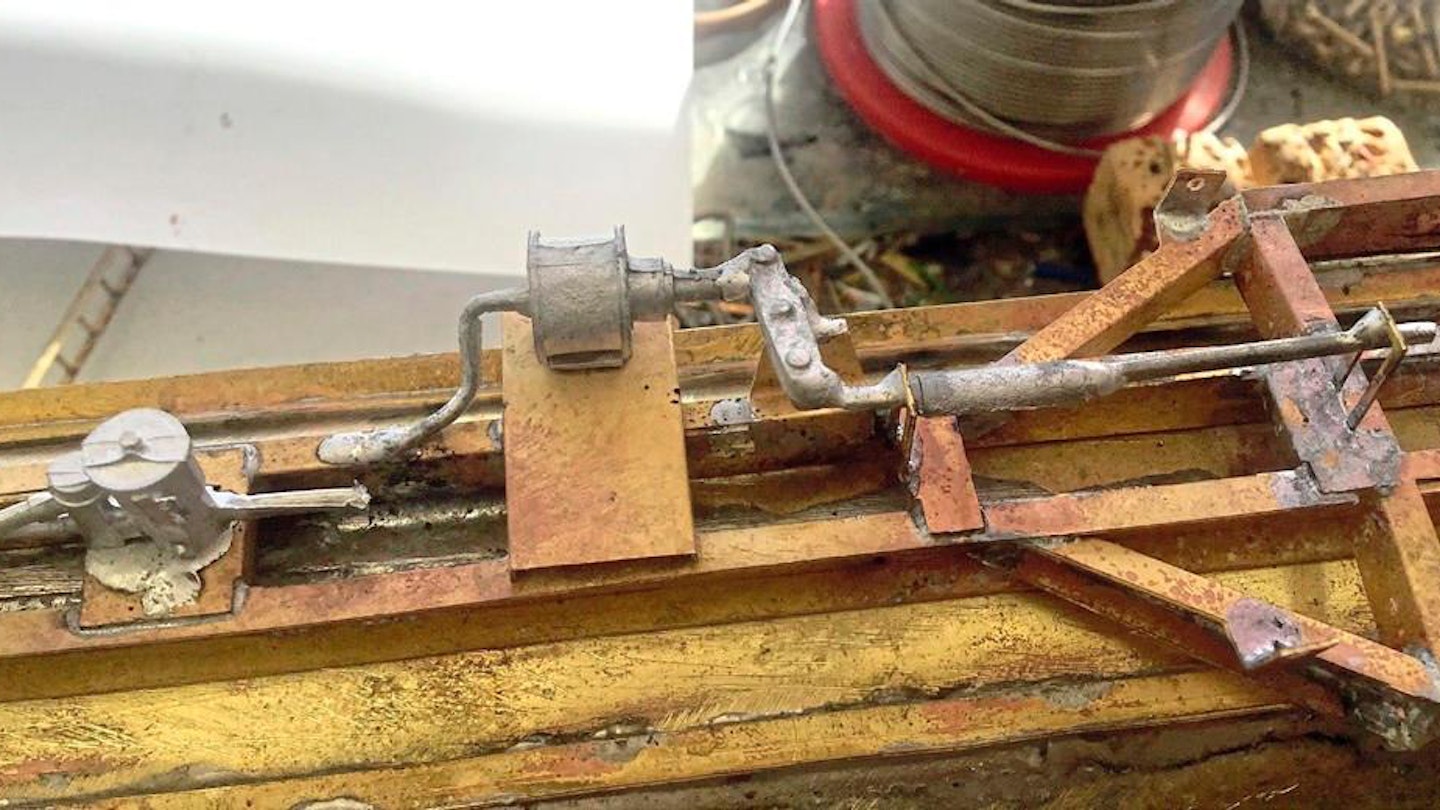
9 Using the assembled barrel as a guide, adjust the end chassis sub-assemblies to fit and work out the required length of the main channel frames, marking them carefully before cutting to size. Ensure the cut ends are square.
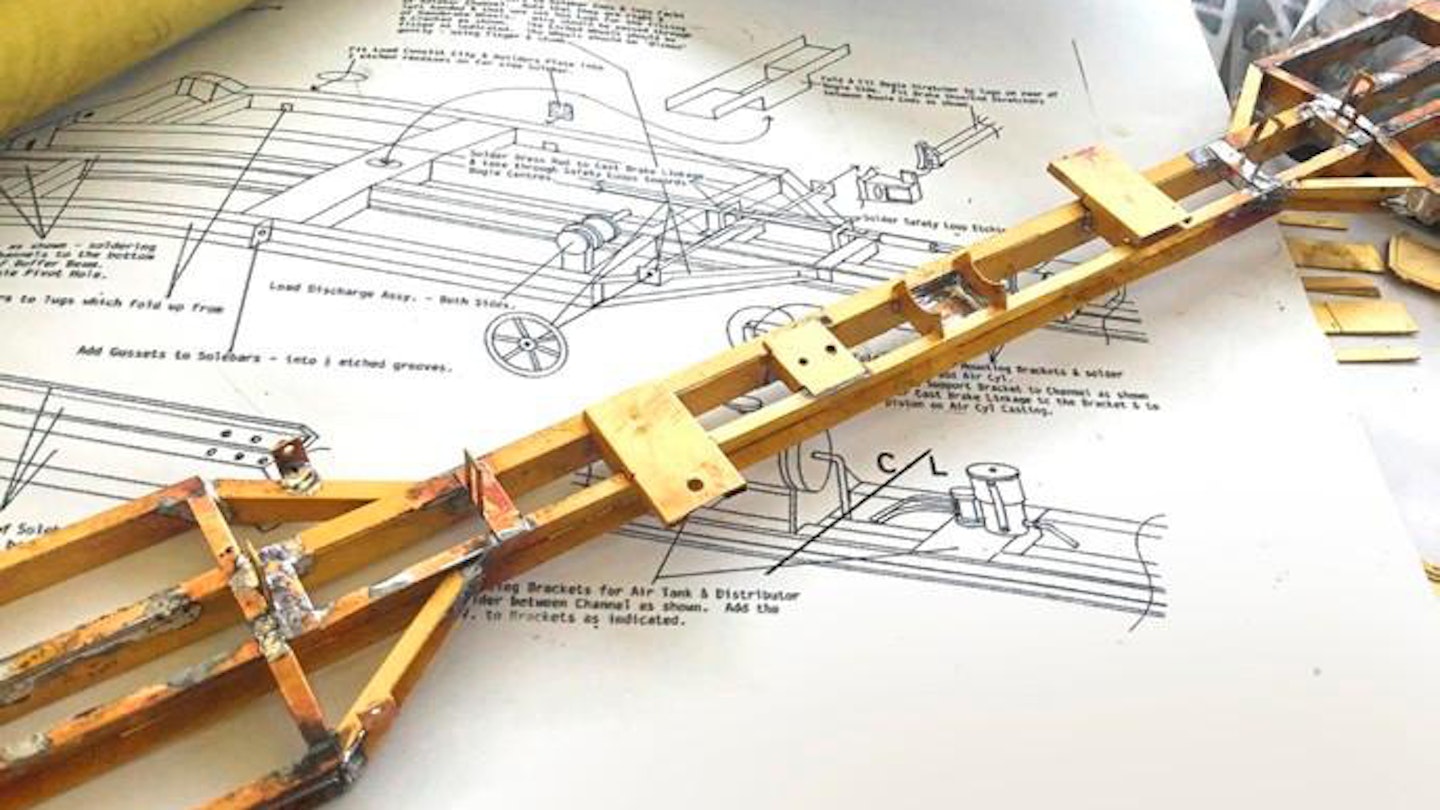
10 The main chassis frame can be assembled, checking repeatedly that everything is square and true. Once the channel sections are bonded, the brackets and equipment mounts can be added, following the supplied diagrams.
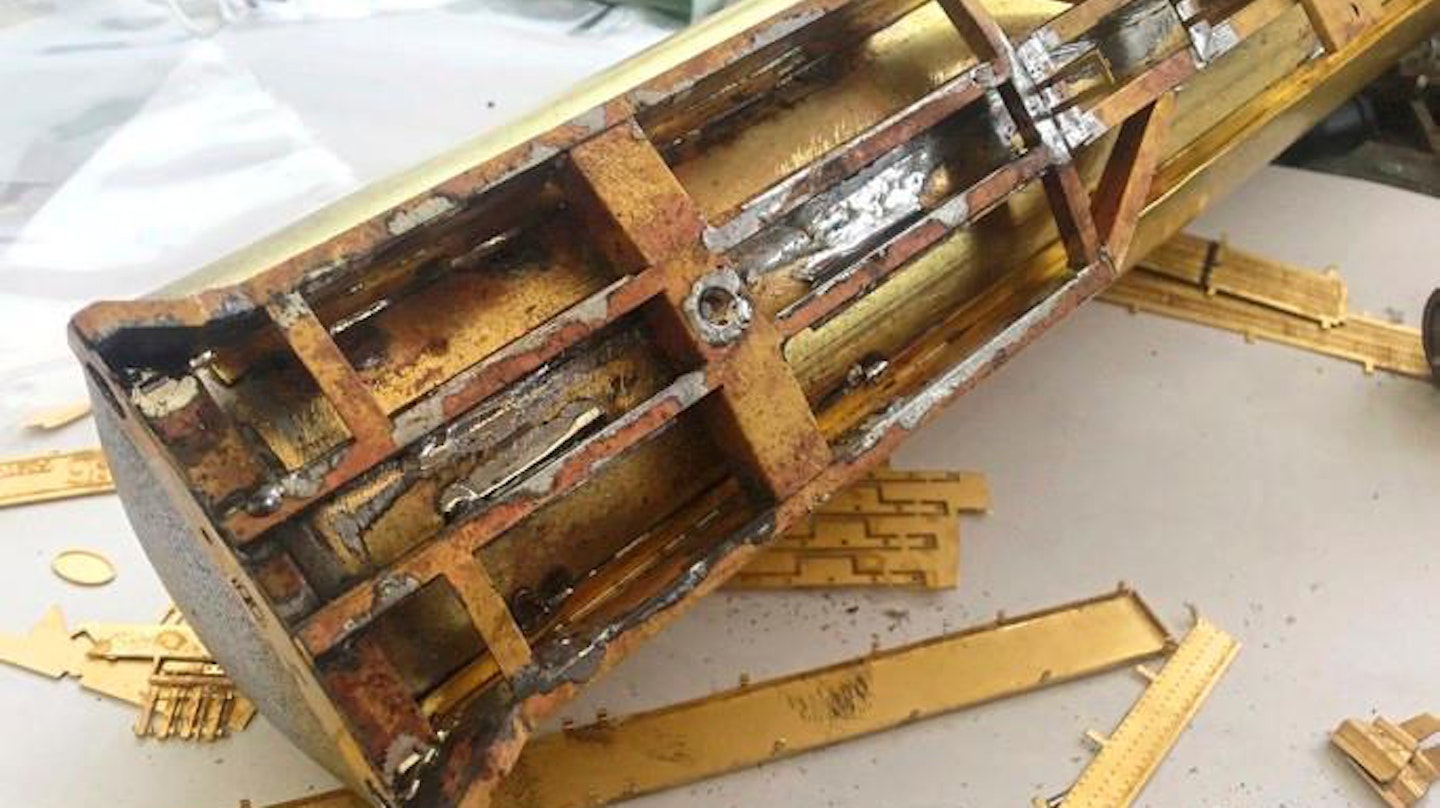
11 The chassis can then be soldered to the barrel and the ends. Making one or two ‘tack’ solder joints initially will make it easier to adjust if something is off. Only make the final bonds when you’re 100% sure.
12 The riveted flitch strips are then added at each end. I used a lower temperature solder for these, ensuring the parts didn’t have to be heated excessively, which could loosen the previous chassis bonds.
13 Apply a length of tape around the barrel, cutting it to length against each side frame. Remove the tape, lay it flat, and mark the centre. Then reapply the tape to guide the upper longitudinal centre line of the tank.
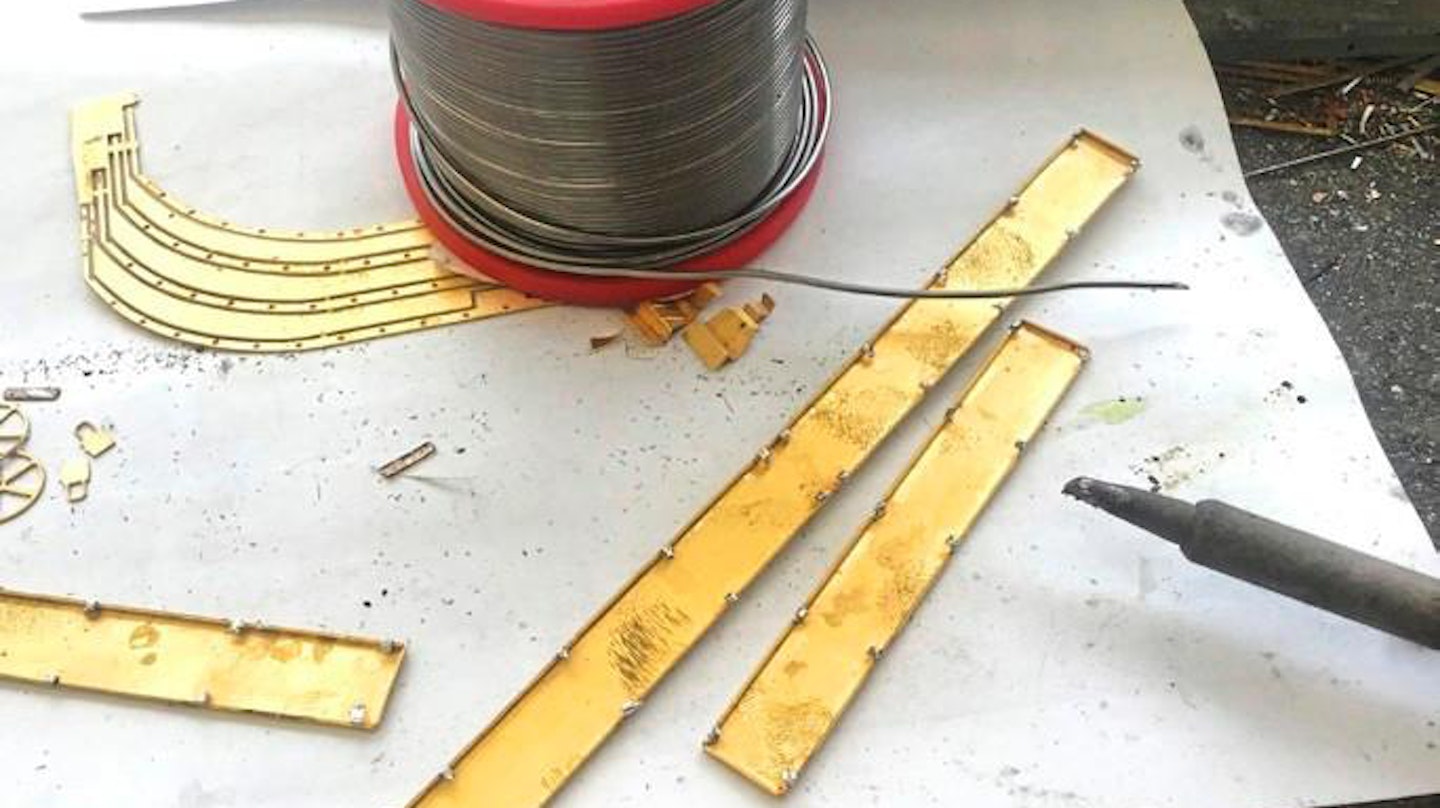
14 The catwalks need to be folded to shape, bending the mounting leg tabs under, and tinning each of these with small blobs of solder.
15 Using centre marks, align the catwalk and clamp with a weight. Apply flux and then gently apply heat to the pre-soldered tags with the iron or a mini blowtorch. This will re-melt the solder on the tabs and bond them to the barrel.
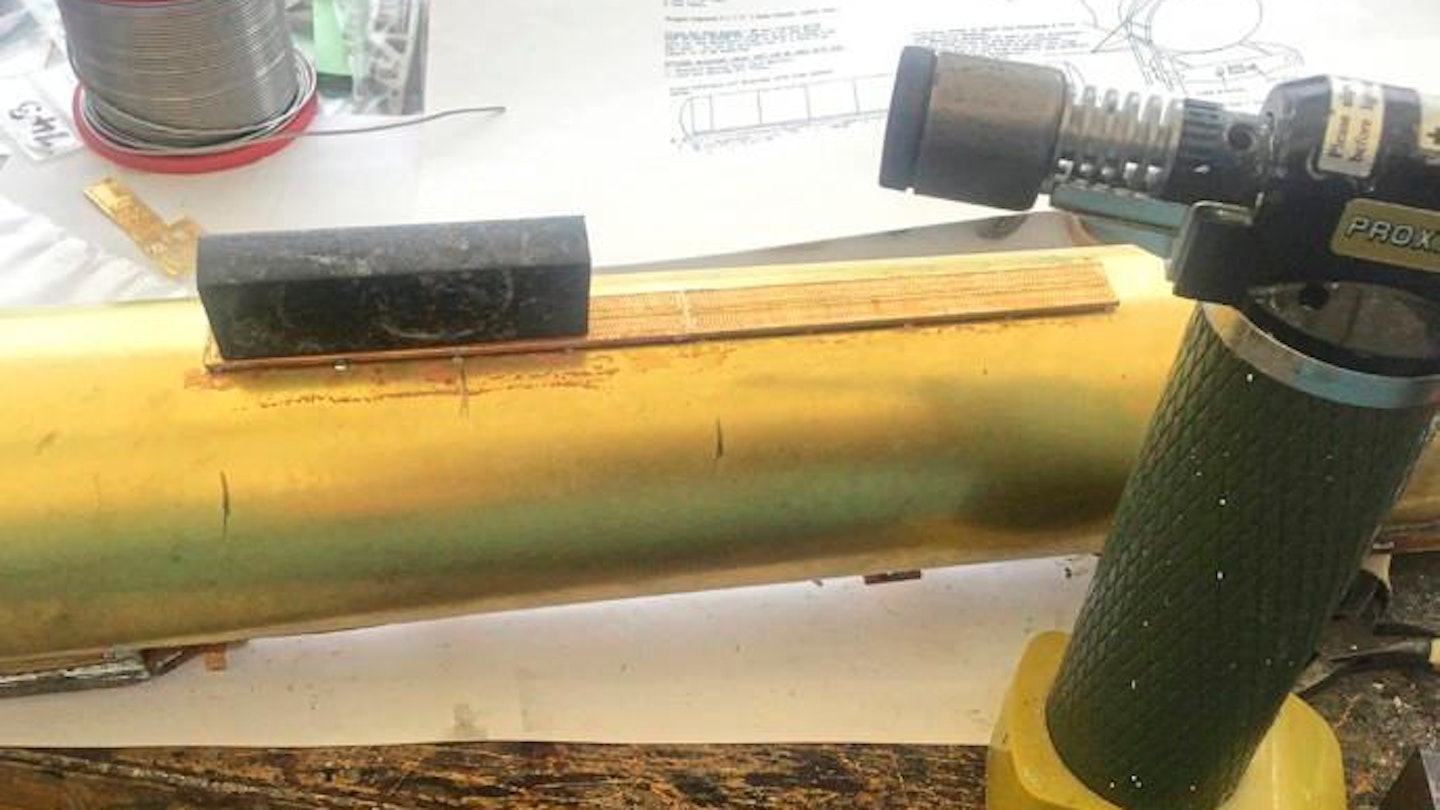
16 Having added a catwalk, a steel ruler can be taped along the top of the tank to align the next section. Again, the tabs were pre-tinned and bonded to the barrel in the same way, taking care not to dislodge previous solder joints.
17 There are also pairs of shorter catwalks to add either side of the filler hatch locations, and these were formed and installed in the same way.
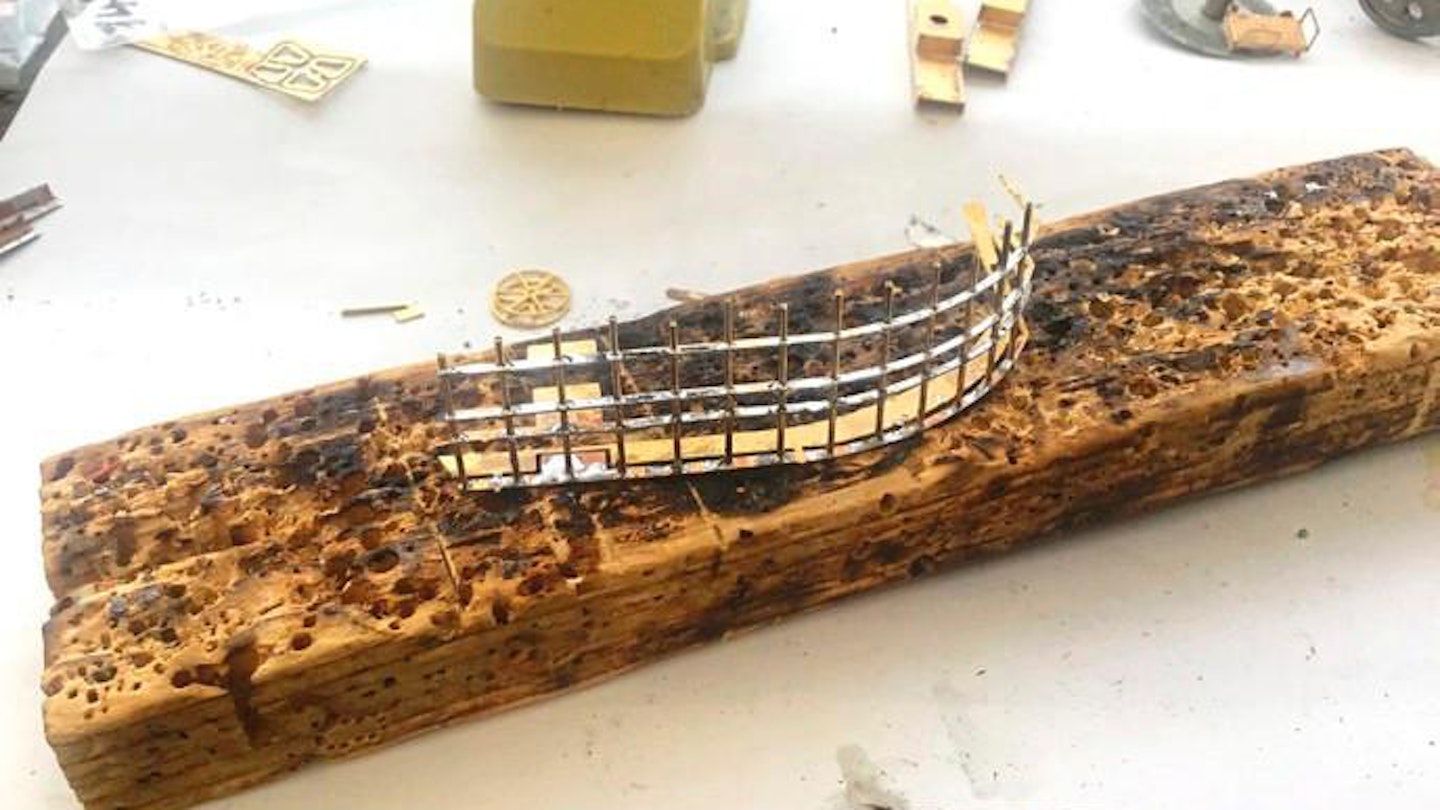
18 The ladders must be assembled from individual side frames and brass wire rungs added. My trusty ‘block of a thousand holes’ came in handy, with holes formed for each rung using the side frame as a drilling guide.
19 With the rungs in position, the first side frame was slotted in place and soldered, followed by the other side. Both ladders were formed at the same time, using over-sized lengths of rod, adding the other side frames in turn.
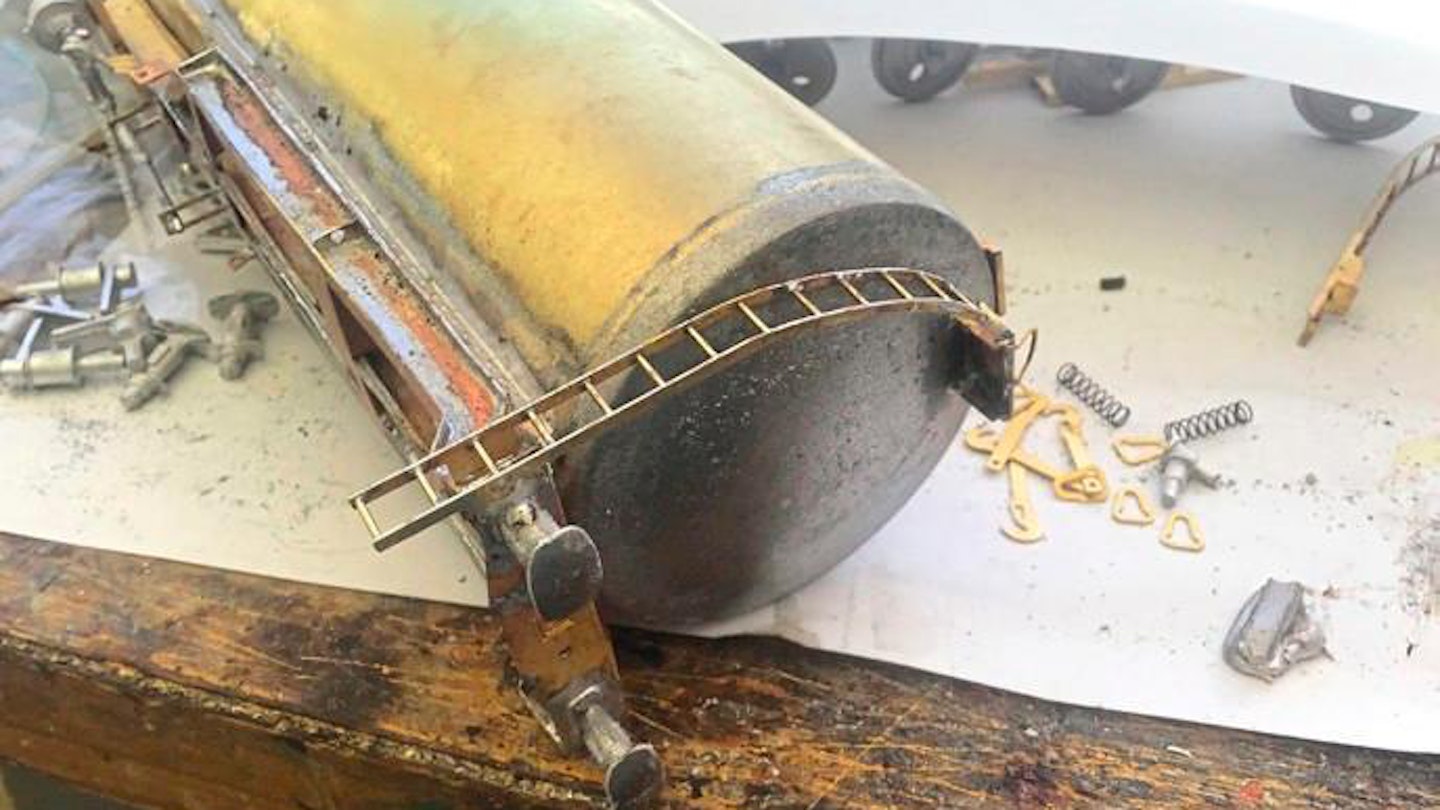
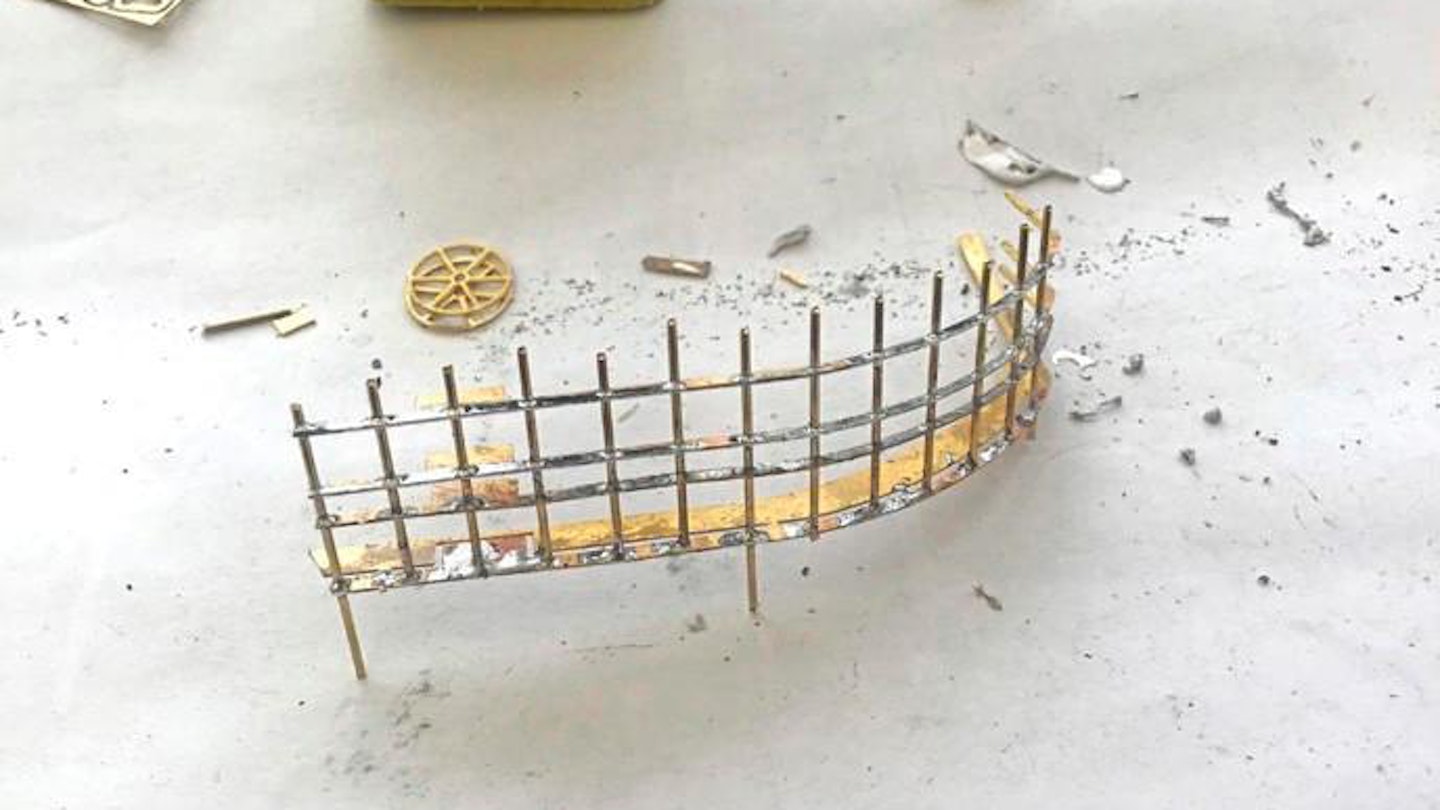
20 I carefully separated the two ladders by snipping excess wire and cleaning up the outer sideframes, taking care not to distort the parts, After filing smooth, the ladders were soldered onto the chassis frame and mounting bracket.
21 Once all the brass work is done, the various whitemetal detail parts were fettled with needle files and abrasives to remove any excess material and casting marks before fixing in place. I soldered most of these parts with a low-temperature iron/solder, although glue is an option.
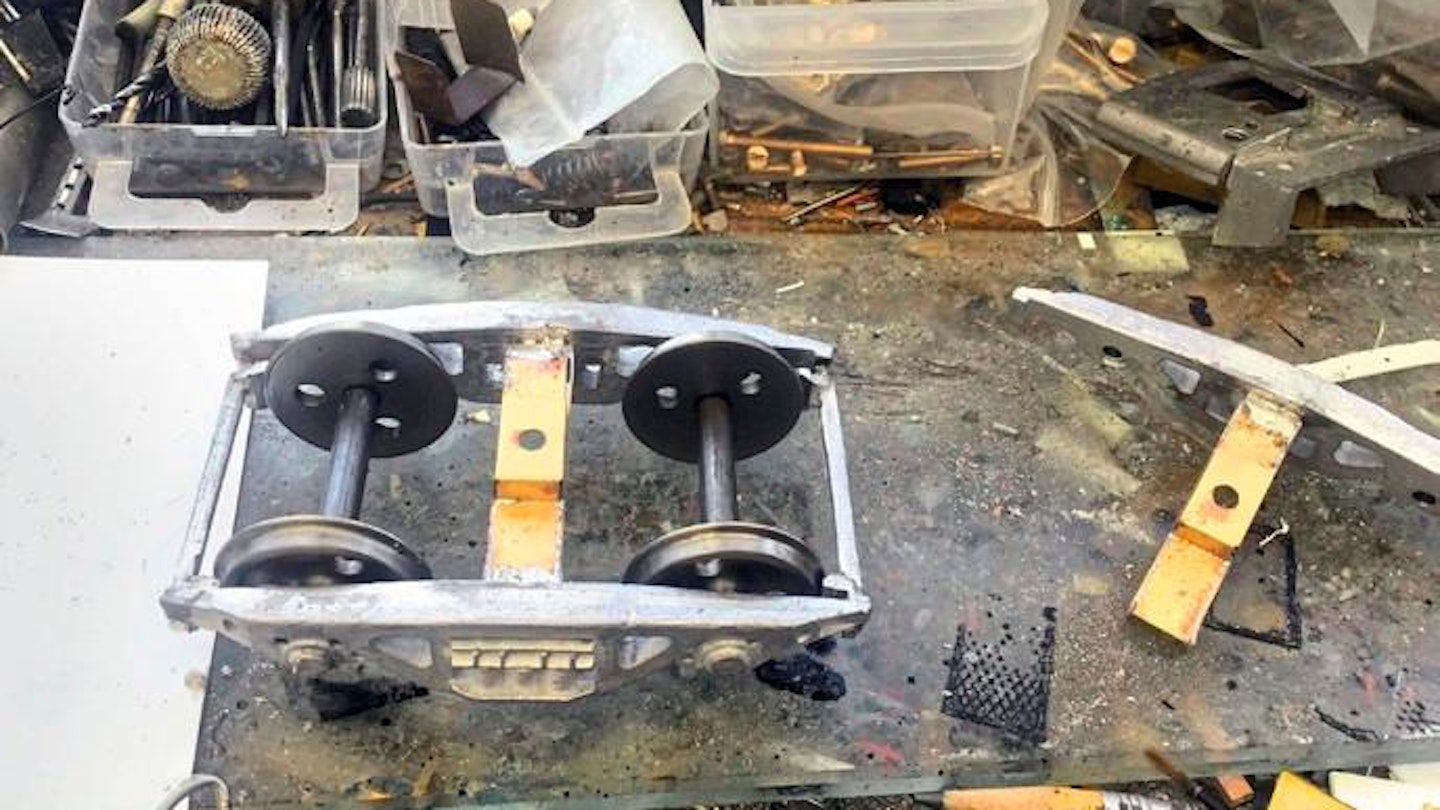
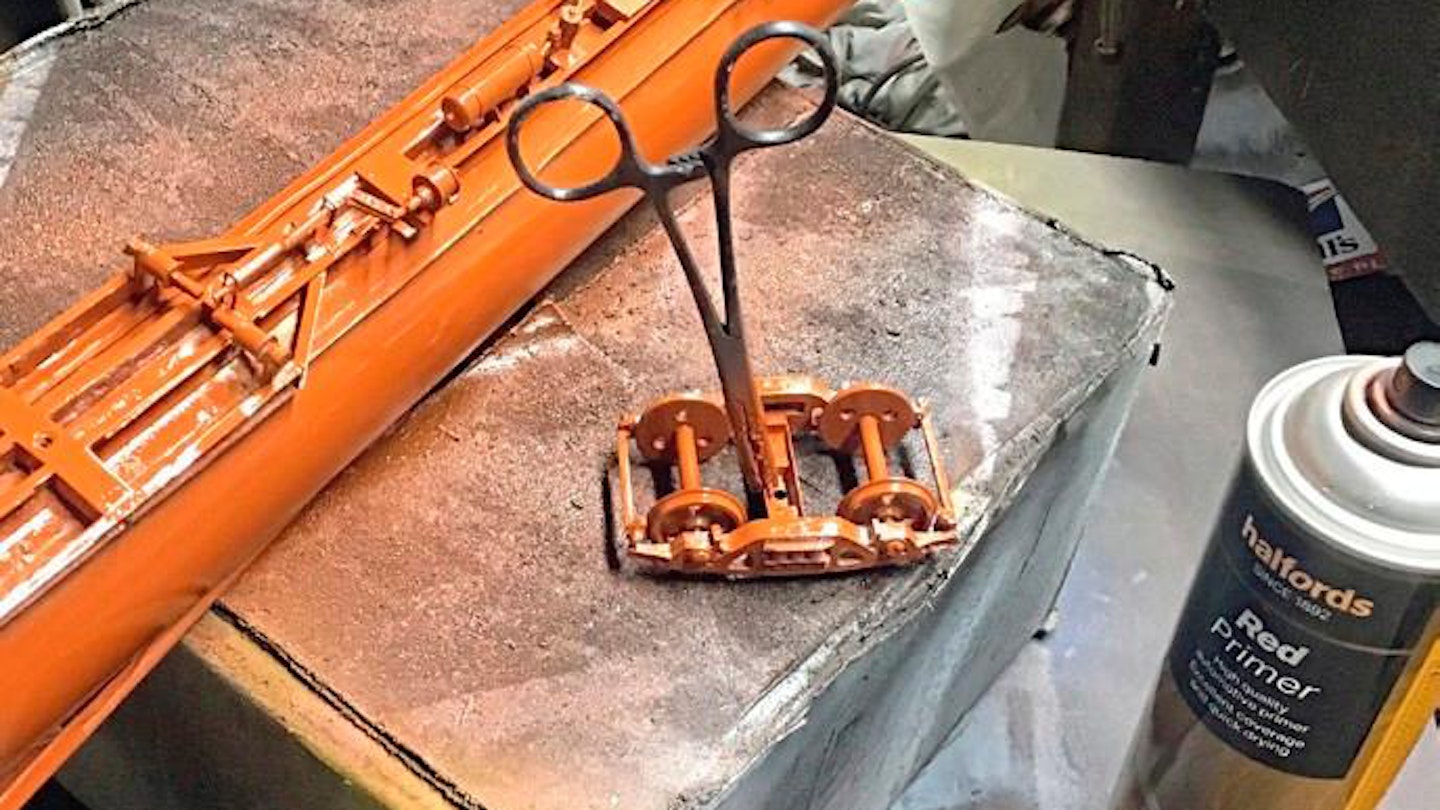
22 Using a piece of glass to ensure the wheels and axles are aligned correctly (all four flanges should always be in contact with the glass), the bogie frames were soldered together. Again, glue is a viable alternative (epoxy).
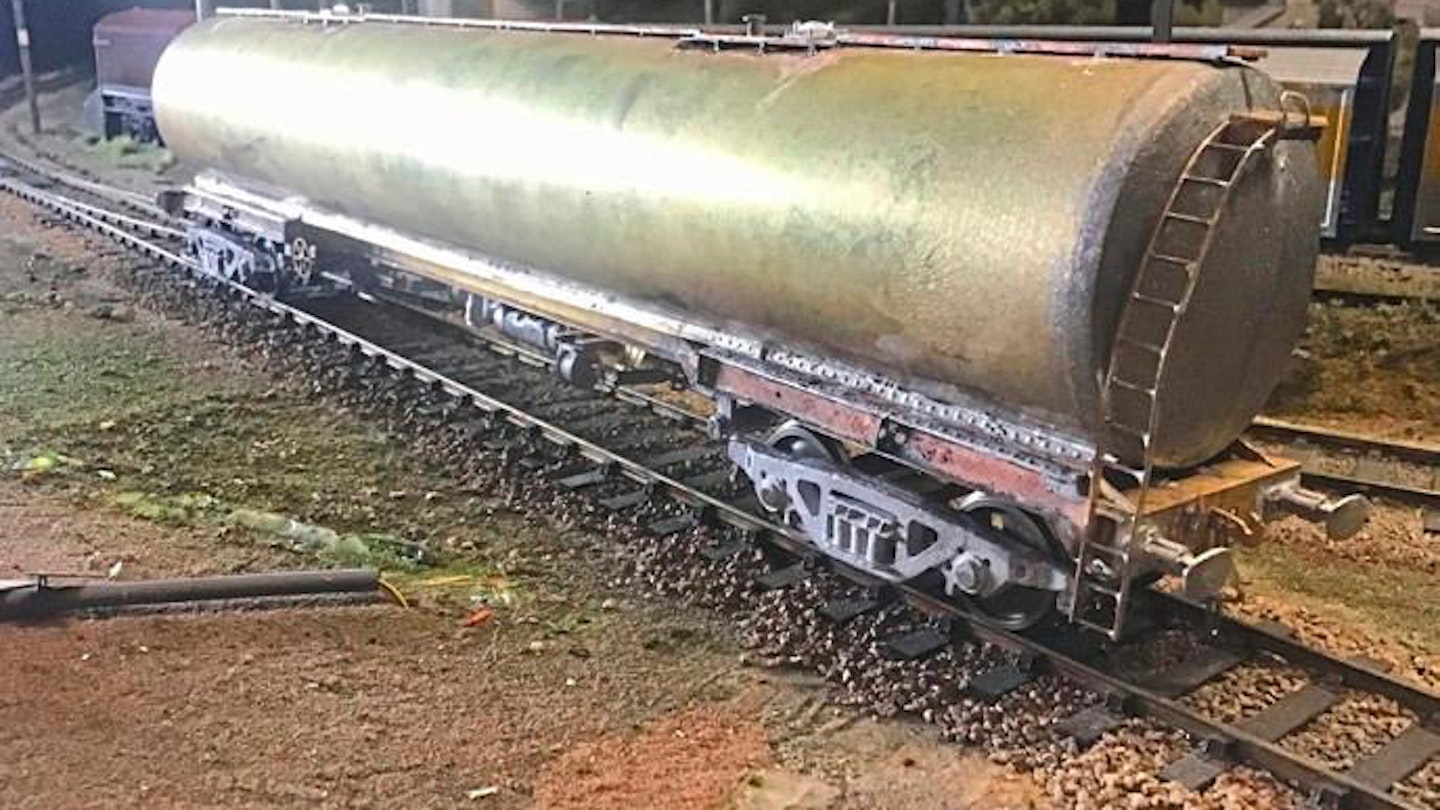
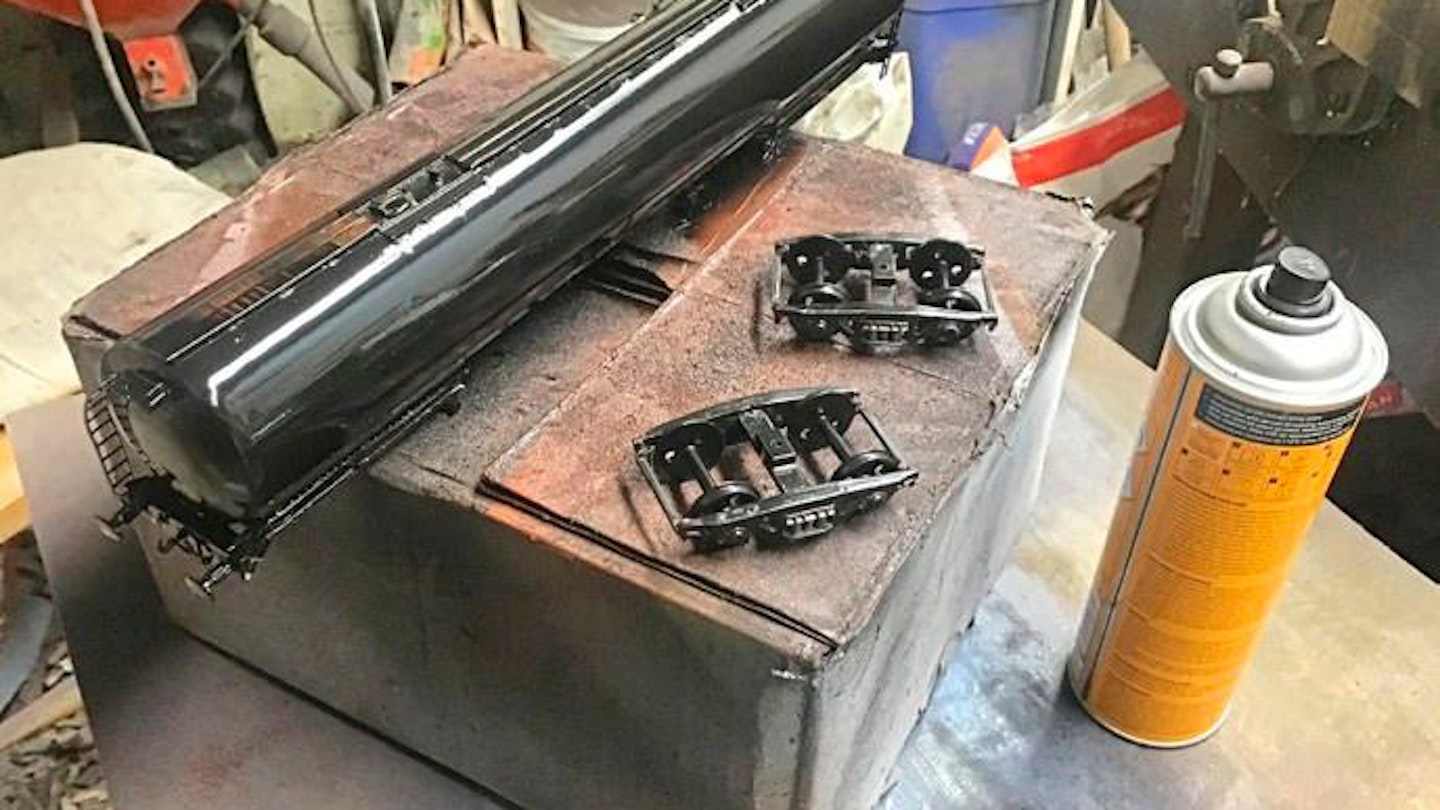
23 With all the detail castings installed and the bogies mounted, the assembly stage is virtually complete. After a test run, the model was thoroughly cleaned and degreased prior to entering the paint shop.
24 The wagon and bogies were sprayed initially with red oxide automotive primer, taking care to ensure the paint reached into all corners of the chassis frames. Spray outdoors on a warm, day or indoors and ensure plenty of ventilation.
25 When the primer was dry, I checked the model over for gaps or imperfections I may have missed. When satisfied, the gloss black topcoats were built up, again using an automotive paint from a spray can.
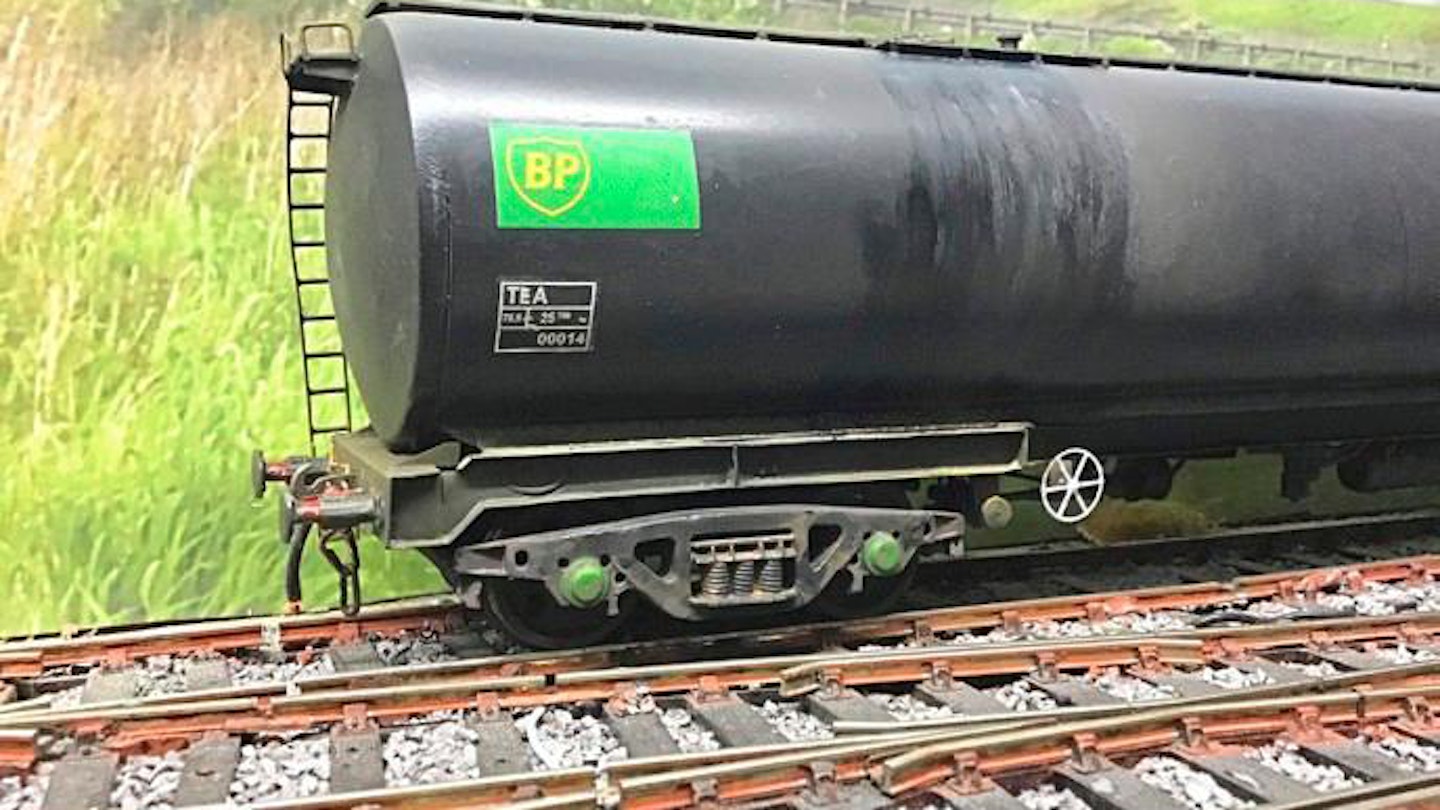
26 Allow the topcoat to harden completely before applying transfers and detail painting, such as brake handwheels, axleboxes and so on. I also applied light weathering as these wagons were rarely clean. The bogies were re-attached.
ROLLING MILL
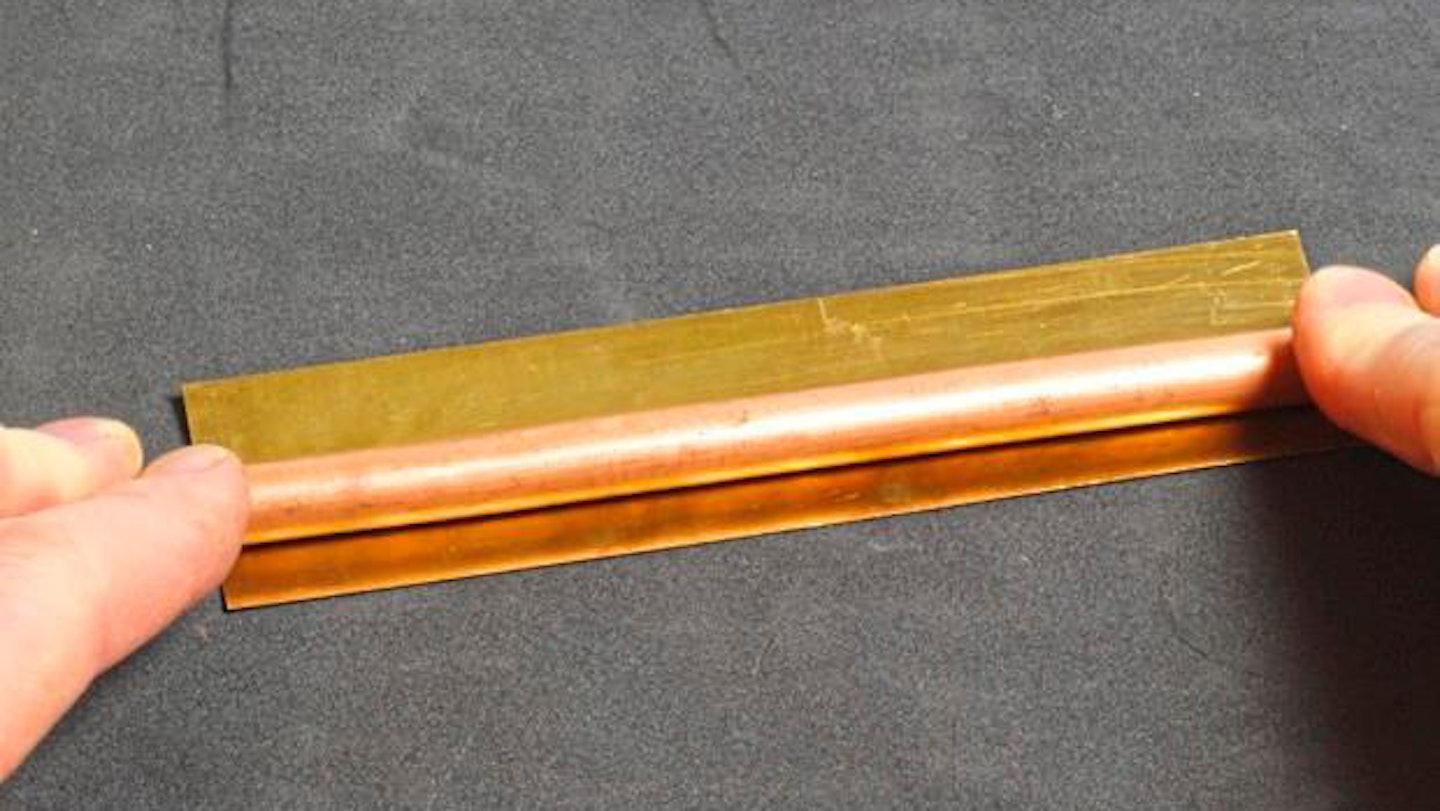
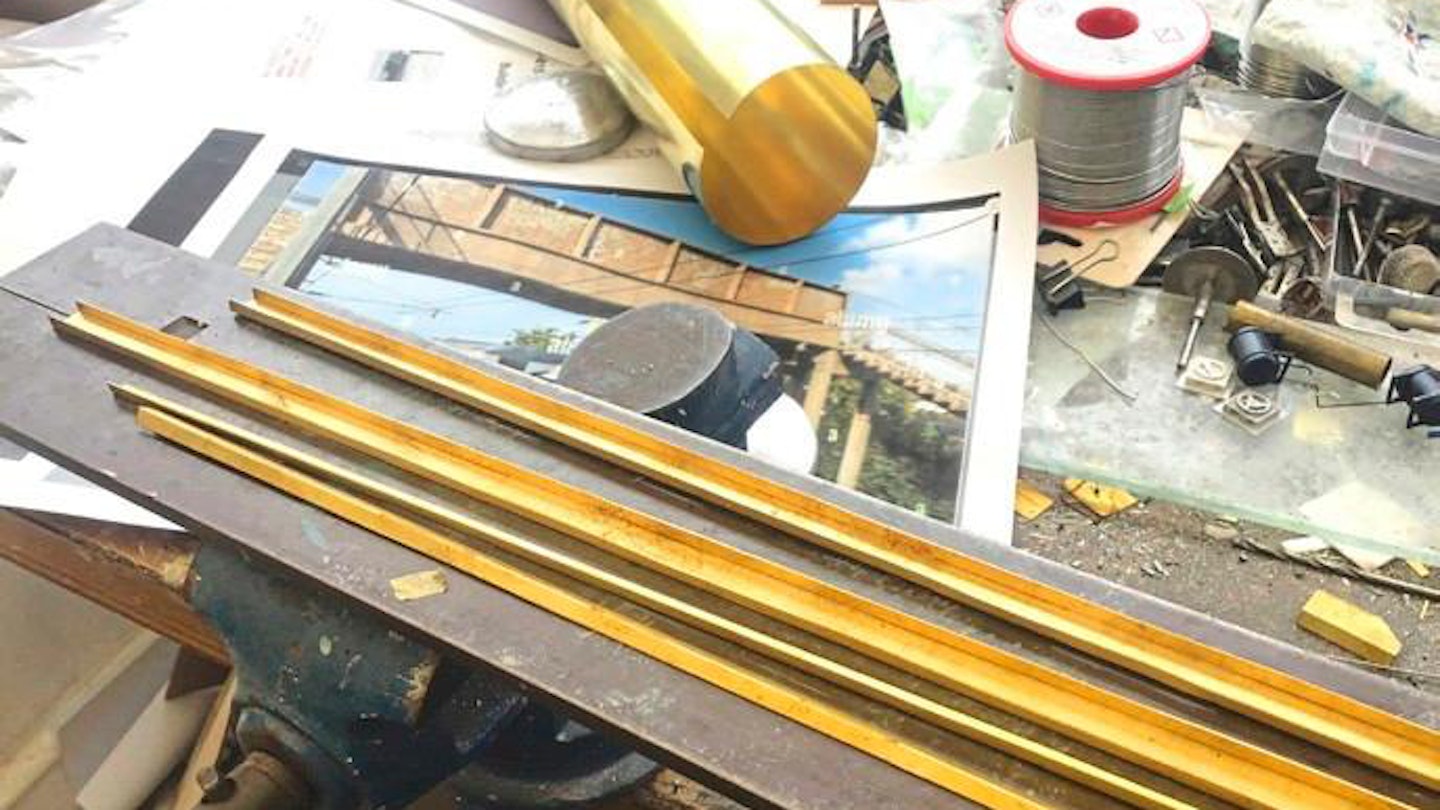
Shaping sheet brass into a curved profile can be achieved by rolling under a metal or wooden rod, working in a similar way to a rolling pin. It’s important to lay the brass sheet on a soft surface, such as a pile of newspapers or the rear of a computer mouse mat, so that the downward rolling pressure from the rods is evenly dispersed throughout the metal. The brass will eventually curl itself around the rod. Exerting greater pressure creates a tighter profile, informed by the diameter of the rolling rod.
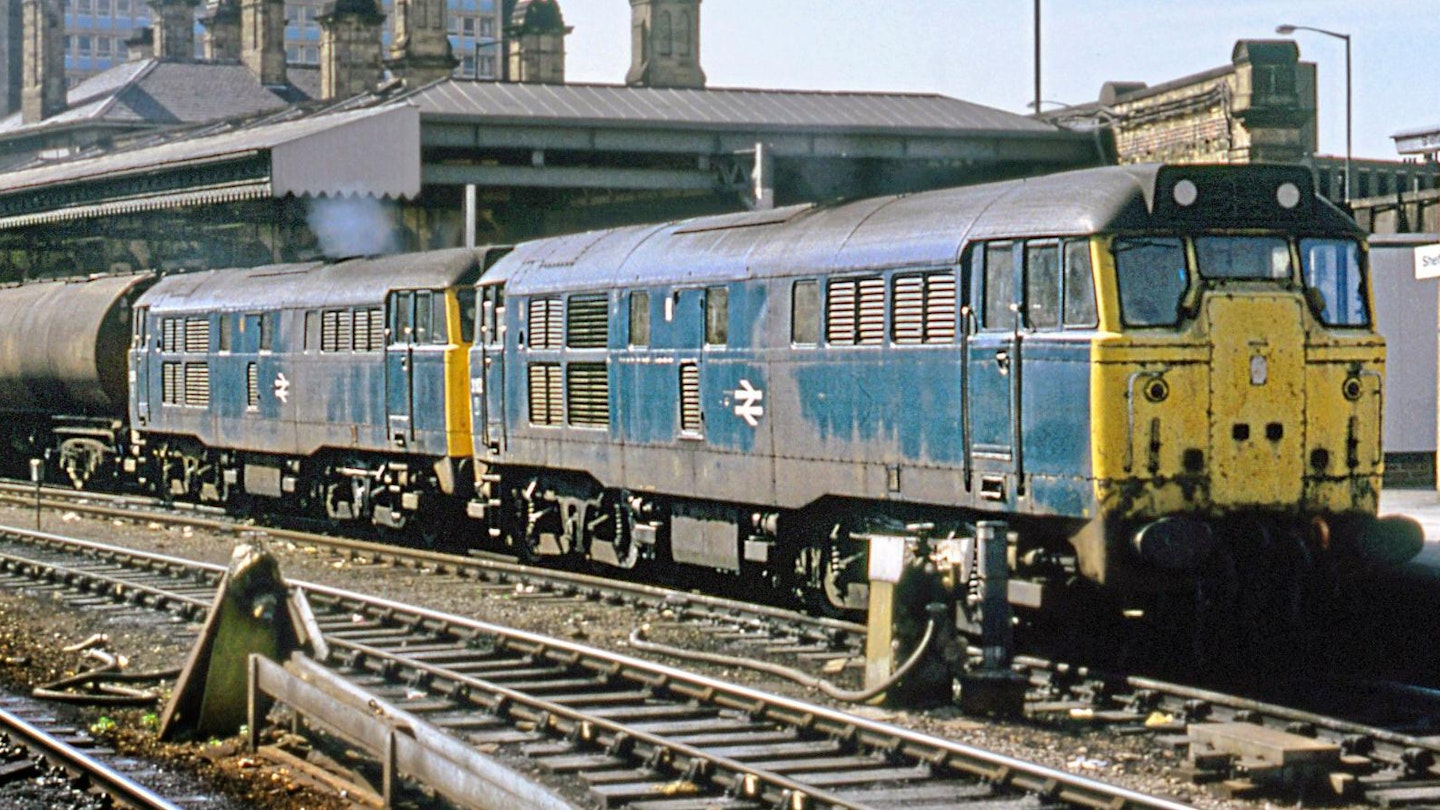
A rake of grimy TEA bogie tank wagons makes for a typical BR-era freight train. In September 1982, 31162 and 31276 work hard to restart a heavy oil train at Sheffield. COLOUR RAIL
1.
Model Rail
Subscribe to Model Rail magazine and get the most out of your hobby

Each issue of Model Rail covers every stage of modelling, from buying your first model train set right through to museum standard fine-scale modelling. Find inspiration for your next project with our helpful tips, advice and in-depth detail on model trains and layouts.
Choose the right subscription for you and get instant digital access to the latest issue.