Workbench
Peter Marriott employs some useful modelling aids to produce convincing scenic contours and lifelike vegetation, offering some vital hints and tips along the way.

It cannot be stated enough how important it is for us modellers to take the time to study the natural landscape around us. This helps us to reproduce what we see more effectively, resulting in better looking scenery.
For example, on looking at an area of grass and weeds it soon becomes apparent that sometimes the shorter grasses are darker than the longer strands. Therefore, the challenge is how to best employ different shades of grass fibres to make the most realistic landscape.
We see many different textures and shades of green in real life which means that, to make the best scenery, multiple layers of scenic covering and a range of different materials are necessary.
Go out for a walk or study photographs of your chosen location, making notes on what you see. When browsing products, you’ll be able to seek out the most appropriate colours and lengths of grass fibres to suit your subject, considering the scale you’re working in and also which season of the year you’re looking to reproduce.
I always suggest veering towards more subdued colours for scenic work, rather than bright vivid colours which can look garish on a scale model. Pay attention to seasonal colours too, as there’s more likely to be paler shades of grass and vegetation in autumn than in the height of spring, for instance.
The use of static grass on model railway layouts has become popular because modellers love the realistic three-dimensional effect that it creates, especially compared to traditional scatter materials. That said, simply covering an area in white glue and planting layers of static grass fibres is not the answer to realistic scenery.
As I demonstrate here, we can create more compelling textures by building up the fibres in layers, varying the length and colours with each application, while complementing grass fibres with scenic foam pieces, tufts and Poly Fibre material. And yes, those traditional fine scatter materials do still have a role to play, adding fine leaf texture to bushes and hedges.
WHAT YOU WILL NEED
SHOPPING LIST
◆ Woodland Scenics Shaper Sheet, Poly Fibre, fine scatter materials, Static-Tac, Tuft Tac and Scenic Glue
Availability: Bachmann stockists
Web: www.bachmann.co.uk
◆ Static grass fibres (2, 4, 6 and 7mm length in various colours), sand
Availability: WW Scenics
Web: www.wwscenics.co.uk
TOOLS
◆ Tweezers
◆ Scissors
◆ Paintbrushes
◆ Electrostatic grass tool
STEP BY STEP
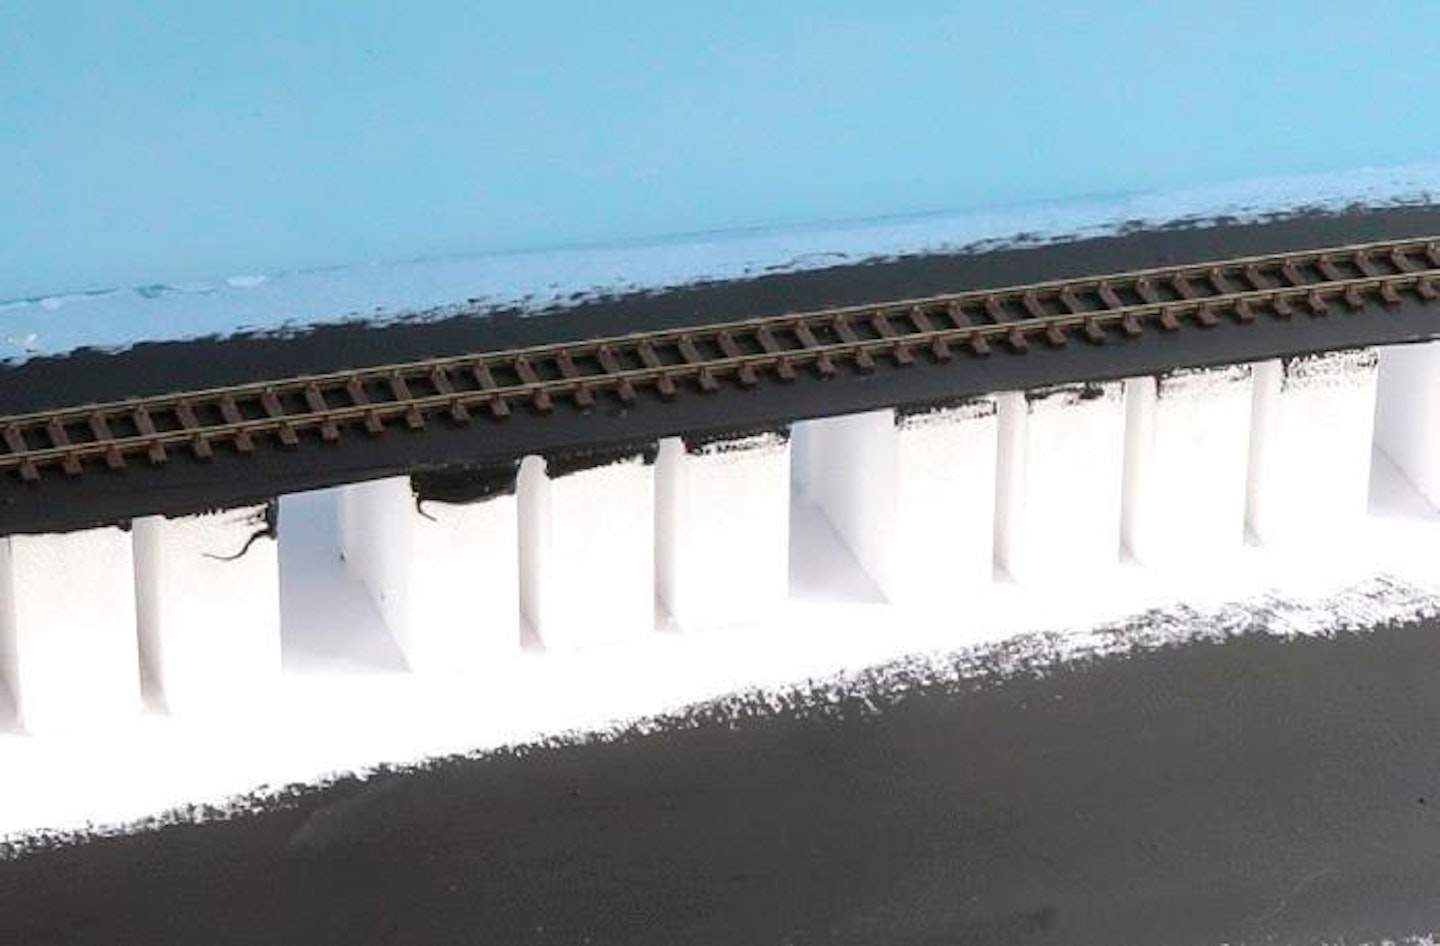
1 The trackbed was raised 2in above the top of the baseboard by using Woodland Scenics foam risers. I also added a strip of 1mm thick mounting card to the top of the riser (bonded with scenic glue) to provide an underlay for the track. The card was painted black.
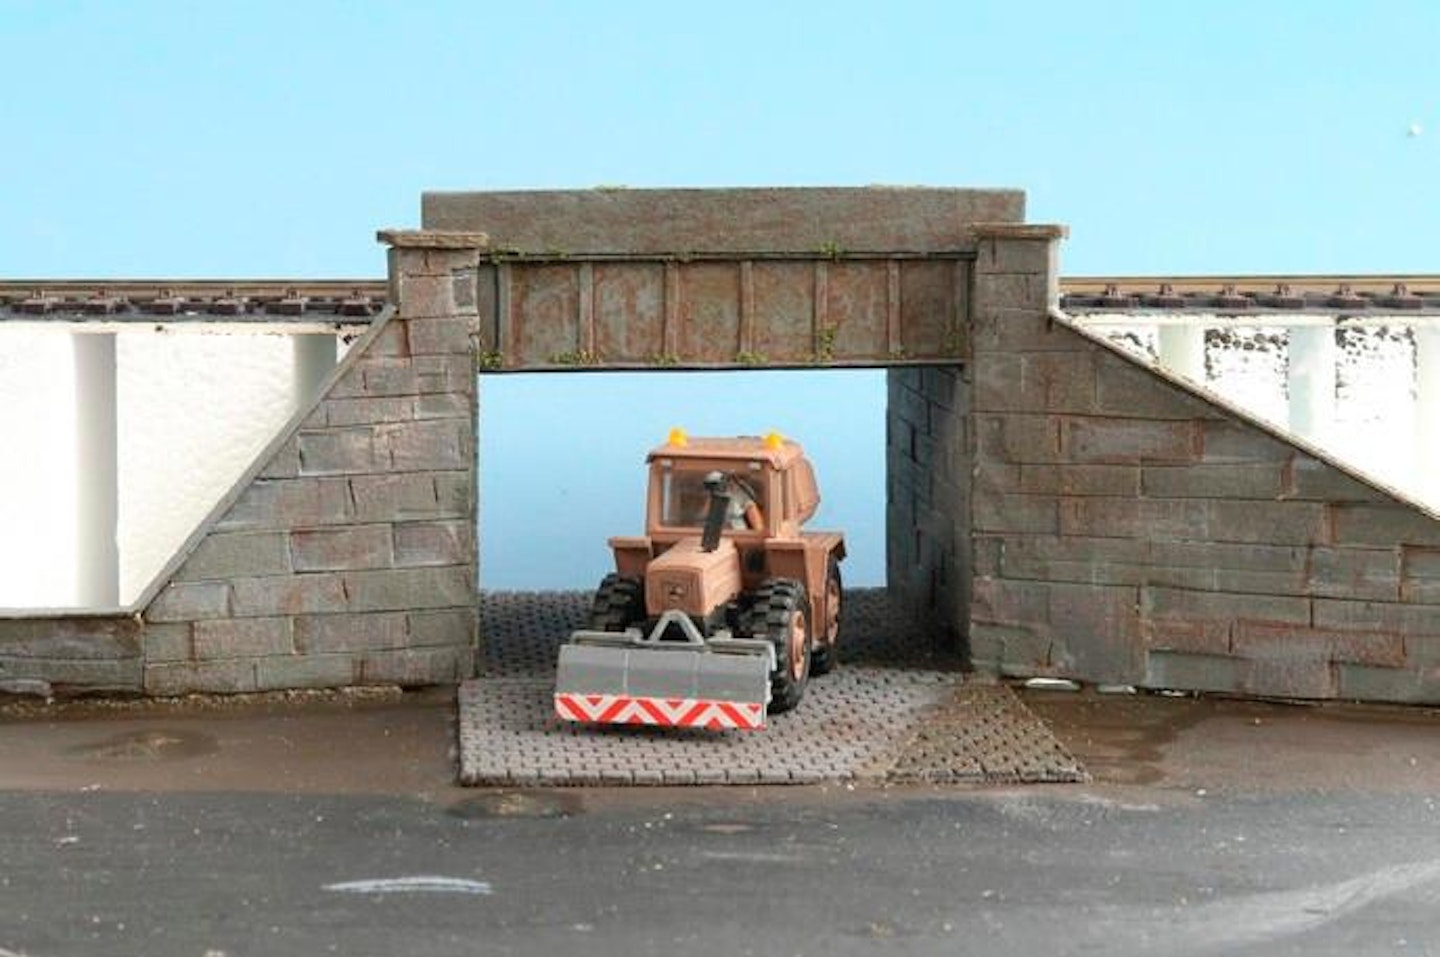
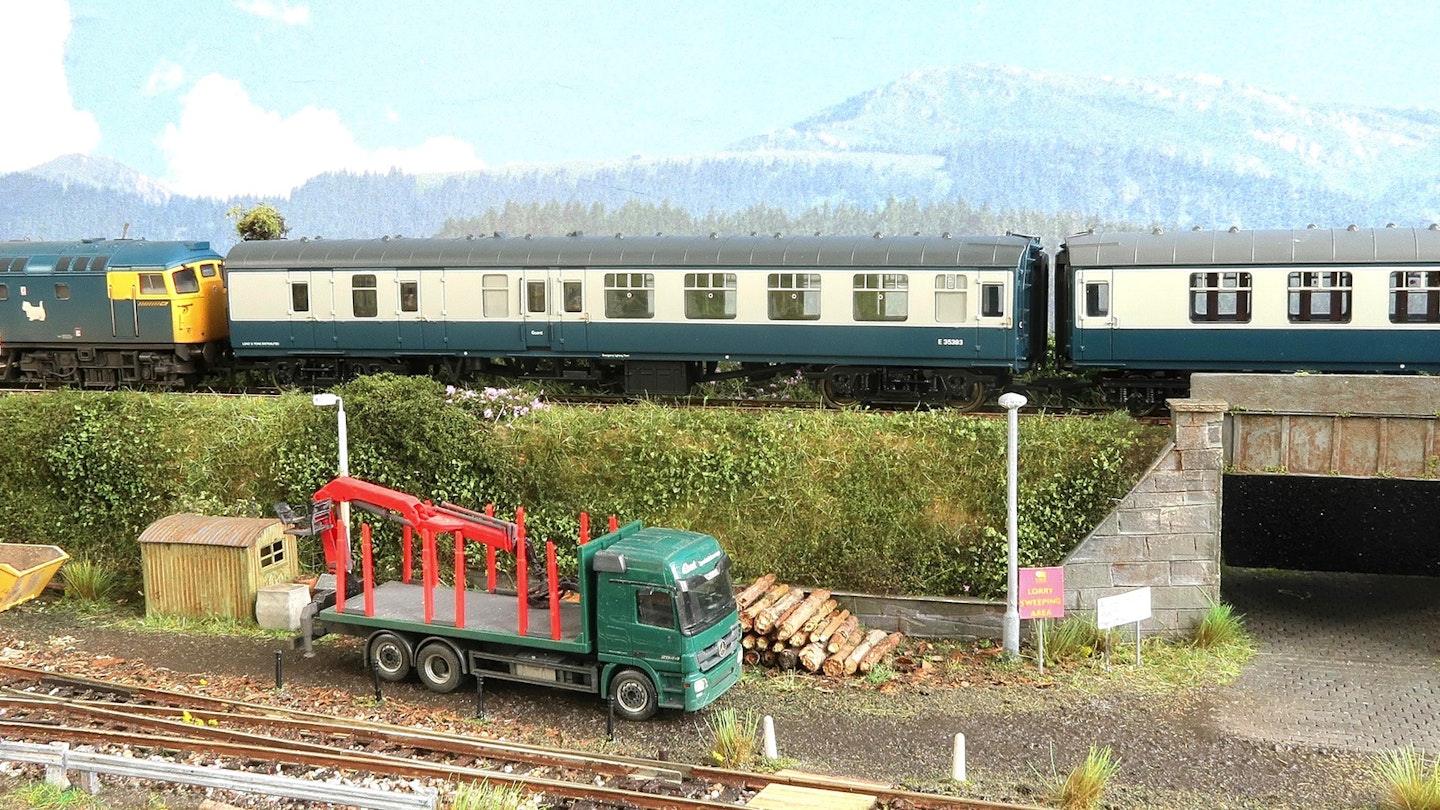
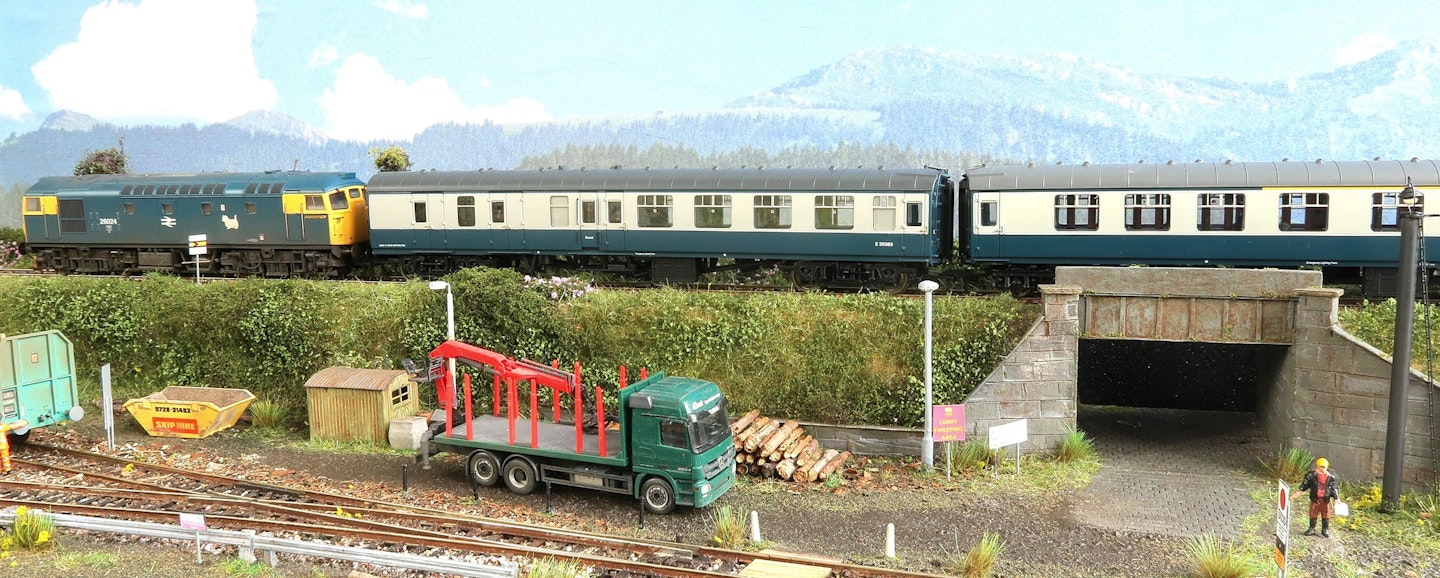
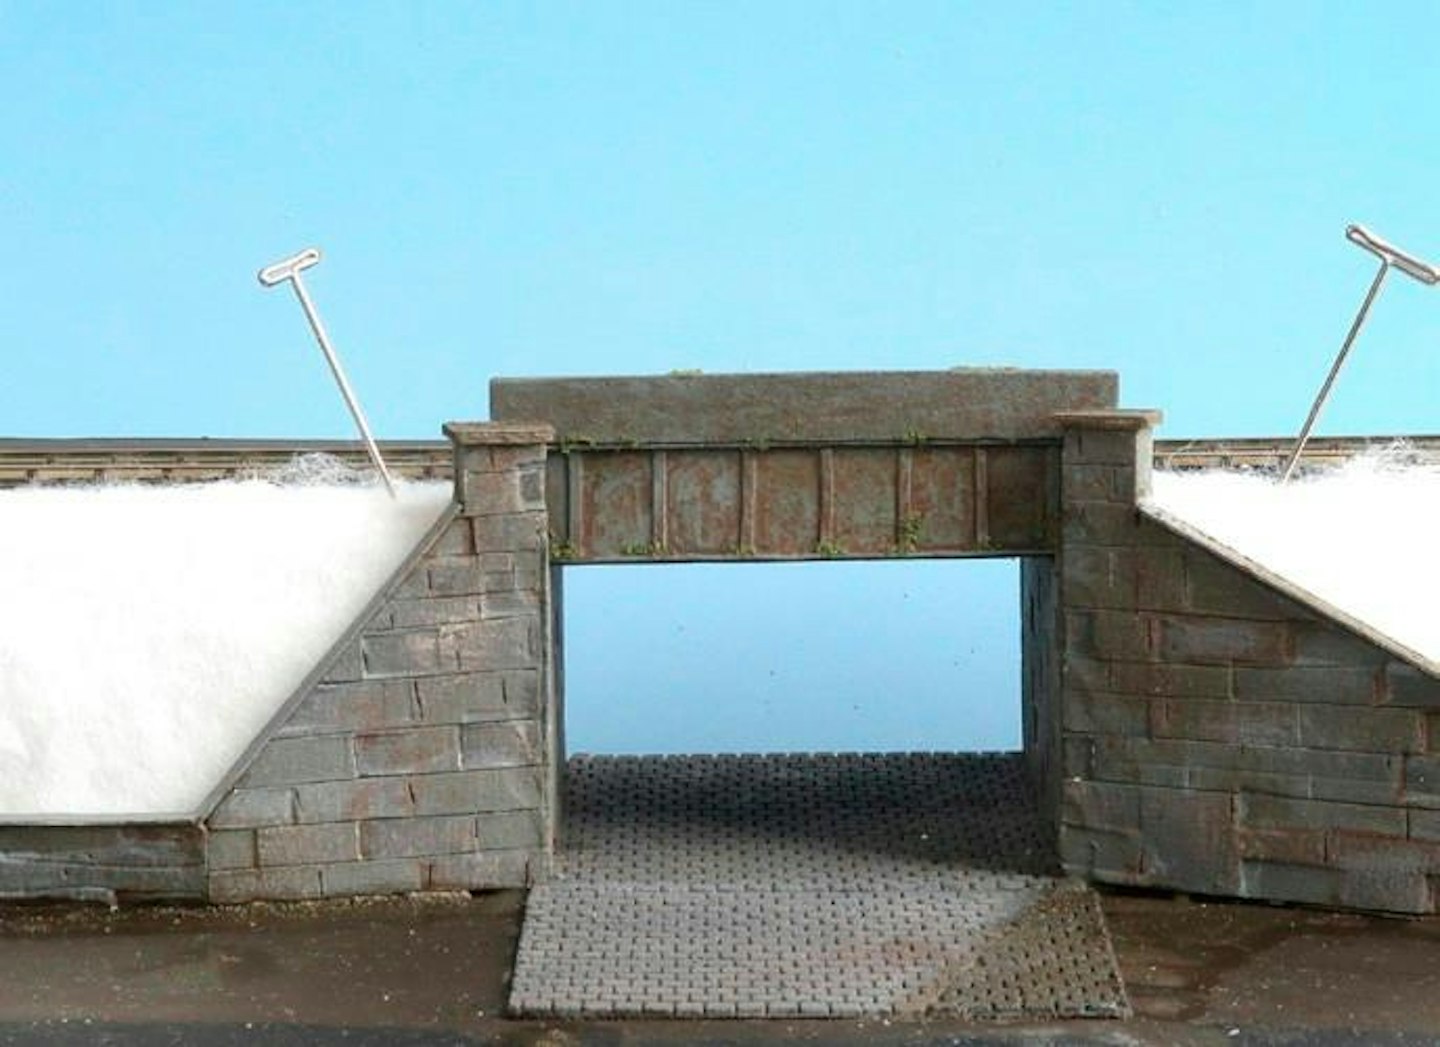
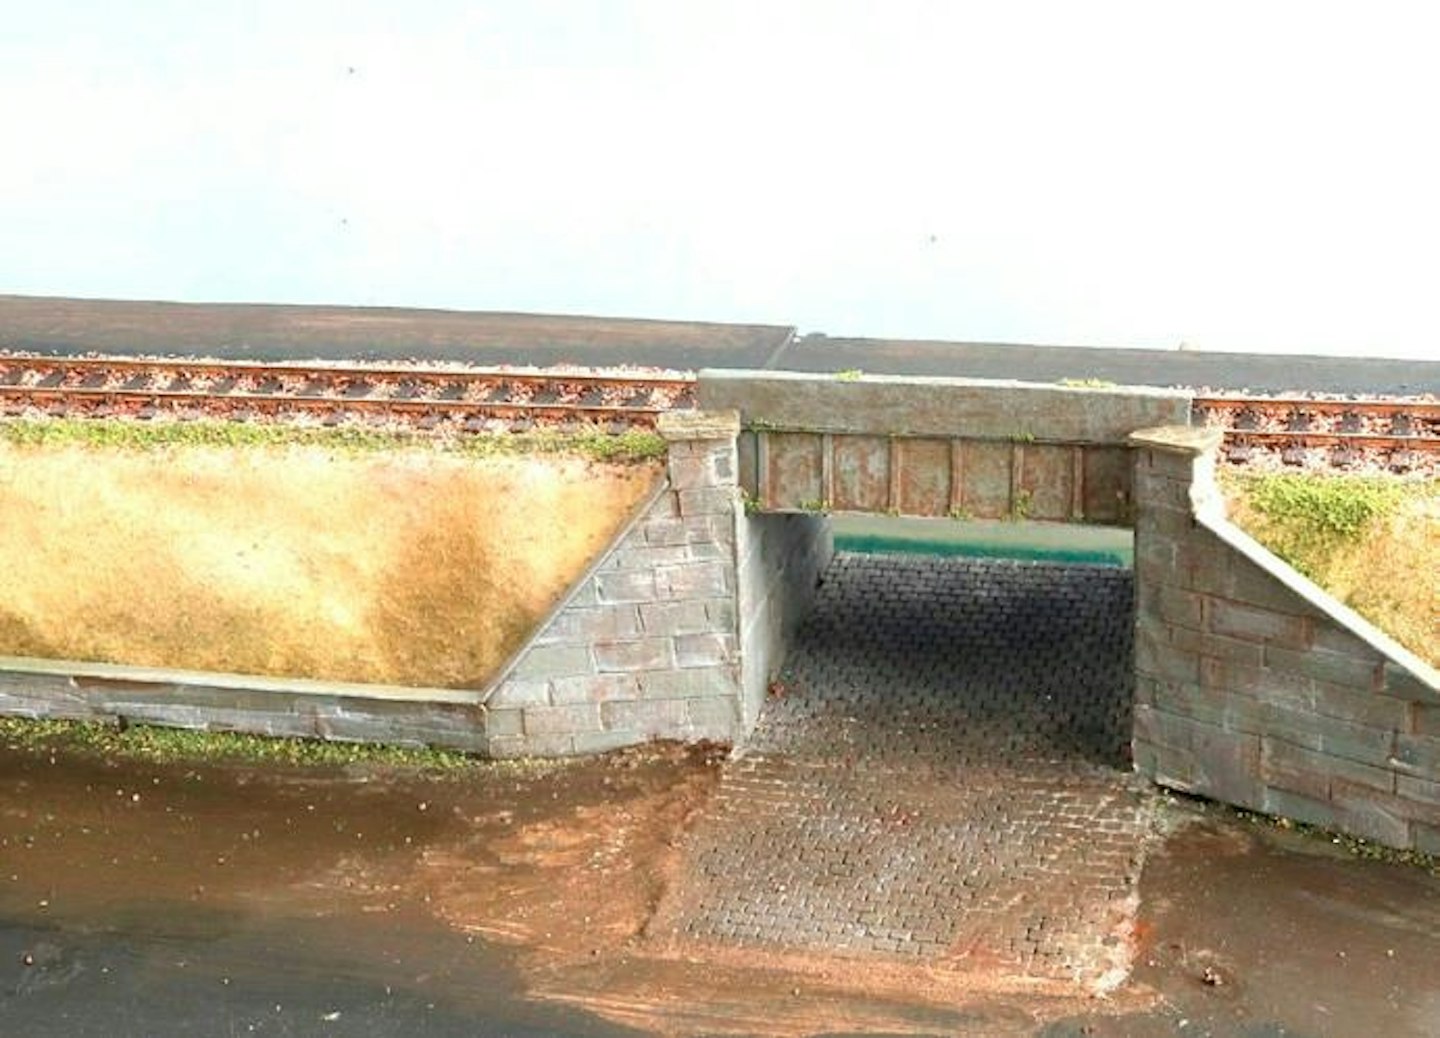
2 A bridge was scratchbuilt from Styrofoam and card (see MR337) and, once this had been fixed in position, it was time to turn my attention to the creation of the embankment around it.
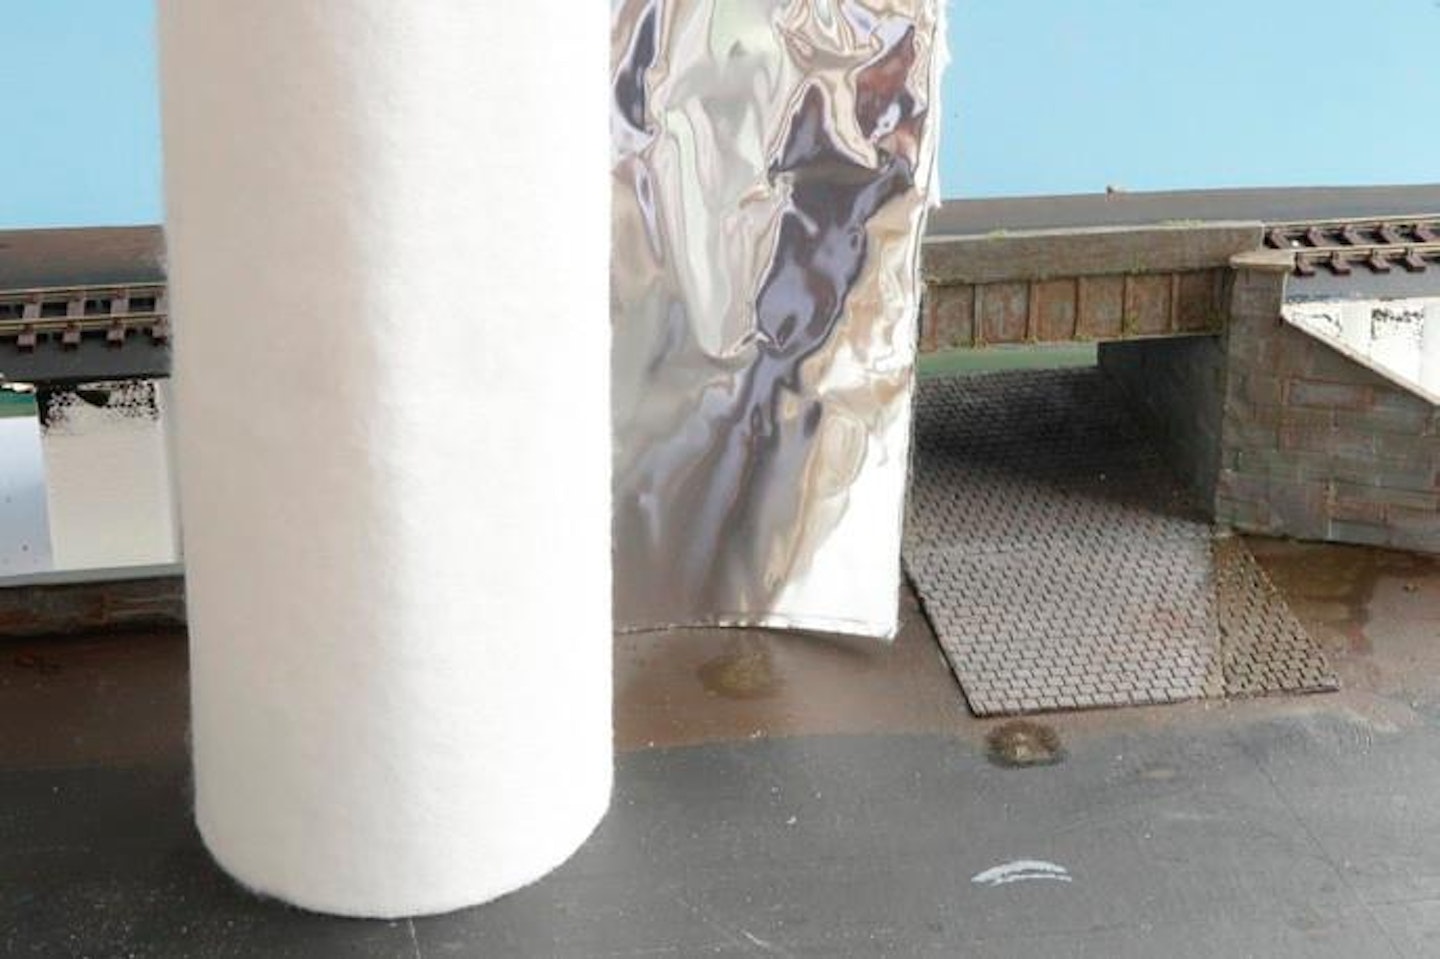
3 Woodland Scenics Shaper sheet holds its form without the need for underlying support. The sheet was cut into long strips wide enough to treat the height of the embankment with a little excess for bonding to the baseboard surface.
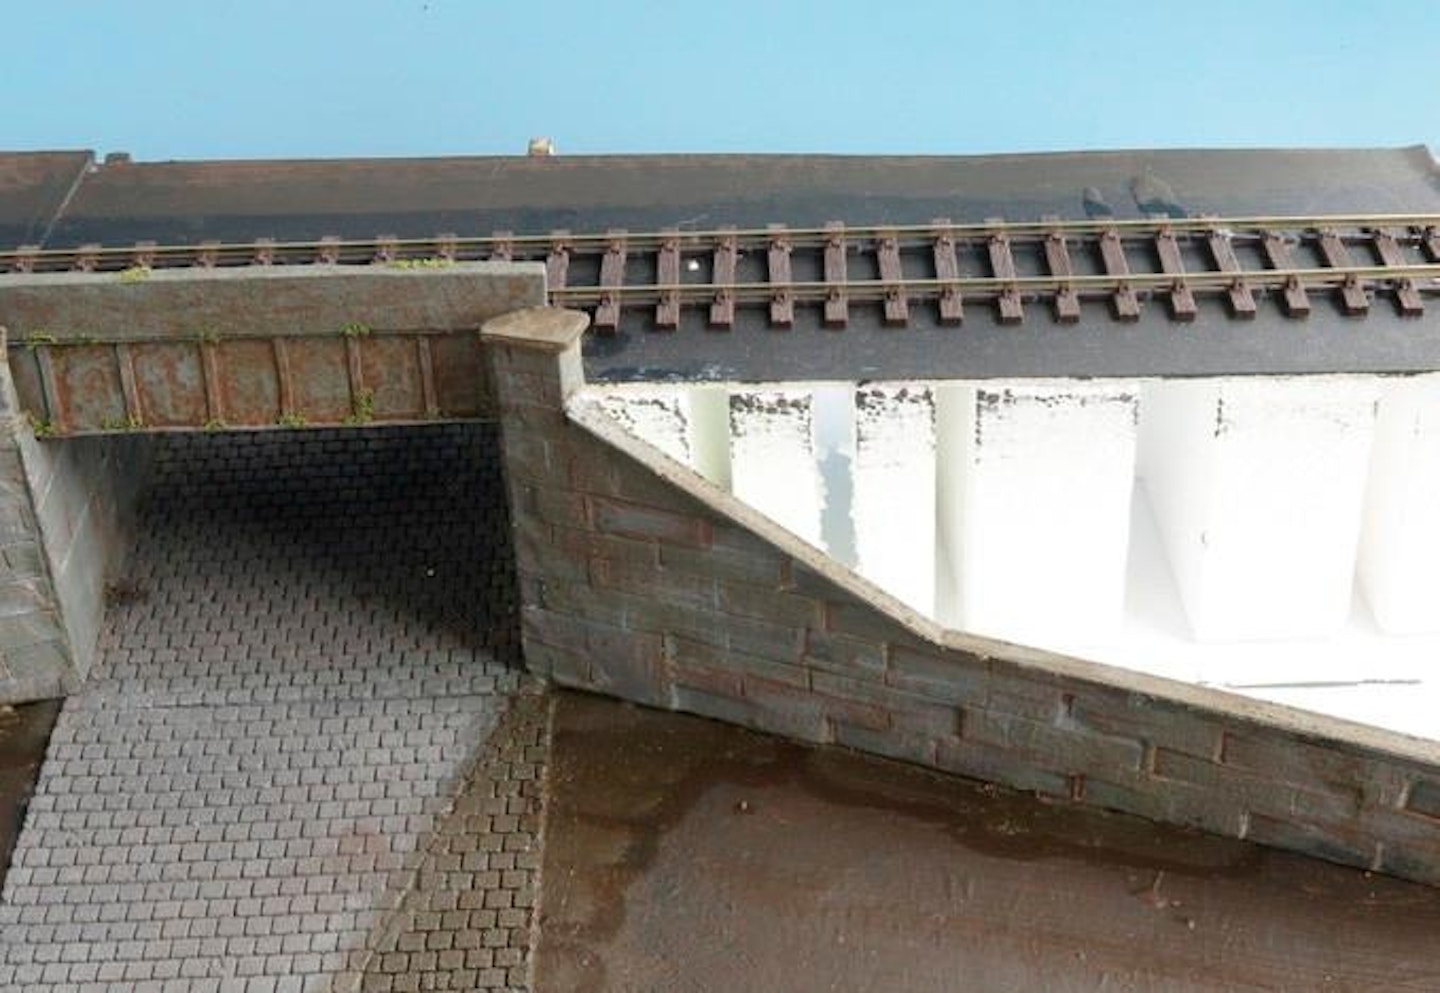
4 The Shaper Sheet strips had to be wide enough to create a gentle landscape profile, and cut to a suitable shape to cater for the abutments and wing walls. Cuts were made gradually after test-fitting the material in place.
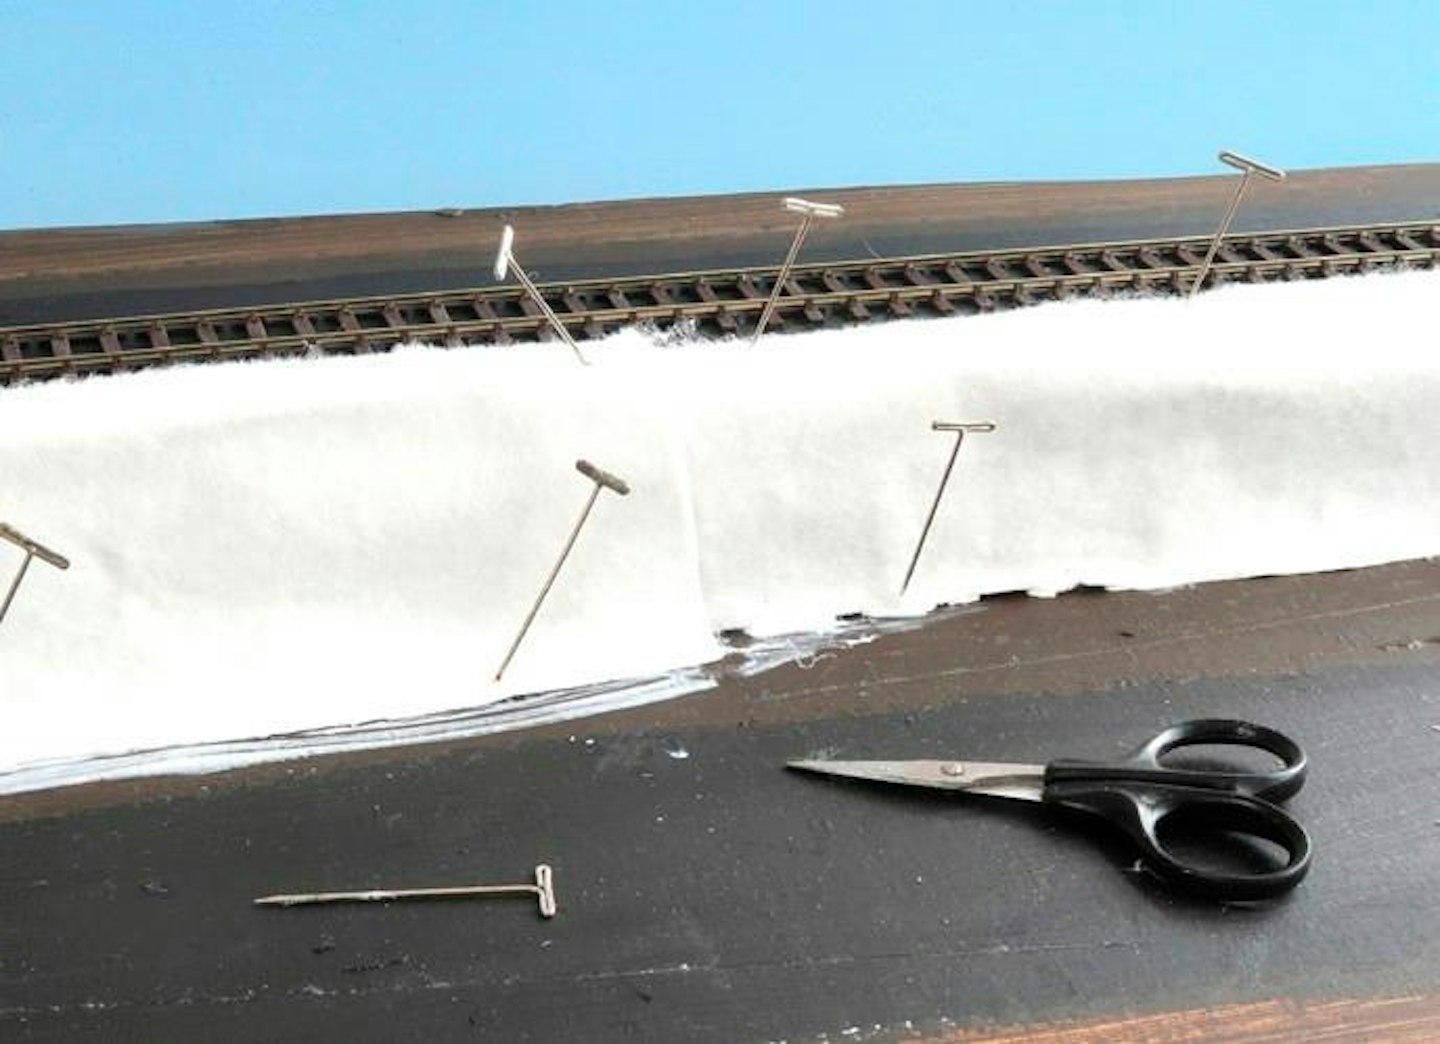
5 After testing the fit of the Shaper Sheet strips, and feeling happy with the shape and contours of the embankment, the material was bonded to the leading edge of the trackbed and held in place with removable nails or drawing pins.
6 The Shaper Sheet was tucked behind the walls of the bridge and bonded with glue, gently stretching the material to achieve the desired contours. Note that the Shaper Sheet was laid with the metal foil side facing down, and the ‘fluffy’ side upwards.
7 Glue was spread along the lower edge of the embankment and the Shaper Sheet formed to the desired contour before pressing it down into the adhesive. Woodland Scenics Foam Nails are handy for holding parts while the glue sets, when they can be removed and reused.
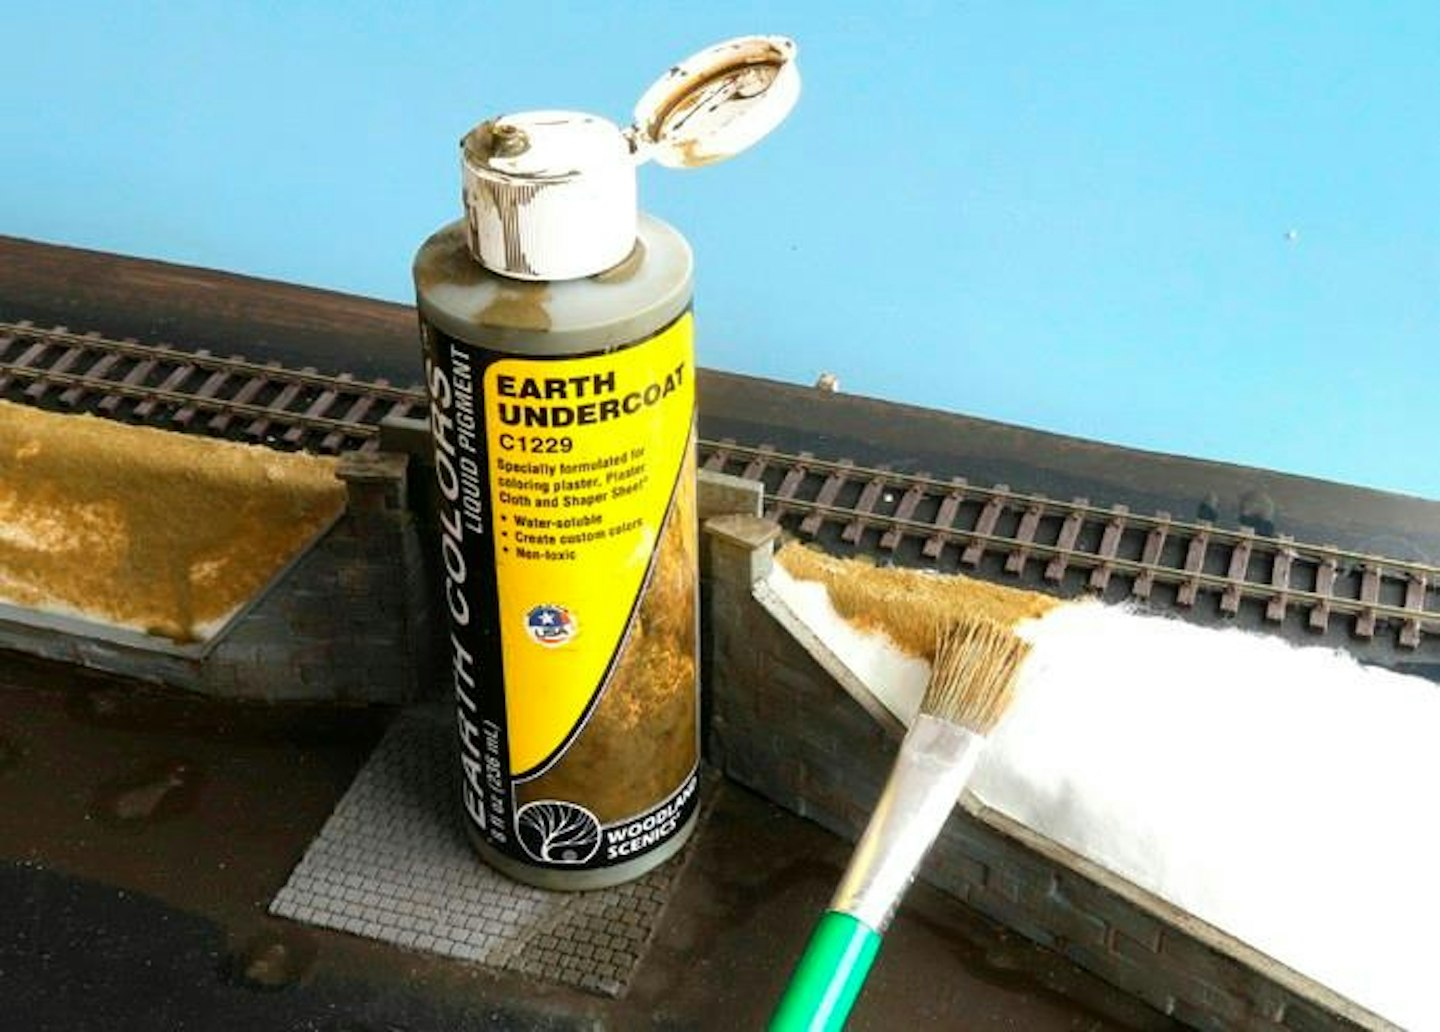
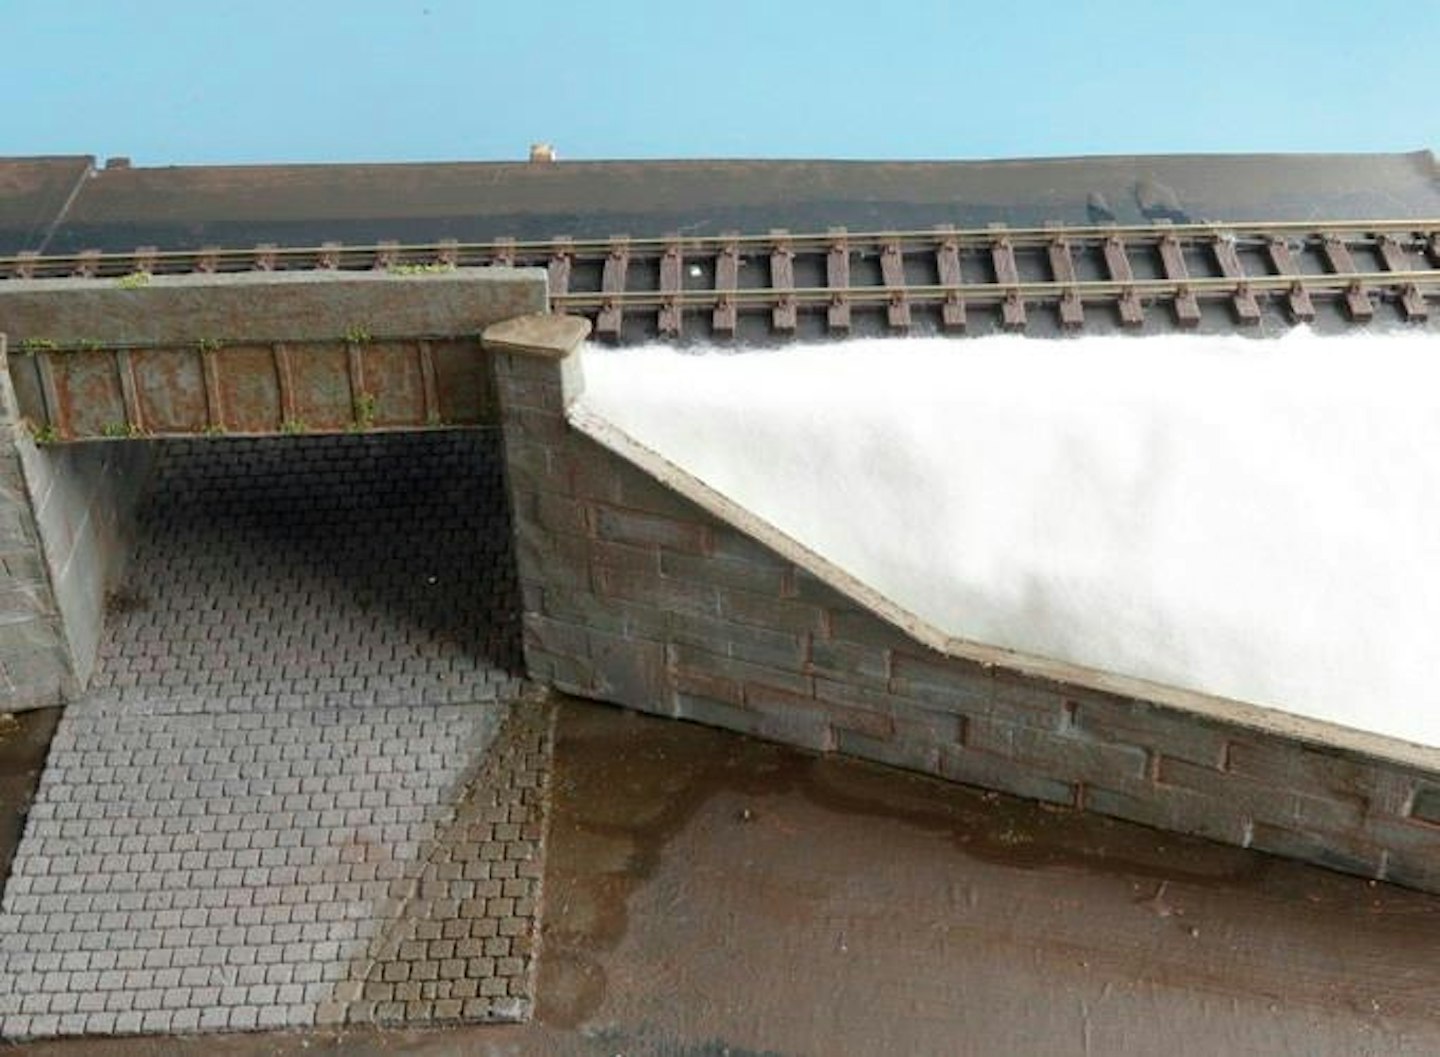
8 Having repeated the process along each side of the embankment, and once the glue had cured, I painted the Shaper Sheet with a coat of earthy brown acrylic paint (Woodland Scenics Earth Undercoat), which soaked readily into the material.
9 The first coat of paint tamed the rough texture of the Shaper Sheet and, once dry, I touched up any areas that were missed. I was impressed how the sheet maintained its gentle profile, in contrast to plaster cloth, which has a habit of sagging unless stretched or supported.
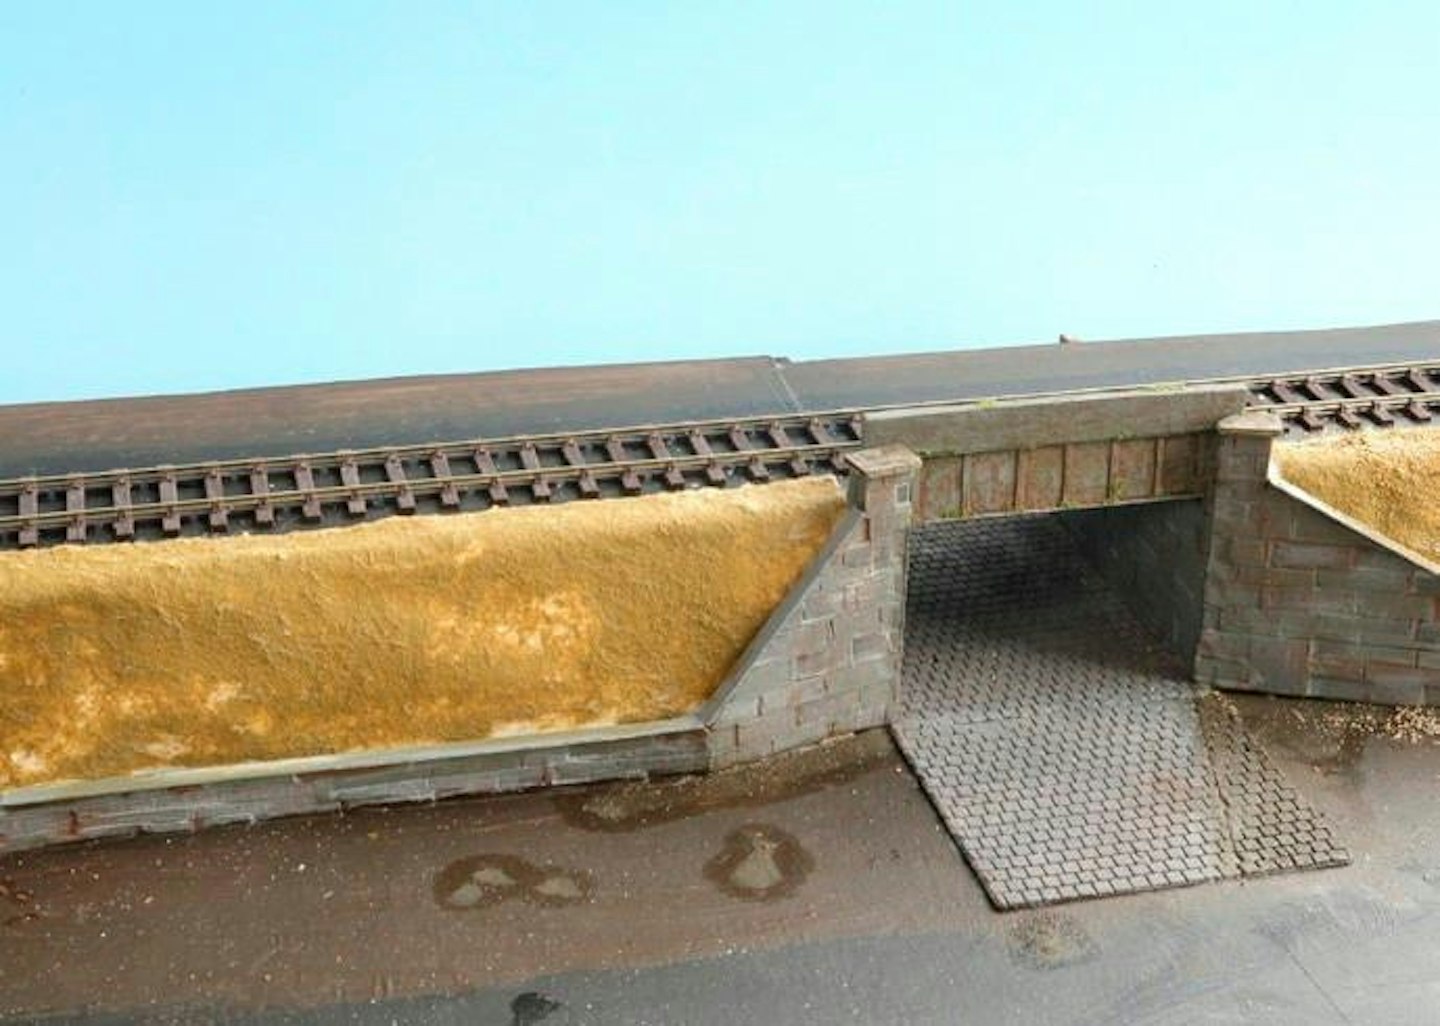
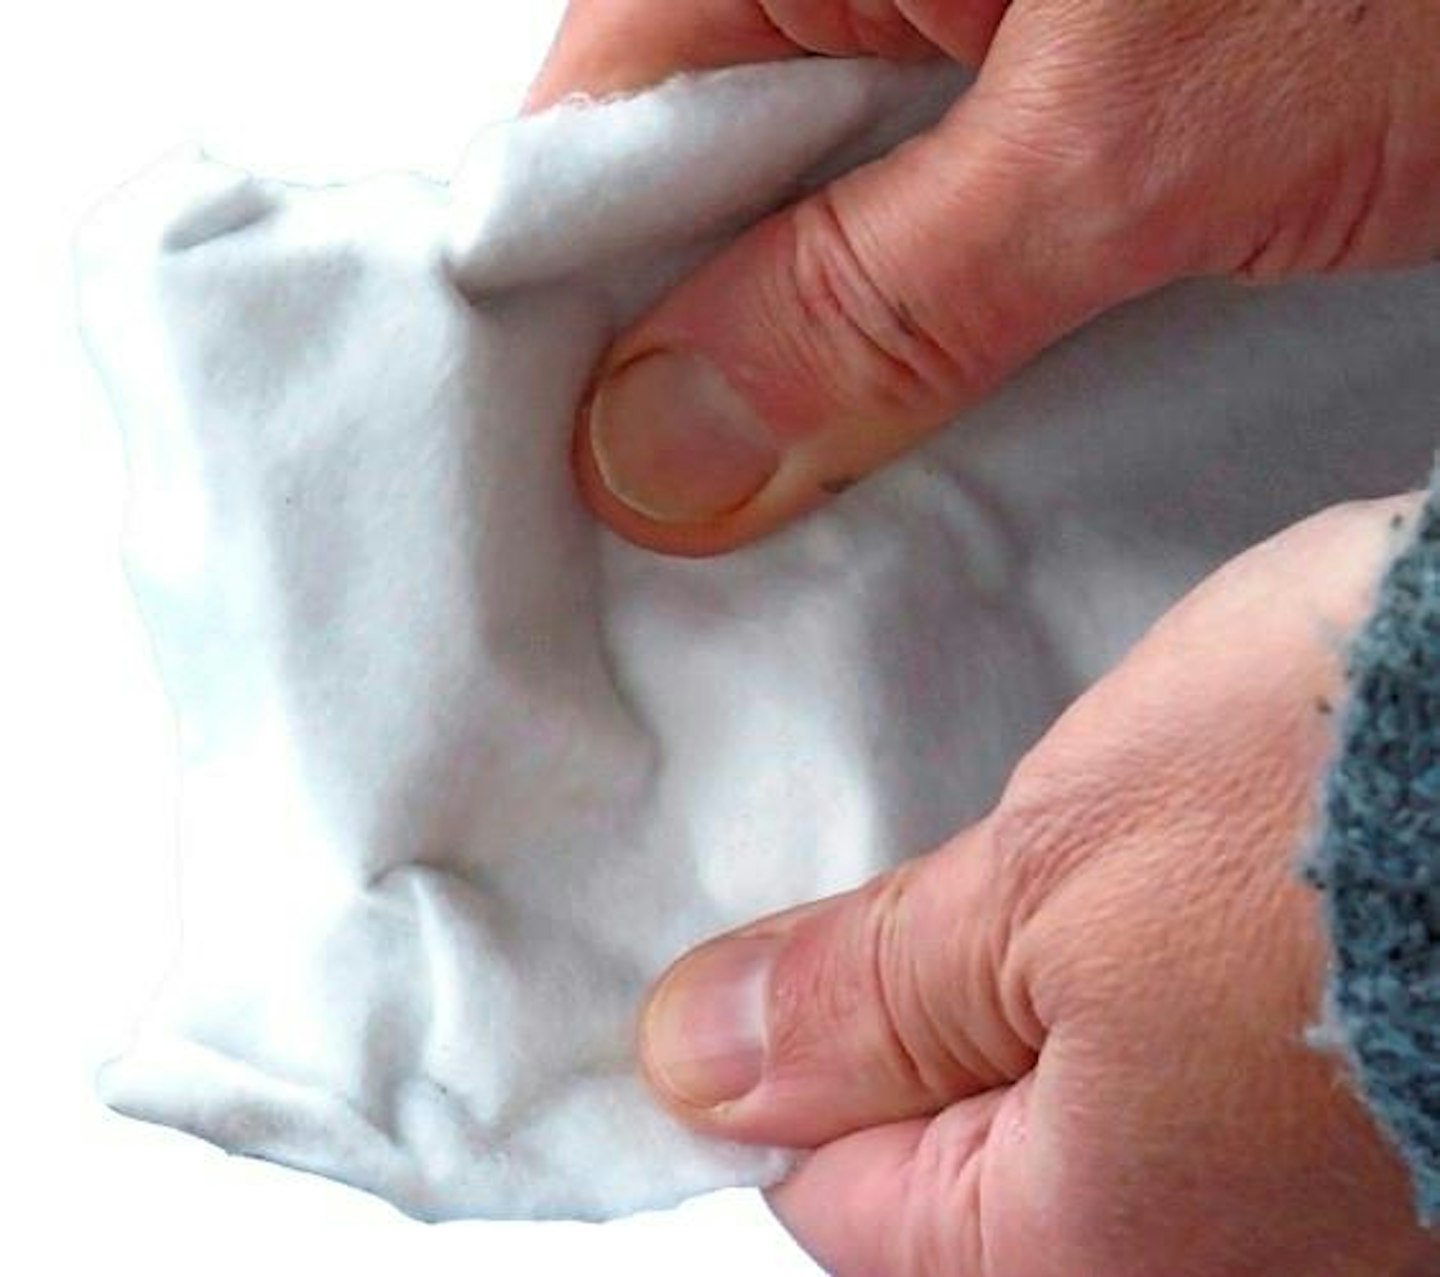
10 I teased out pieces of Poly Fibre and glued them to certain areas of the embankment. I then misted over a layer of extra-hold hairspray across the scene before sprinkling a range of fine scatter materials to create a leaf effect on the vegetation.
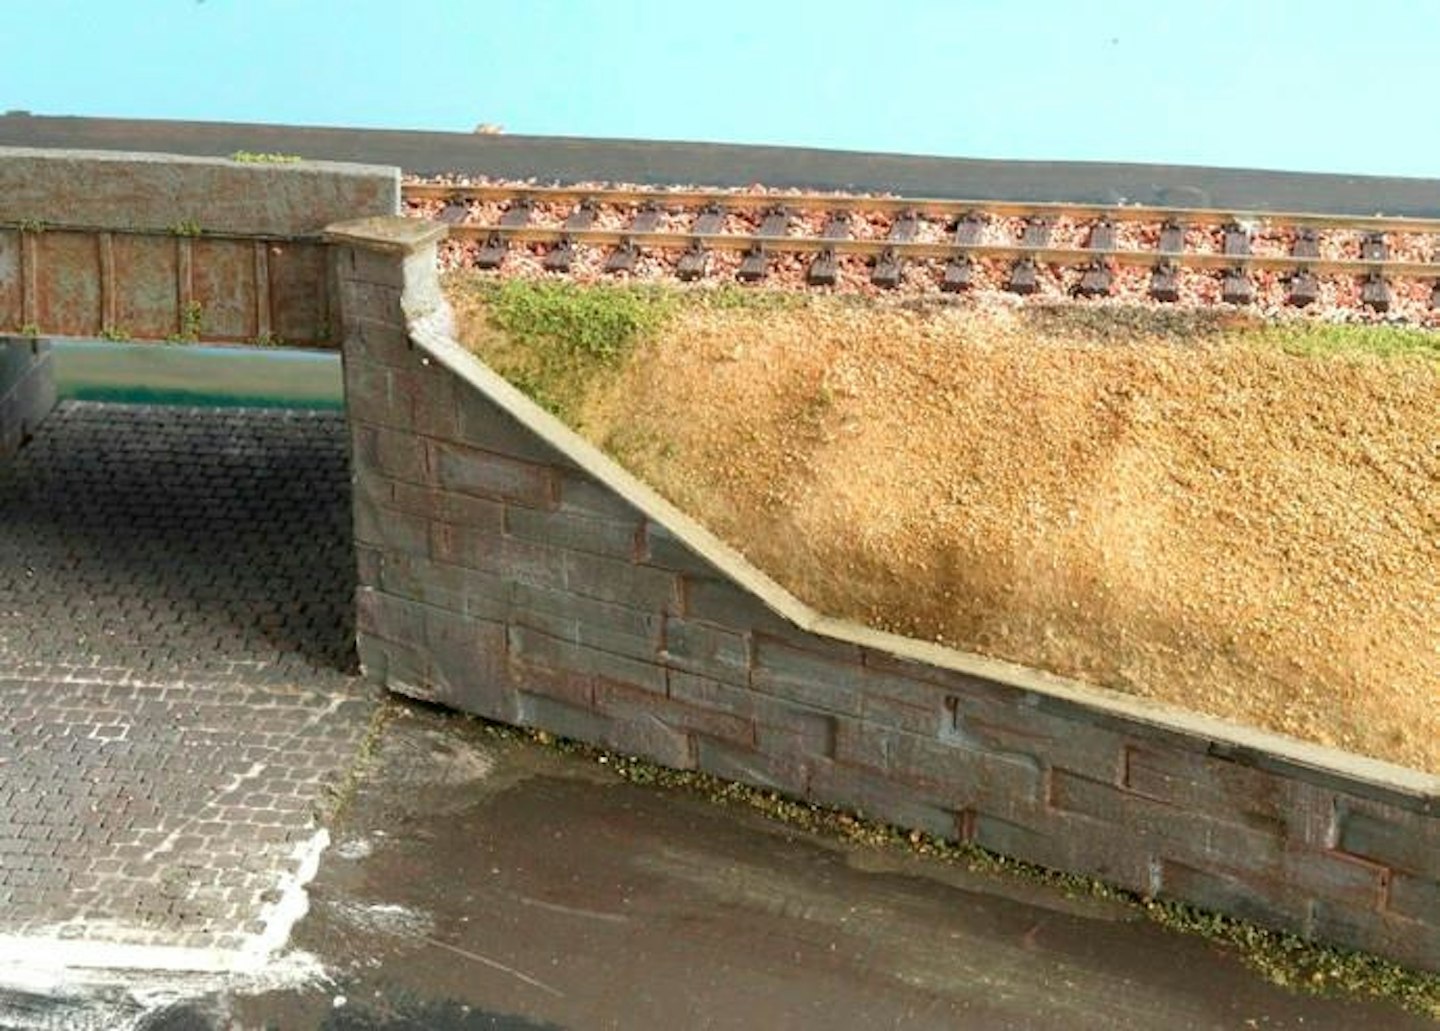
11 Rather than cover the entire embankment in static grass, I wanted areas of exposed stony earth, so I brushed on some cheap PVA and sprinkled a layer of fine sand into the wet glue. The track was then ballasted, bonding it in place with a thin PVA-type glue.
12 The next step was to run beads of PVA glue along the top of the embankment, along the edge of the ballast, and along the lower edge of the bridge and retaining walls. I sprinkled on a mixture of green scatters into the wet glue.

13 Static-Tac glue was spread with a round paintbrush around the areas of exposed rough ground, dabbing it into the surface. I wanted to create the impression of random plants of a gravelly embankment, being careful not to paint the entire slope with glue.
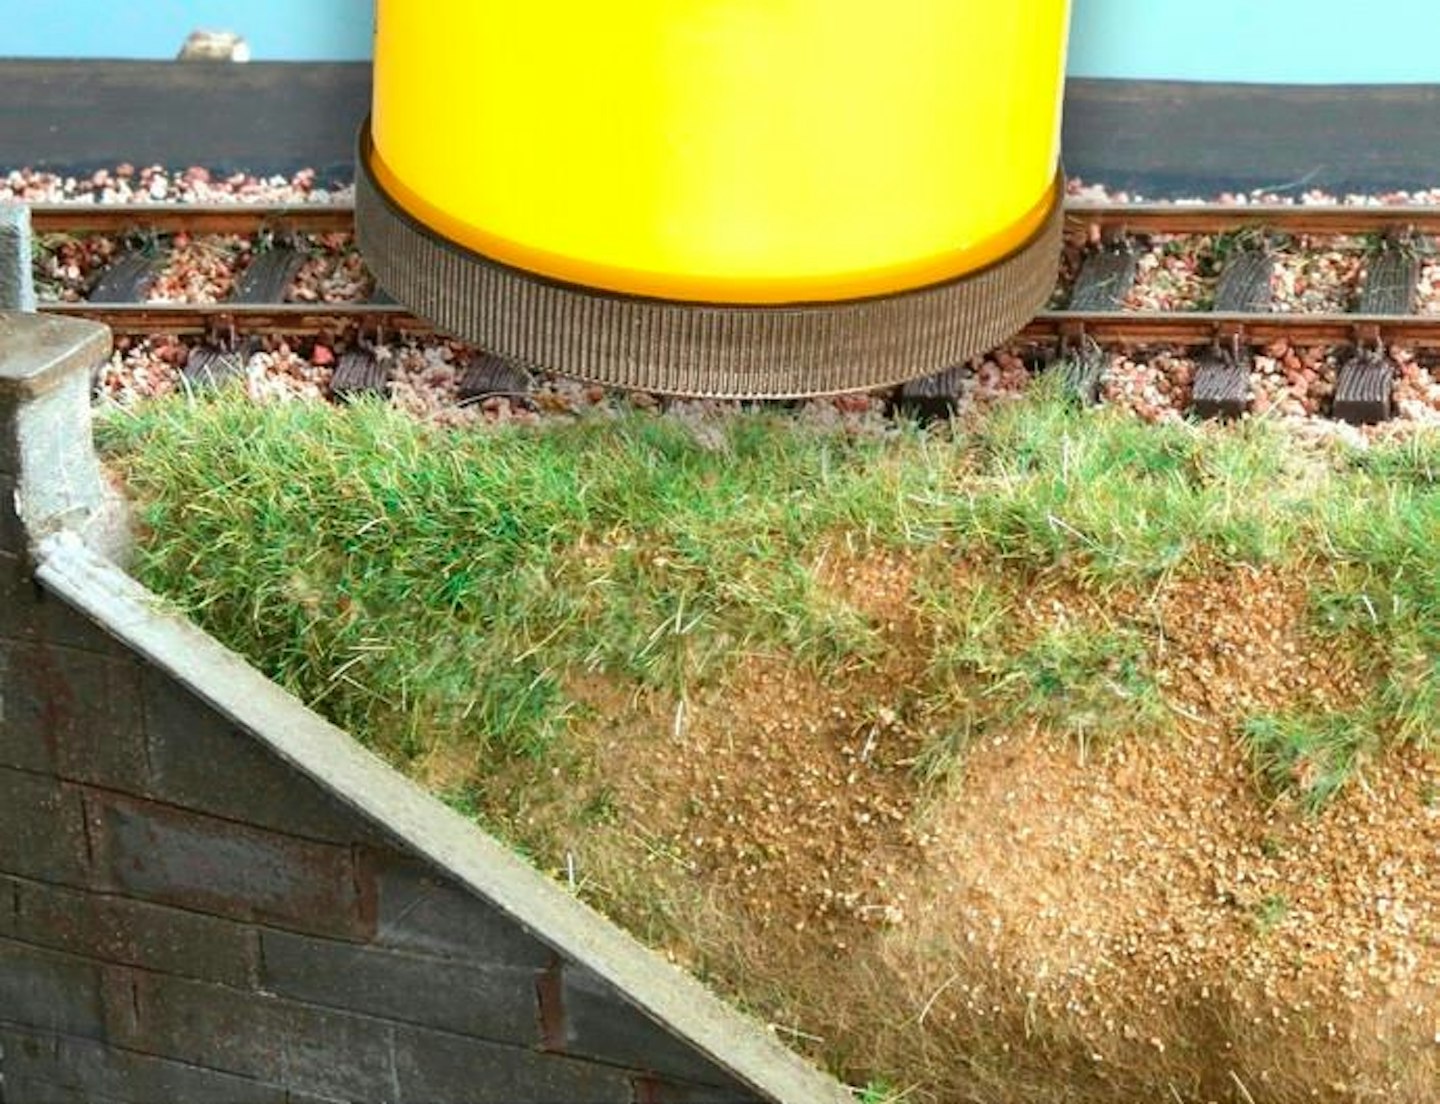
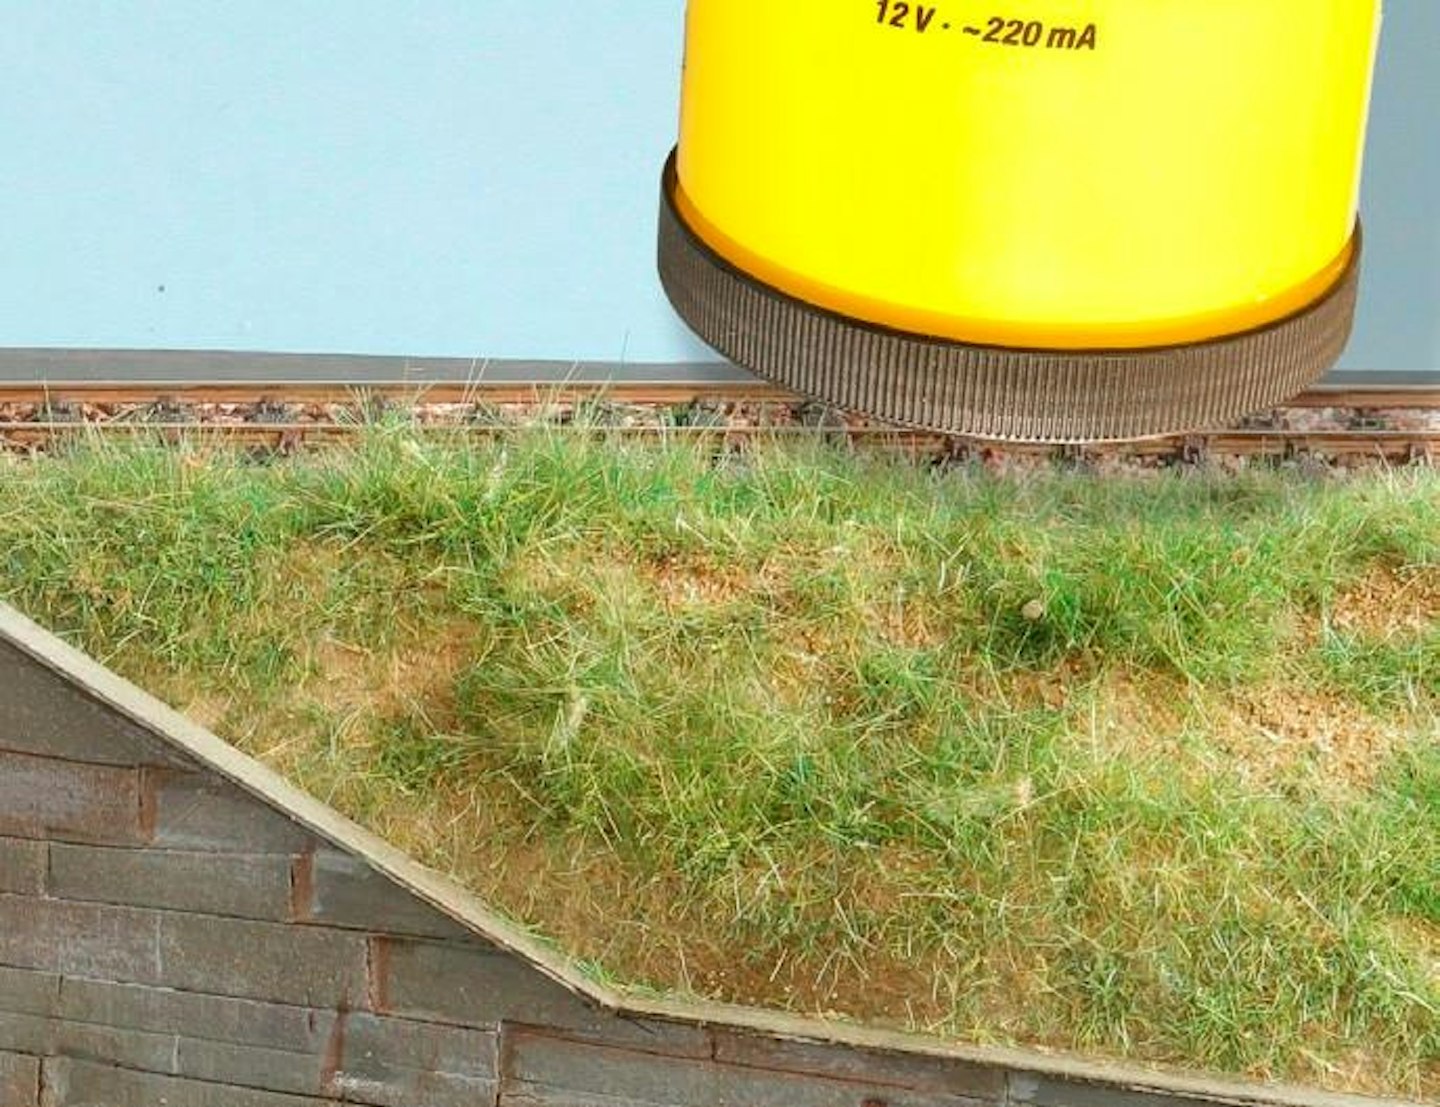
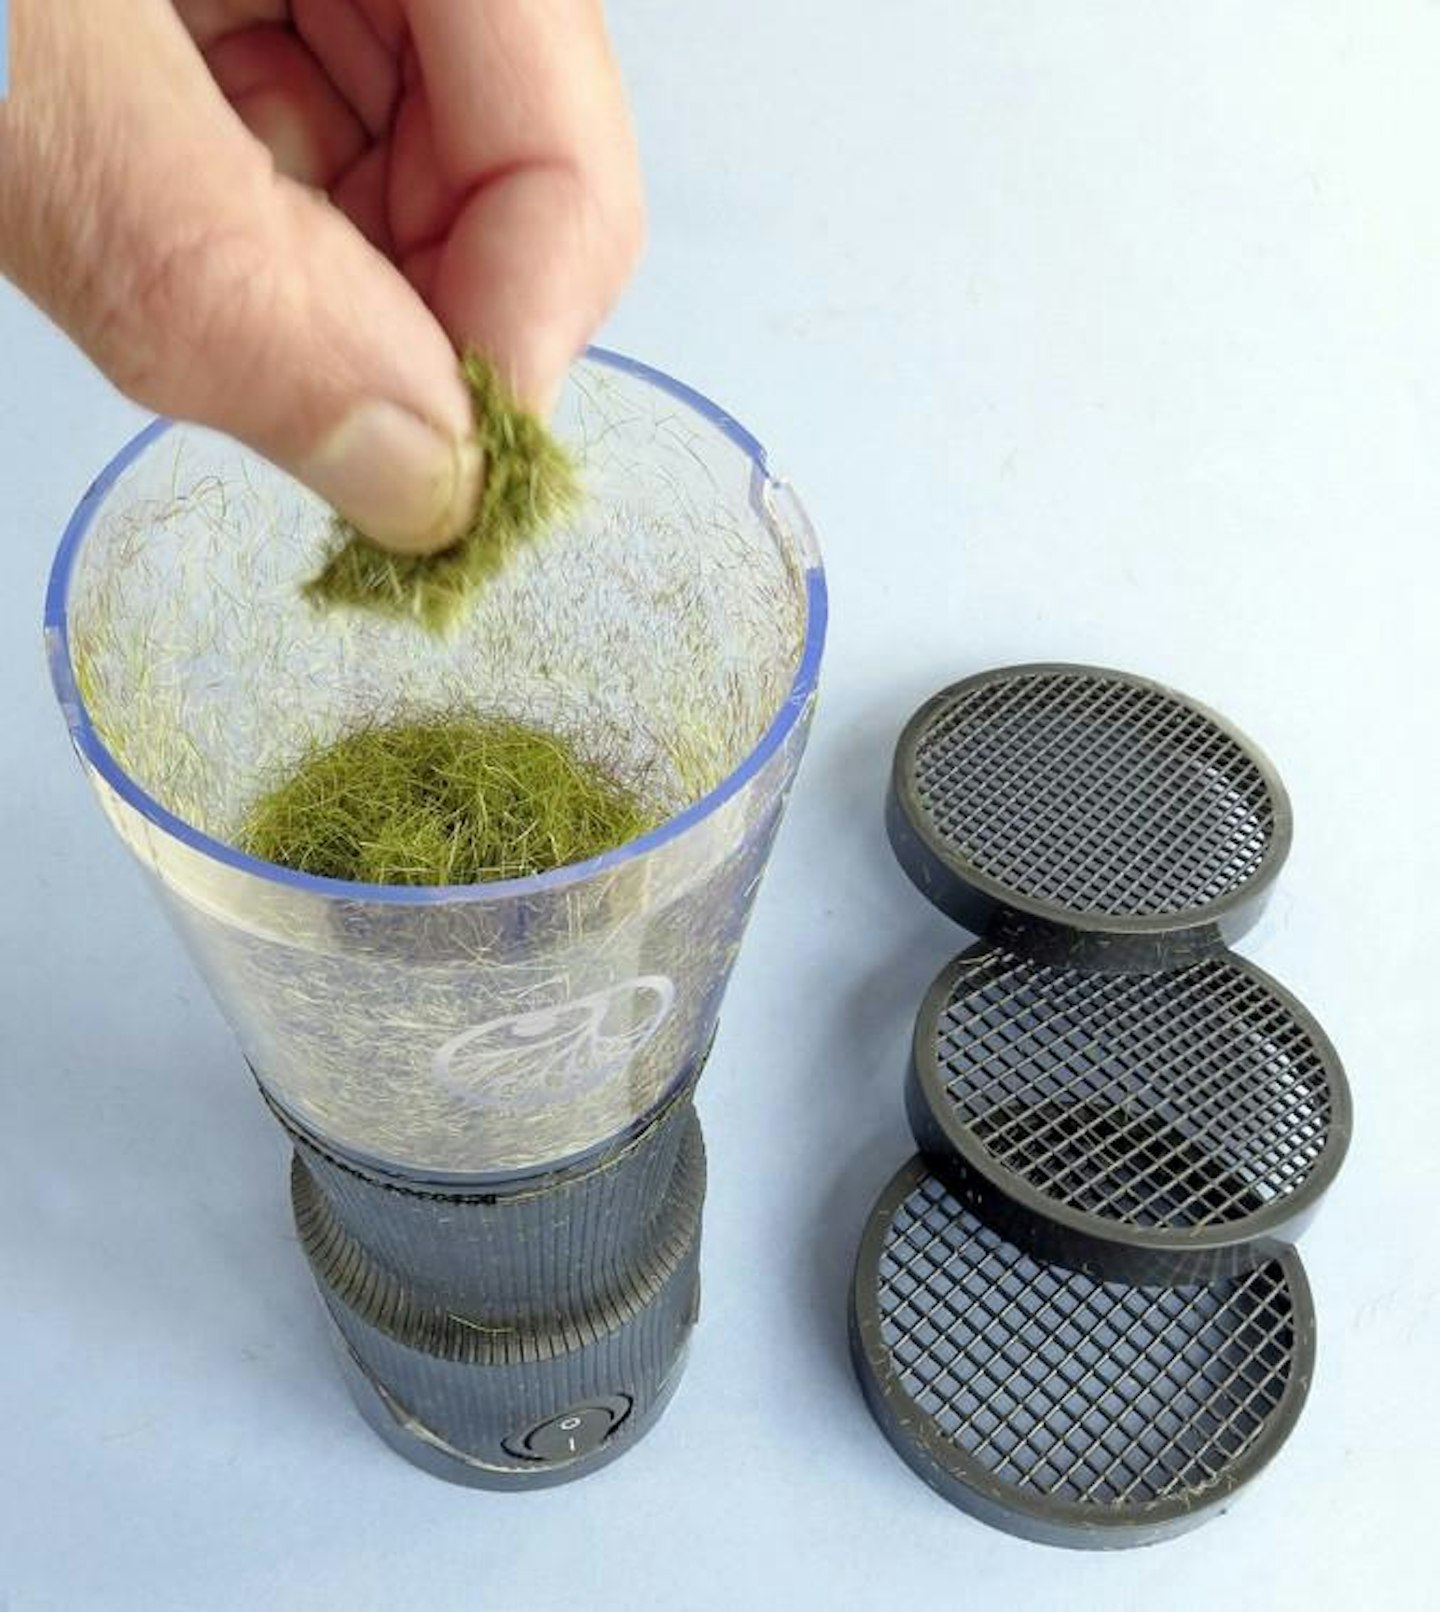
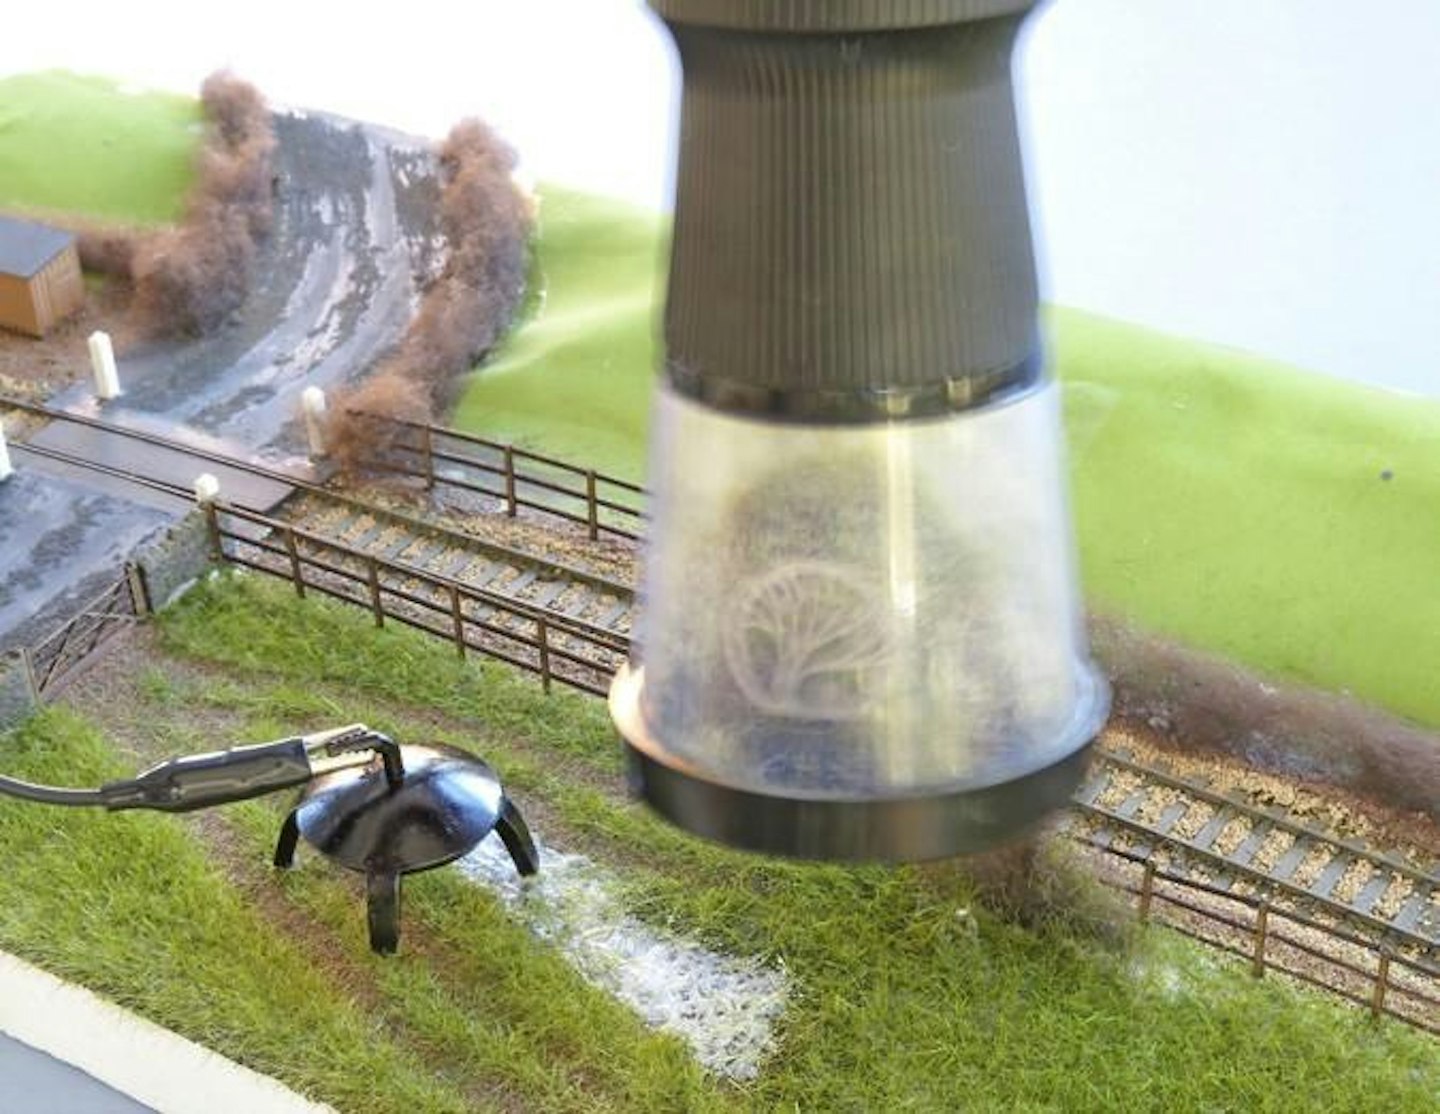
14 To plant static grass fibres, I used an electrostatic applicator tool, loaded with a mixture of lengths and colours. The contact cable was clipped to a rail track, the tool activated and gently shaken over the wet glue.
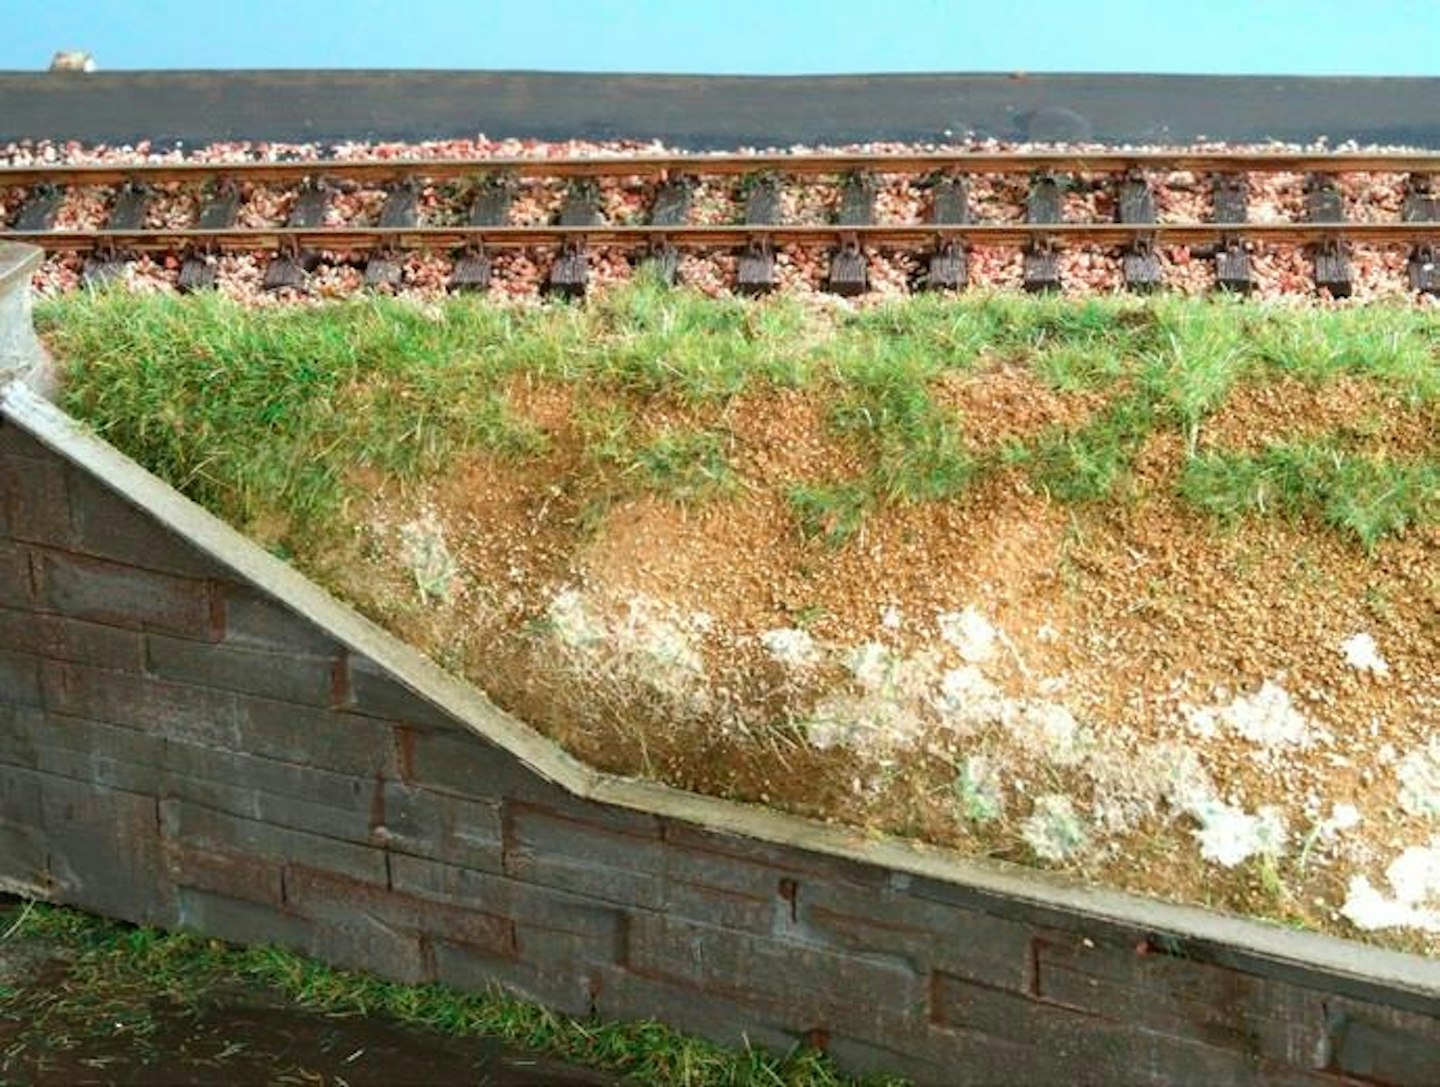
15 The process was repeated a second time, blowing away any loose fibres to reveal ‘bald’ areas of sand, then dabbing on a little more Static-Tac adhesive, especially towards the base of the embankment.
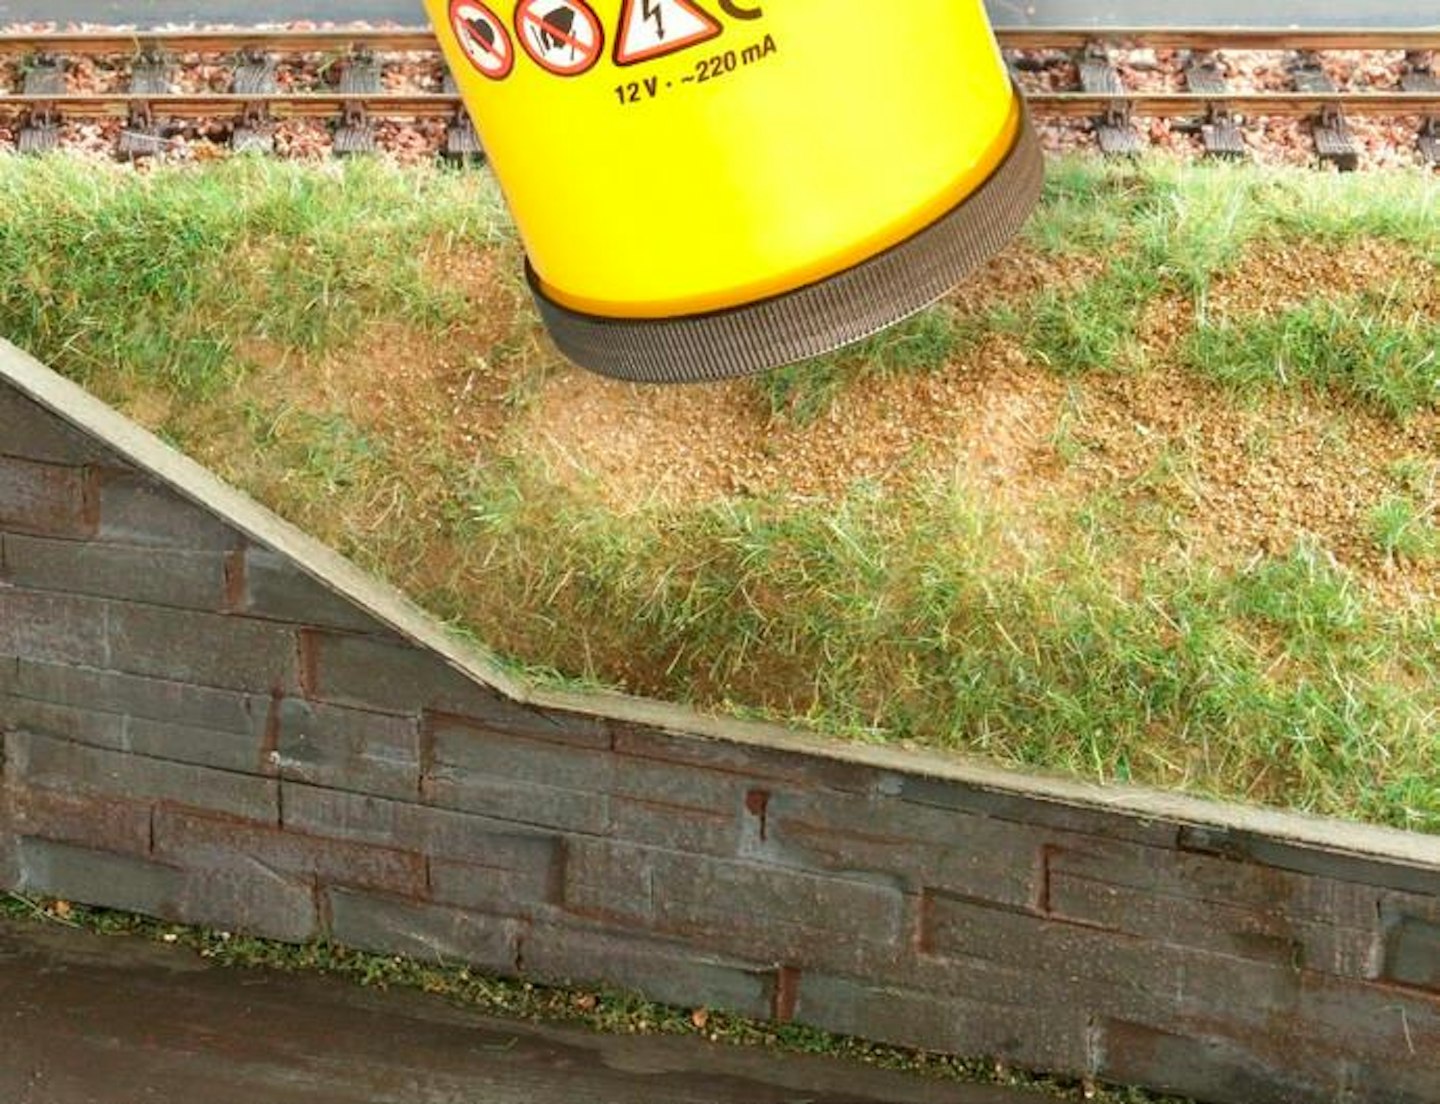
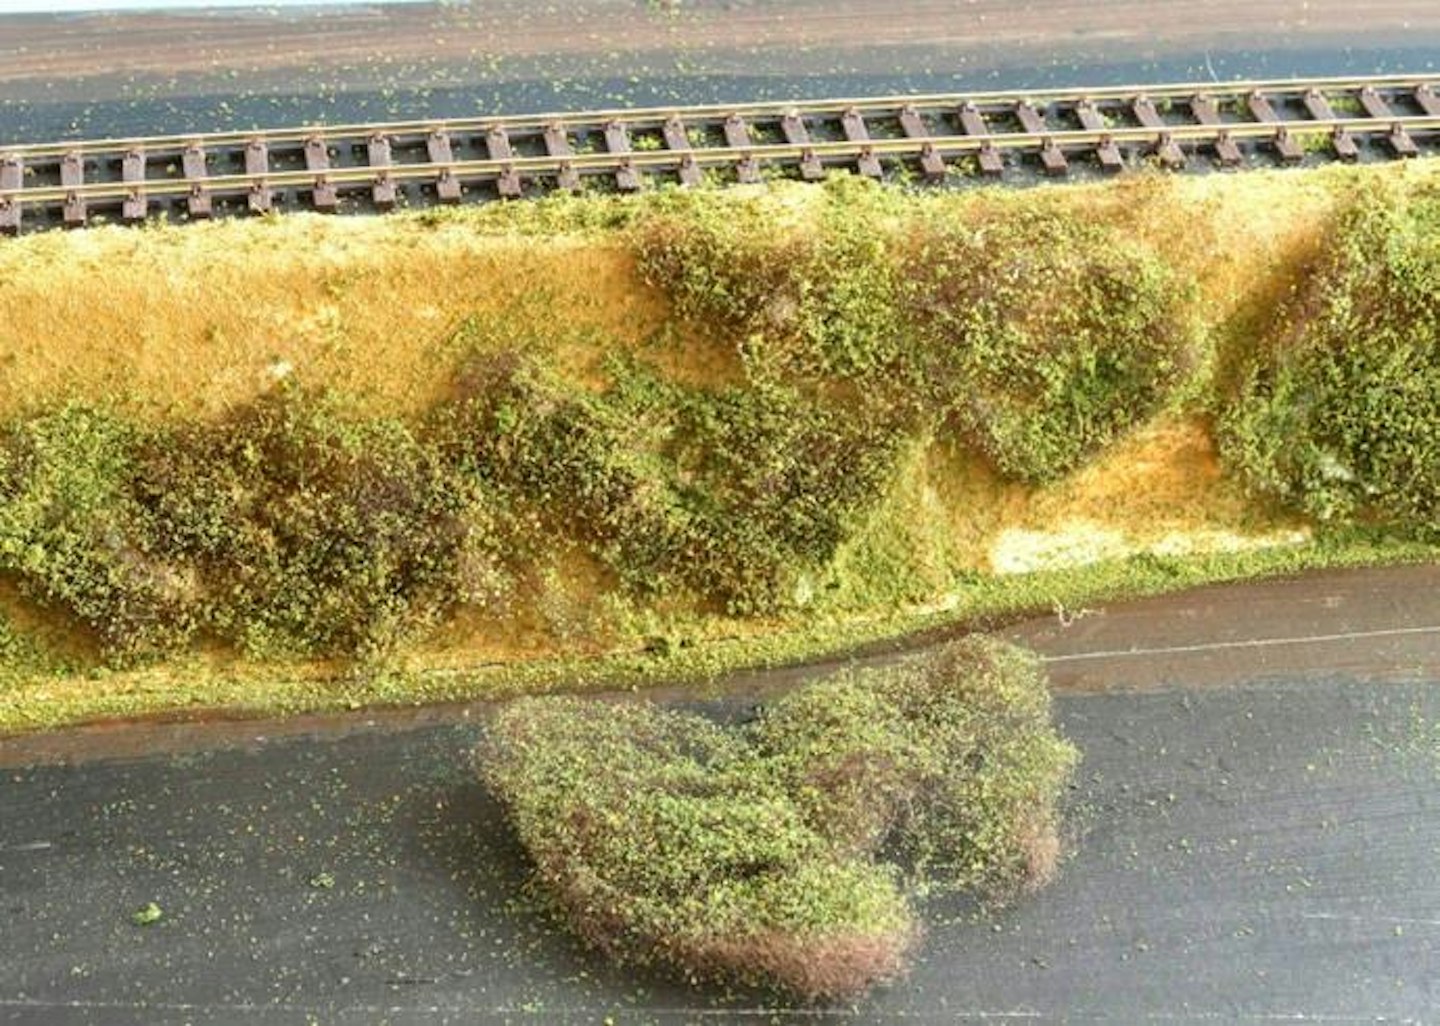
16 More static grass fibres were applied from the tool. My aim was to create the appearance of random weeds rather than a uniform layer of grass. For this ‘OO’ scene, I used a blend of 2mm, 4mm and 6mm long grass fibres.
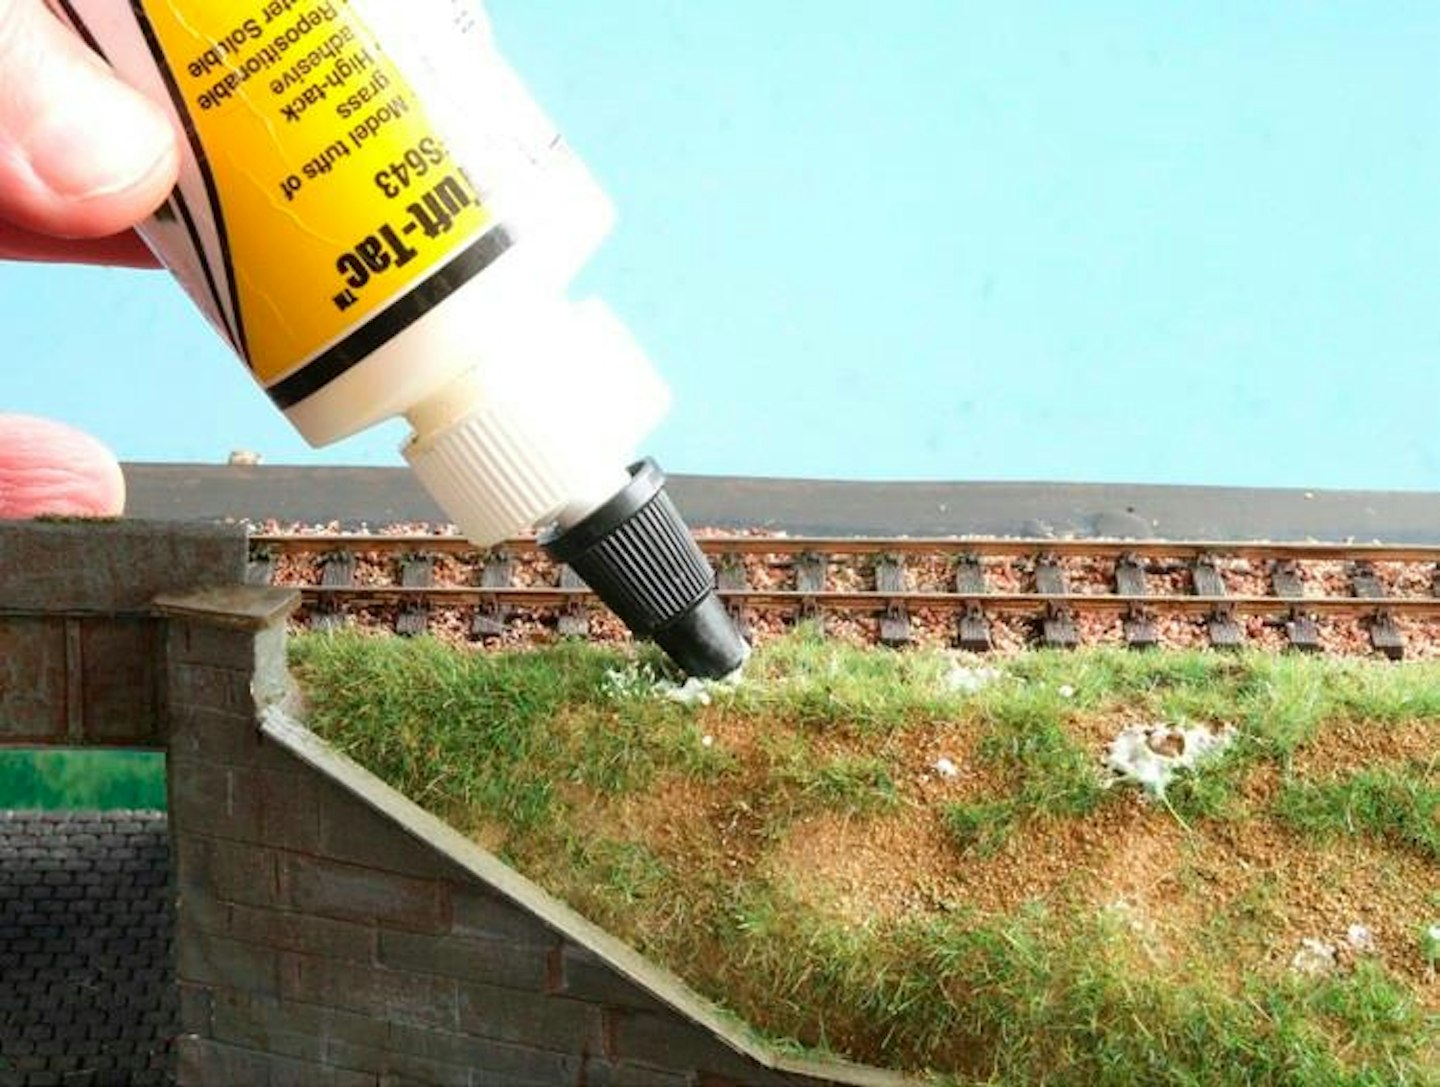
17 Once the glue on the first layer of the fibres had dried, the next day, I added dots of Tuft Tac in random places, prior to planting taller and darker static grass fibres.
18 The clumps of taller, darker grasses provide greater visual variety and texture, contrasting nicely with the visible areas of rough earth (created with the sand scatter material). I was really happy with the results so far.
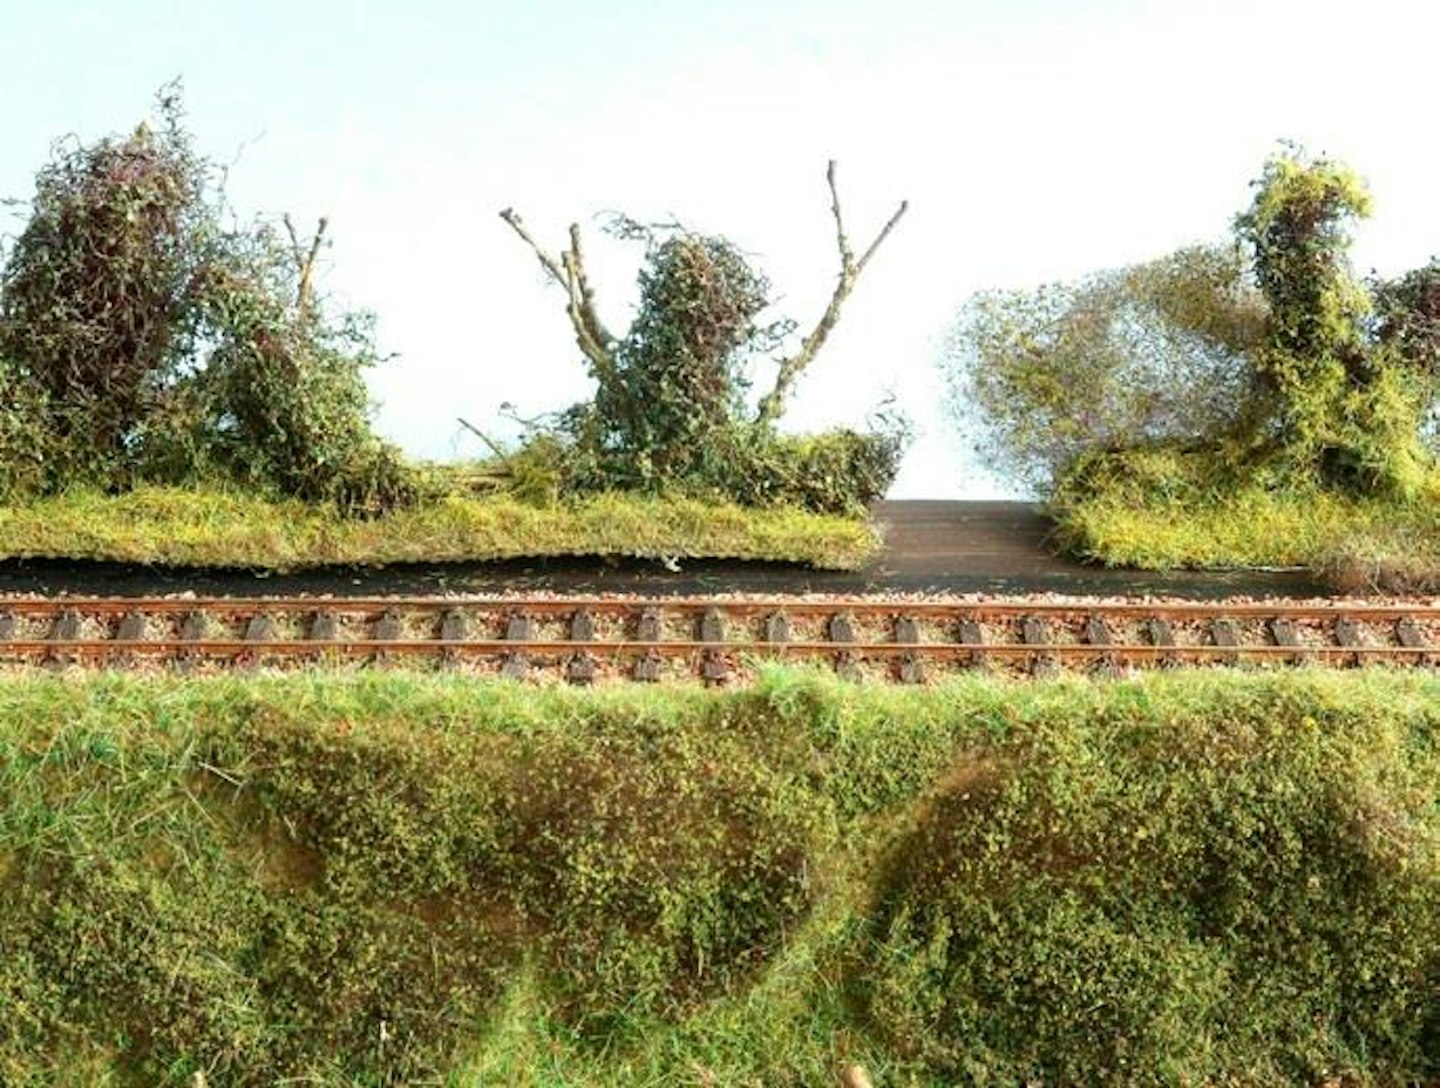
19 Behind the track I needed a strip of dense vegetation to form part of the backscene, so I started first with some pieces of hedging salvaged from a previous layout, fixing these to the mounting card using scenic glue.

20 Gaps between the hedgerows were filled with teased-out pieces of Poly Fibre. These were leftovers from previous projects, so it was quite random. The Poly Fibre clumps were bonded to the base with PVA glue.
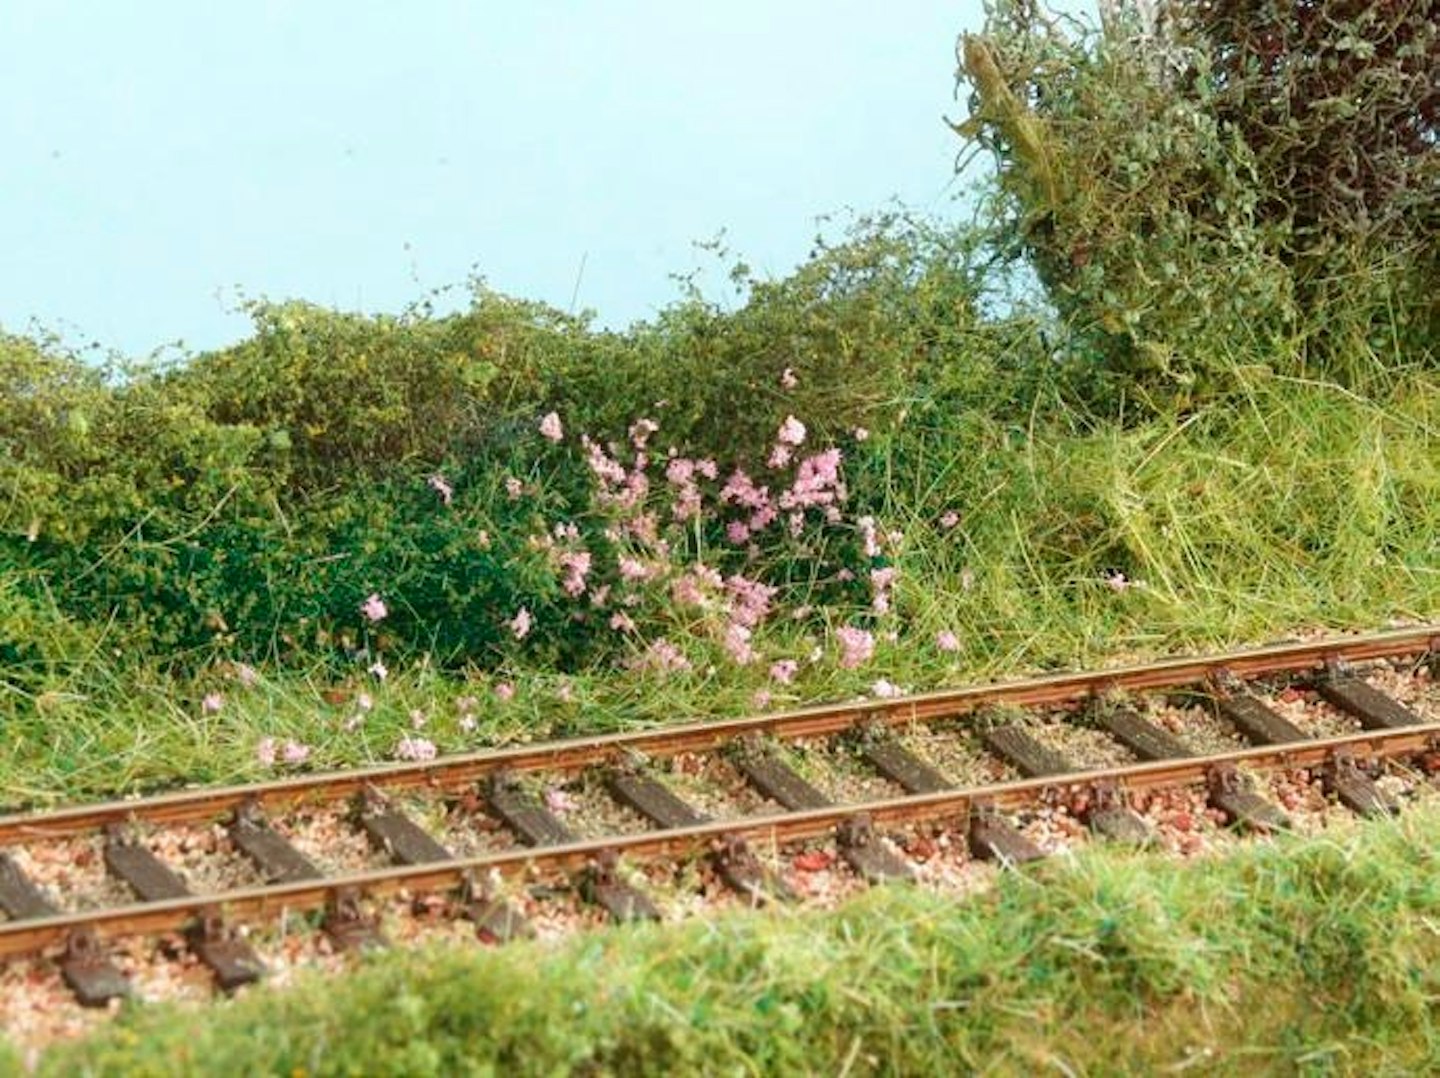
21 More layers of hairspray were misted on, followed by more fibres between the trackbed and the hedging, plus a few coloured bits of foam to add some attractive wildflowers. Use the hairspray to seal everything in place.
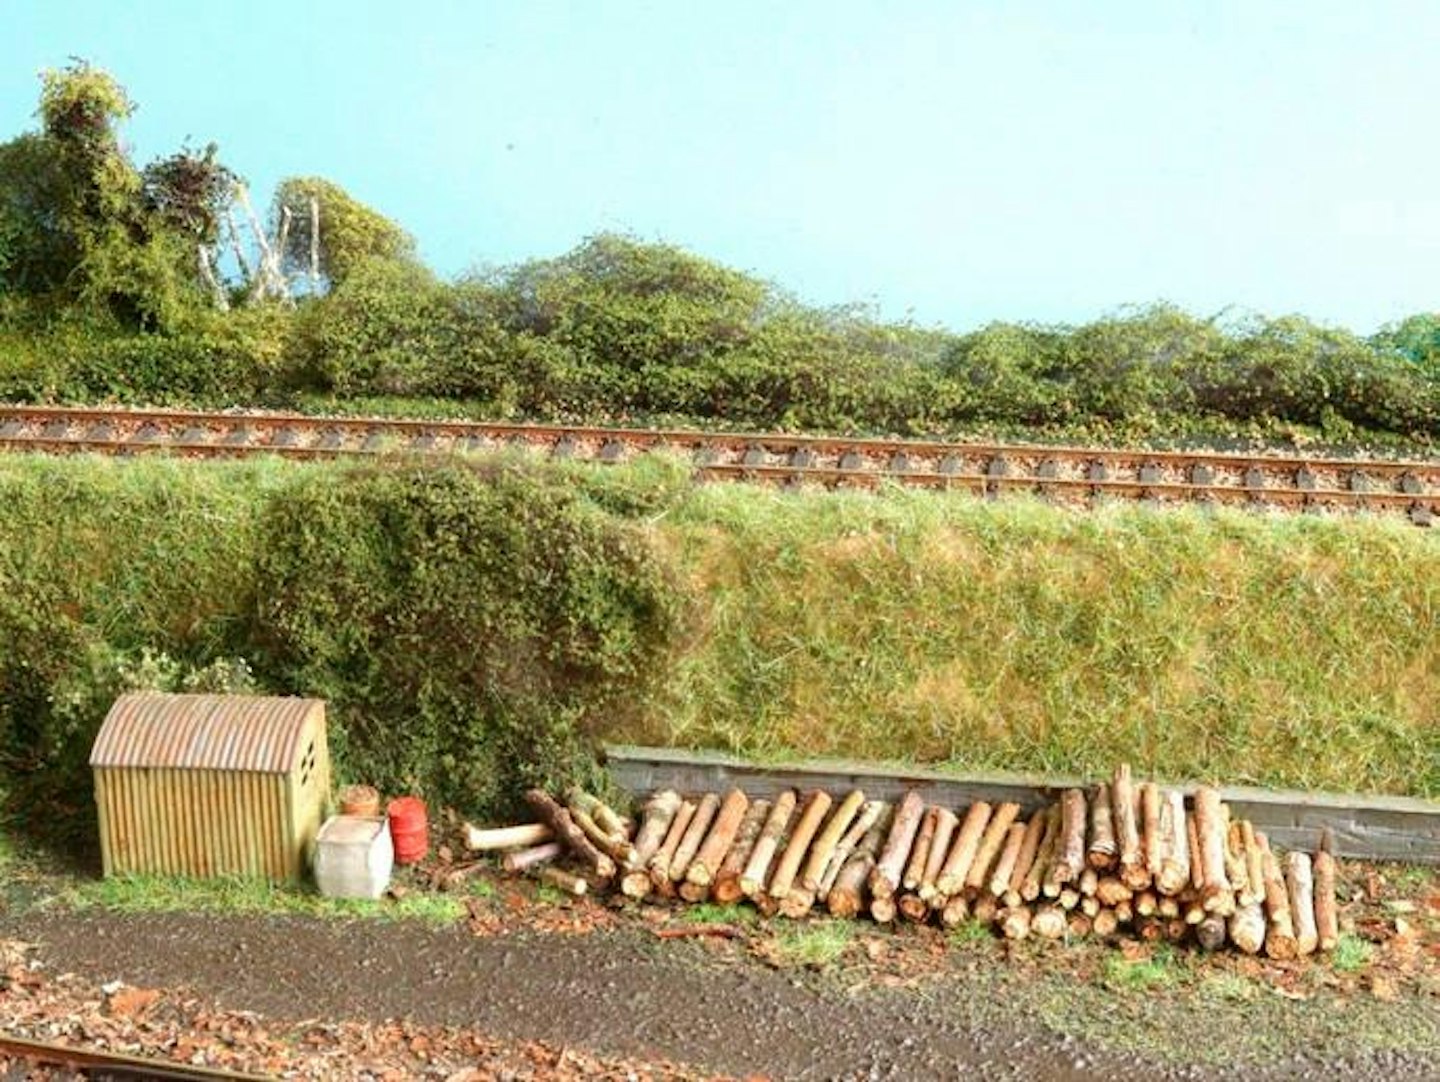
22 After spraying the teased-out Poly Fibre and Hedgerow Scenics vegetation with extra-hold hairspray, a mix of fine scatter materials were applied, unifying the appearance and providing leafy texture.
SHAPING UP WELL
Woodland Scenics Shaper Sheet is a very useful product, consisting of a strong and pliable sheet that holds its form without the need for extensive support. It can be shaped and re-formed to create the desired landscape profile and can, if desired, be covered with wet plaster (matching Shaper Sheet Plaster and Plaster Cloth products are also available), to create a wide range of effects, such as rock faces. The wet plaster bonds securely to the fibrous coating of the Shaper Sheet’s upper surface to form a hard, permanent shell, while the metal foil of the underneath is what helps keep its shape.
To link flat sections of Shaper Sheet together, tease the fibre mesh away from shaper foil along the connecting edge, thus exposing the tacky surface. Pull off the gauze backing on the fibre mesh from the shaper foil and press the section of Shaper Sheet onto the tacky surface and cut away any excess material.
-
Product: Woodland Scenics WC1178 Shaper Sheet
-
Price: £17.75
-
Availability: Woodland Scenics/ Bachmann stockists
-
Web: www.bachmann.co.uk
BE A STATIC KING
Like real grass and vegetation, static grass fibres stand upright when applied with an electrostatic tool. Using static grass is a great way to model areas of vegetation, whether that be fields and meadows or even patches of weeds around rail tracks or concrete aprons.
It helps to employ different lengths and colours of grass fibres to mimic different kinds of vegetation and phases of growth. For example, the Woodland Scenics Field System range includes four lengths of fibres – 2mm, 4mm, 7mm and 12mm – in four different colours – light green, medium green, dark green and straw.
For this project, I used a Woodland Scenics Static King electrostatic tool, which is good for covering large areas and, thanks to its clever design, it can be placed upside-down for easier filling. It comes with various sieve sizes to suit different fibre lengths, while a divider allows the use of multiple colours and lengths at the same time.
Another welcome feature is the clear hopper that ensures you always know how much Static Grass you have left. An indicator light makes it easy to know if the Static King is turned on or off. Power is supplied via a 9V battery (not supplied) or, to ensure more consistent operation, by using a mains power supply (available separately).
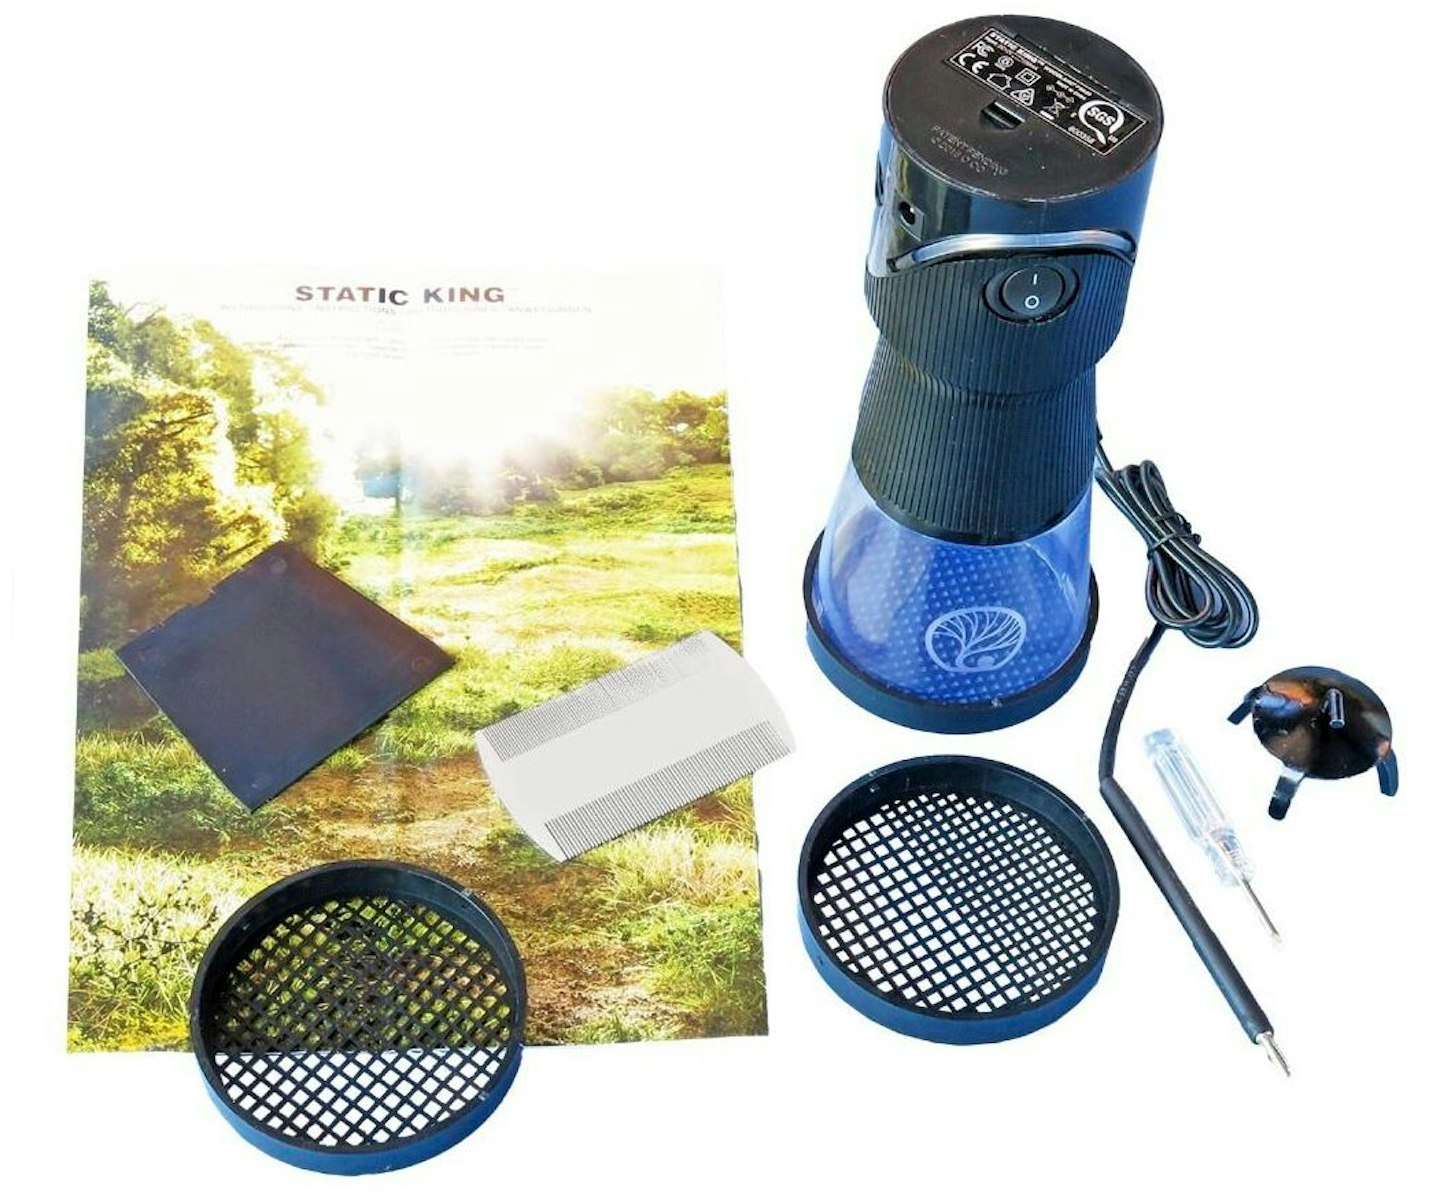
Like all electrostatic tools, it’s necessary to create a static field between the applicator and model surface. Often, a cable and crocodile clip are provided which can be attached to a nearby rail or a nail temporarily pushed into the scenery. With the Static King, a four-pronged metal anchor provides an effective ‘ground’ connection.
-
Product: Woodland Scenics WFS639 Static King
-
Price: £124.50
-
Availability: Woodland Scenics/Bachmann stockists
-
Web: www.bachmann.co.uk

Each issue of Model Rail covers every stage of modelling, from buying your first model train set right through to museum standard fine-scale modelling. Find inspiration for your next project with our helpful tips, advice and in-depth detail on model trains and layouts.
Choose the right subscription for you and get instant digital access to the latest issue.