Workbench
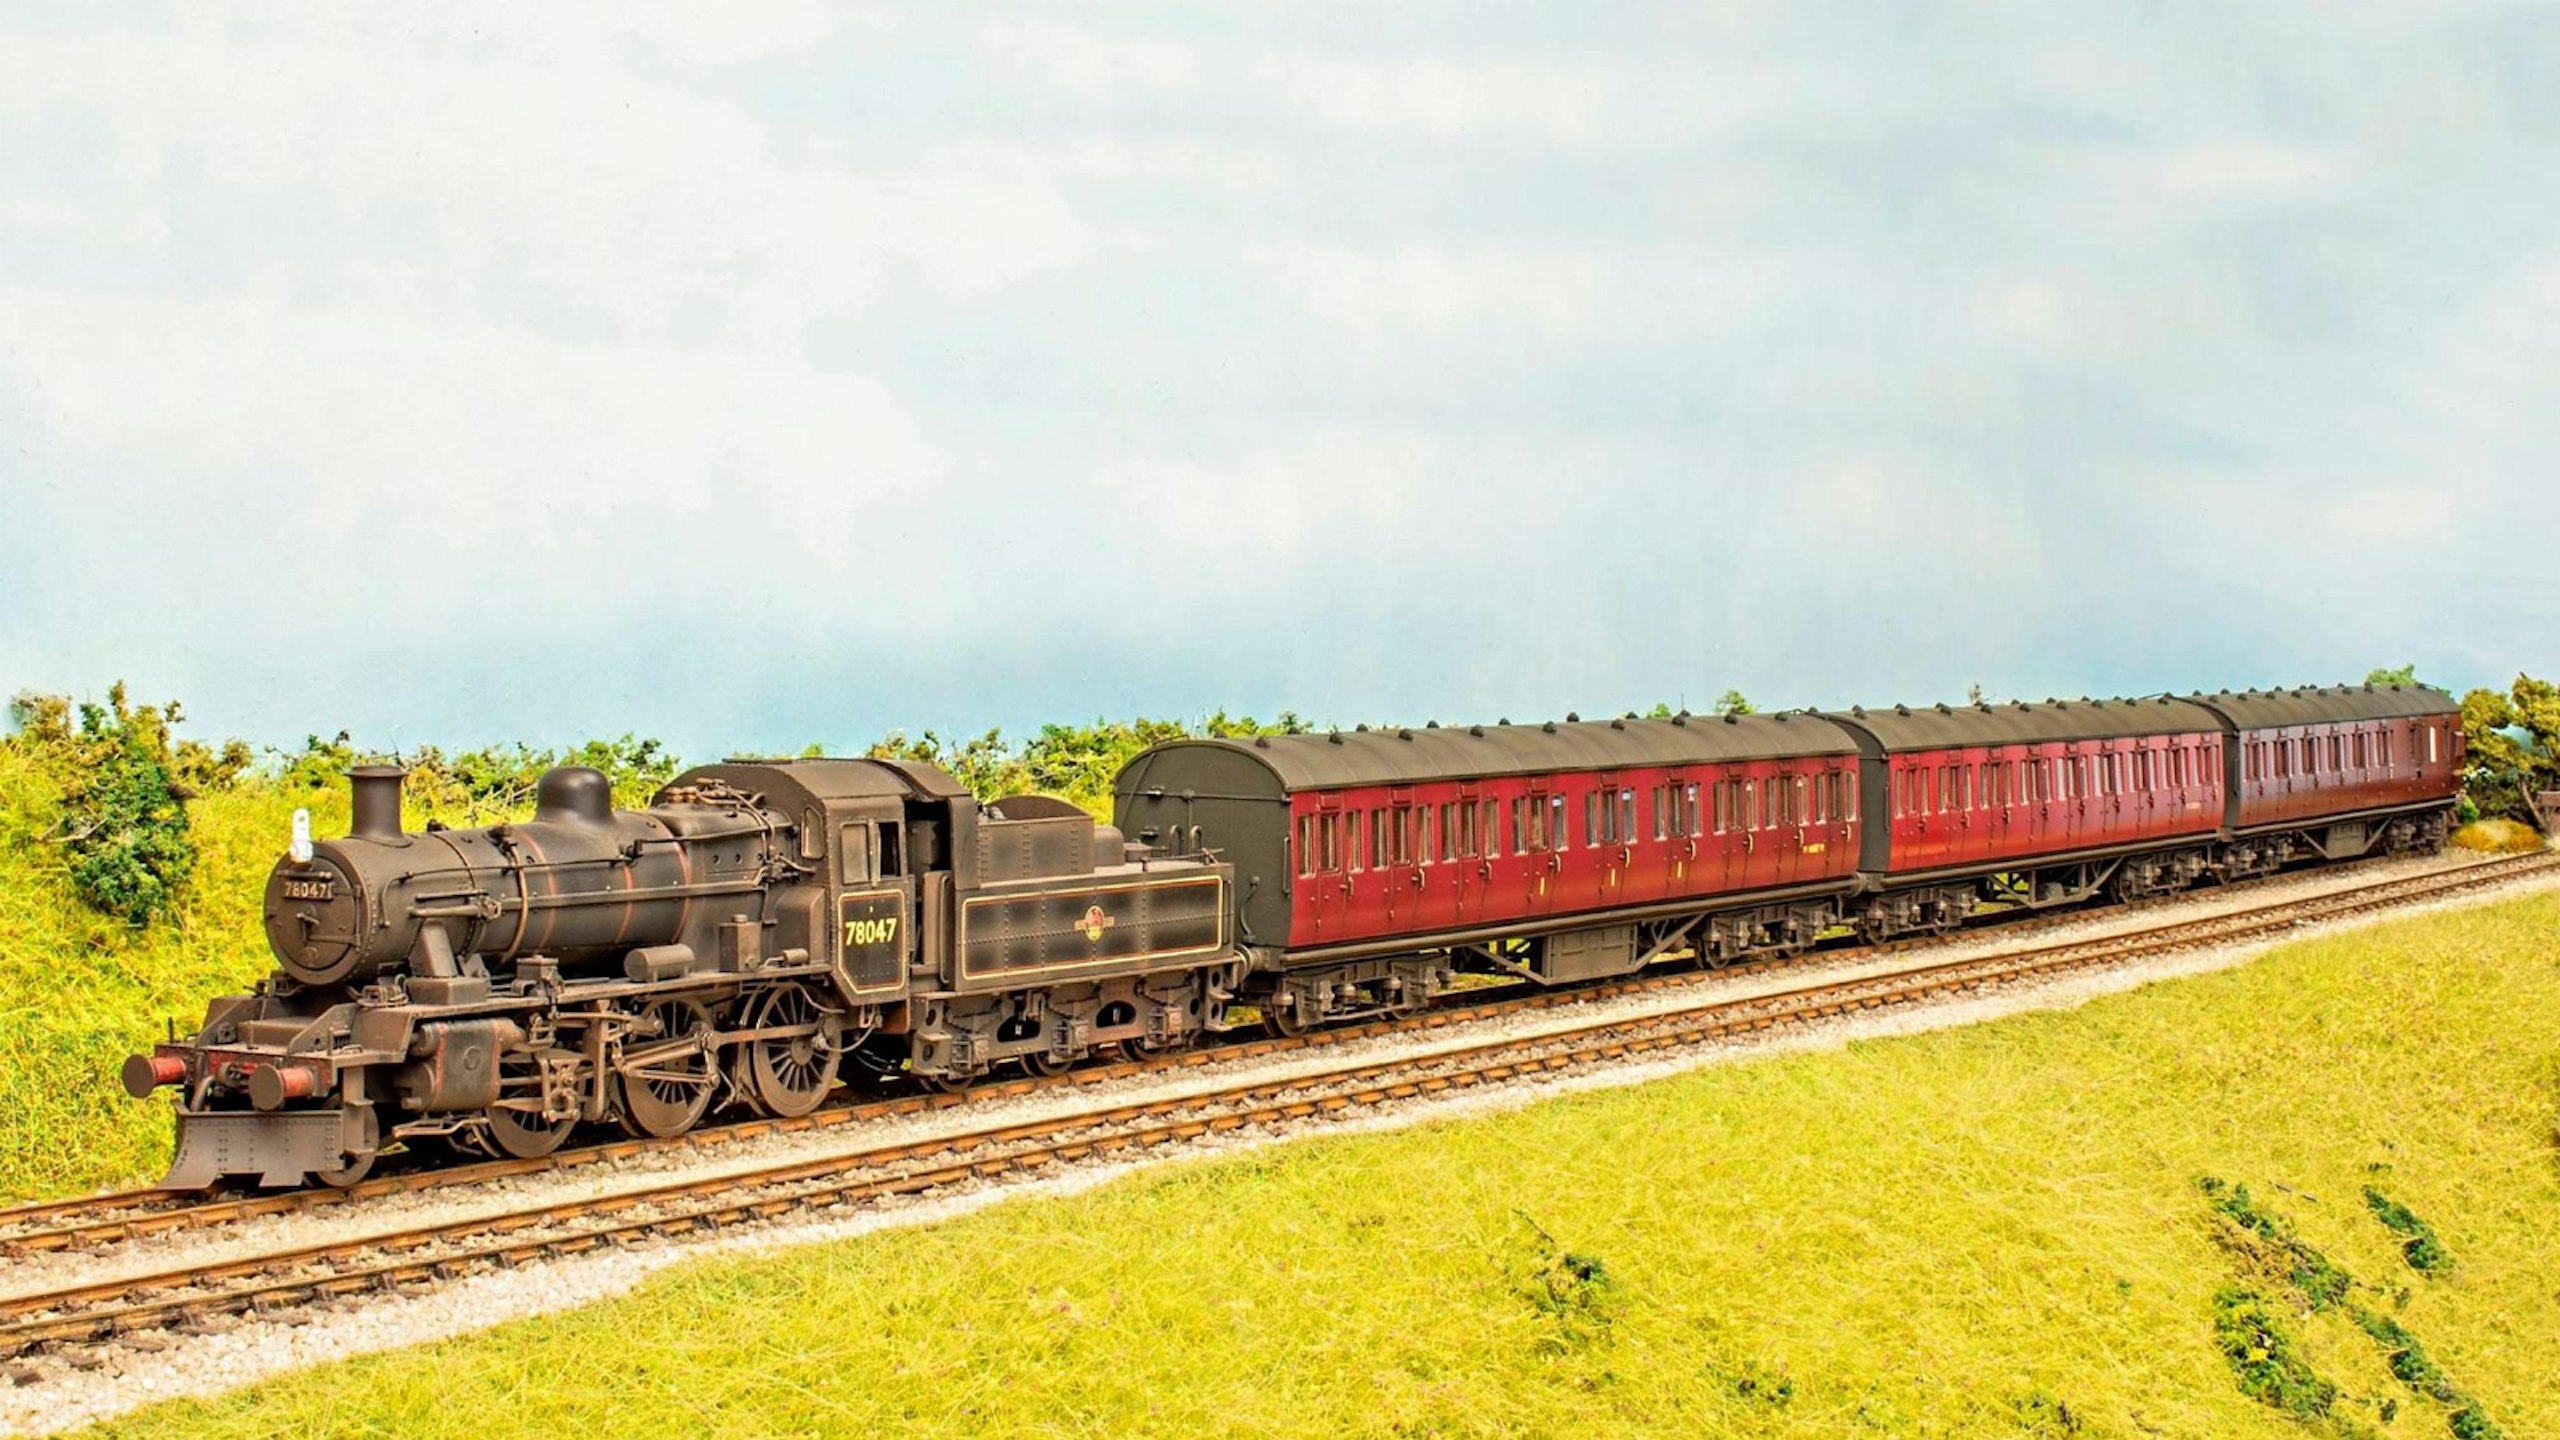
Having a short rake of Suburban stock to titivate, George Dent explains how he populated the interiors and gave the Hornby models a suitably lived-in appearance.
PHOTOGRAPHY: GEORGE DENT
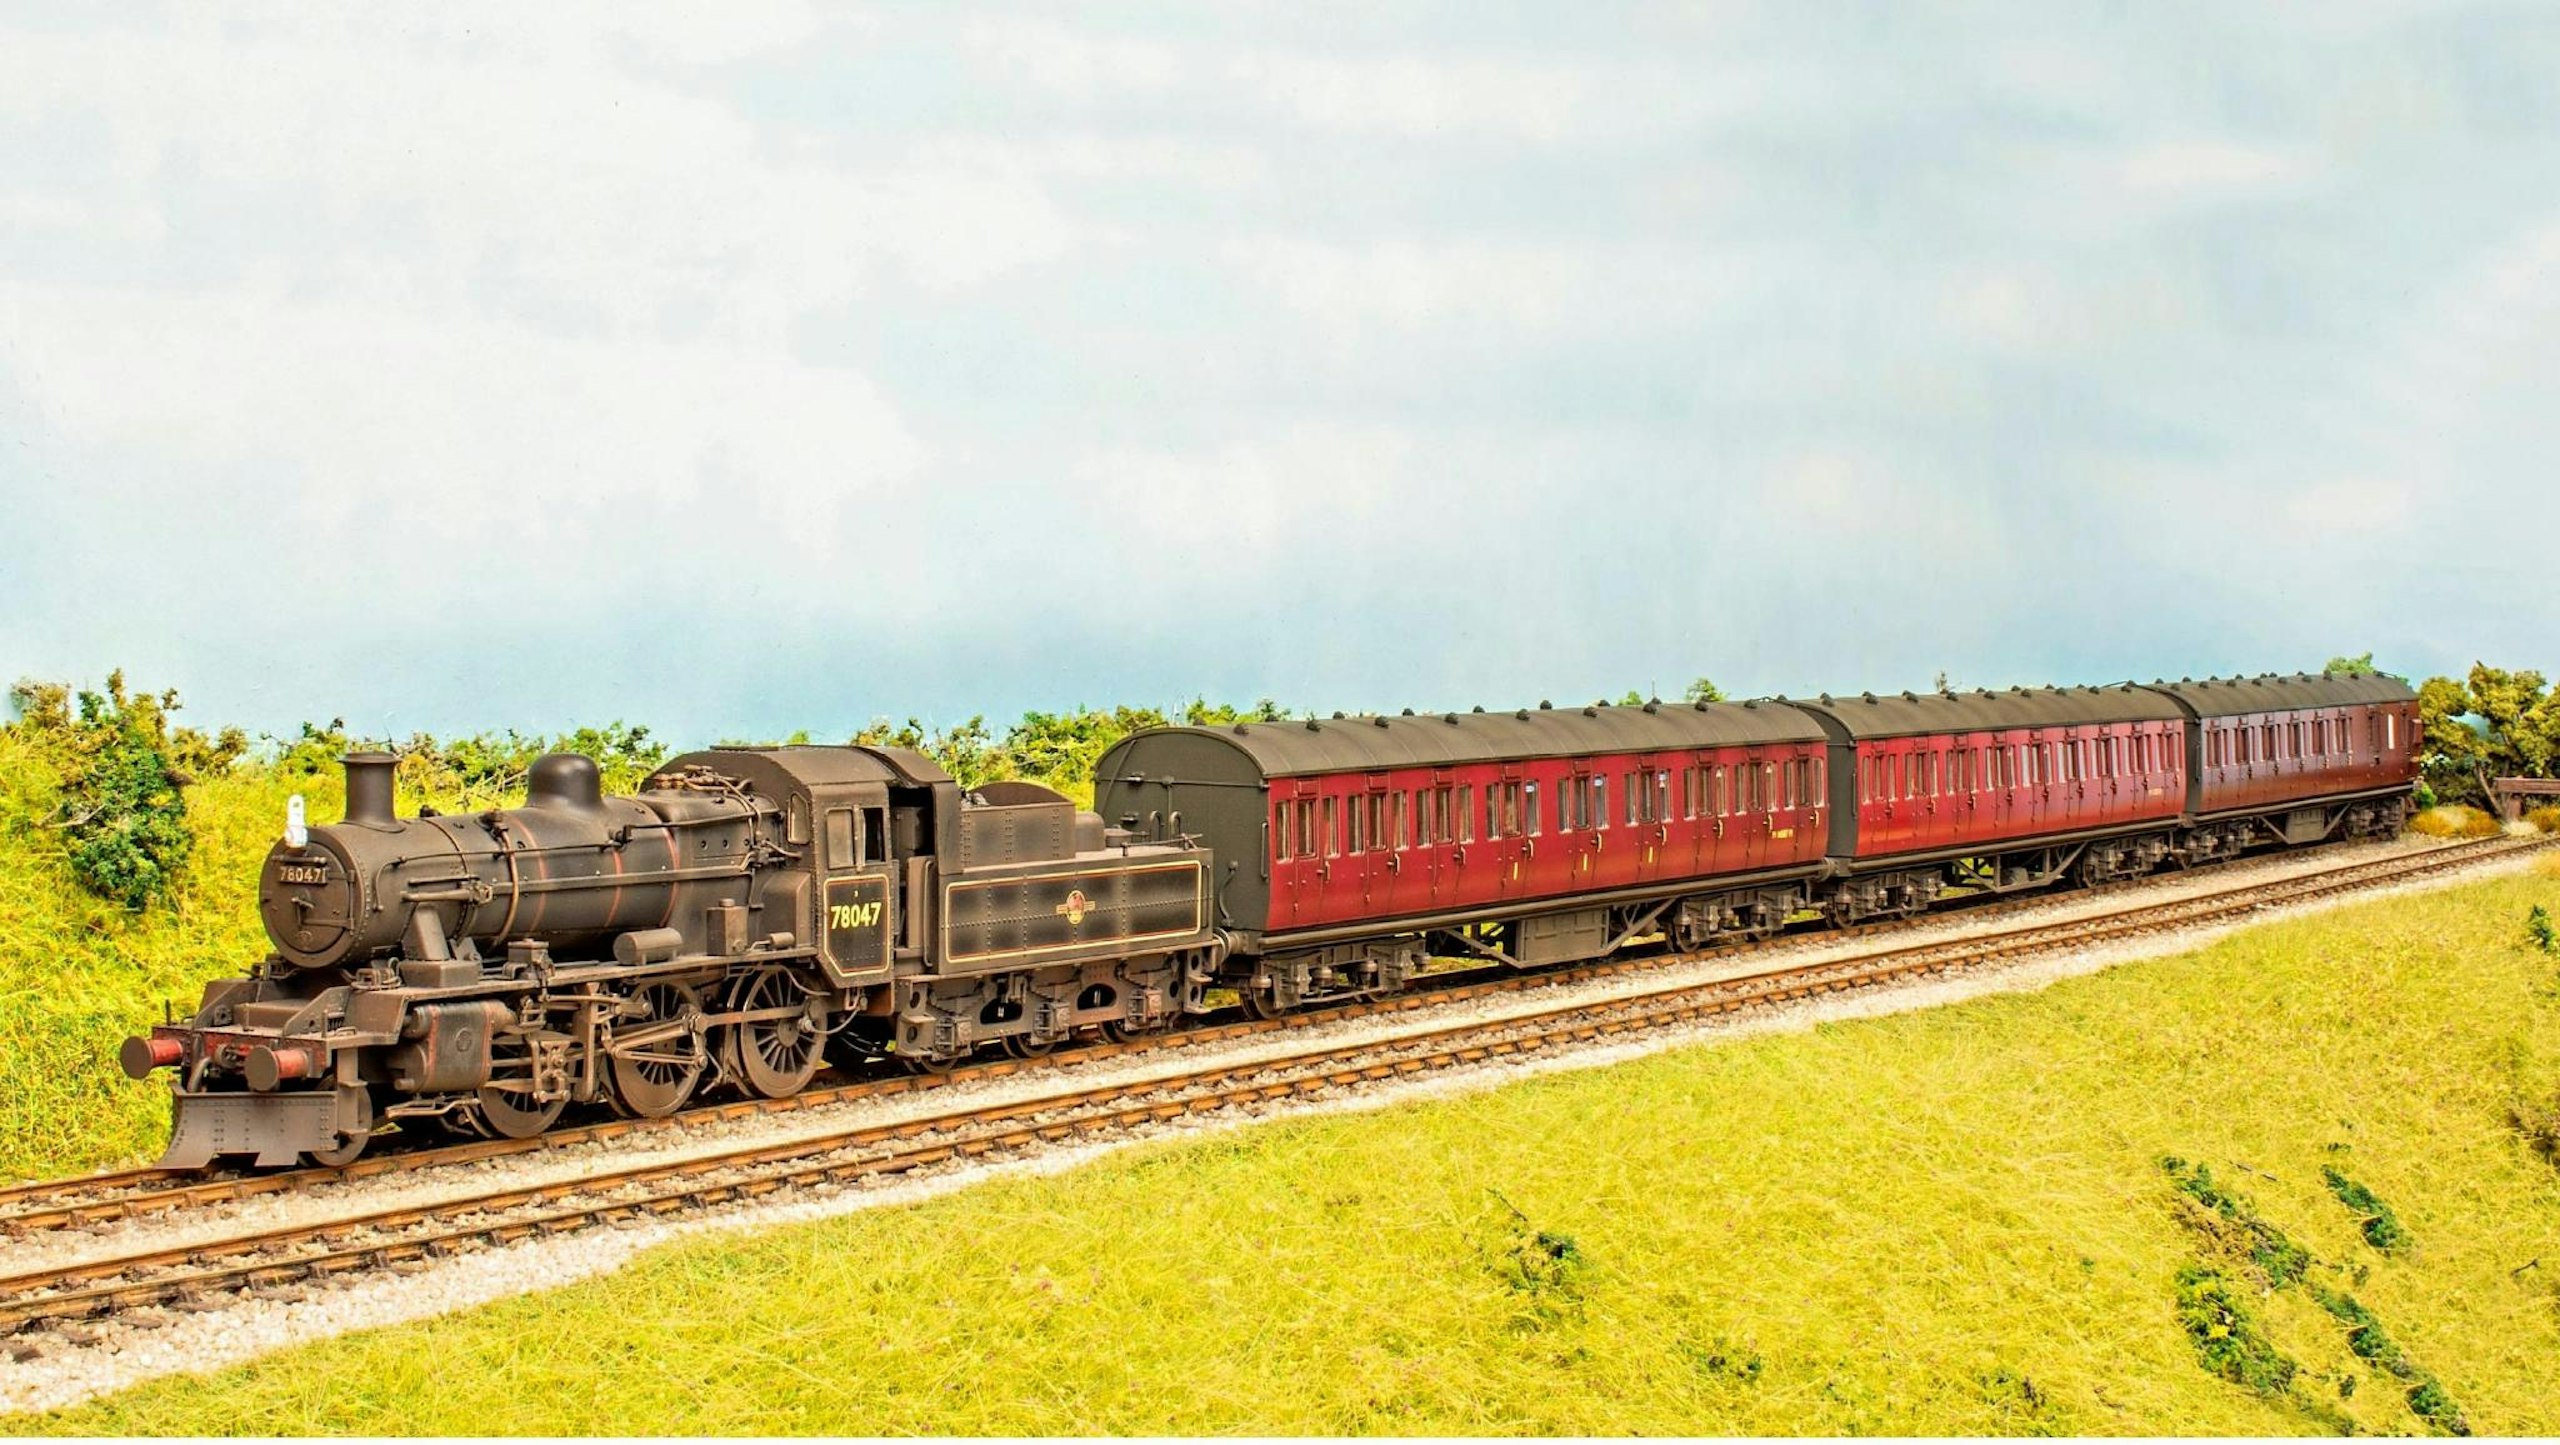

Faced with a need to create a rake of ex-LMS non-corridor coaches for a typical late 1950s/ early 1960s branch line operation, a trio of Hornby Stanier 57ft coaches has been waiting its turn on my workbench for a while.
I had set myself a brief of adding interior lighting units, a decent complement of passengers in suitable garb for the period, and to give the coaches a workaday appearance, redolent of daily use in harsh weather conditions in the wilds of northern England. The carmine and maroon cars needed to show signs of being cleaned – or the bodyside at least – but not as regularly as, say, stock intended for express and prestigious services.
Operating on a steam-powered railway, the carriage roofs, ends and underframes would have to be weathered accordingly, preferably with a discernible texture to the grime and soot.
GETTING TO WORK
I’d actually forgotten how nice the Hornby models were, featuring some fine detail on the bodyshells, including wire handrails, plus well-appointed underframes. The painted interiors are welcome too, with contrasting upholstery colours for Third- and First-class compartments.
Accordingly, there wasn’t much needed in terms of detail upgrades. I did mean to add some homemade dynamo belts, but completely forgot (it’s my age!), so that’s a job for the future…
Instead, I concentrated on imparting a more authentic, polished look for the paintwork, albeit with a few years’ worth of ingrained dirt visible around doors, inspired by many period colour images which showed vivid crimson and maroon bodywork contrasting starkly with grime-encrusted roofs, chassis and ends.
To achieve this polished look in the past, I have employed T-Cut automotive finish restorer to buff up the factory paintwork, which works a treat. However, more recently, I’ve realised I can achieve the same results simply by spraying a few coats of good-quality clear varnish, which saves plenty of labour!
Mr Super Clear Gloss, from the Mr Hobby range, is my clear coat of choice, as it adheres to the factory finish well, requires only a light layer, and dries to a tough, super-clear finish. It’s dry to touch within an hour or so, but I err on the side of caution and leave it overnight to cure fully before handling.
With the Mr Super Clear, I don’t need to mask the glazing either, as it remains crystal clear. This is not always the case, so you may want to consider masking (with tape or a masking fluid) or removing the glazing if possible. The latter approach is less onerous than masking individual windows, especially on suburban stock, but it brings a risk of breakage – it all depends on how much glue has been used during assembly.
Masking tape was applied once the clear gloss coat had cured, to keep the sides clean while the roof and ends were weathered. Don’t forget to mask the inside faces of the glazing too, to prevent stray paint or dirty fingerprints from finding their way onto the windows.
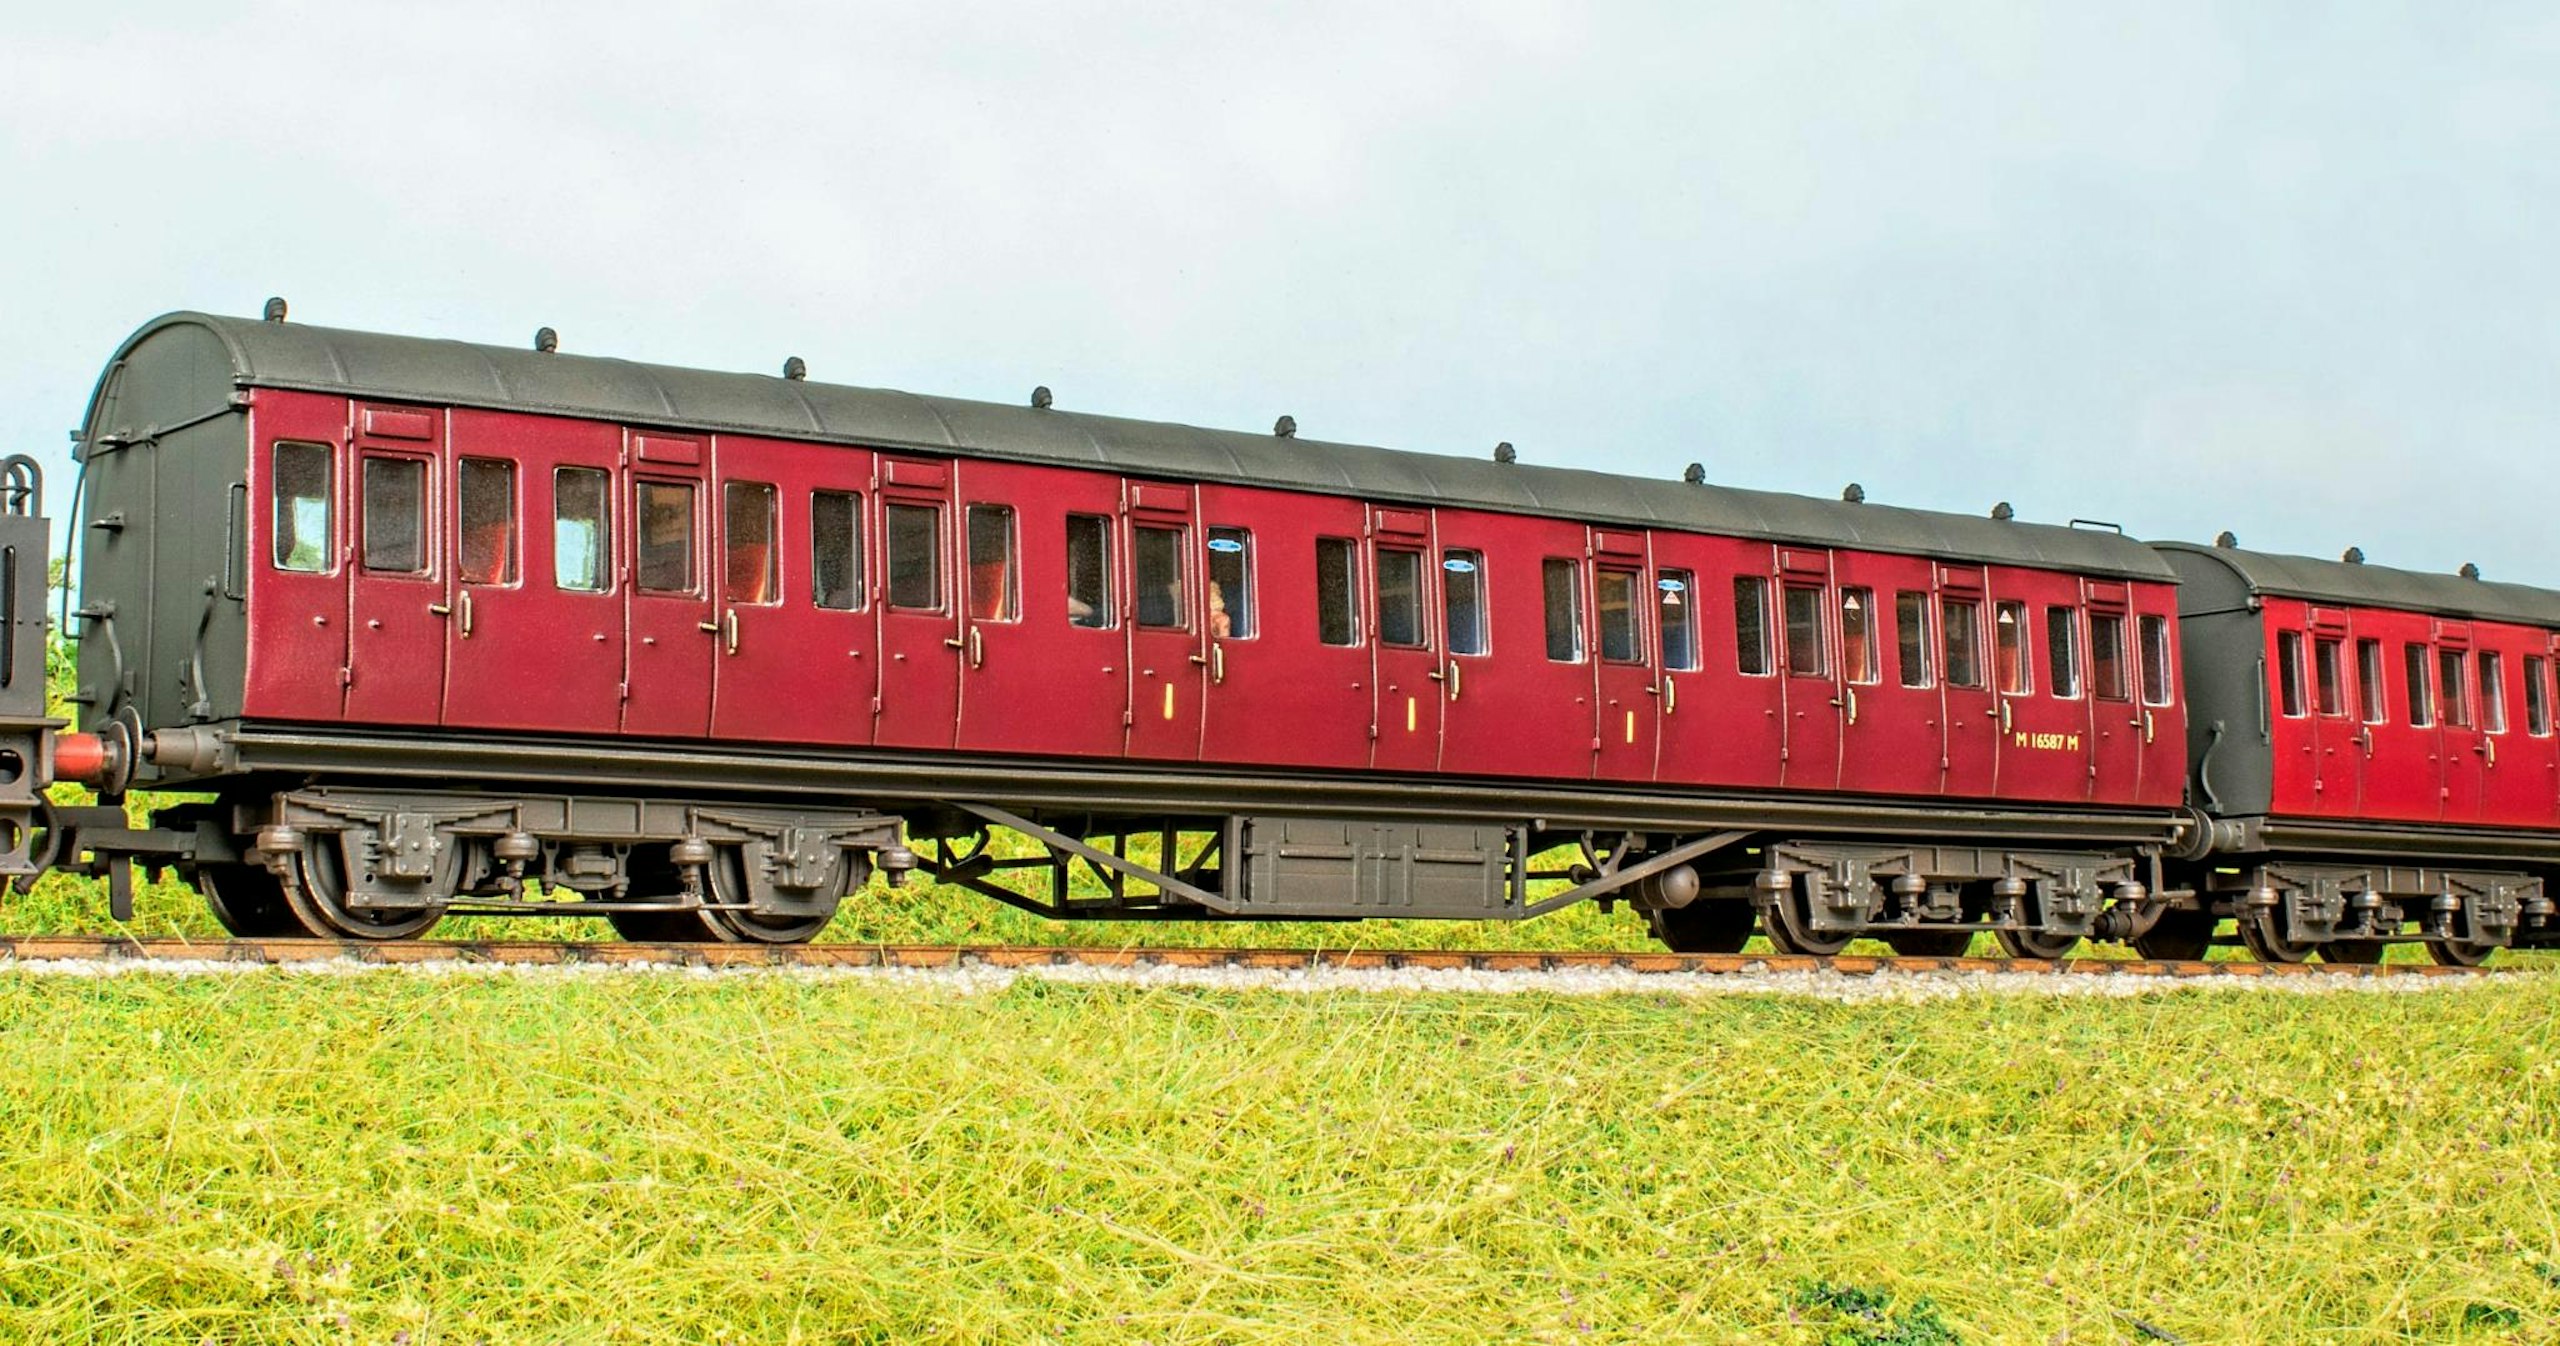
The factory finish of these Hornby models has been enhanced by the initial clear gloss coating, adding a deeper lustre to the paintwork redolent of the paints employed on the real vehicles.
IMPORTANCE OF TEXTURE
Studying plenty of prototype images revealed that texture would be just as important as the choice of ‘dirt’ colours employed during weathering. Carriages built during the steam era invariably featured a layer of waterproof material stretched over the roof panels, which would then be painted and, if you look closely, this has a distinct texture which a smooth plastic moulding fails to represent.
Simply brushing a coat of acrylic paint over the roof is often enough to rectify this, and, once the brush strokes and shading have been refined with an airbrush, the results can be effective.
Underframes are even more prone to the build-up of thick layers of grime, including brake dust, oil and grease and myriad other unpleasant deposits.
Again, hand-brushed coats of acrylic paint are great at taking away the smooth, perfect appearance of the plastic mouldings, while adding some dry pigment into the paint introduces a gritty texture. The coarseness can be tailored simply by the amount of dry pigment added to the blend, so it’s something that’s worth experimenting with, perhaps on an old, scrap model to begin with.
The airbrush duly softens the harshness of the hand-brushed underframe and allows the final tones and shading to be refined.
Of course, not everyone has an airbrush (or wants to use one), but the great thing about the layer of acrylics on the roof and underframe is that dry weathering pigments will adhere readily to these matte surfaces. Applying powders with a soft brush can produce effects very similar to an airbrush, albeit with rather more mess on the workbench (and often on one’s clothes!).
The bodysides were not left completely pristine, with enamel washes proving effective for mimicking ingrained dirt trapped within door seams and around the door furniture in these high-traffic areas. The glossy surface allows the washes to be manipulated easily without recourse to enamel thinners. Indeed, it’s important to keep thinners away from glazing to prevent clouding of the clear plastic. That said, the enamel washes themselves caused no issues with the glazing.
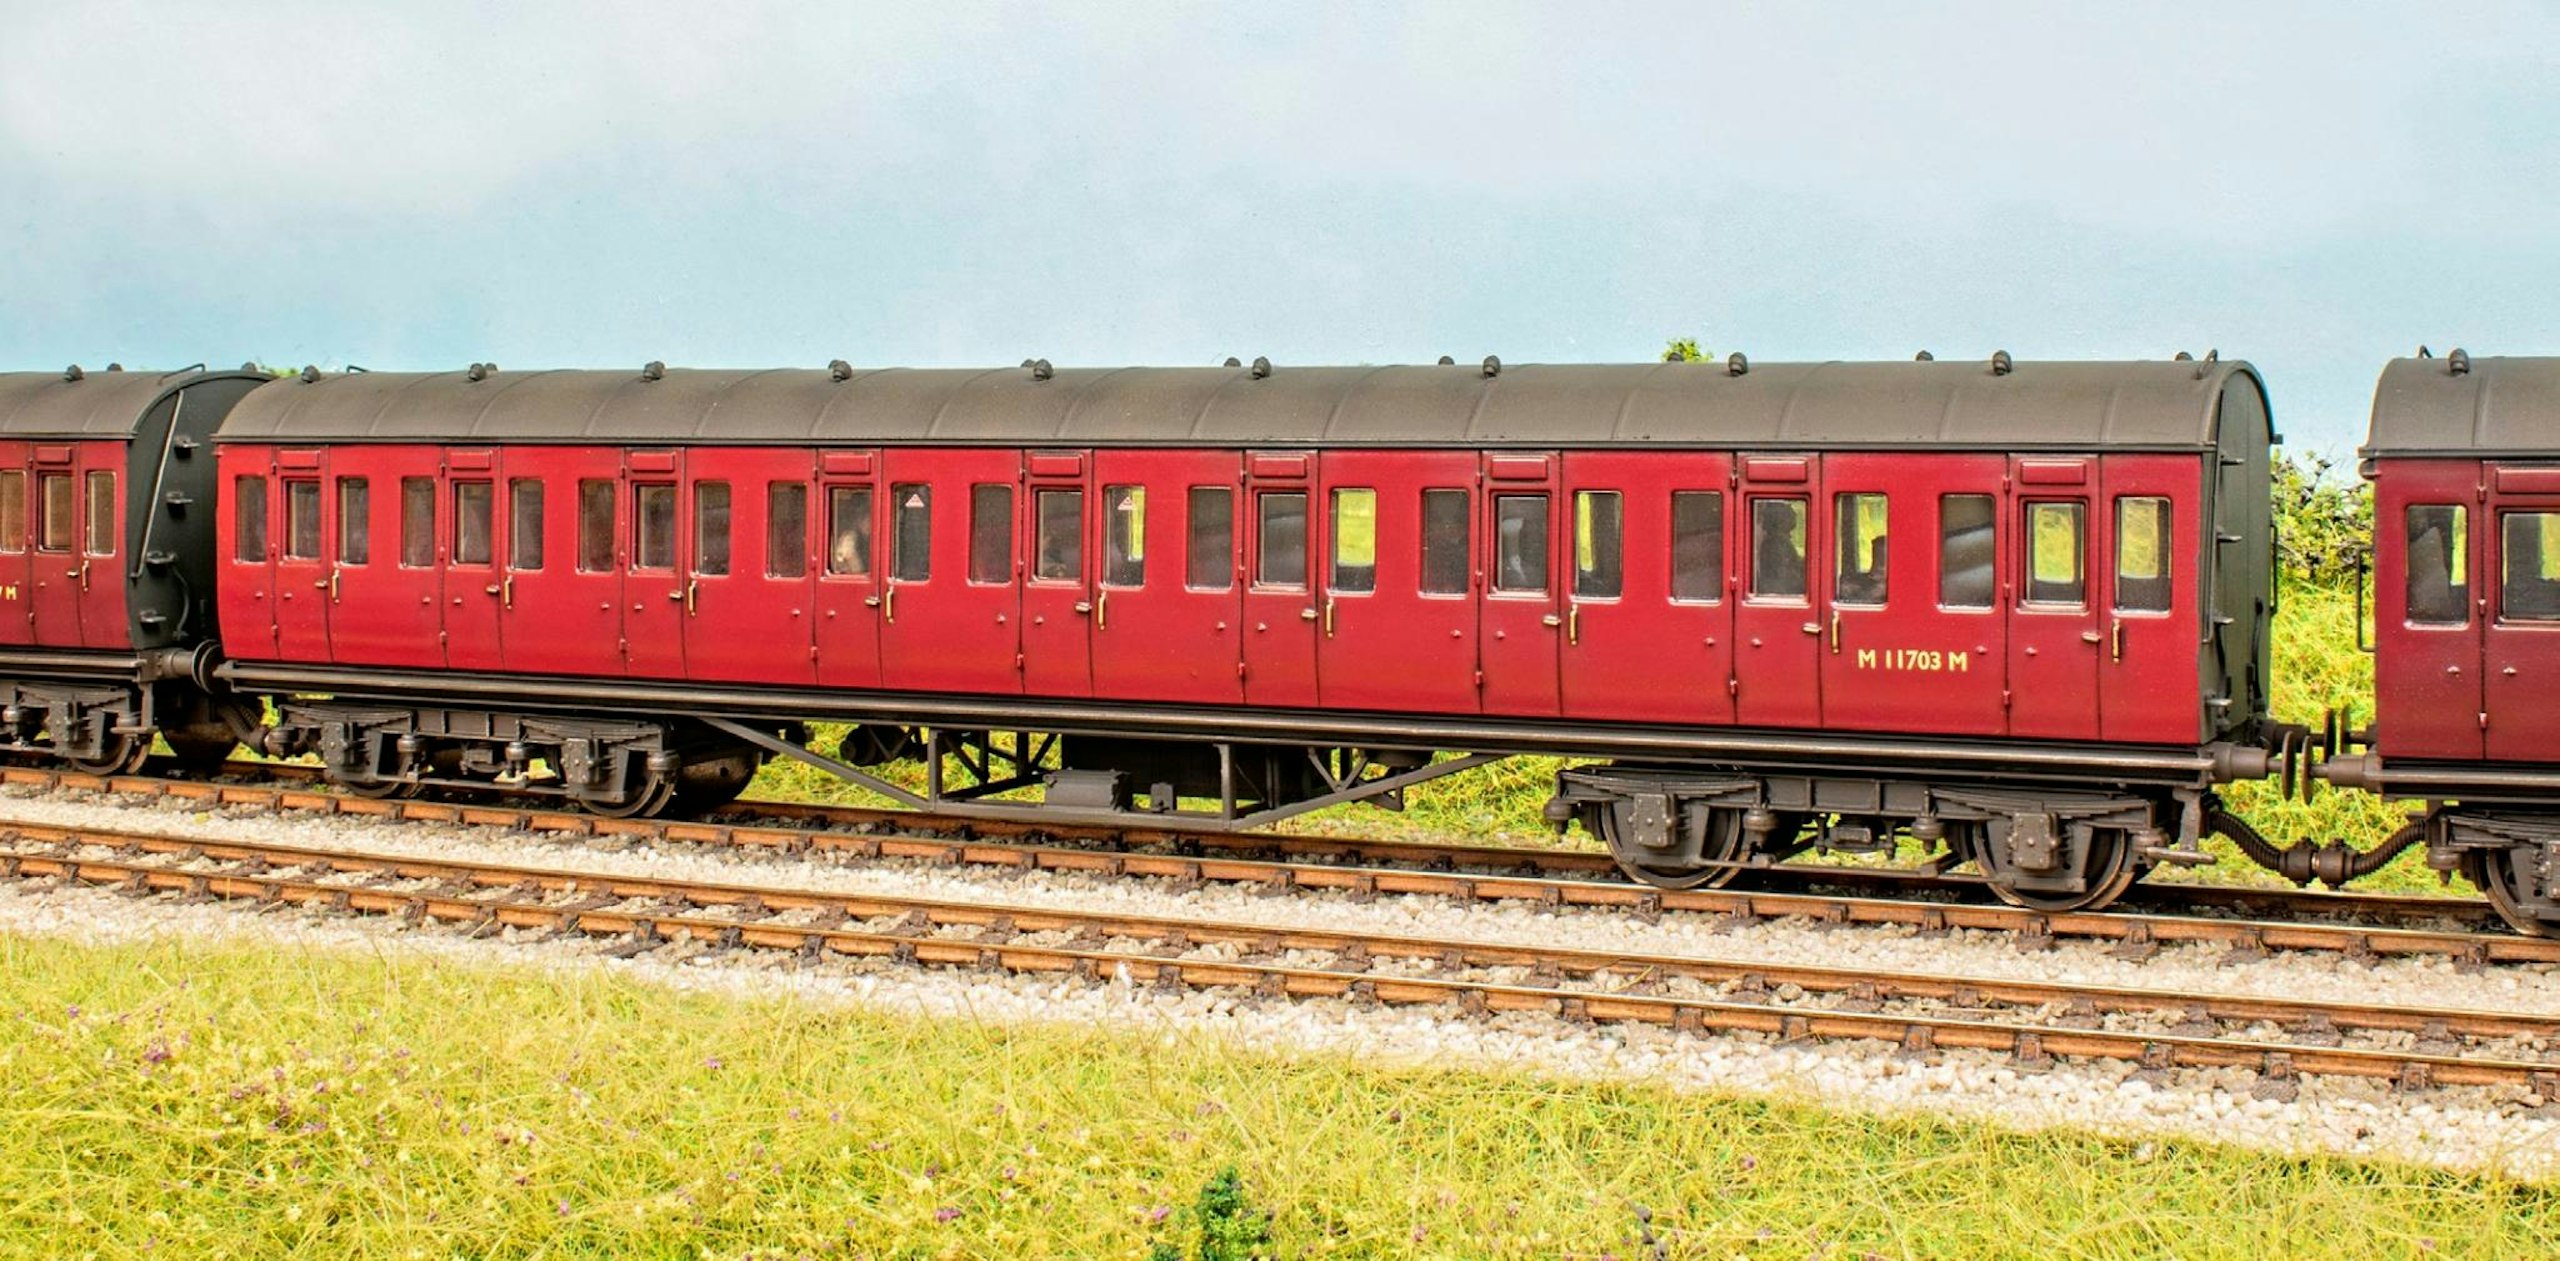
Offering a slight contrast to its maroon neighbours, M11703M wears the earlier BR carmine livery.
INSIDE MATTERS
A few Train-Tech LED lighting units were installed to the rake of carriages, which are powered by small button cell batteries and feature motion-sensitive switches, so no wiring is required. Simply fix to the inside of the roof with double-sided sticky pads or Black Tack.
The lighting switches itself on when the carriages begin to move and powers off after being still for a few minutes. I chose a pack with traditional ‘warm’ lighting, although, in hindsight, the strip doesn’t feature enough LEDs to illuminate all of the compartments – they’re better for open carriages – so I may replace them in future.
As for the passengers, a mix of Preiser ‘HO’ scale plastic and Modelu ‘OO’ 3D-printed seated figures had to be painted individually before installation. This is not one of my favourite tasks these days, and it reminded me that I’m overdue for an eye test, but it was worth it in the end.
As I noted some traces of light oil in the axle bearings when I removed the wheels for weathering (they were de-greased with Deluxe Materials Track Magic before the paint was applied), I duly added a few drops of fresh oil during re-assembly to ensure smooth running.
Cleaning the wheel treads and pinpoint axle tips of any paint was an important step.
The completed branch line train has turned out well, enhancing the pleasing appearance of the Hornby models and providing a convincing load for my BR Standard ‘2MT’. It also provided a hugely rewarding project.
What you will need
SHOPPING LIST
● Train-Tech carriage lighting units
● Preiser ‘HO’ seated passengers (unpainted)
● Tiny Signs printed carriage posters
● Track Magic cleaning fluid • Glue n Glaze adhesive
Availability: Gaugemaster
Web: www.gaugemasterretail.com
● Seated passengers
Availability: Modelu
Web: www.modelu3d.co.uk
● LifeColor acrylic paints, dry pigments, airbrushes and equipment
Availability: The Airbrush Company
Web: www.airbrushes.com
● Mr Hobby clear gloss aerosol
● Tamiya acrylic paints, thinners and masking tapes
● MIG enamel weathering washes
● AMMO Dio Drybrush paint (Gun Metal), paintbrushes
Availability: Scale Model Shop
Web: www.scalemodelshop.co.uk
TOOLS
● Modelling knife and spare blades
● Tweezers
● Pliers
● Miniature screwdrivers
● Paintbrushes
● Cotton swabs
● Airbrush and equipment
STEP BY STEP
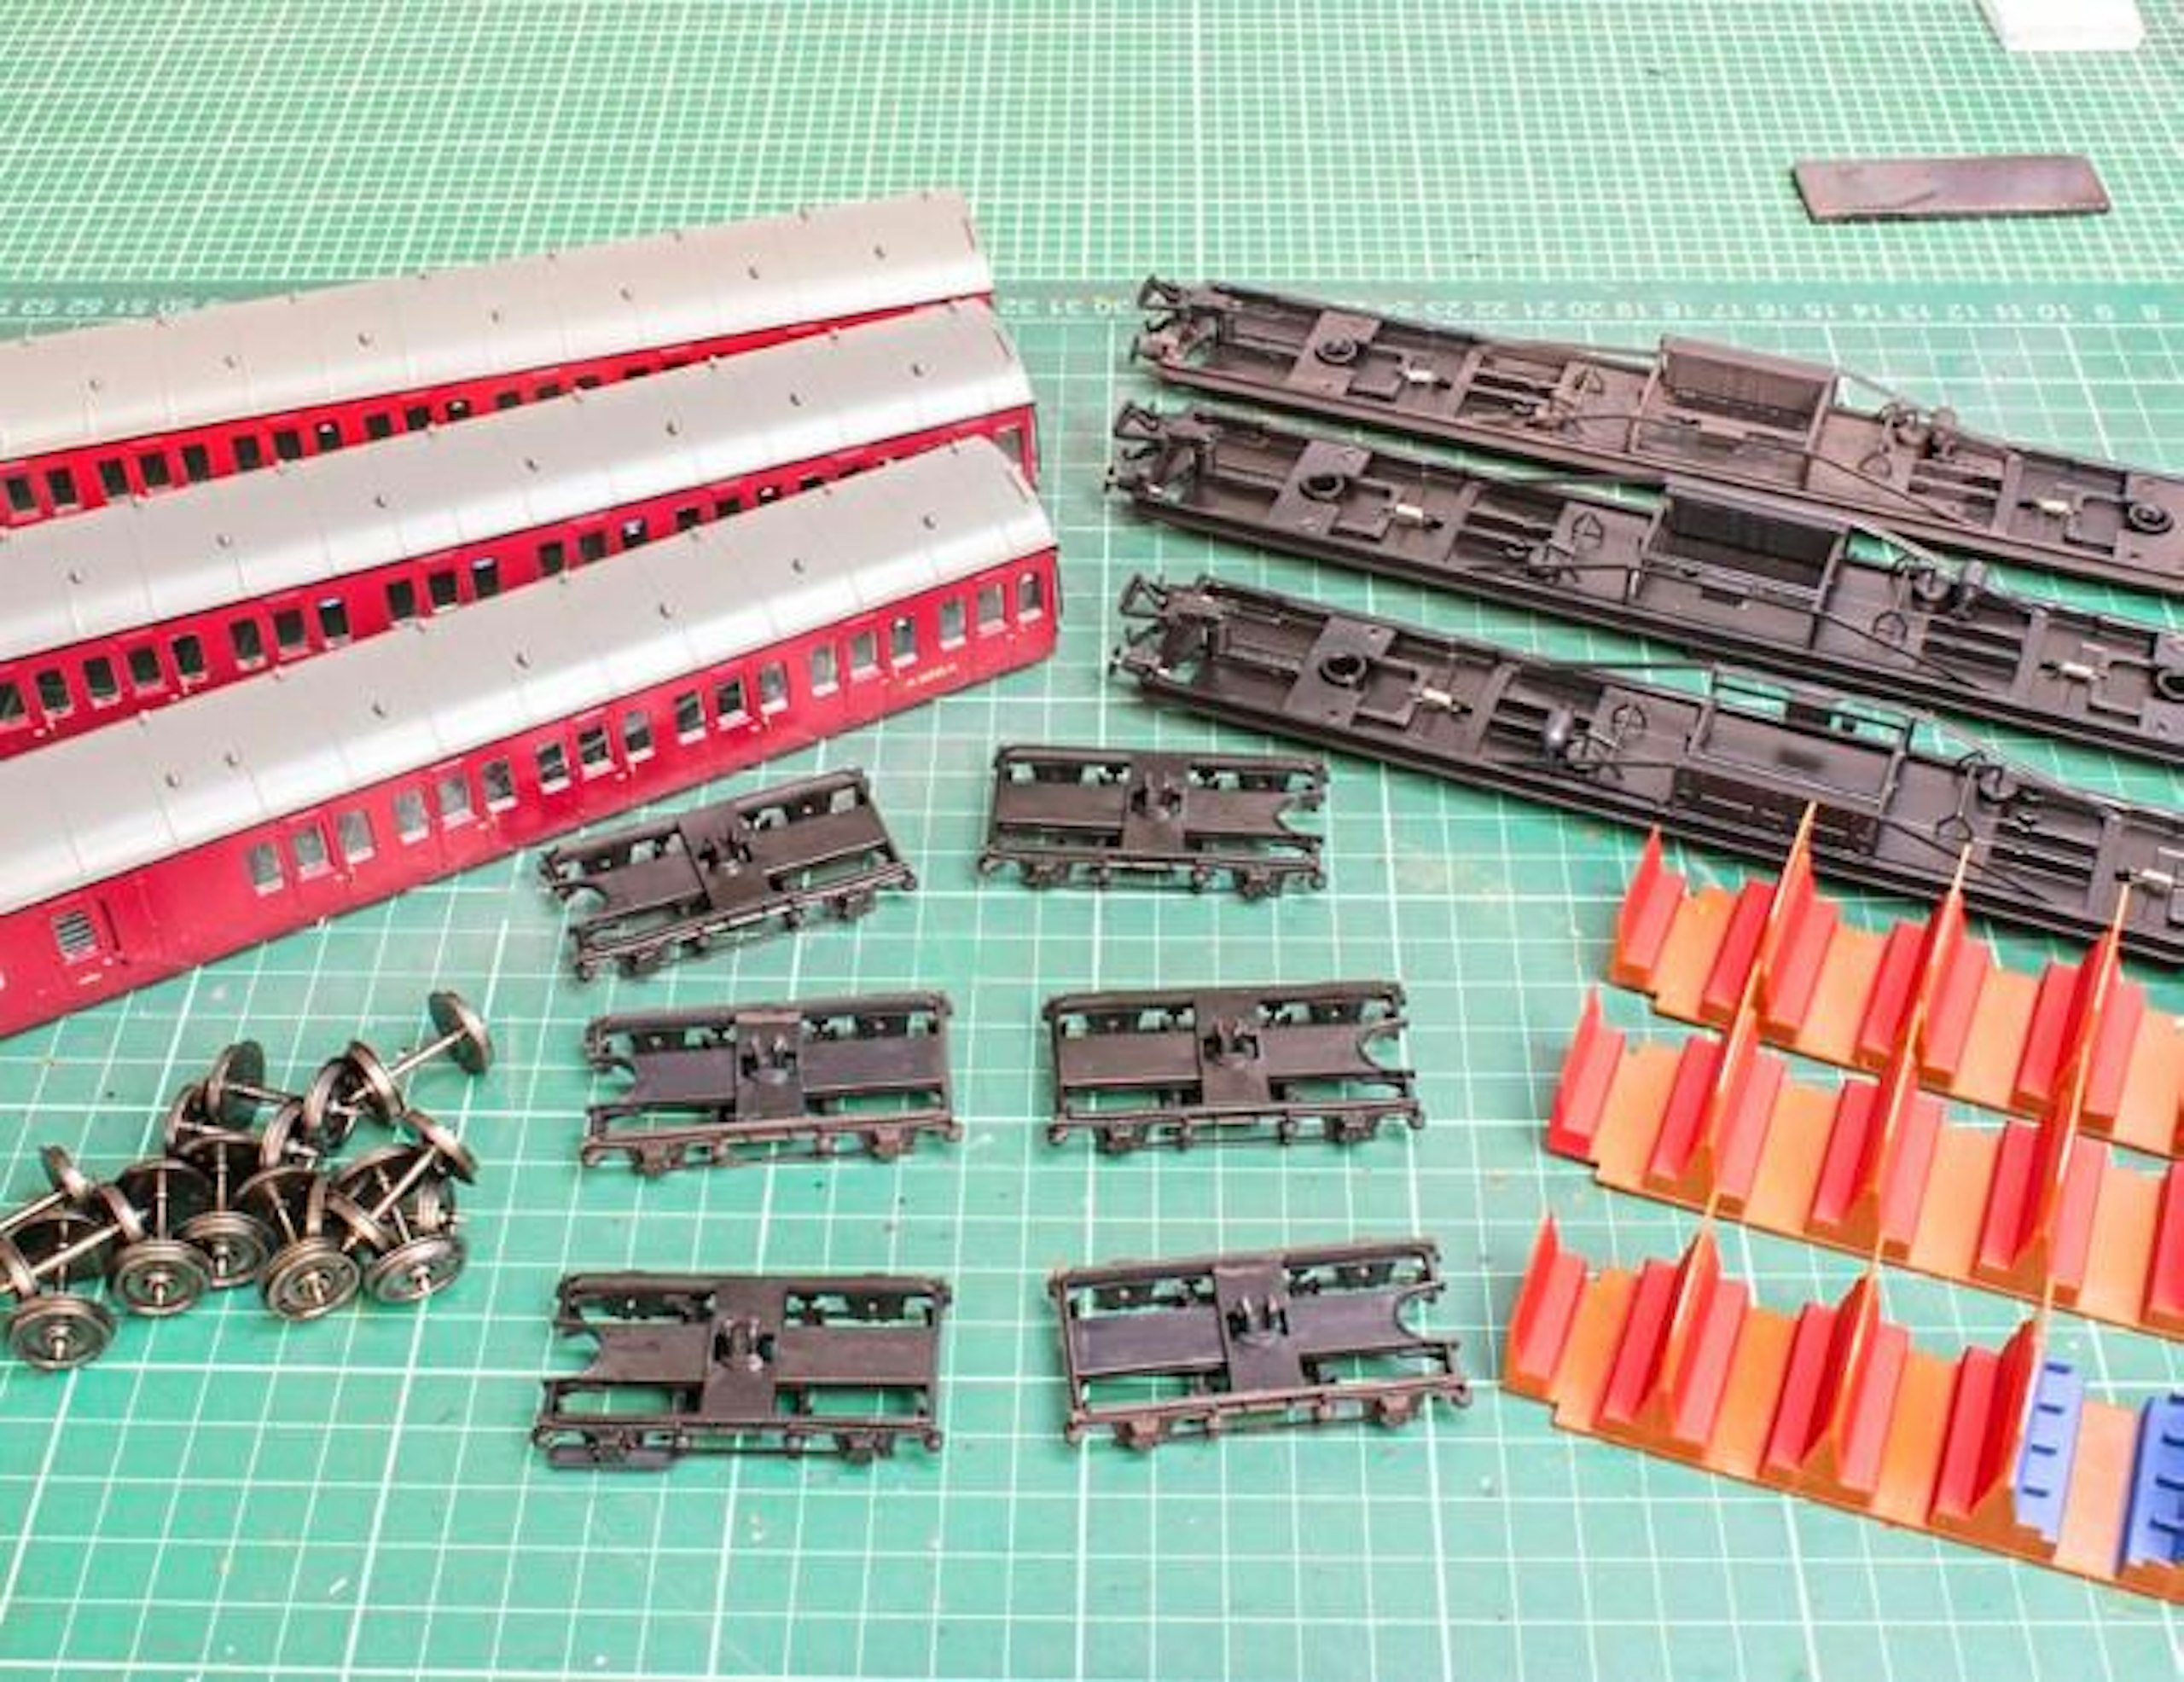
1 The Hornby coaches are tricky to dismantle. There are small clear plastic retaining tabs at each corner, plus large central locating tabs. The bogies unclip with the aid of pliers.
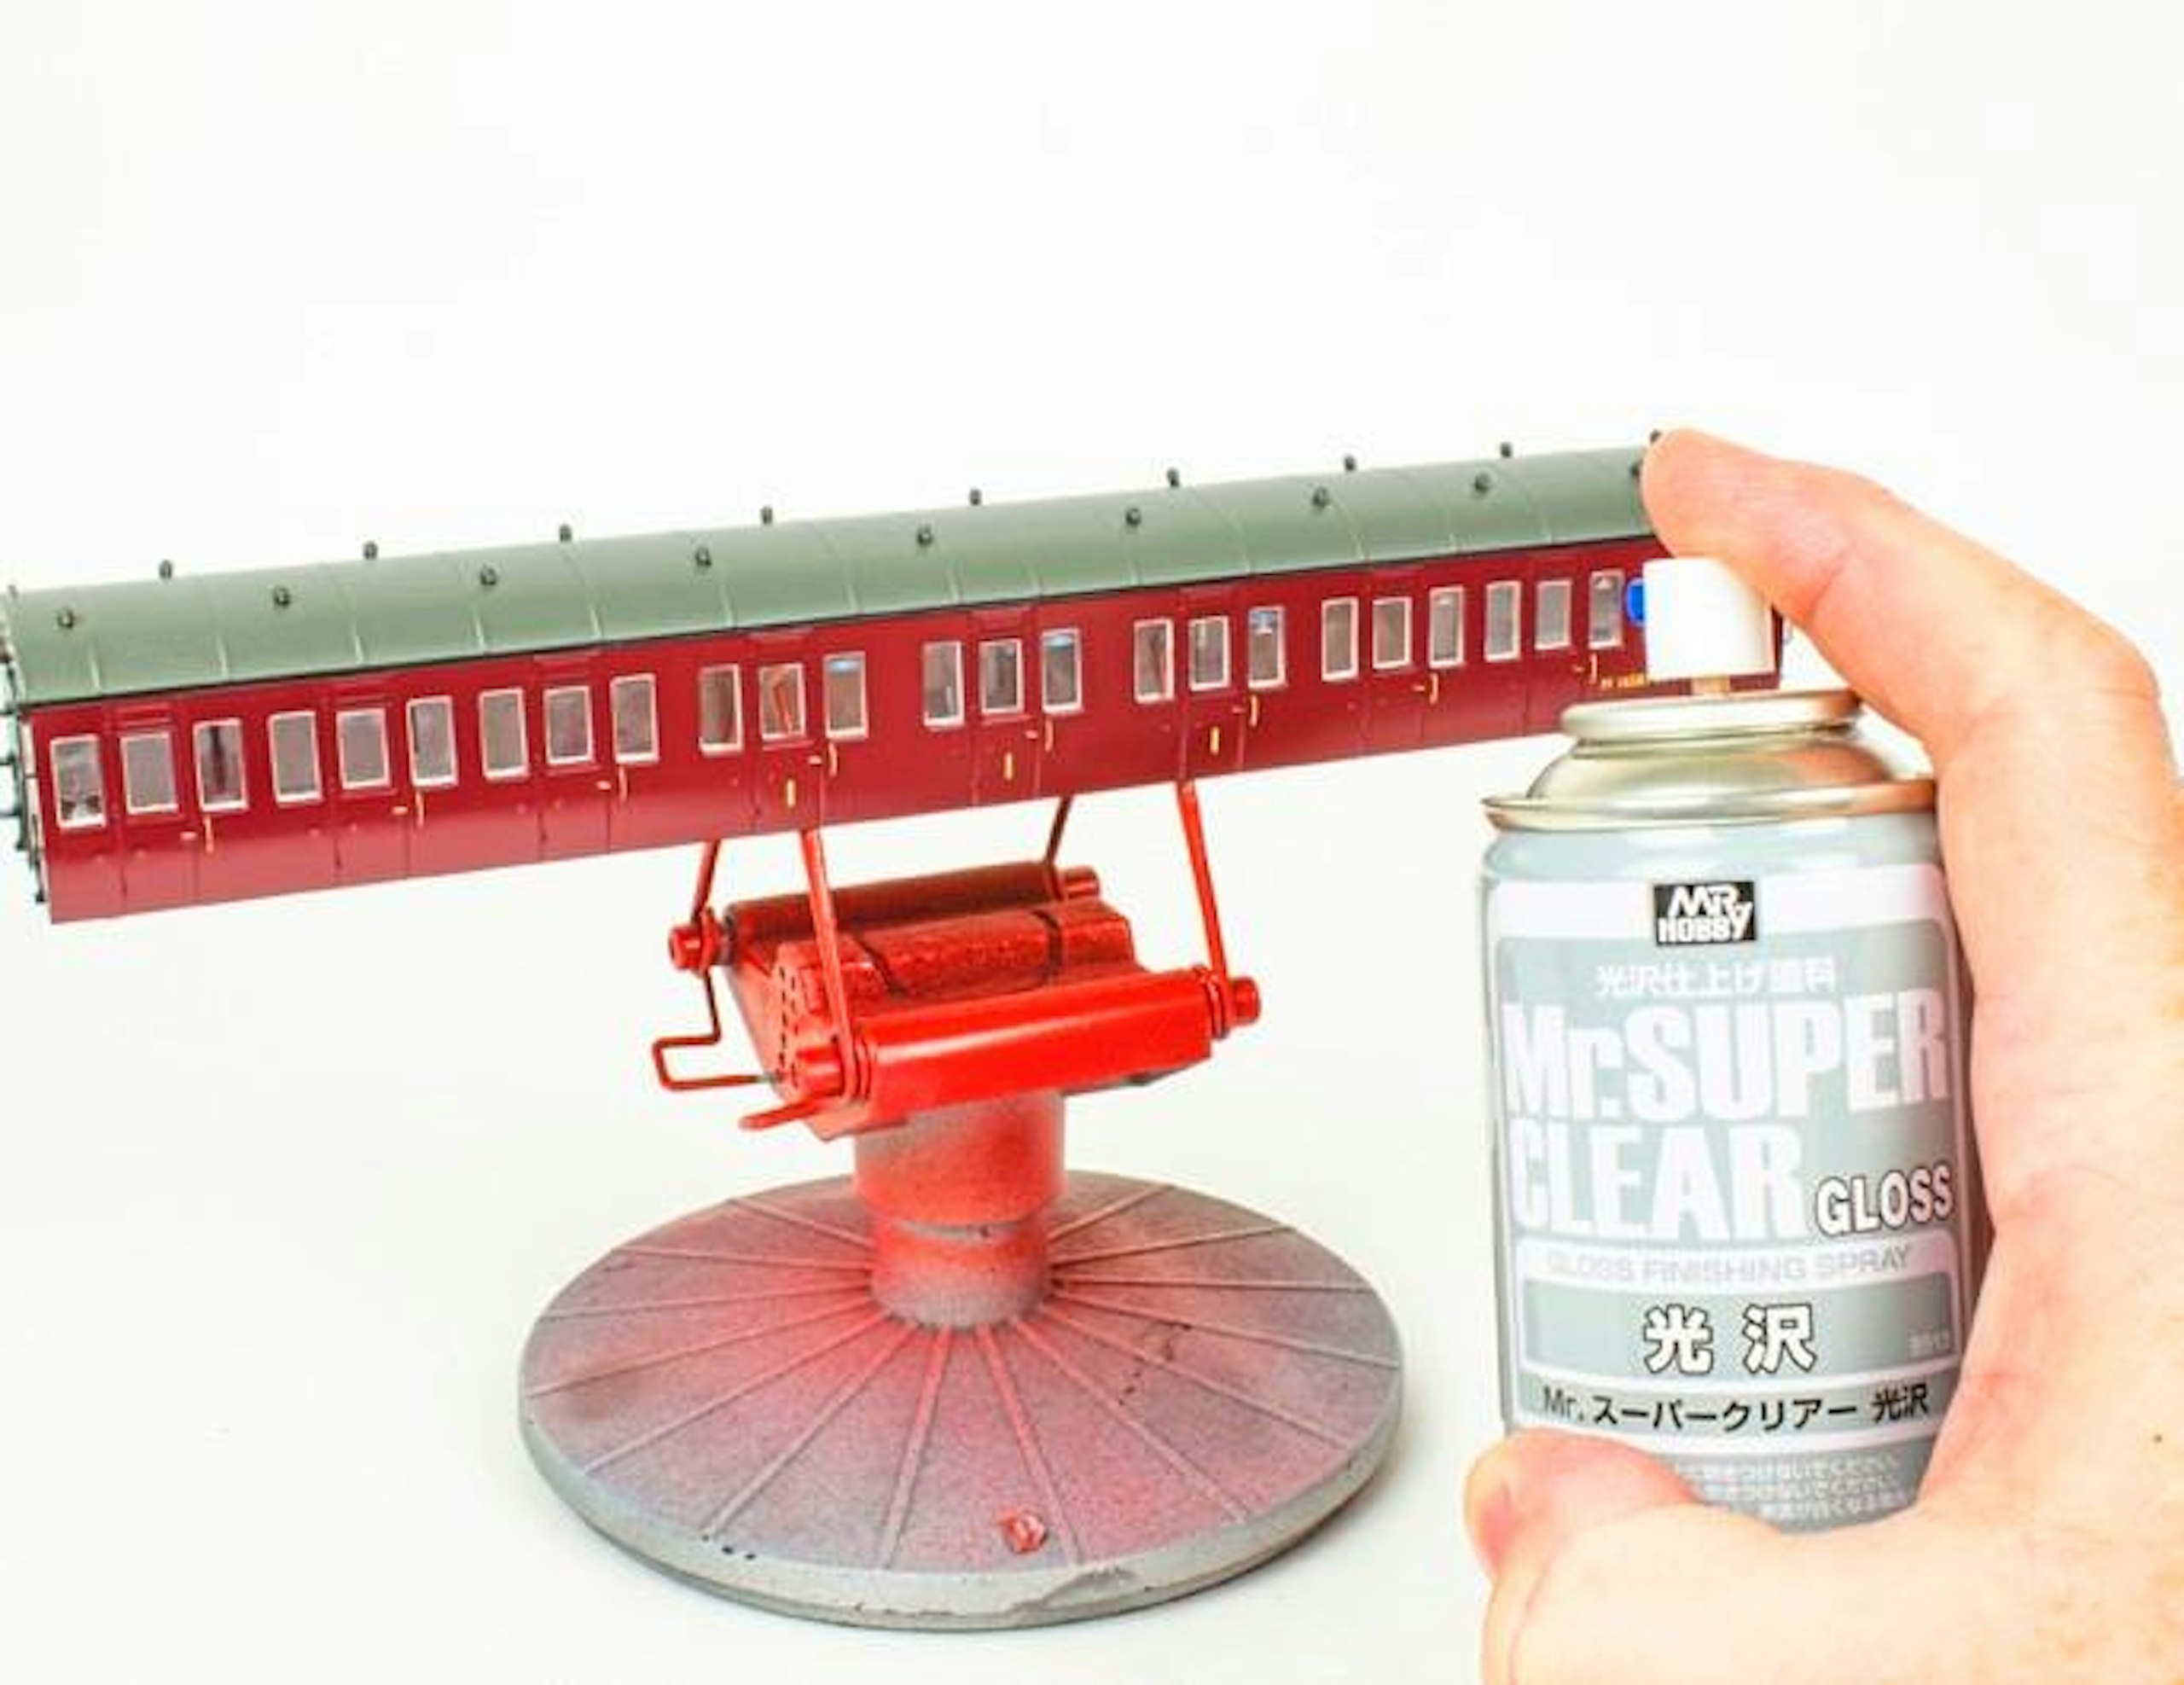
2 After cleaning the body, the first job is to give the sides an overall coat of clear gloss. I used Mr Super Clear Gloss from Mr Hobby. I didn’t bother masking the glazing (see main text).
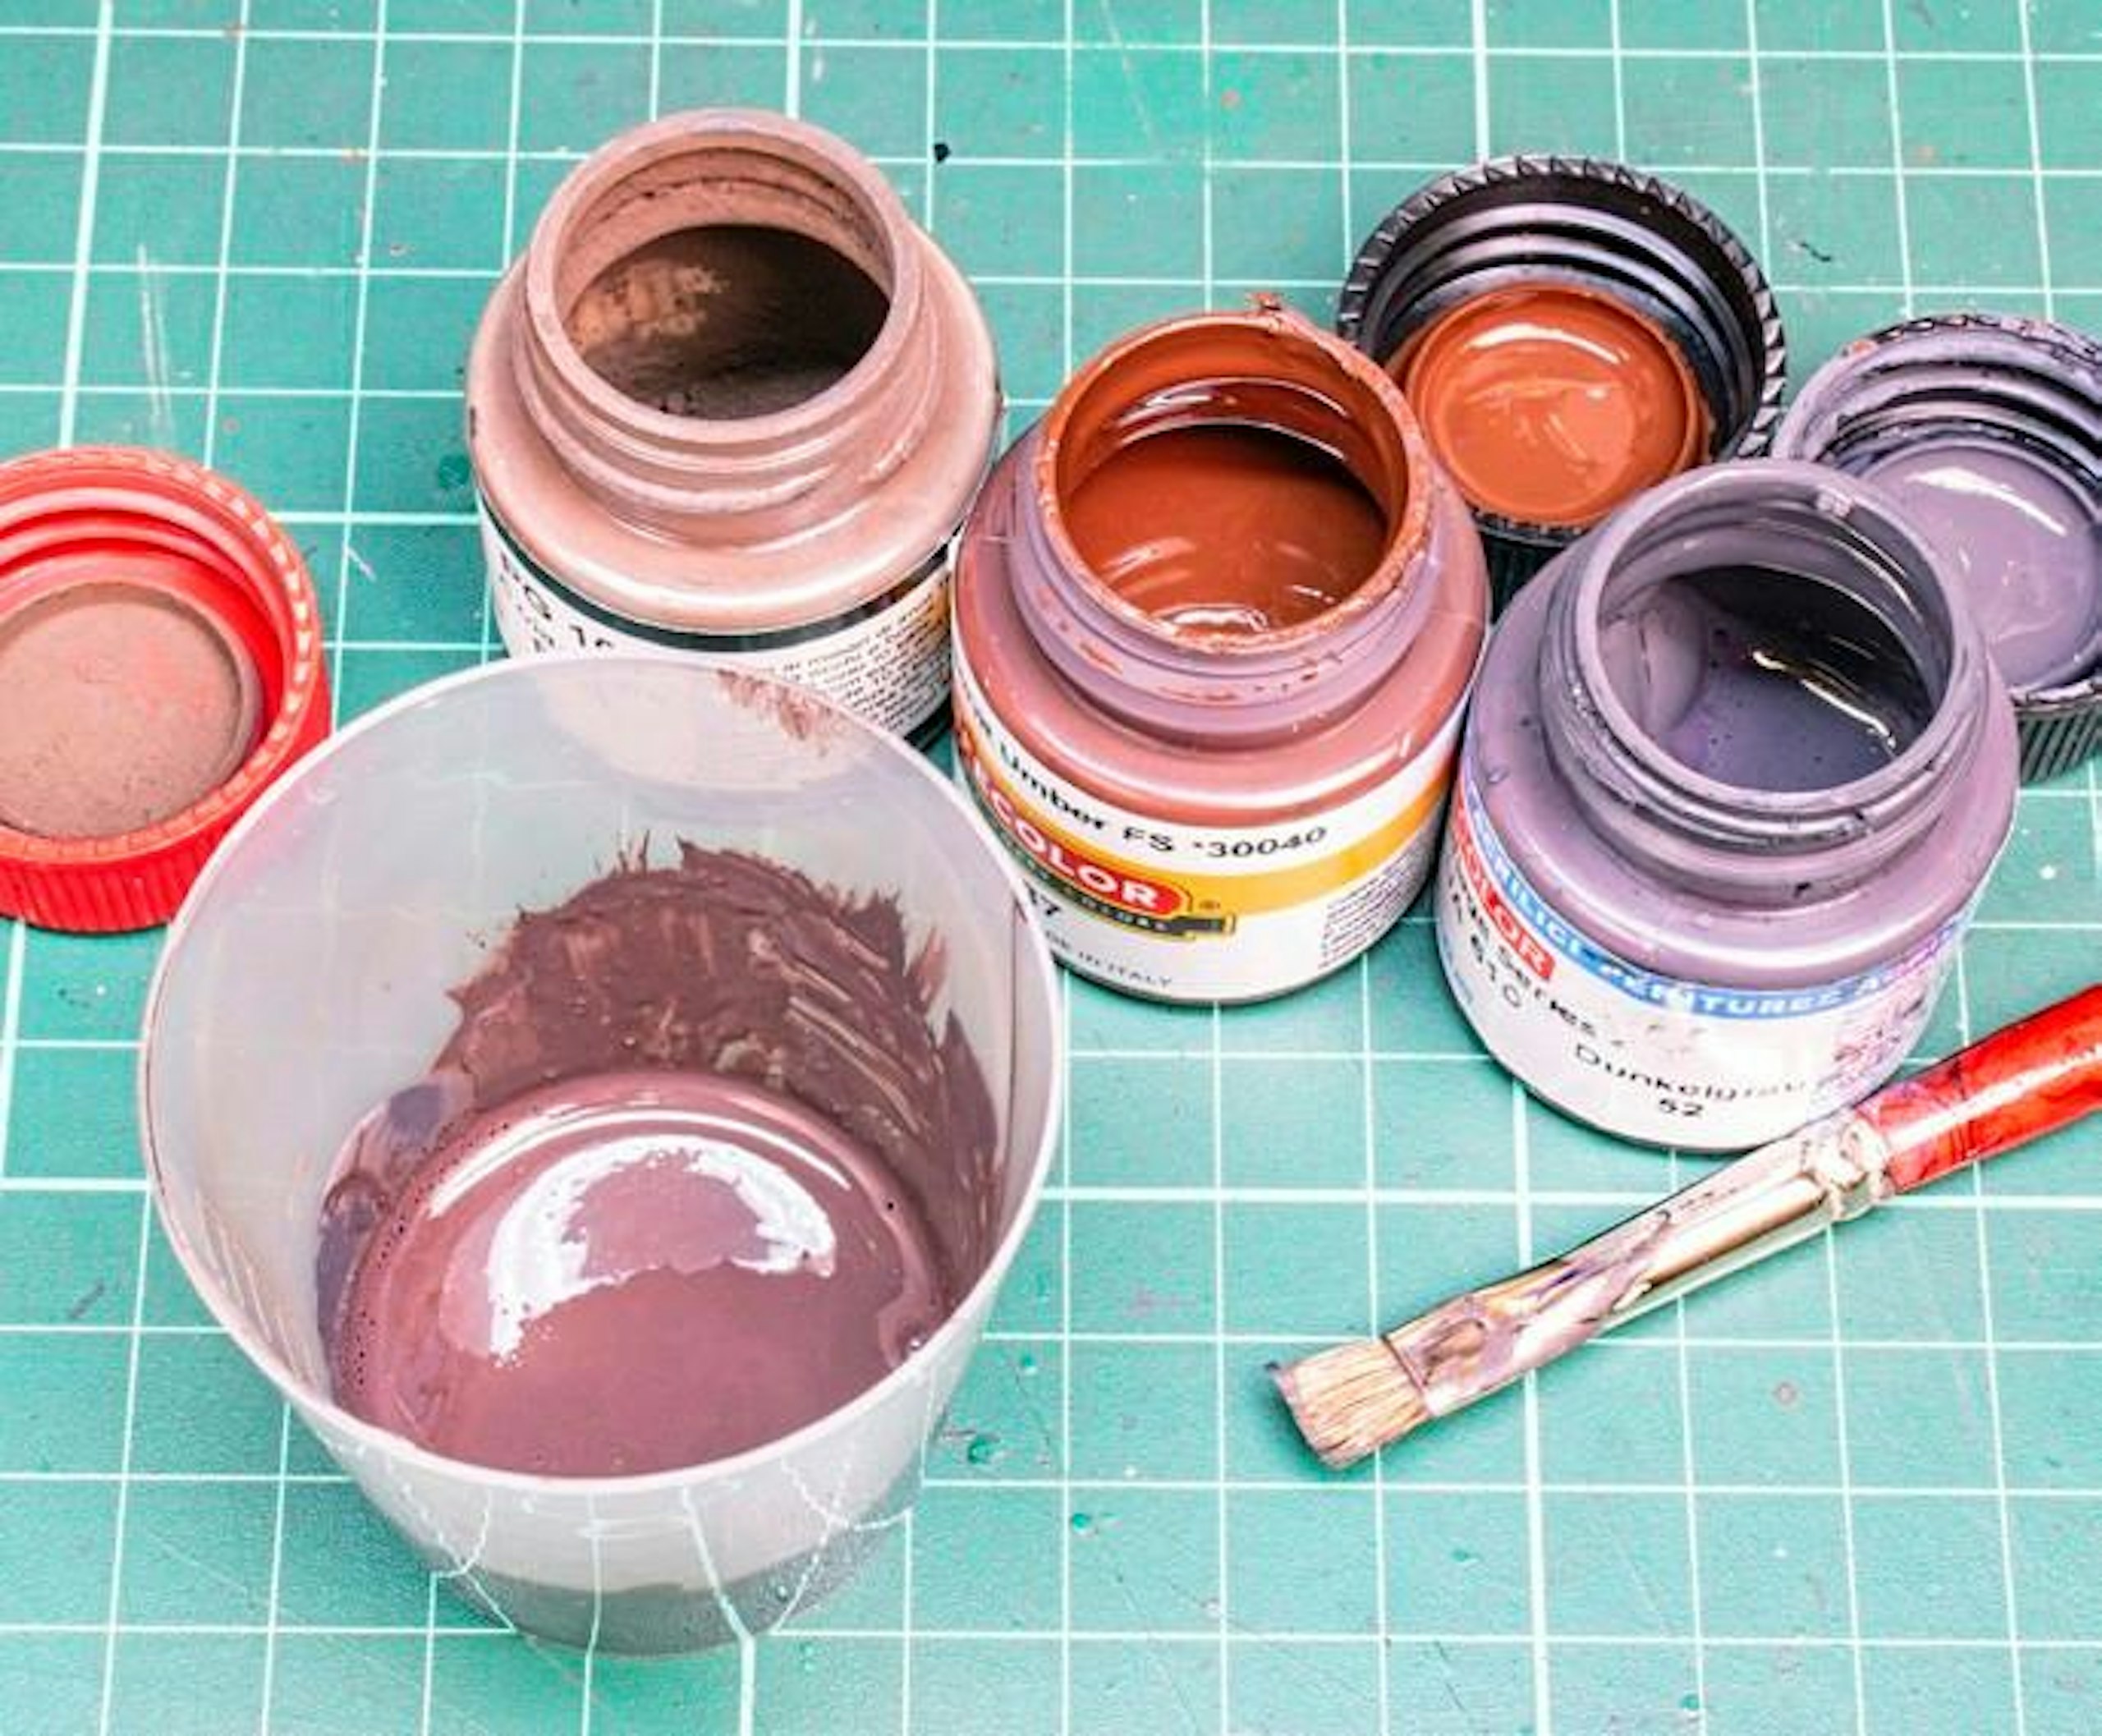
3 The bodyshells were left to dry. Meanwhile, I set to work on the chassis, blending dark grey and brown LifeColor acrylics with a dark brown shade of dry pigment.
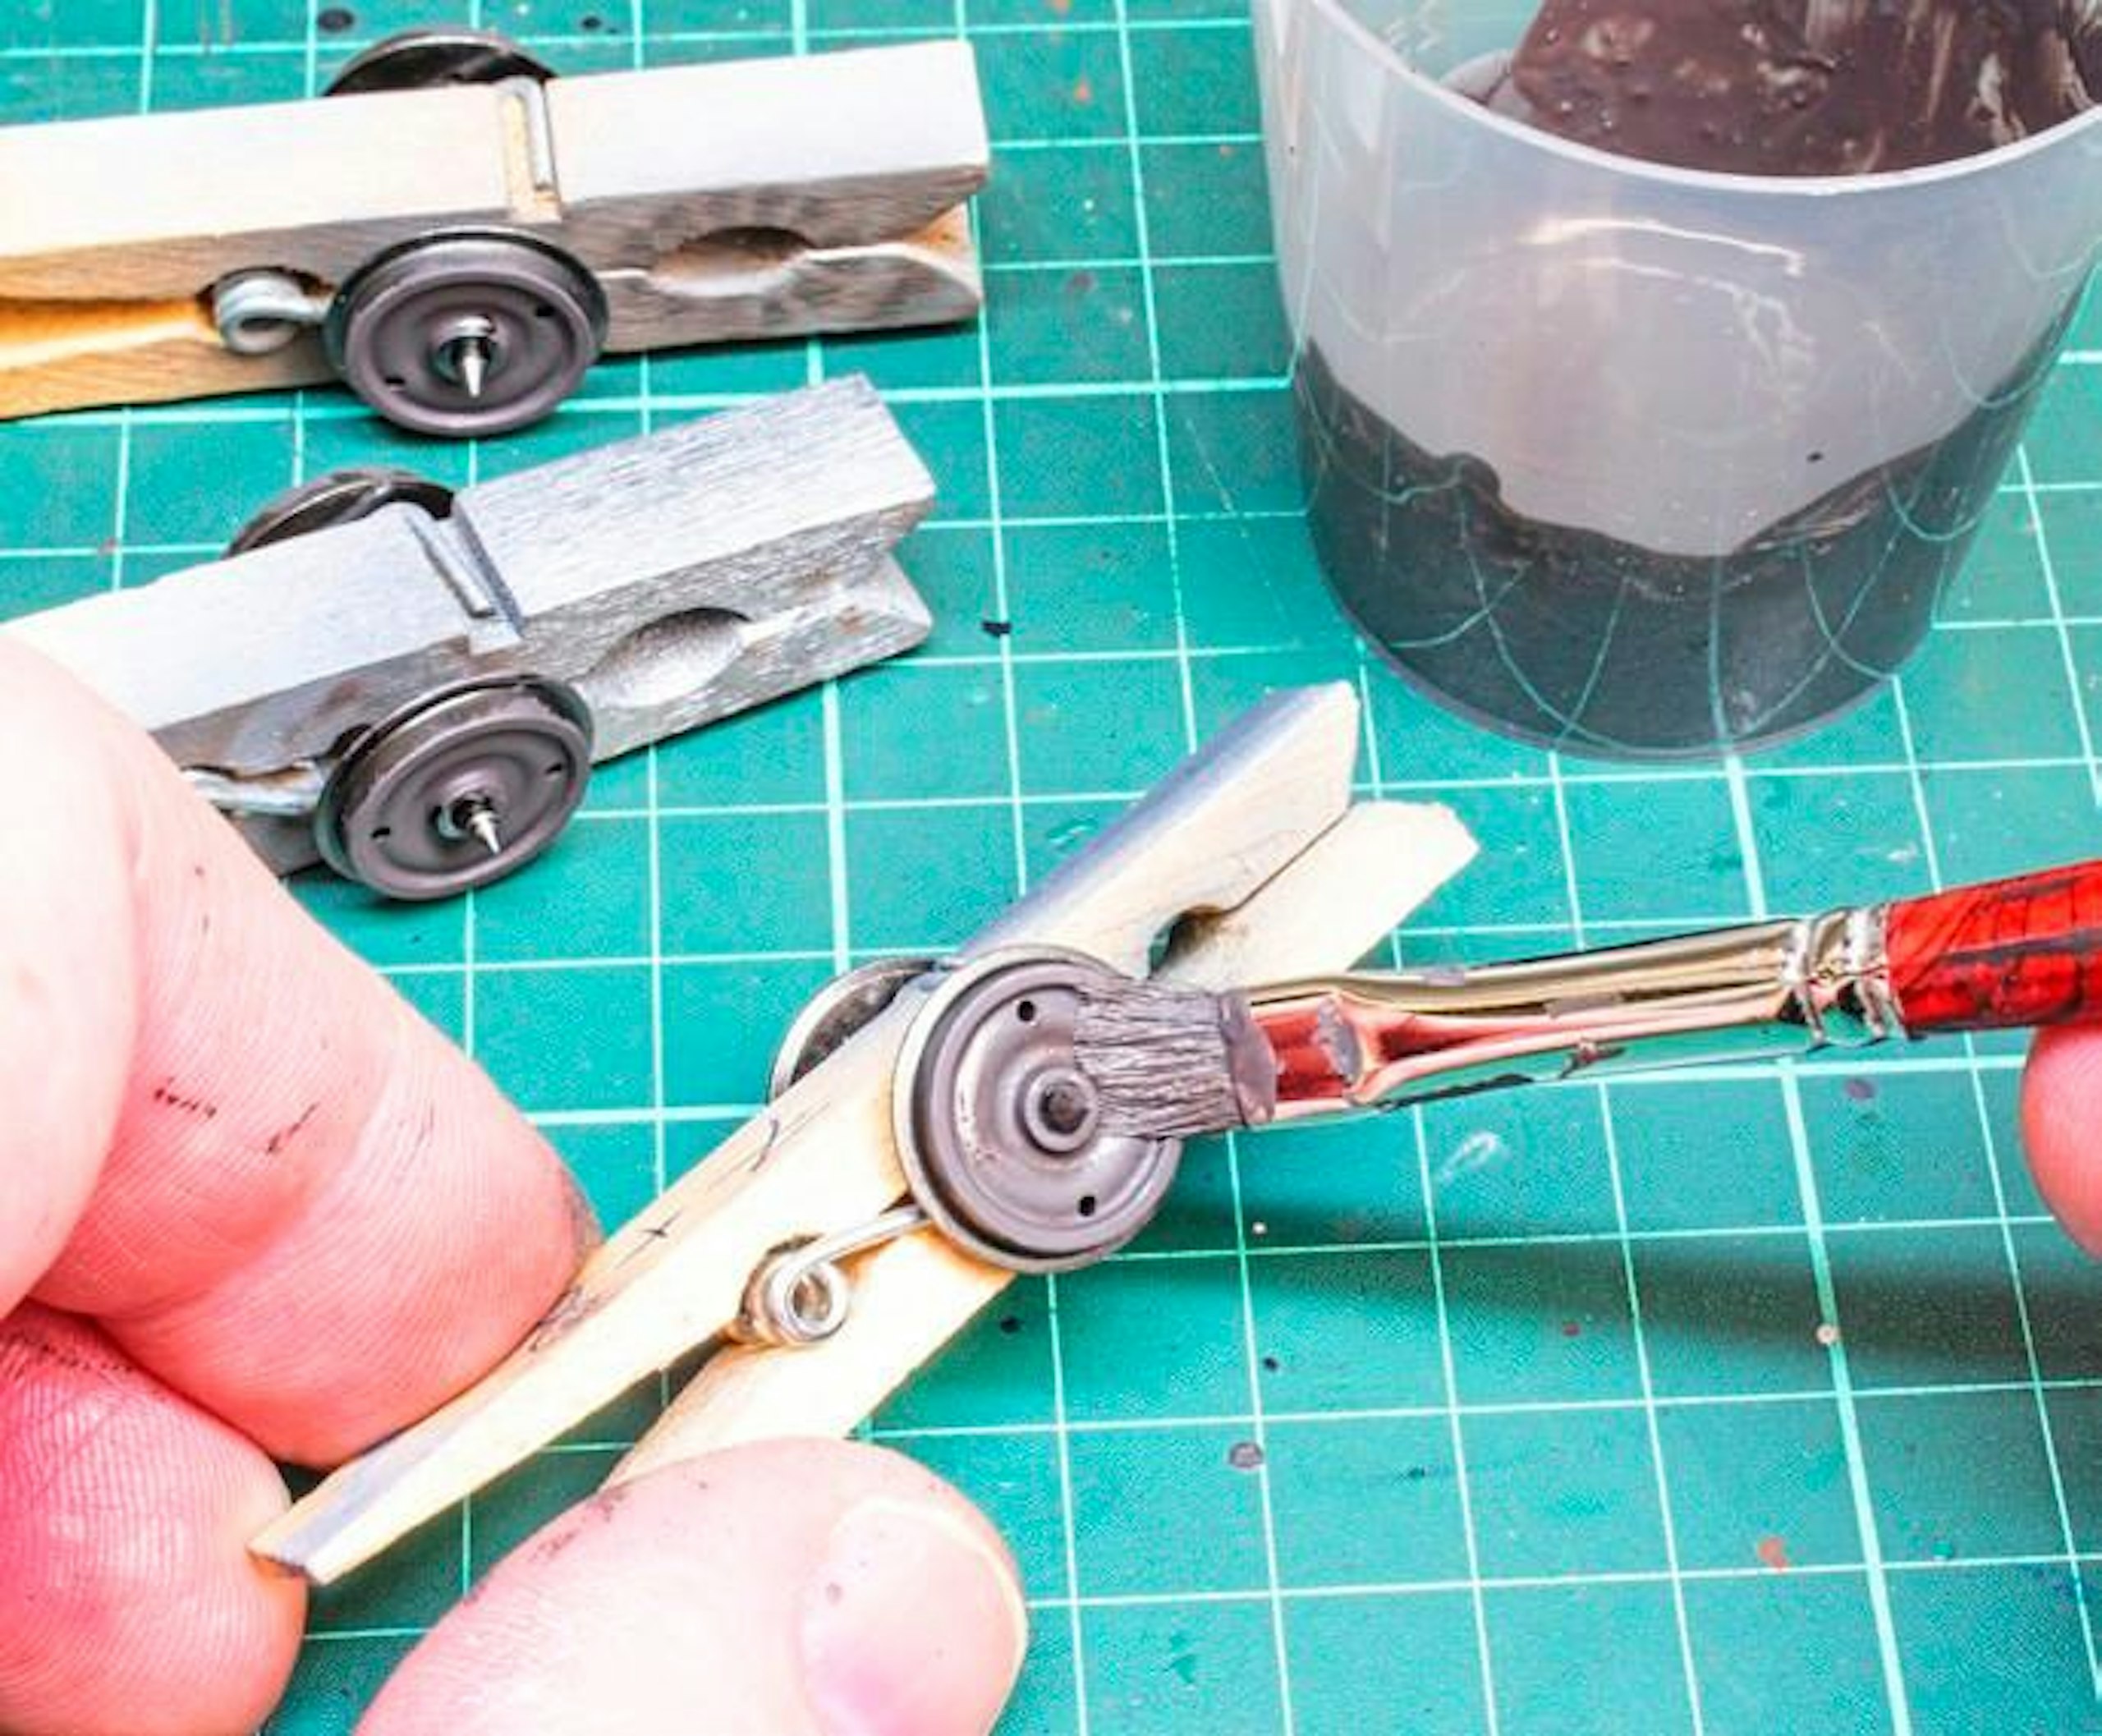
4 With the wheel sets held in clothes pegs, I dabbed the gritty paint onto the wheel faces with a flat brush. Built up over two coats, the stippling action imparted a random texture.
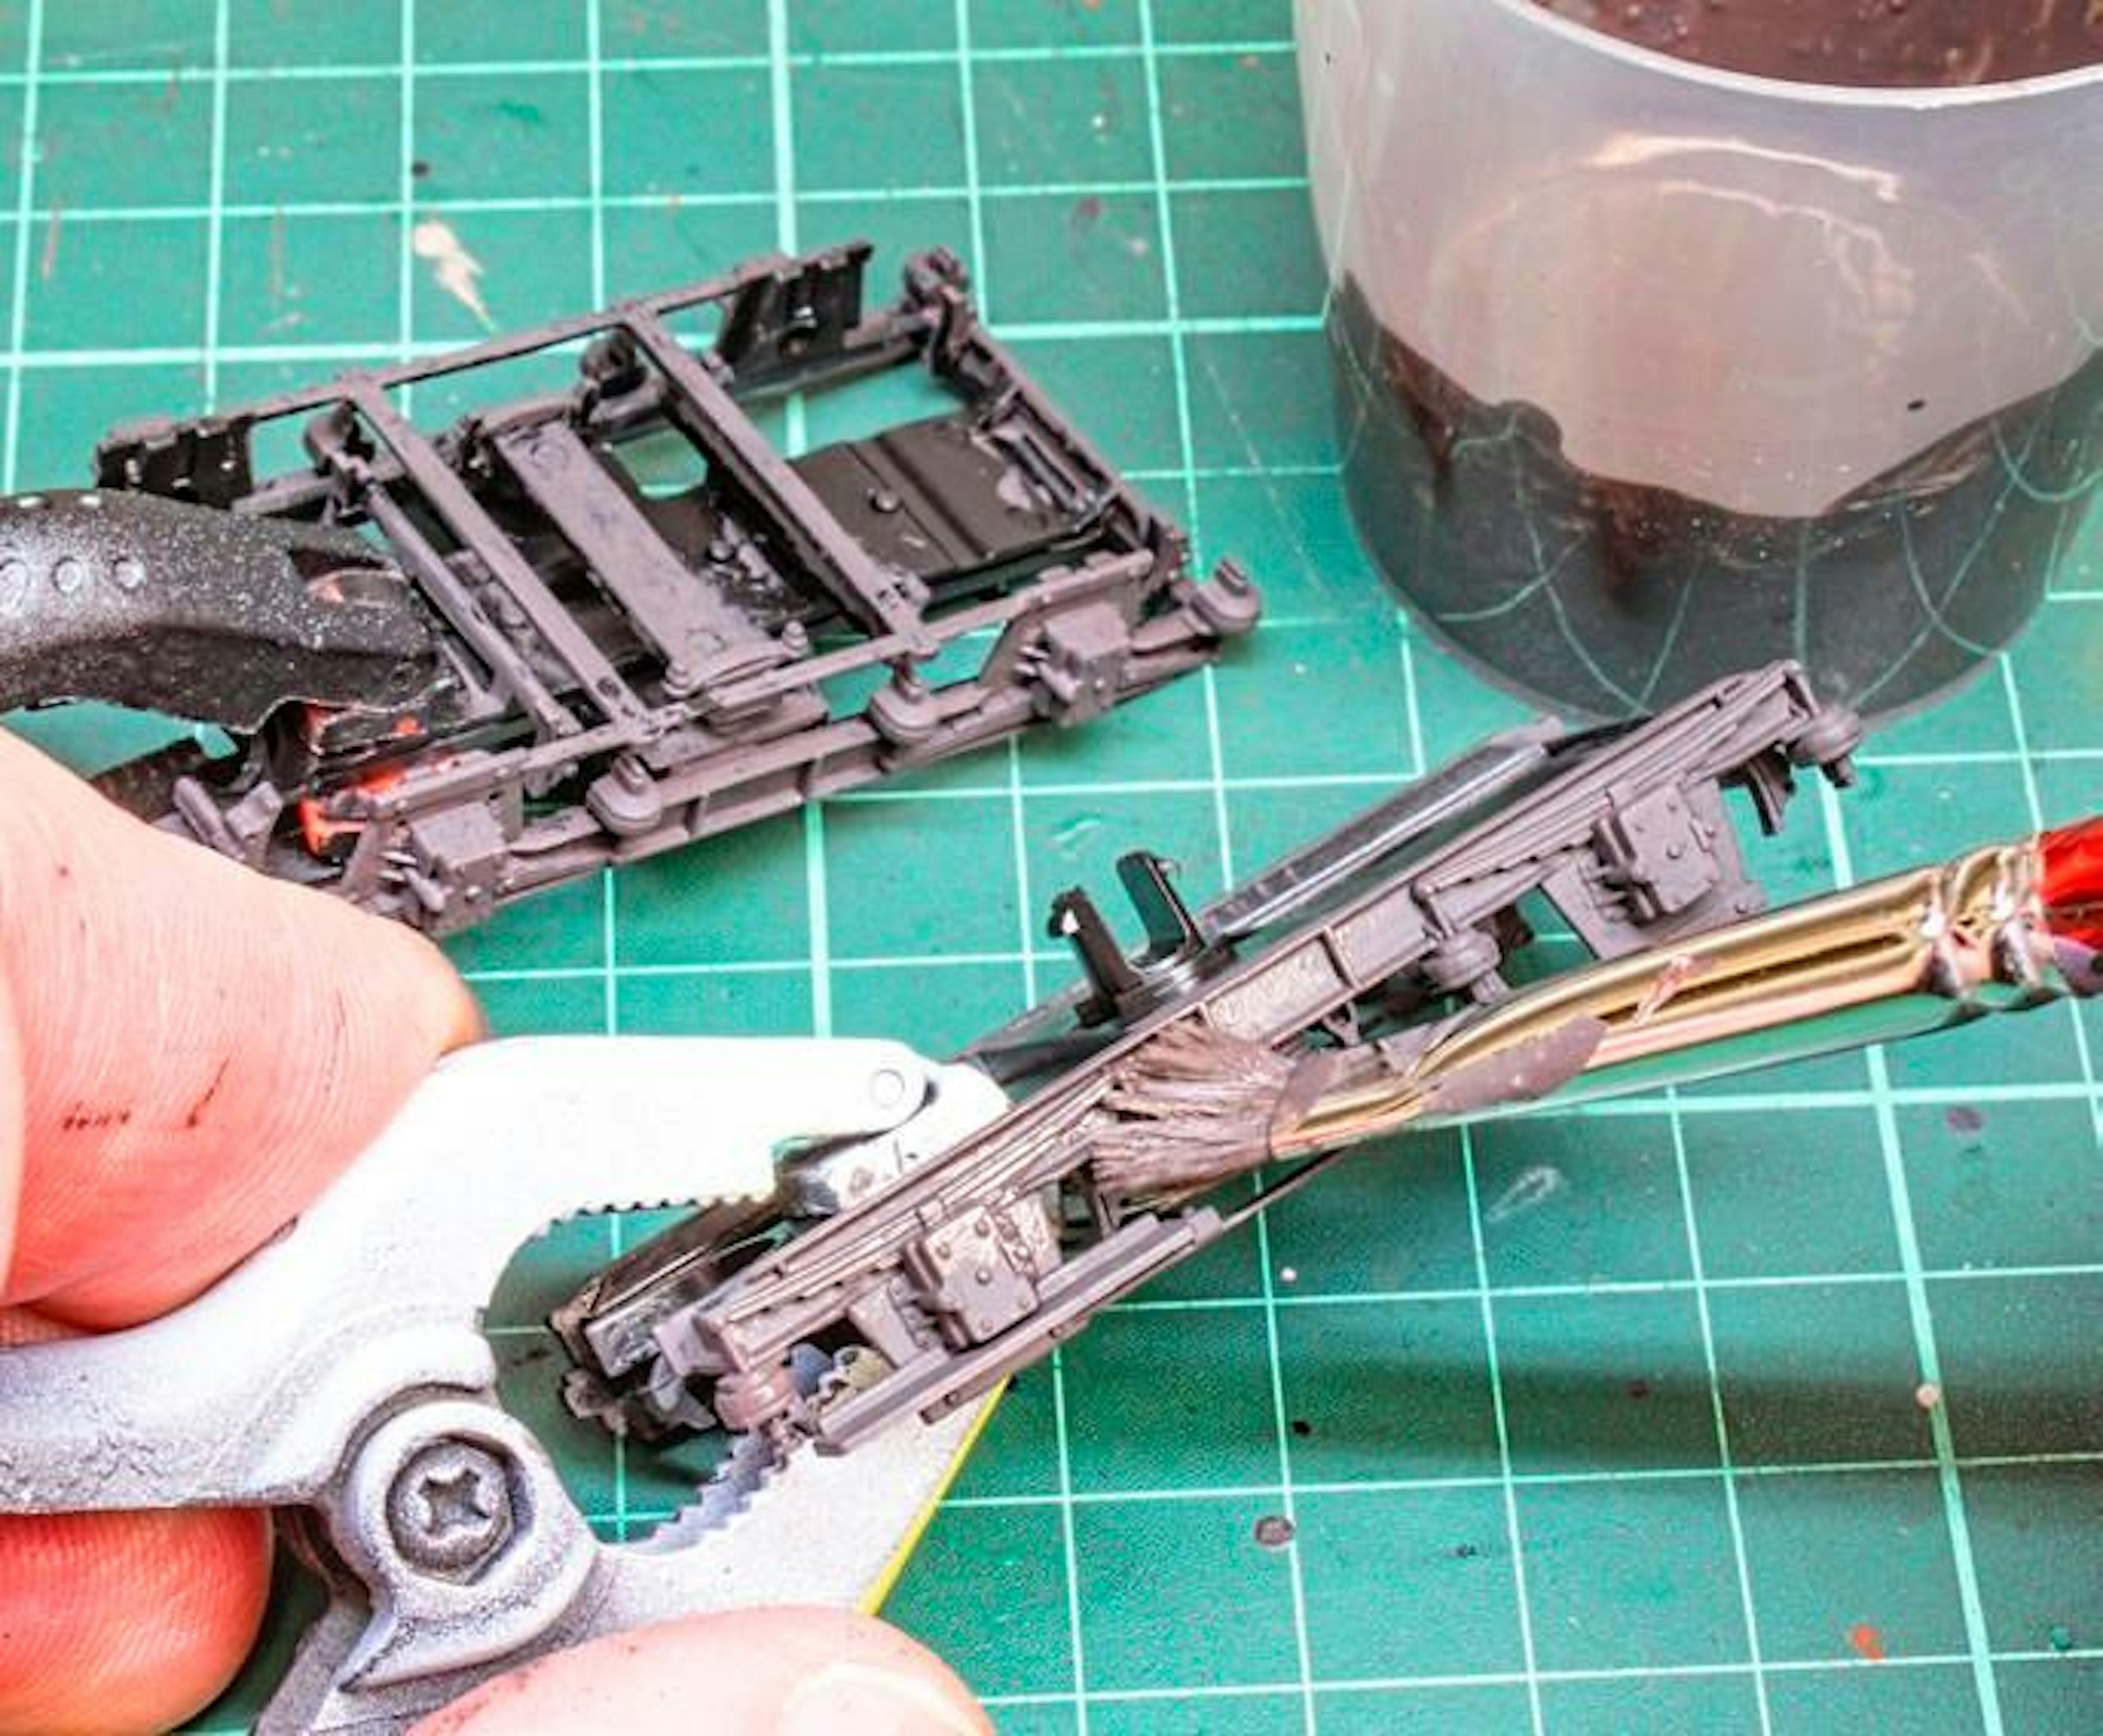
5 The same blend of paints and dry pigment was also stippled onto the bogie frames, working it into all the recessed areas, yet keeping it away from the pinpoint axle bearings.
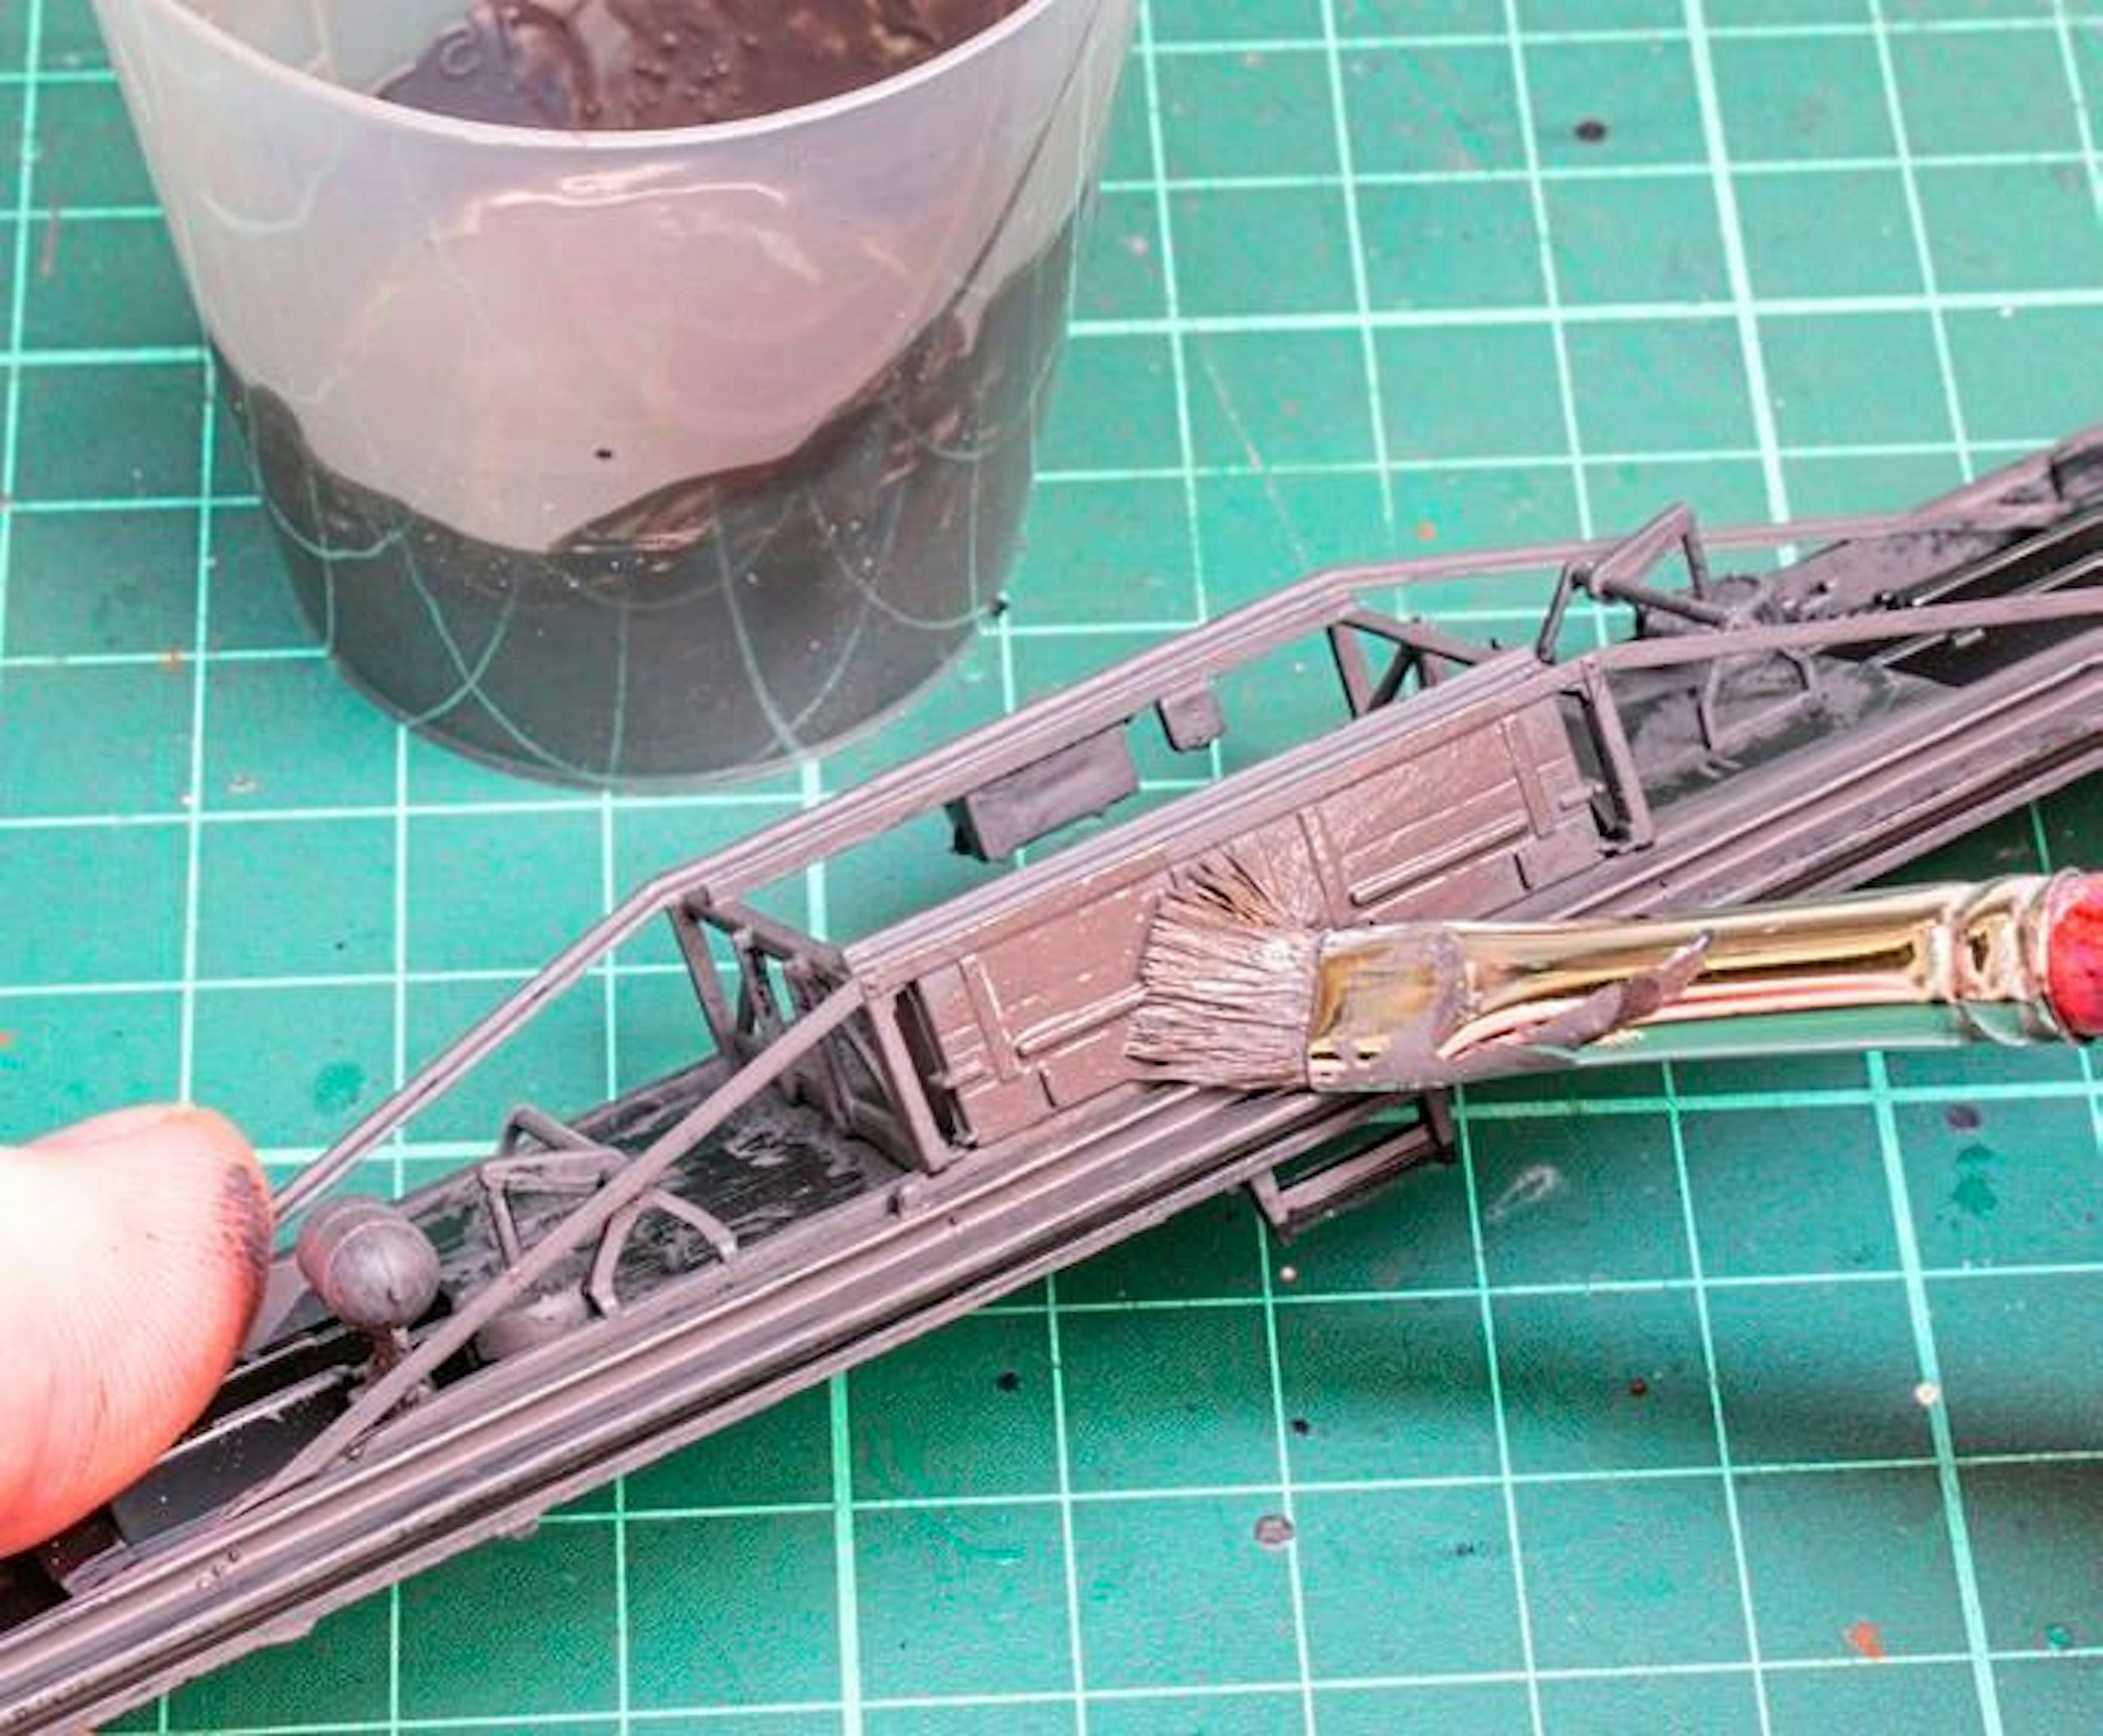
6 Work continued on the chassis frames. Again, I took care to work over all the details using a stippling action. The main purpose is to impart a textured coating.
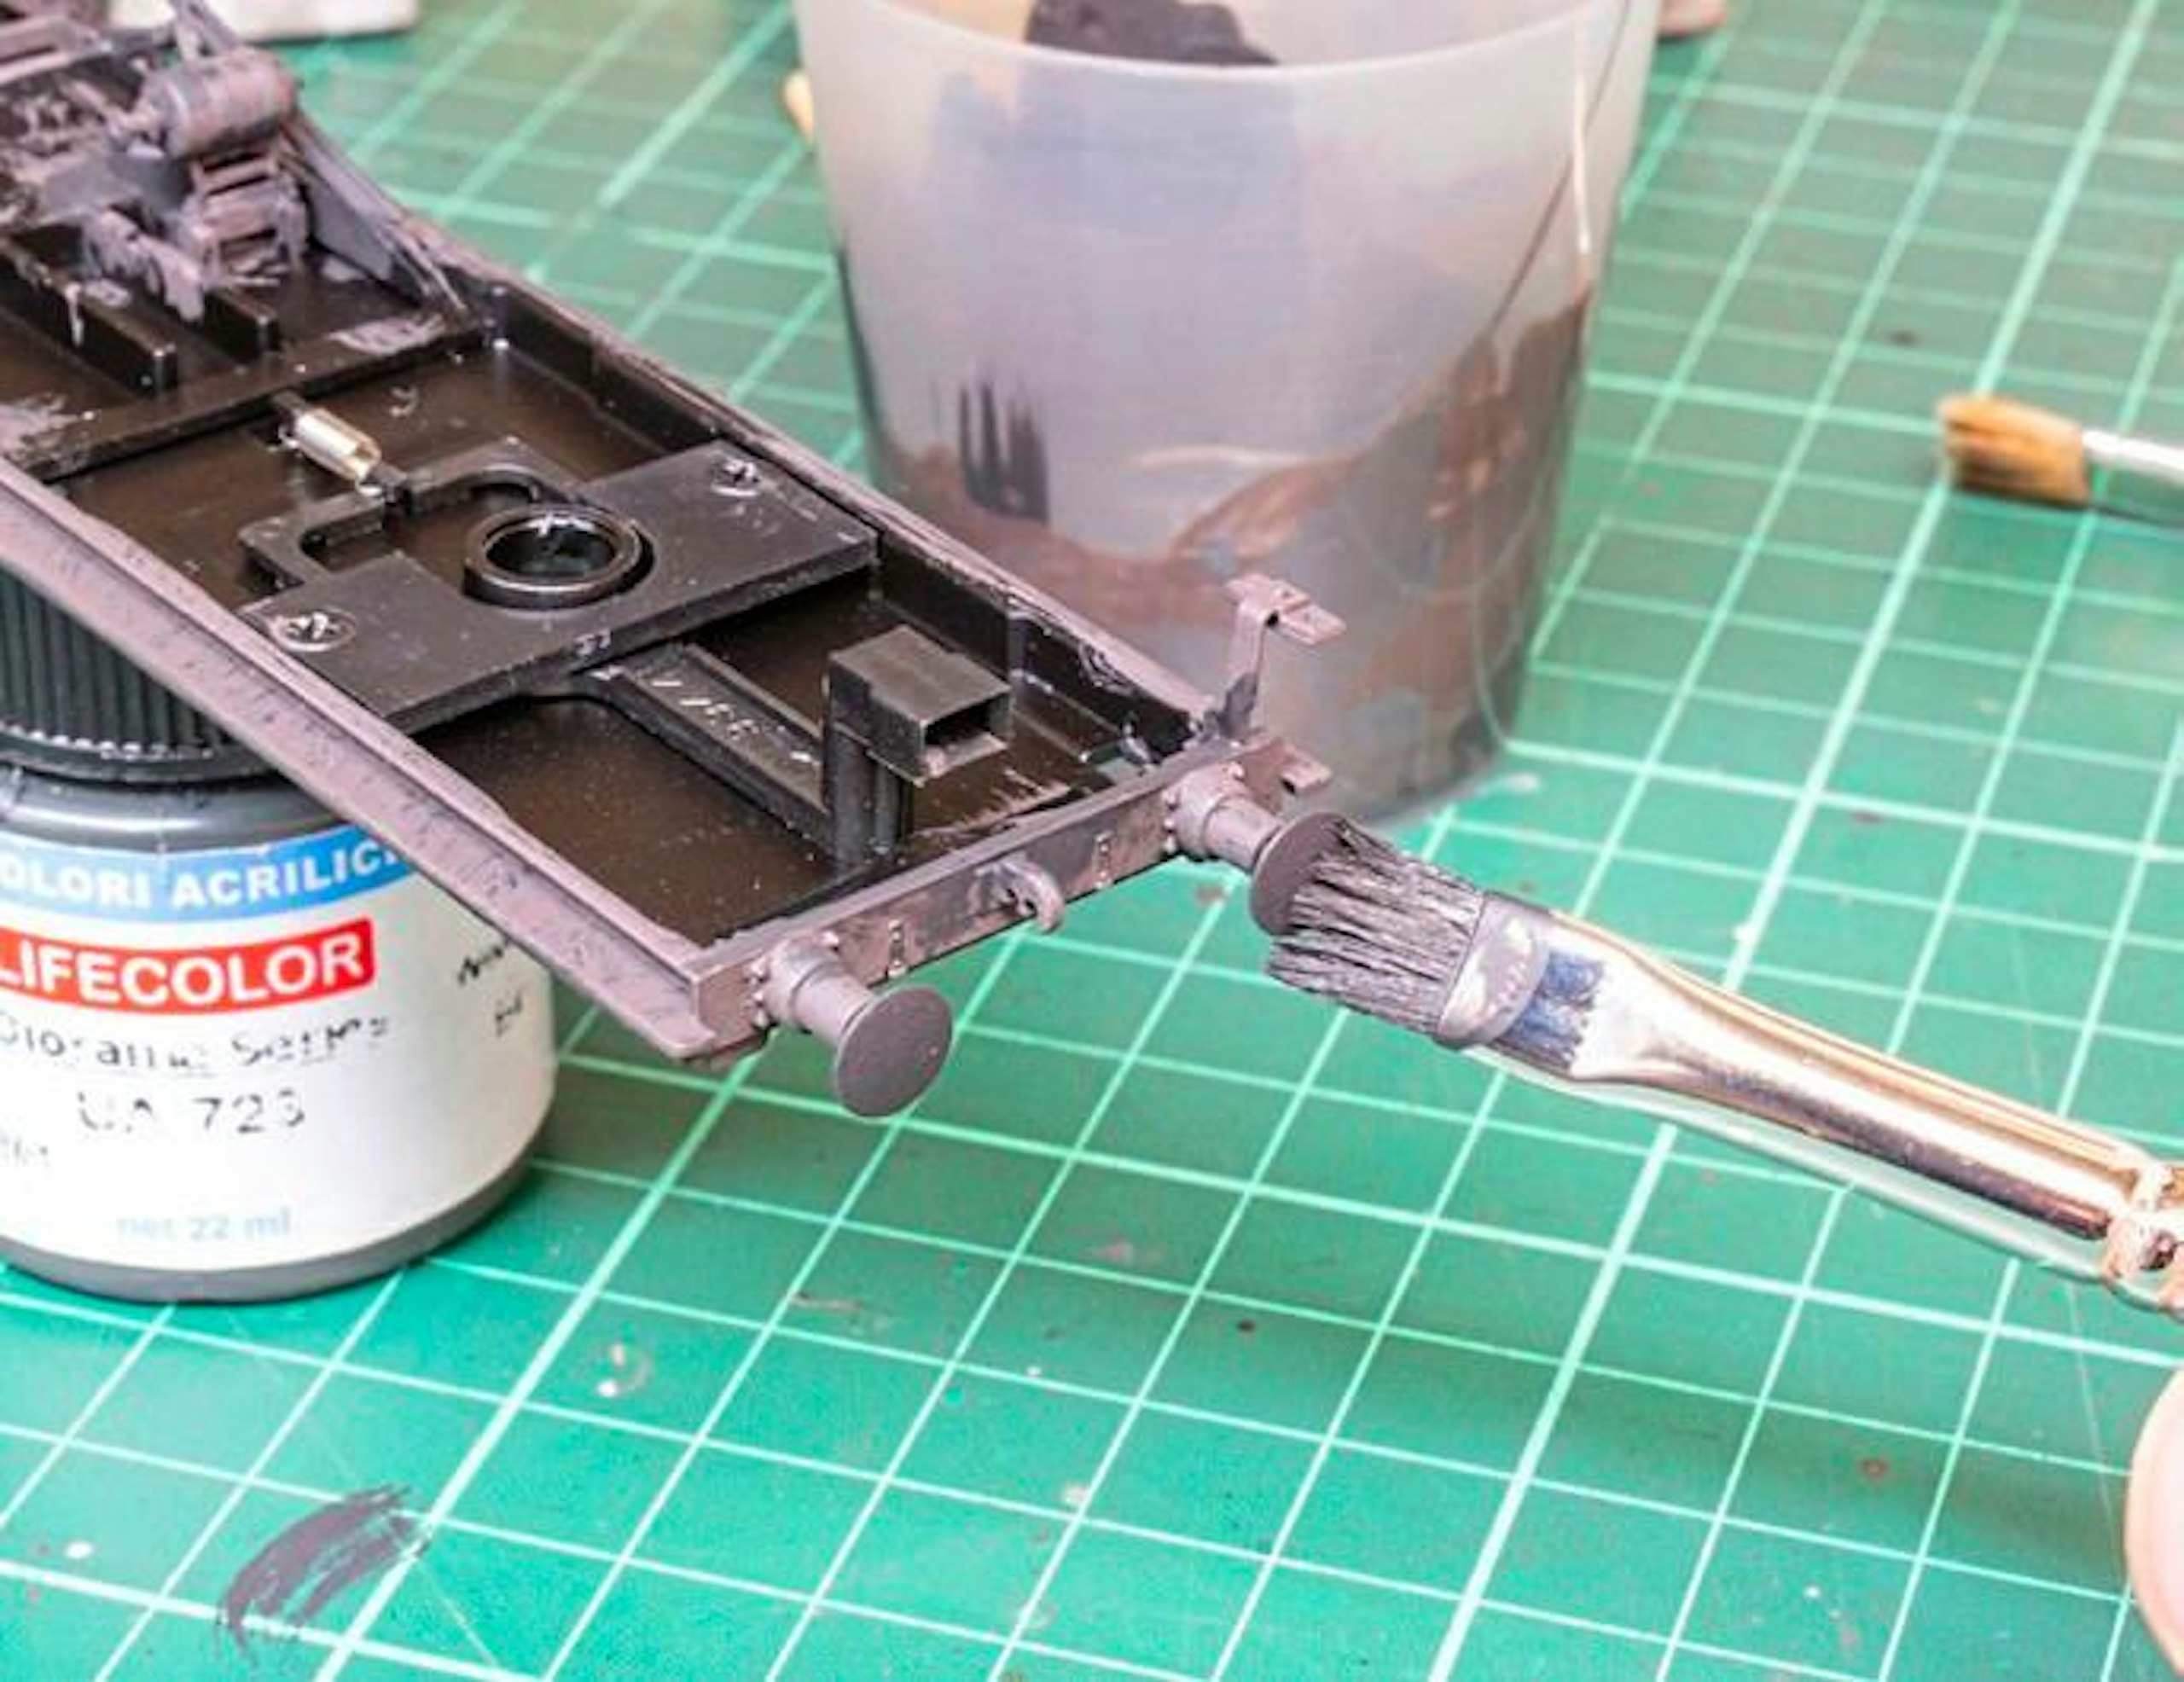
7 It looks messy now, but everything will soon be refined. I added more dry pigment to the paint to create a thicker, coarse blend, then dabbed it onto the bufferheads to mimic thick grease.
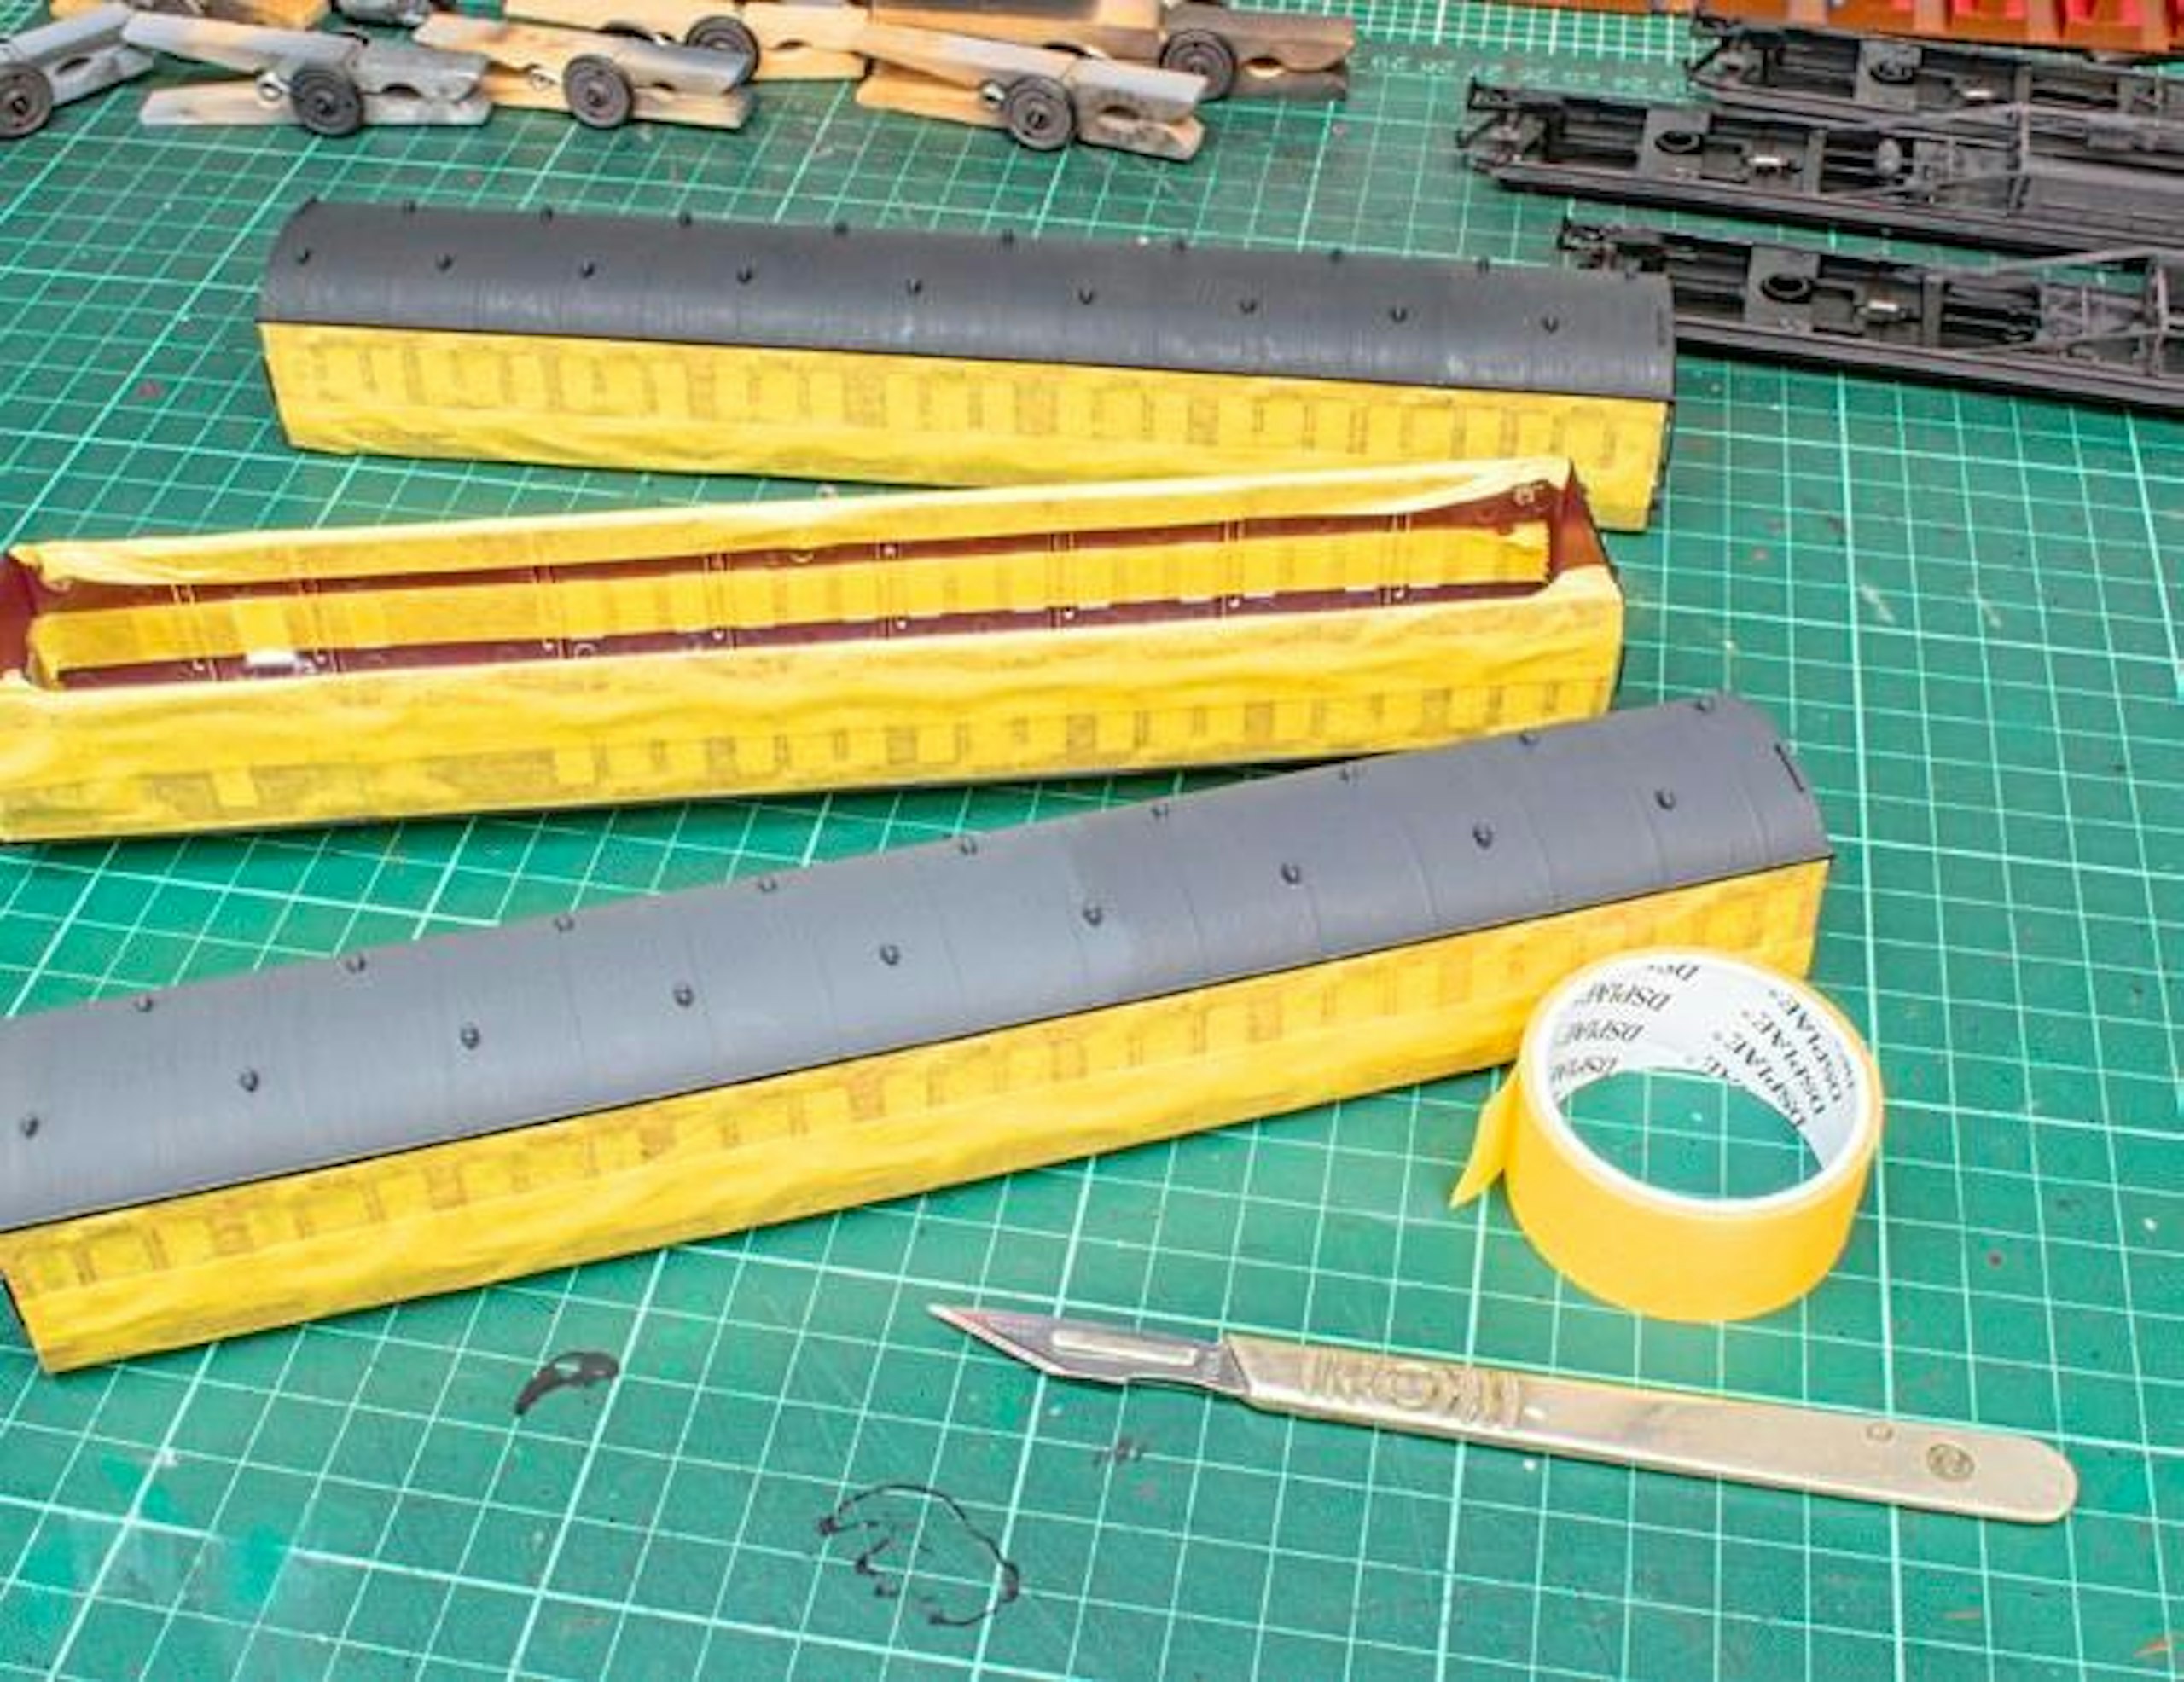
8 Once the clear gloss coats had cured, I masked off the coach sides. I also masked the inside of the glazing, just in case any stray paint worked its way to the interior.
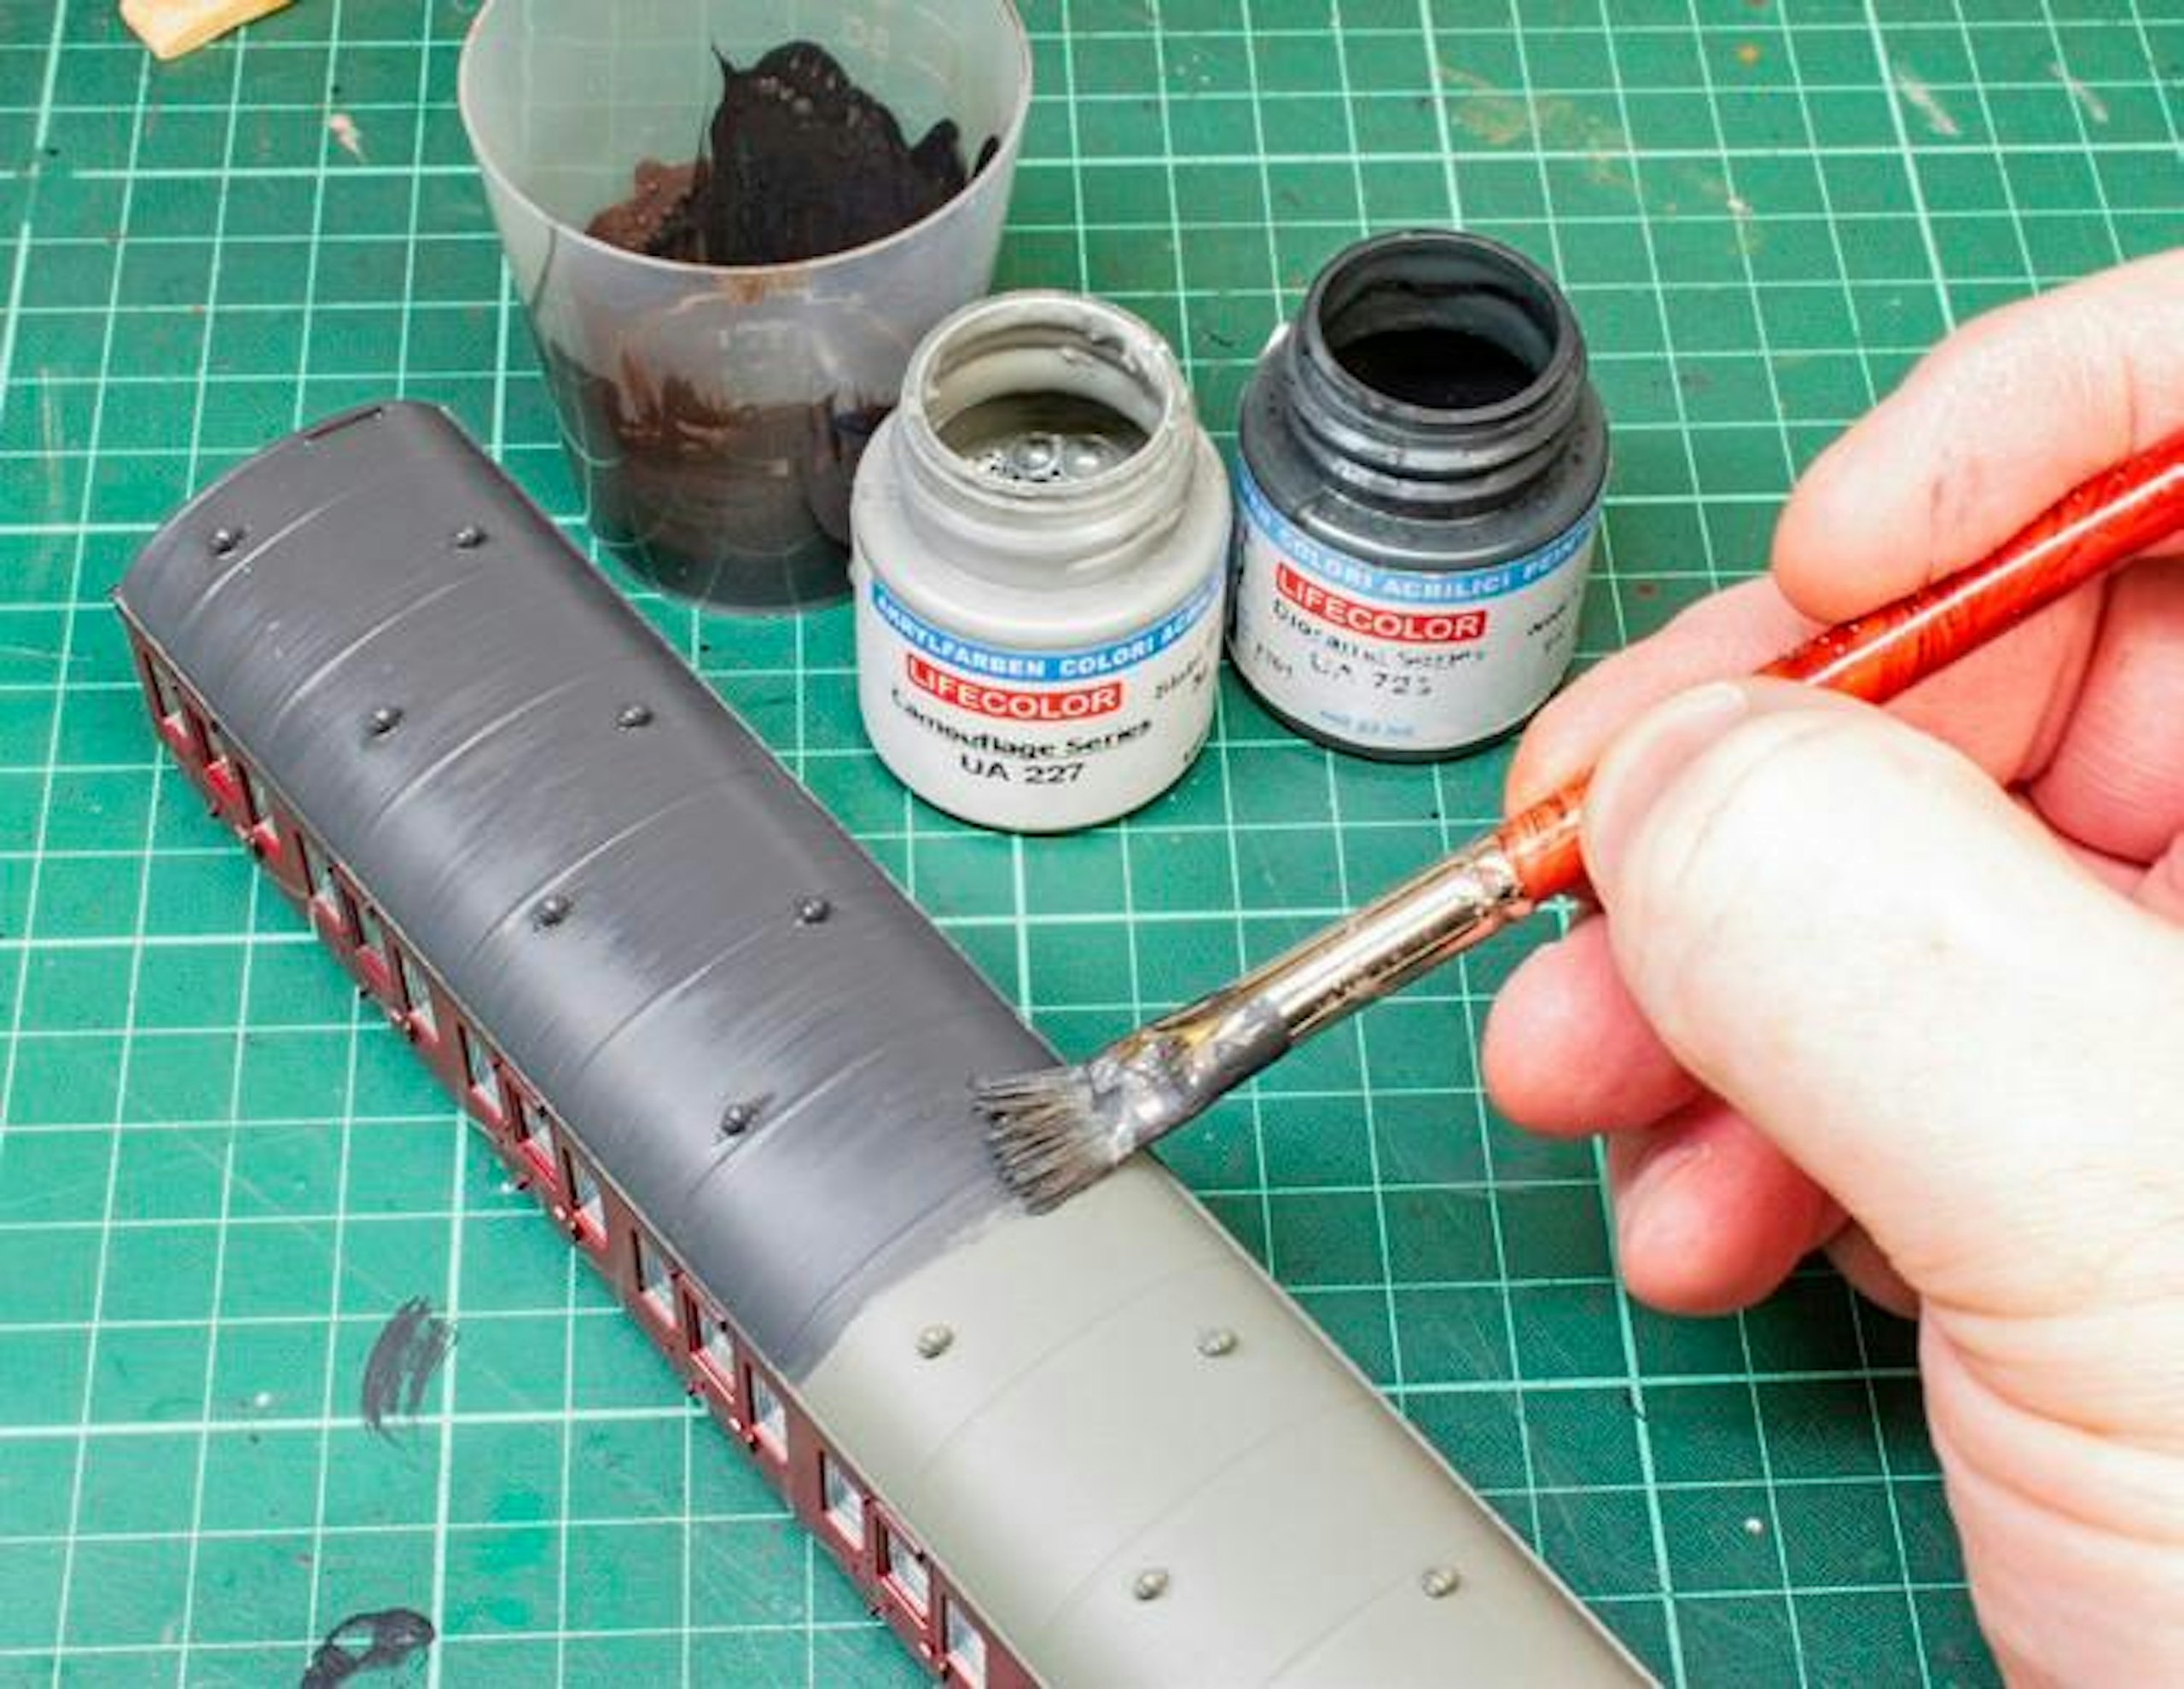
9 A blend of LifeColor grey acrylics was brushed over the roof using lateral strokes. Again, this is intended to add some surface texture and take away the smooth, plasticky look of the roof.
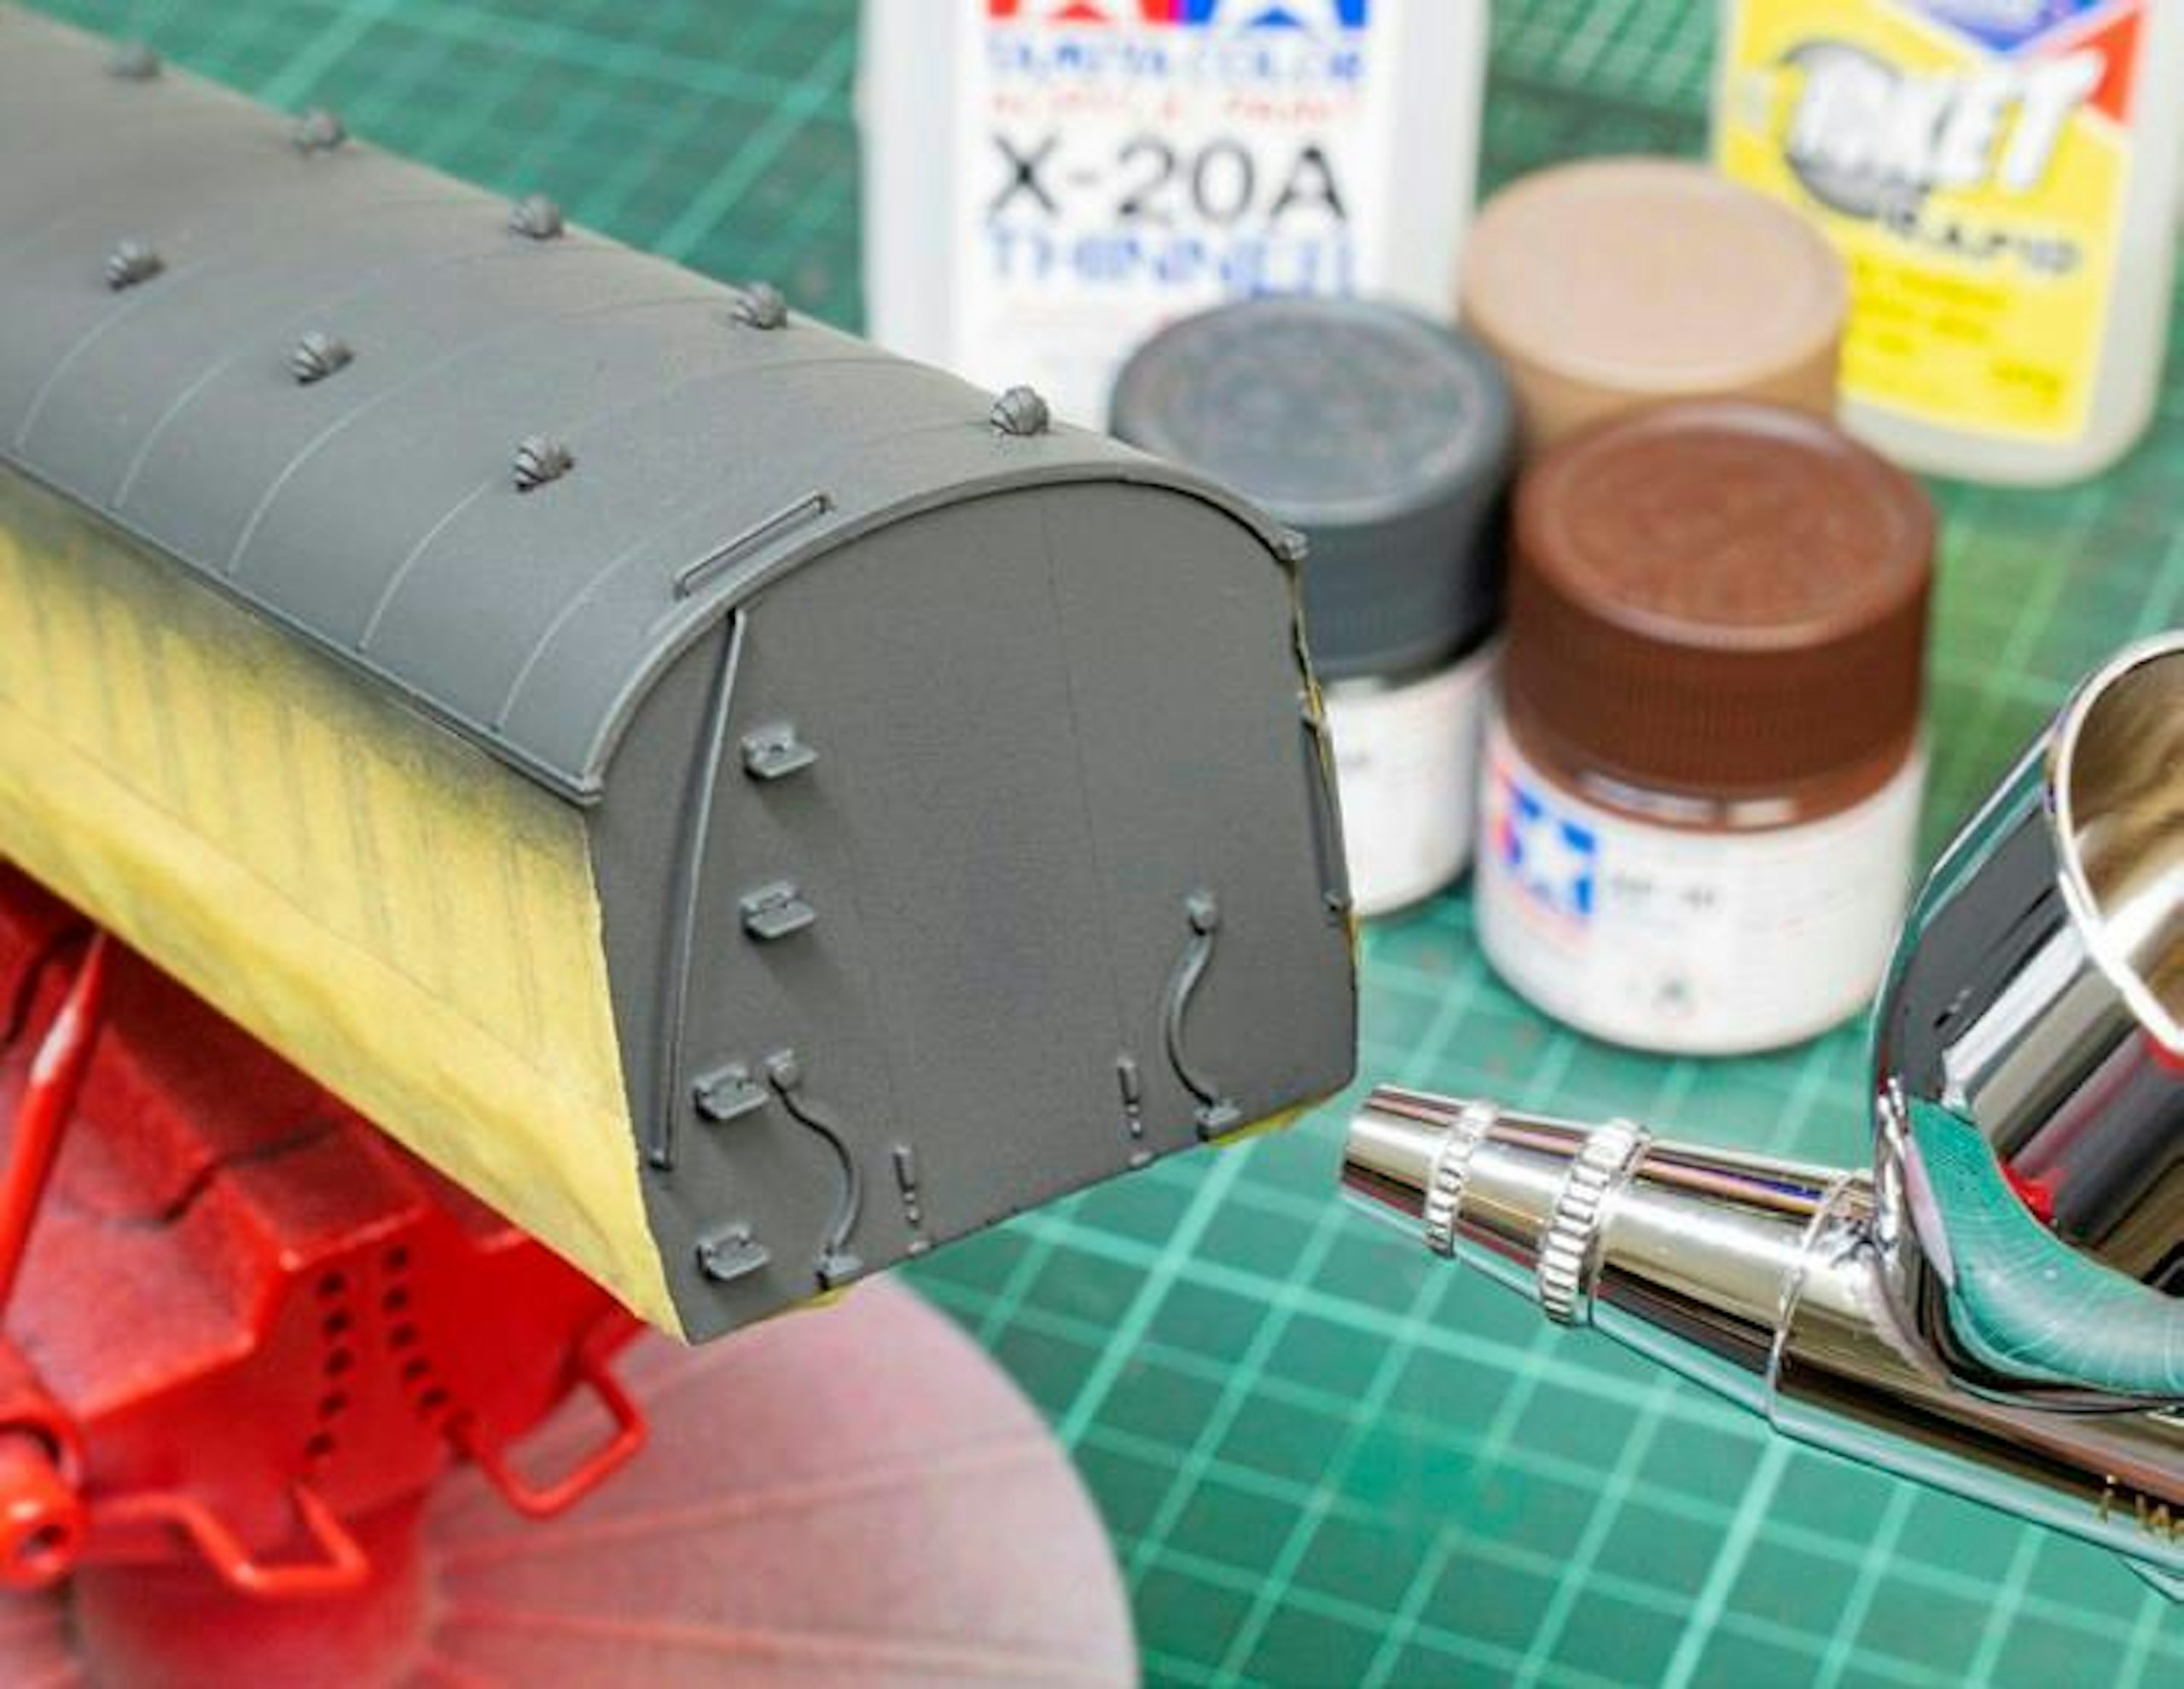
10 A ‘dirty’ dark grey blend of Tamiya acrylics was airbrushed over the ends. The ends of non-corridor stock like this would rarely be cleaned in real life.
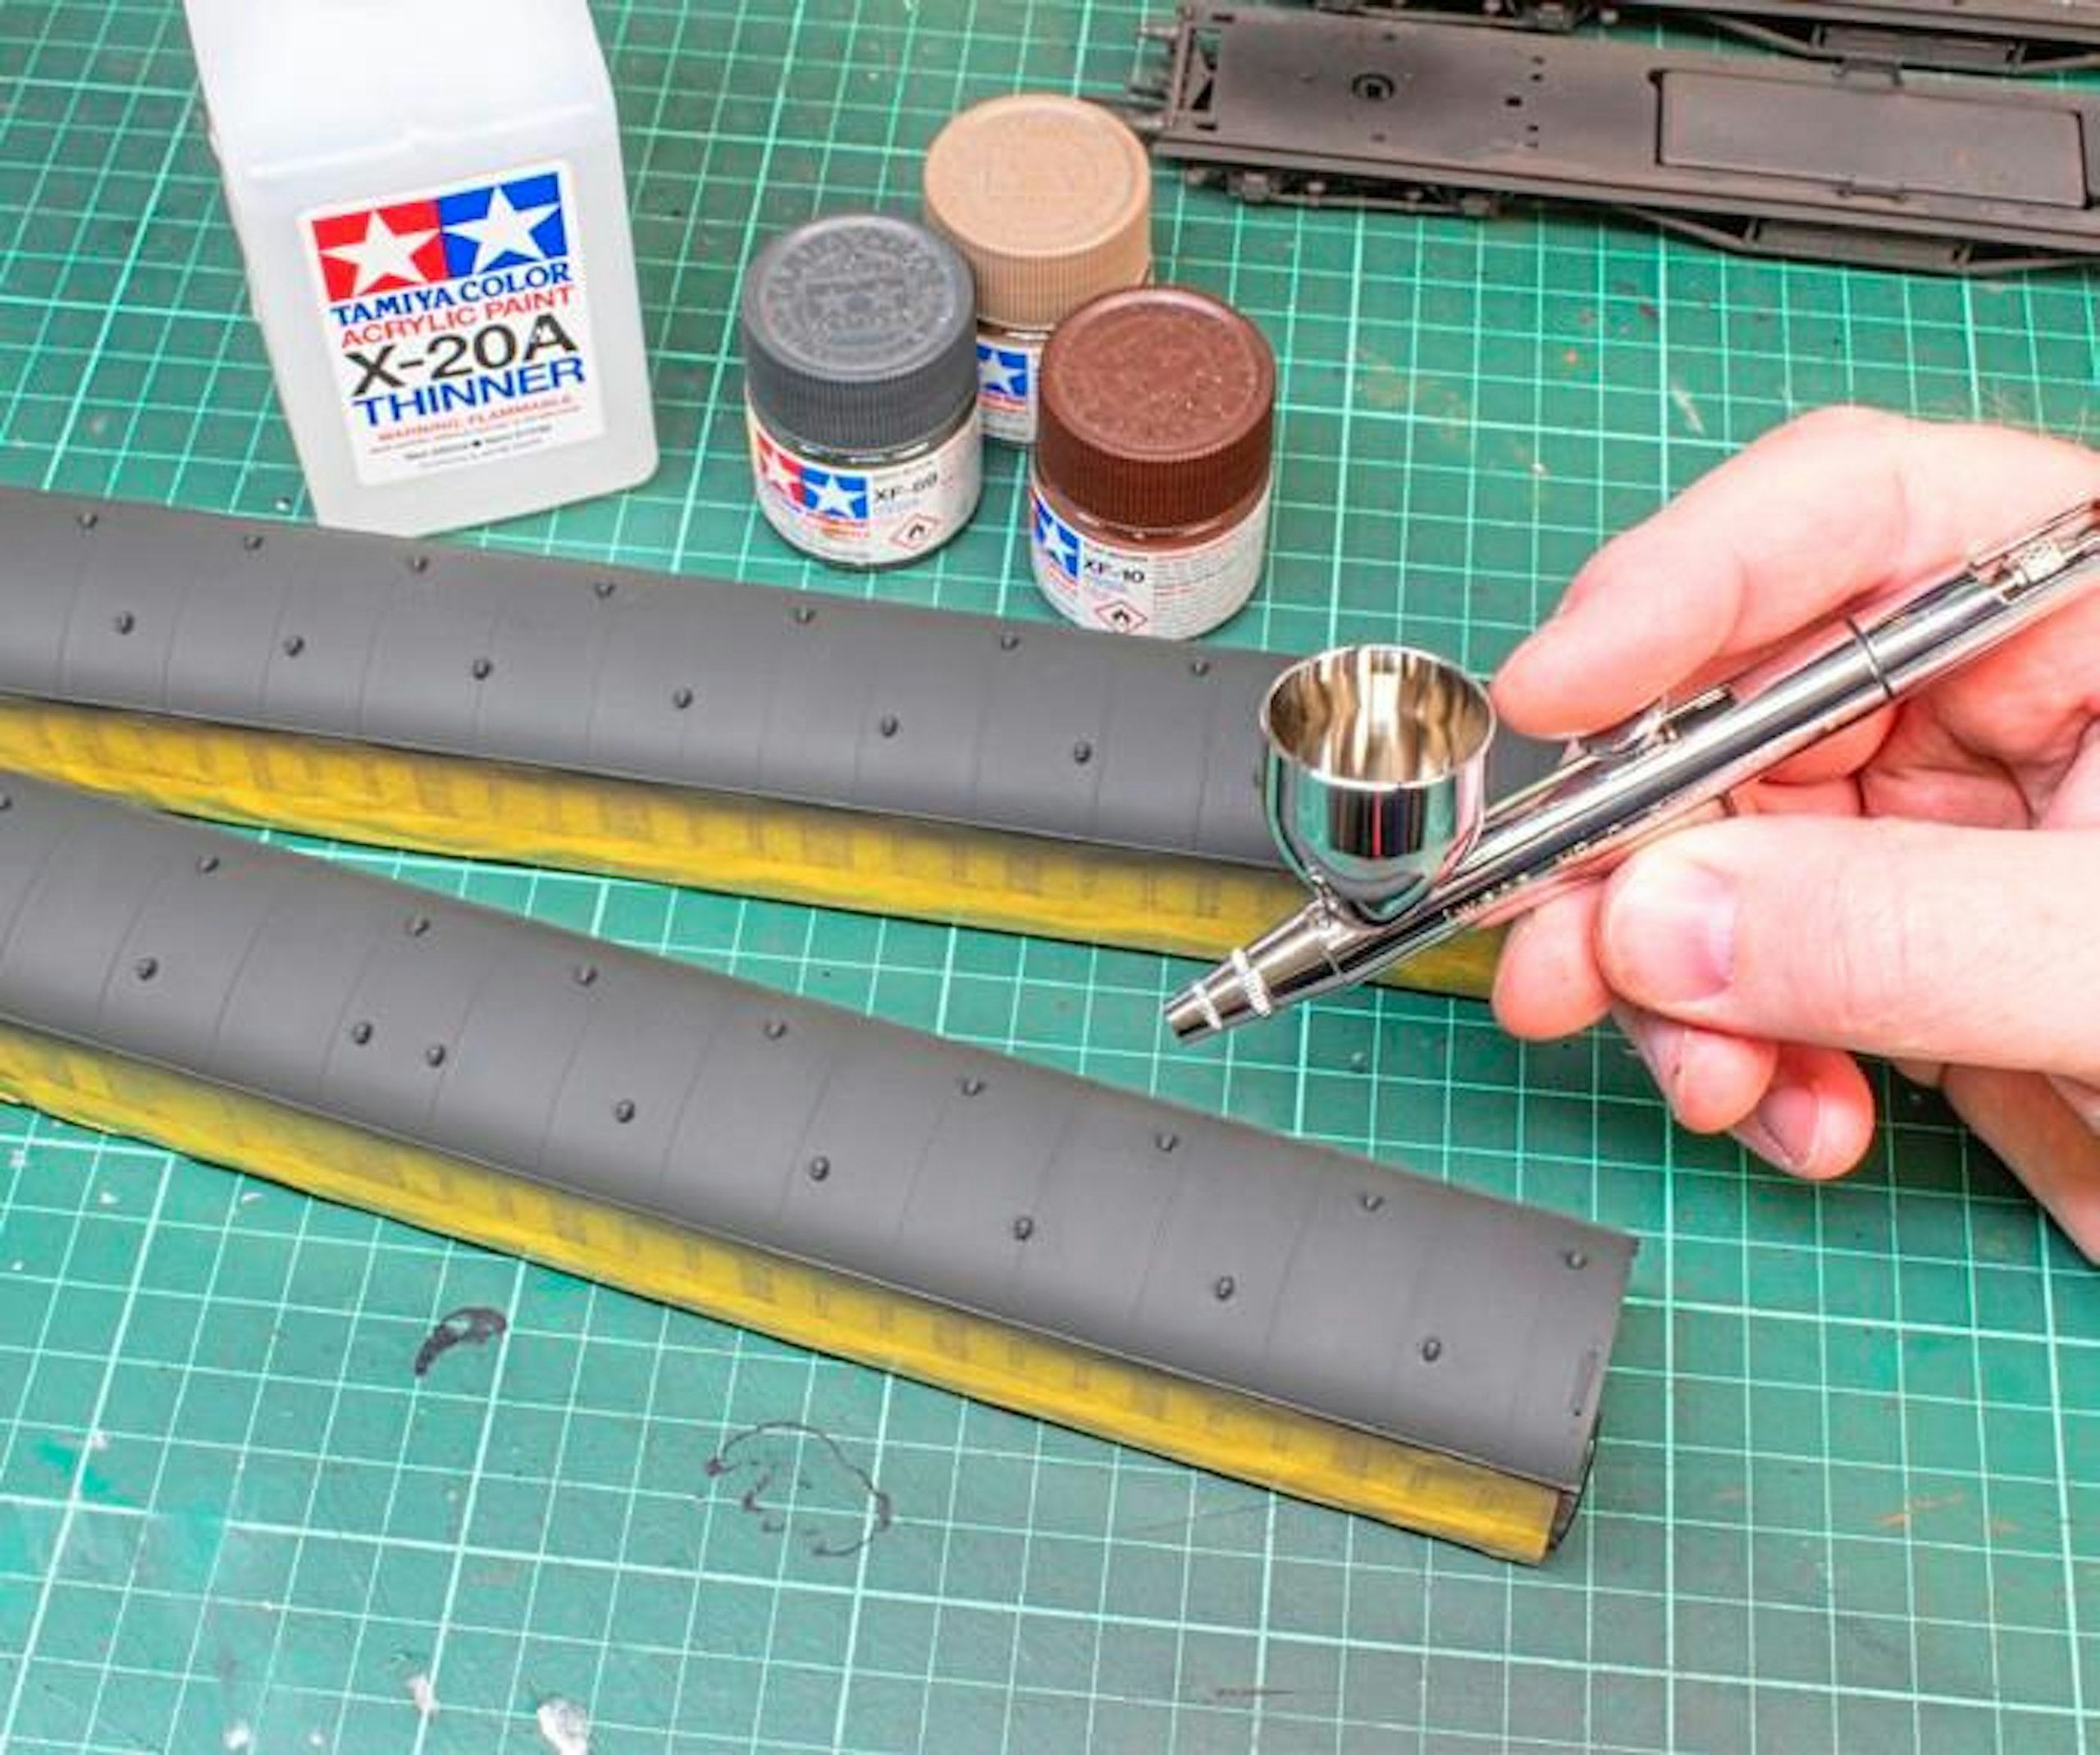
11 The same blend of Tamiya paints was then misted over the roof. This hid the unsightly brush marks in the initial coat while retaining the surface texture of the LifeColor acrylic.
POWDER POWER
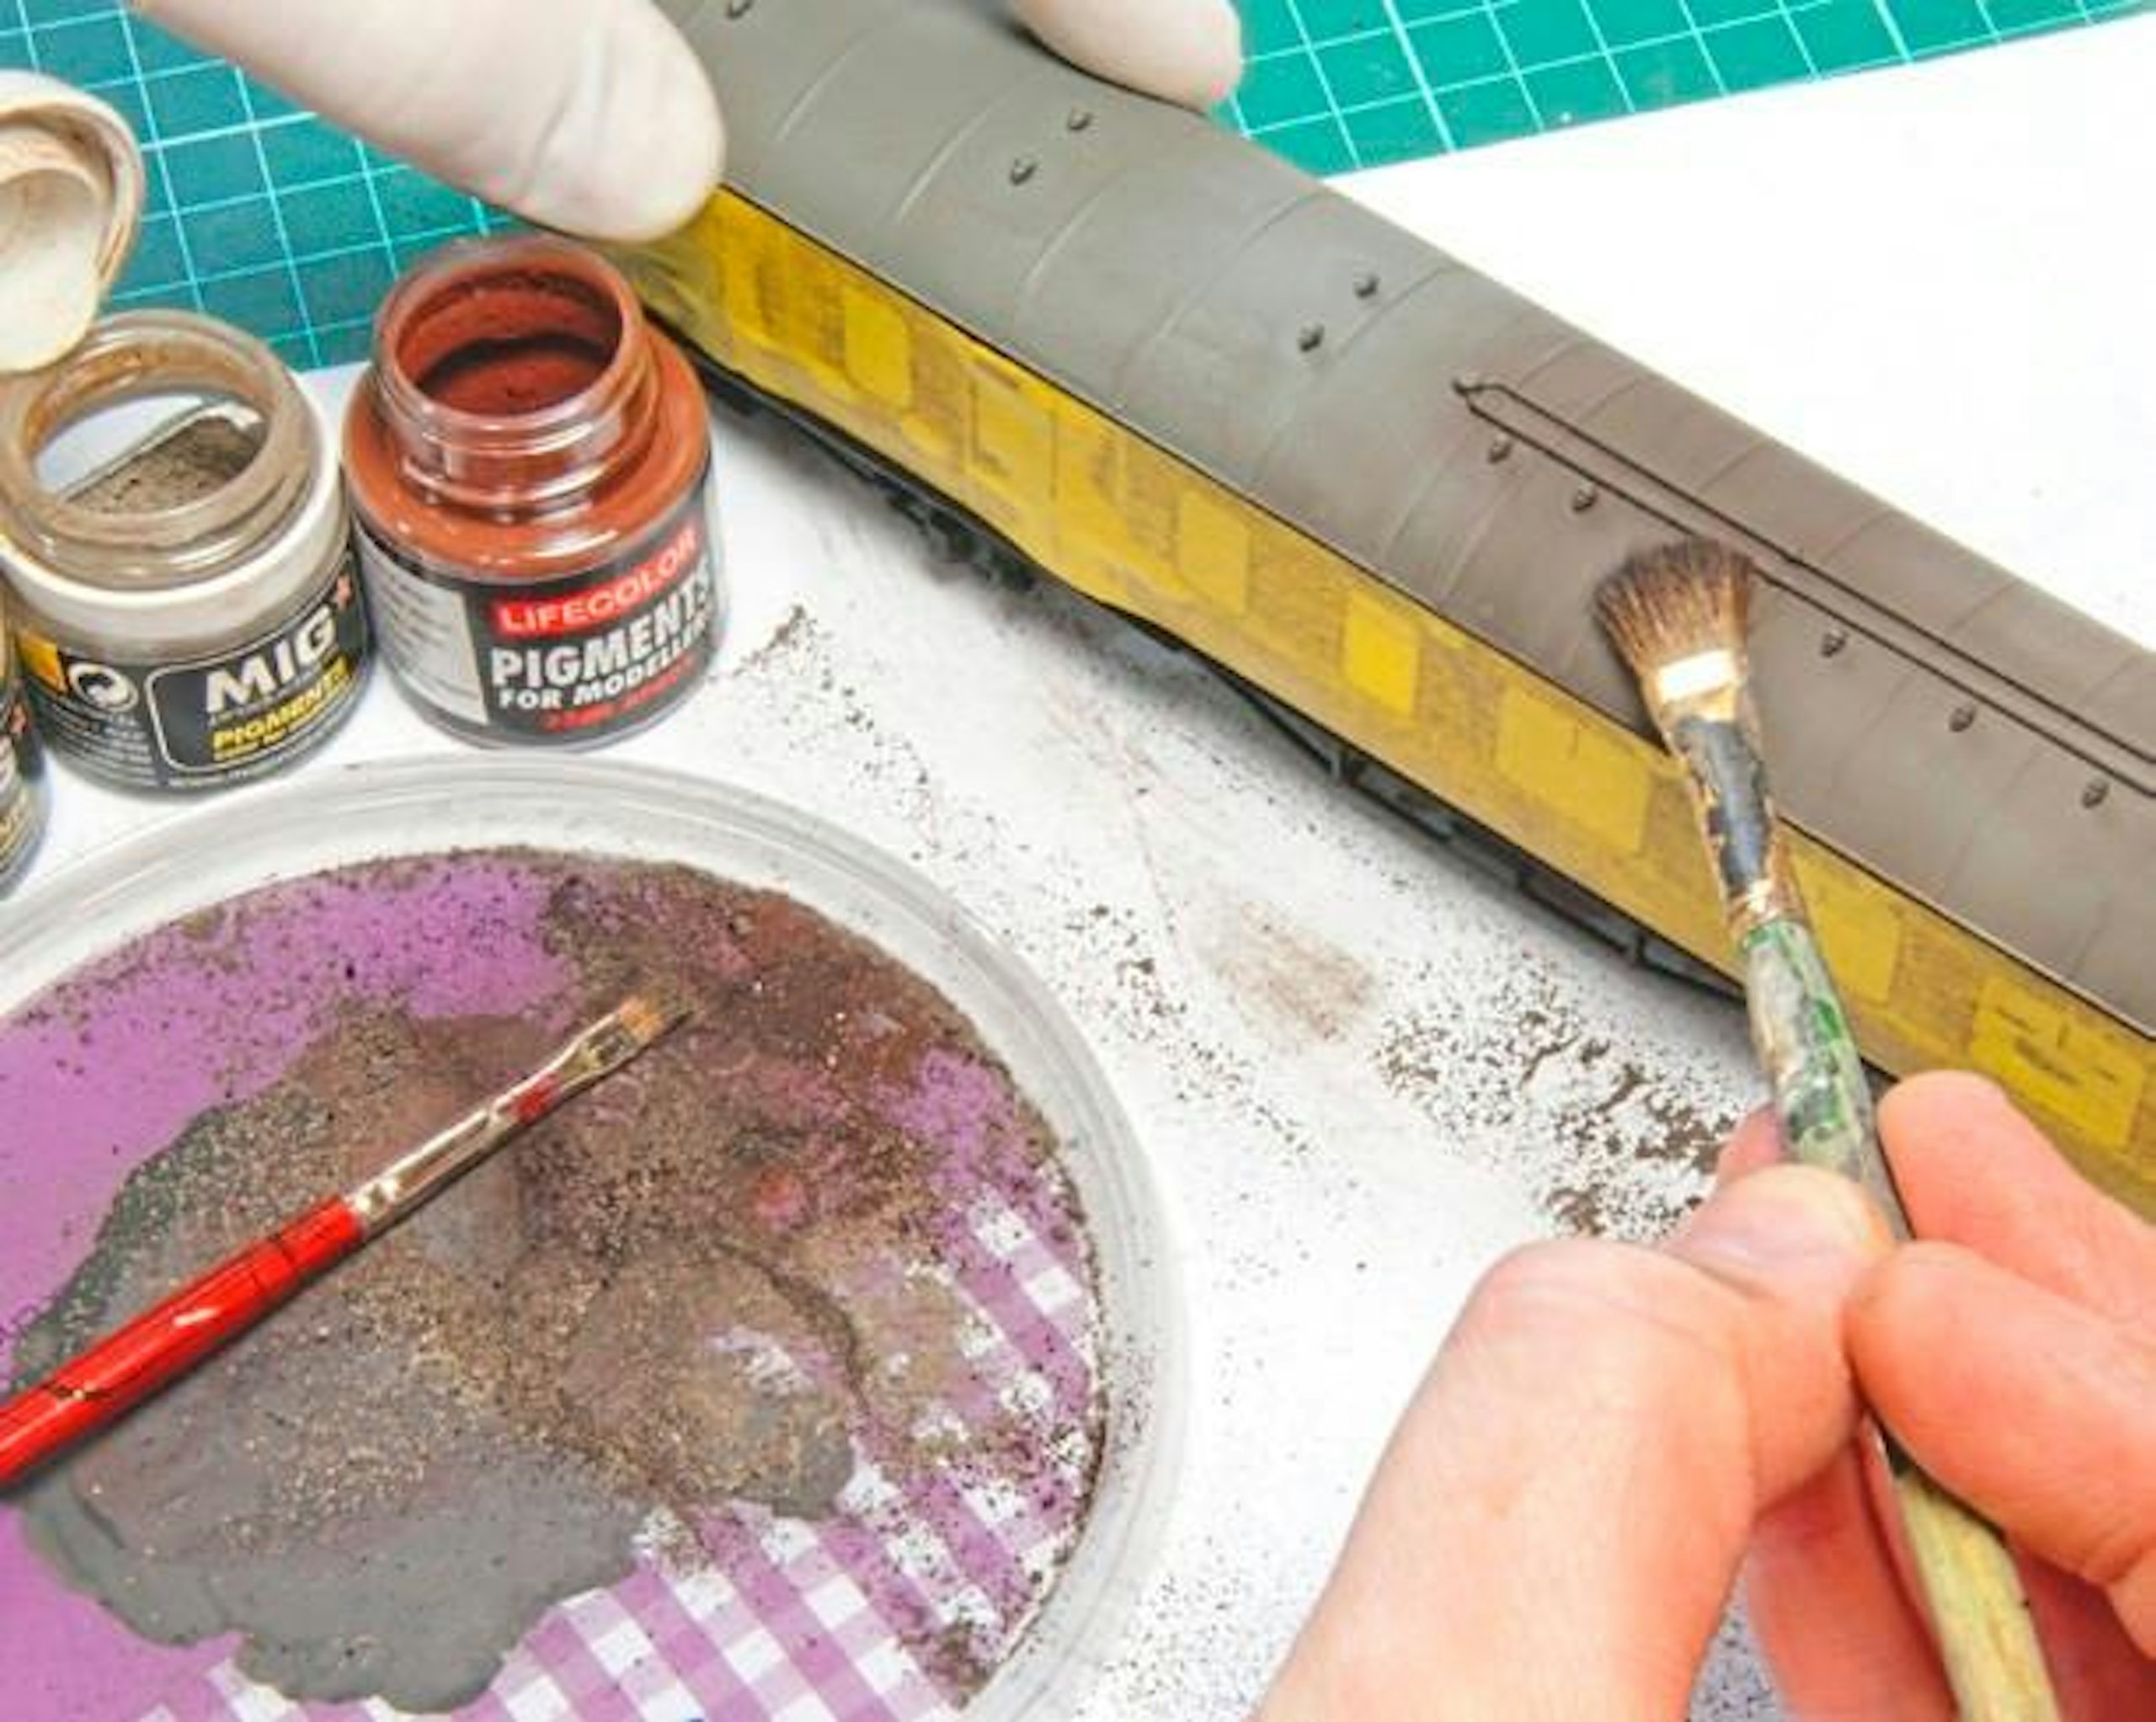
For those without an airbrush, the finessing of the weathering can be achieved with dry pigments, often referred to as weathering powders. The matt finish created by the acrylic paints applied to the roof, ends and underframe provide the perfect base for the dry pigments to adhere (the paint must be fully dry).
Simply create a suitable blend of pigments and apply with a dry brush, working it into the surface and brushing away the excess with a soft brush. Avoid blowing it away with your breath, as any moisture landing on the surface will cause staining. A stiff brush, such as an old toothbrush, can create streaking effects.
Once applied, the powders will benefit from sealing with a pigment fixative solution, which can be sprayed through an airbrush or plant mister. Alternatively, an aerosol matt varnish can be misted over.
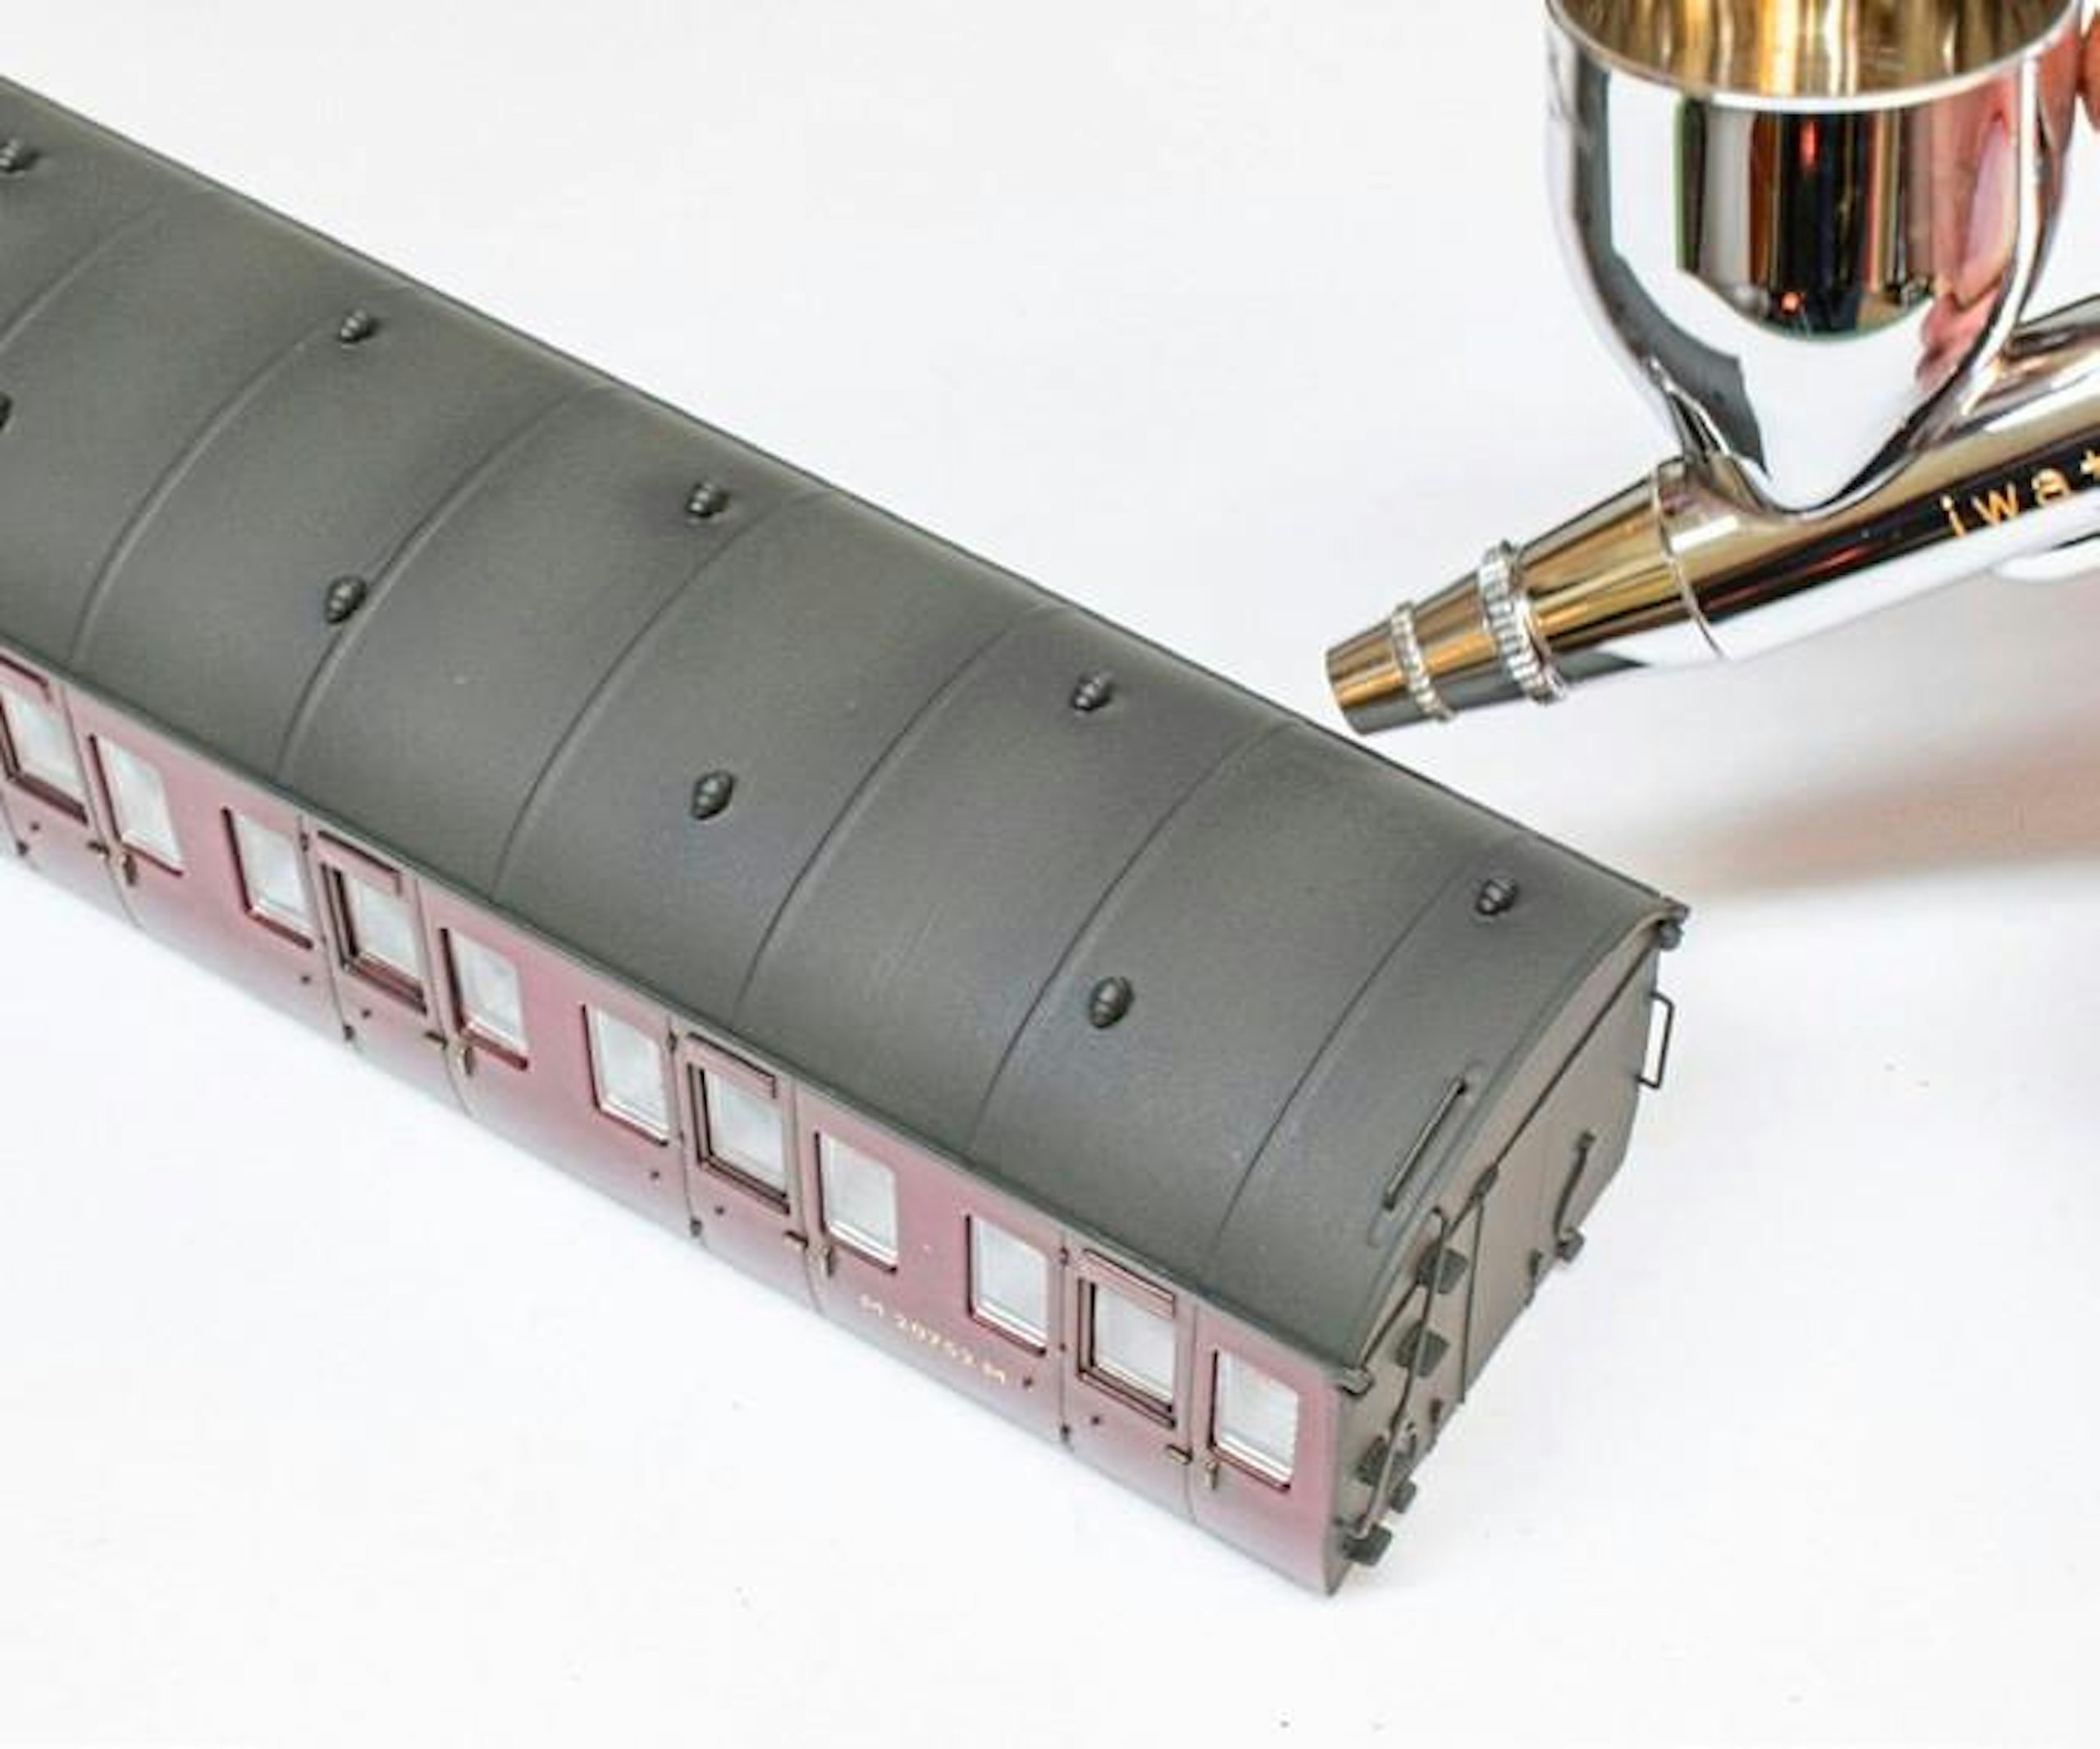
12 Shifting to a darker shade, I added some tonal variety to the roofs, targeting the paint around the raised ventilators and following the ribbing and gutter lines.
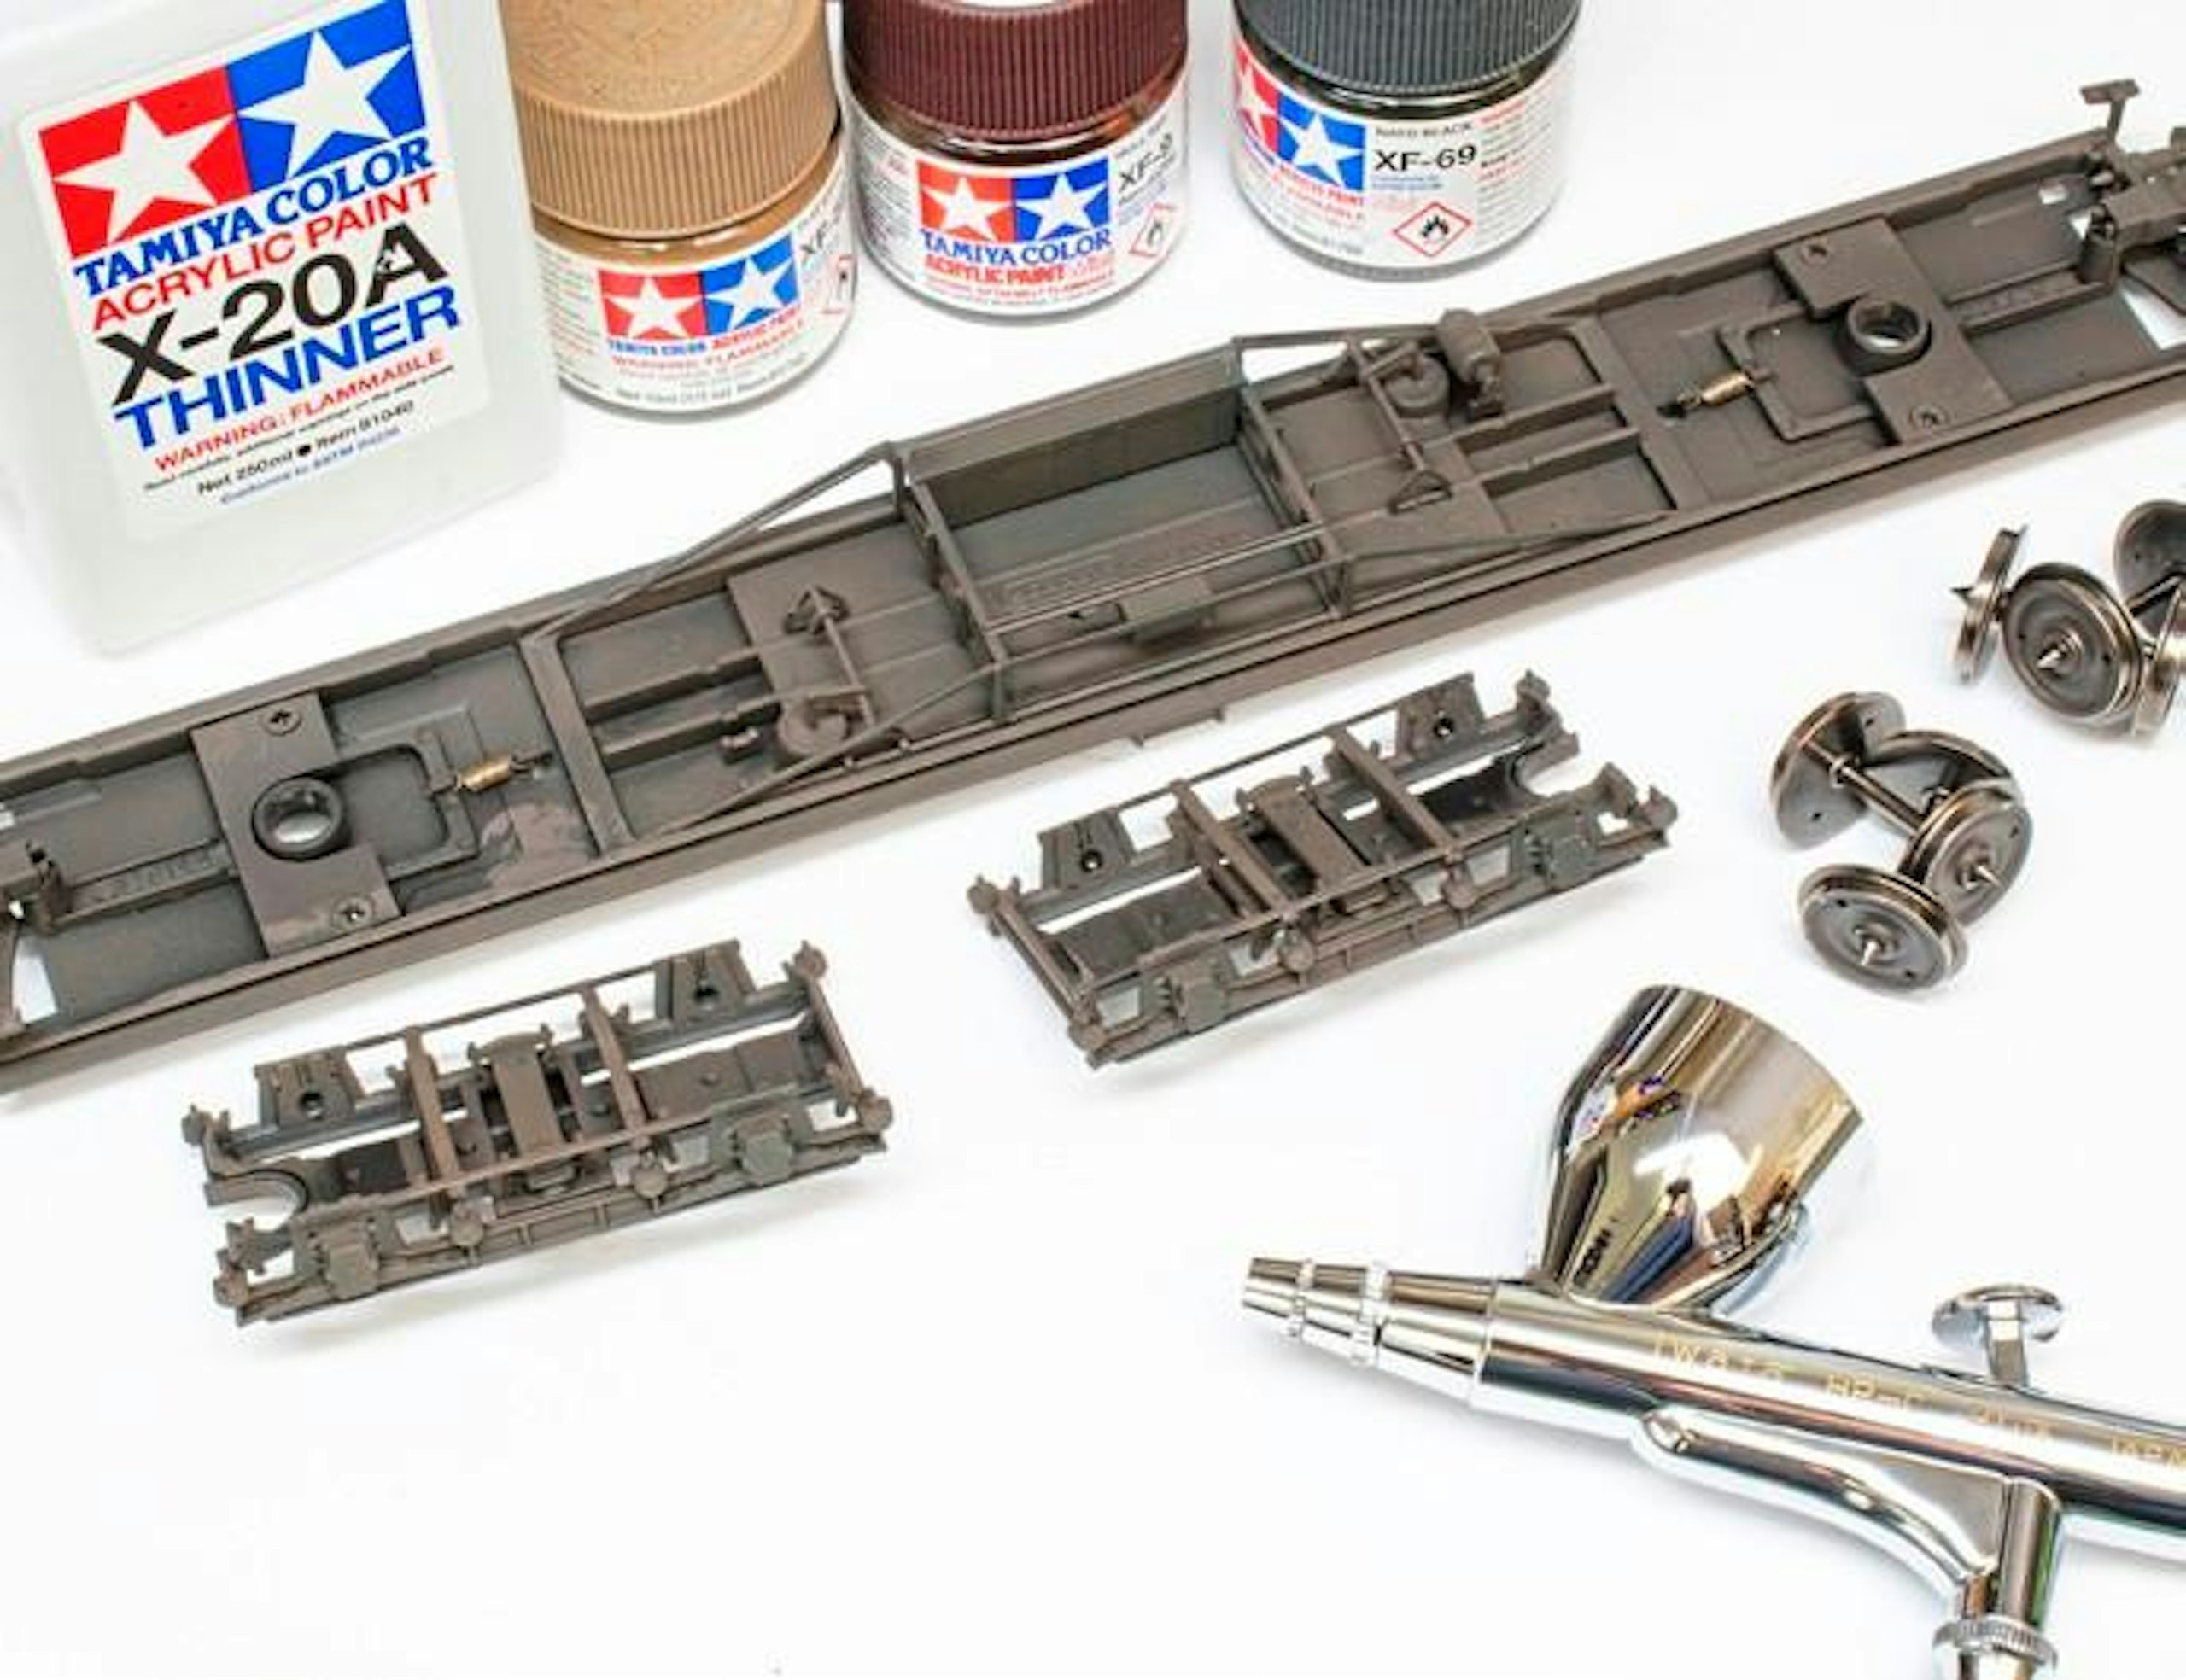
13 A different blend of Tamiya acrylics was used on the underframe. A gentle misting through the airbrush gave the chassis, bogies and wheels a more authentic appearance.
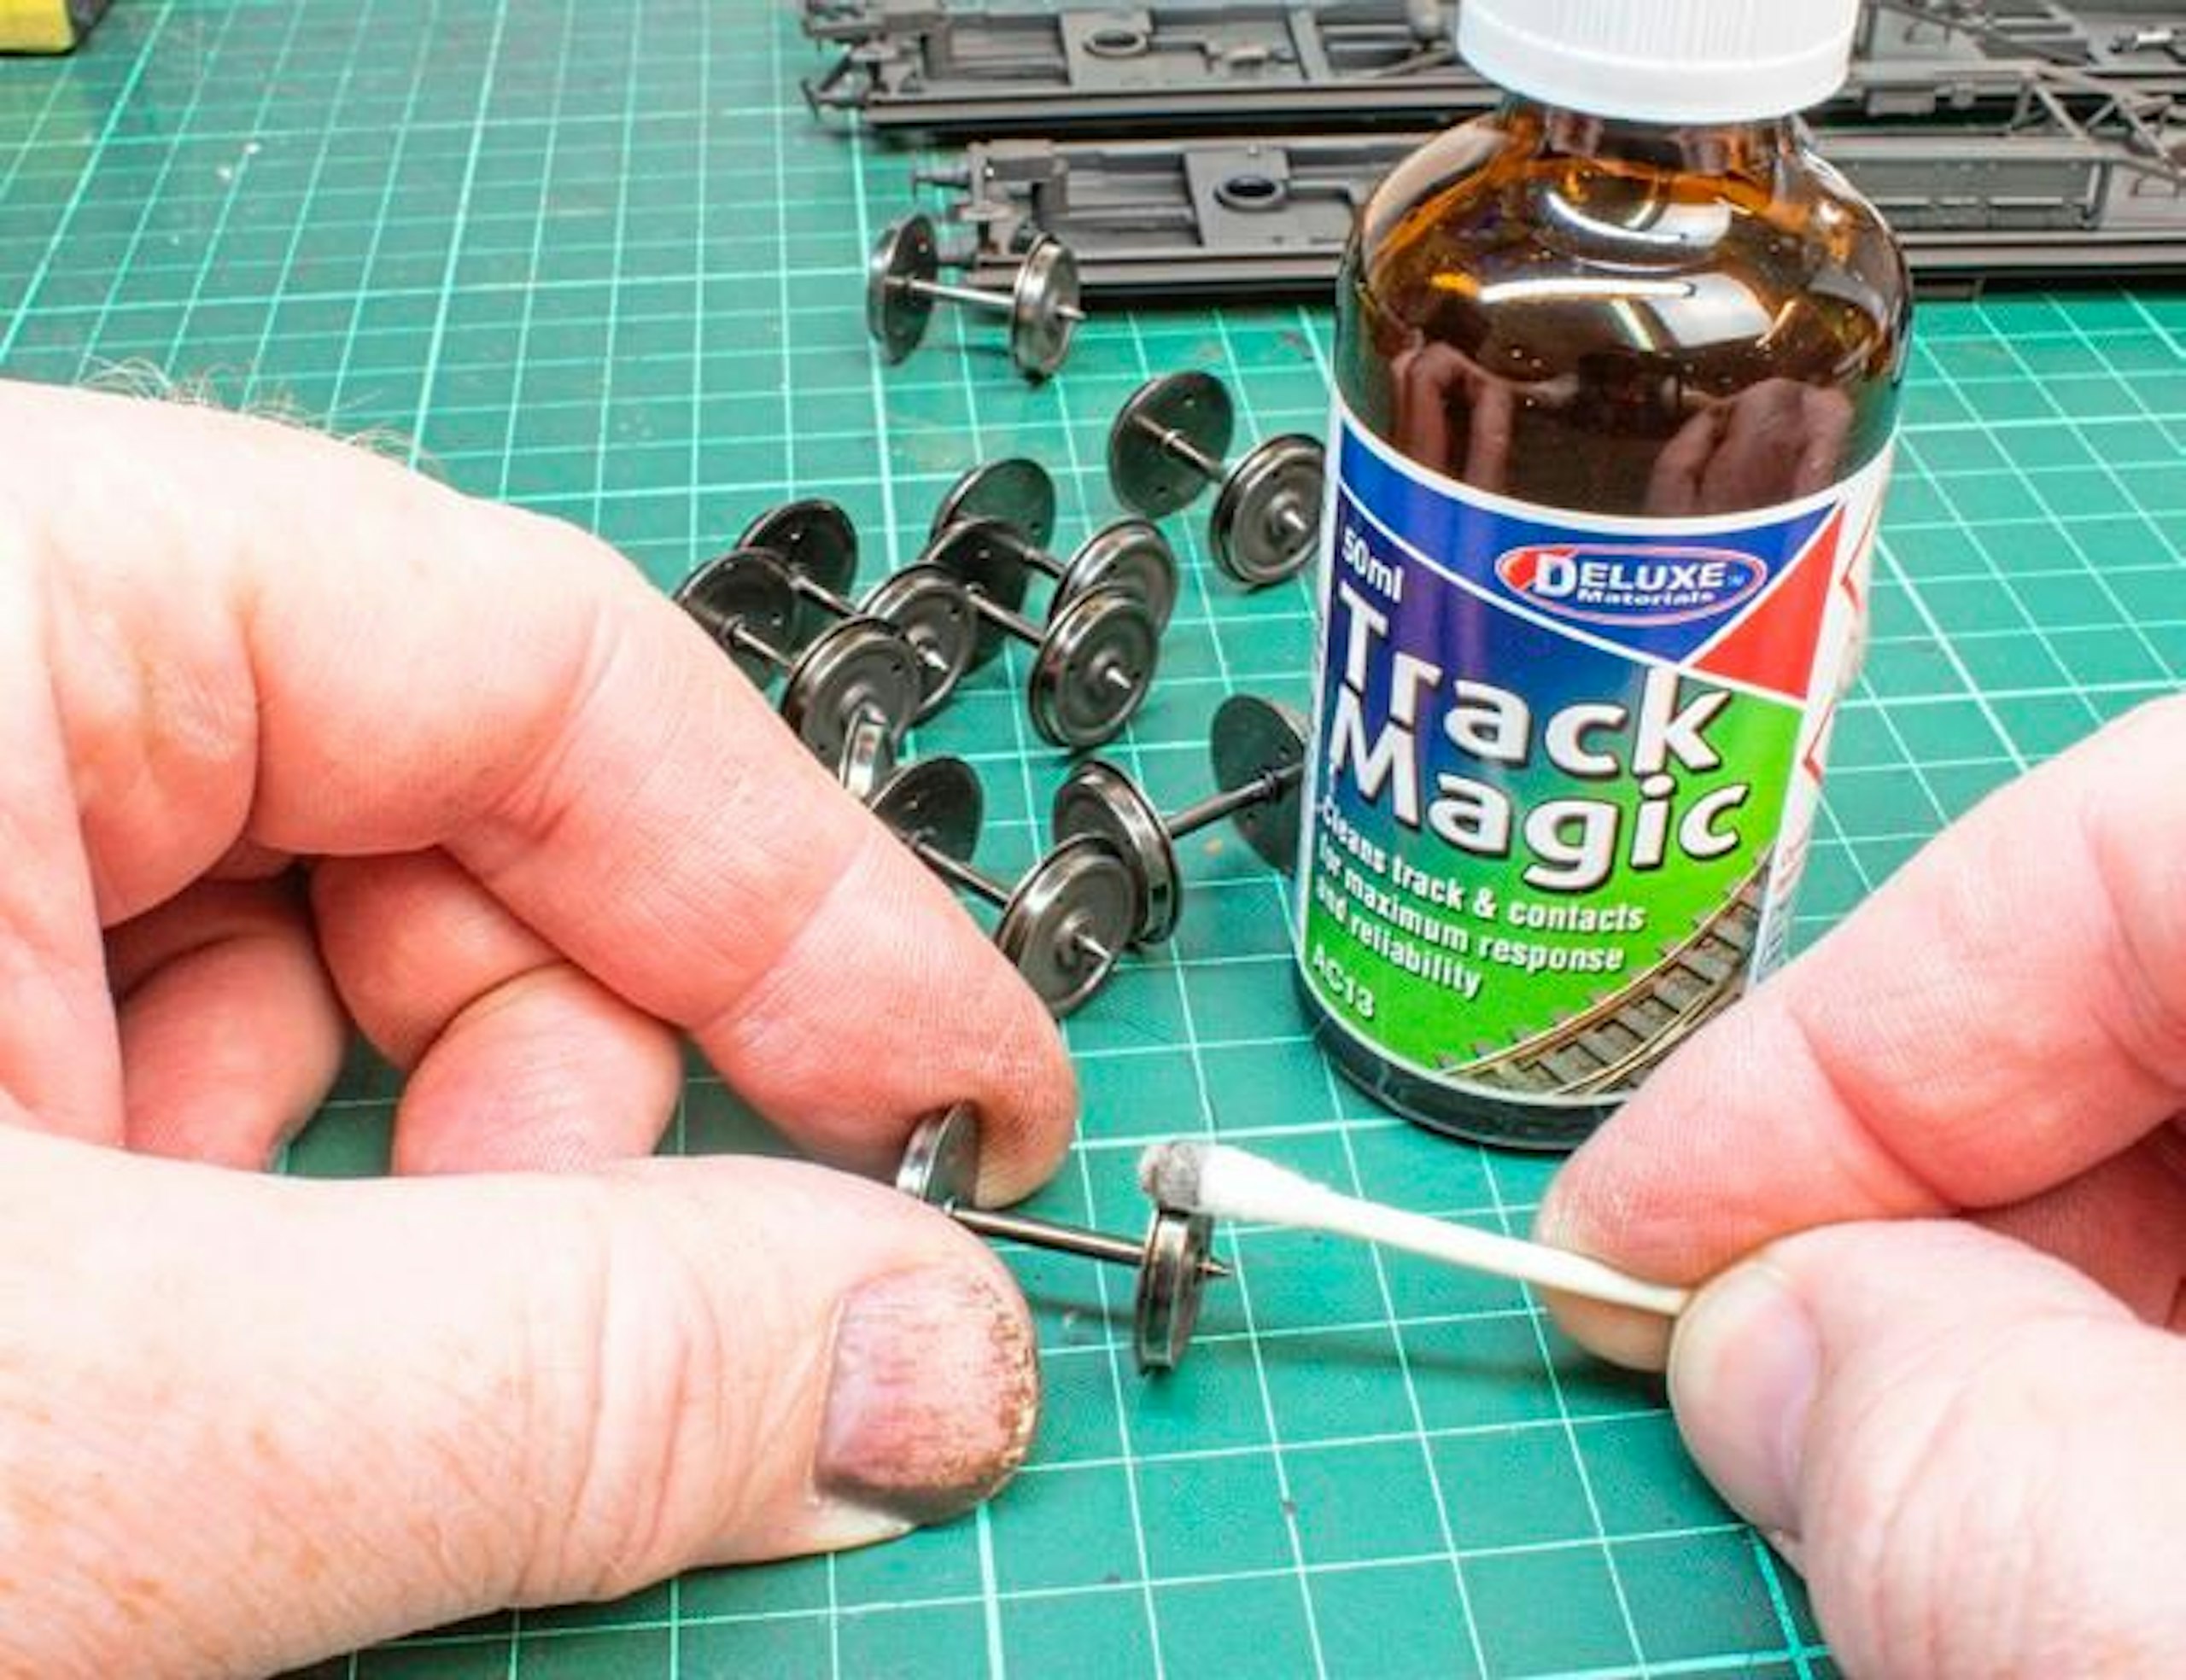
14 It’s vital to clean the wheel treads. Deluxe Materials Track Magic, applied with cotton swabs, removed the paint quickly. The pinpoint axle tips were cleaned, too.
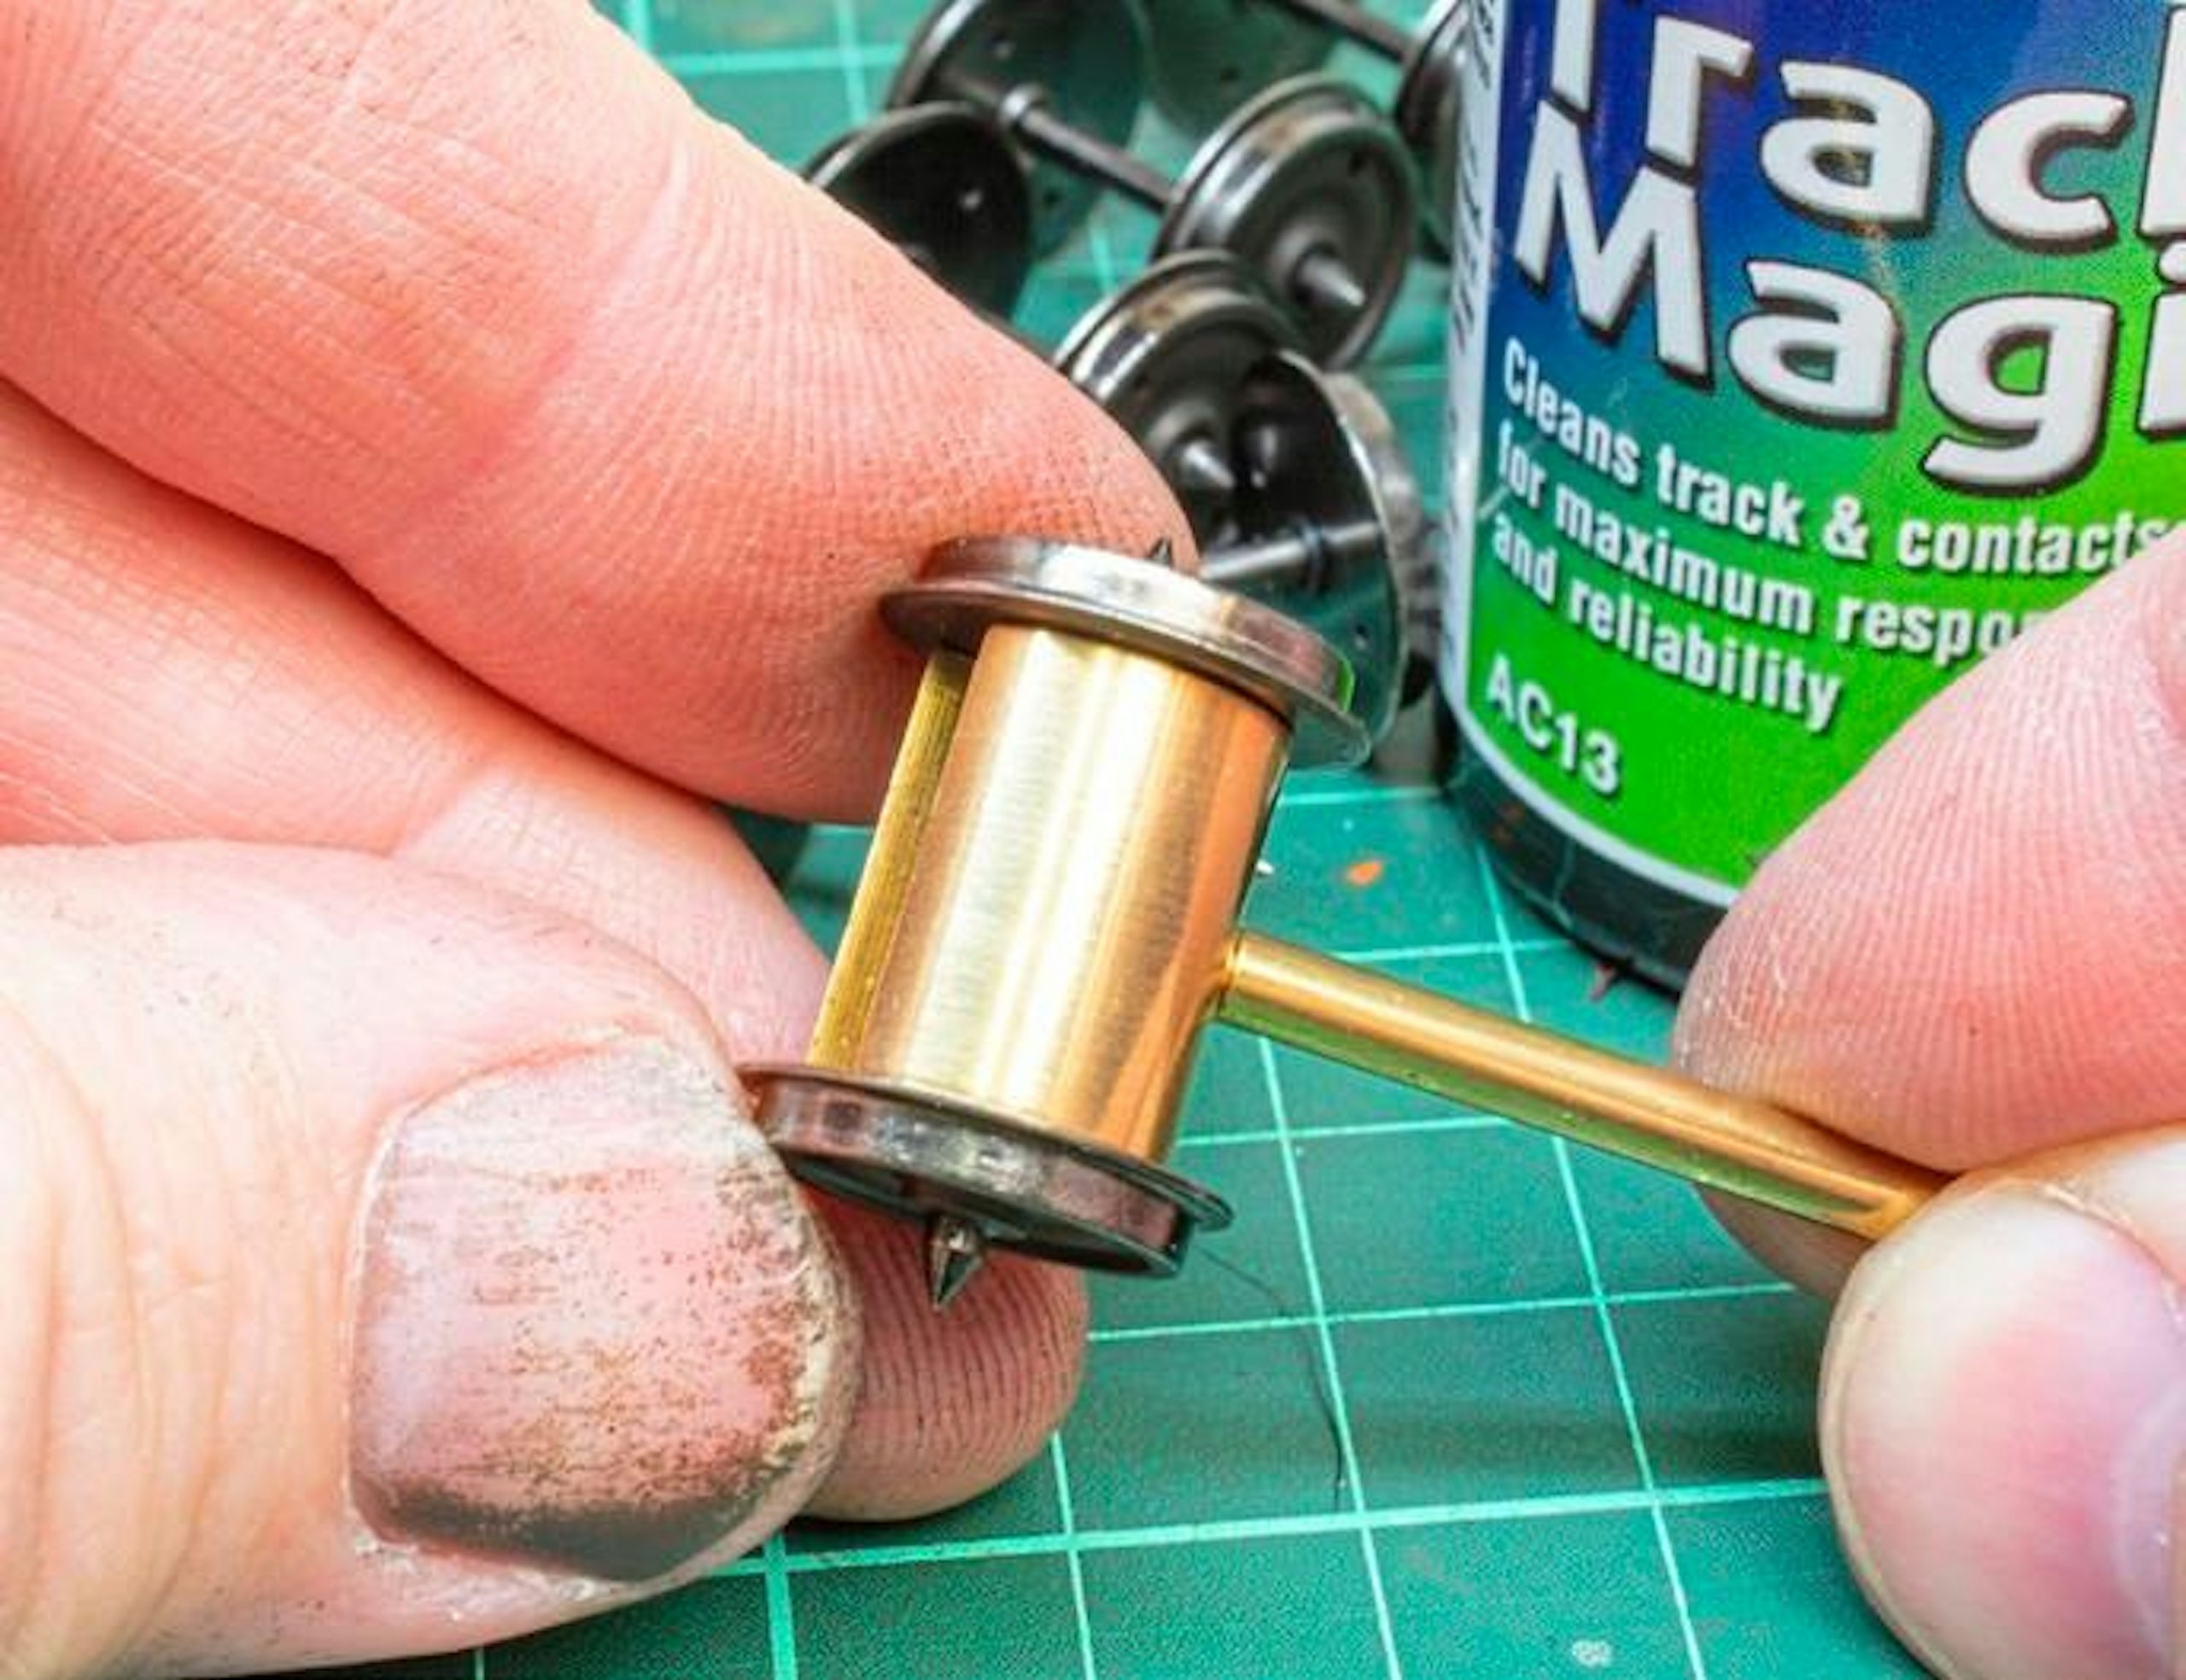
15 While cleaning the wheels, I double-checked the back-to-back gauging before the axles were fitted back into the bogies. Various gauges are available for this task.
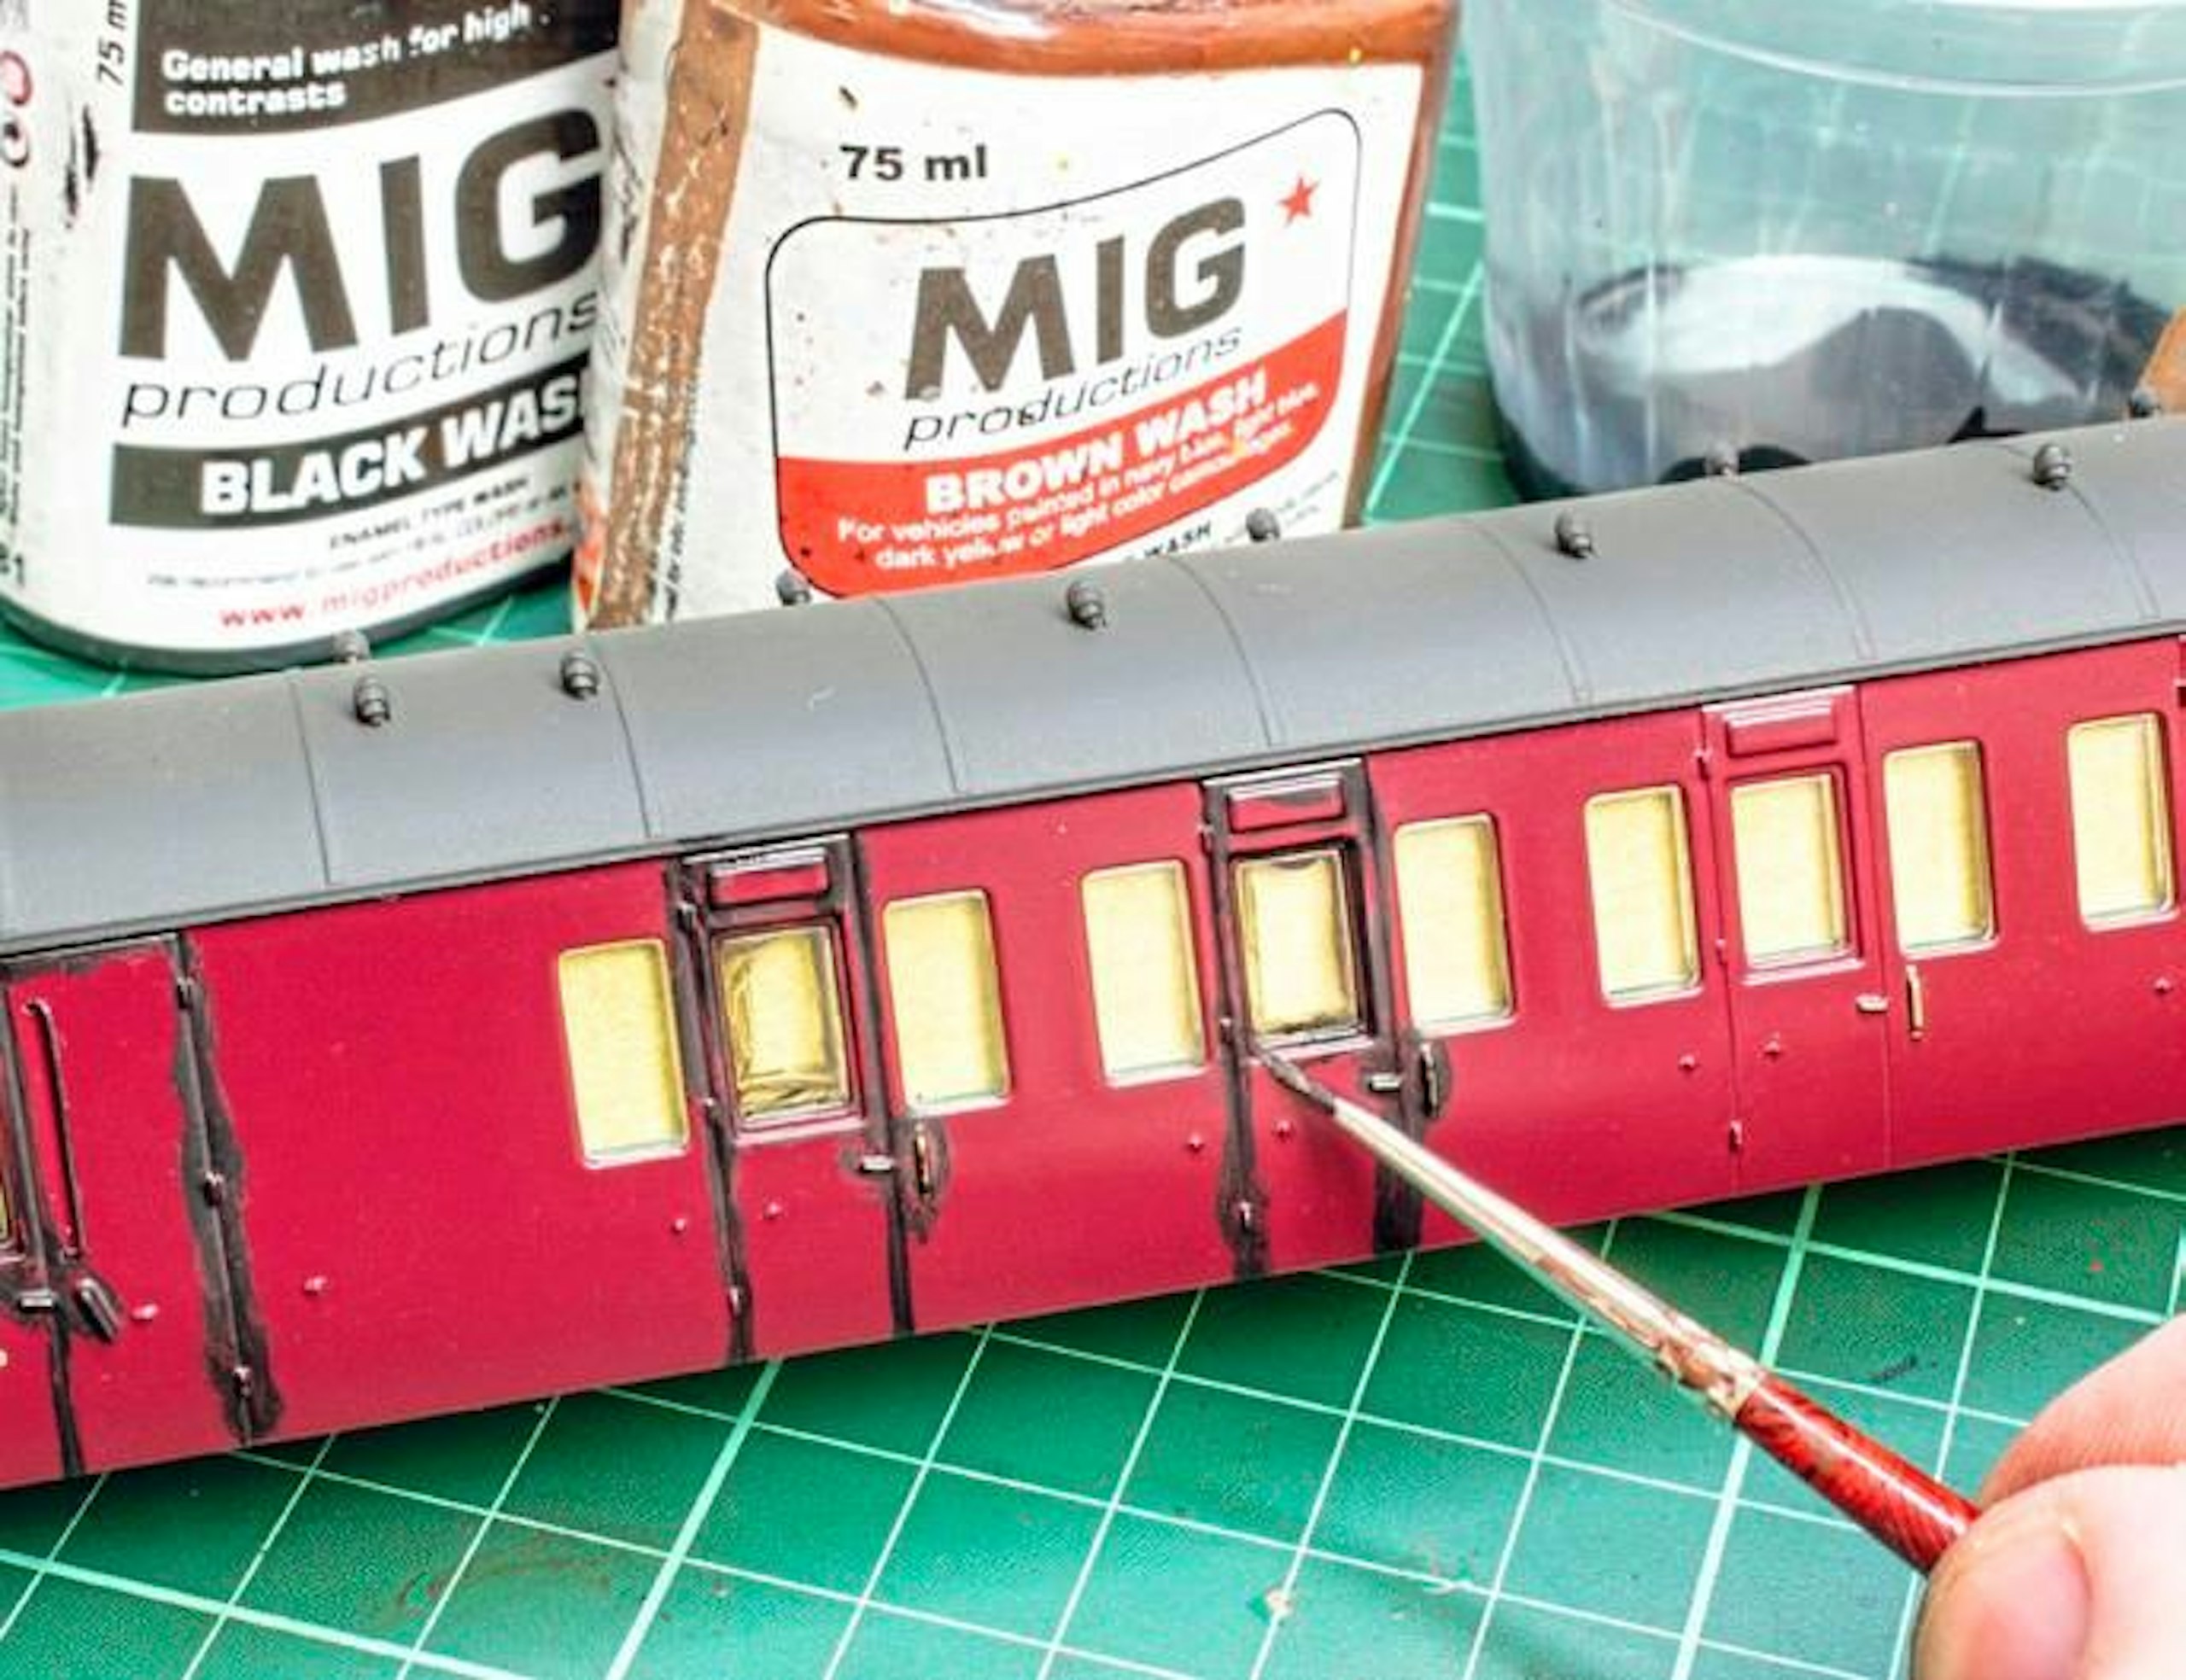
16 Before re-assembly, the sides need to be unmasked and weathering washes brushed into the door seams, around the door furniture and into the window recesses.
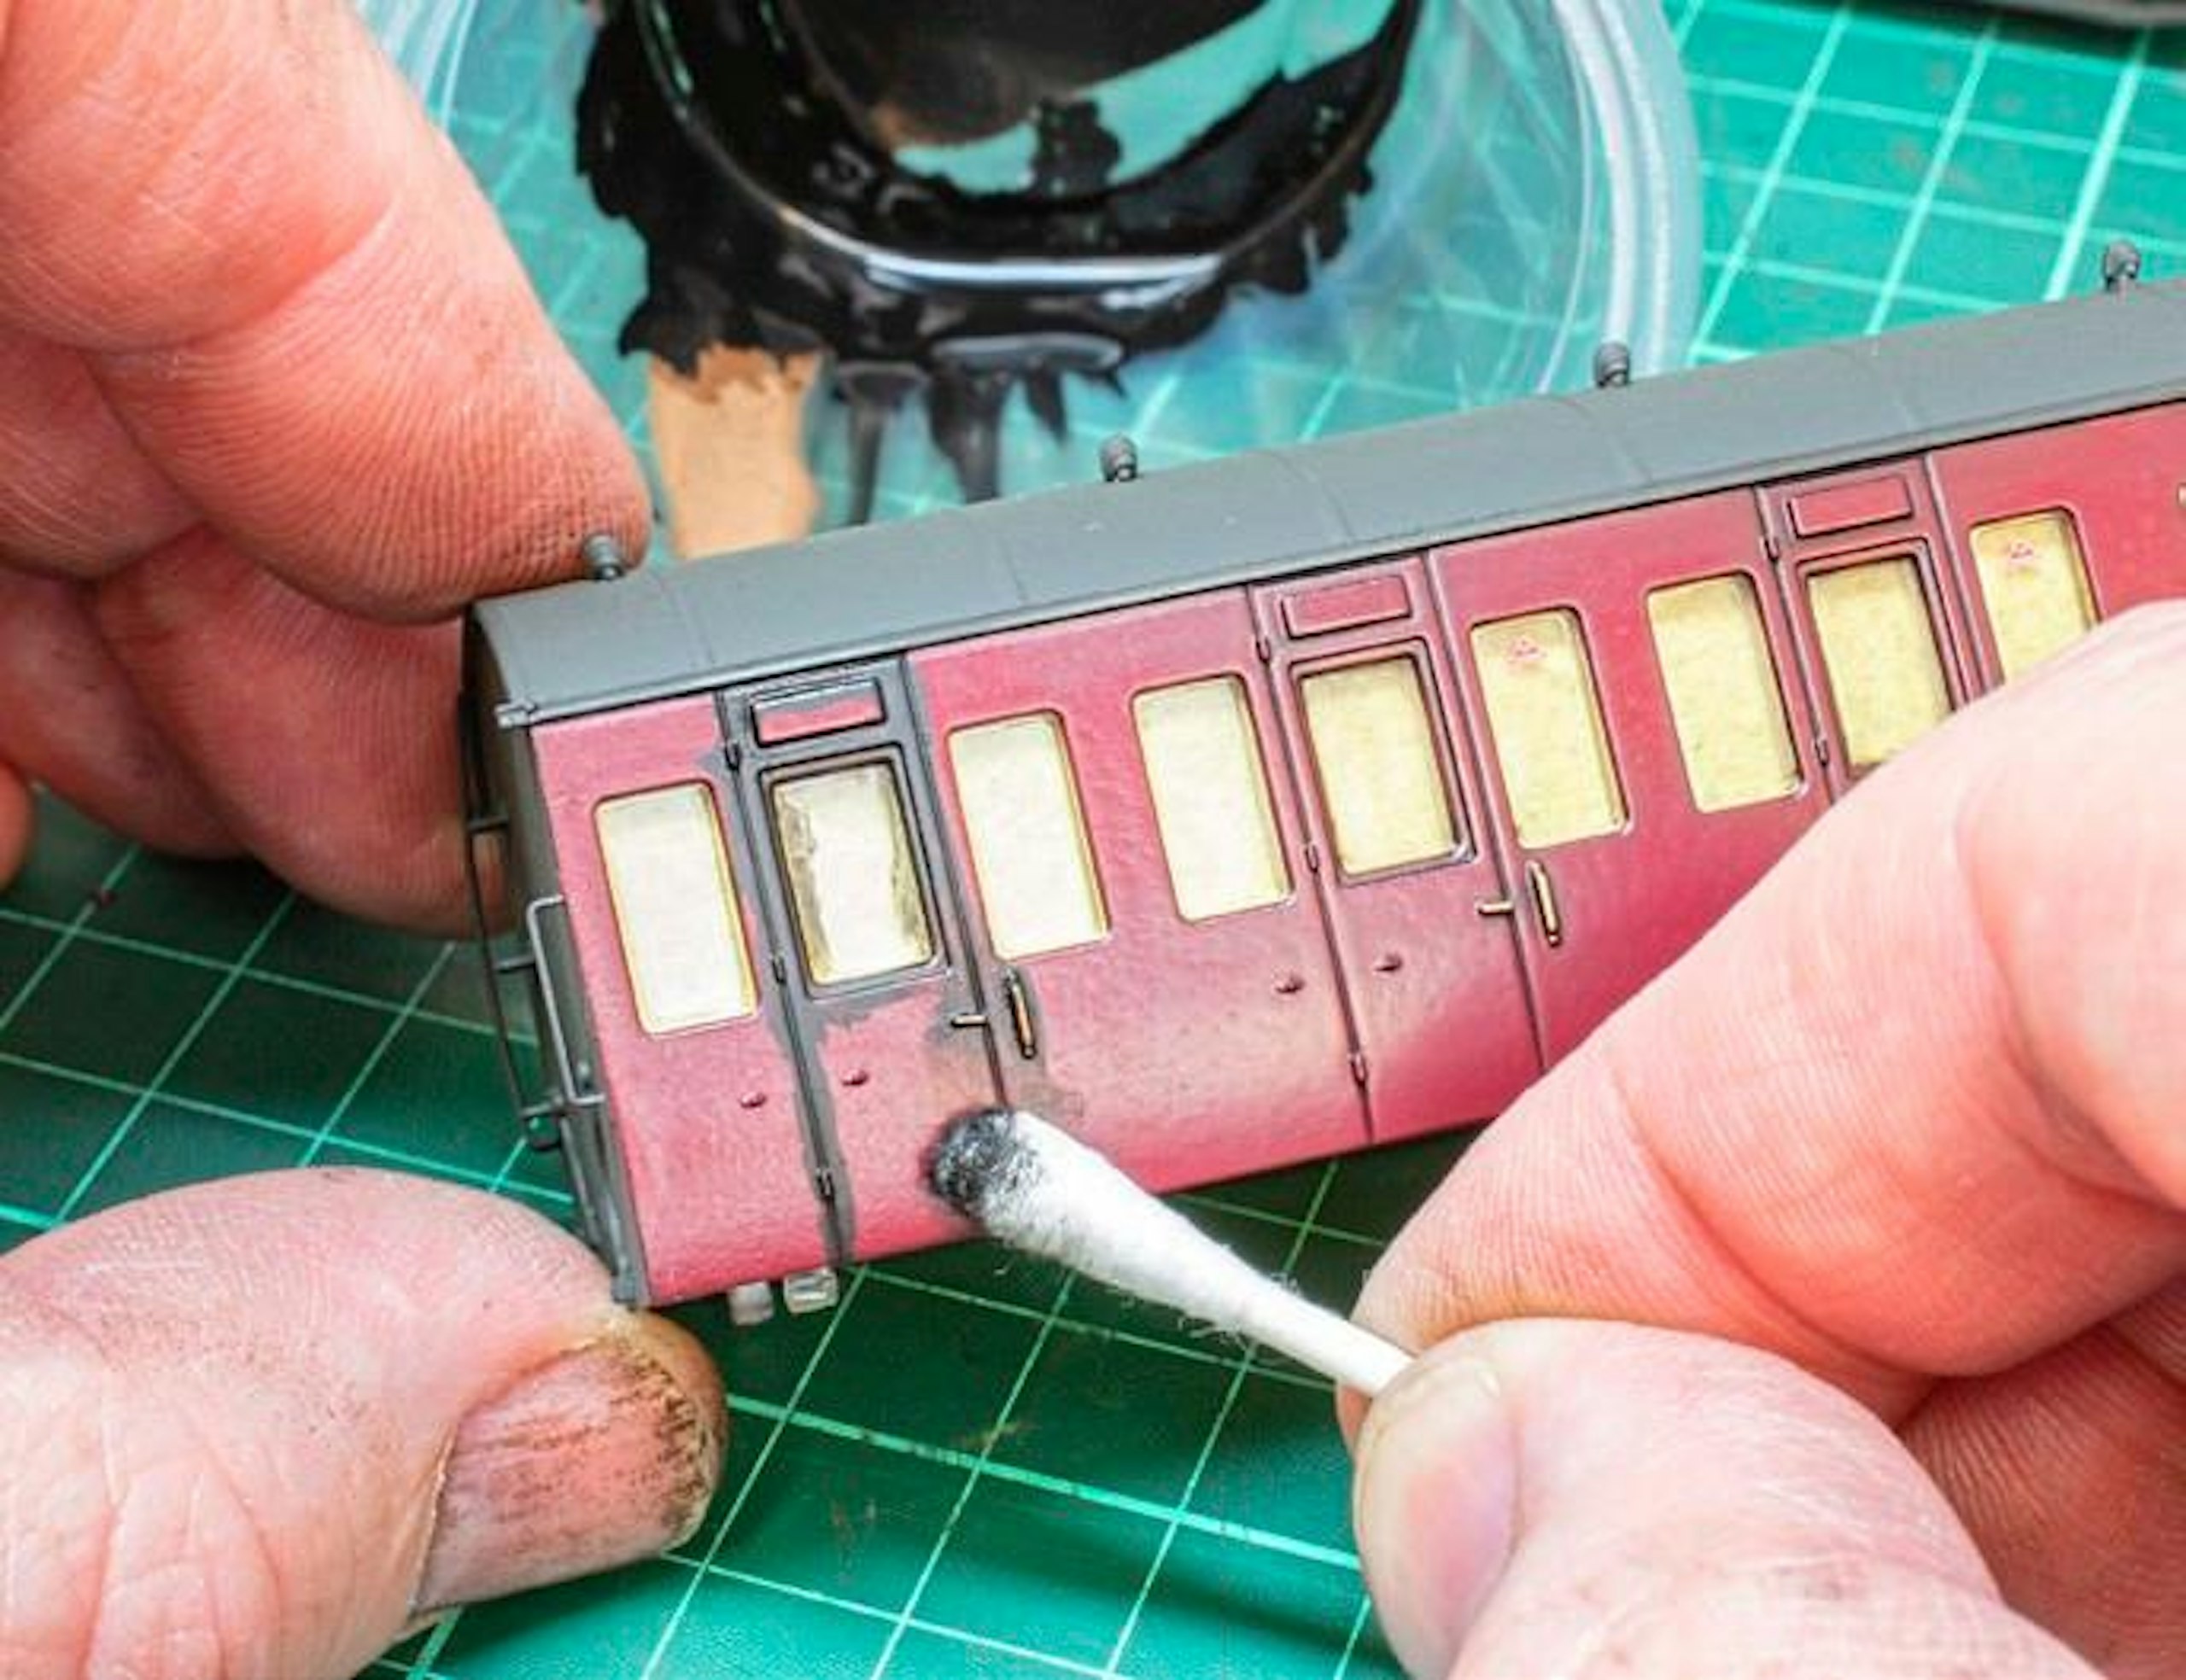
17 As the wash begins to dry, a swab wiped most of it away, leaving the dark pigment within the recessed seams. Switch to a clean swab when the cotton becomes clogged.
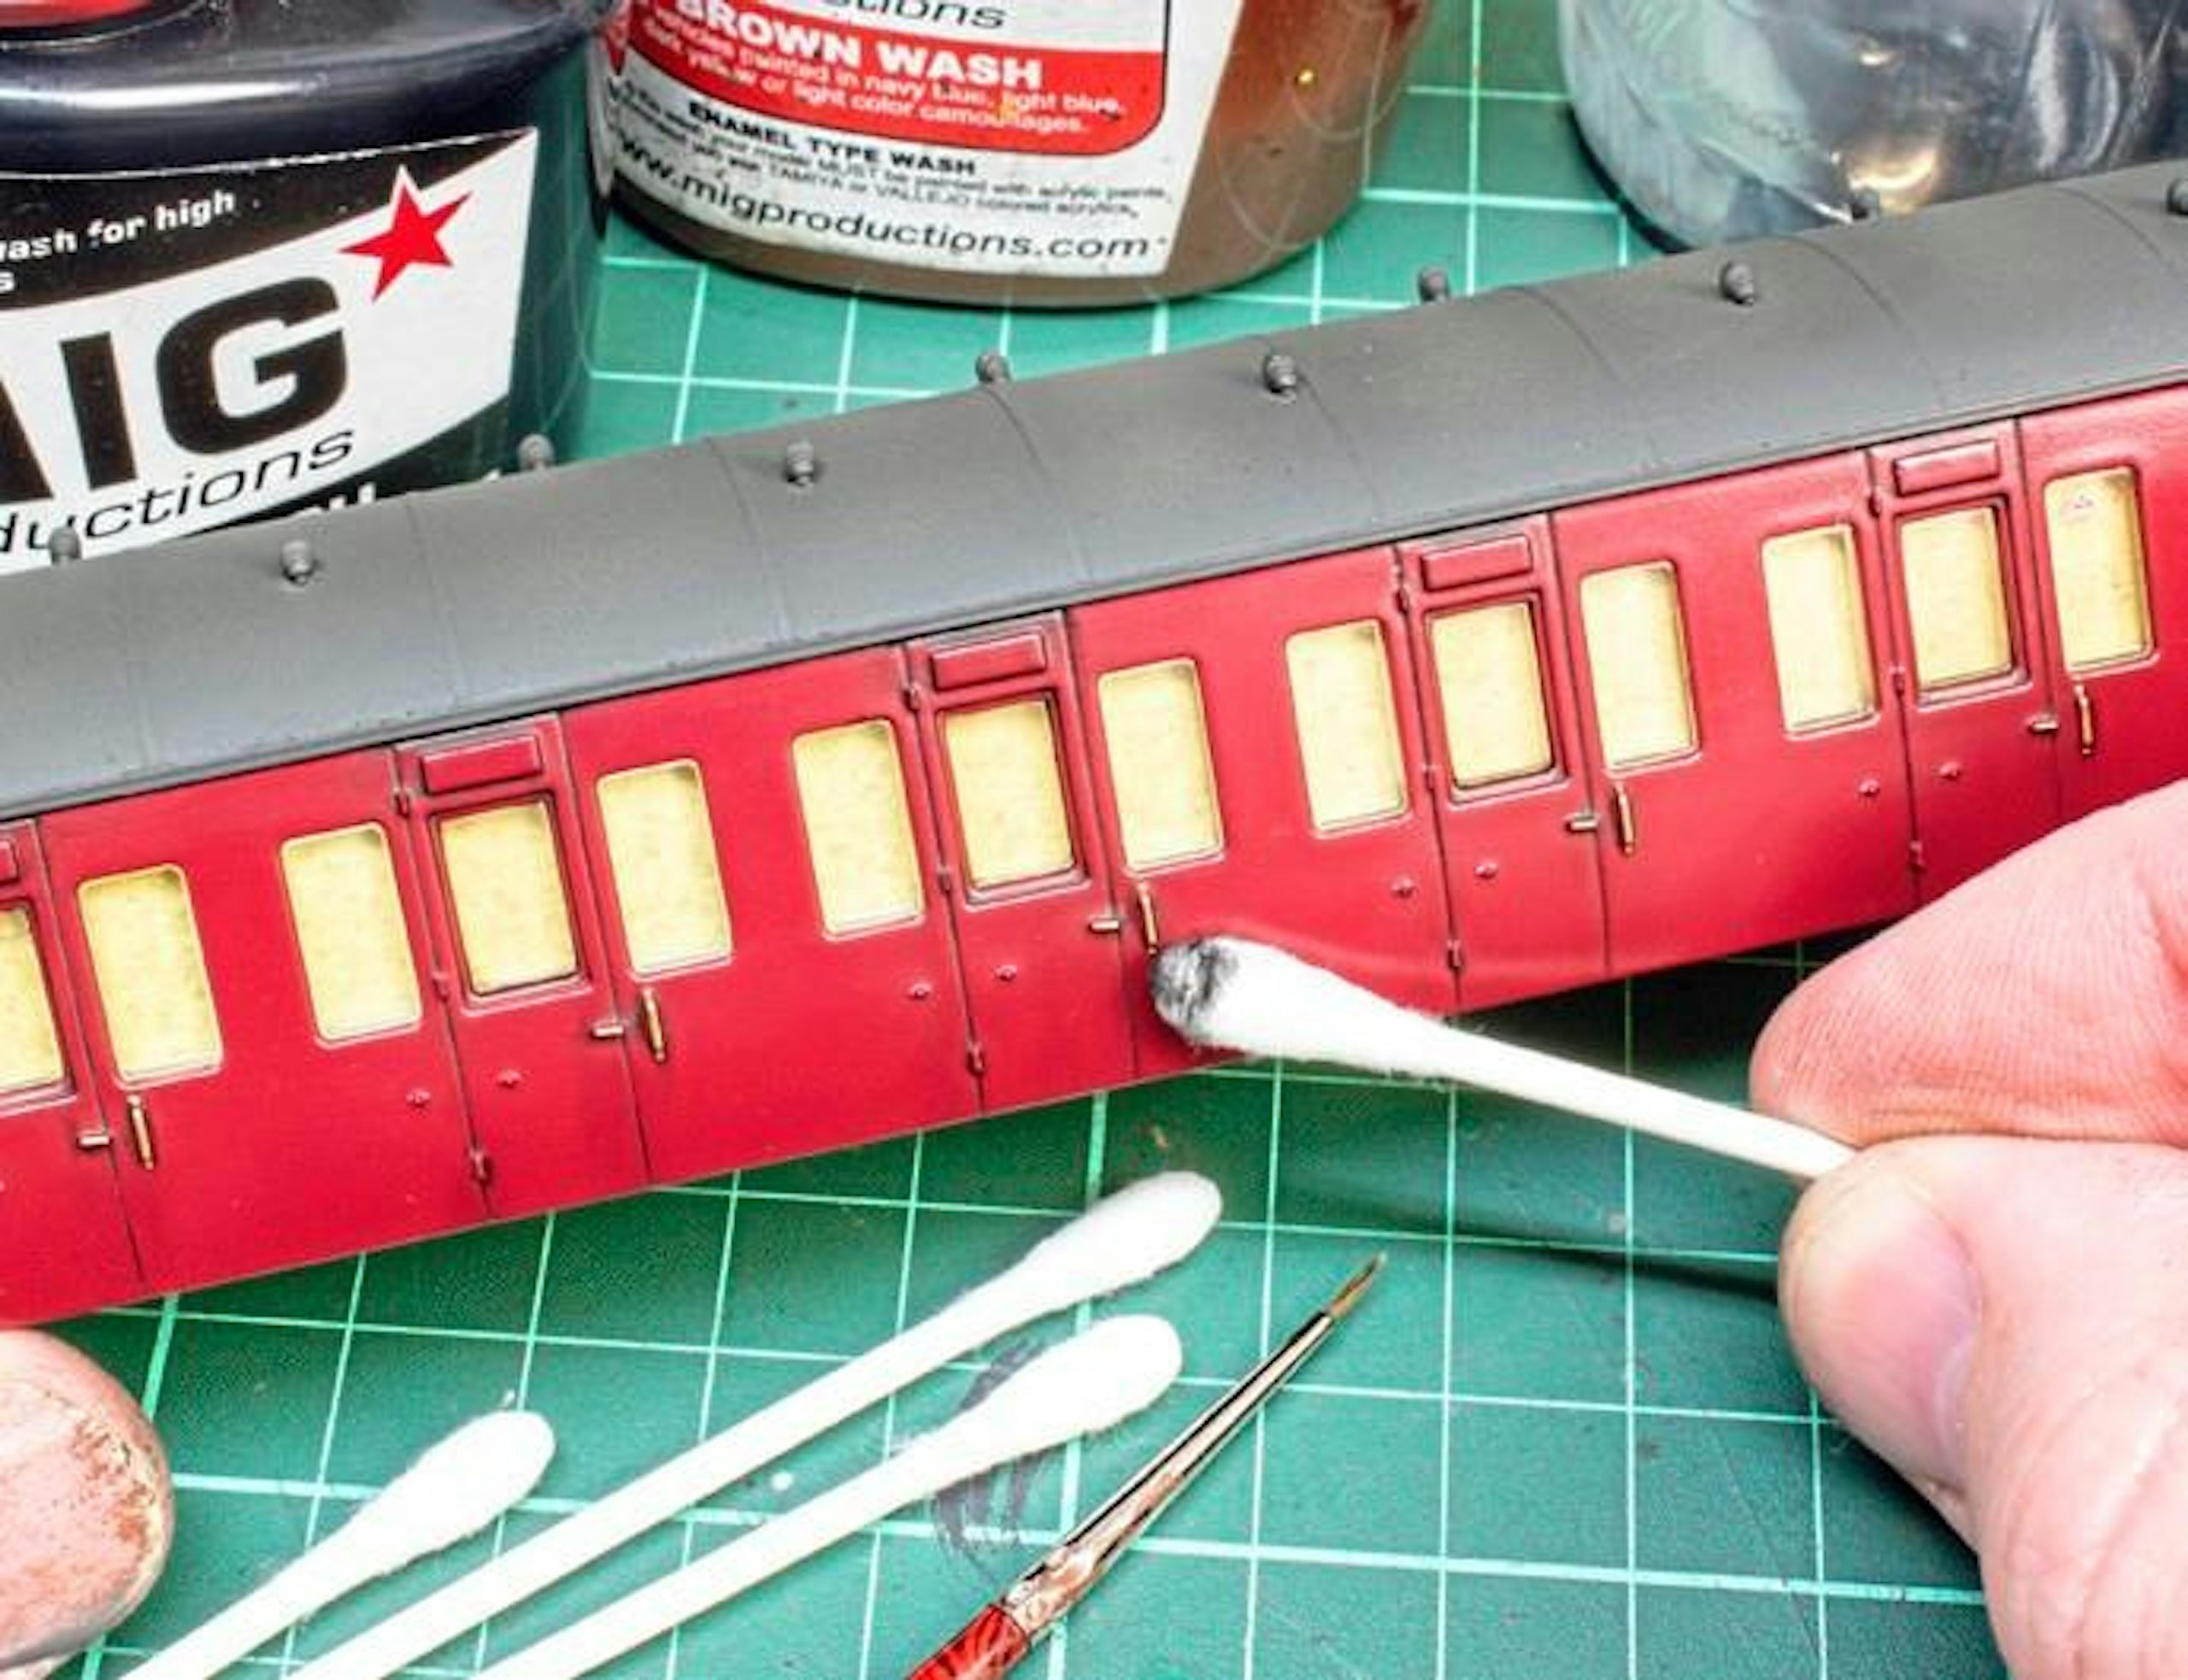
18 The results can be tailored to your tastes, and the appearance of the ‘dirt’ will depend on how dark the wash blend was. For more subtle effects, use more of a brown/light grey shade.
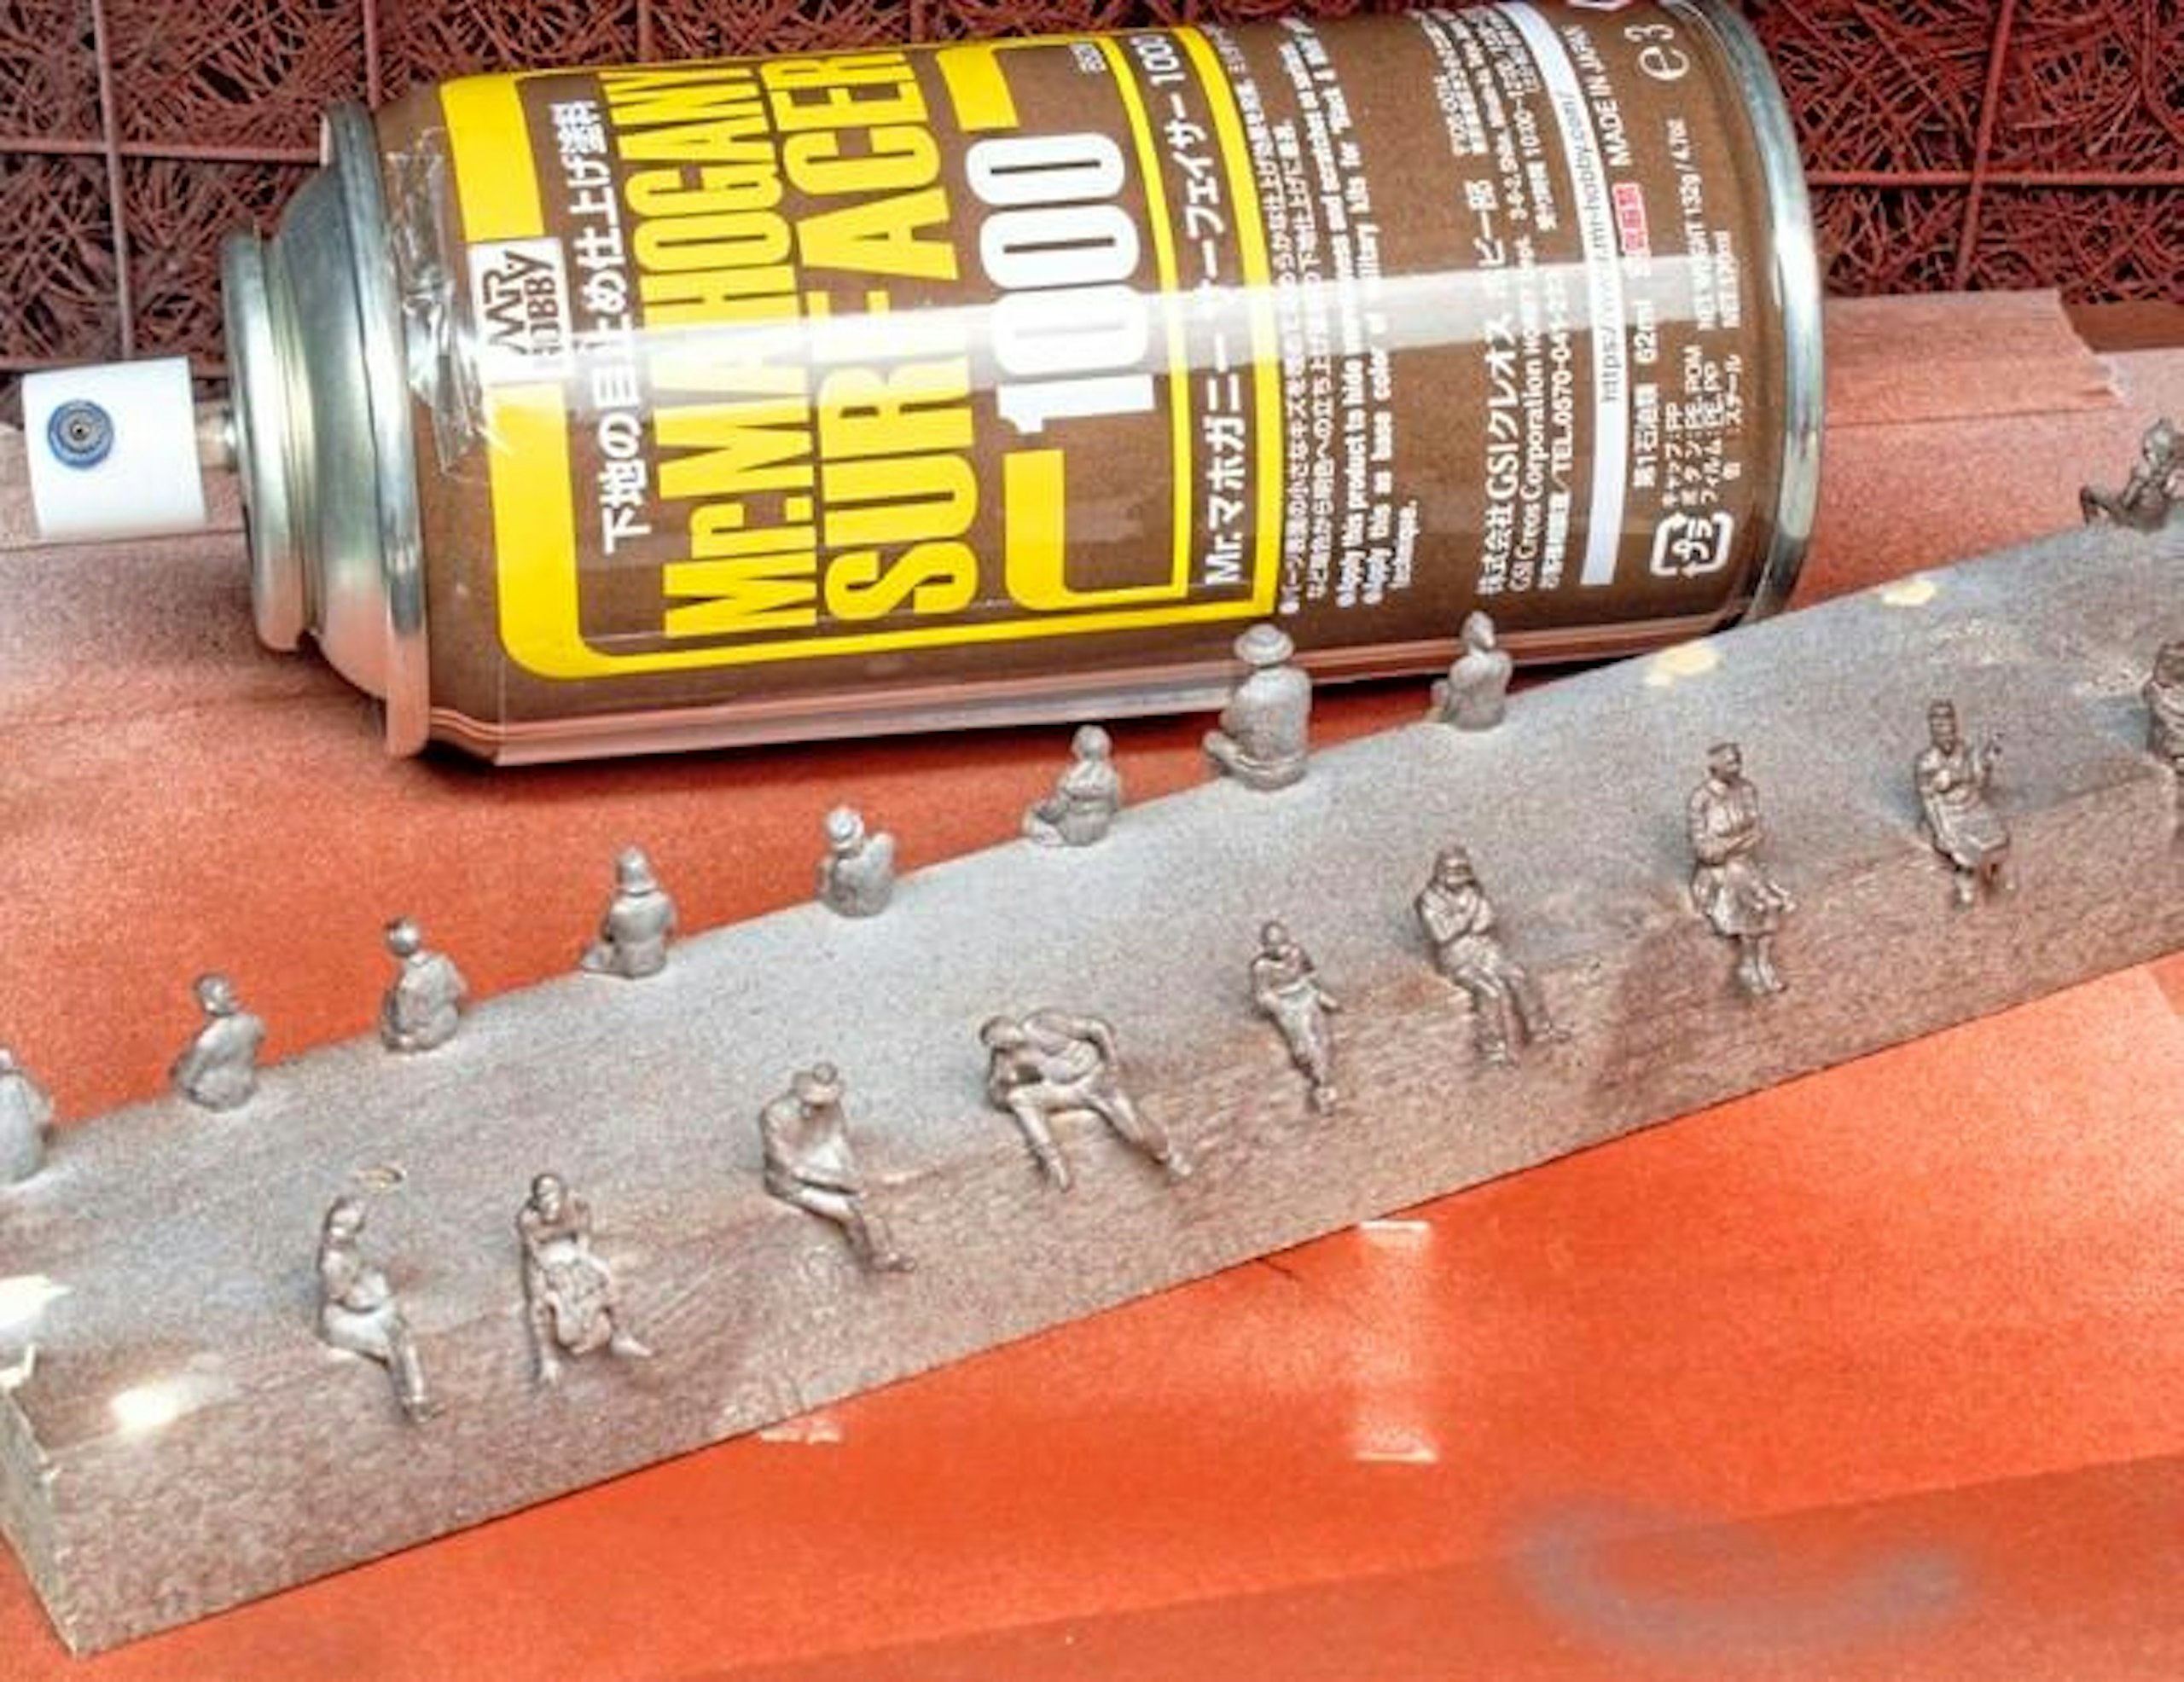
19 Attention turned to the passengers. A mix of plastic and 3D-printed figures was tacked to a scrap of wood with cyanoacrylate glue and coated with a misting of aerosol-based primer.
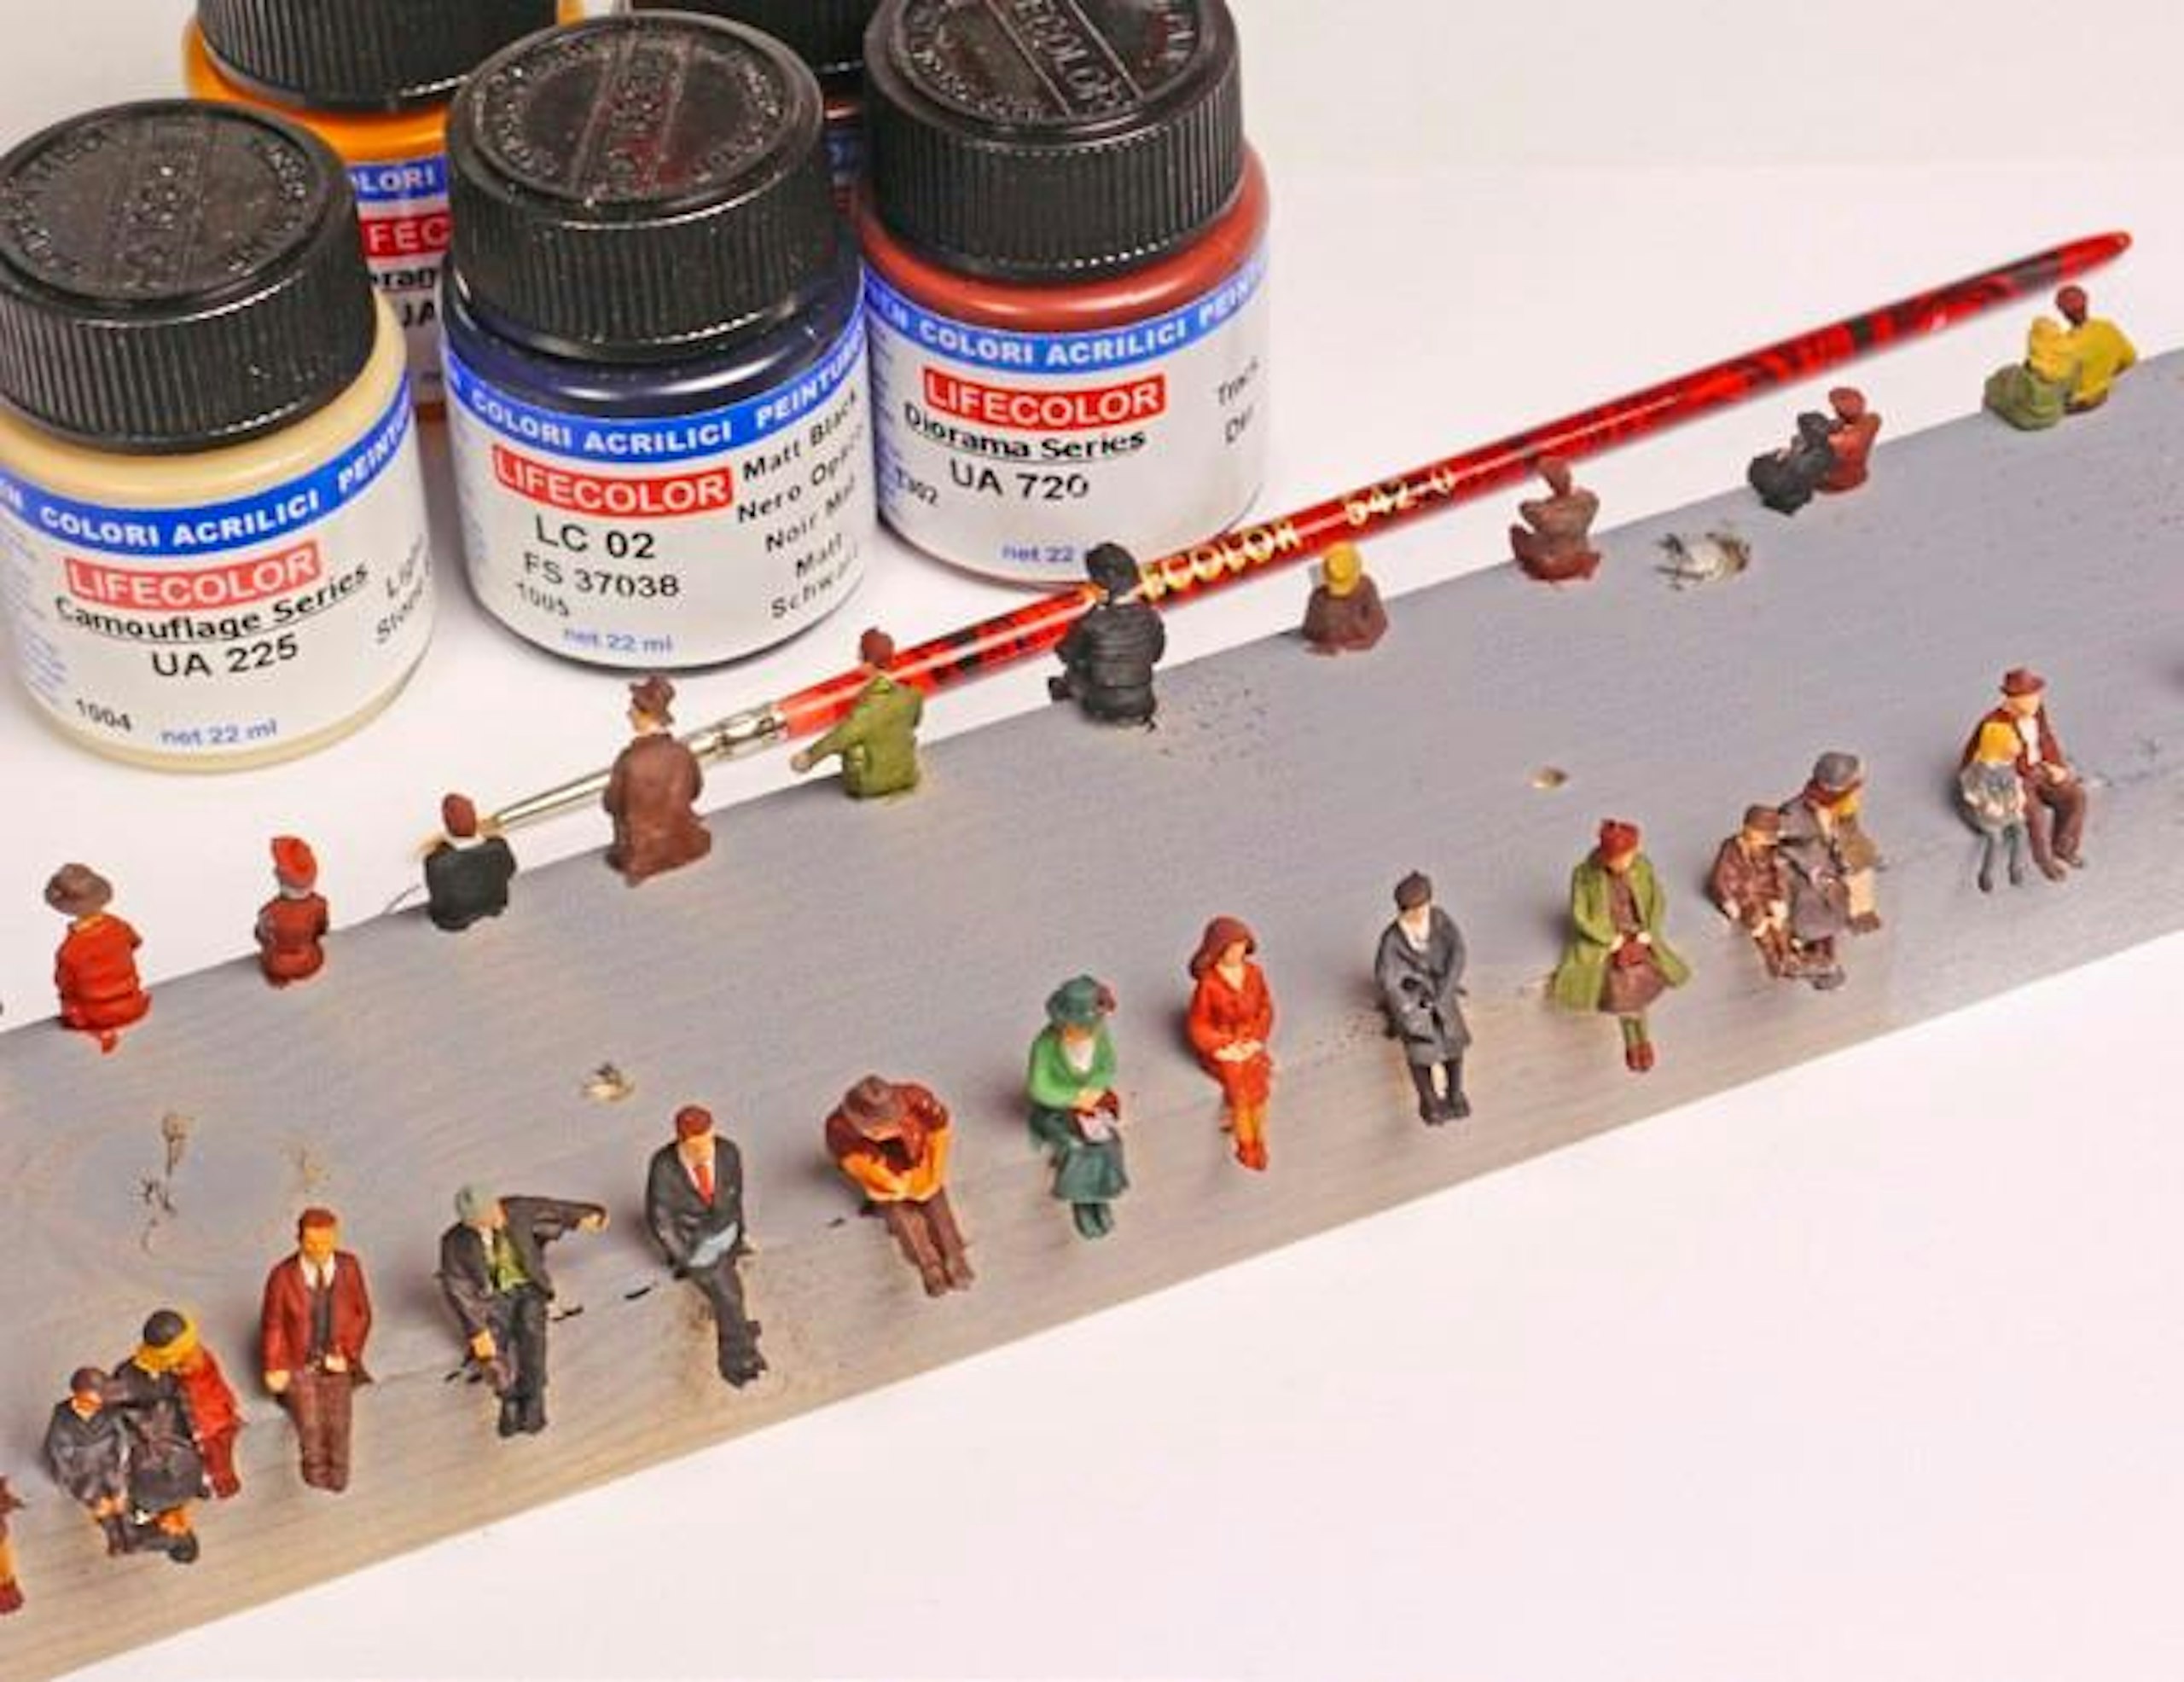
20 I used LifeColor acrylics to paint the little people, as they dry quickly, but any hobby paint will do. I tried to use muted colours for the clothing to suit the late 1950s period.
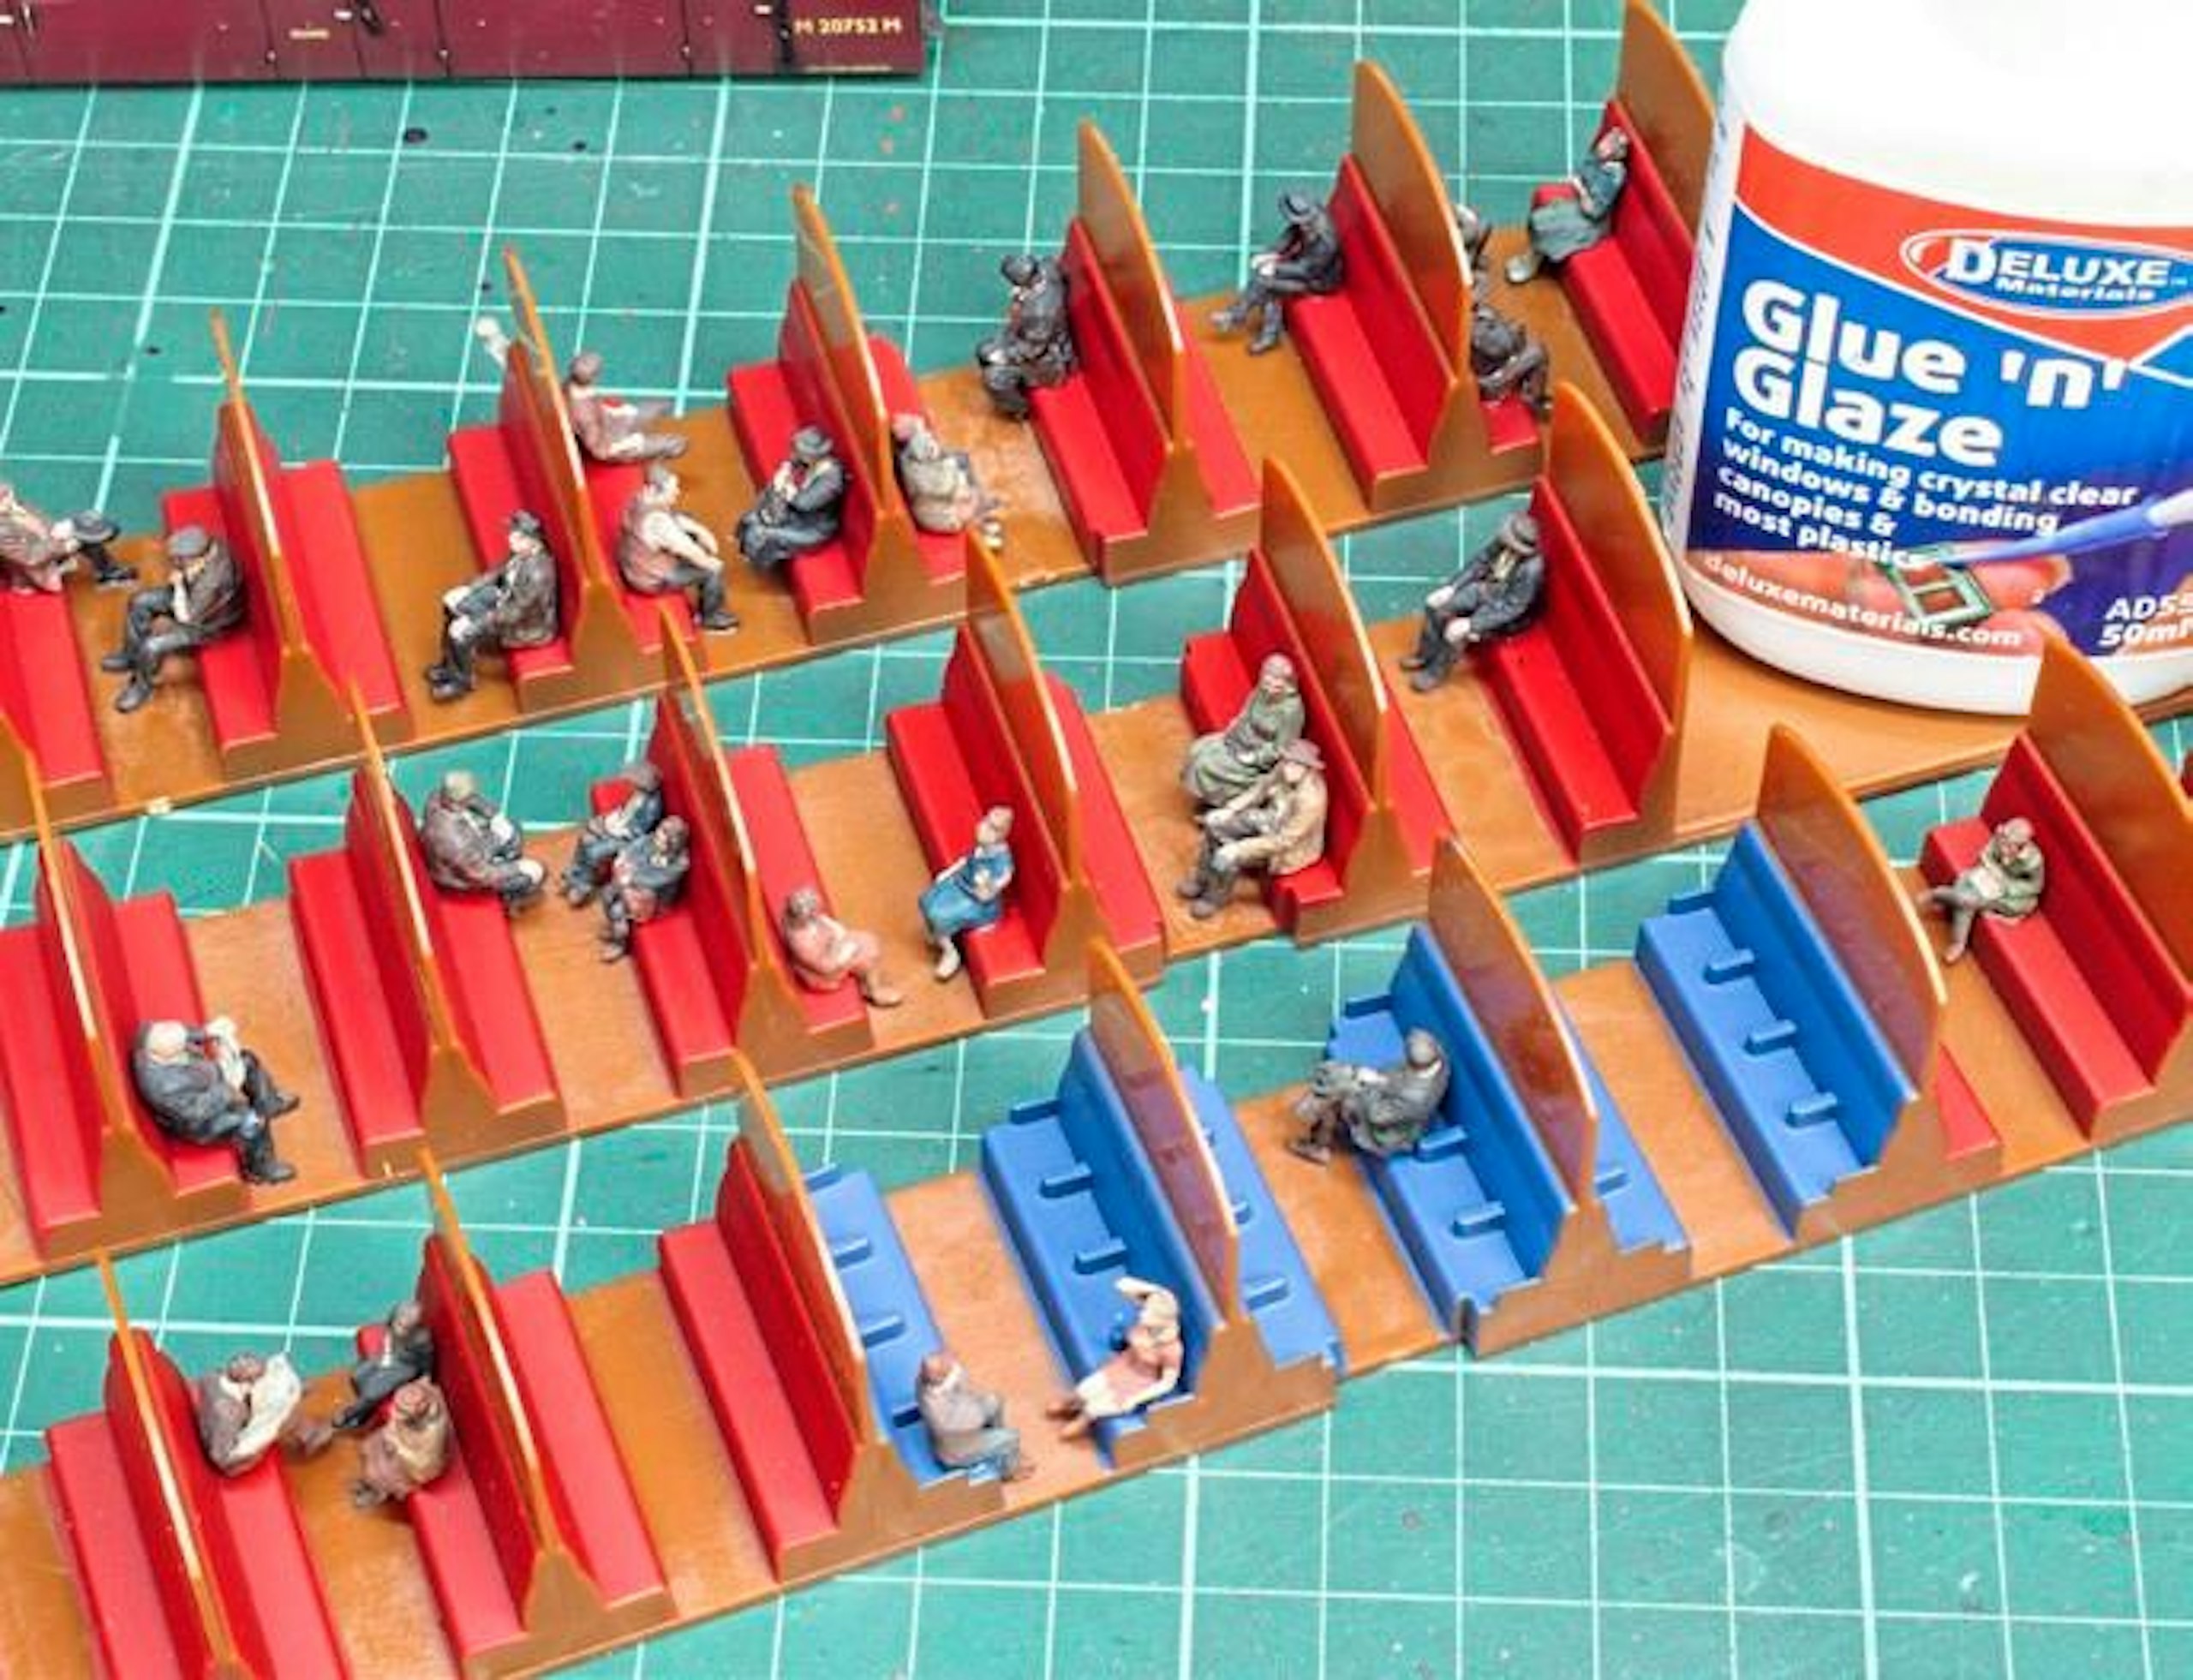
21 Painting lots of figures in one go can feel laborious, so I did it in shifts to save my sanity. Once complete, they were gently ‘snapped’ off the wood block and fixed into the interiors.
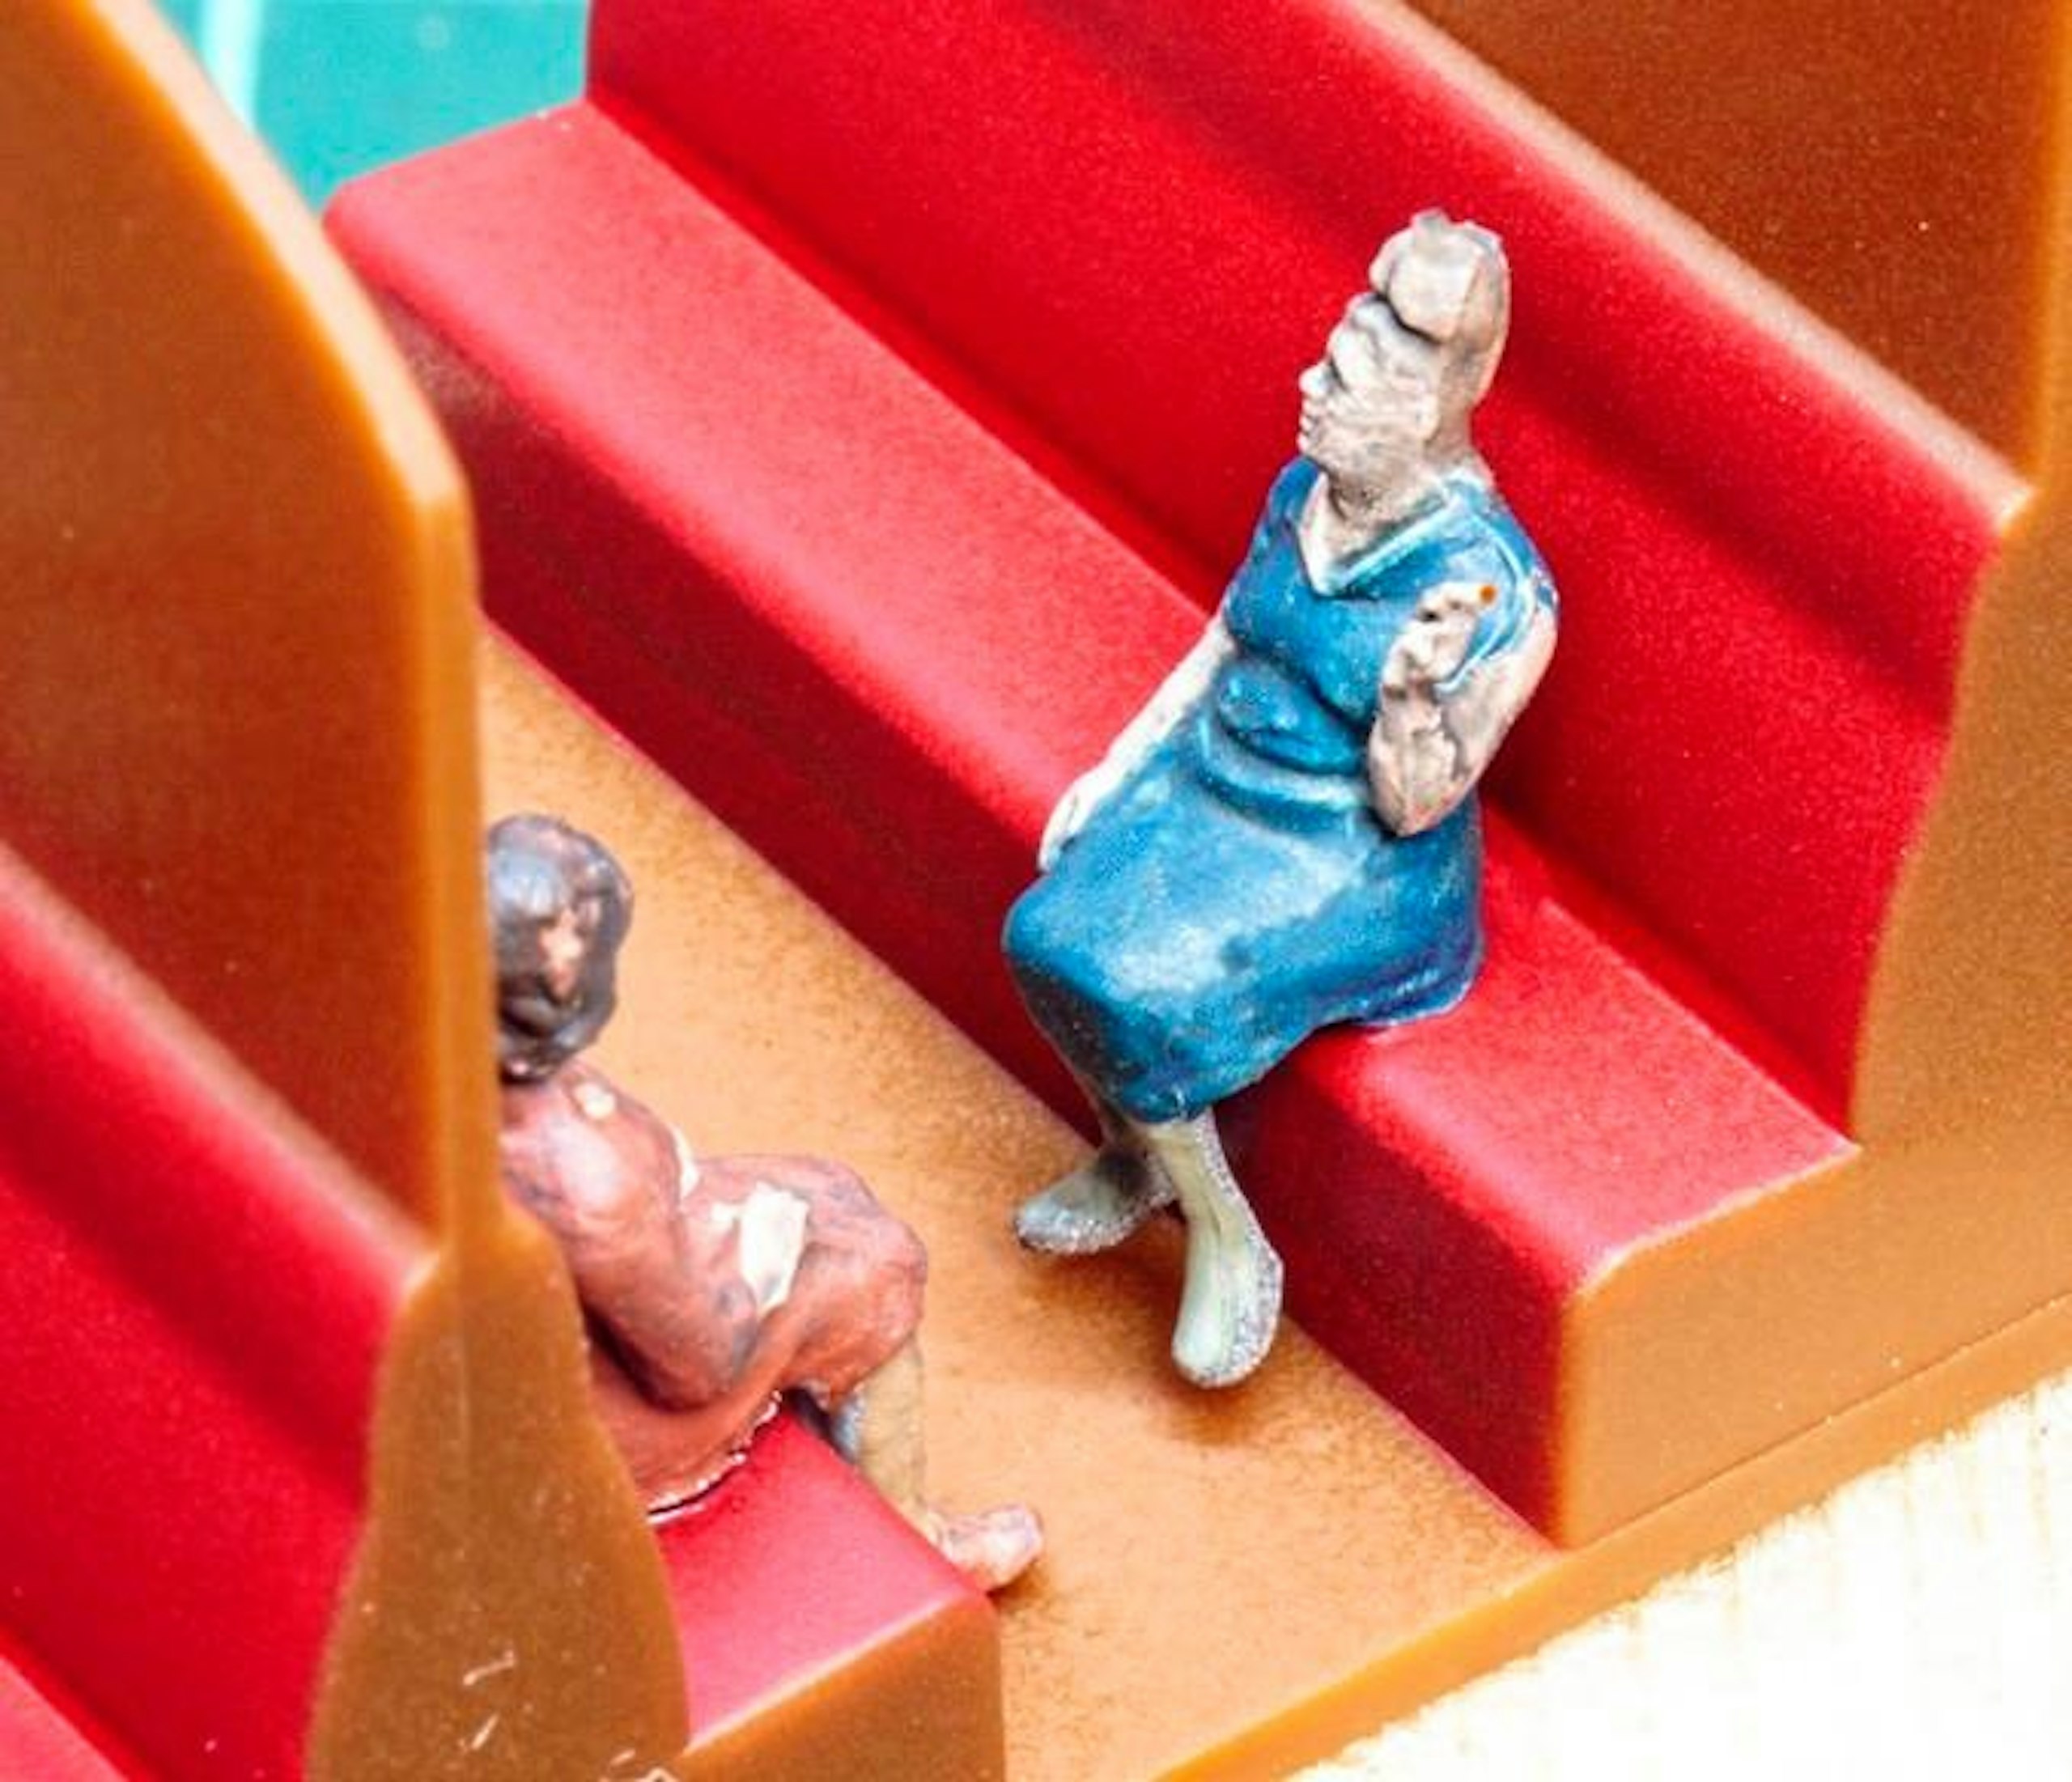
22 The Glue ‘n’ Glaze takes time to cure. I noticed this lady had a cigarette on the go, so I made sure she was sat in one of the smoking compartments.
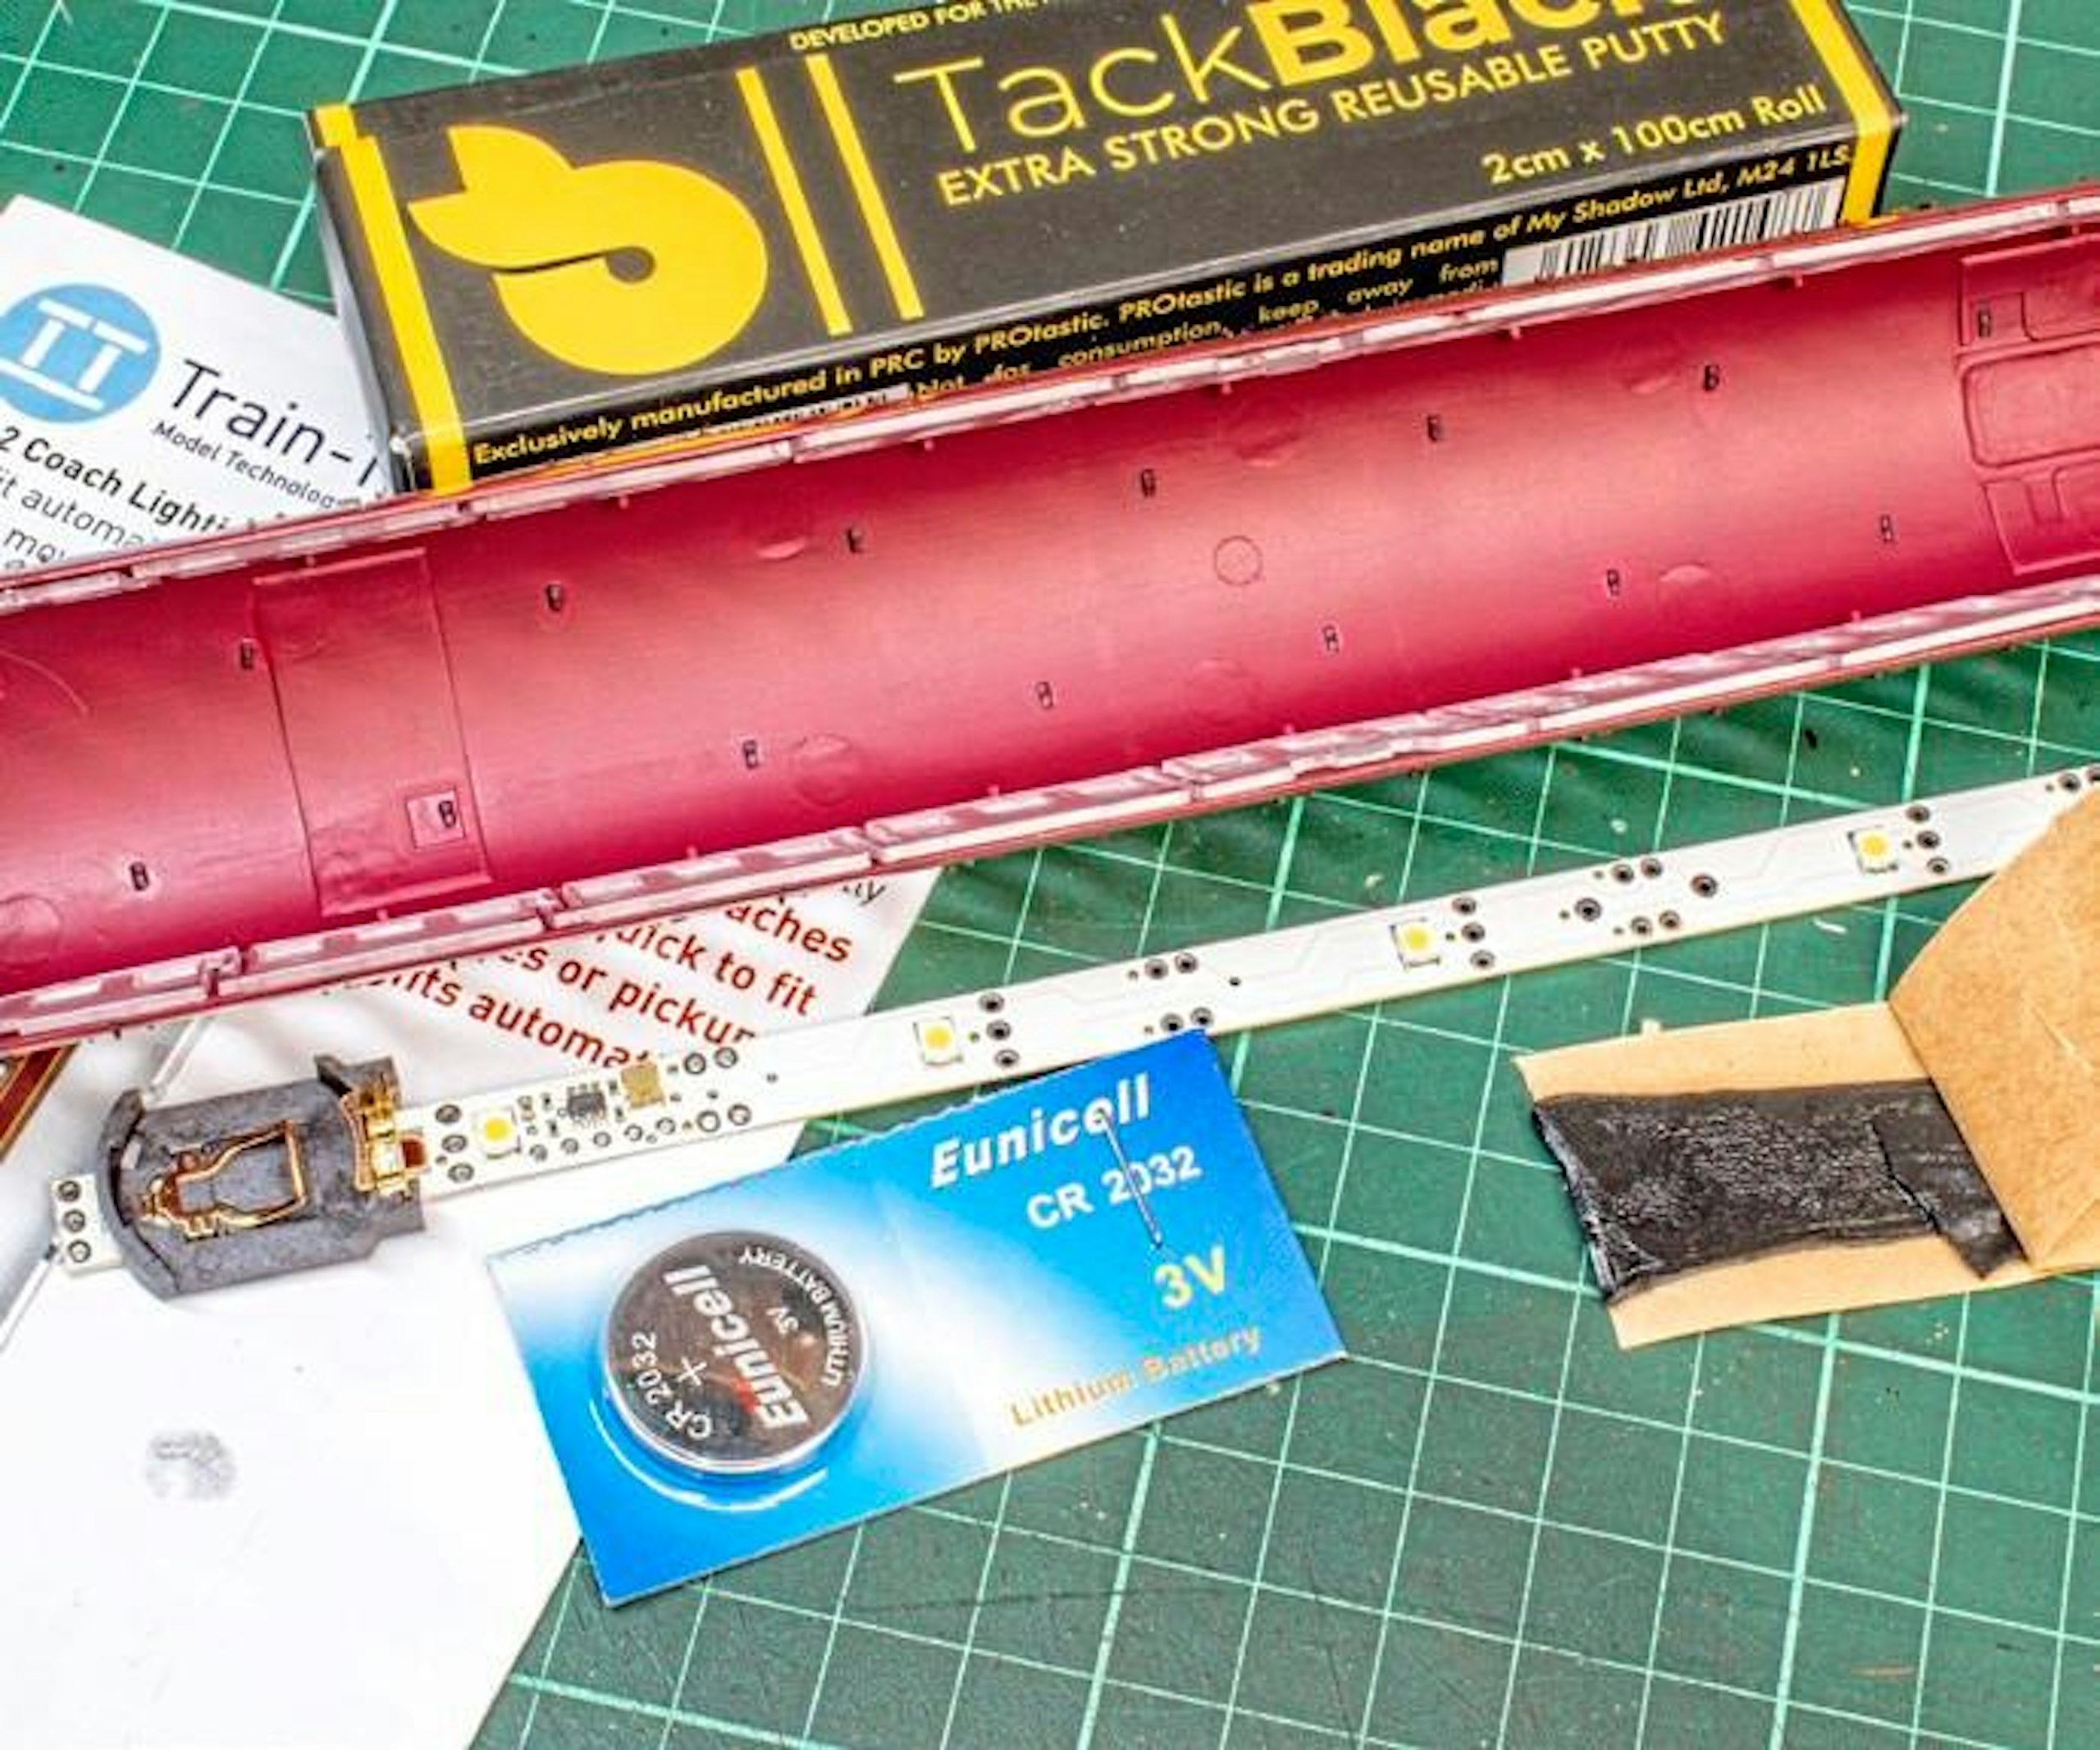
23 I’d been saving a few Train-Tech coach lighting kits for these coaches. They’re battery-powered and feature motion sensors. Simply insert the battery and fix the unit to the inside of the roof.
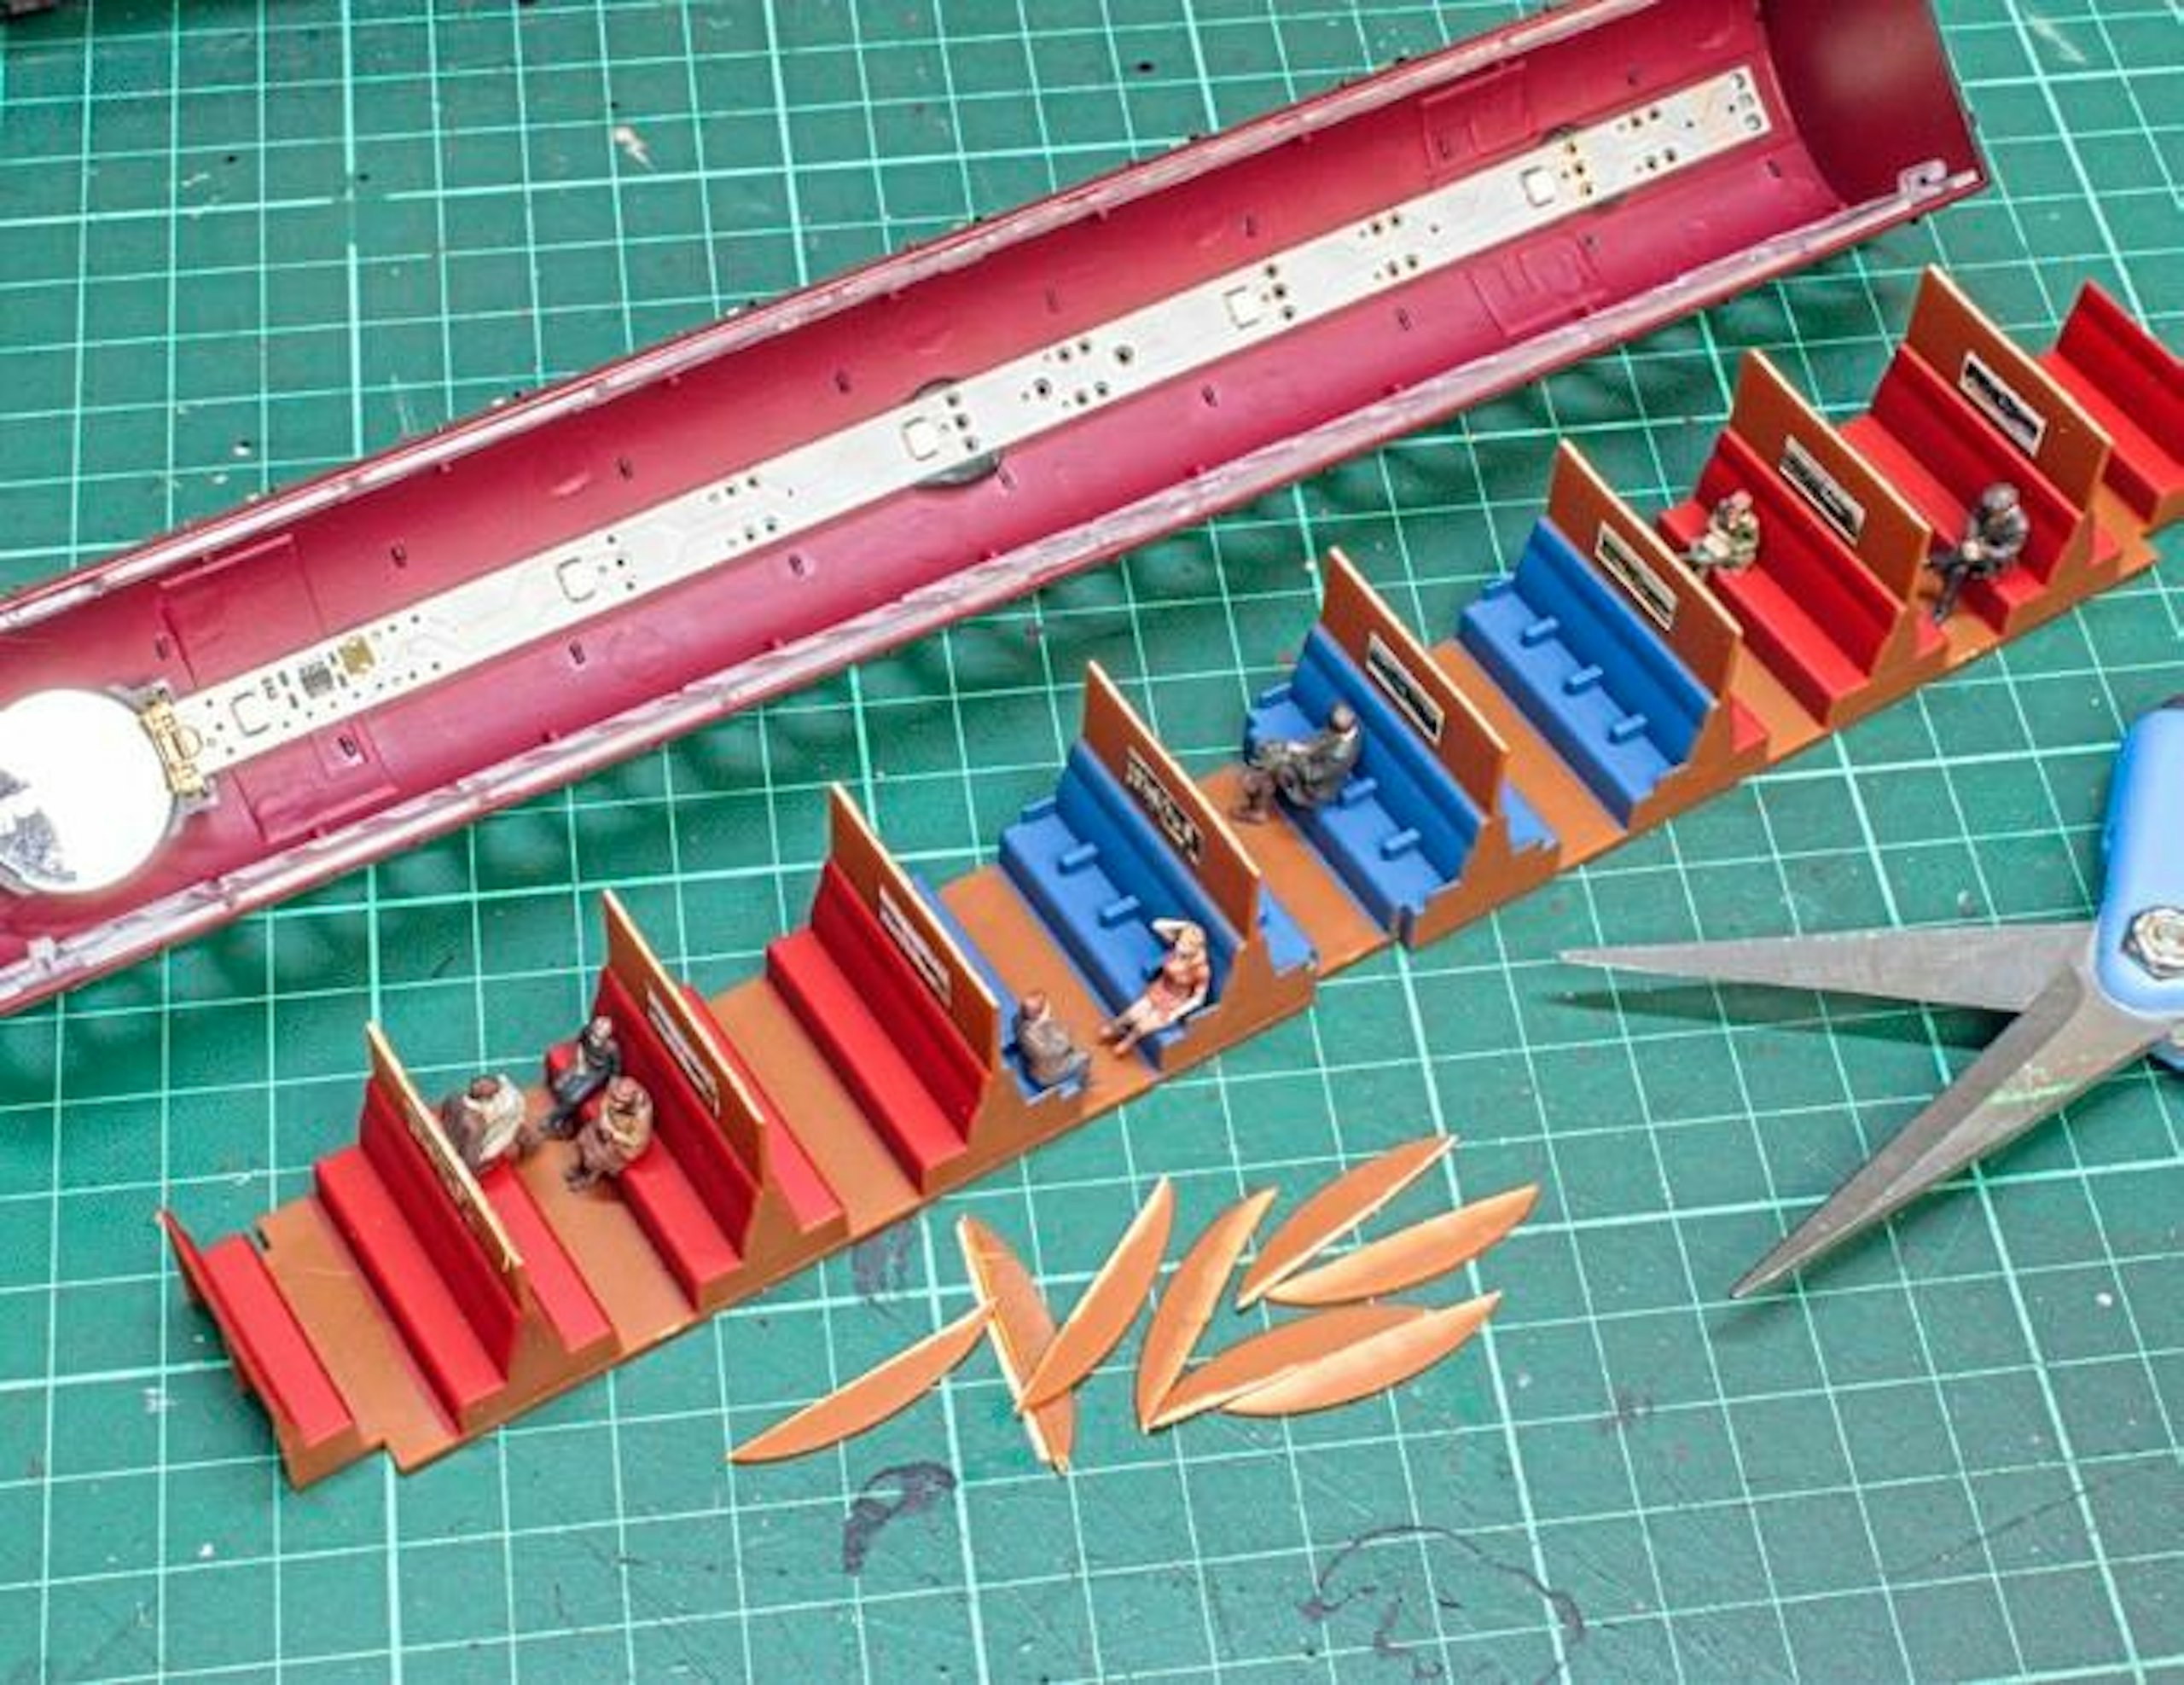
24 I used Black Tack to secure the lighting strip. After a test fit, I had to trim the tops of the compartment bulkheads to provide clearance for the lighting circuit board.
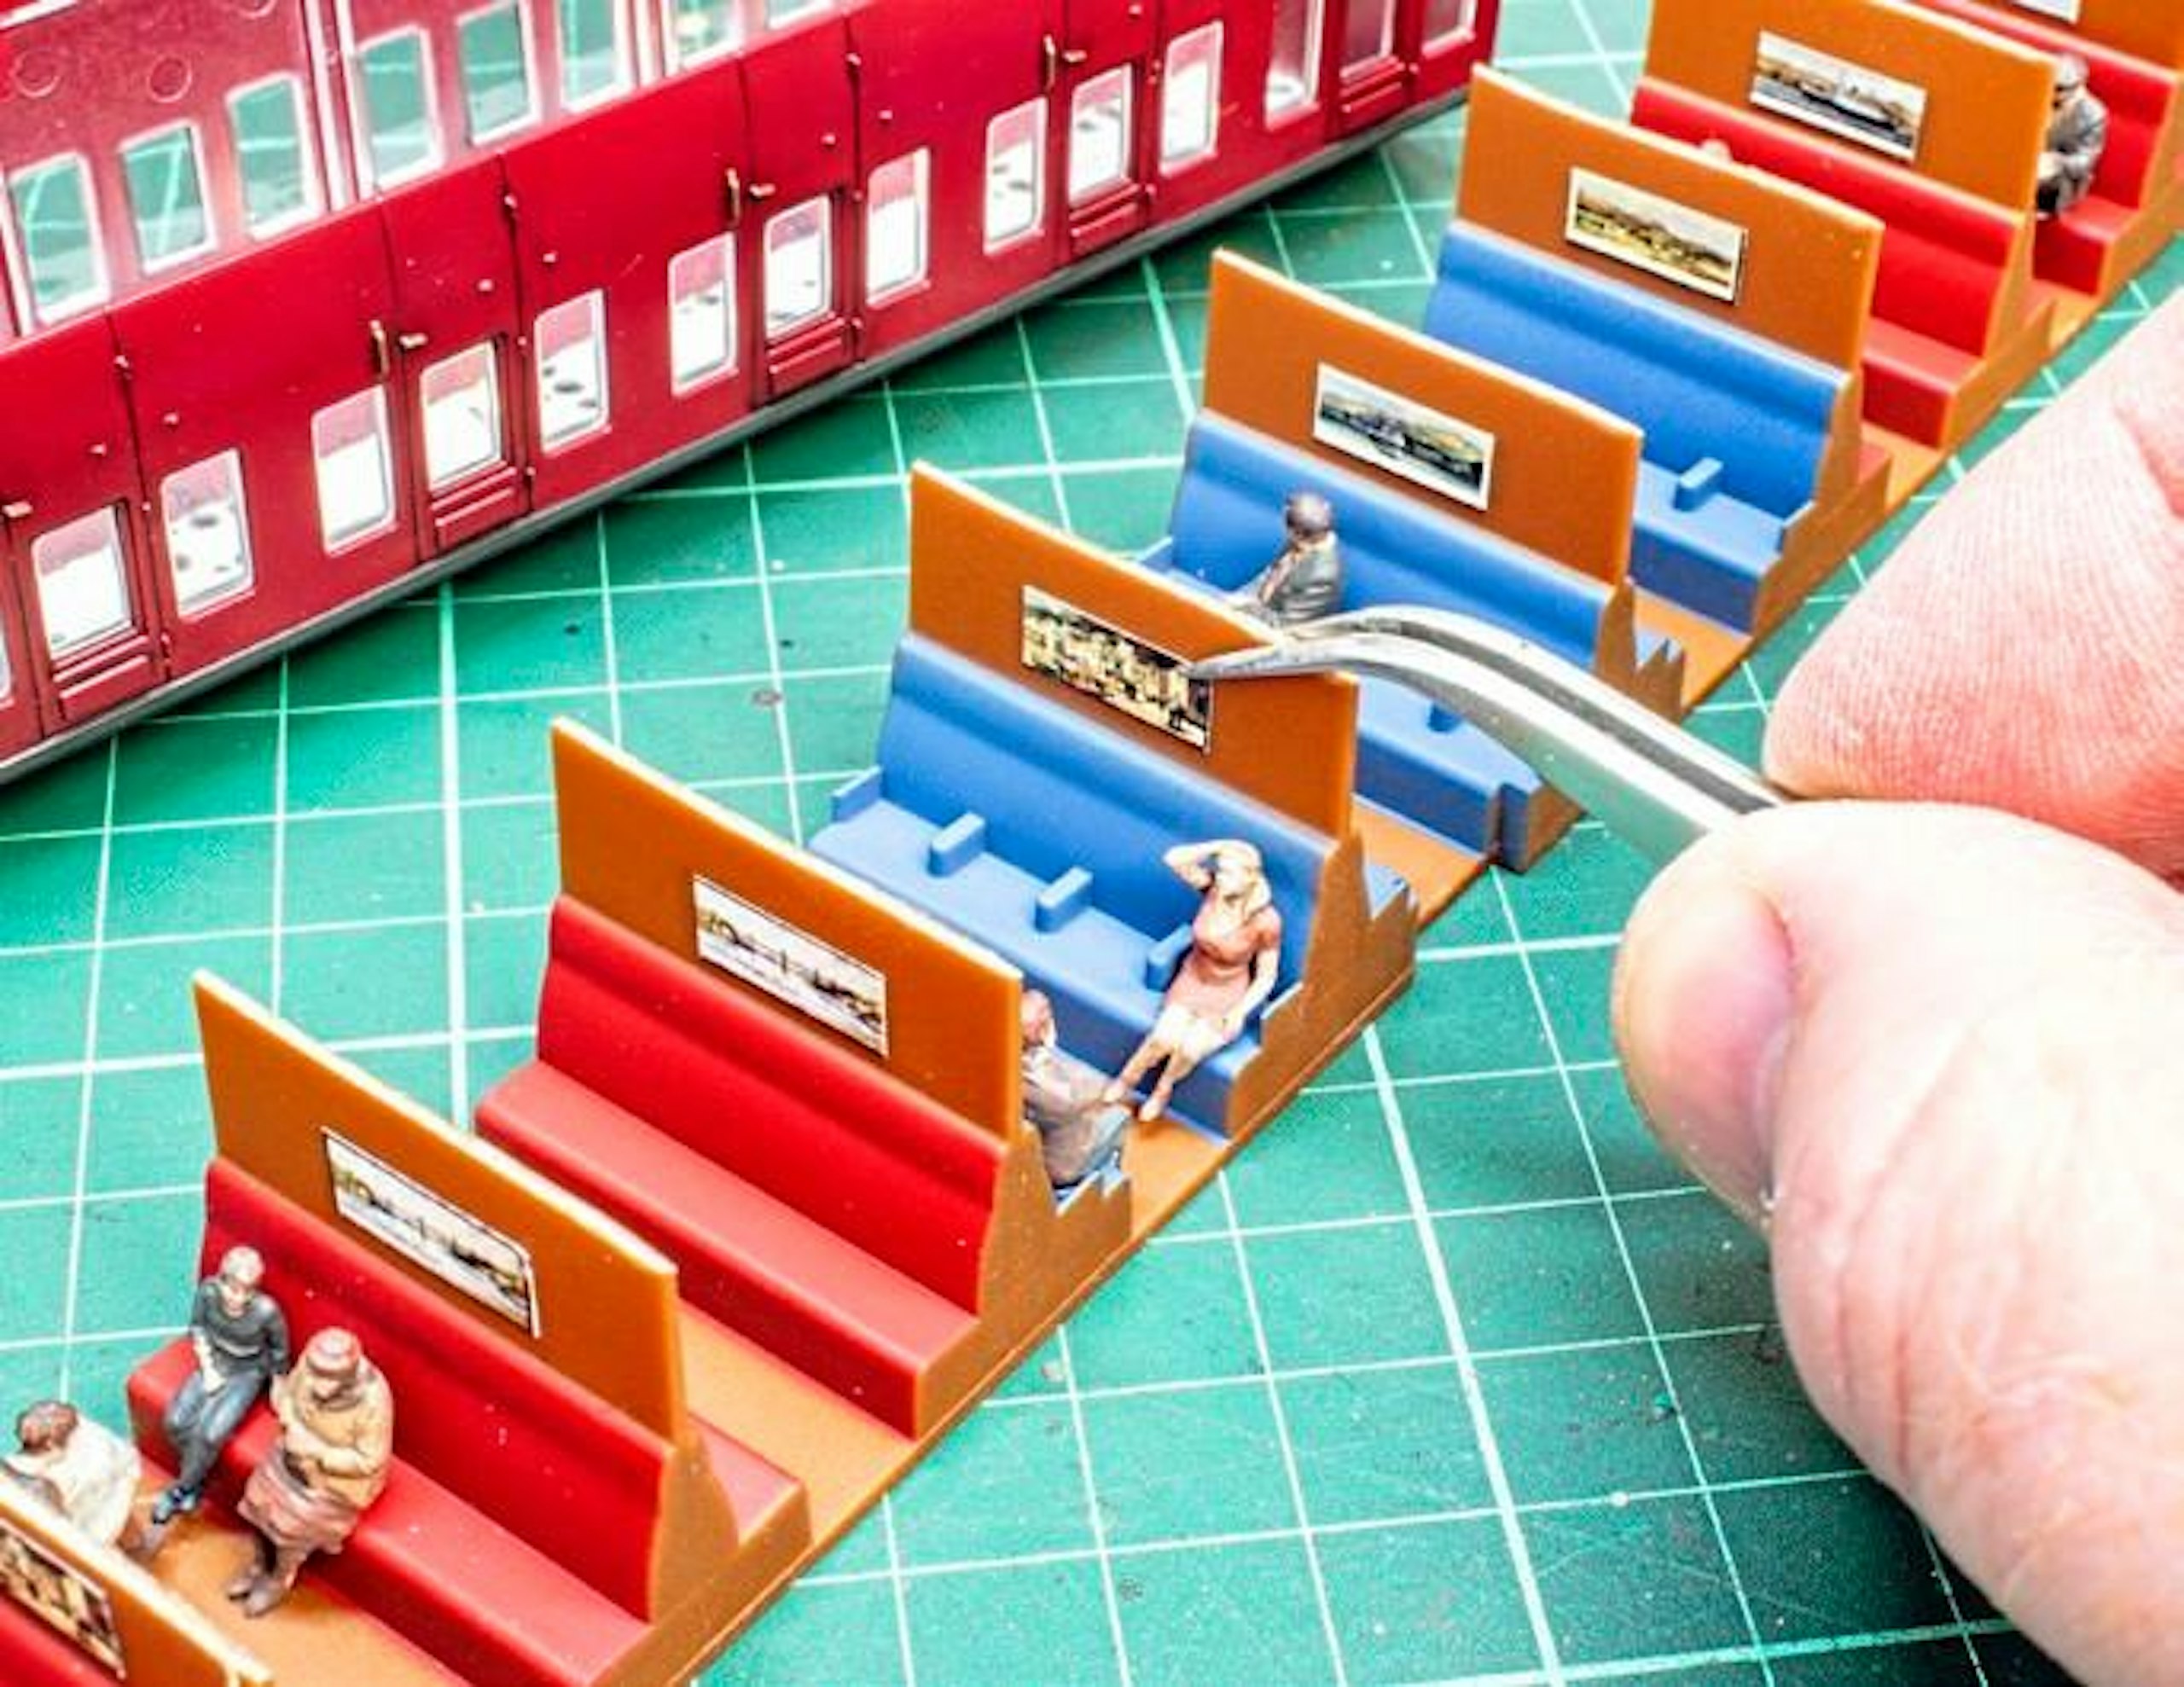
25 A final touch for the interiors was a series of printed carriage prints, which were cut from a sheet and fixed in place with a small bead of Glue ‘n’ Glaze.
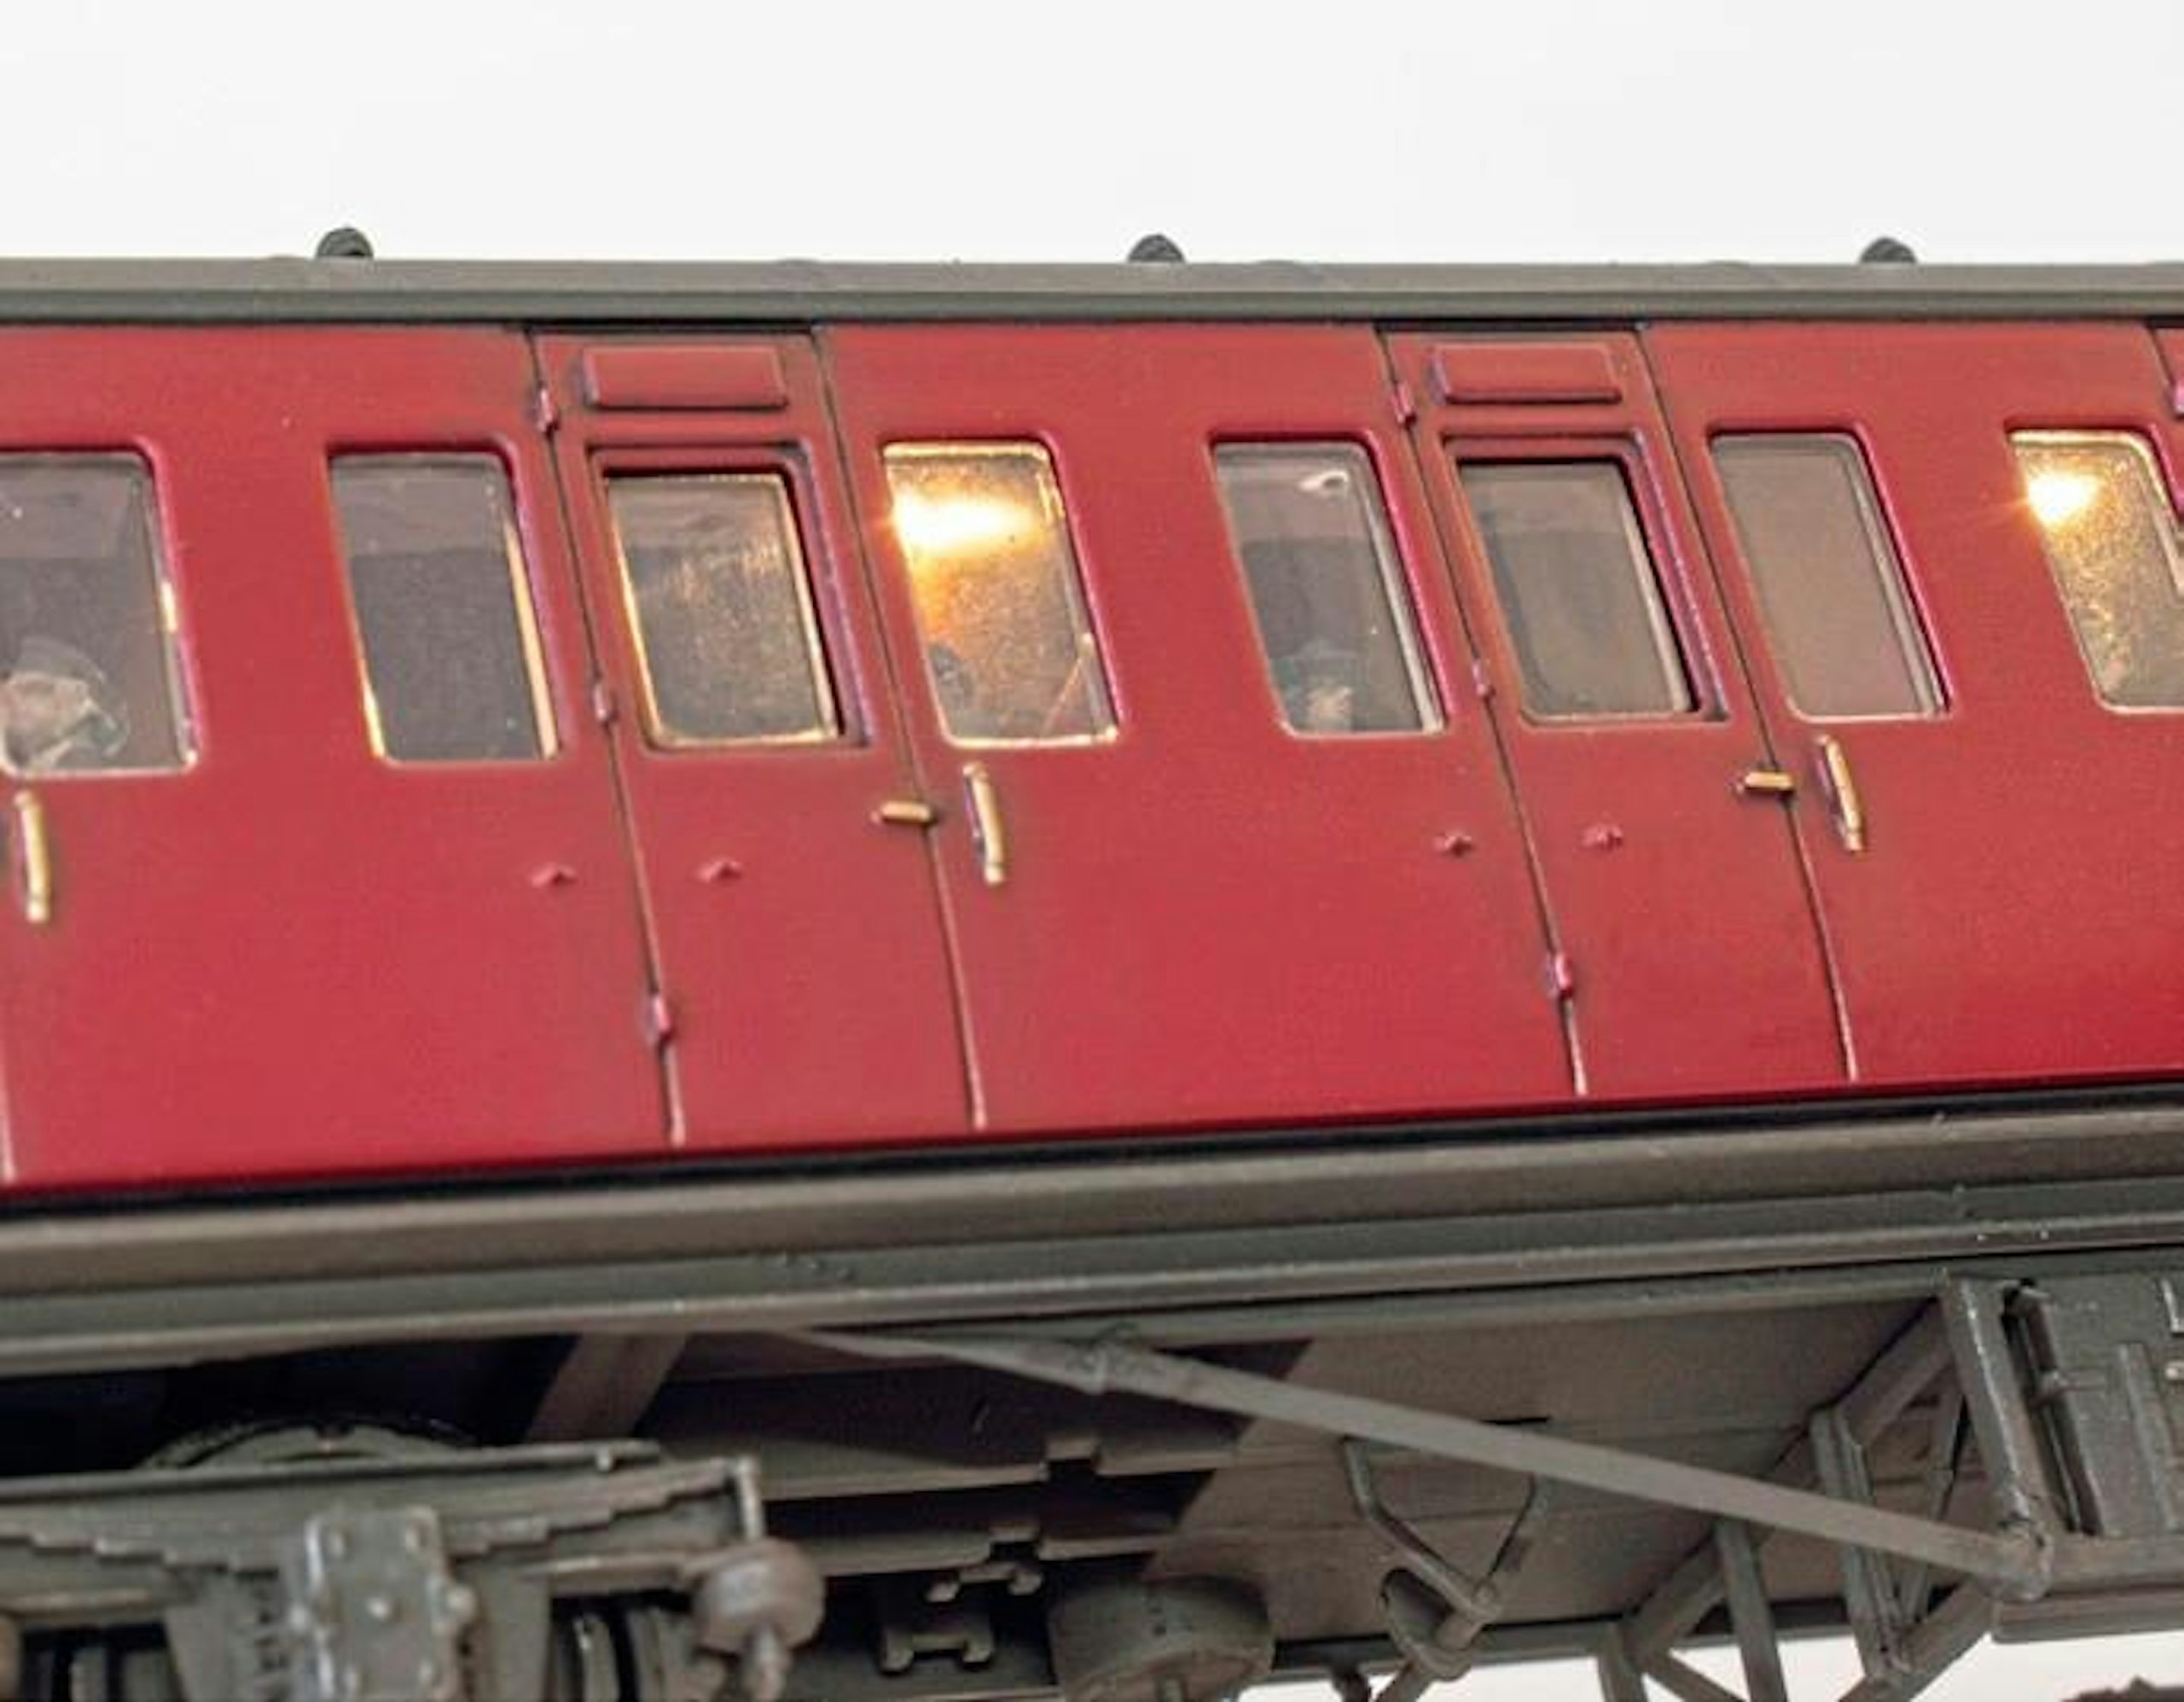
26 After giving the glazing a wipe, the carriages were reassembled. The lighting units work well, switching on when movement is sensed, then powering off after a few minutes of stillness.
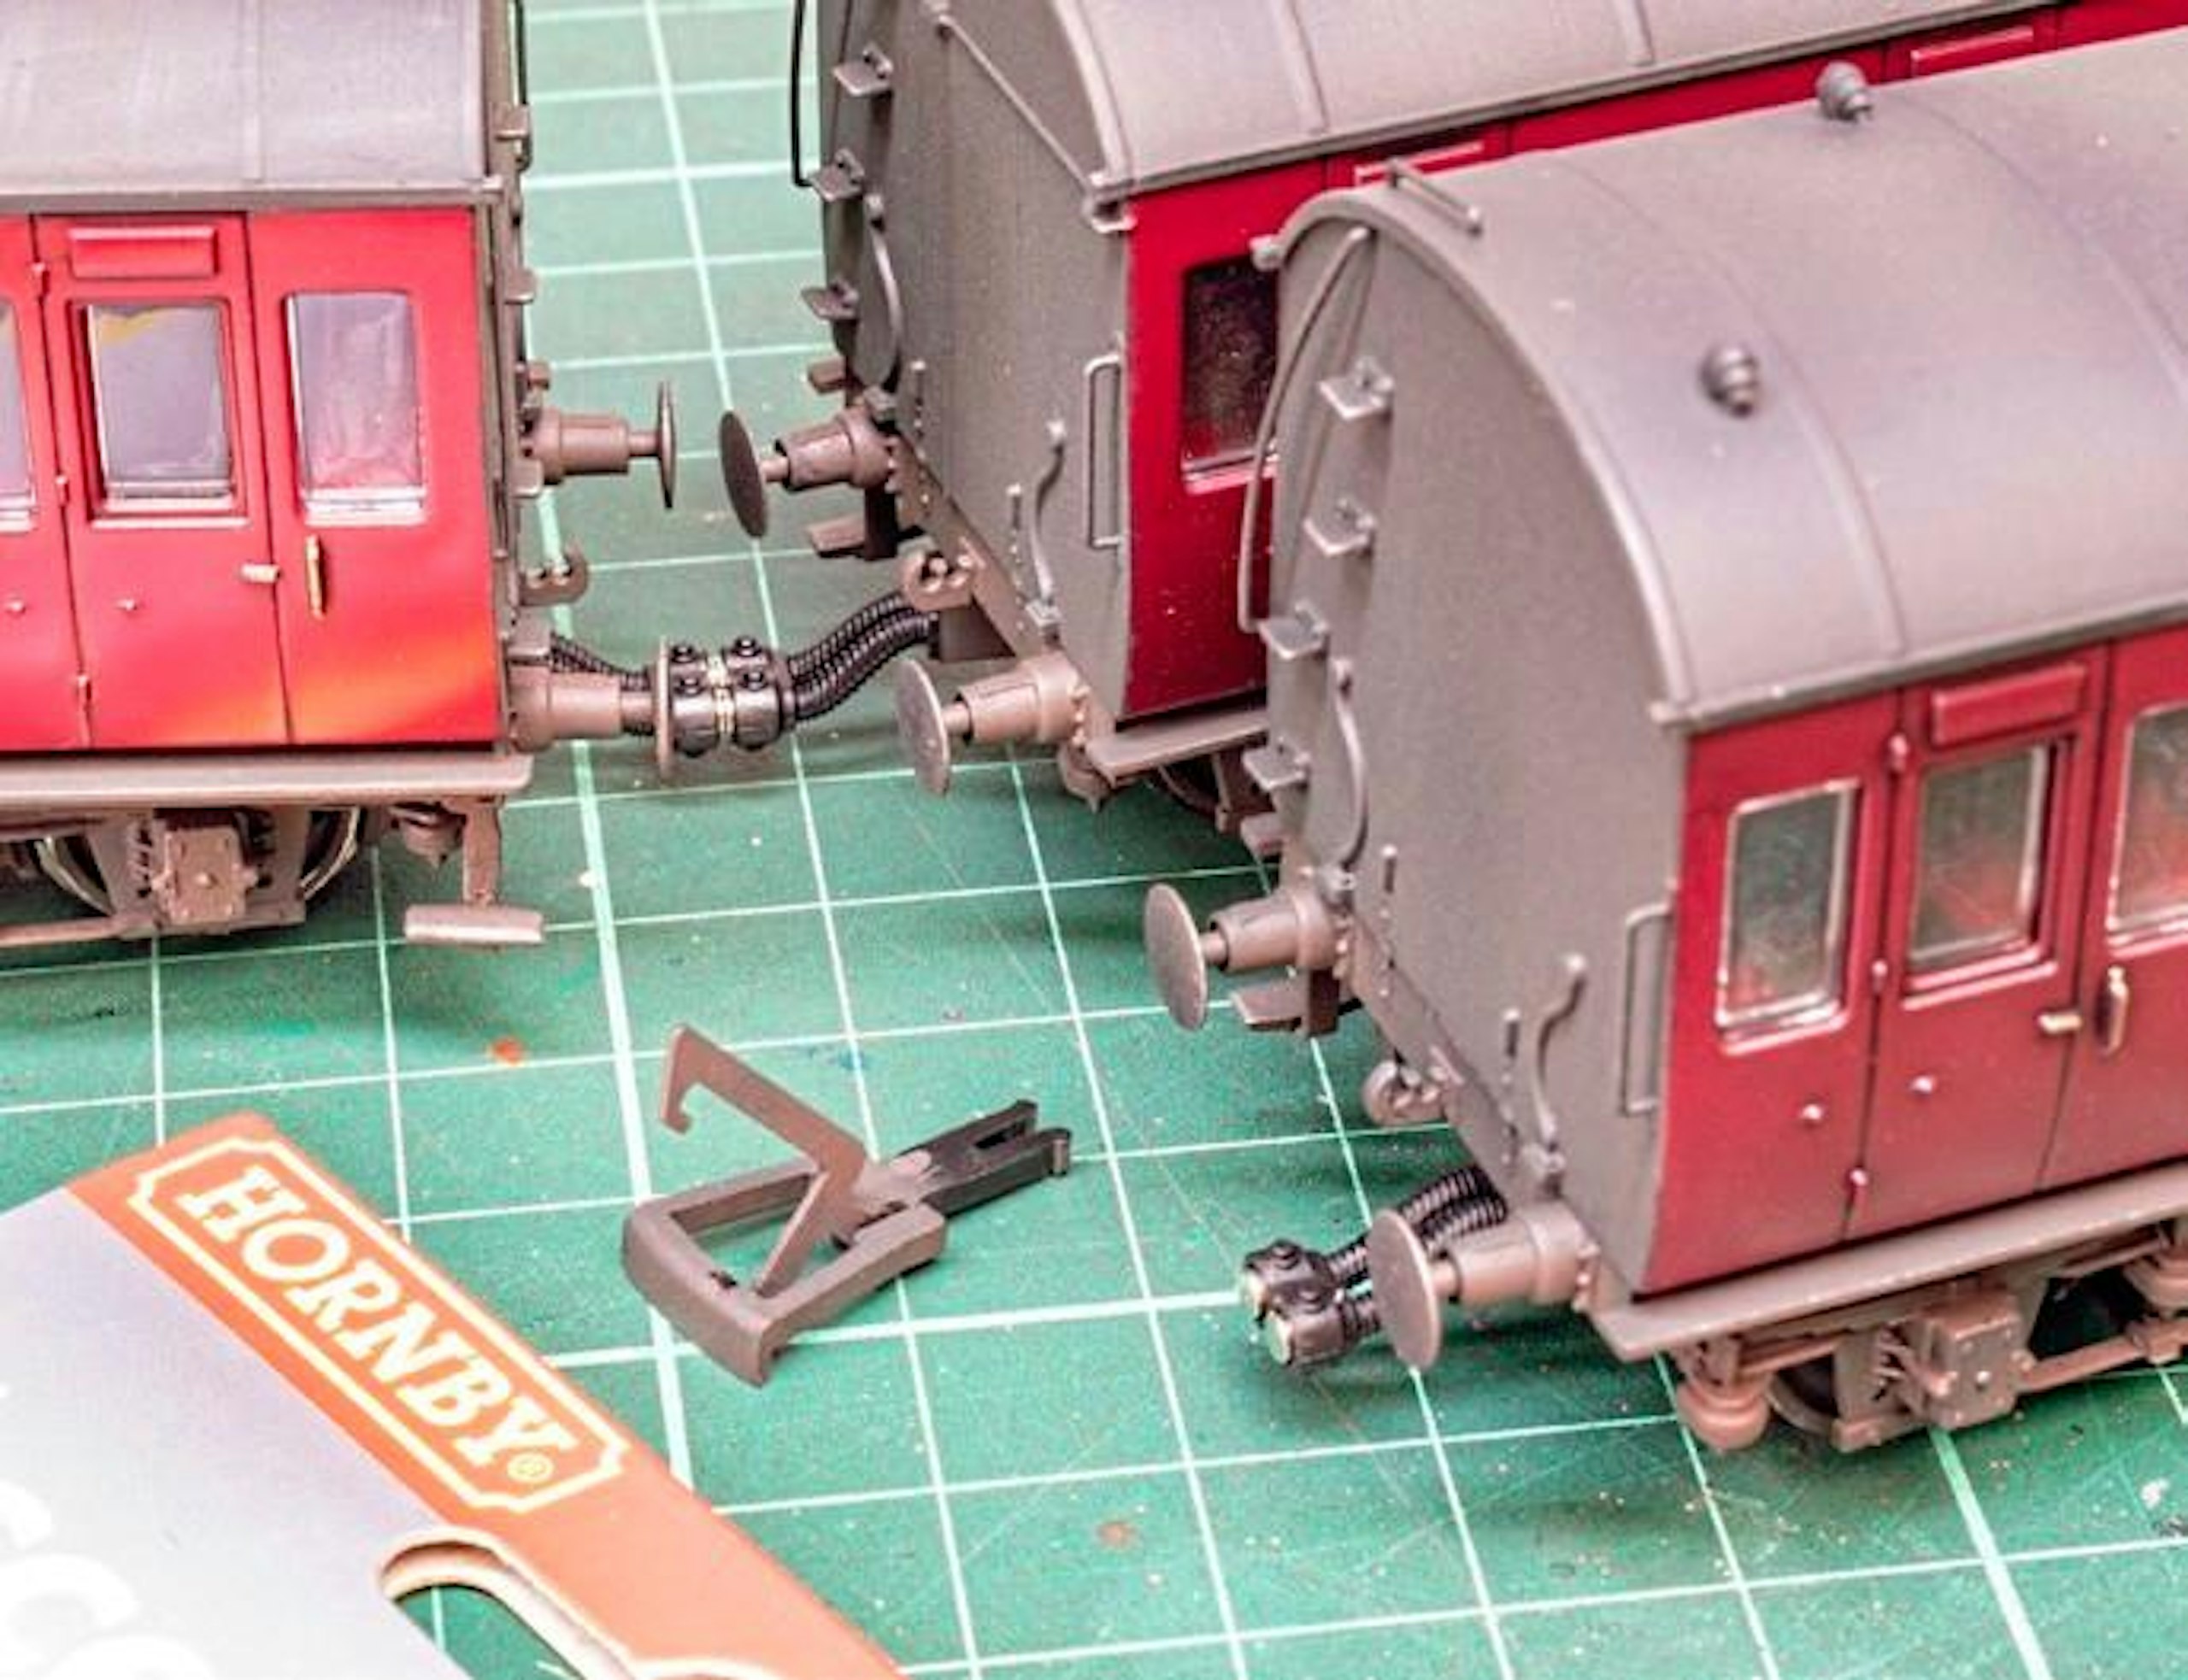
27 I almost forgot to install the Hornby magnetic couplers in place of the tension locks. I chose the 20mm vacuum pipe style couplers (R7399), but buckeye types are also available.
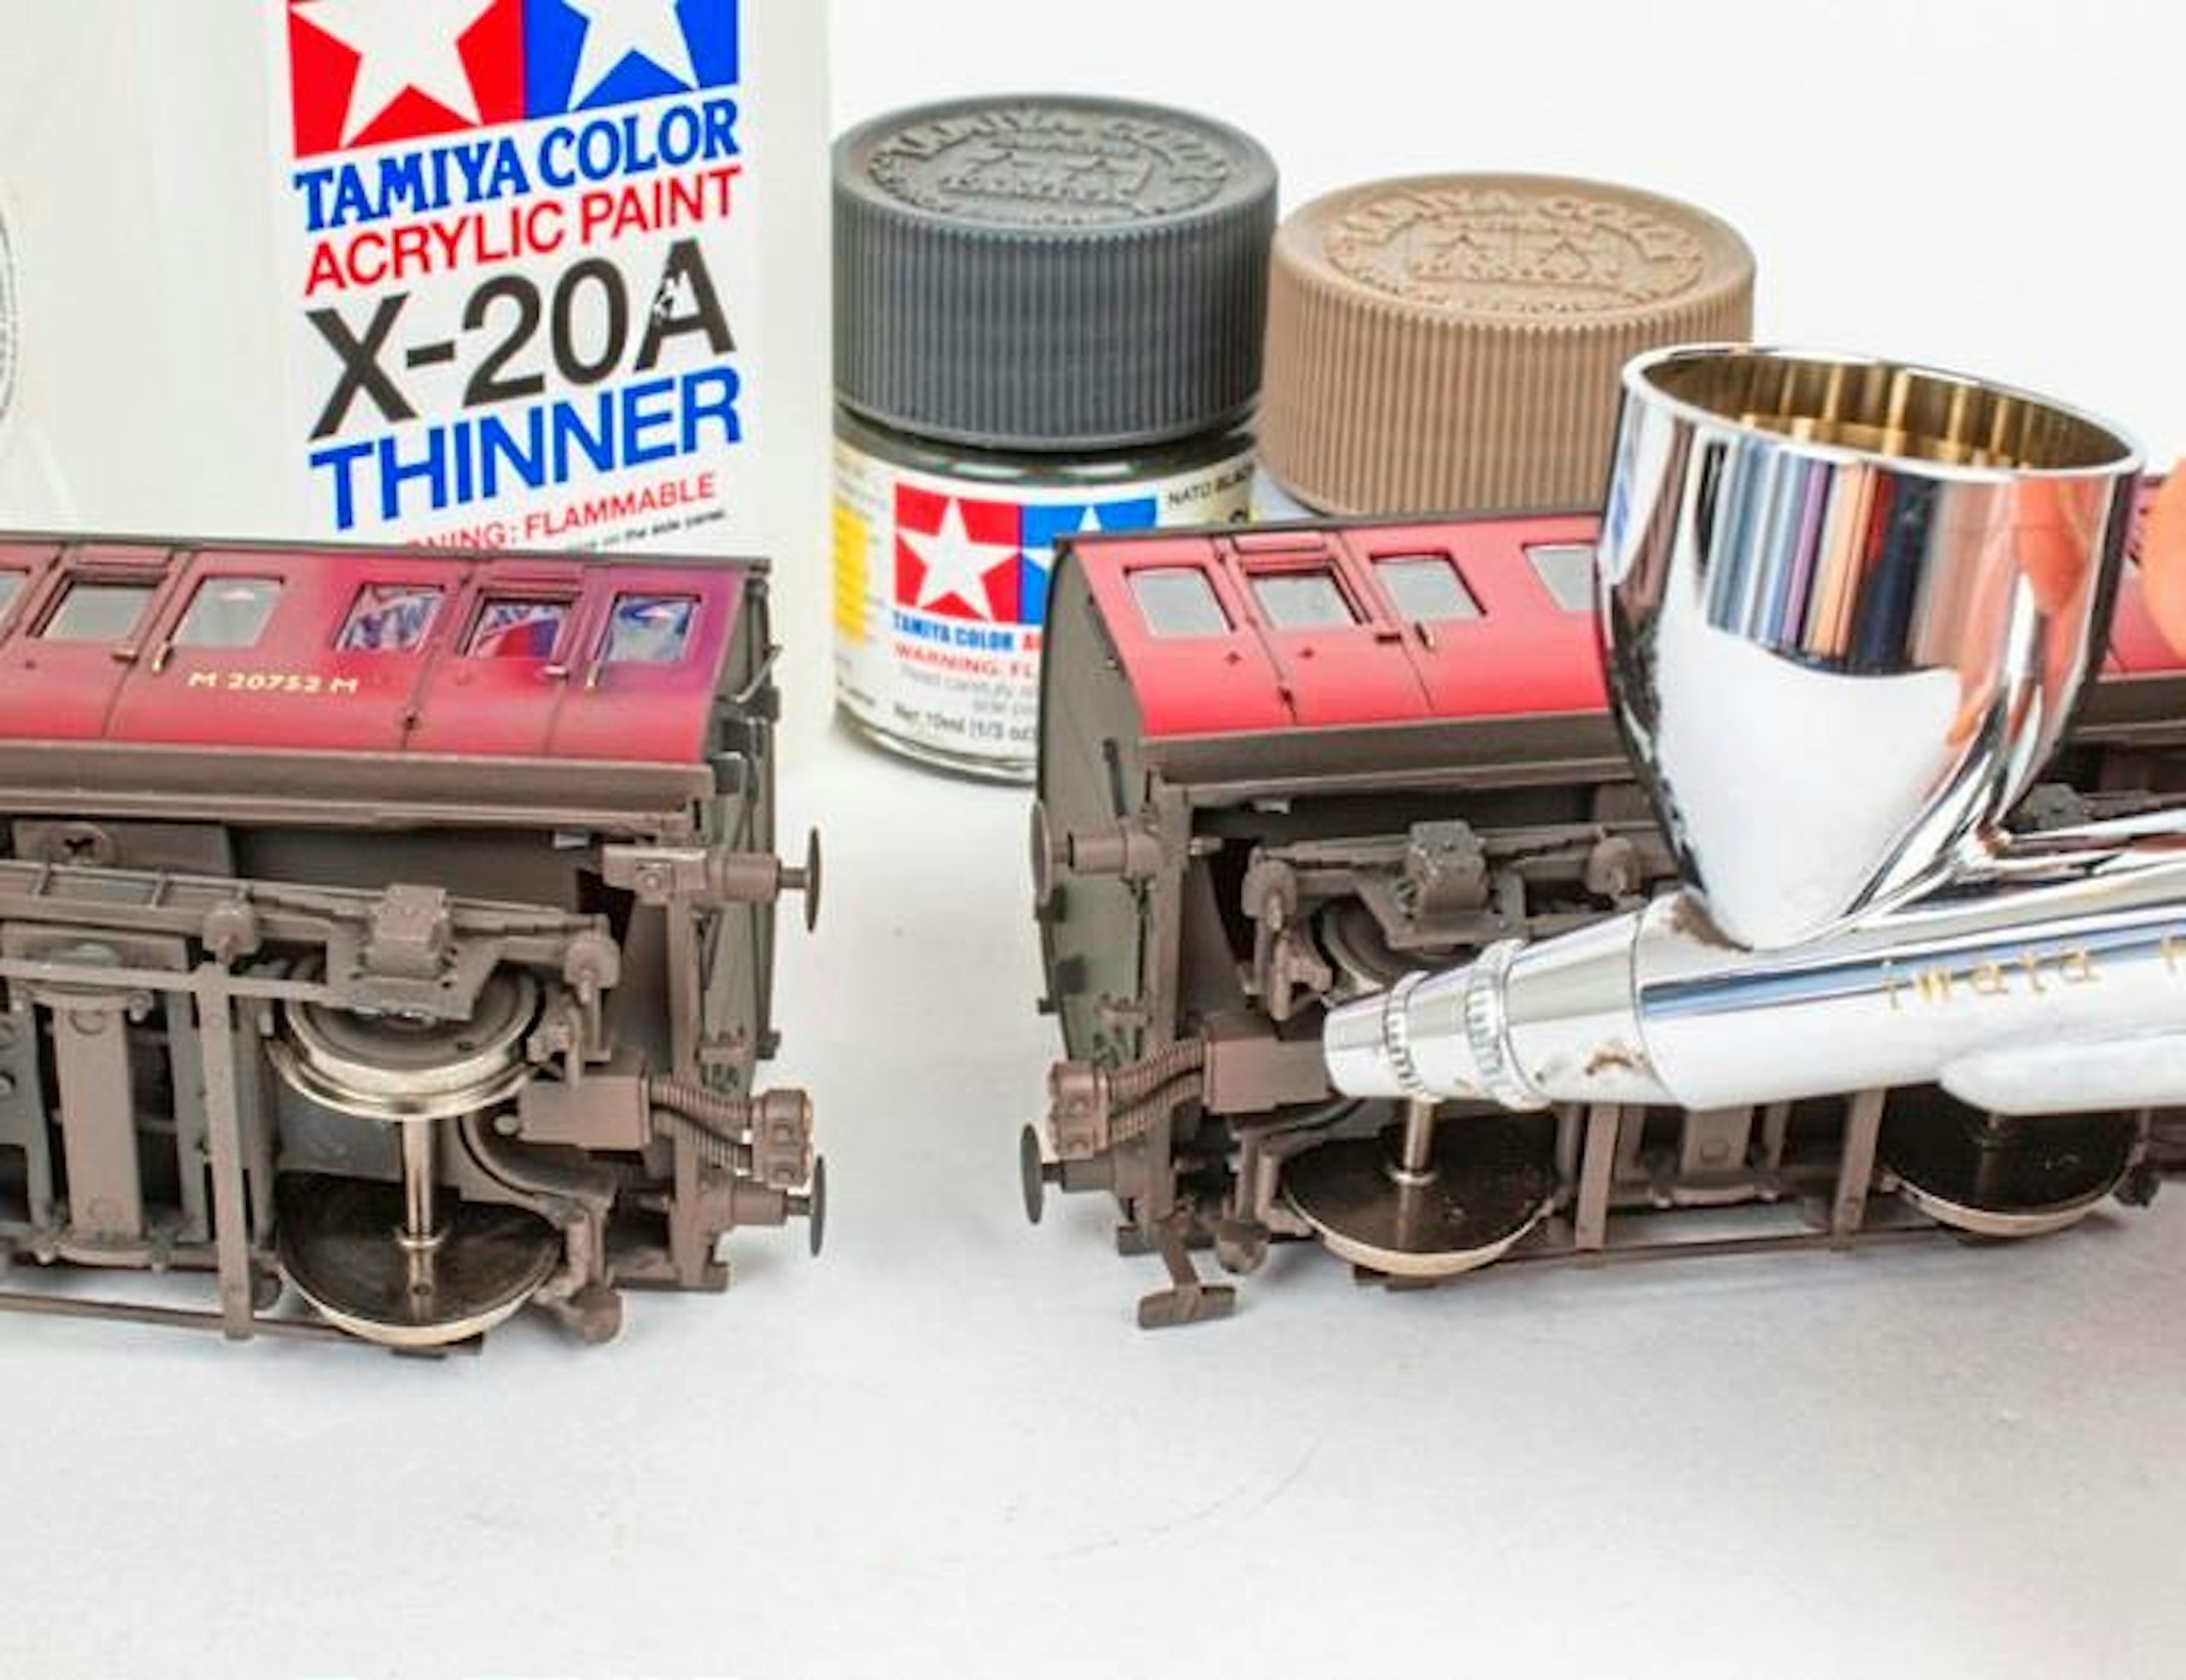
28 The new couplers were misted with the same Tamiya paint mix to help them blend with the underframes. I wiped the faces of the magnets clean with a swab before the paint dried.
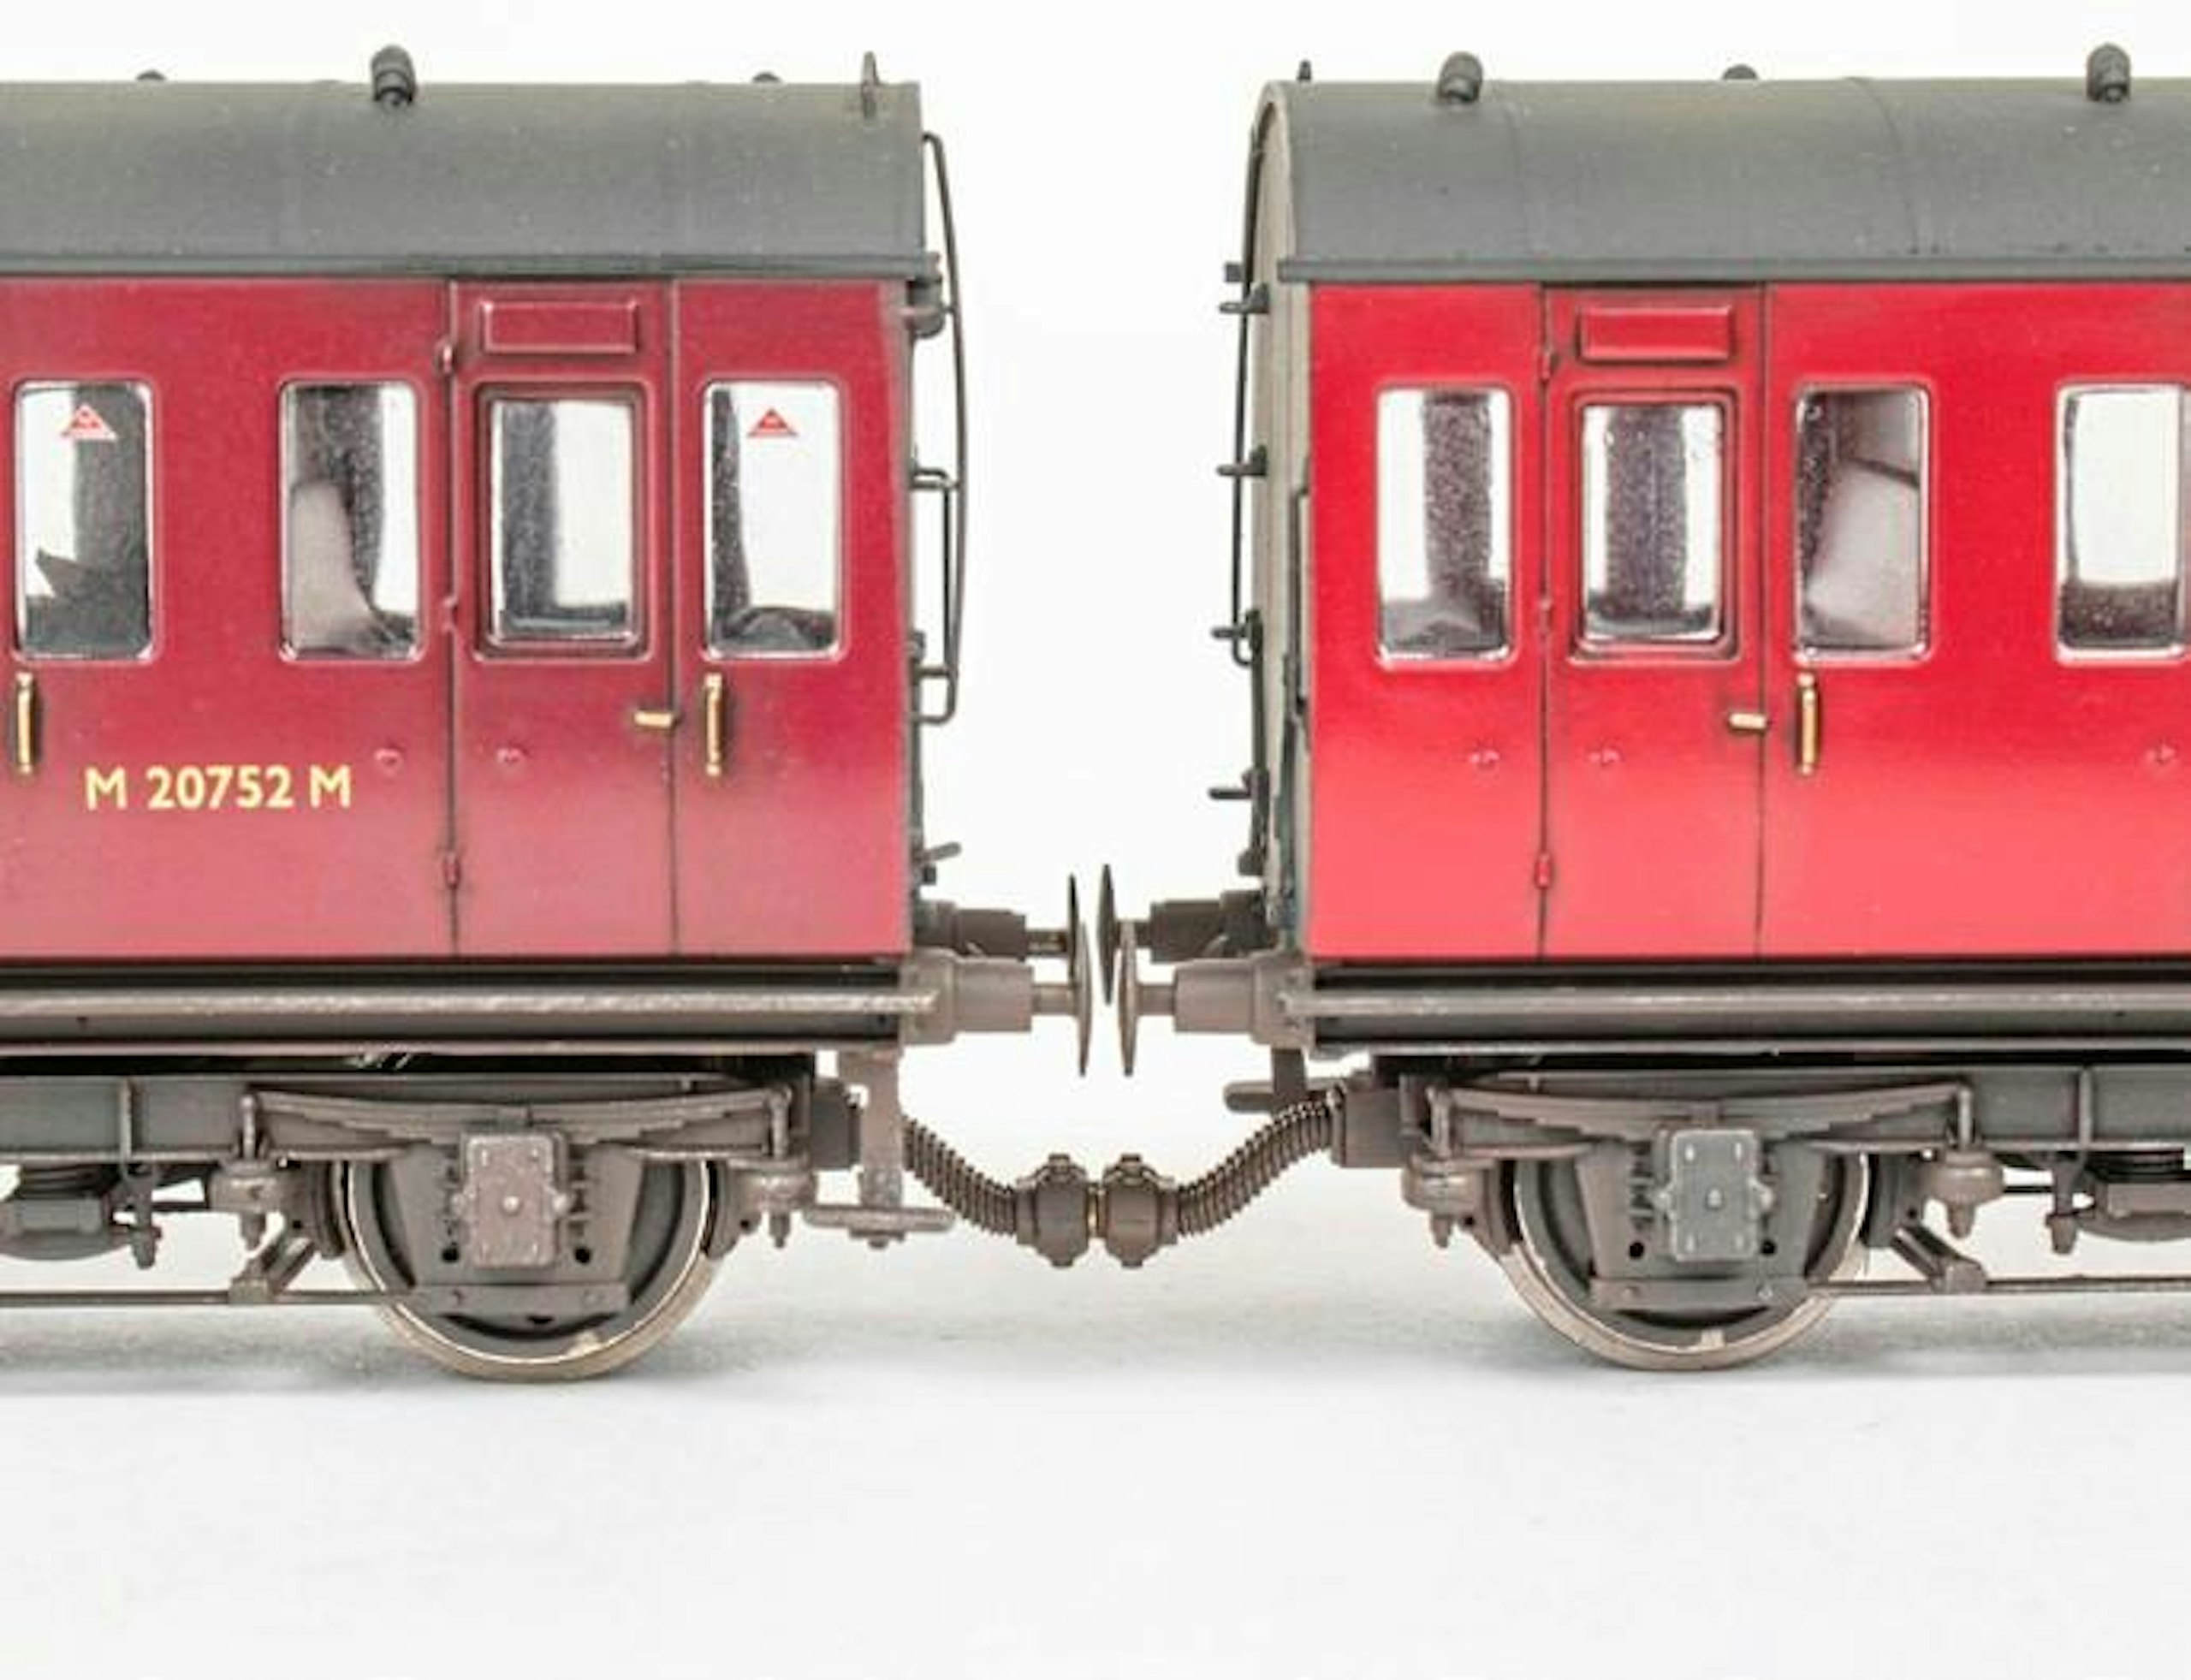
29 The magnetic vacuum pipe-style couplers look convincing and work very well, making them a simple, worthy upgrade.
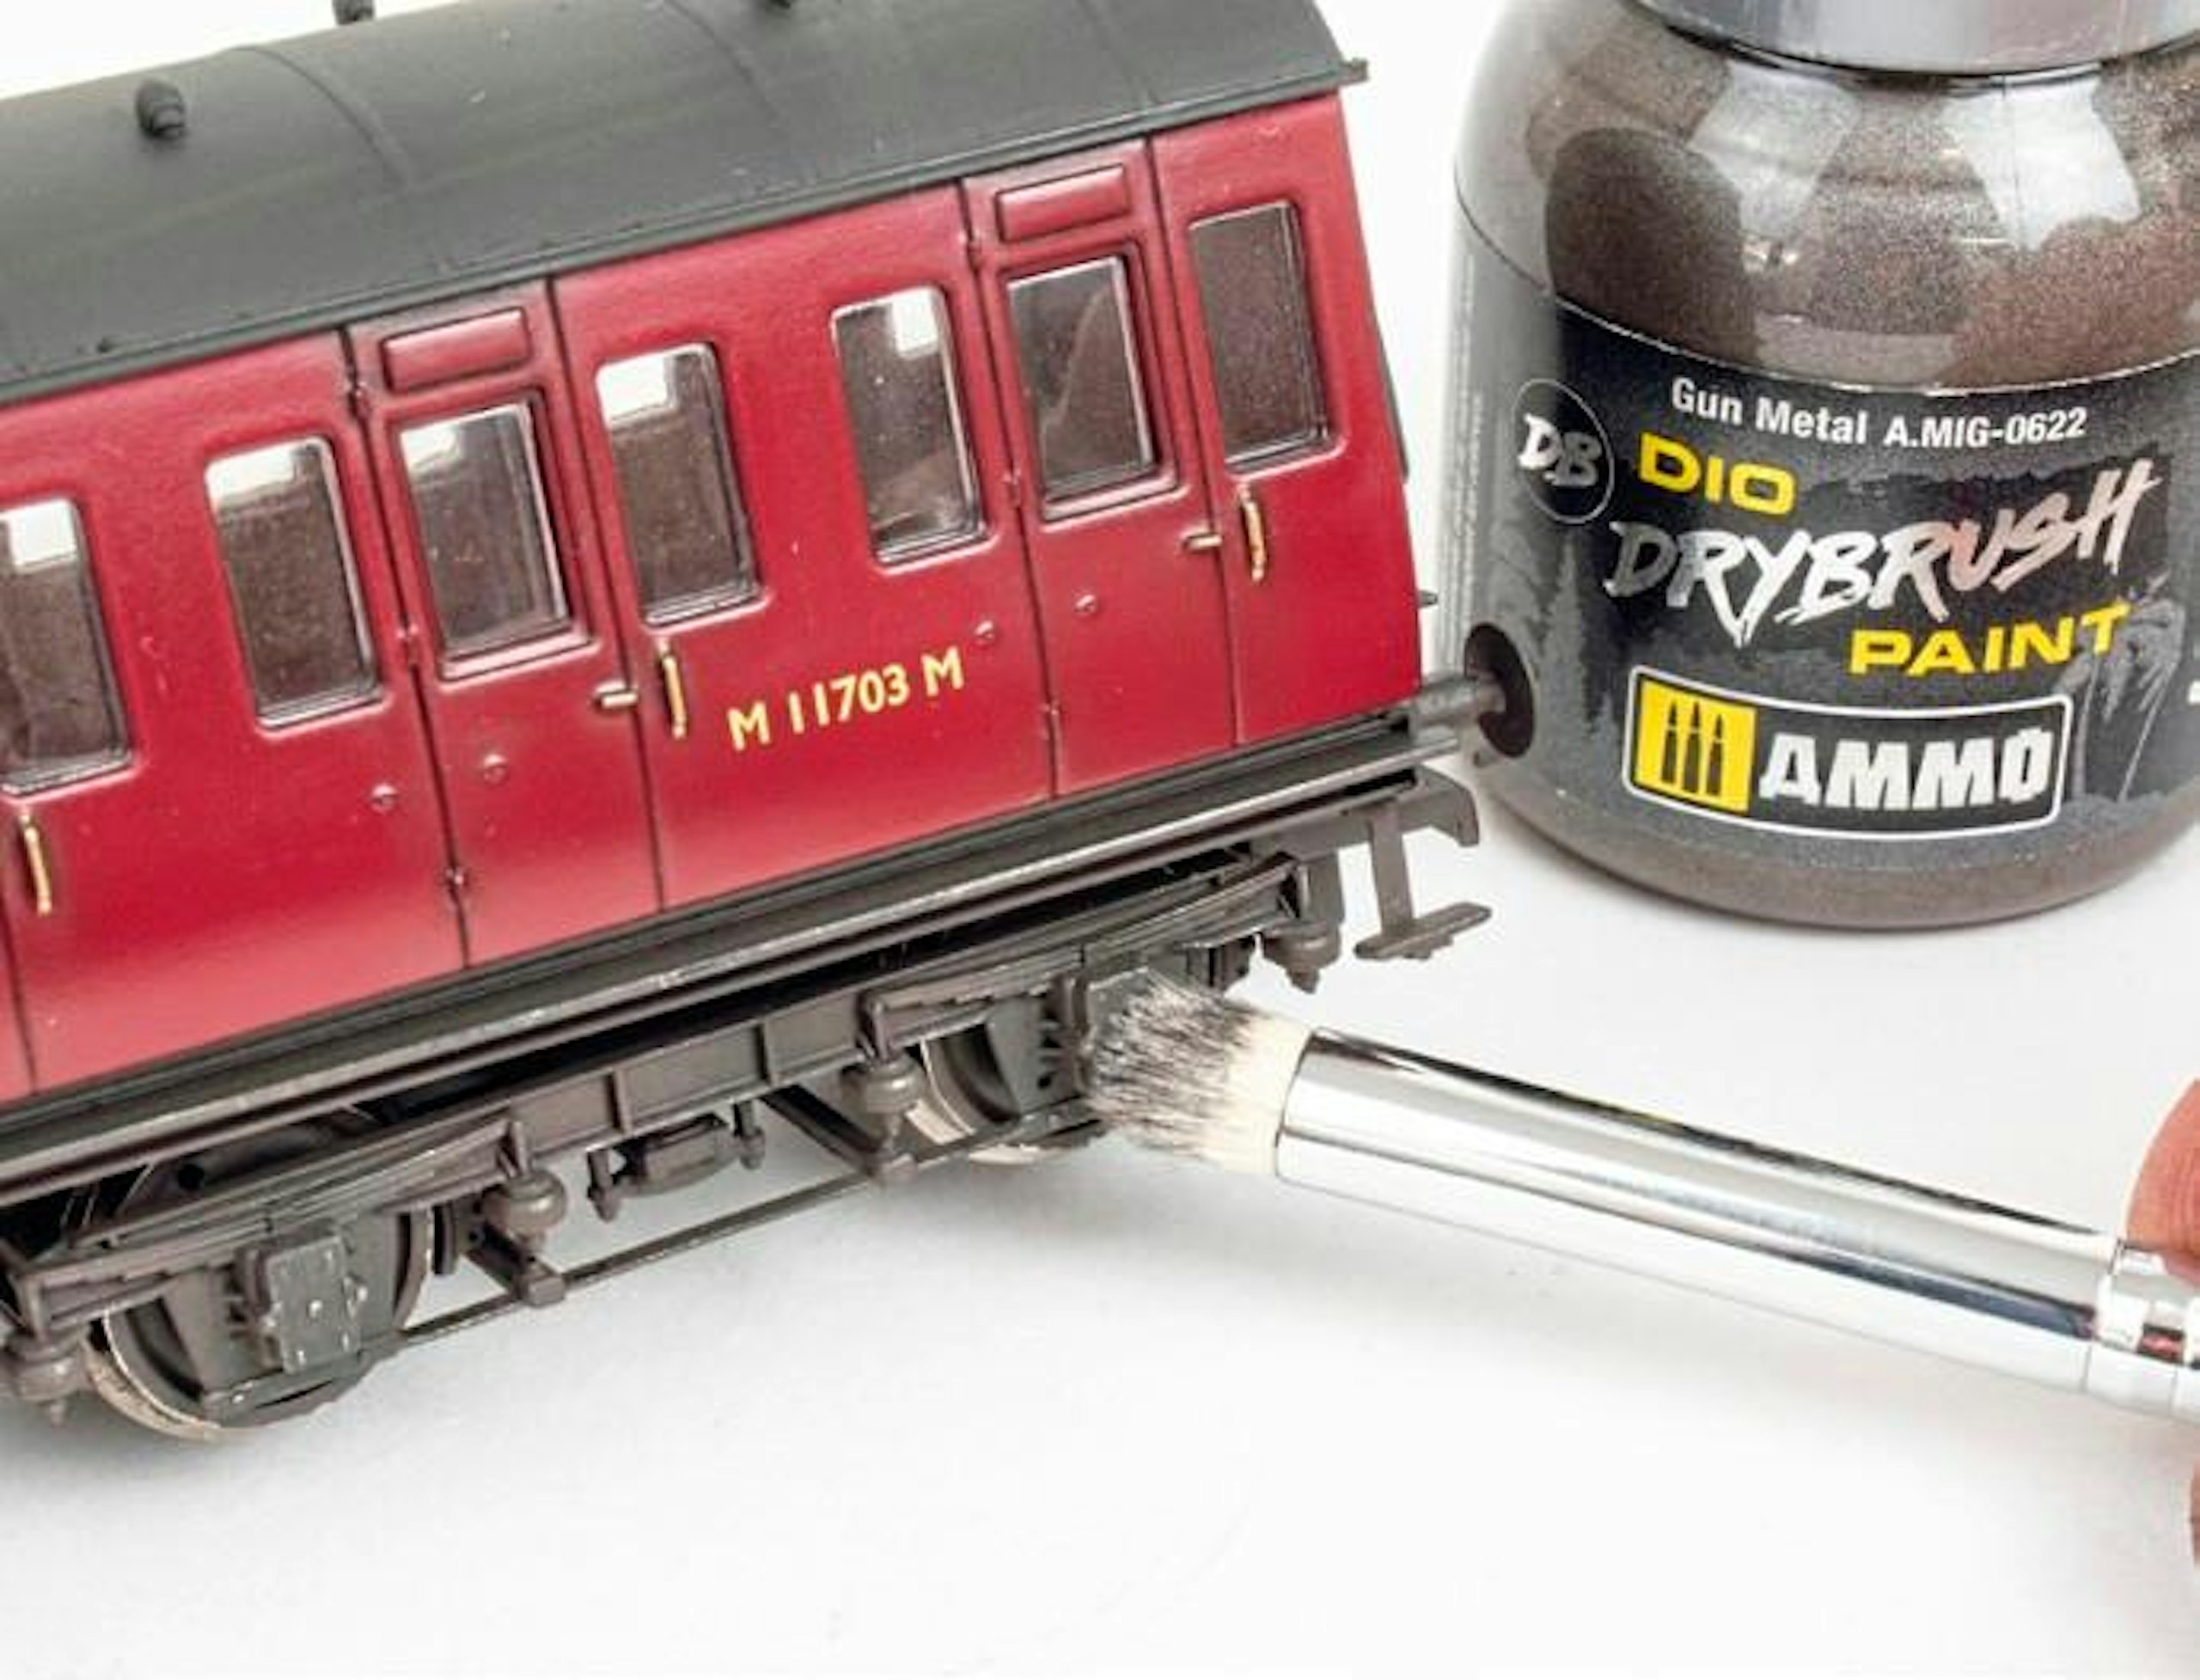
30 The finishing touch was added with AMMO Gun Metal Drybrush acrylic paint. Using a soft-bristled brush, most of the paint is wiped from the bristles onto tisssue before it is swept over the raised edges of the footboards and underframe. The deposits of metallic pigment help the detail stand out. If you apply too much, simply wipe it away with a cotton swab.
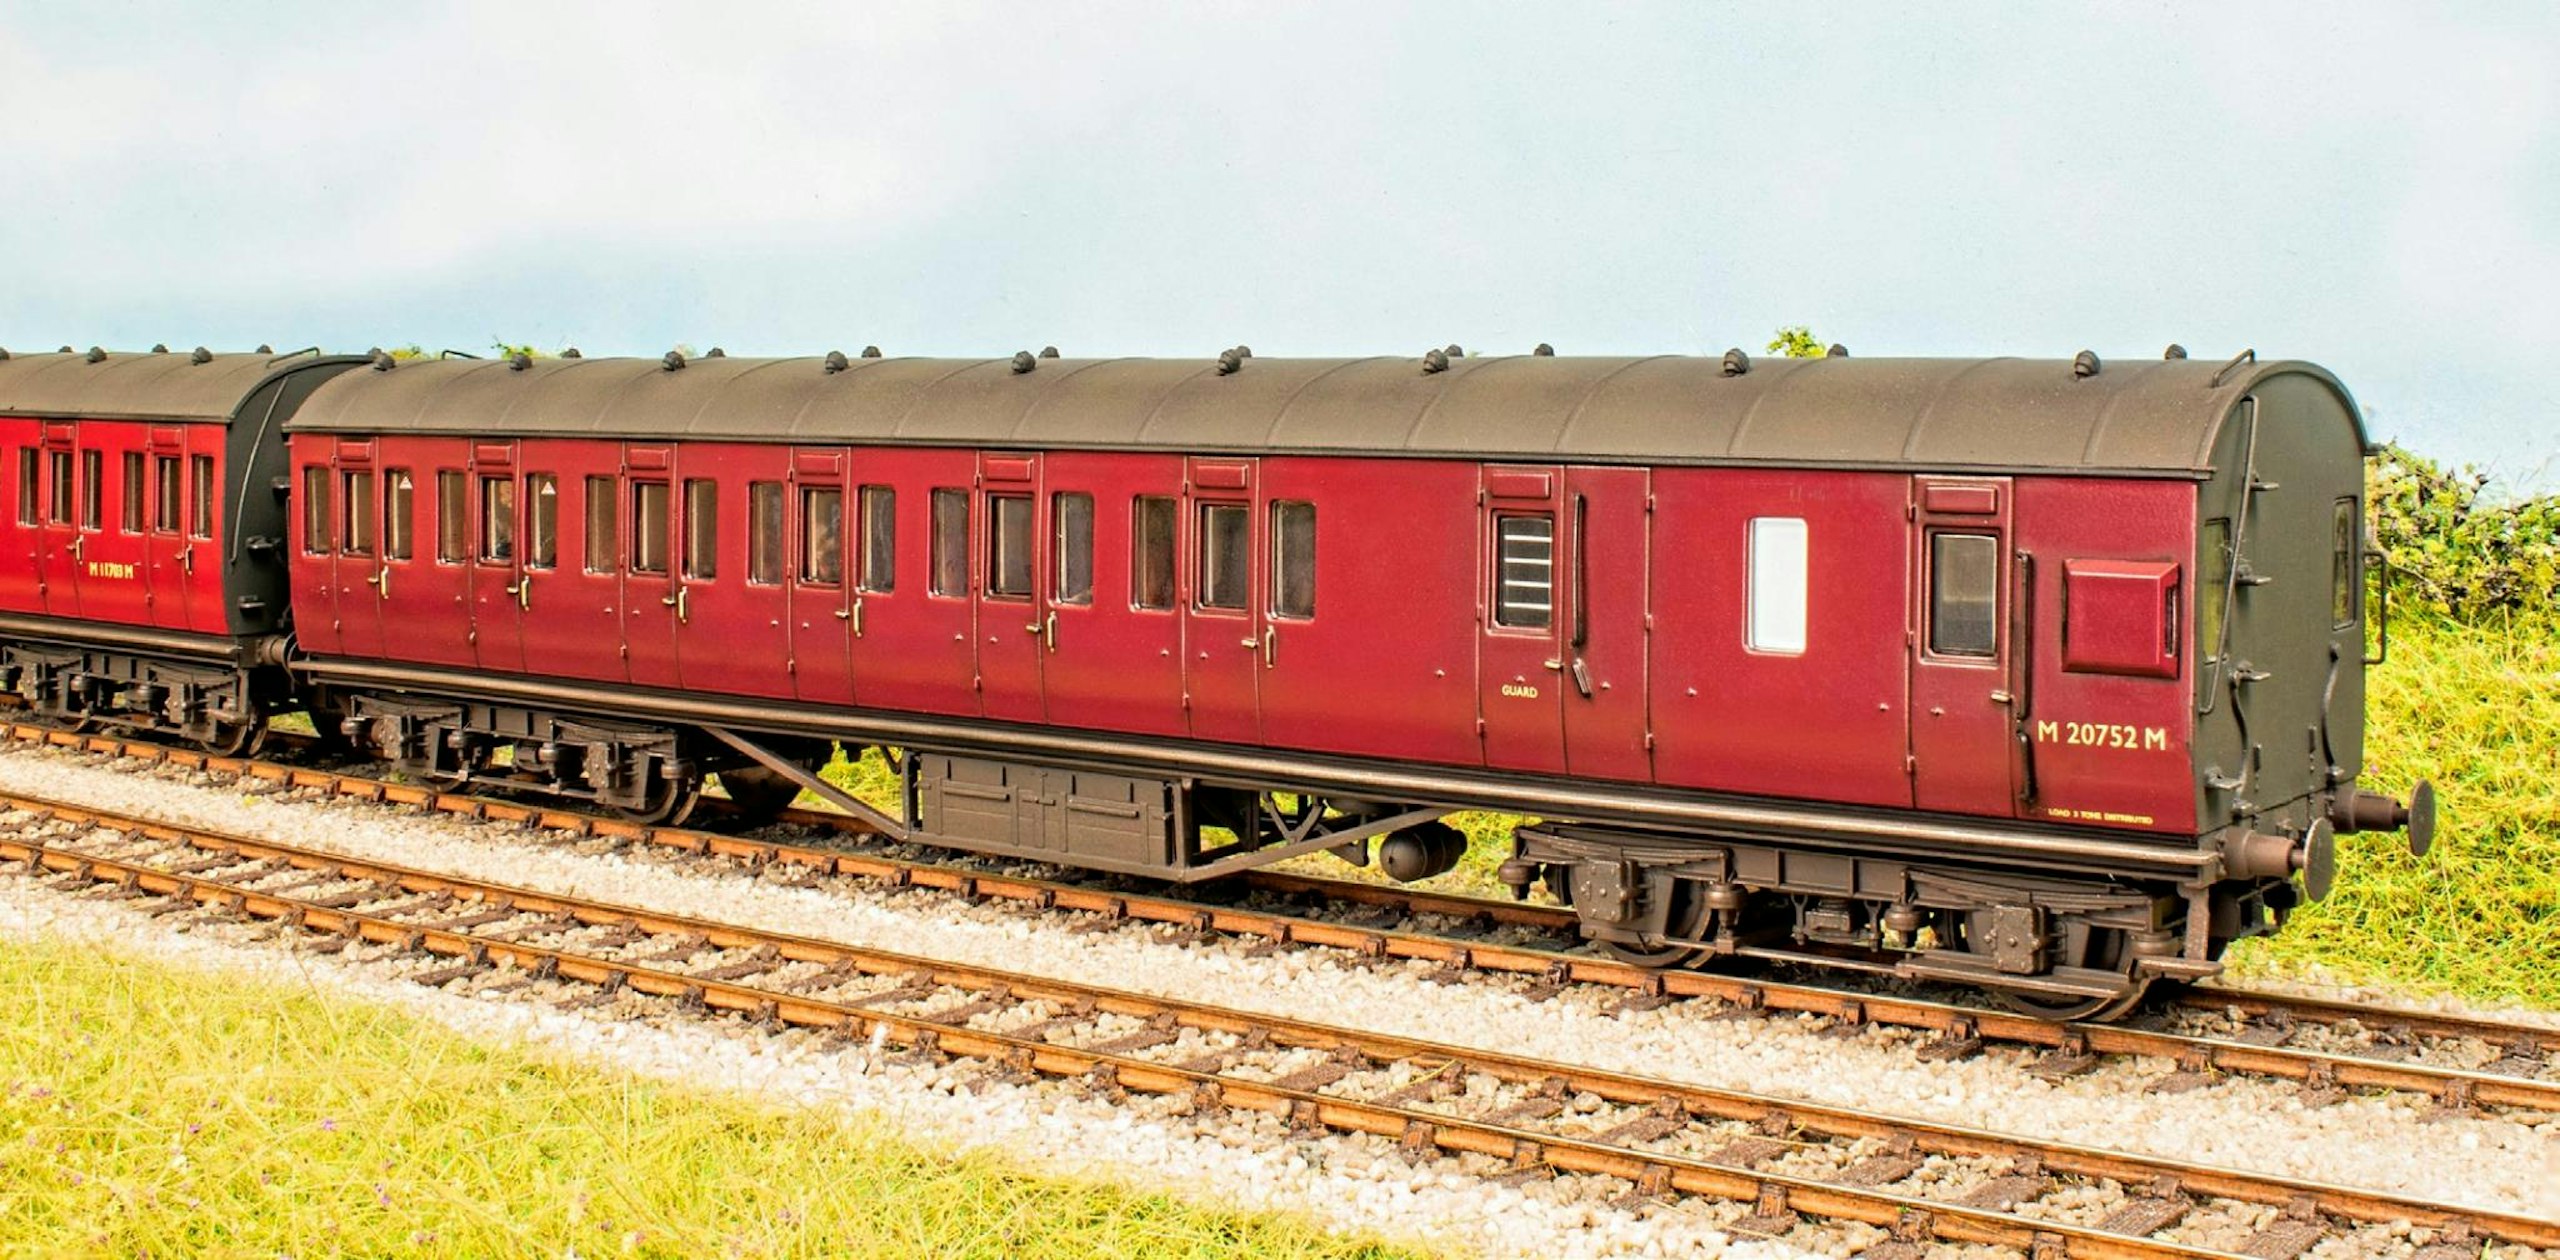
The contrast between the glossy bodysides (with subtle staining around the doors) and the textured matt roofs, ends and chassis makes for a compelling appearance.
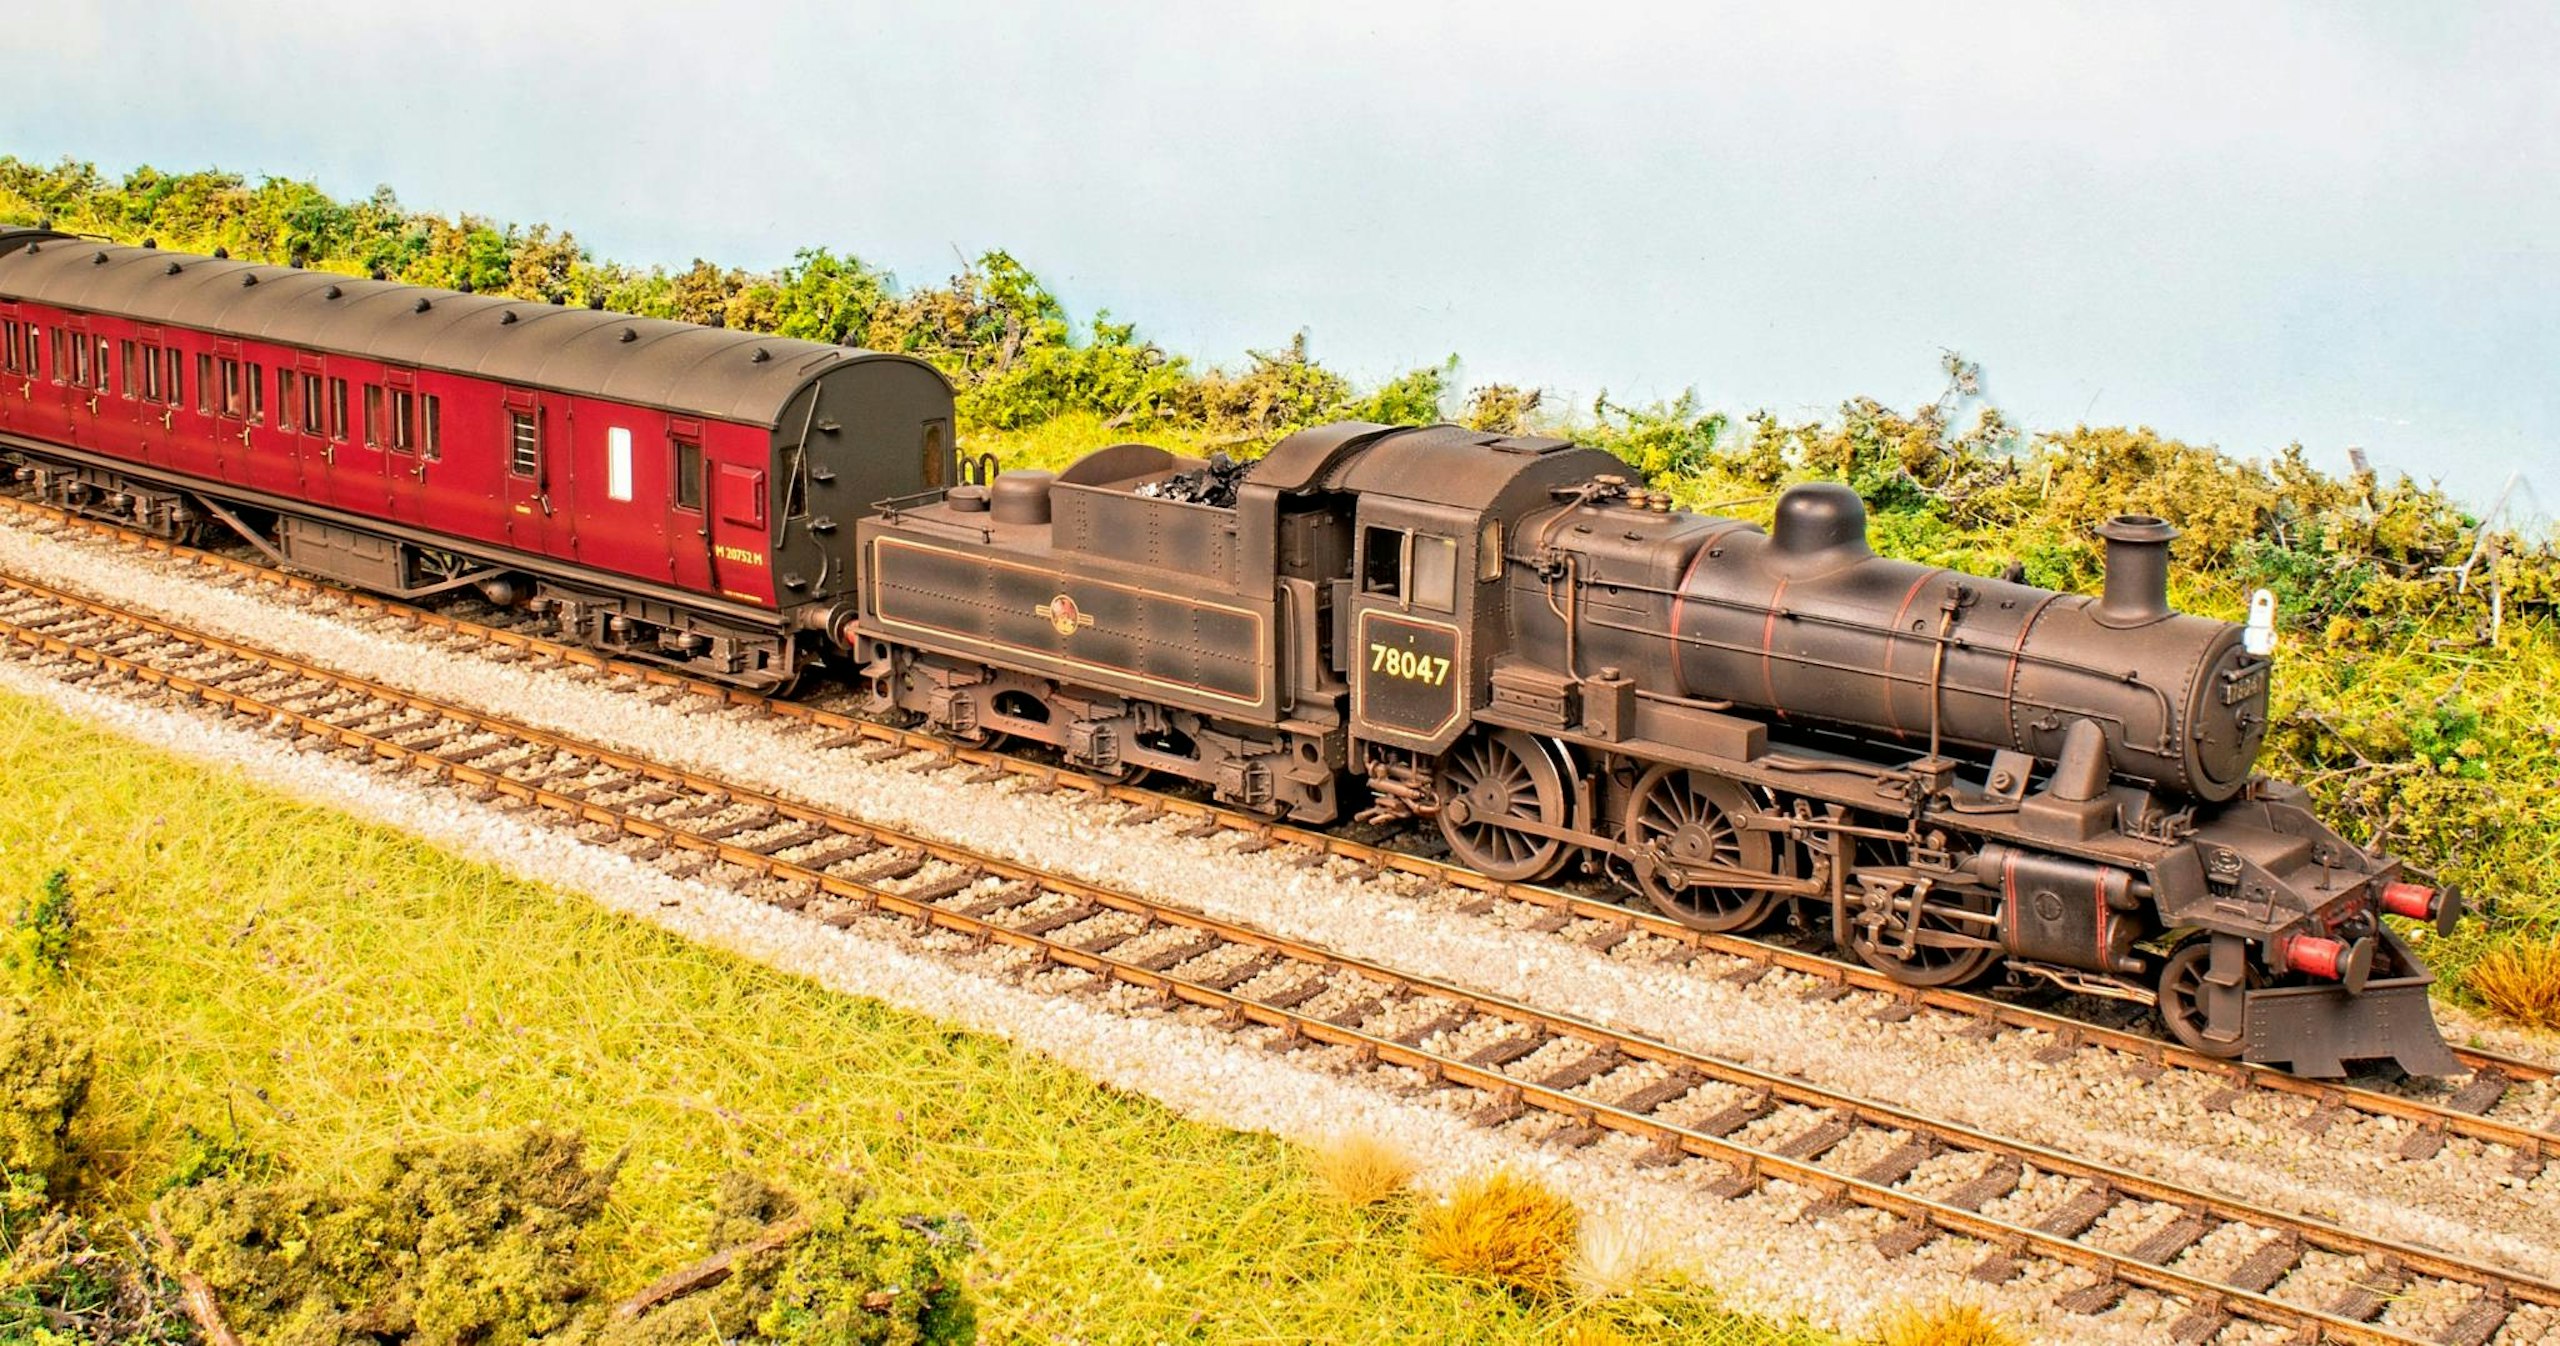
Providing a suitable formation for this Hornby BR ‘2MT’, the train looks at home in a branch line setting.
Subscribe to a Model Rail Print+ Subscription today and you'll get instant digital access, PLUS FREE UK delivery so you will never miss an issue.