Workbench
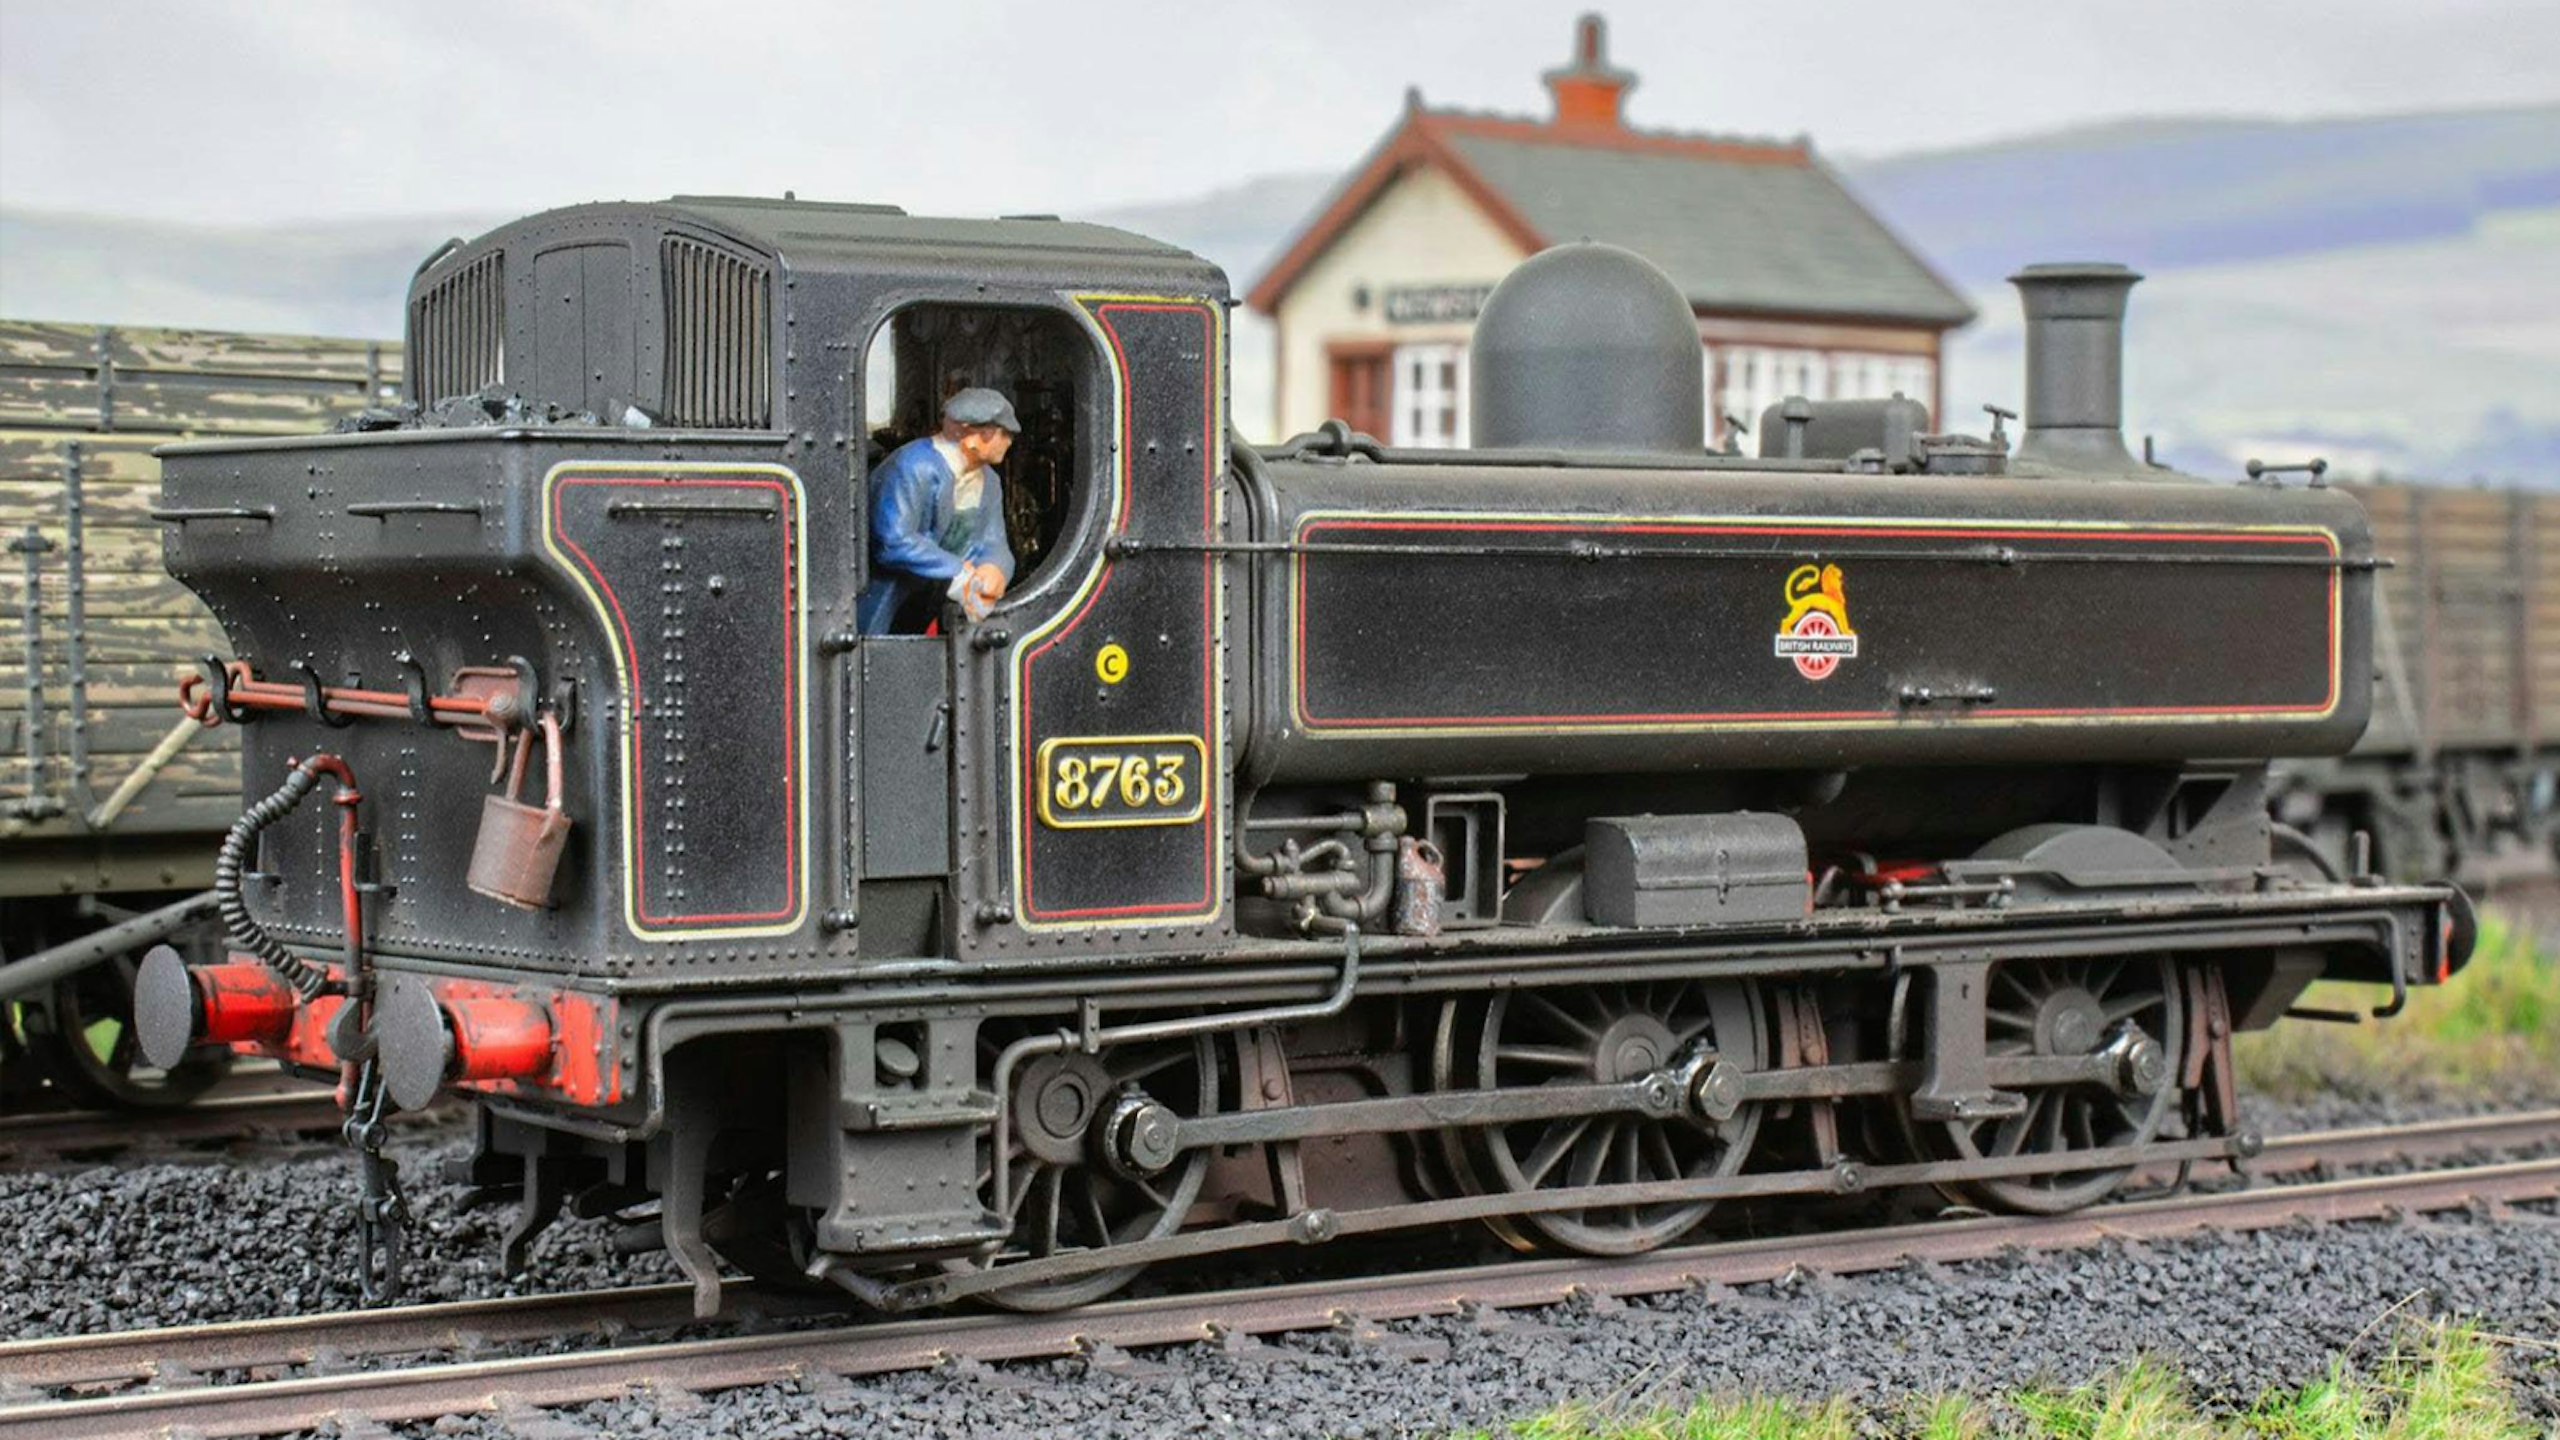
There’s nothing quite like the sight of a pannier tank pootling up and down a Western Region branch line, with a set of tools hanging off the rear. George Dent set about enhancing a member of Accurascale’s excellent ‘57XX’ family.
PHOTOGRAPHY: GEORGE DENT

There’s something especially beguiling about the Great Western’s 060 pannier tanks, with their distinctive looks and character.
We’ve certainly been well-served – in ‘OO’ at least – with good quality model locomotives of many different iterations of GWR/BR pannier tanks available from various manufacturers, including Model Rail’s own ‘16XXs’, produced exclusively for us by Rapido.
Accurascale’s suite of pannier tanks, released earlier this year (see MR349), catered for the ‘57XX’, ‘67XX’ and ‘8750’ classes, with models selling out quickly. Indeed, not long after the first batch landed in the UK, Accurascale announced a second production run, offering a host of new versions for the GWR, BR and preservation eras, plus a striking industrial scheme.
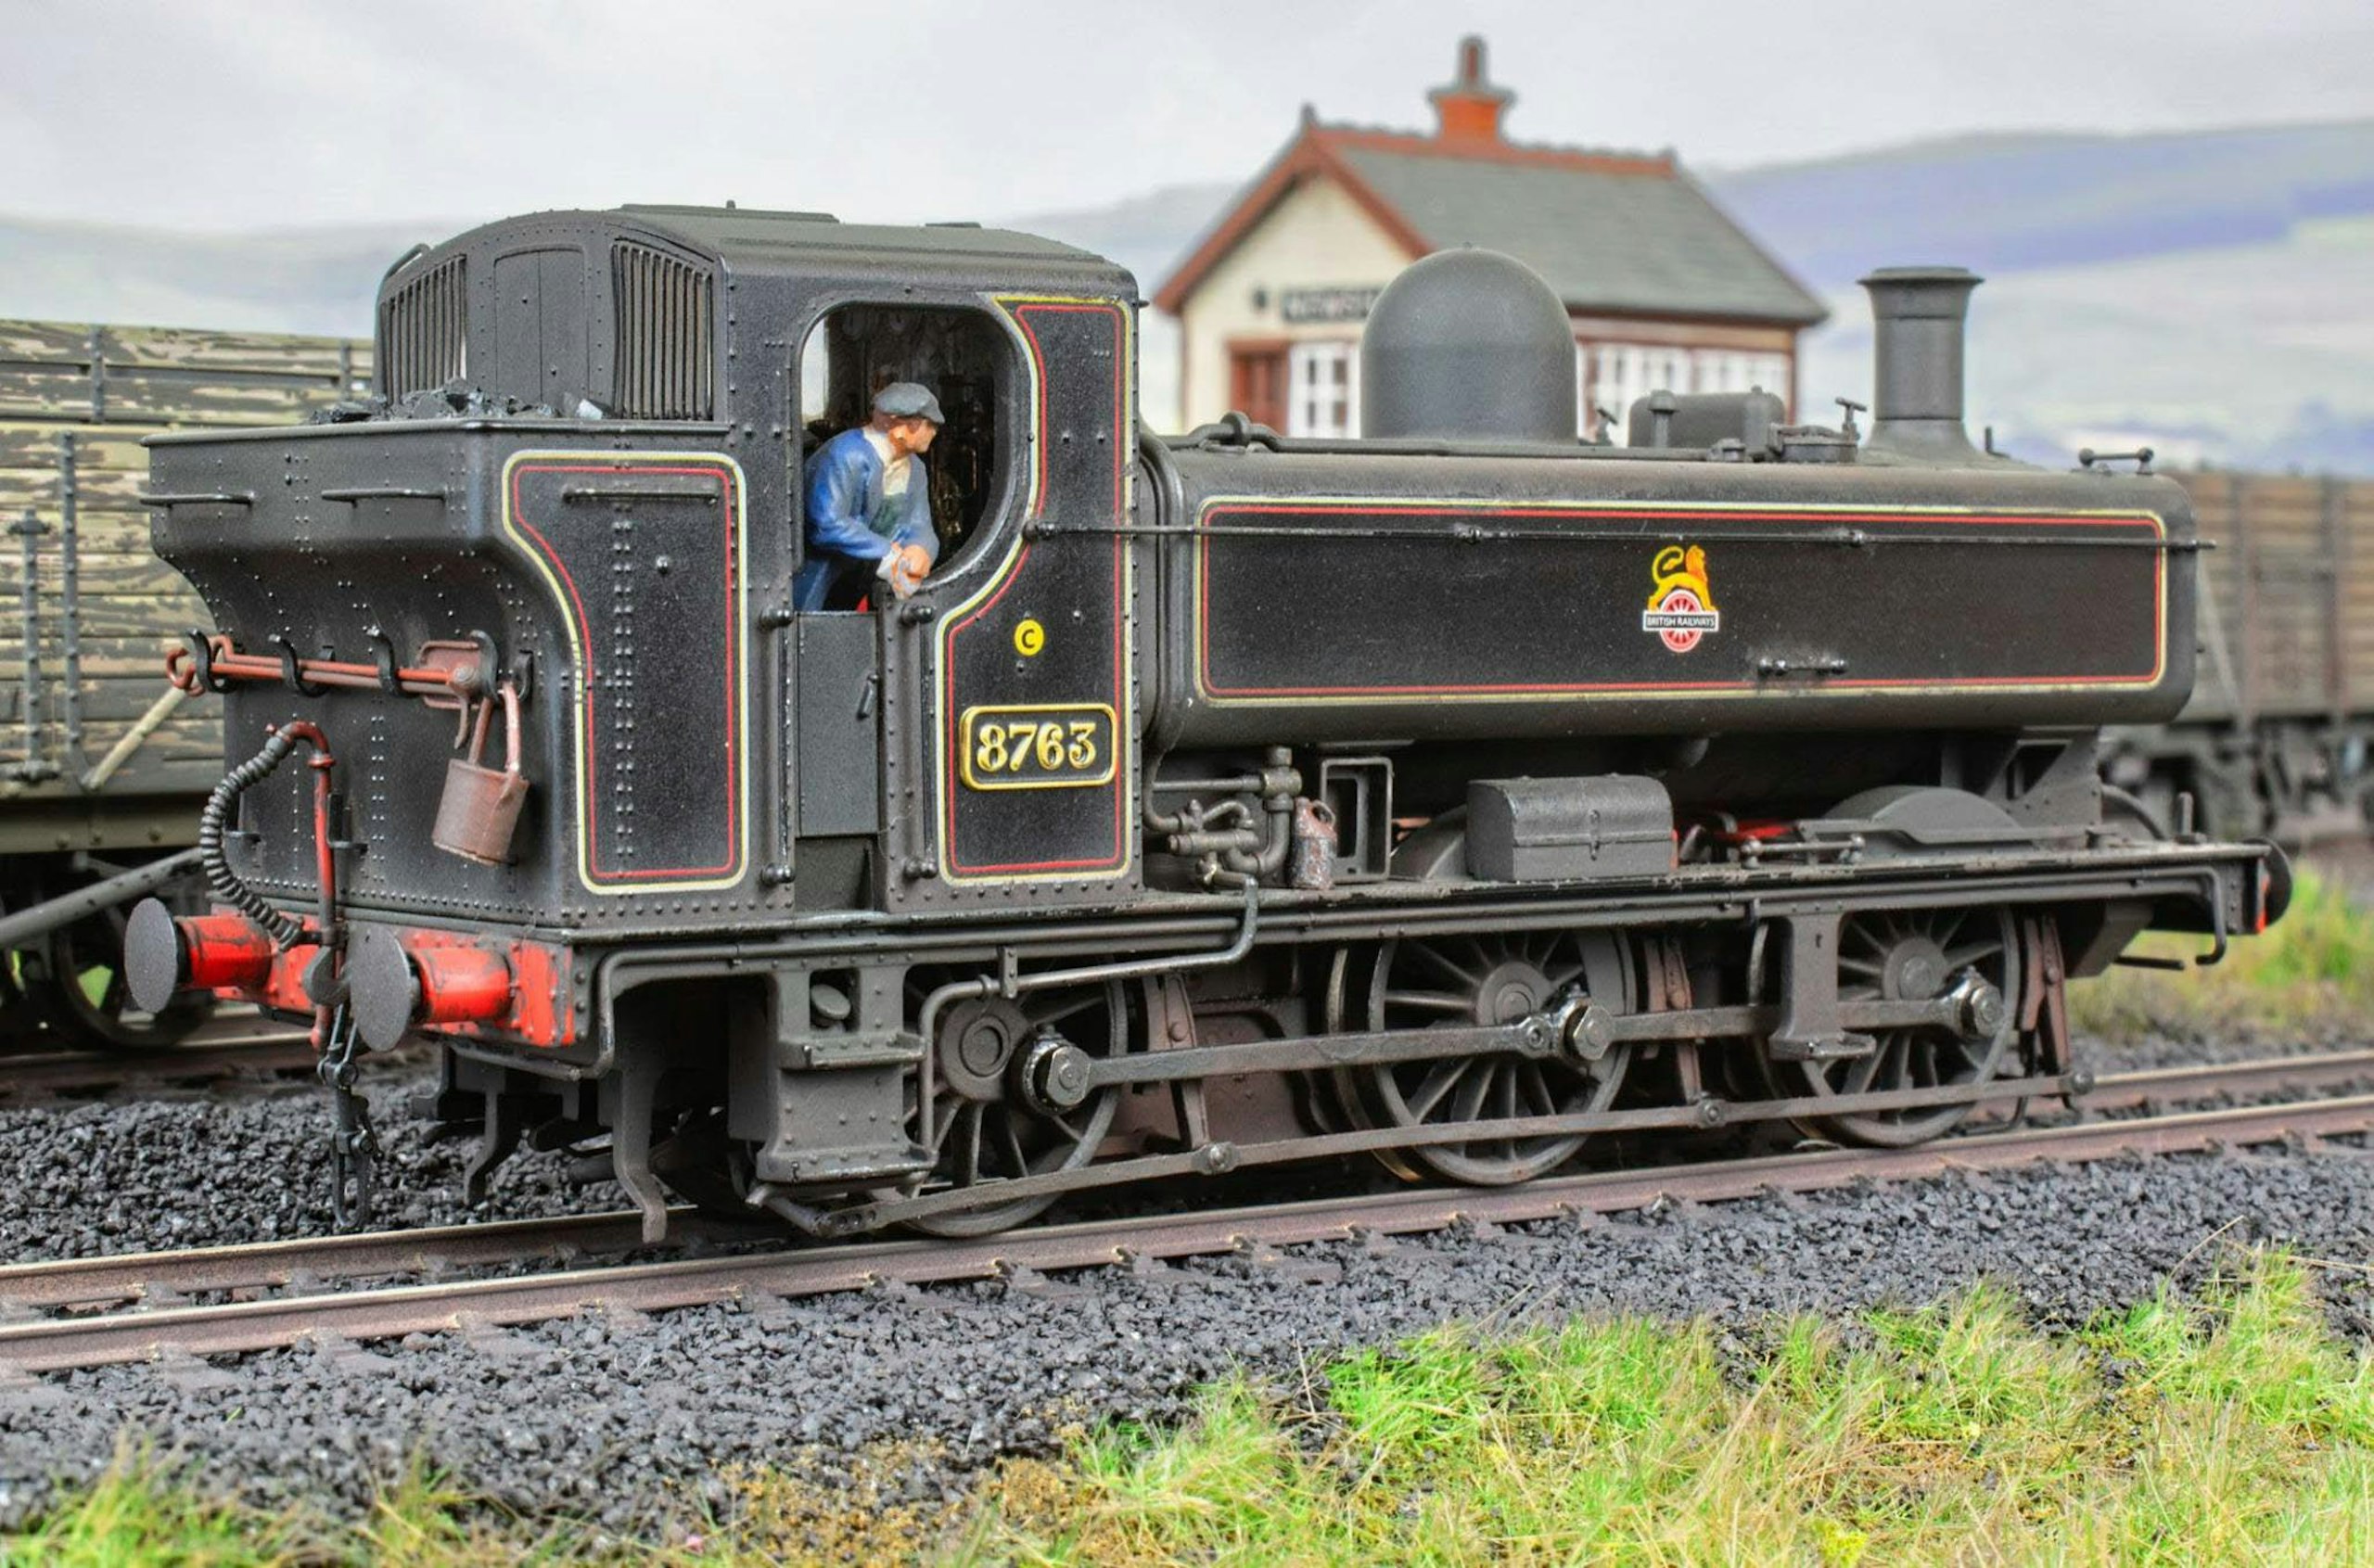
One of the review samples we received from Accurascale is No. 8763 in lined BR black, a scheme befitting its regular use as a station pilot at Paddington, although my model is earmarked for use on a branch line layout. As well as adding the supplied extra details – etched numberplates, screw couplings and oil lamps – I also wanted to install a footplate crew and a set of fire irons to the rear bunker, given that this is my favourite aspect of these tank locomotives.
A couple of oil cans and a few smaller tools also add some extra visual interest, and it’s handy to be able to easily source such ephemera these days, thanks to the growth in 3D-printed detailing parts and accessories.
My other main task was to impart a suitably weathered finish while maintaining the polished look of the sides, which was a common feature of steam locomotives in the BR era. It proved to be a hugely enjoyable project, spread over just a couple of days and employing mostly simple materials and techniques.
I did unleash my airbrush for part of the process, but that was simply to tidy things up and add the ‘polished’ sheen. However, if you don’t have an airbrush, similar results can be achieved by spraying a coat of clear gloss varnish over the body sides beforehand.
Alternatively, you could gently polish the key areas with a tiny amount of TCut automotive finish restorer, using cotton buds, before the weathering commences. Just take care not to damage the lining (if your model has it) or printed markings.
One thing I did have to be careful with was working around the wiper contacts, which transmit power from the inner faces of the wheels to the motor. These metal strips are very delicate and easily distorted, so I tried to keep away from them wherever possible, and the wheels were given a thorough clean after the weathering had been applied. It’s worth checking that the wipers maintain contact with the wheels as the axles move around in their bearings, adjusting as necessary.
In fact, Accurascale’s forthcoming second batch of pannier tanks (available to pre-order now from your local stockist) will feature improvements to the wiper power contact design, following customer feedback.
Such was the enjoyment gleaned from customising No. 8763 that I was moved to tackle a Bachmann ‘64XX’ too, employing the same processes to bring out the deep lustre of the GWR green livery (see page 3).
What you will need
SHOPPING LIST
◆ Modelu footplate crew figures, tank locomotive tool sets (various)
Web: www.modelu3d-co.uk
◆ Springside Models locomotive tool sets, lamps
Web: www.springsidemodels.com
◆ LifeColor acrylic paints and dry pigments, airbrushes and equipment
Web: www.airbrushes.com
◆ Tamiya acrylic paints and clear varnish, thinners, primers, paintbrushes
Web: www.scalemodelshop.co.uk
TOOLS
◆ Miniature screwdrivers
◆ Knife and spare blades
◆ Cutting mat
◆ Tweezers
◆ Fine nosed pliers
◆ Hacksaw
◆ Files
◆ Paintbrushes
◆ Cotton buds
STEP BY STEP
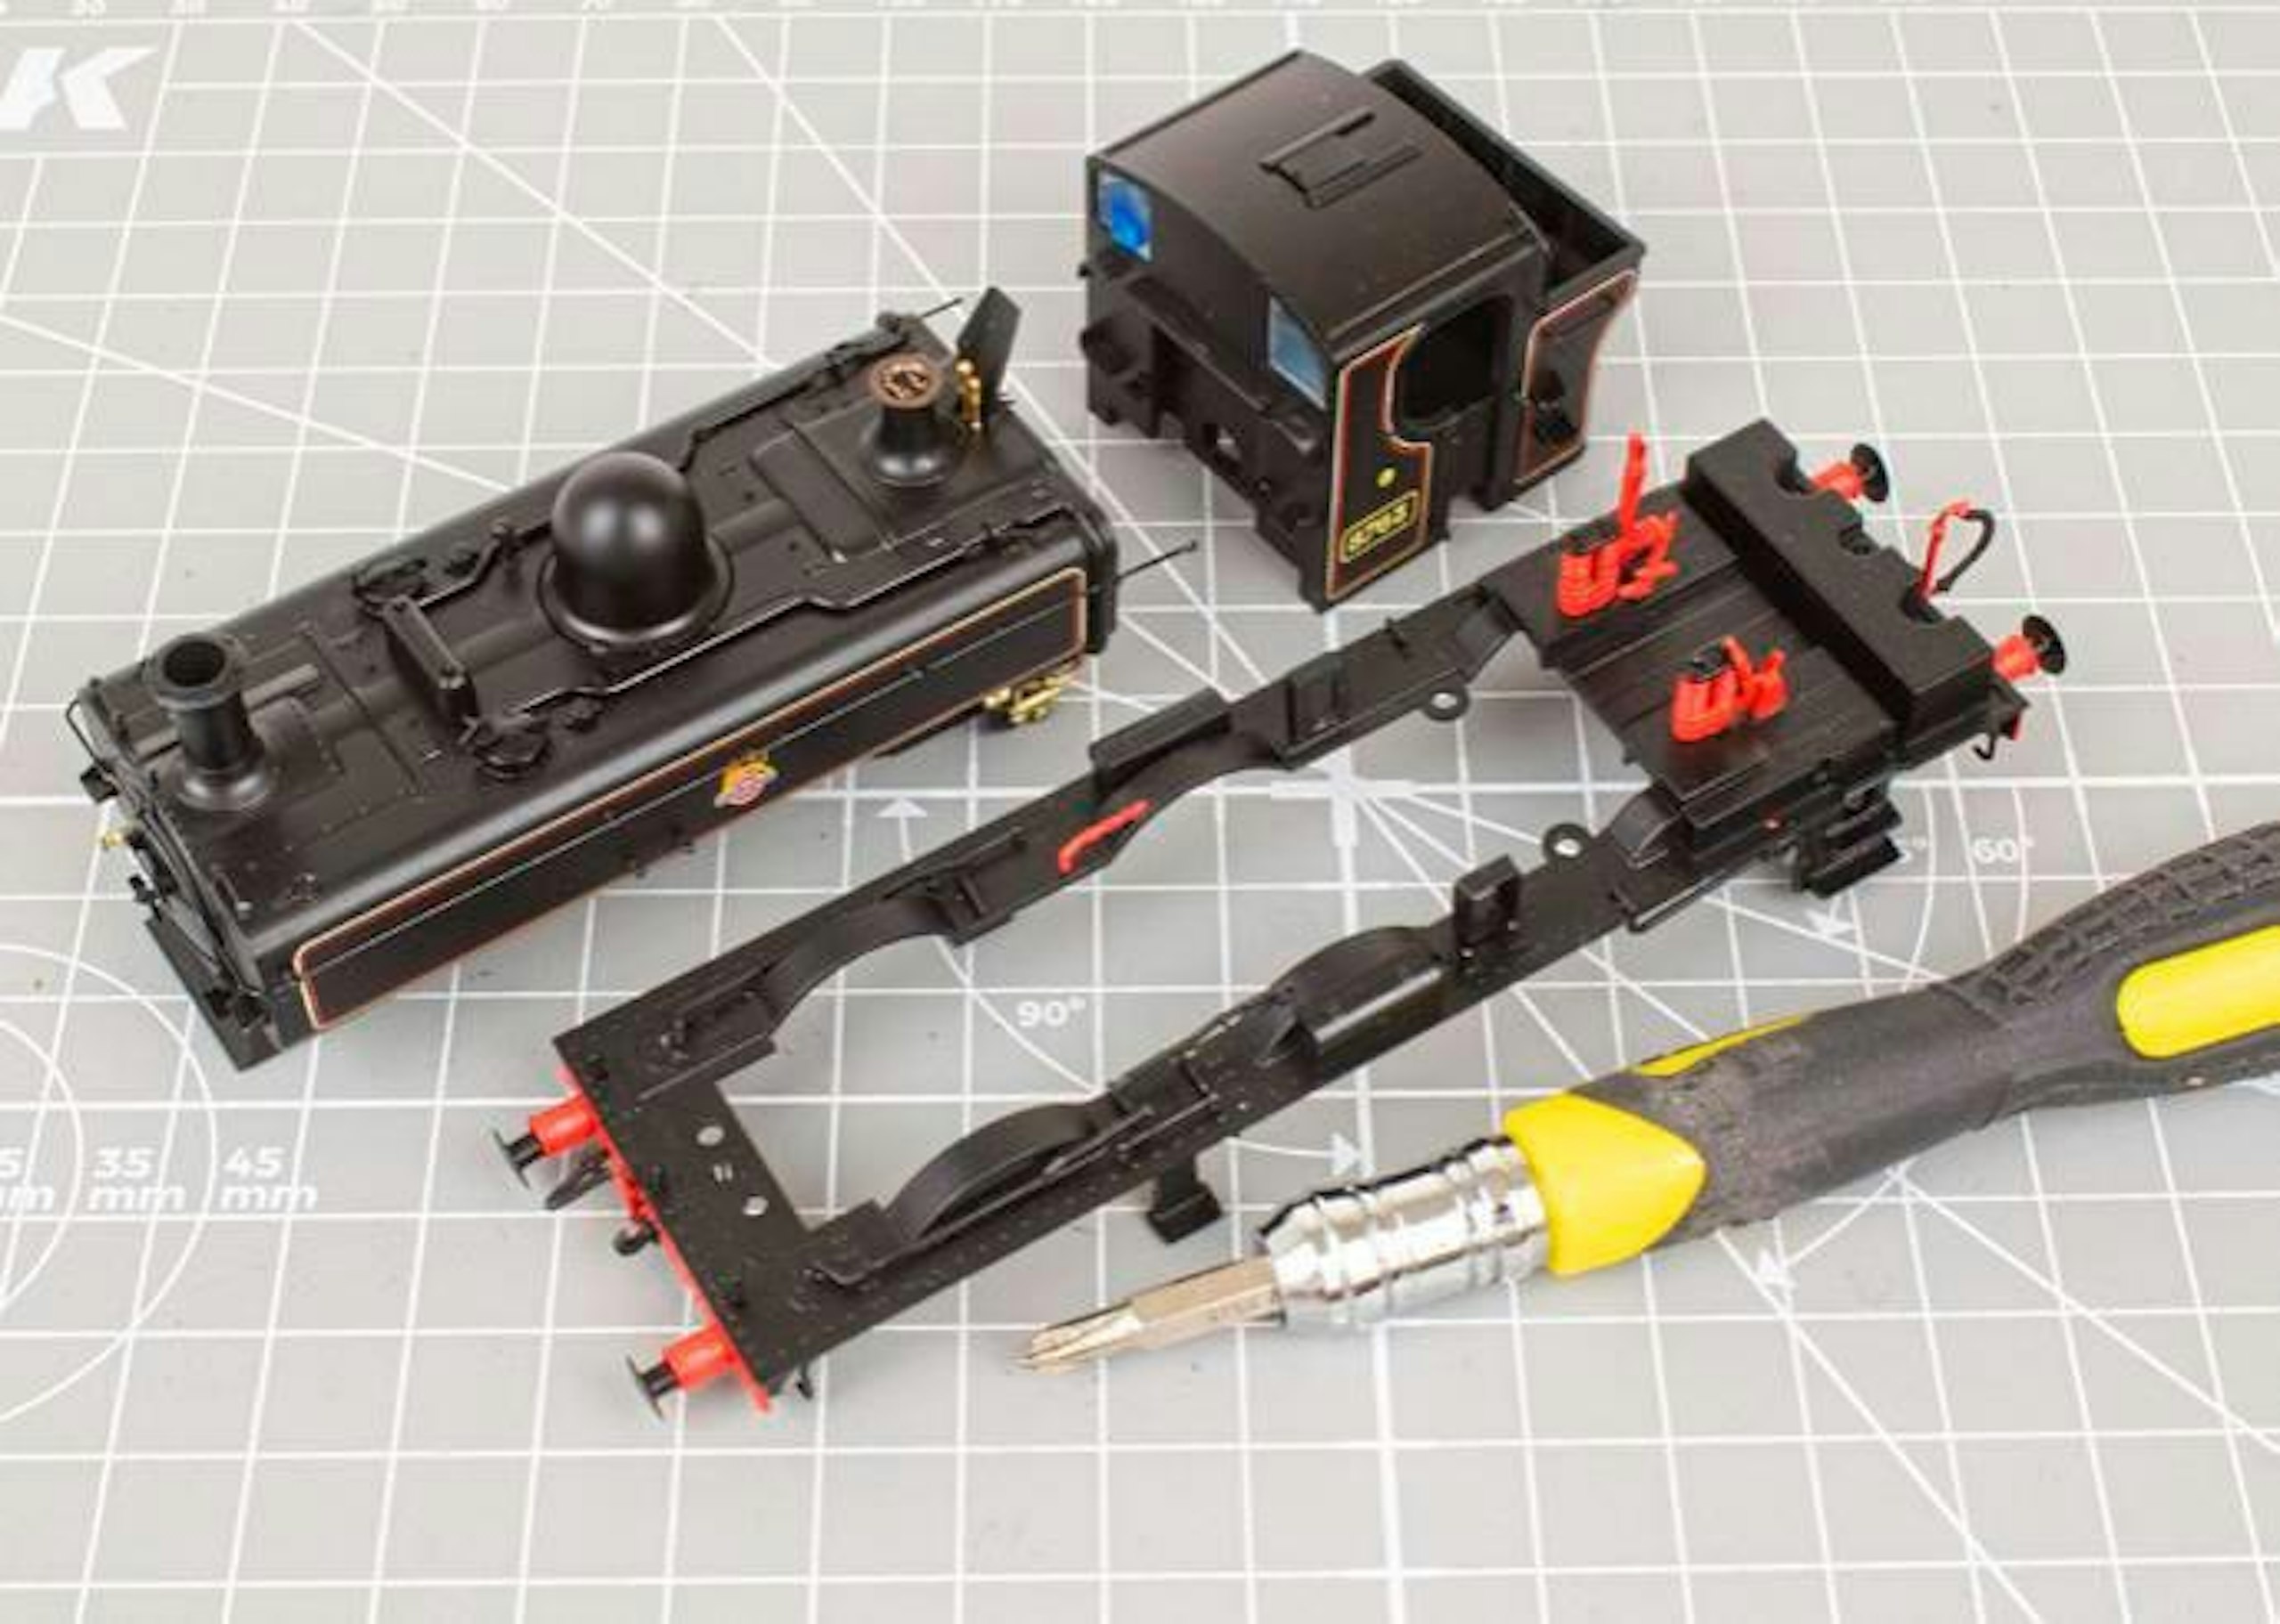
1 The Accurascale ‘57XX’ was easy to dismantle, with screws (hidden below the NEM coupler pockets) releasing the chassis. Further screws allow the cab and boiler/tanks to be separated. Keep all the screws safe.
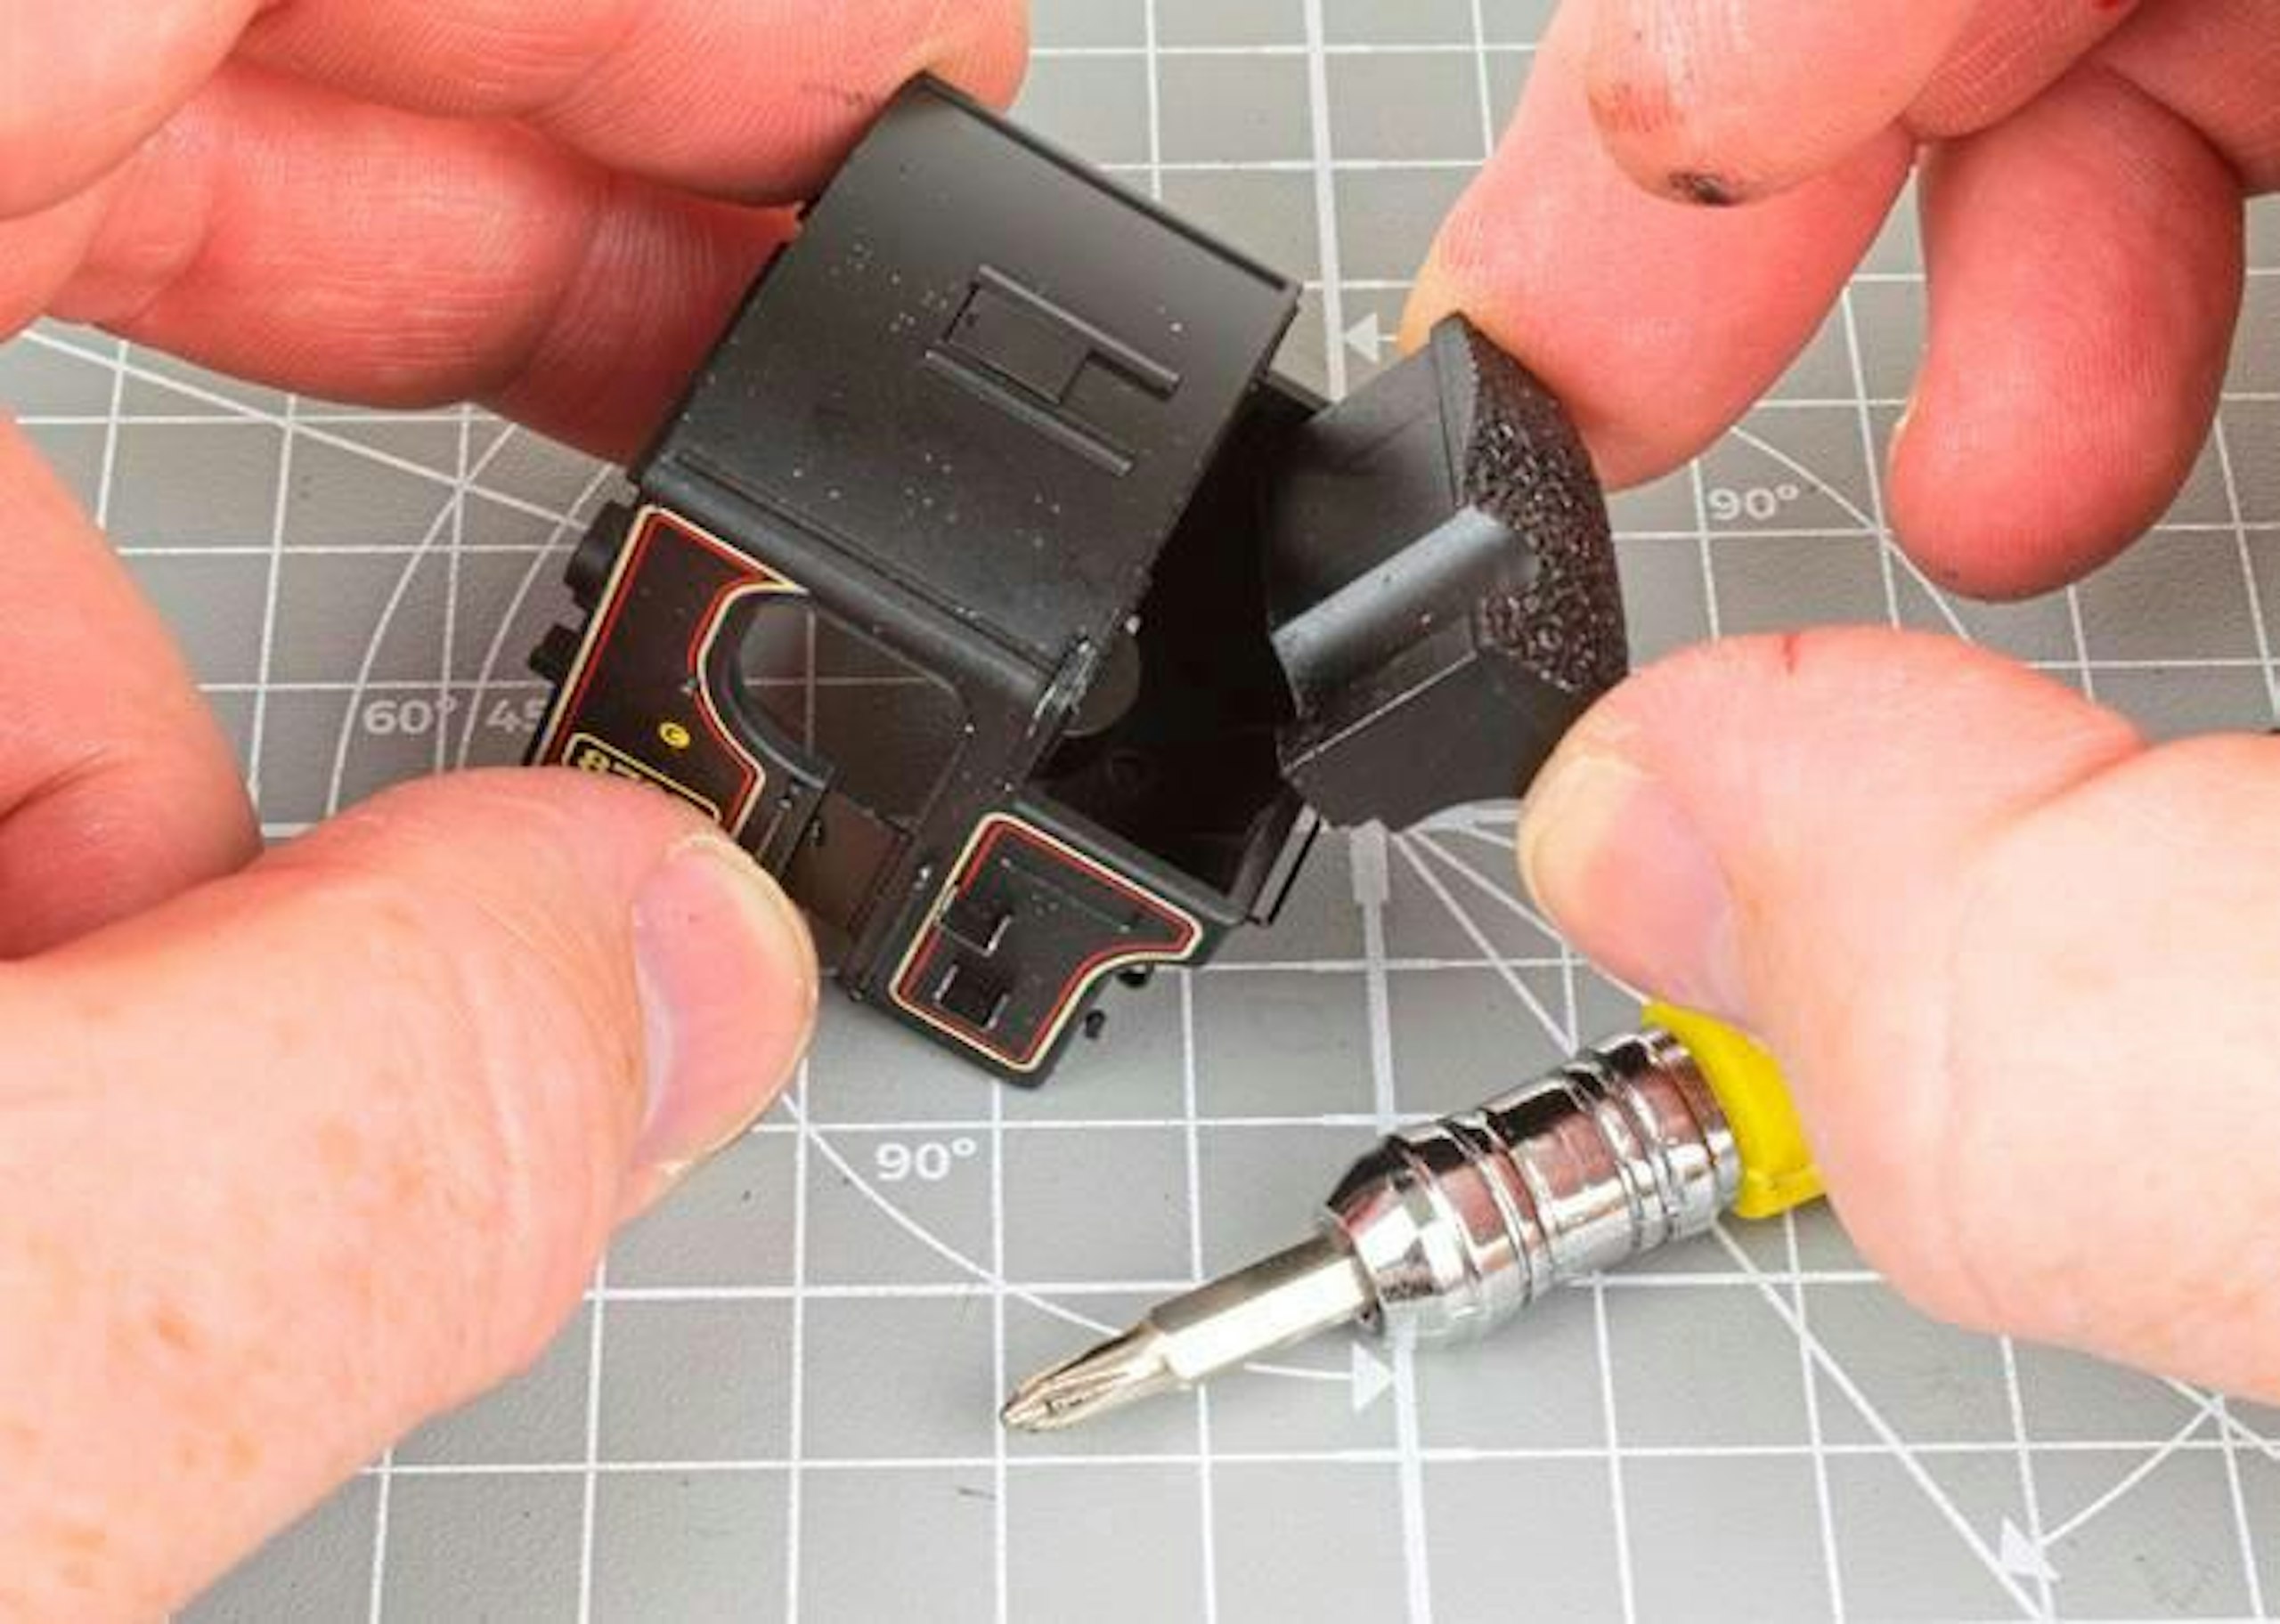
2 Another screw releases the cast metal ‘coal’, which doubles as an extra weight. Make a note of which screw goes where to aid reassembly. I have a plan for the metal coal, so it was put to one side for now.
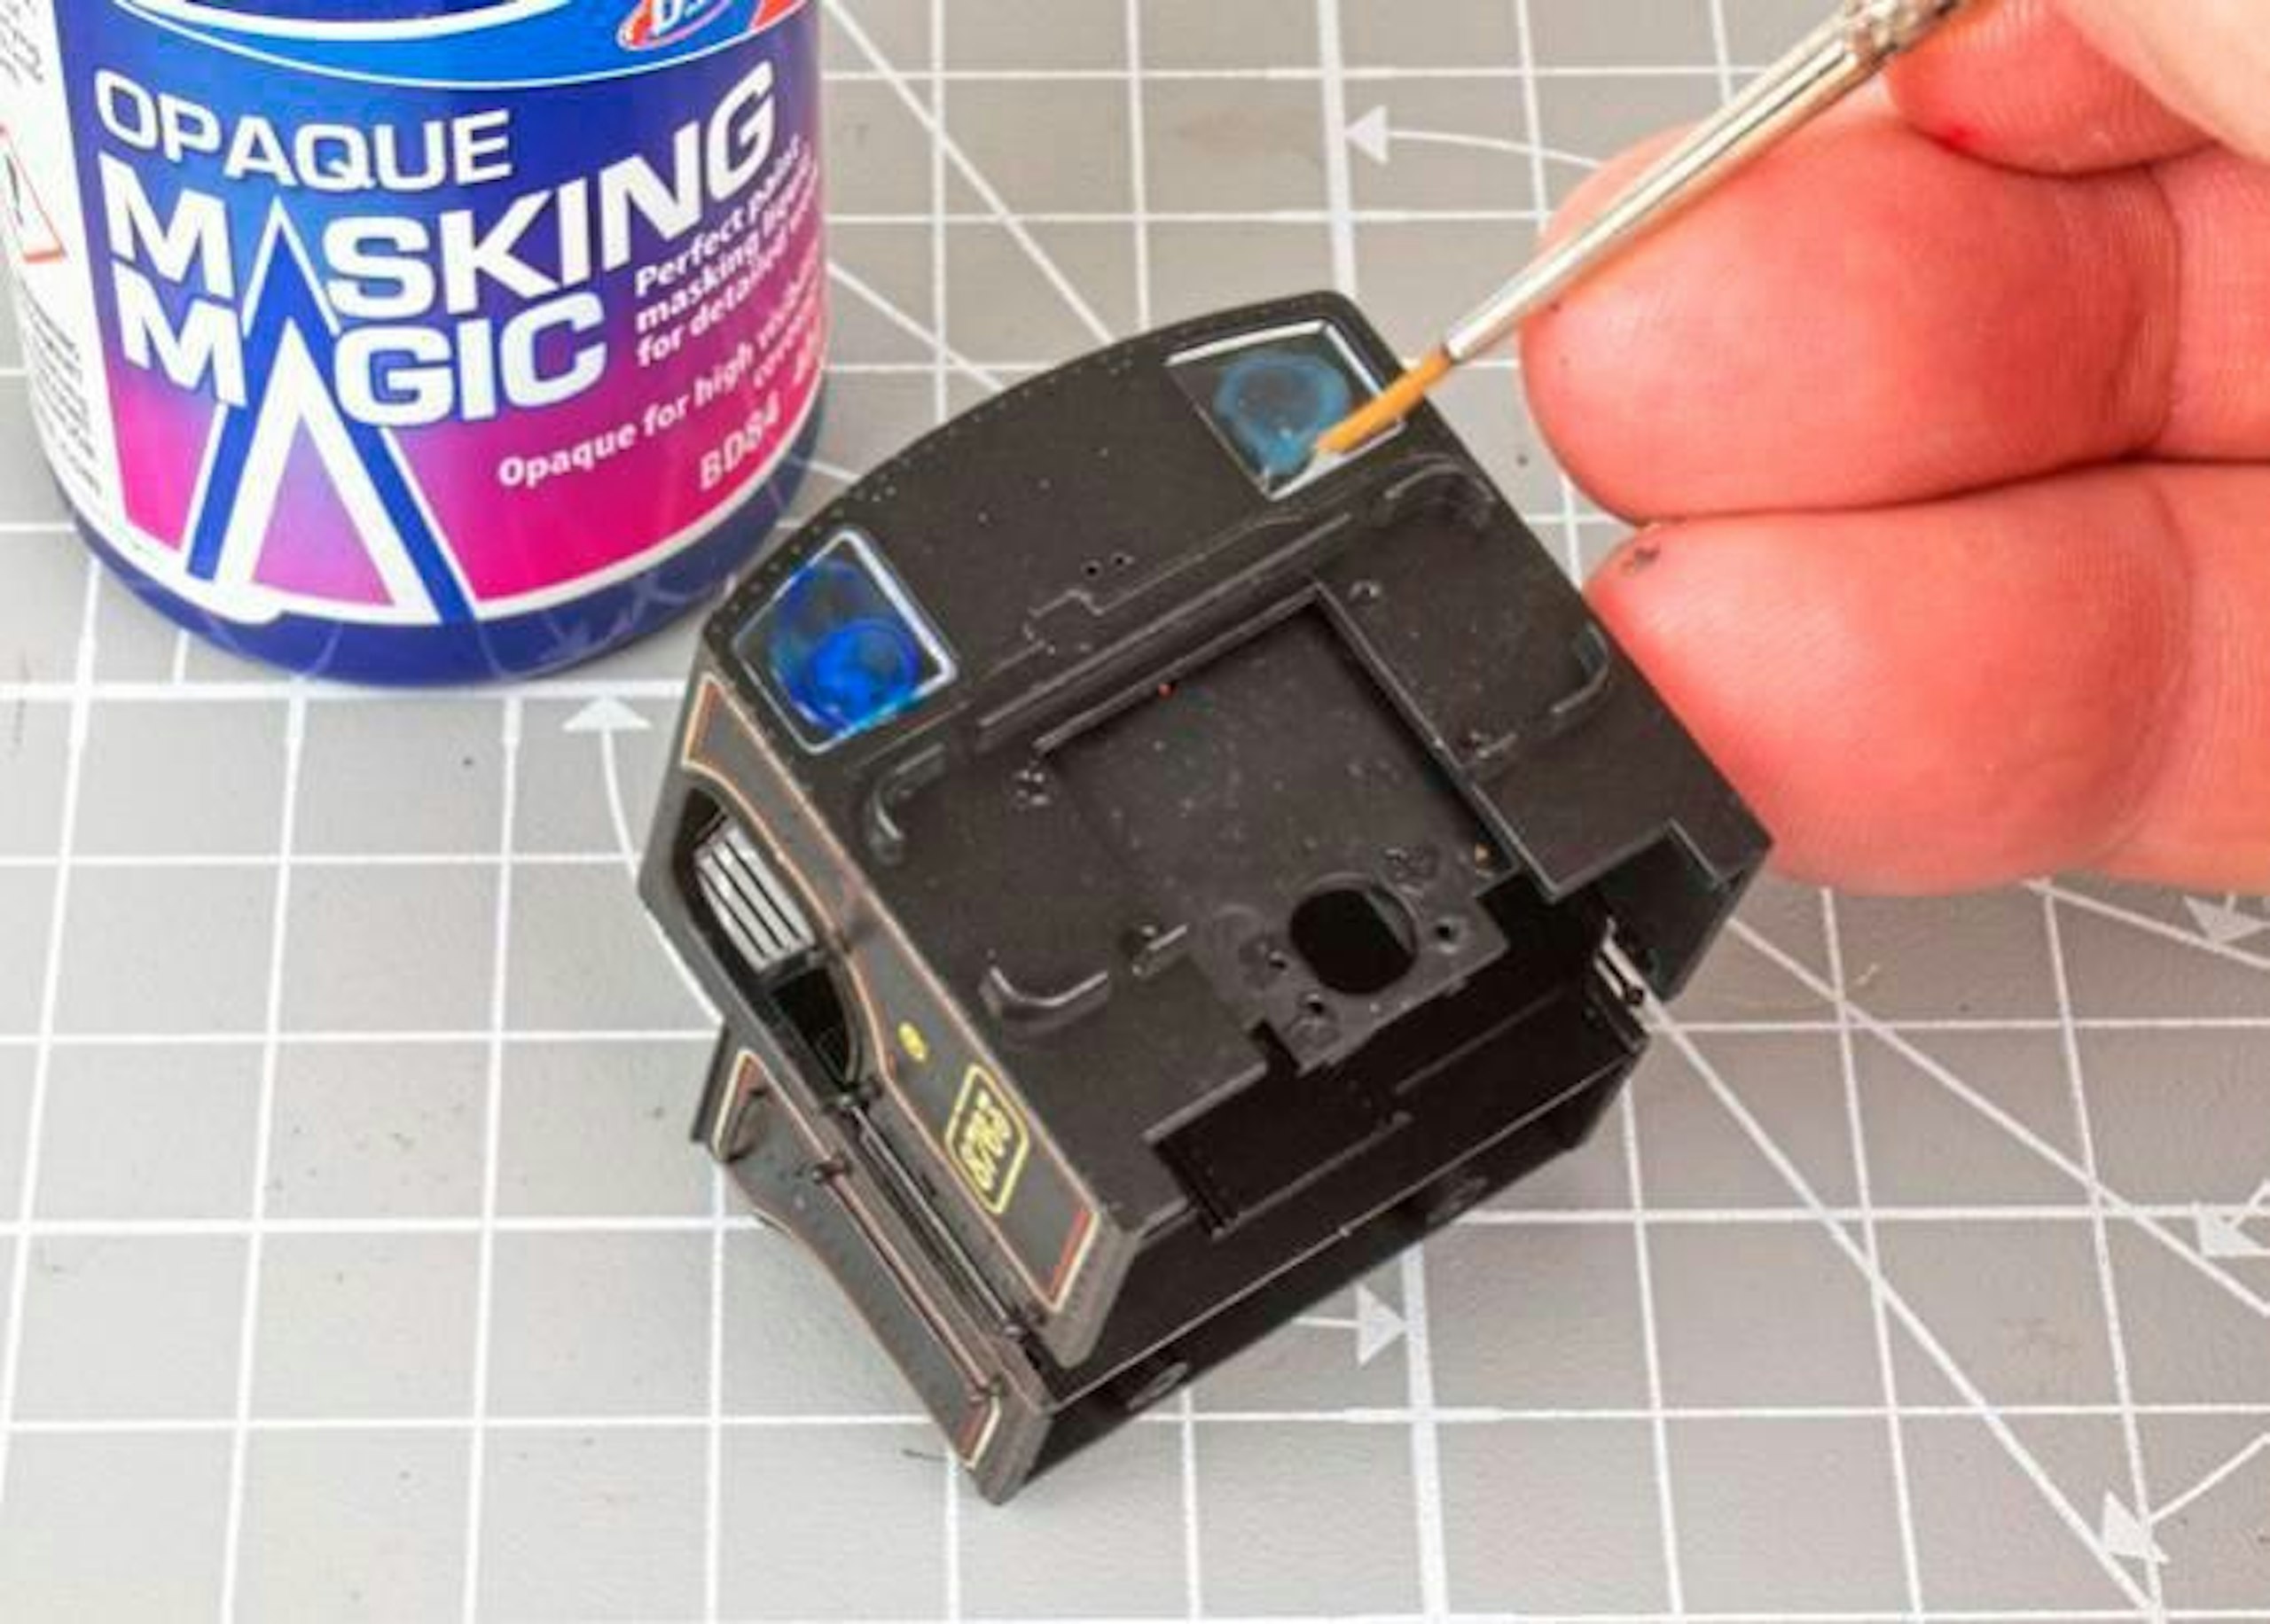
3 I brushed masking fluid onto the front glazing panels. To ensure some dirt accumulated around the edges of the glass, I applied the Masking Magic in a random pattern. Clean the brush in water and allow the fluid to dry.
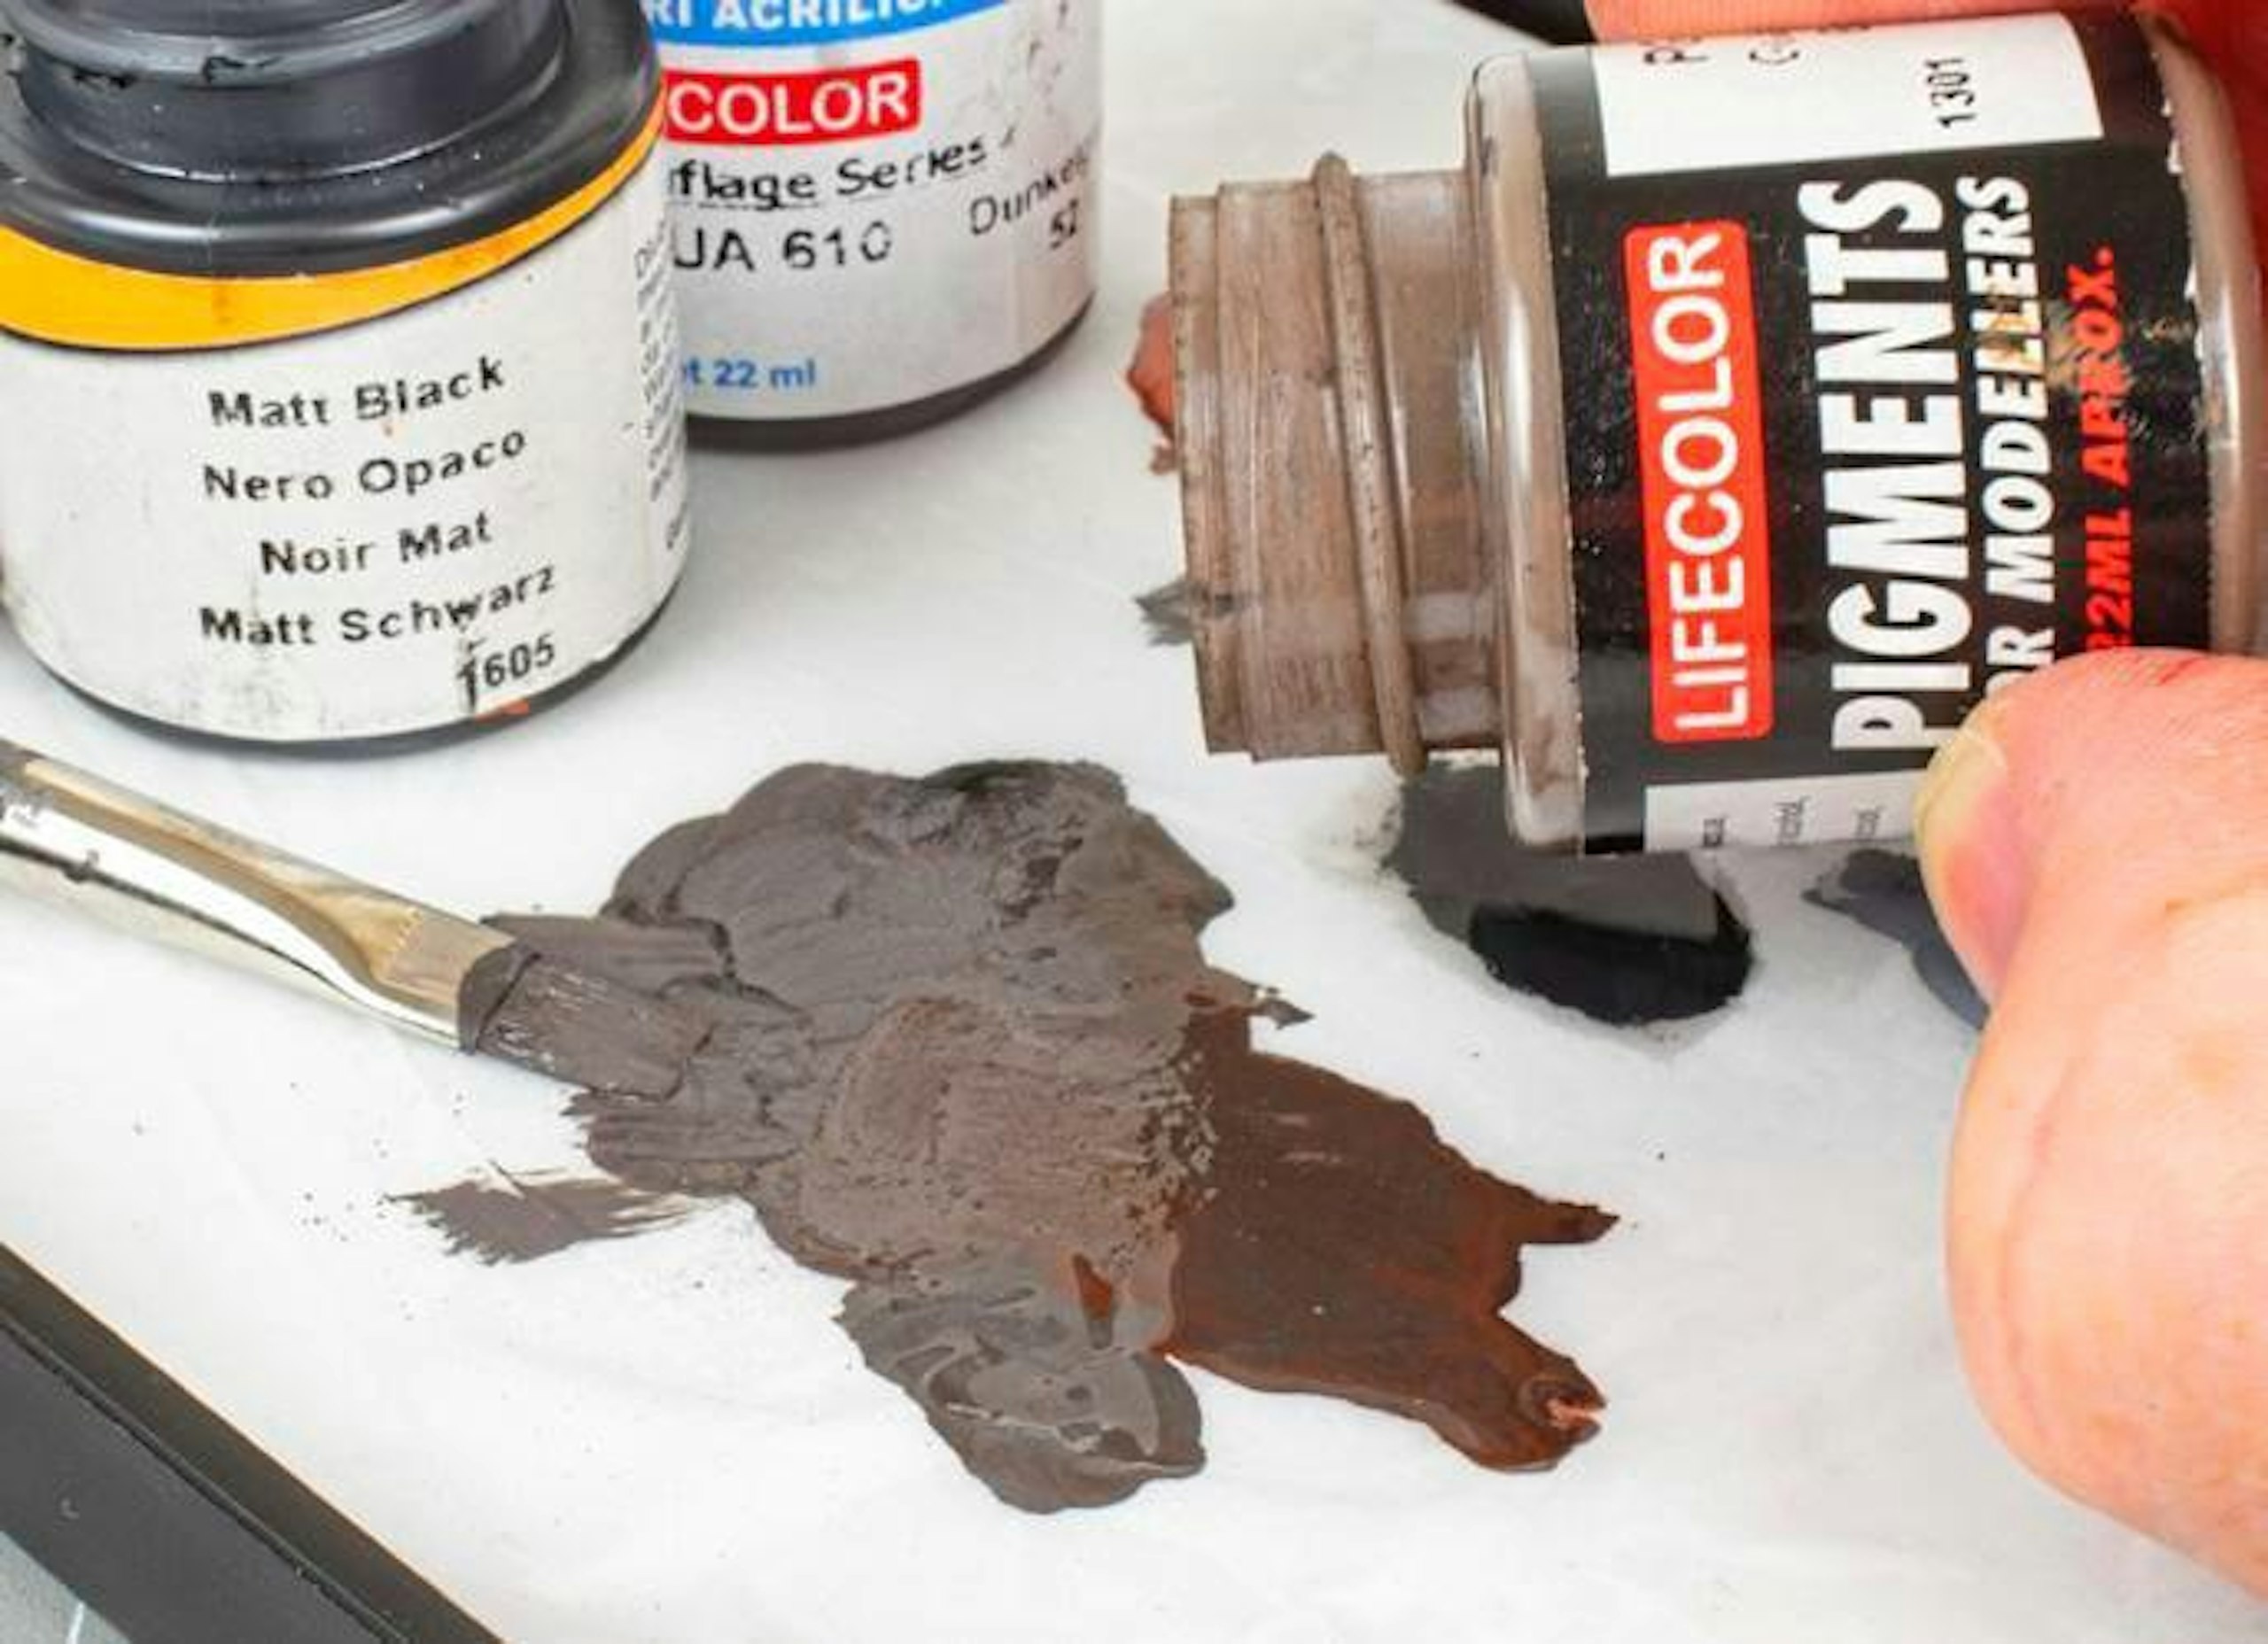
4 On a mixing palette, I created a blend of LifeColor acrylics (LC02 Matt Black, LC37 Burnt Umber, UA610 Dunkelgrau 52), plus a smidgen of PG101 Golan Dark Earth dry pigment to add some grit.
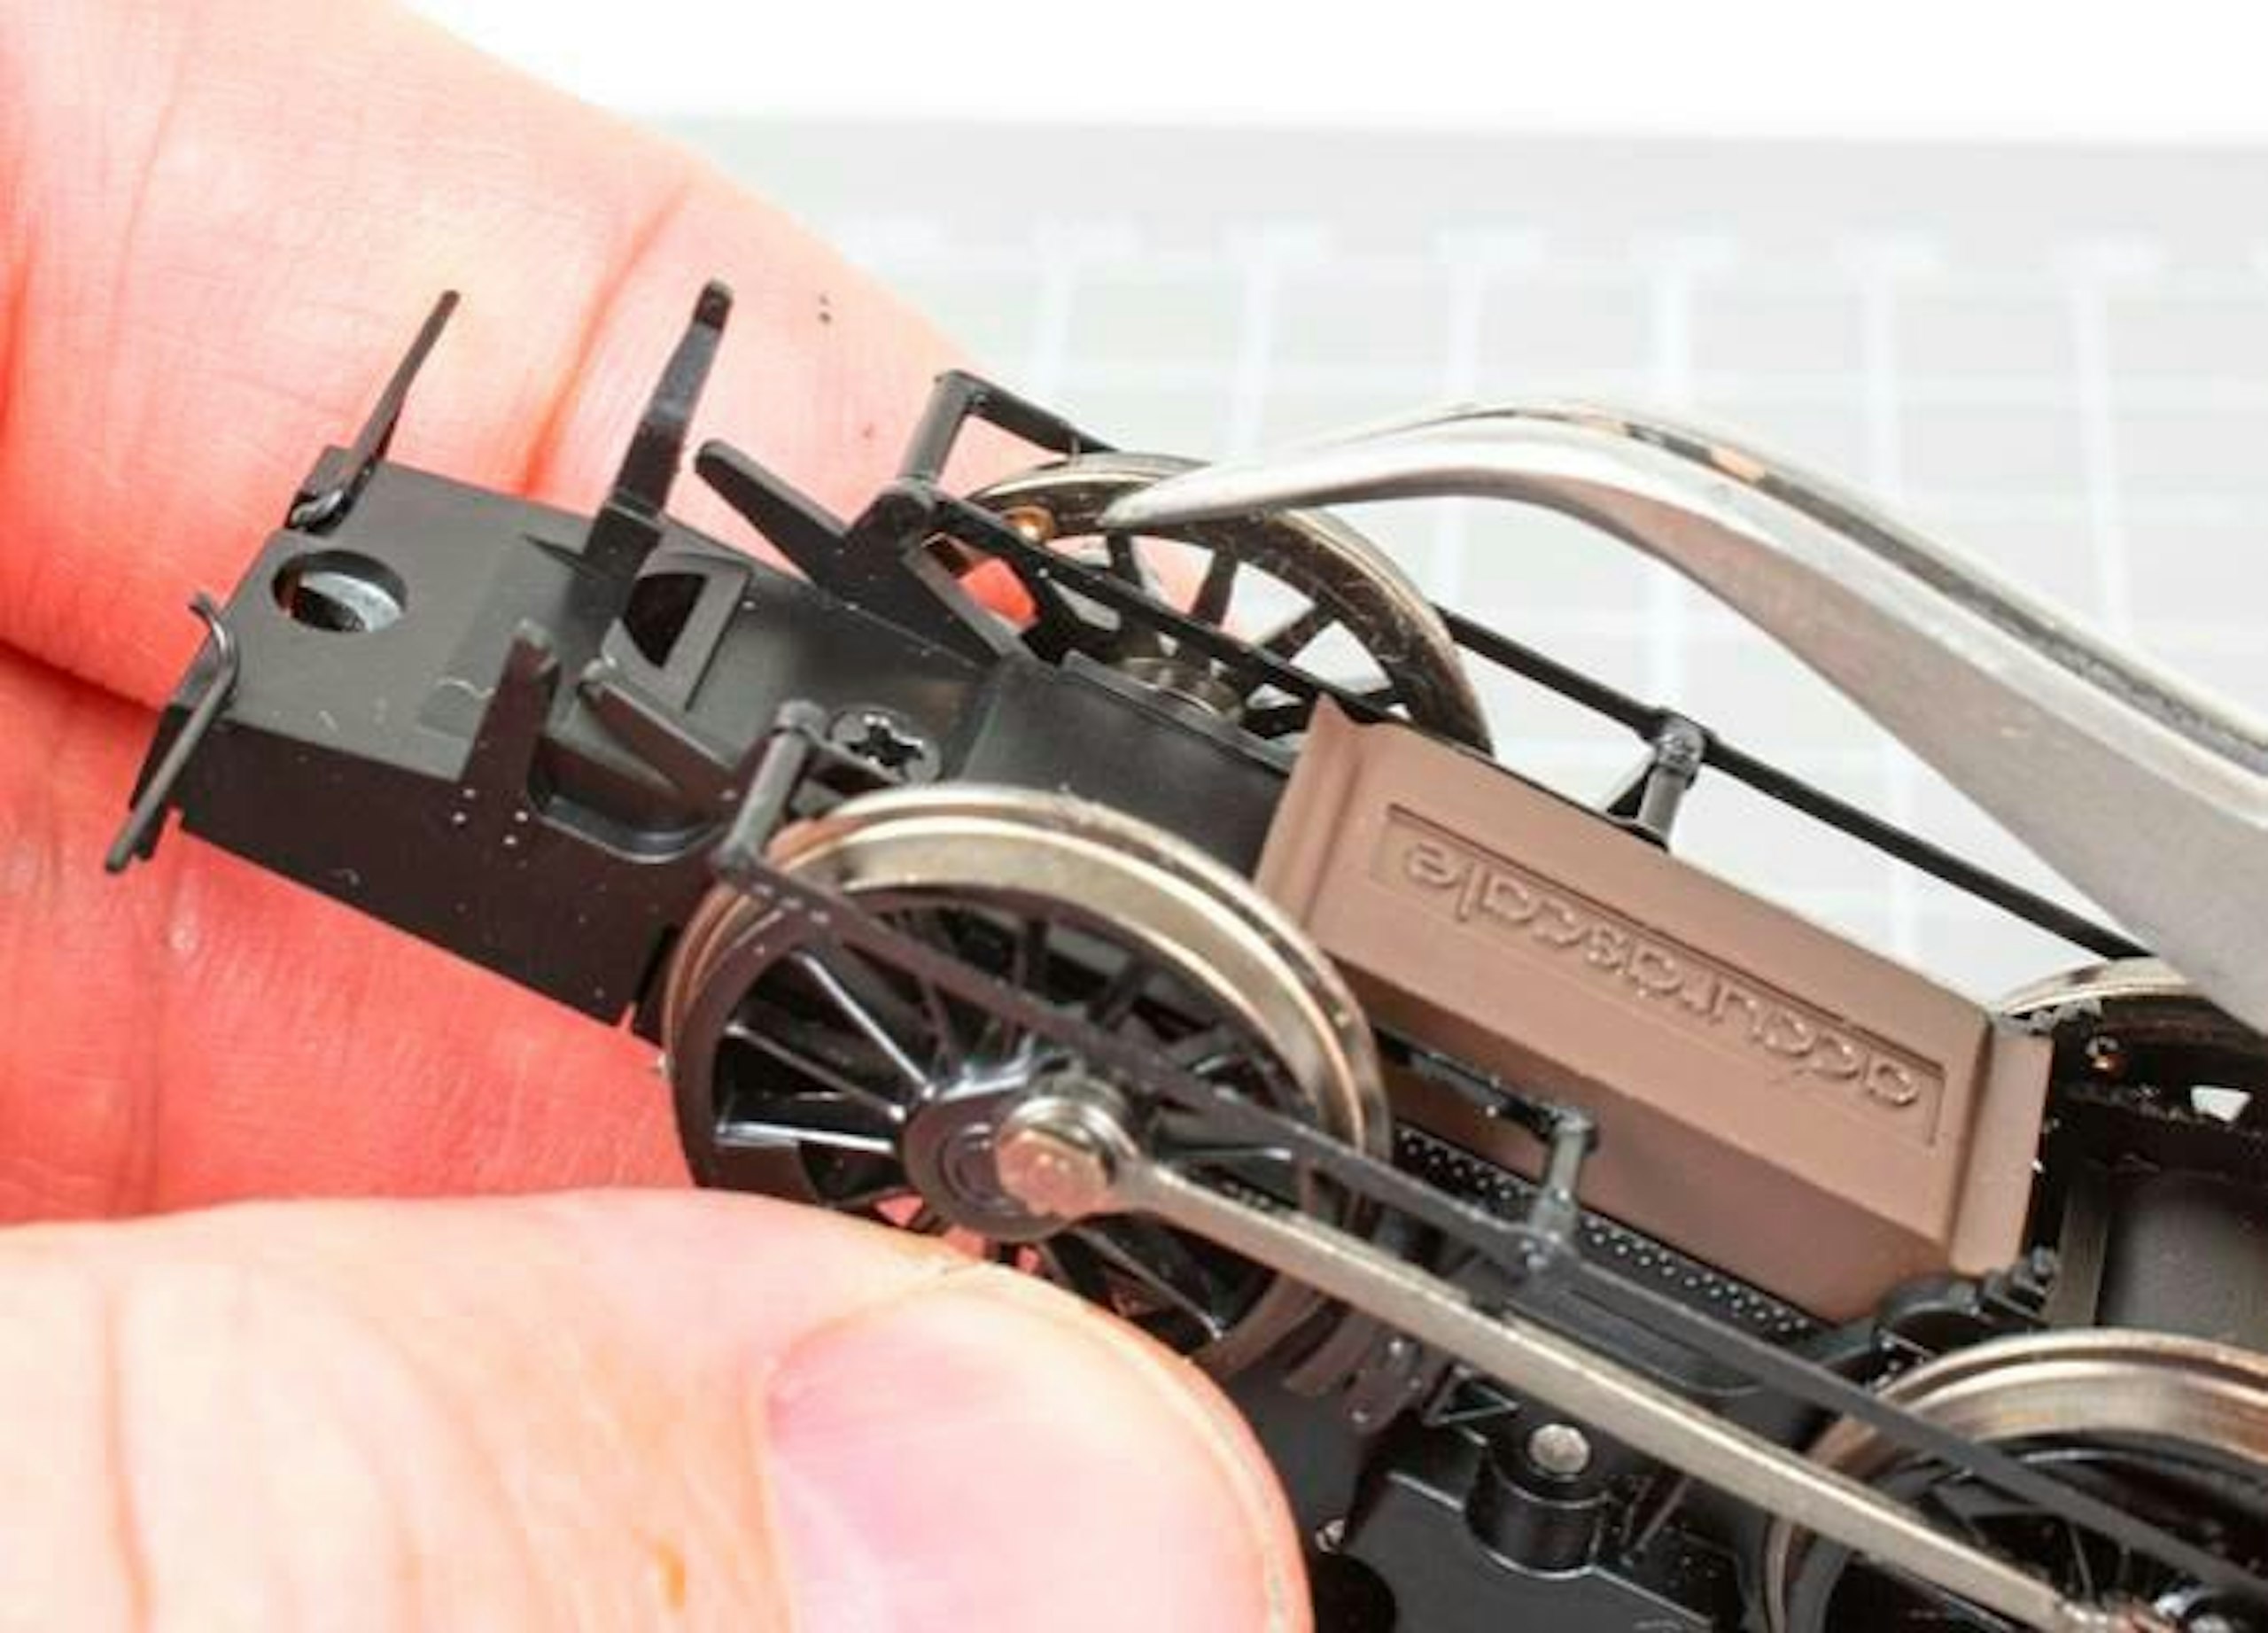
5 Before doing anything to the chassis, I made a note of the location of each wiper contact. These collect power from the rear faces of the wheels and are very delicate. I needed to steer clear of them wherever possible.
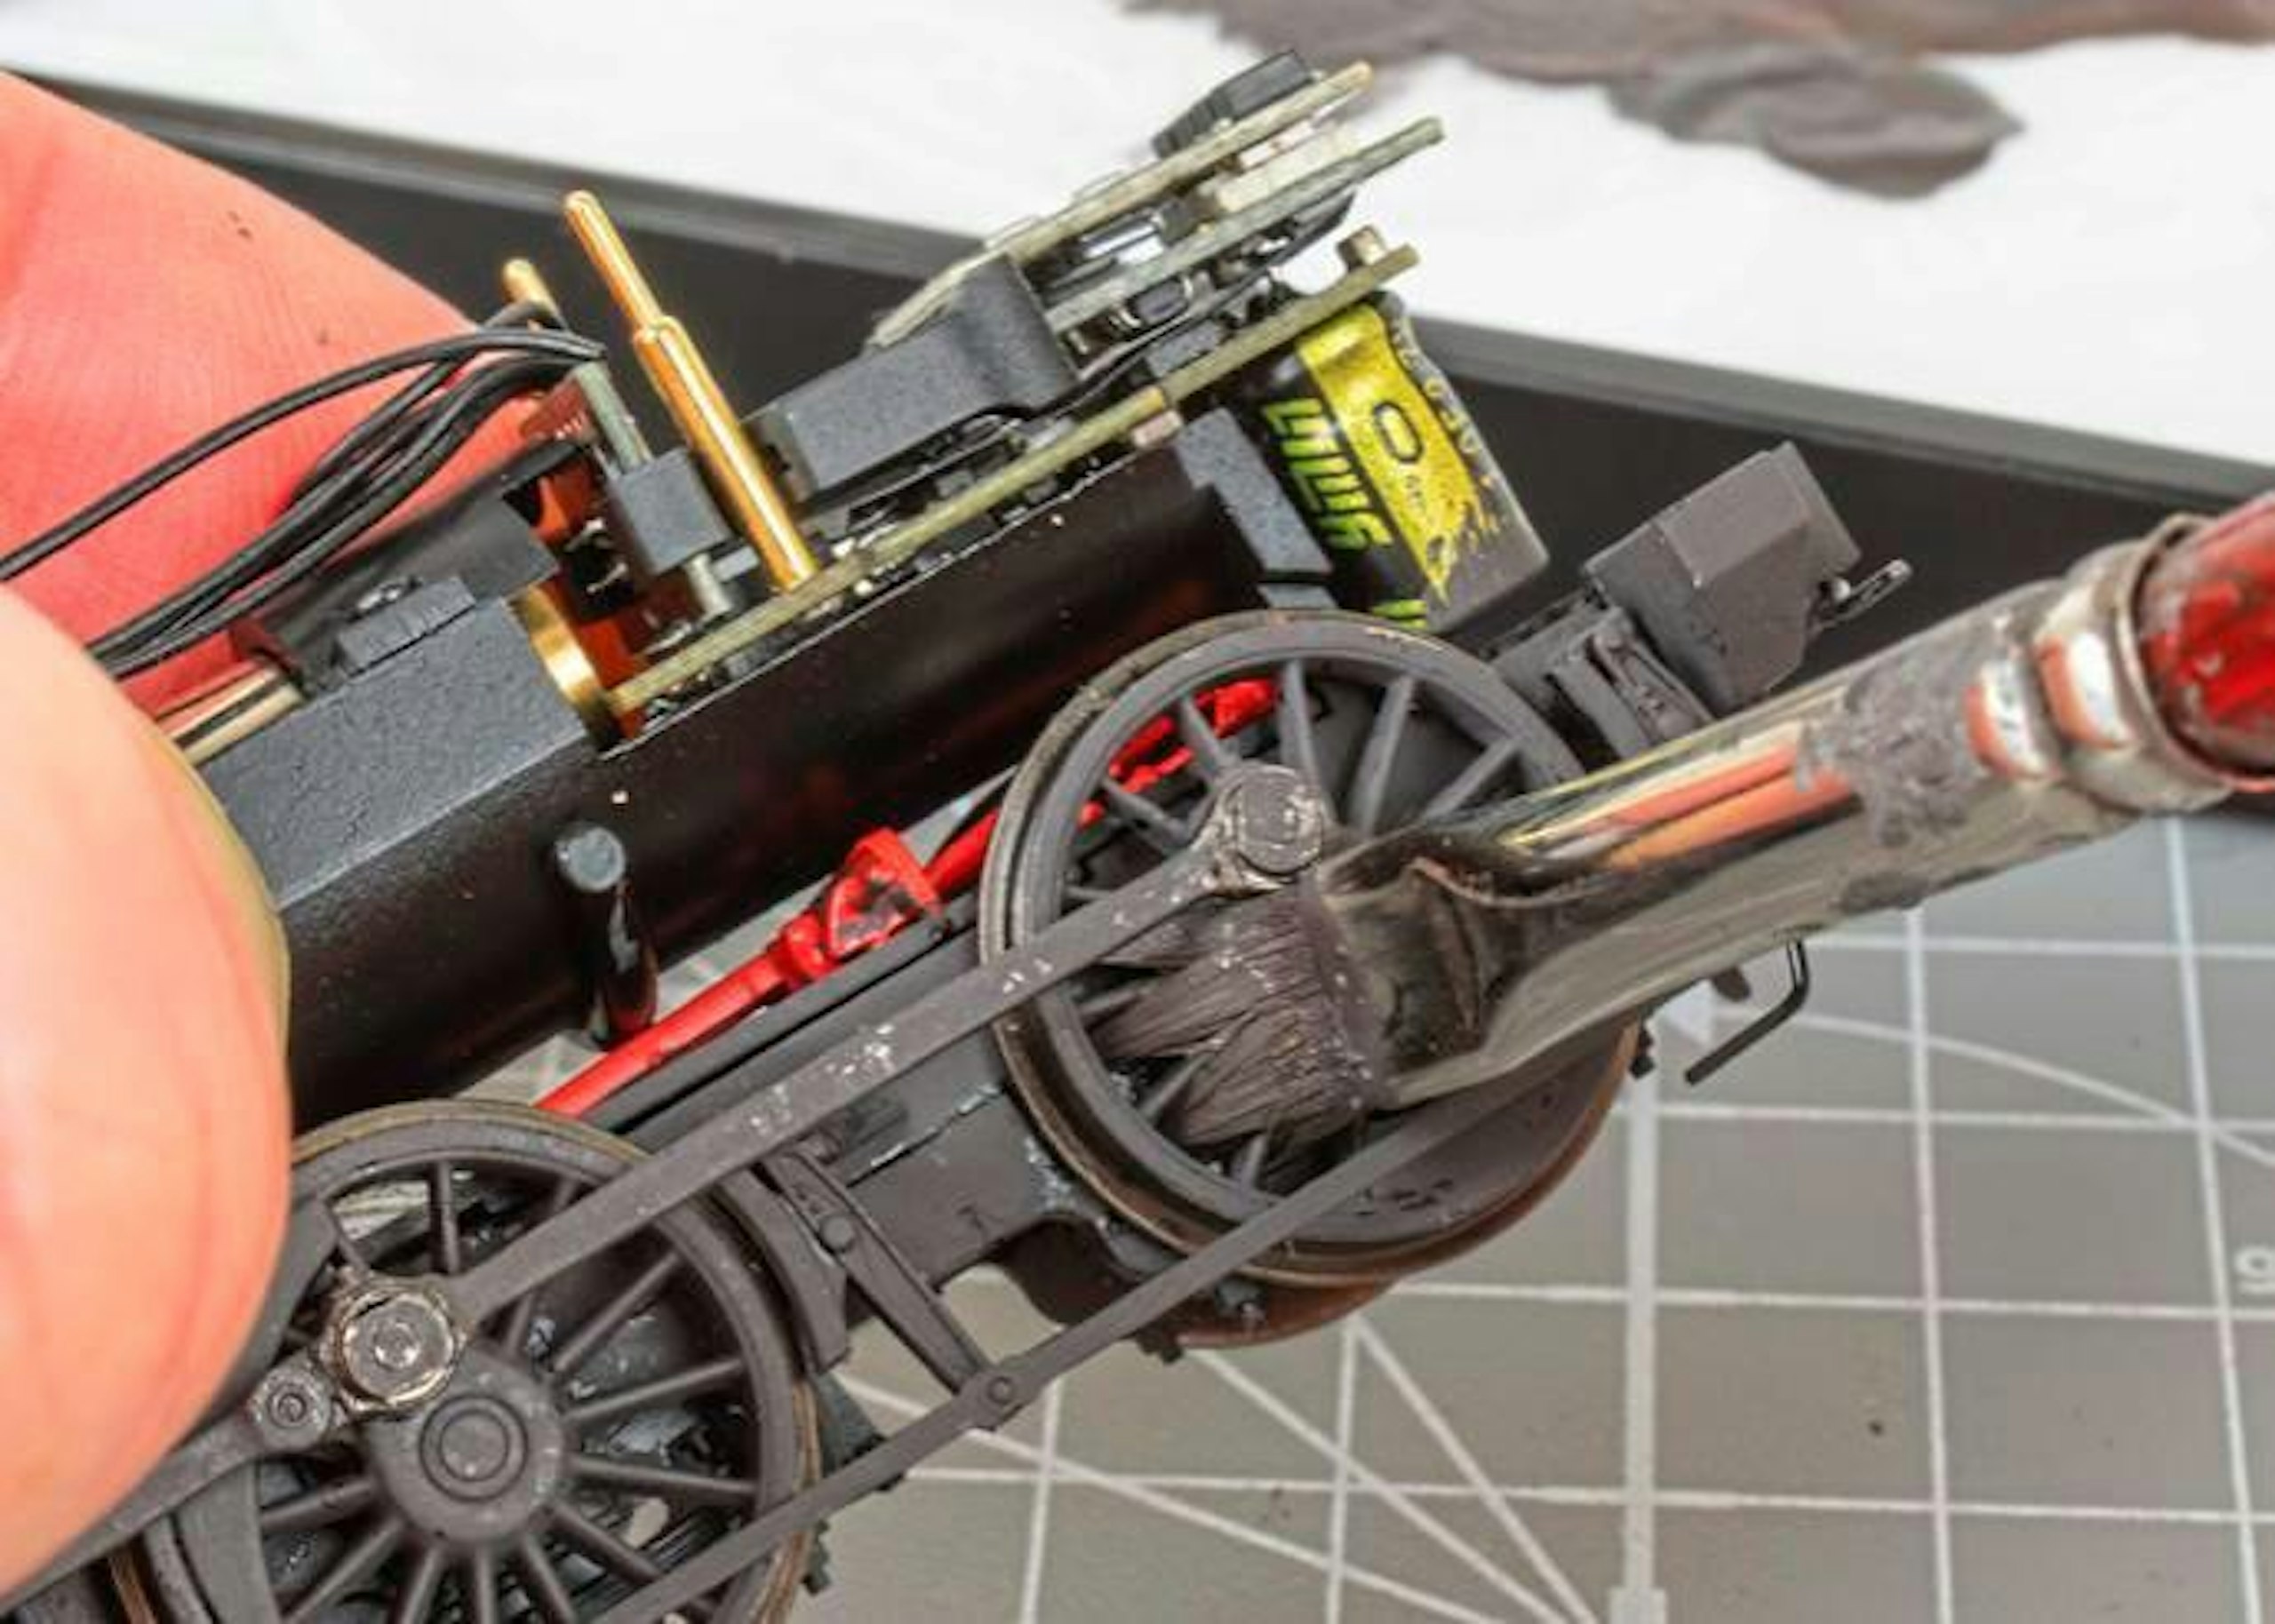
6 The paint was brushed very carefully over the chassis and wheels, working it between the spokes and onto the frames, remembering to avoid those wiper contacts. The inside valve gear and base of the boiler were treated too.
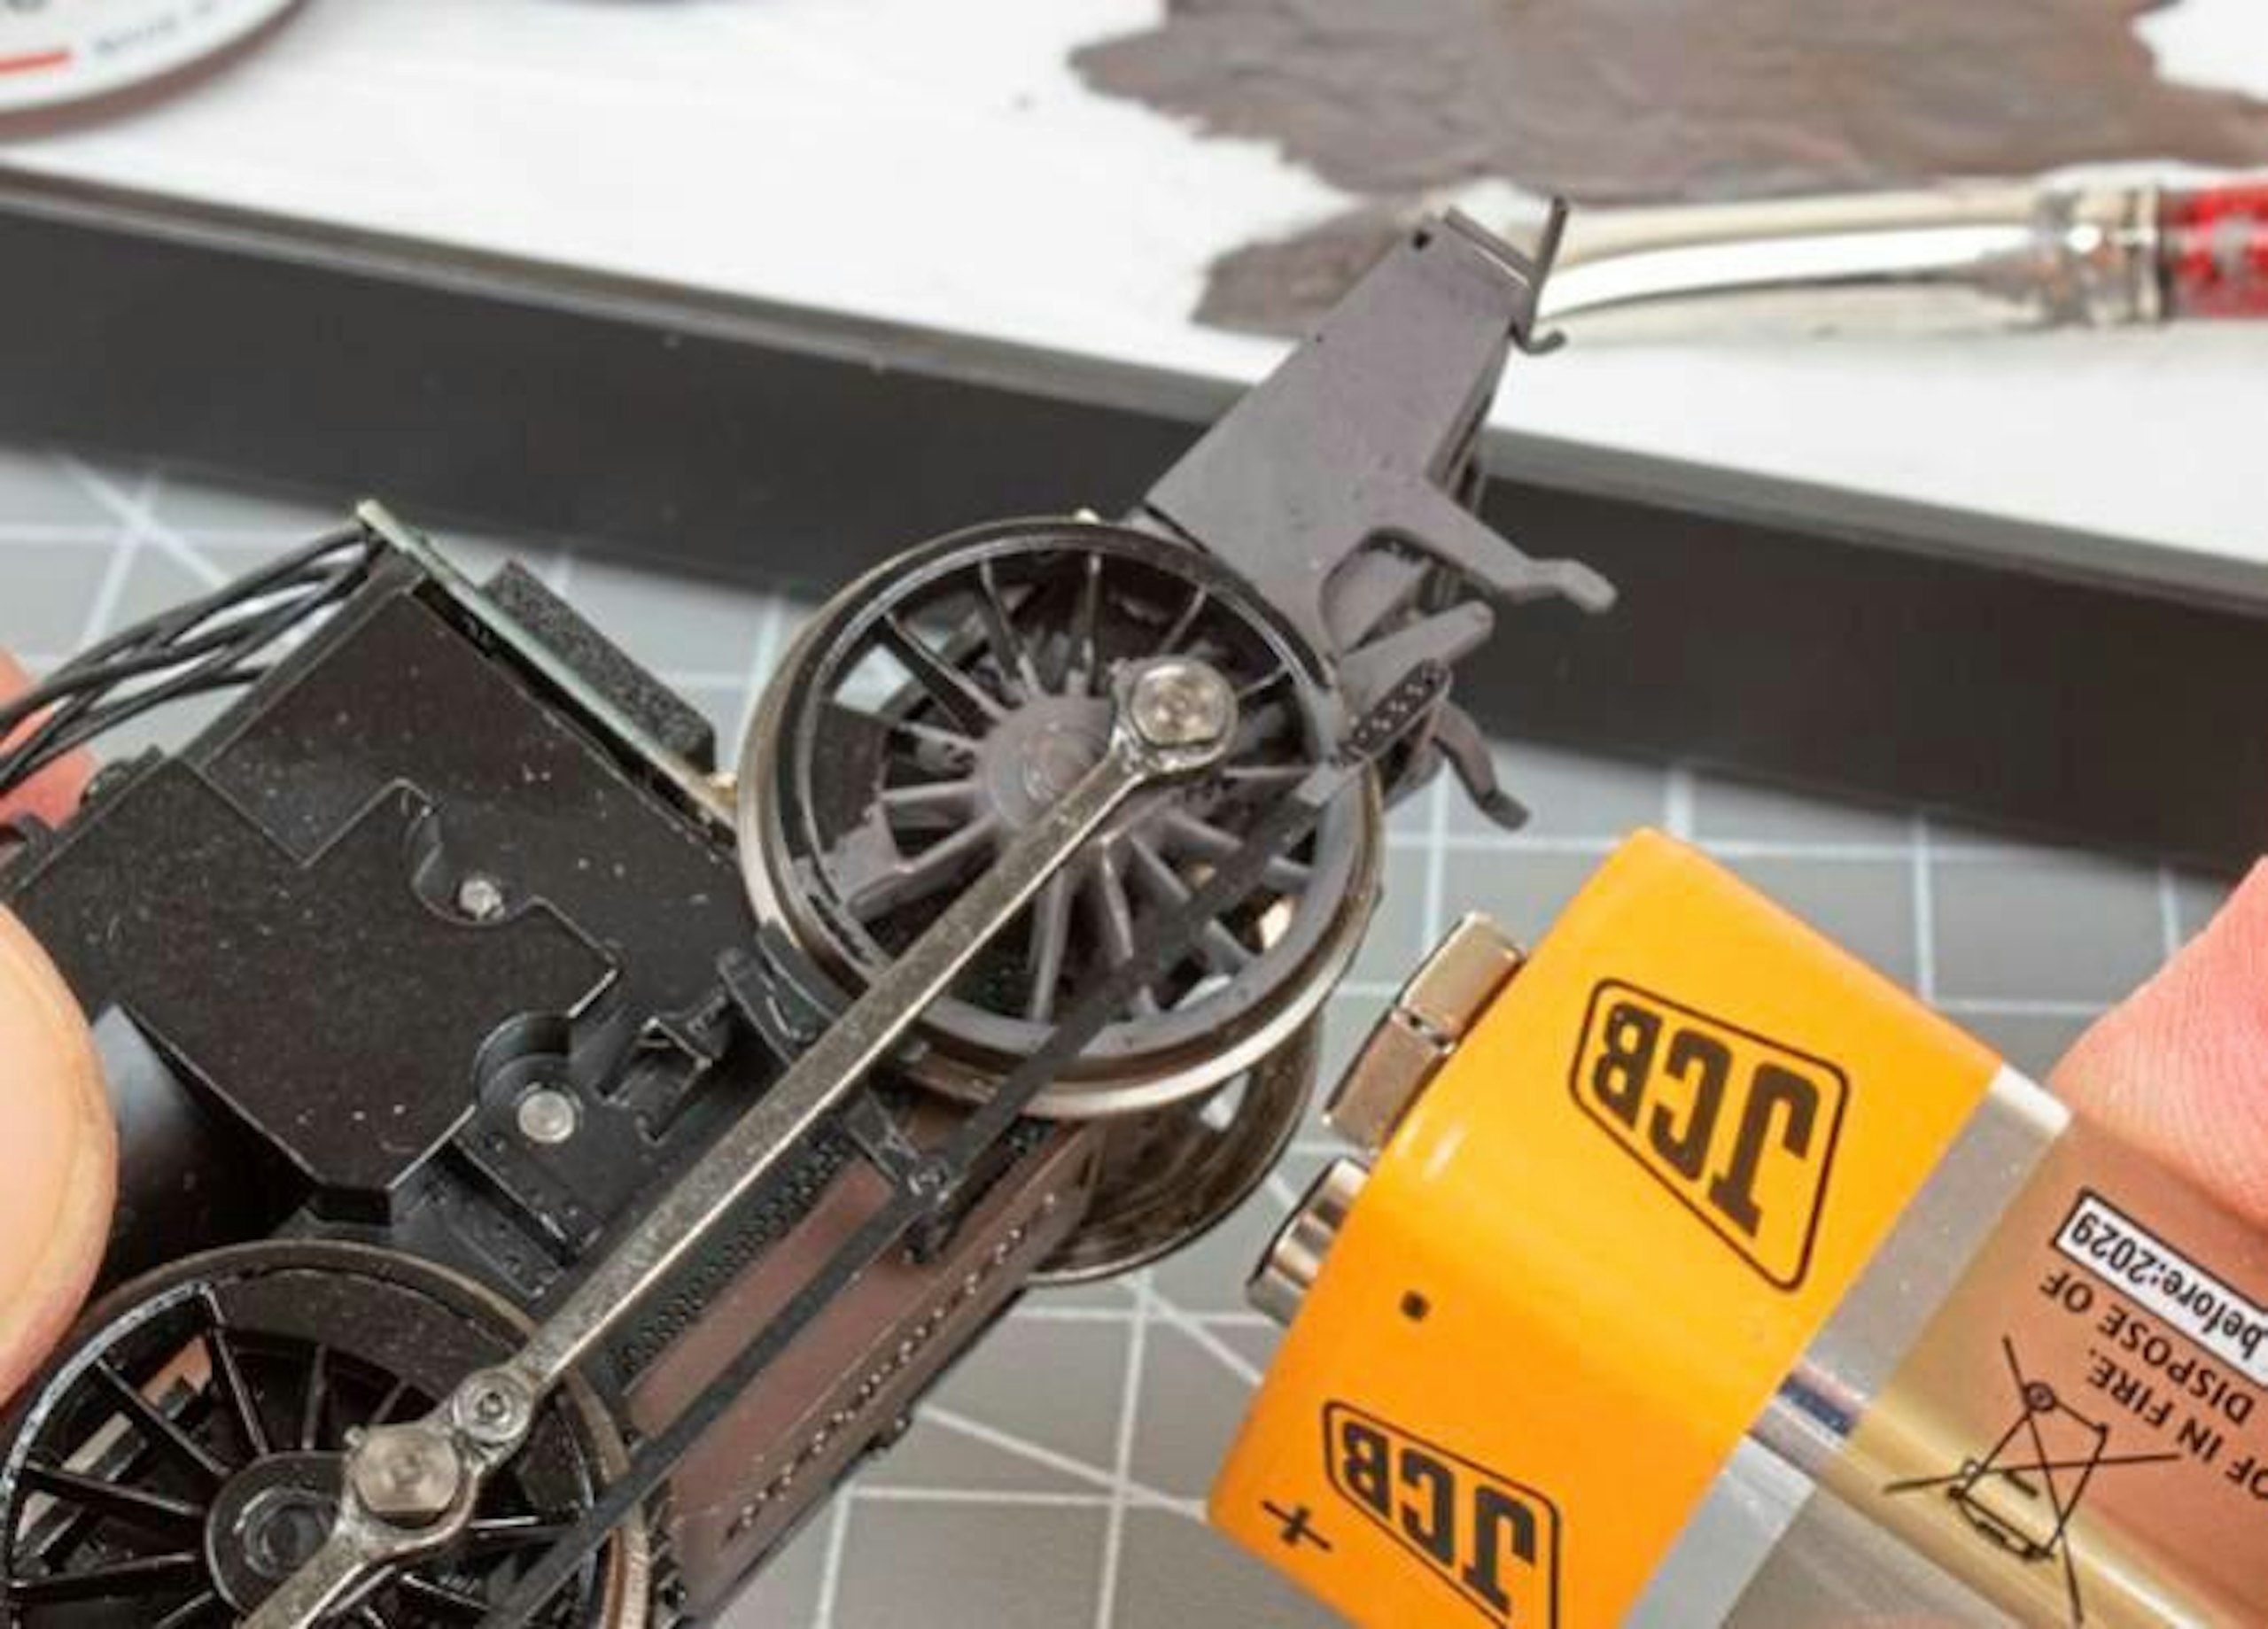
7 For this non-DCC-fitted model, I could touch the terminals of a 9V battery to the wheels to energise the motor and gain access to hidden areas. This is NOT recommended for most models with DCC decoders installed.
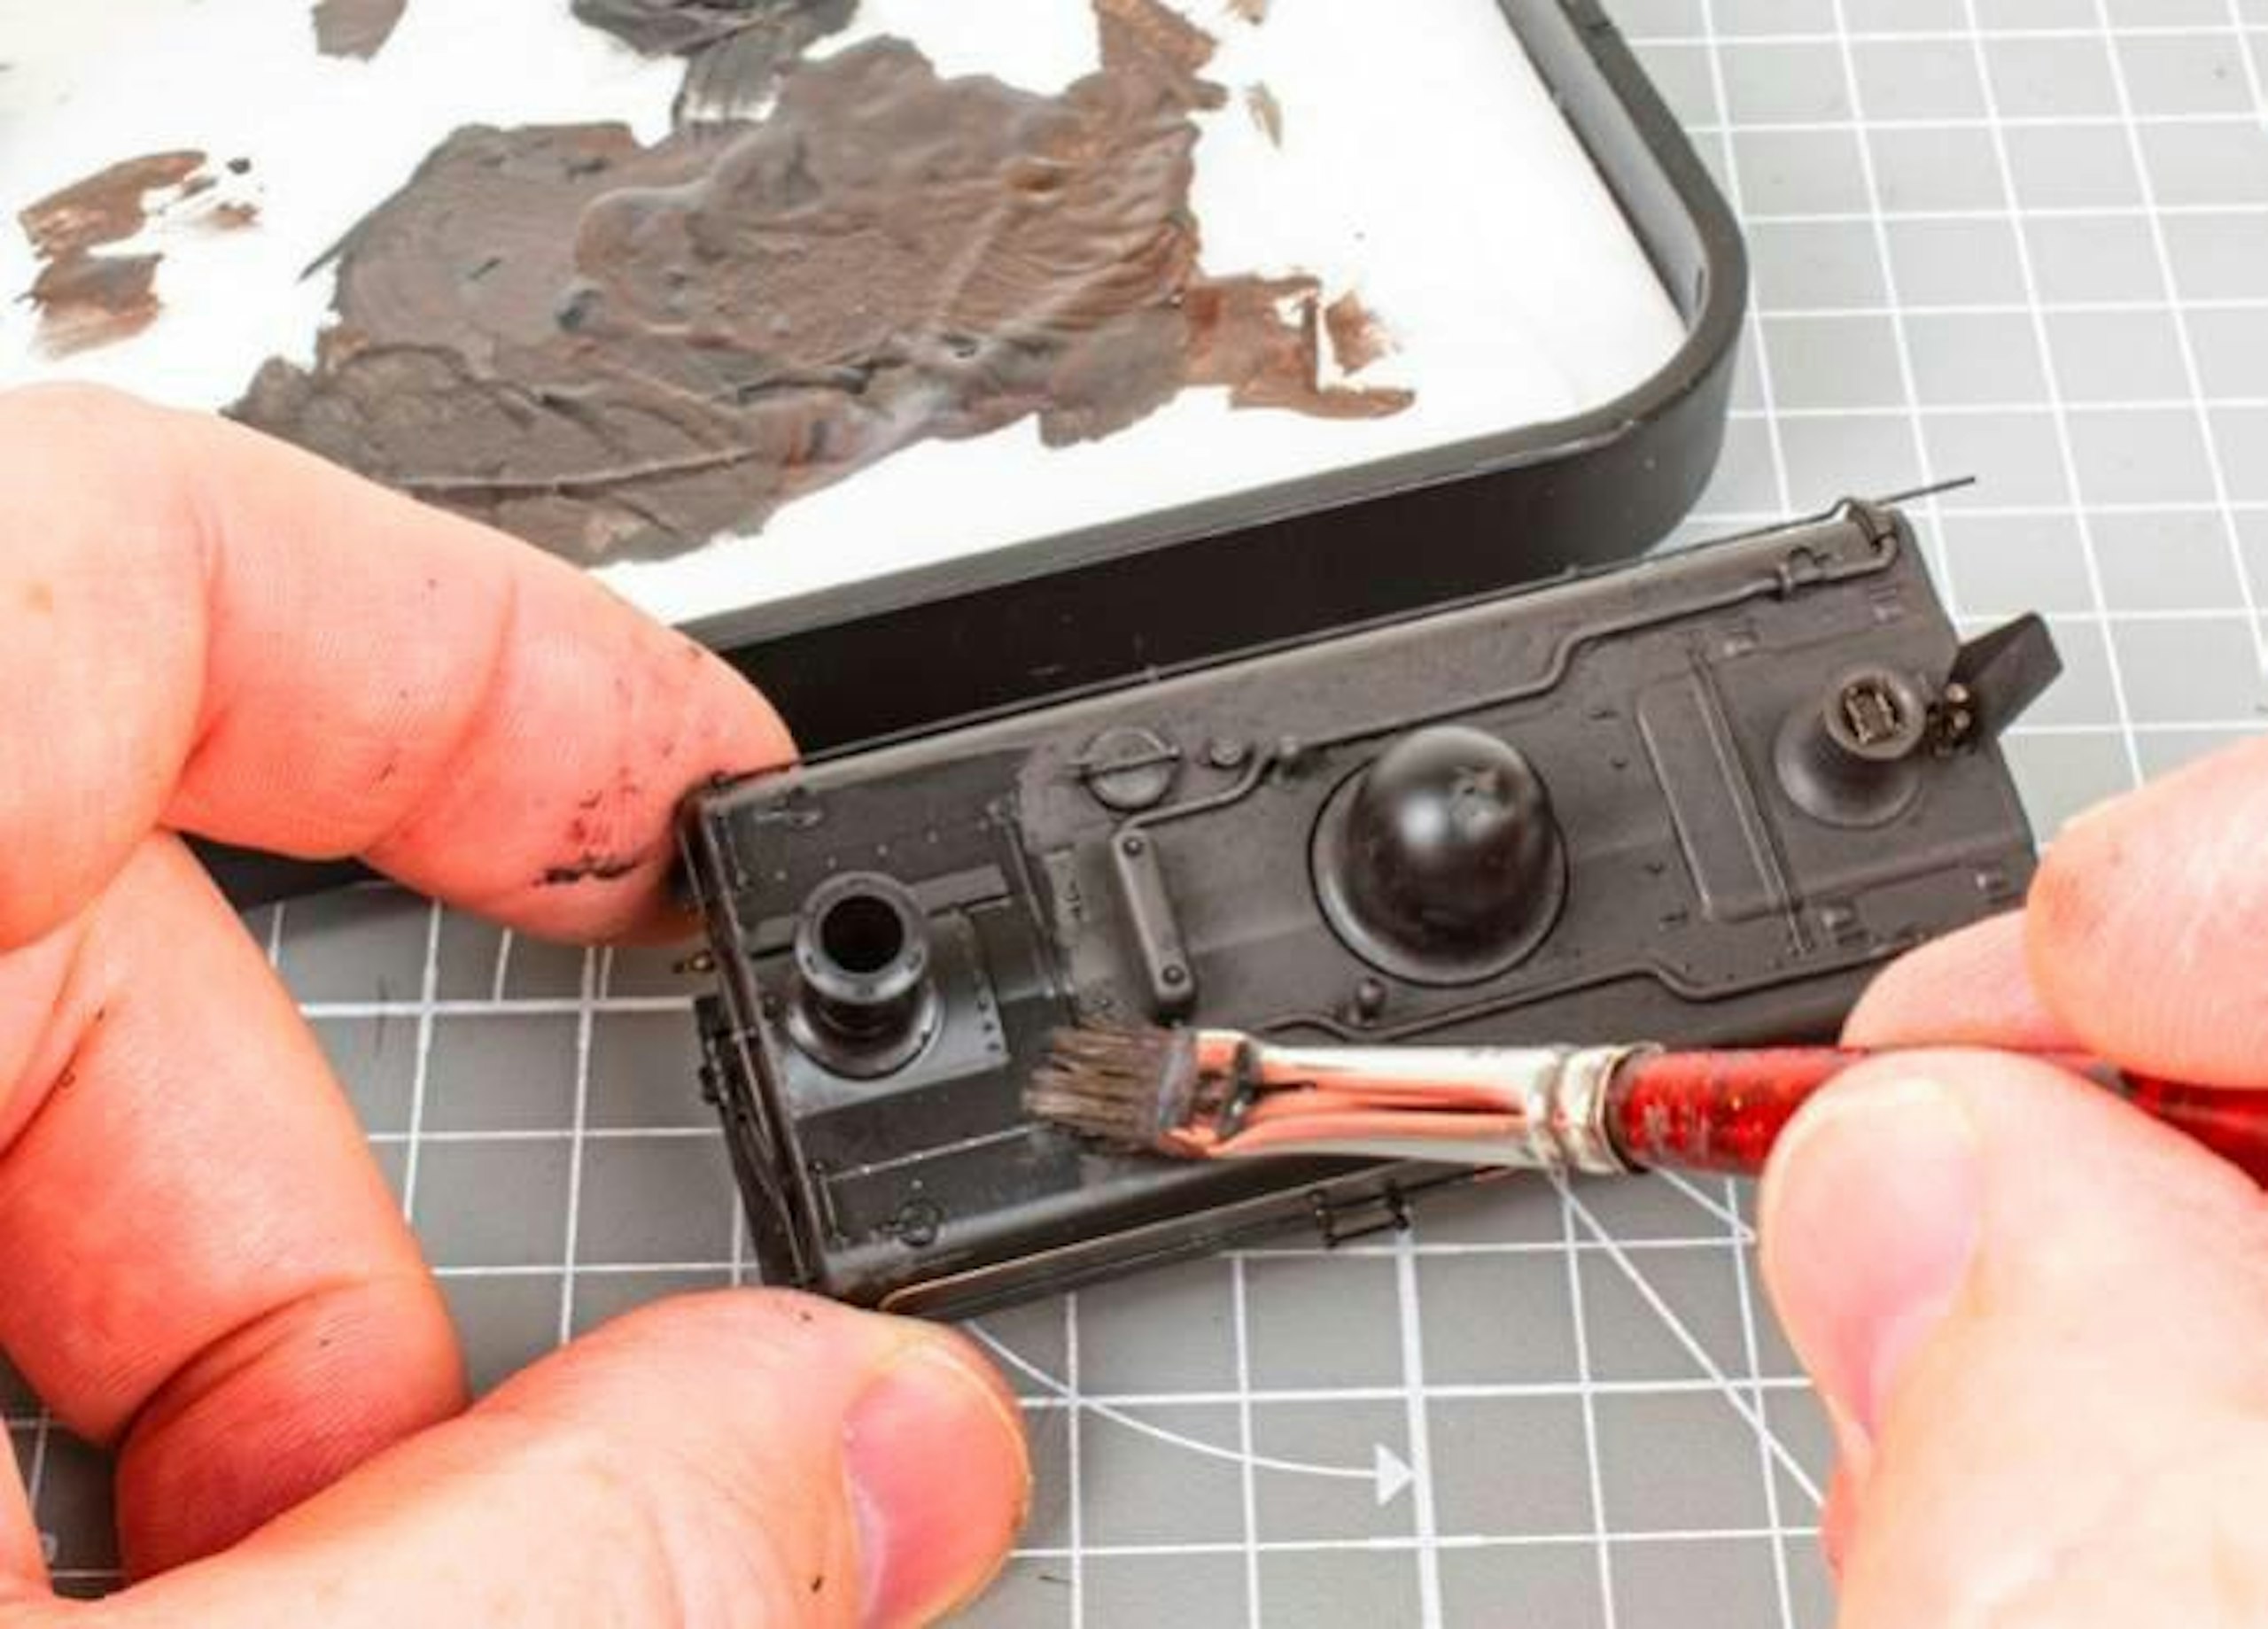
8 The same paint mix was stippled over the top of the boiler, smokebox and tanks, working it around all the details. The underside of the tanks and firebox sides were treated likewise, but the tank sides were left clean for now.
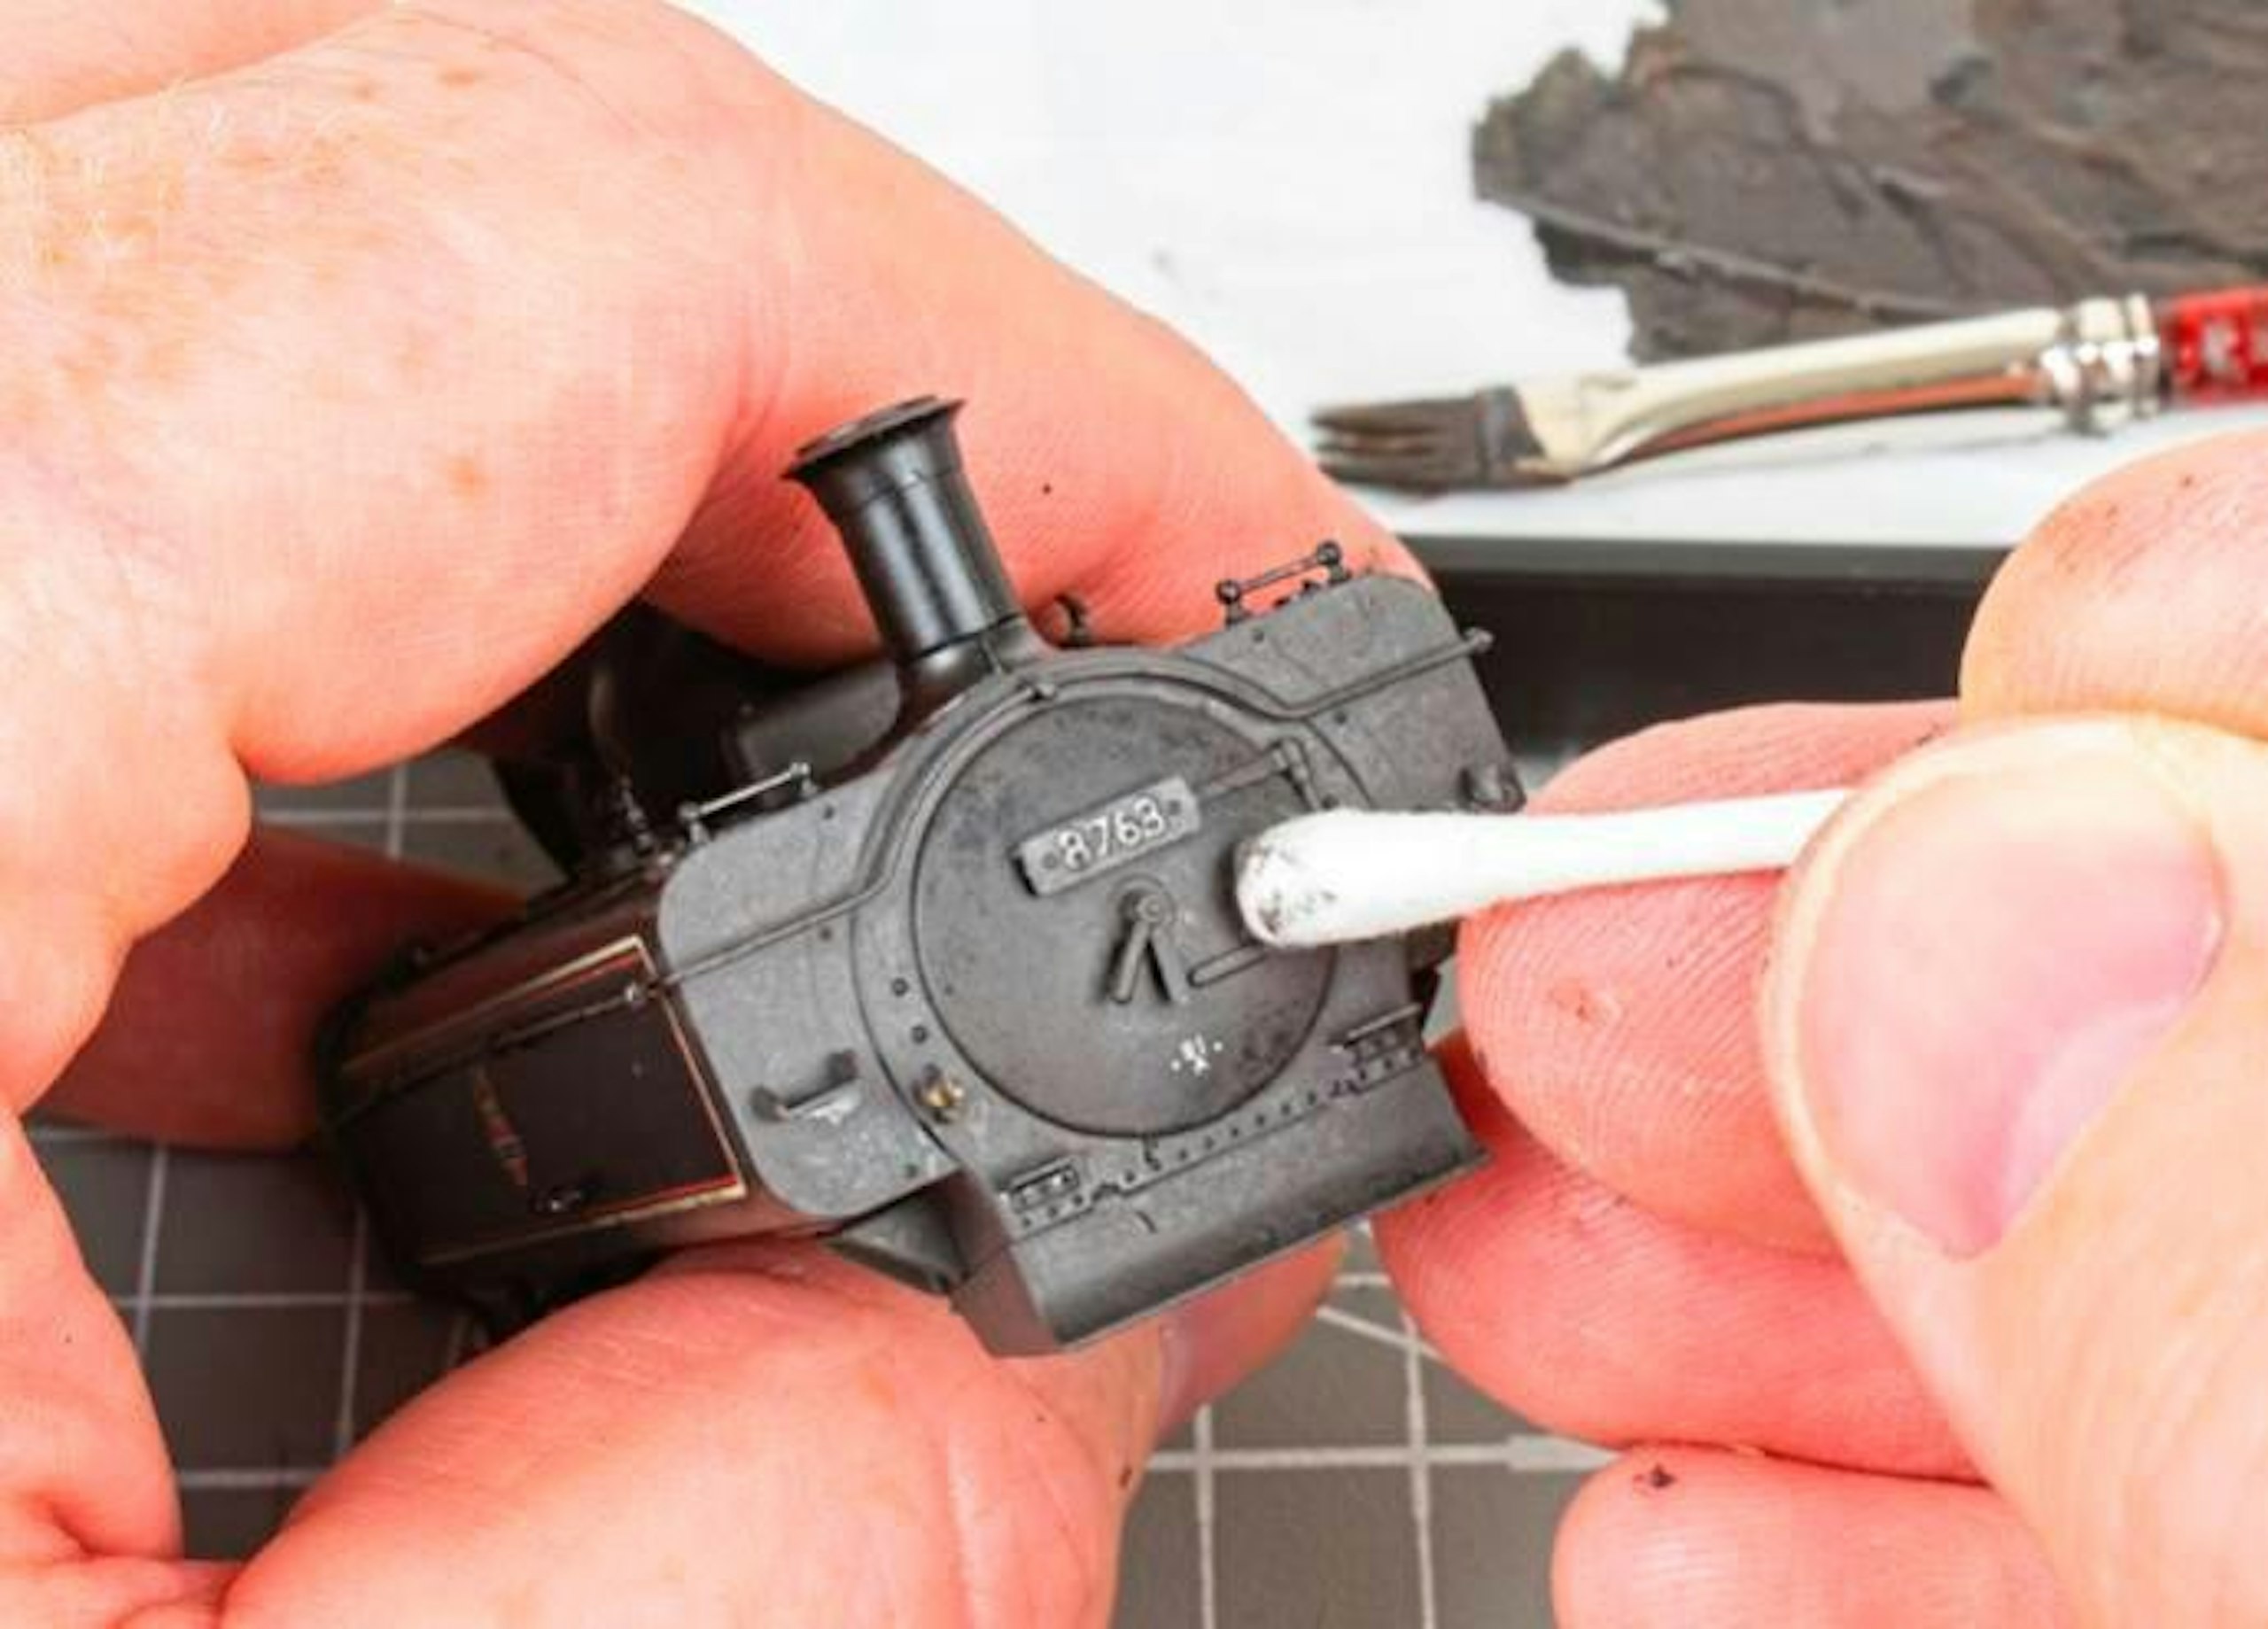
9 After stippling the paint and dry pigment over the smokebox, and with the paint still wet, I dabbed at the surface with a cotton bud to impart a random texture. The numberplate and shedcode panel were wiped clean.
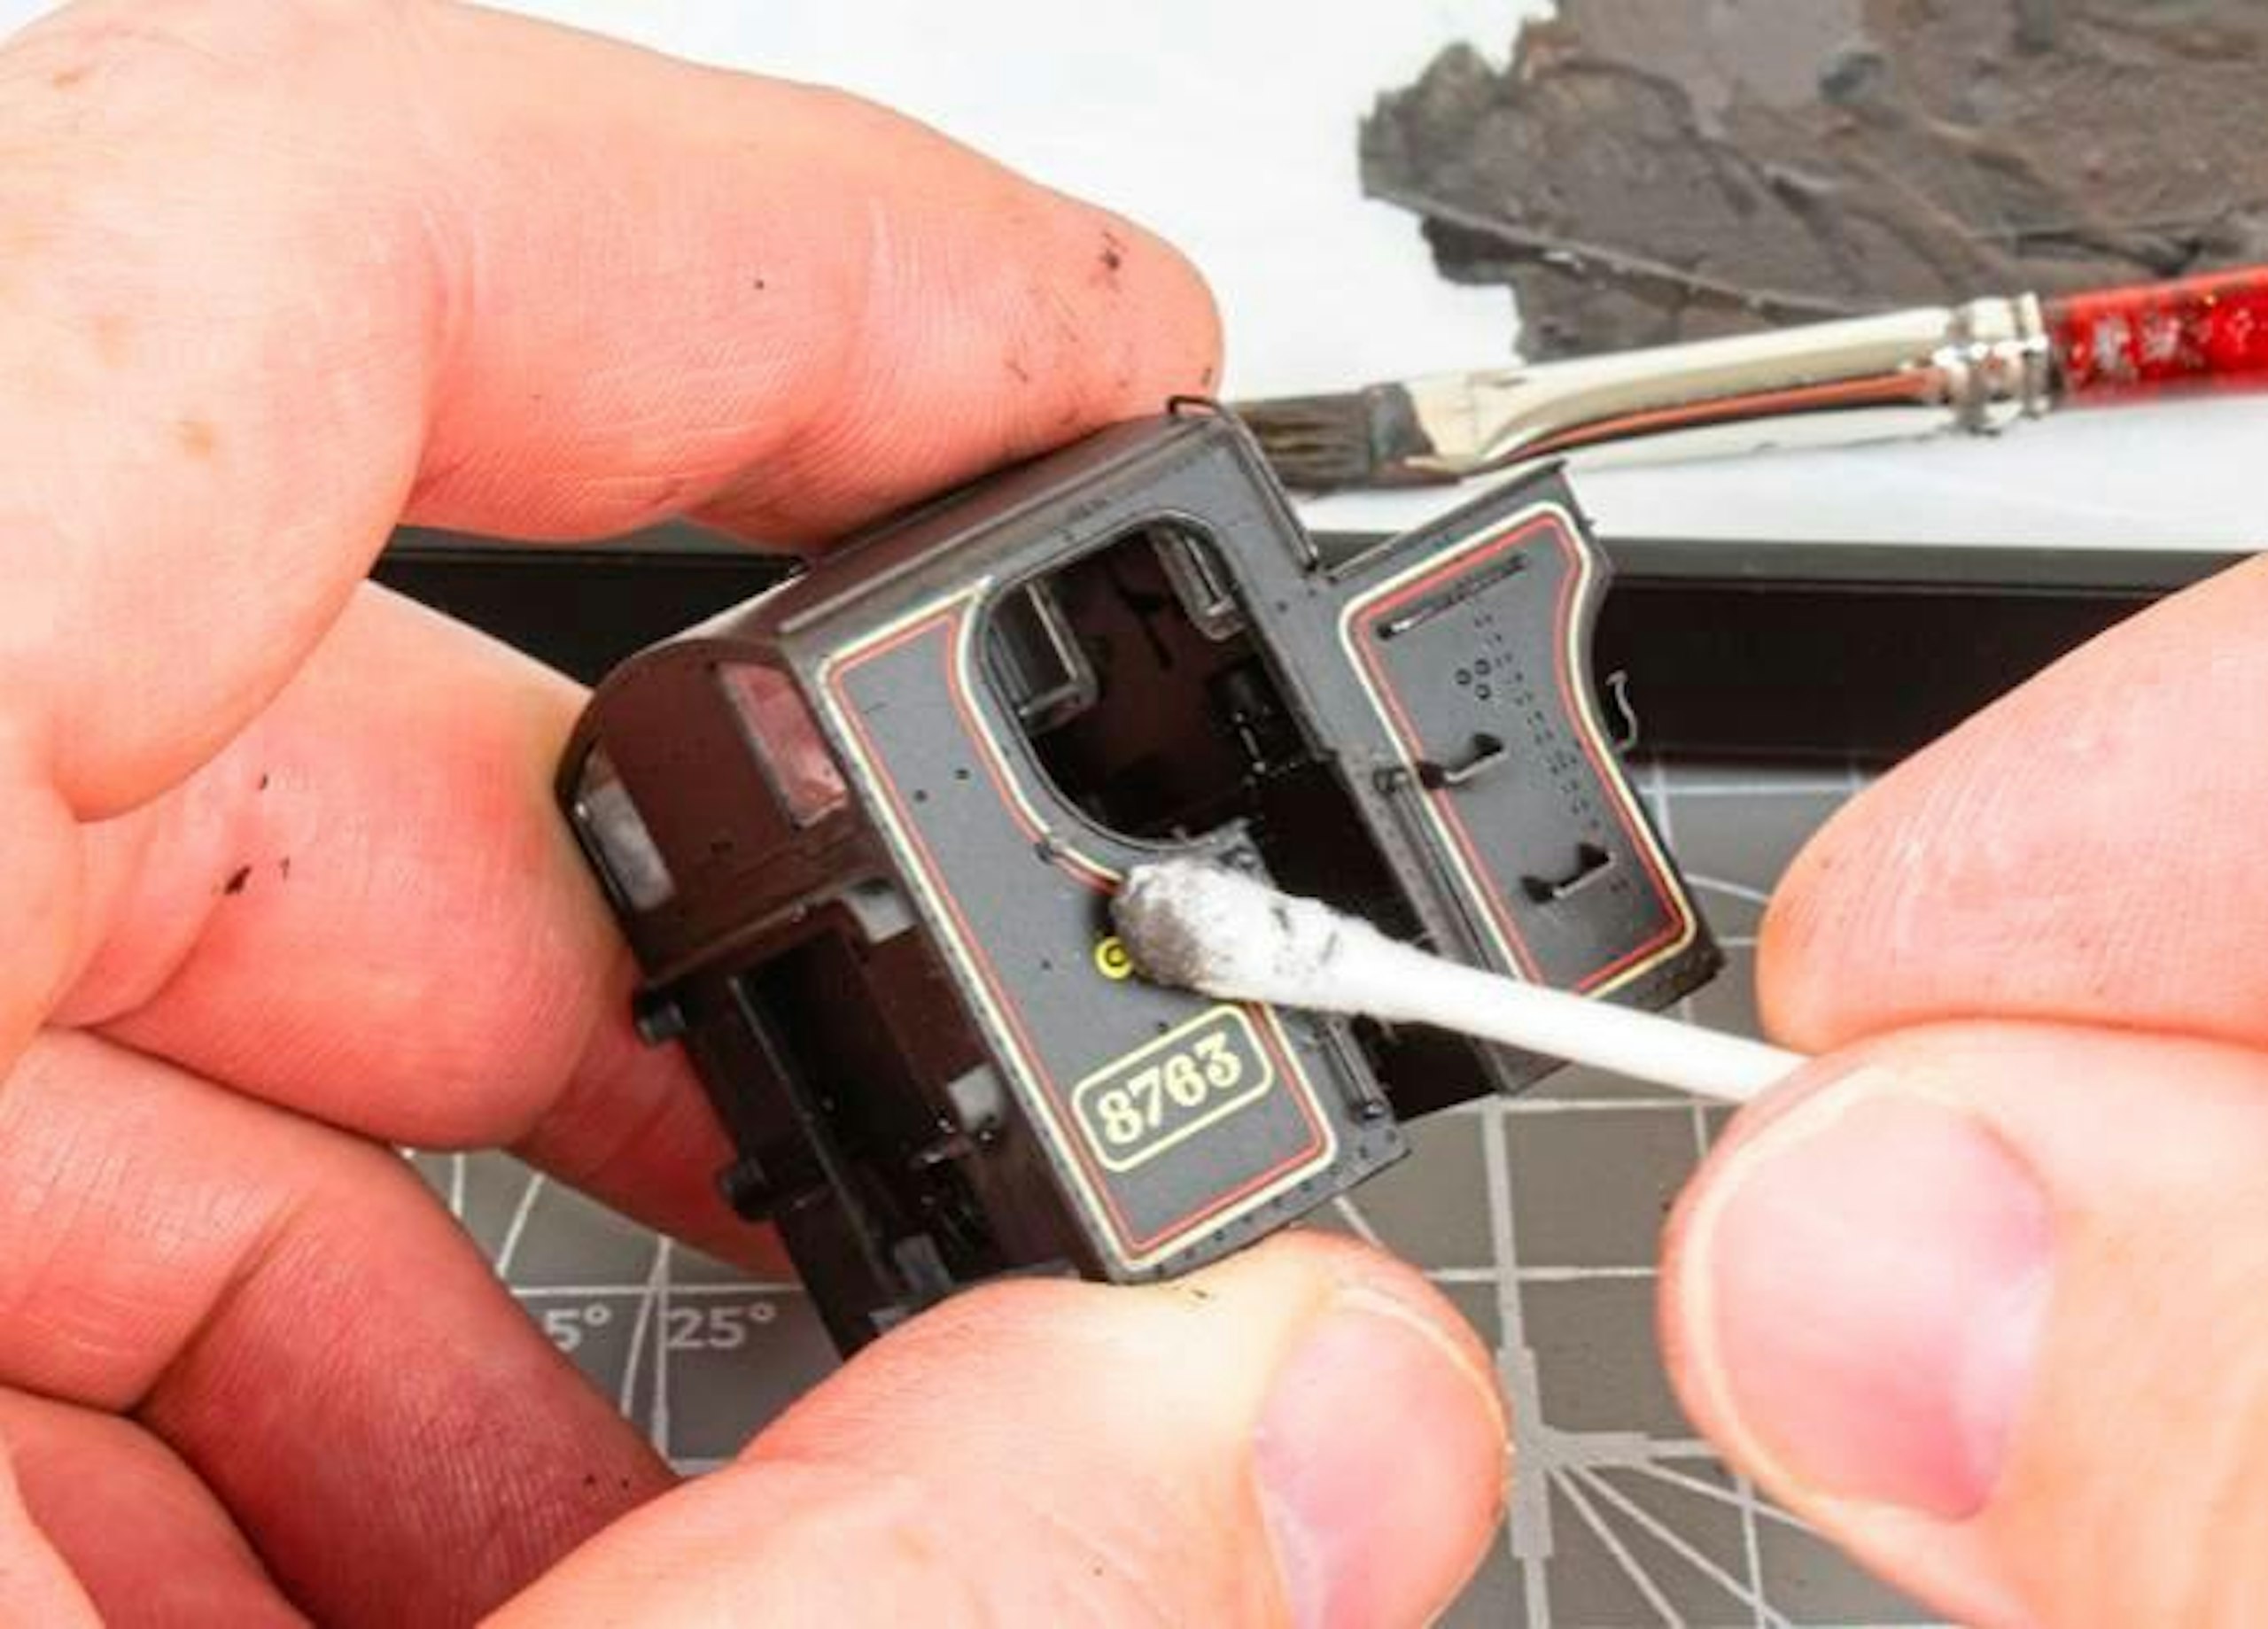
10 A similar blend of paint, minus the dry pigment, was brushed over one side of the cab. Immediately, I wiped away most of the paint with a dry cotton swab, leaving traces of pigment around the raised detail.
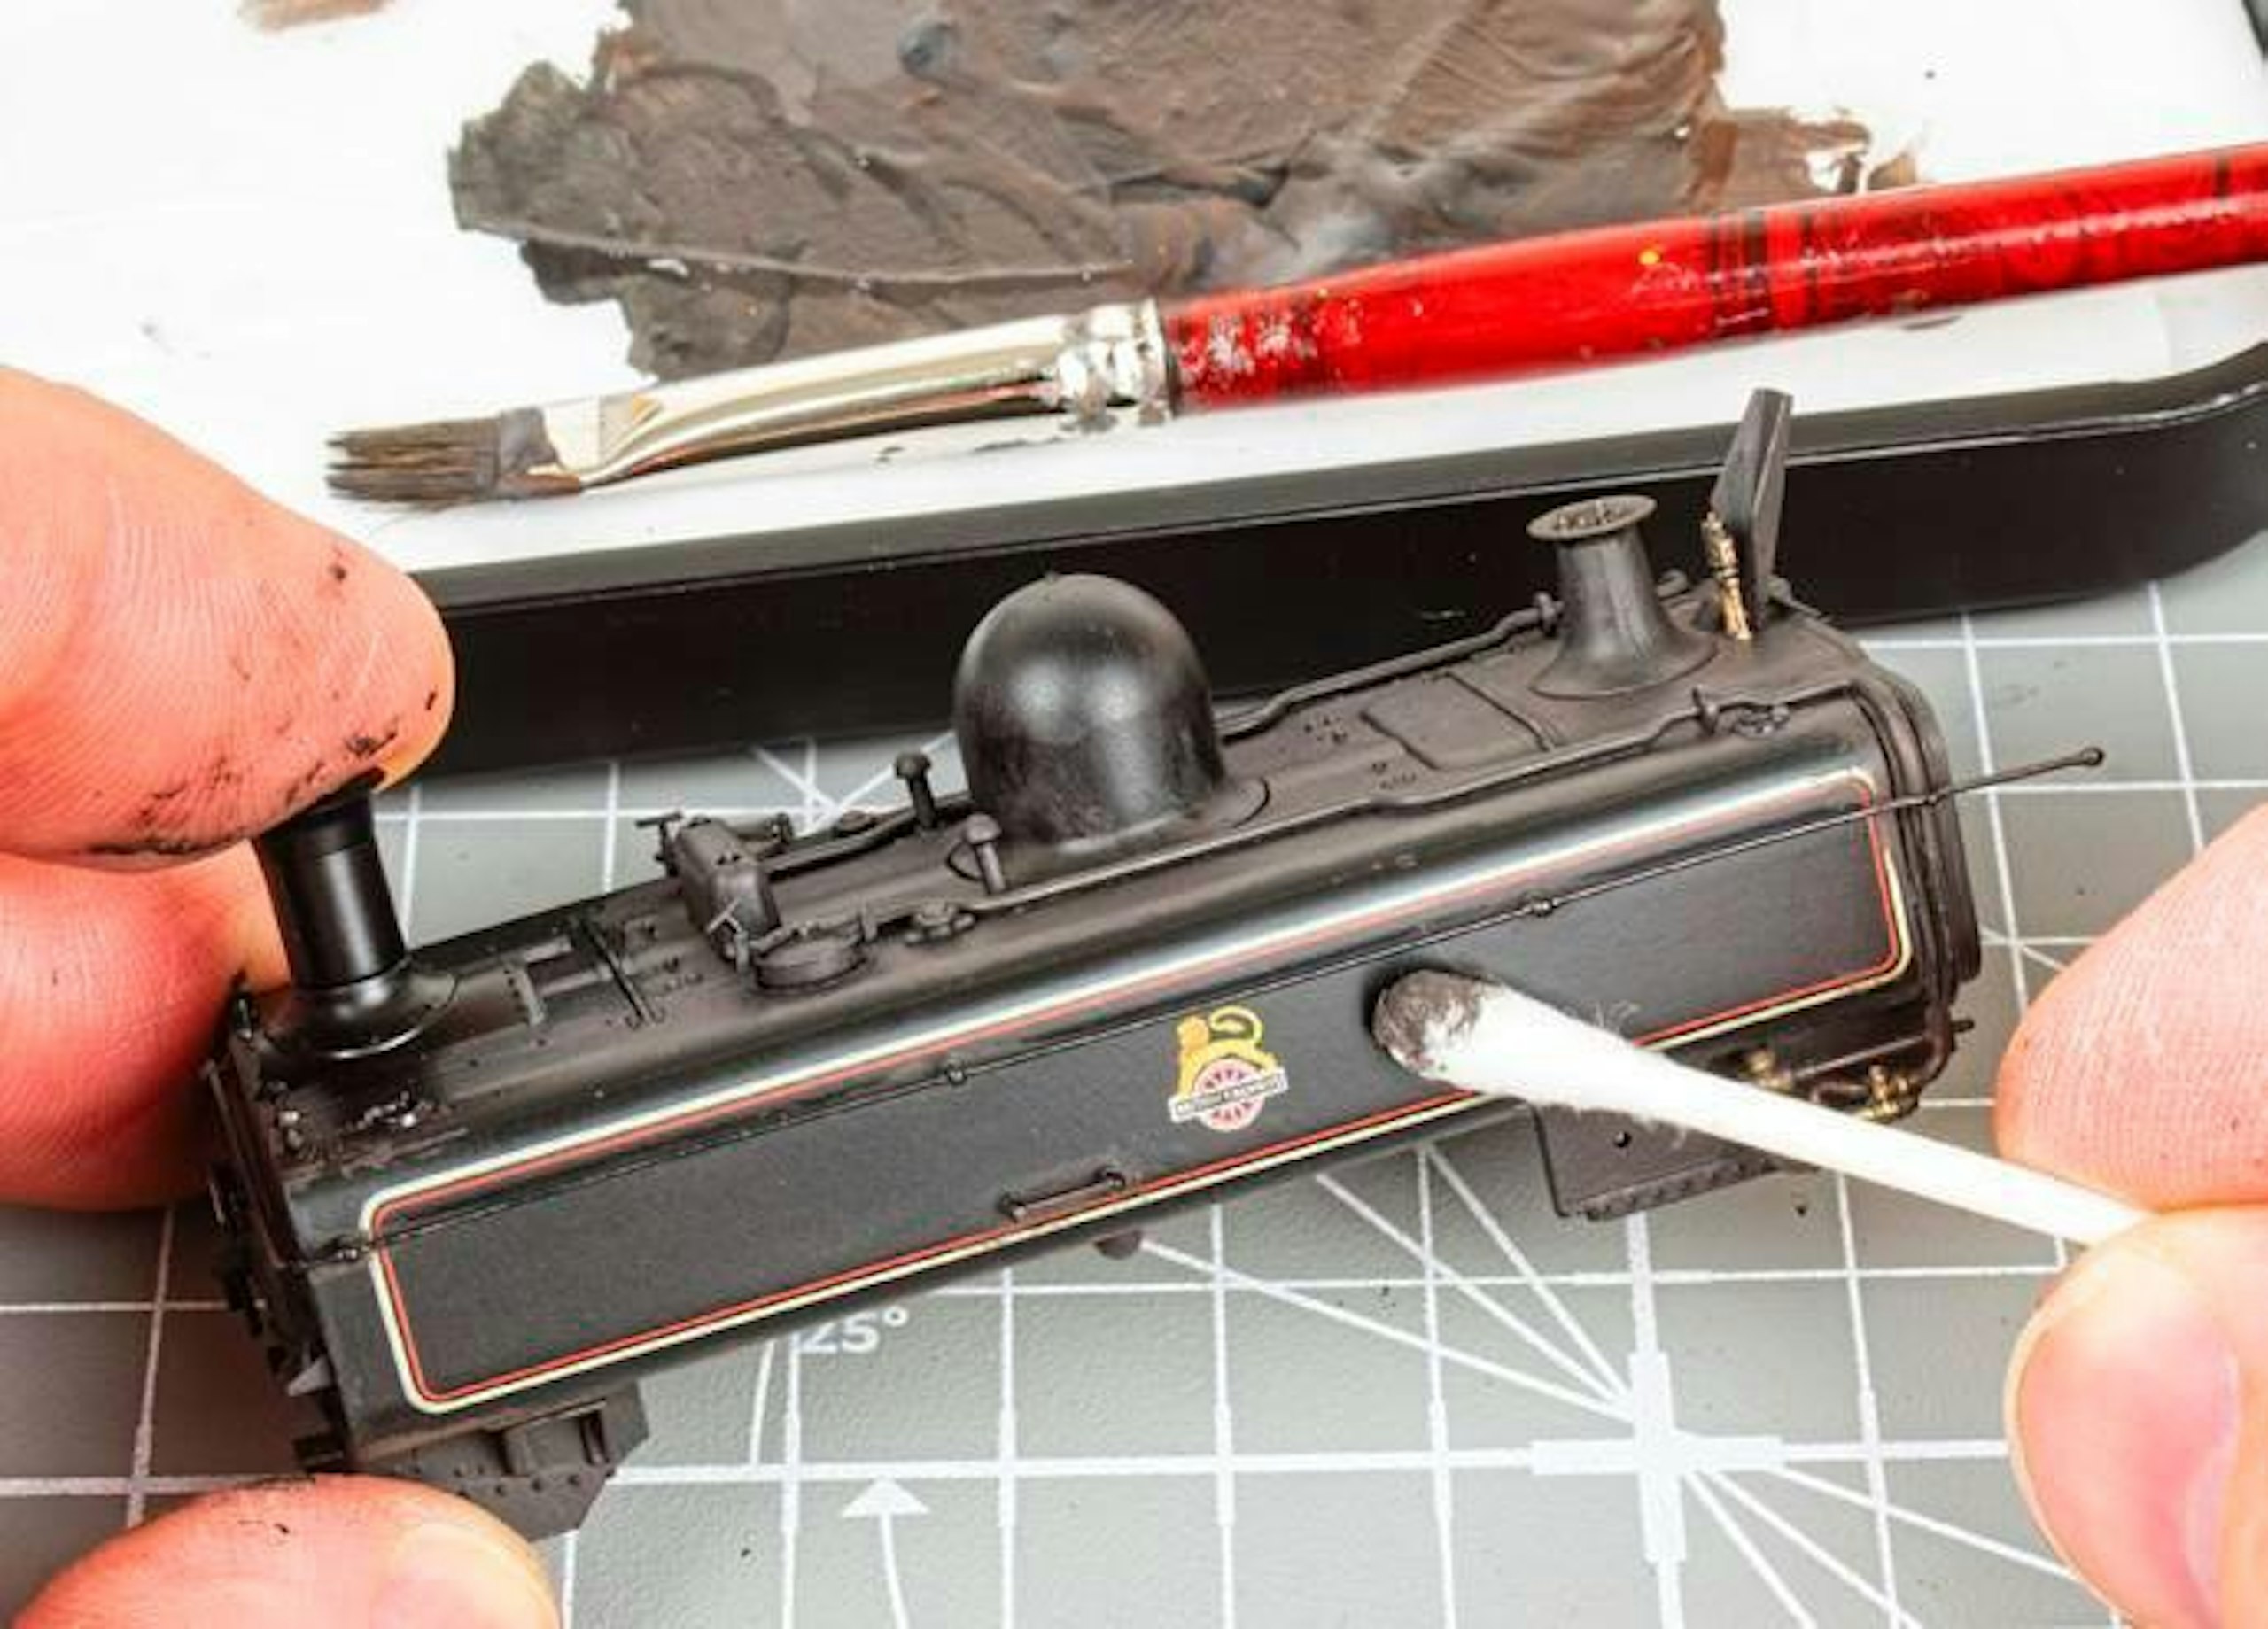
11 After treating all four sides of the cab in turn, the same ‘brush-on-wipe-off’ process was employed on the tank sides, cleaning away almost all traces of paint, but leaving deposits around the handrail mounts.
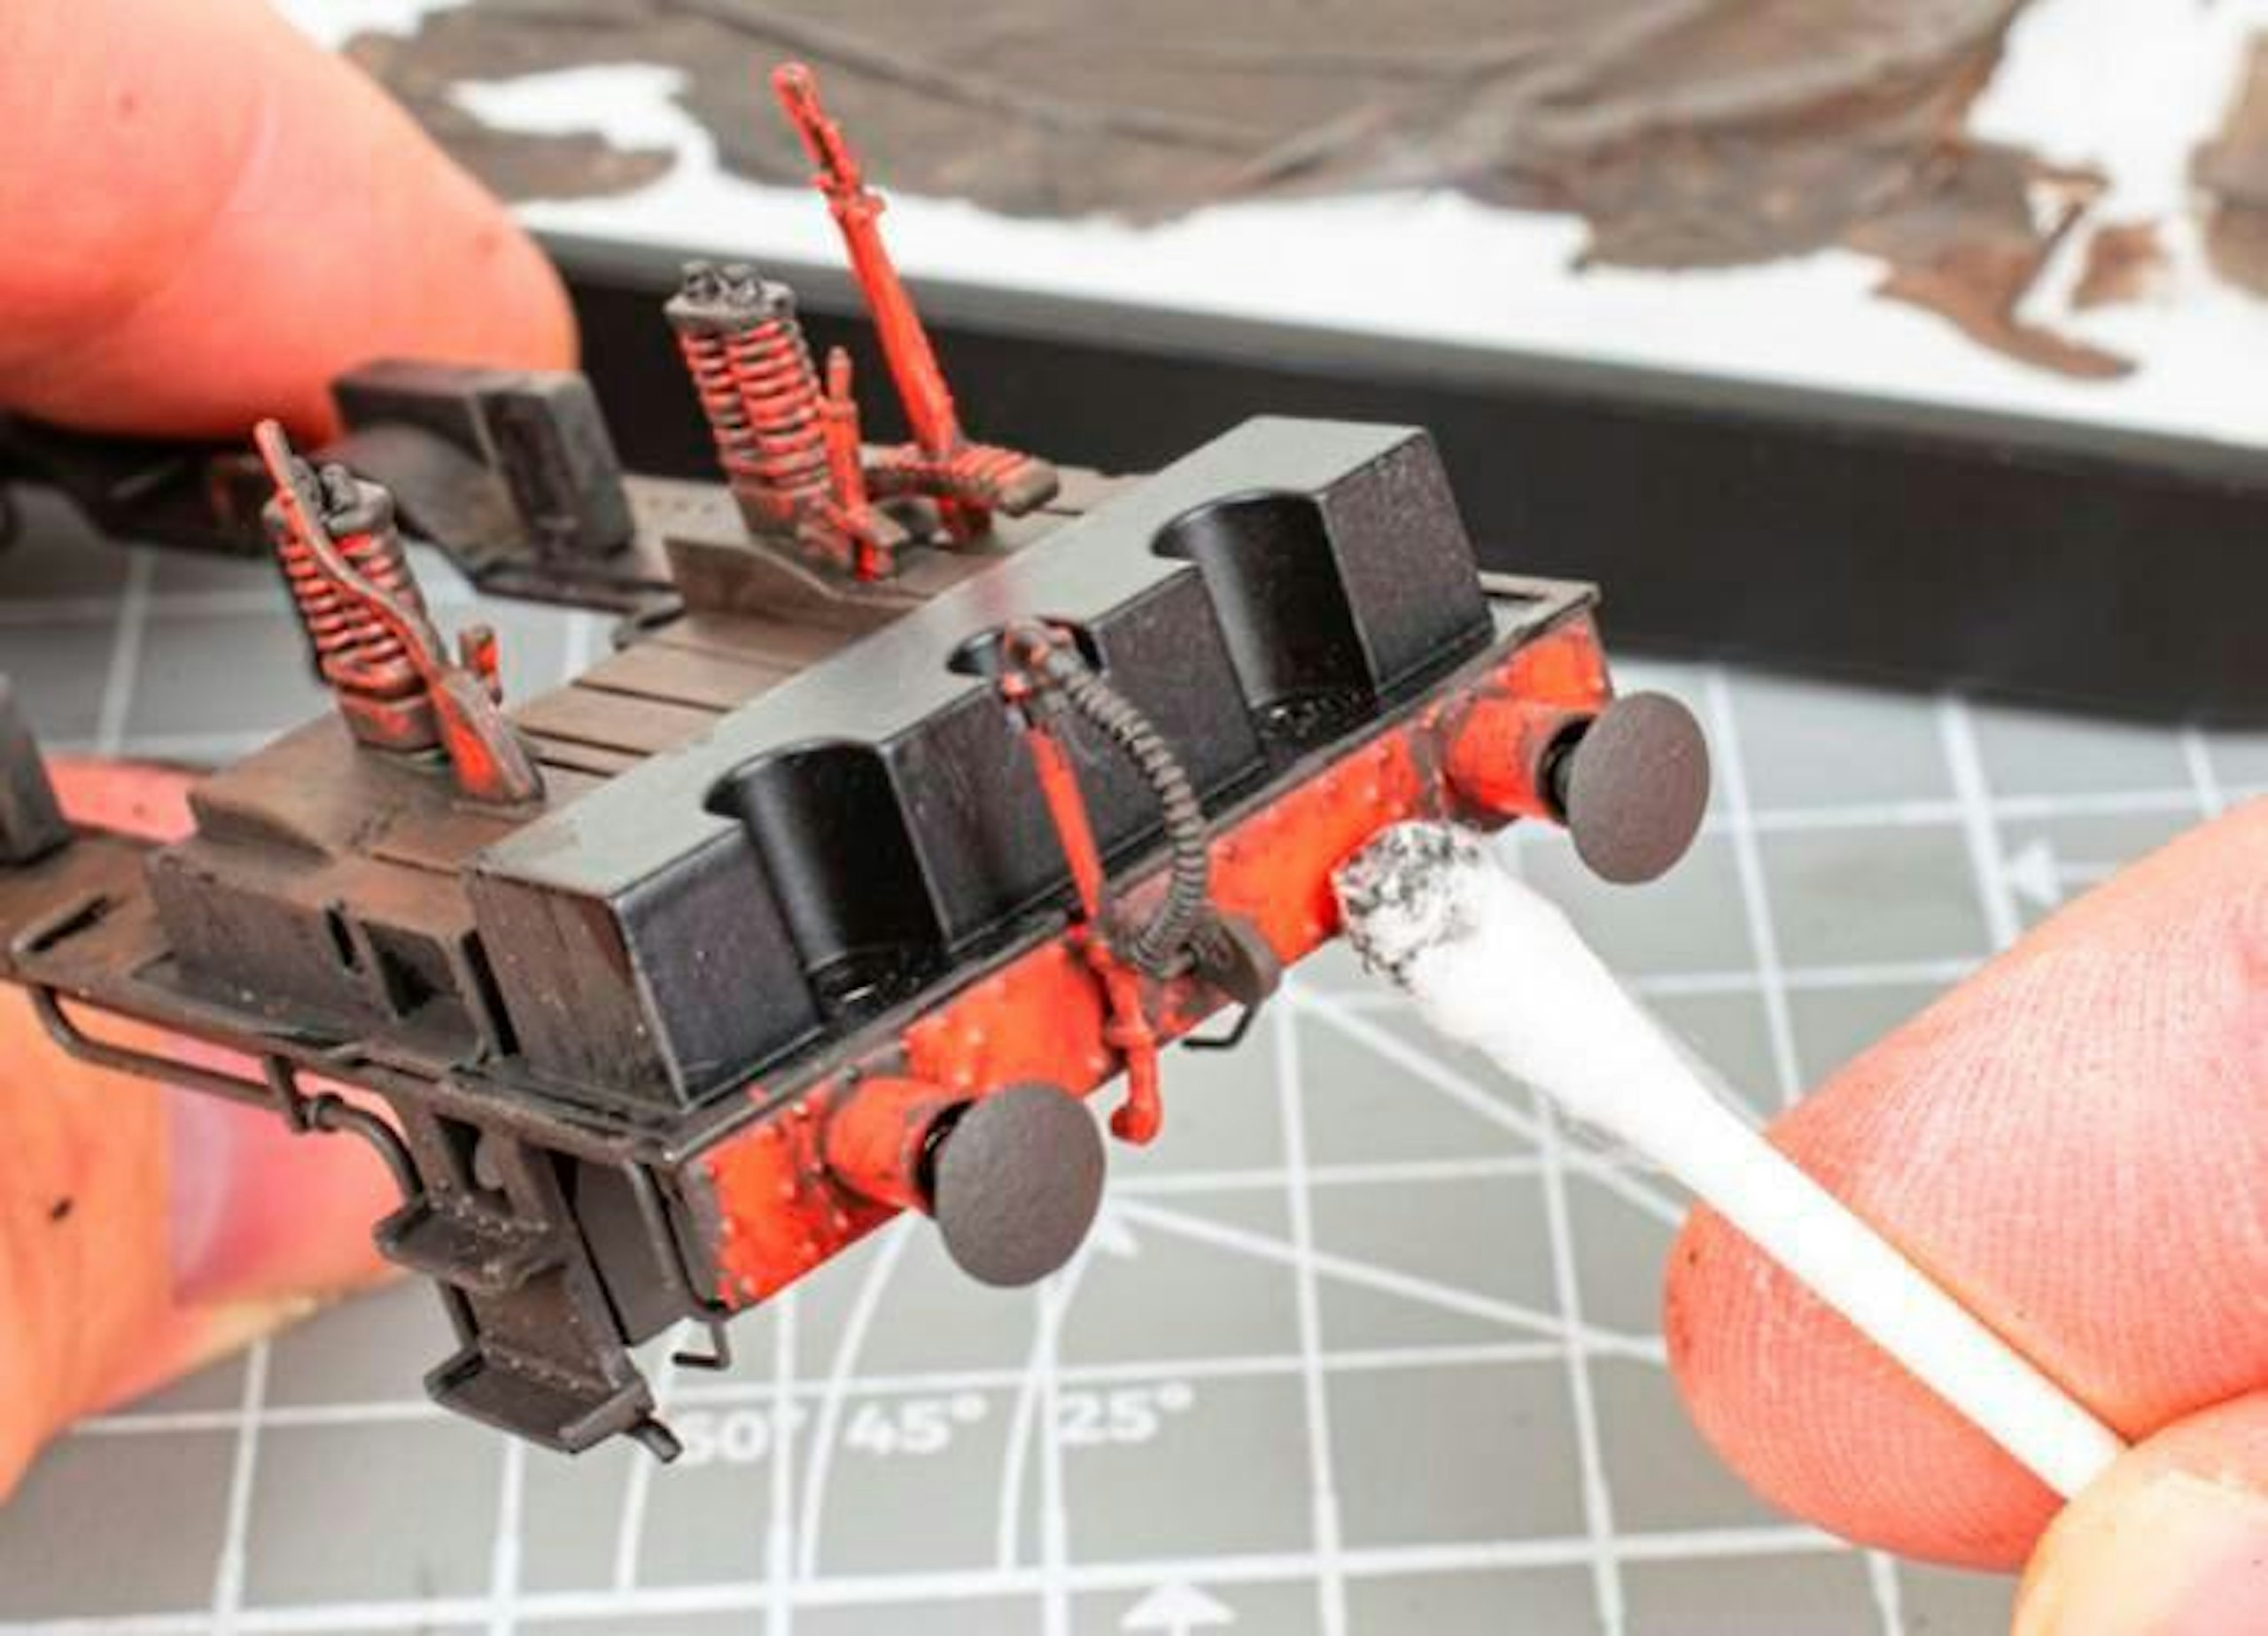
12 The running plate was treated next, stippling the paint along the upper surfaces, footsteps and edges. The red bufferbeams were wiped partially clean. Use vertical strokes to create streaks in harmony with gravity.
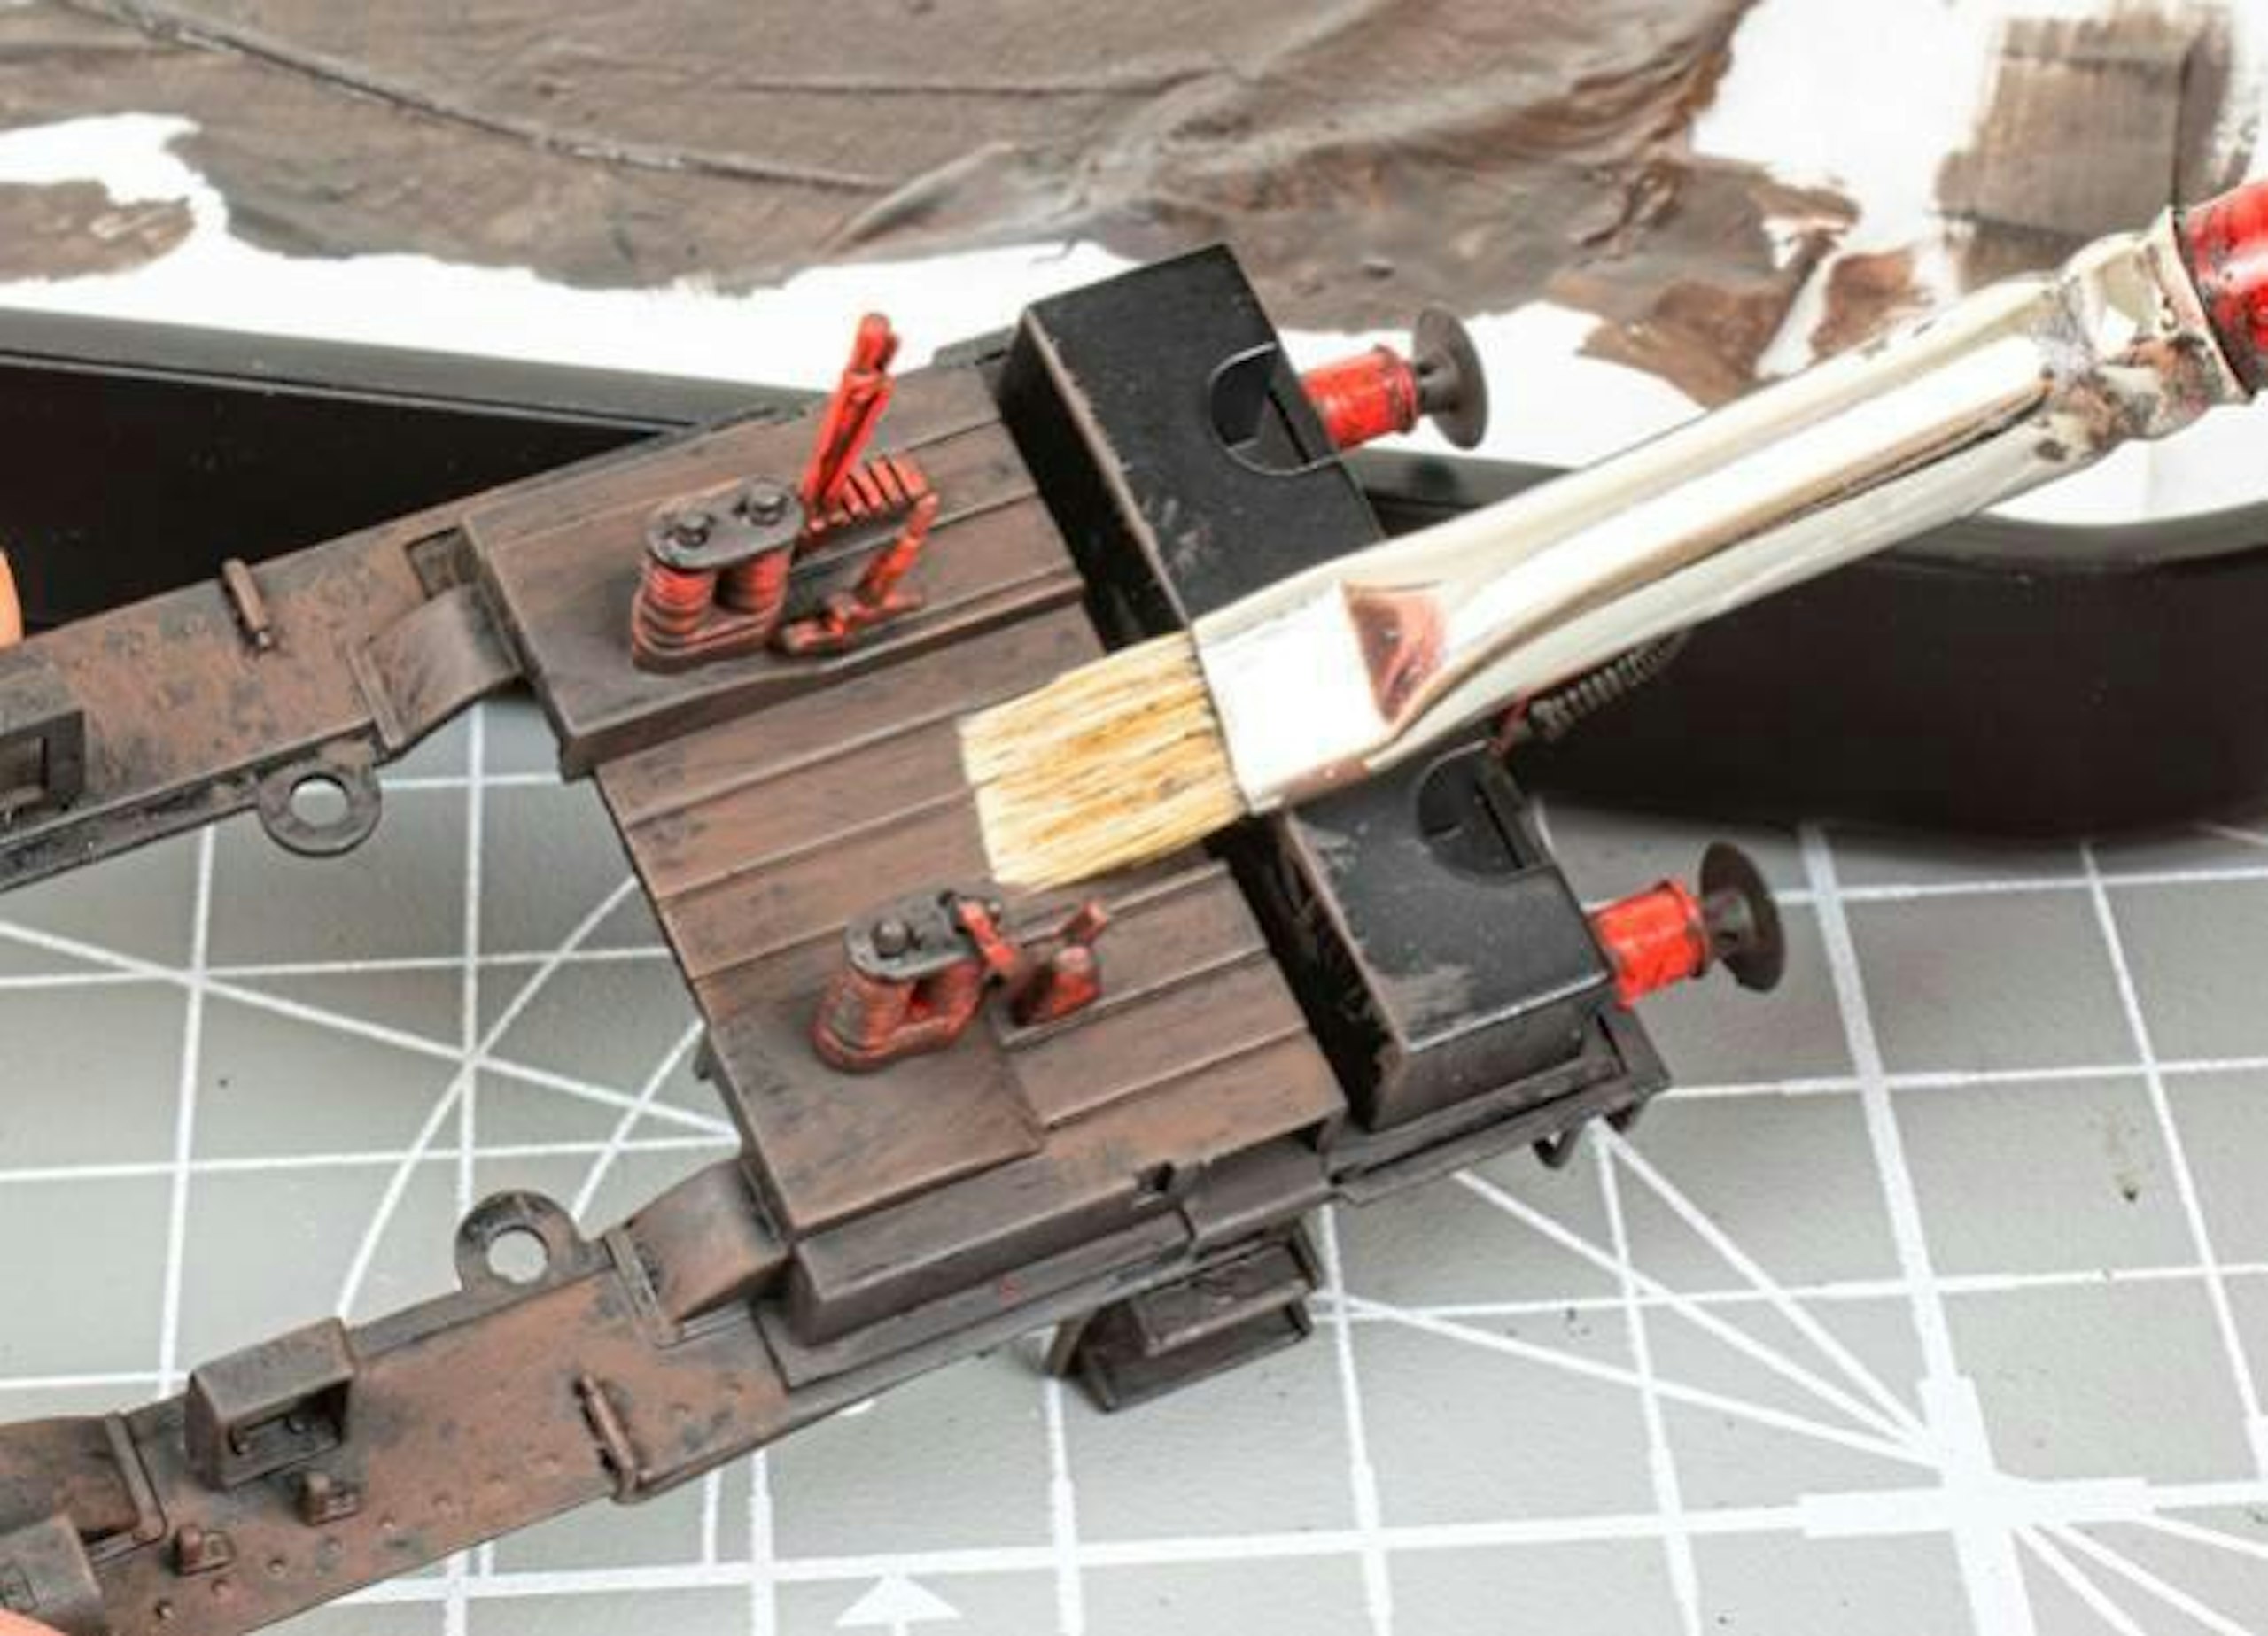
13 Adding more of the earthy brown shade to the mix, I stippled on some contrasting staining to the chassis frames and running plate, along with the cab interior floor. The model was then left overnight.
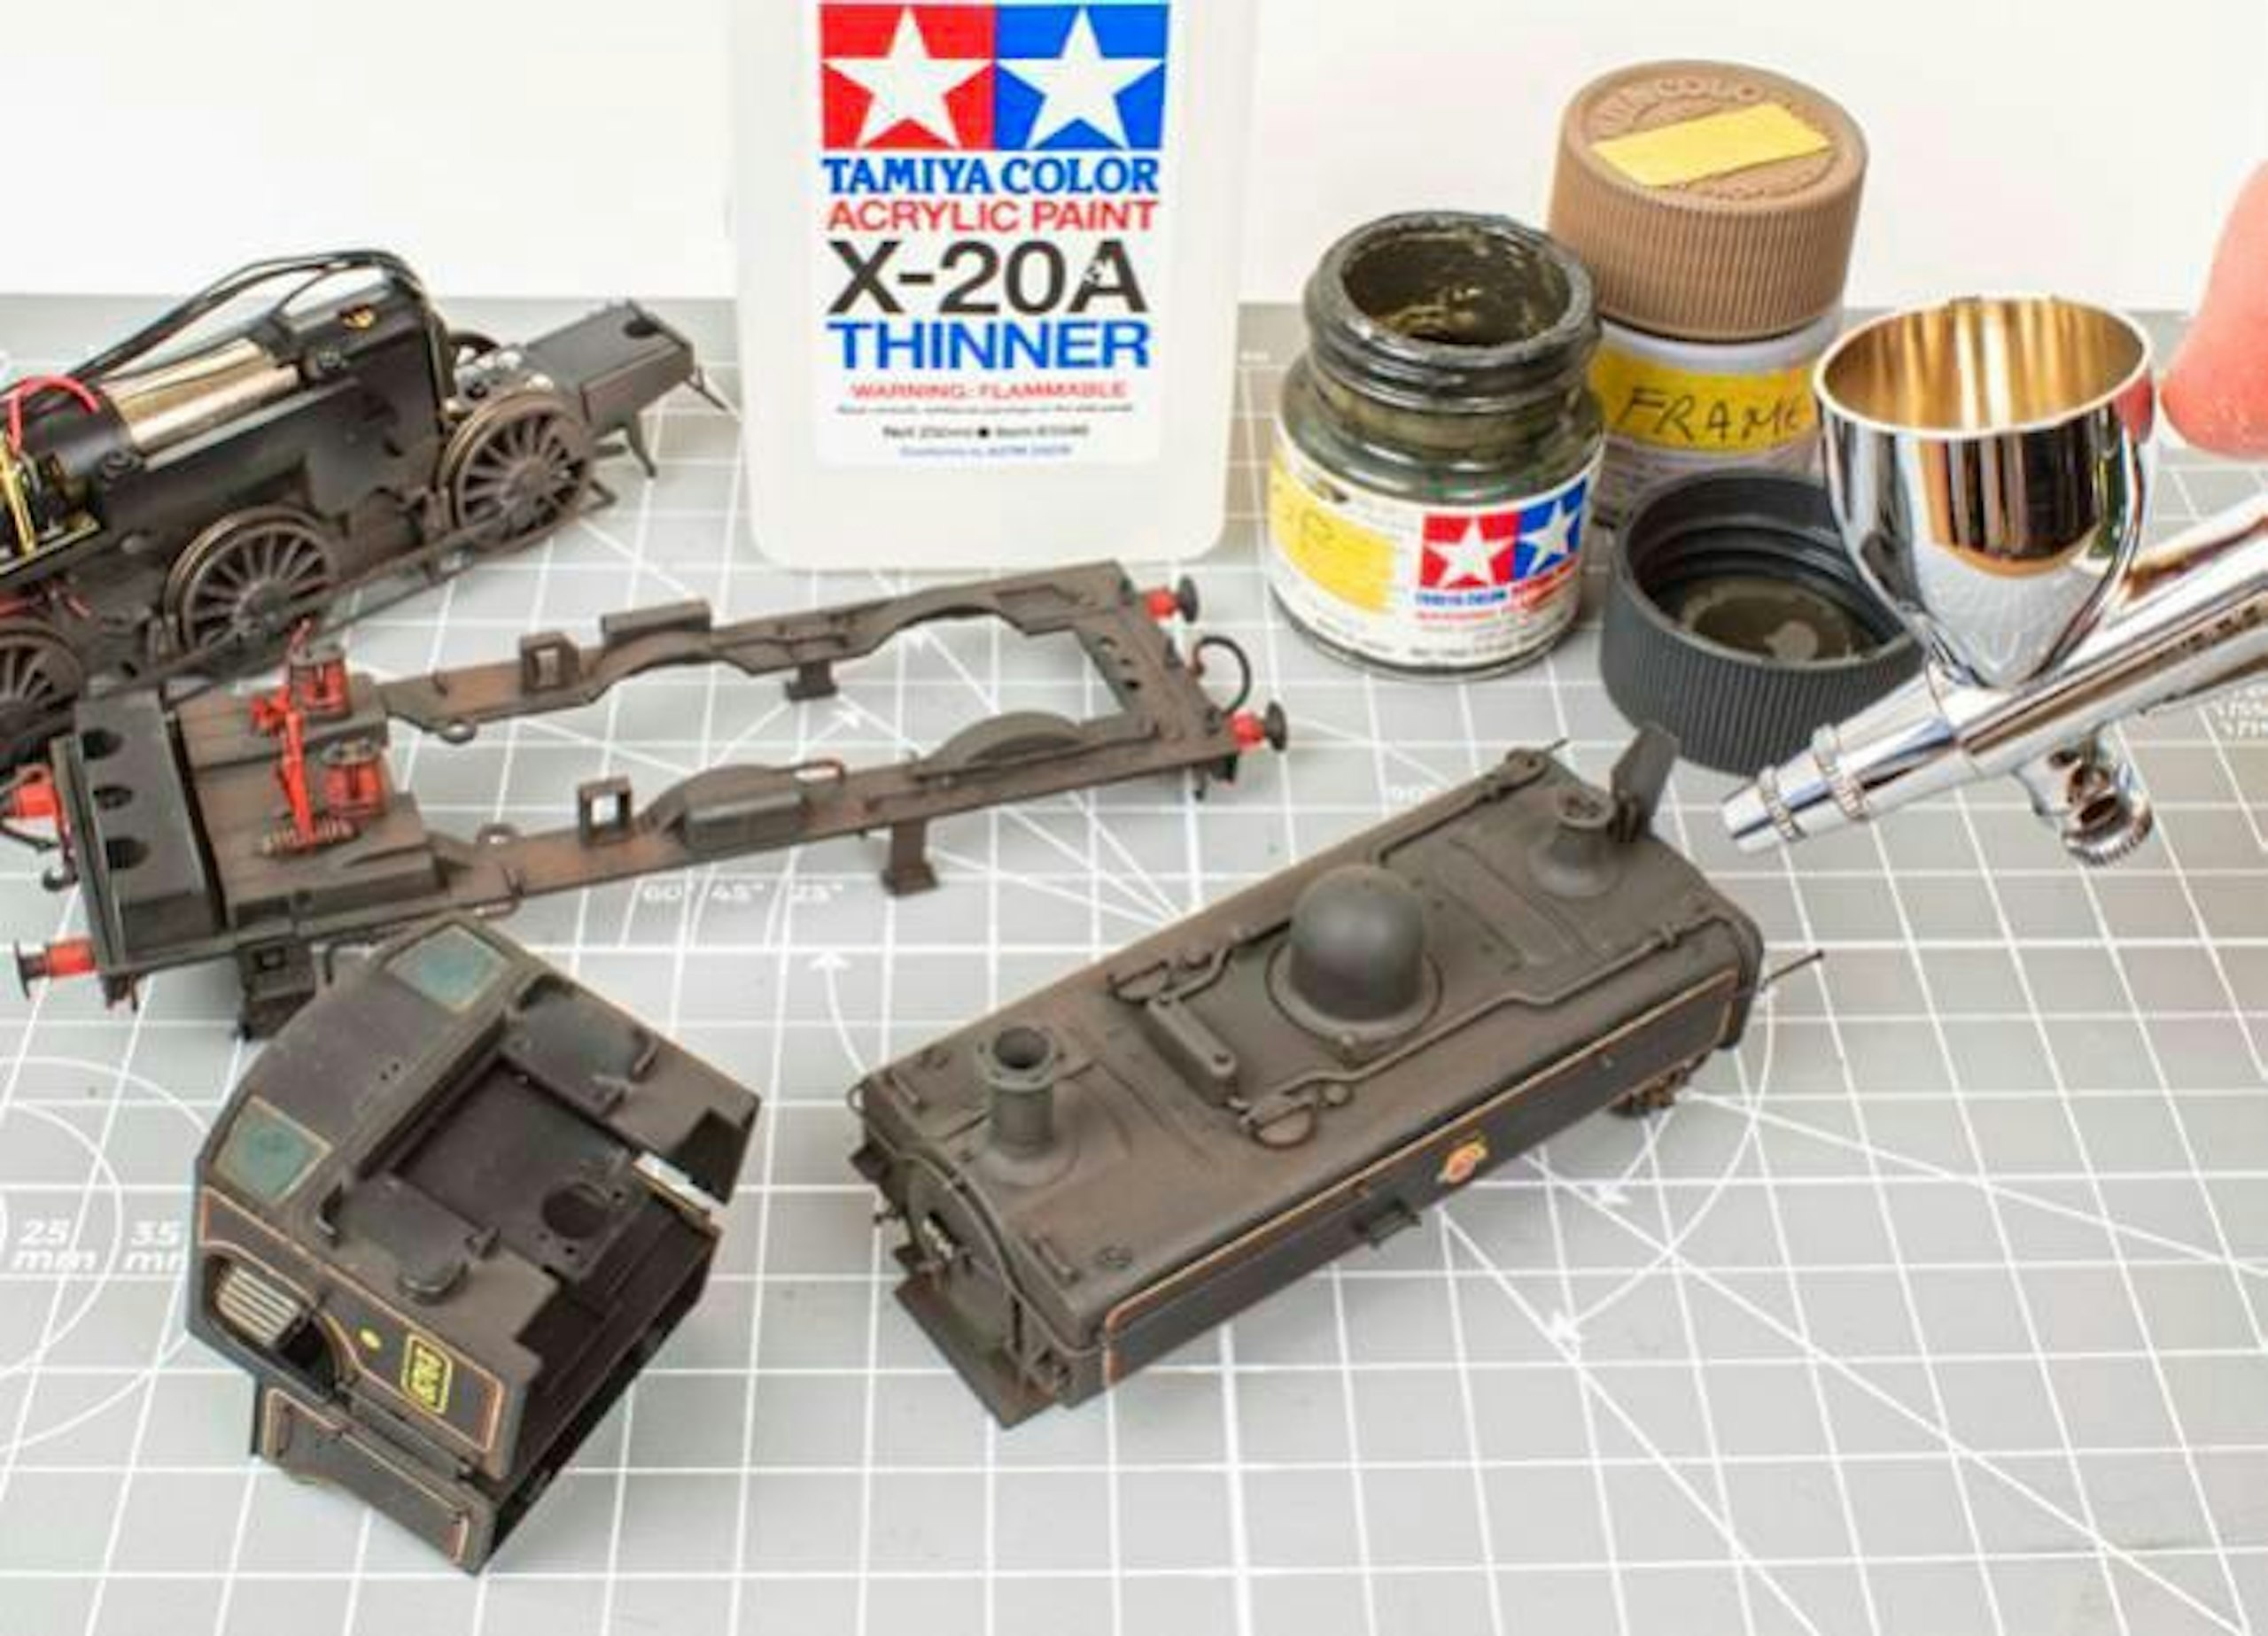
14 An airbrush was employed to refine the effects, with an ultra-fine mist of generic ‘dirty’ brown and dark grey-brown shades sprayed over the chassis and bodywork, but keeping clear of the ‘clean’ cab and tank sides.
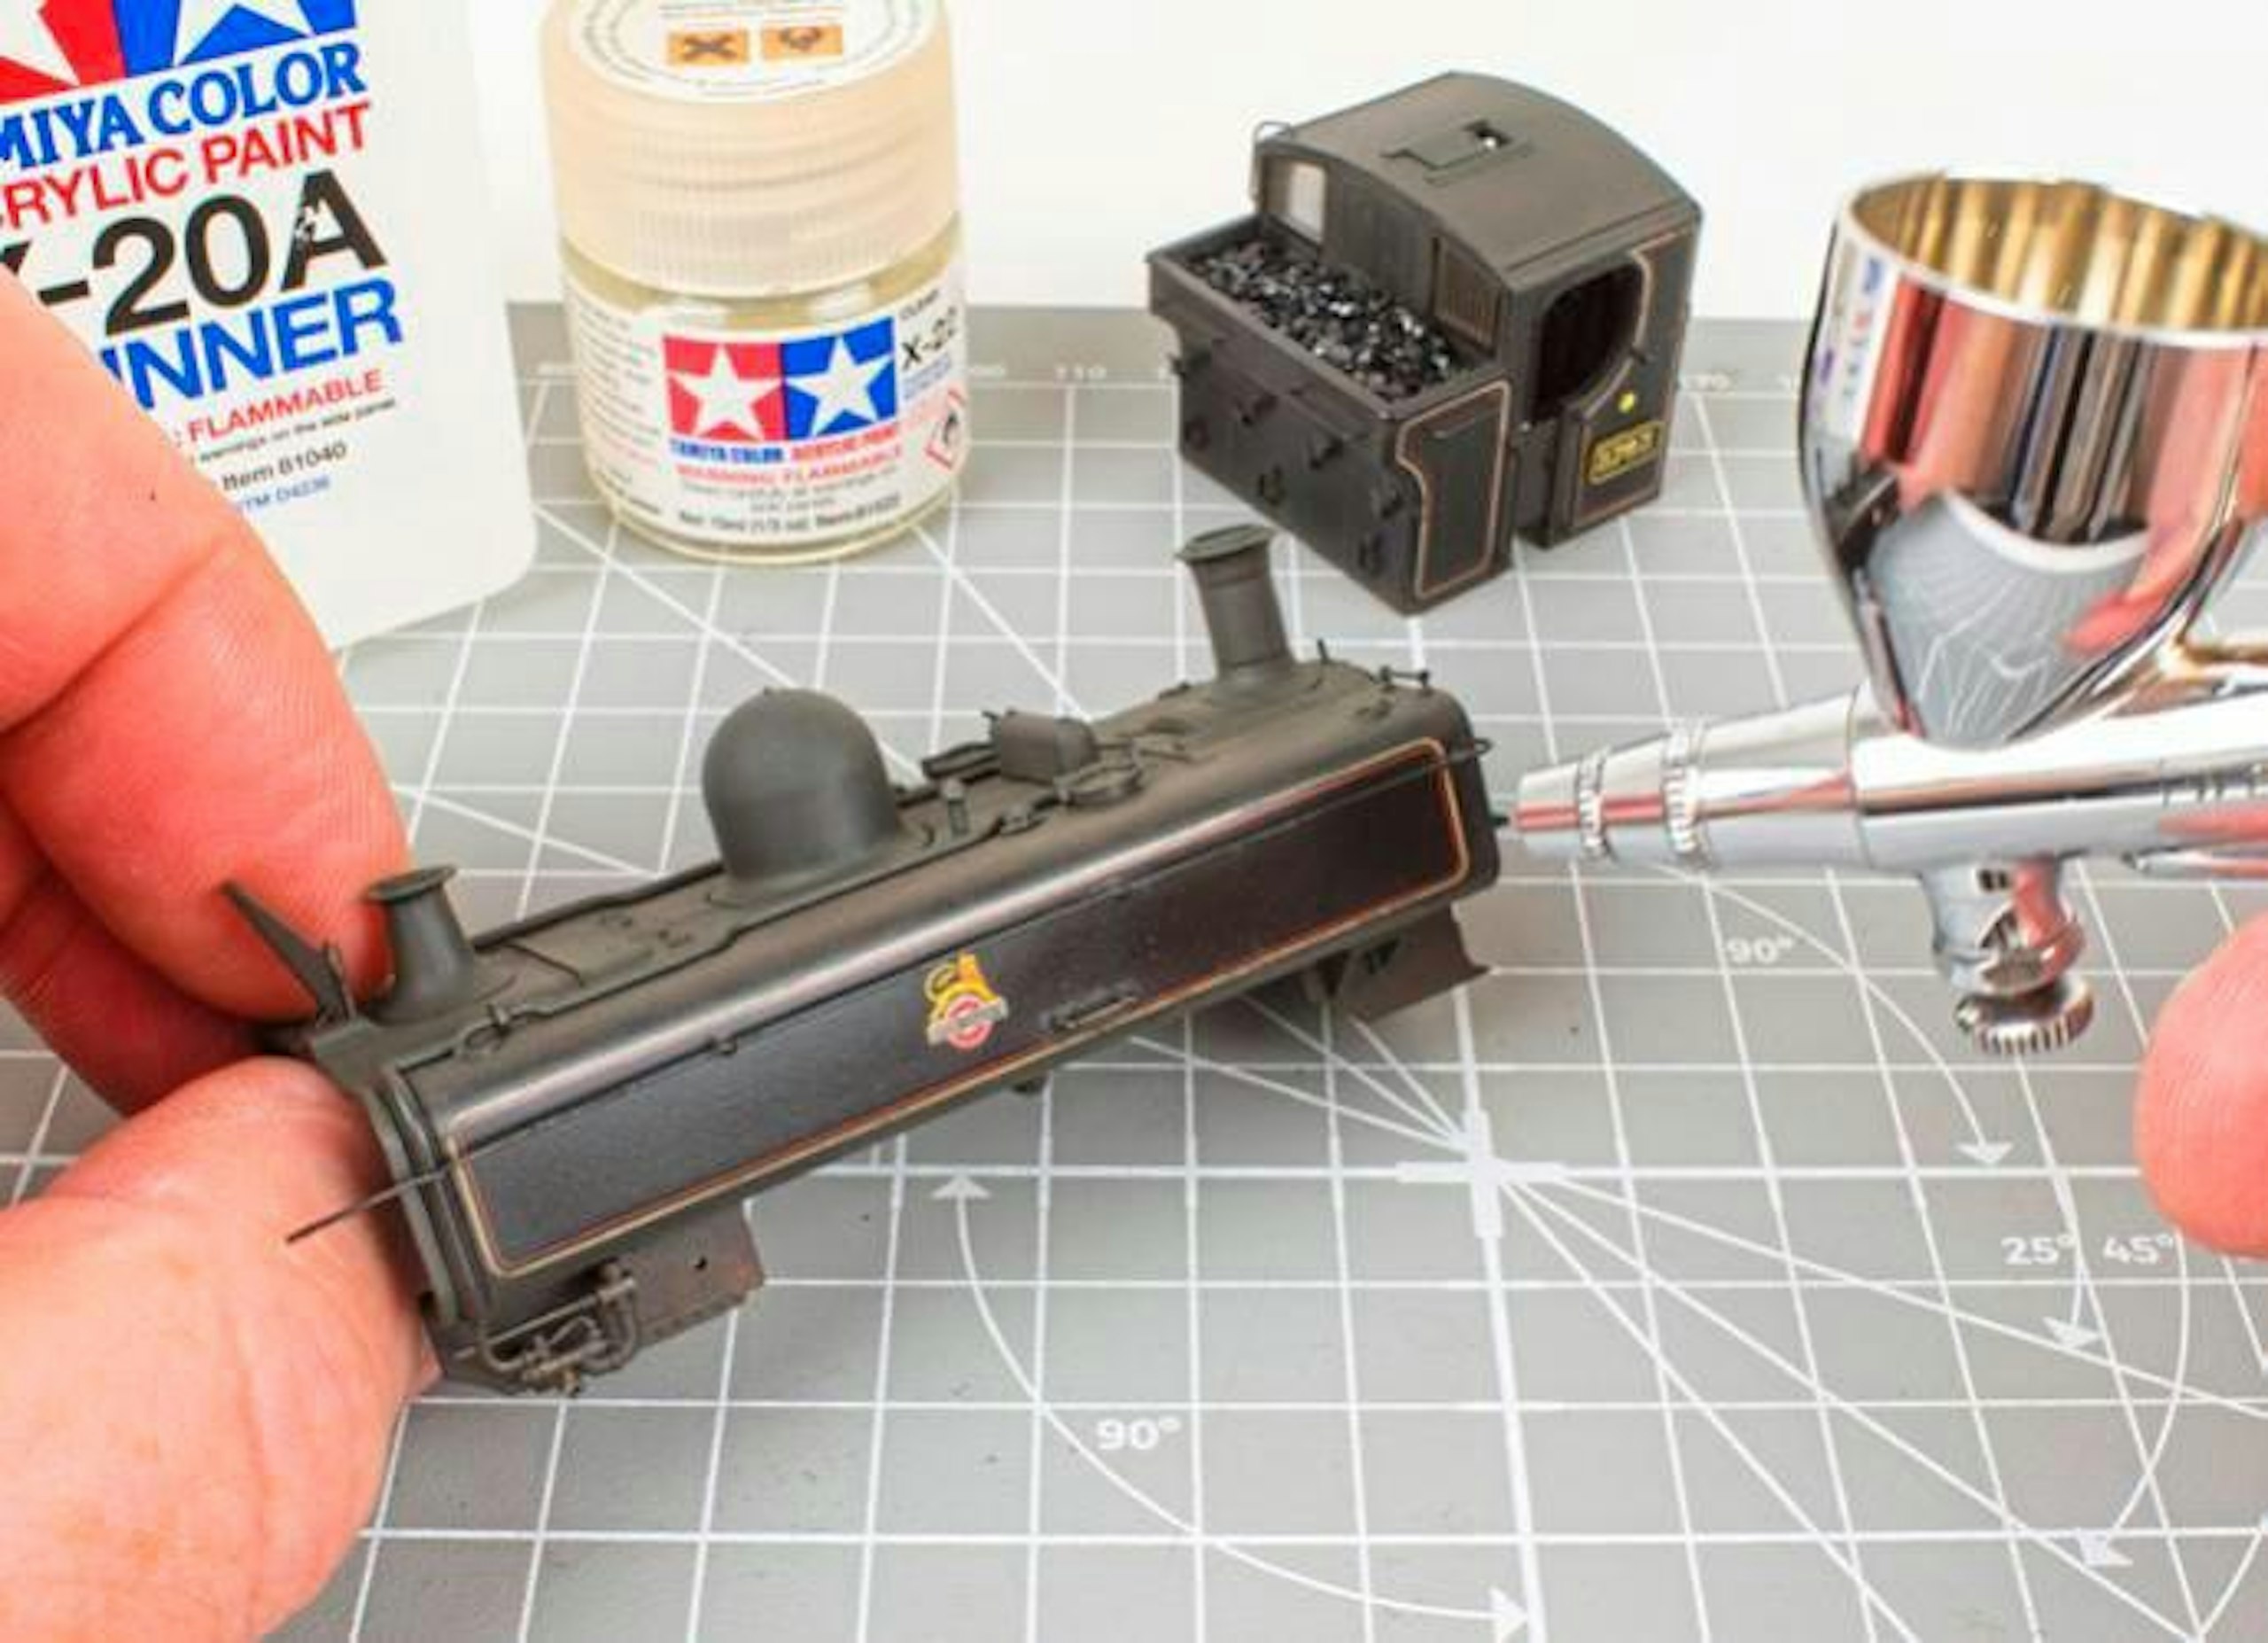
15 Tamiya’s X-22 Clear (a translucent gloss) was later airbrushed over the cab and tank sides, again in very lightly misted coats. This gives the underlying paintwork a shiny look, as if it has been polished with an oily rag.
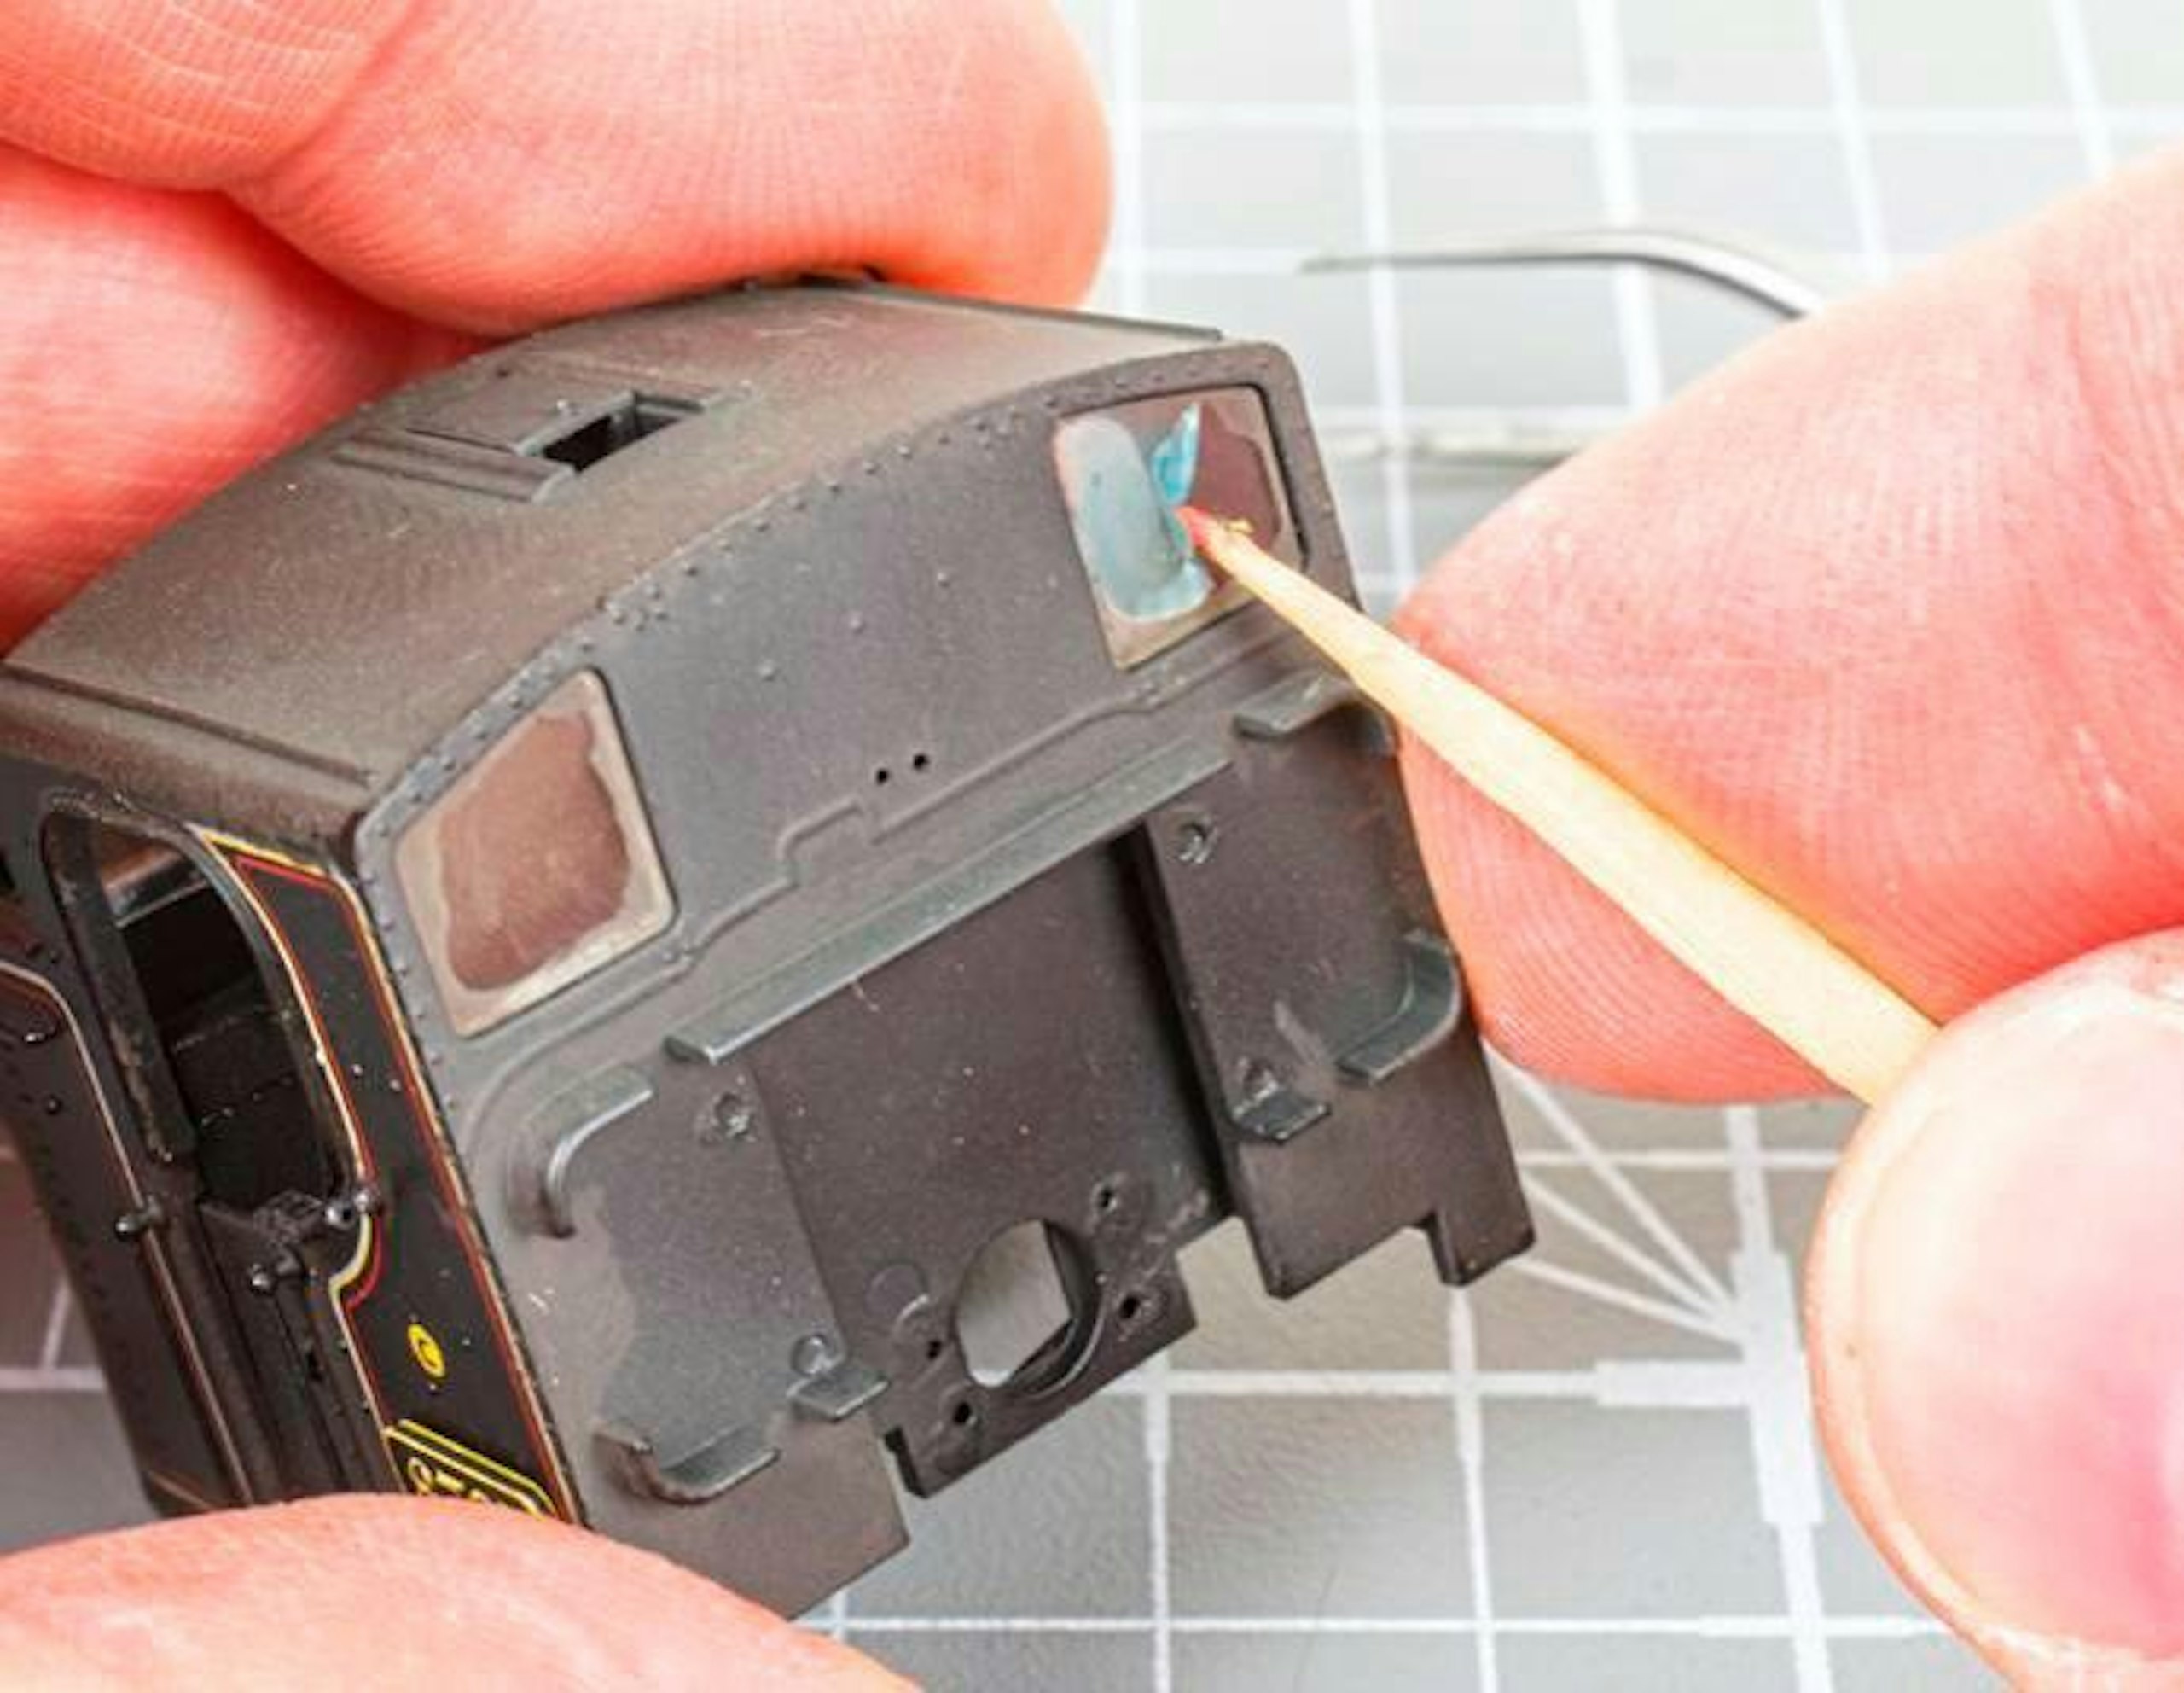
16 After another overnight rest to allow the Tamiya paints to harden fully, I removed the masking film from the cab windows, using a wooden toothpick. The ‘dirt’ around the edges looked convincing.
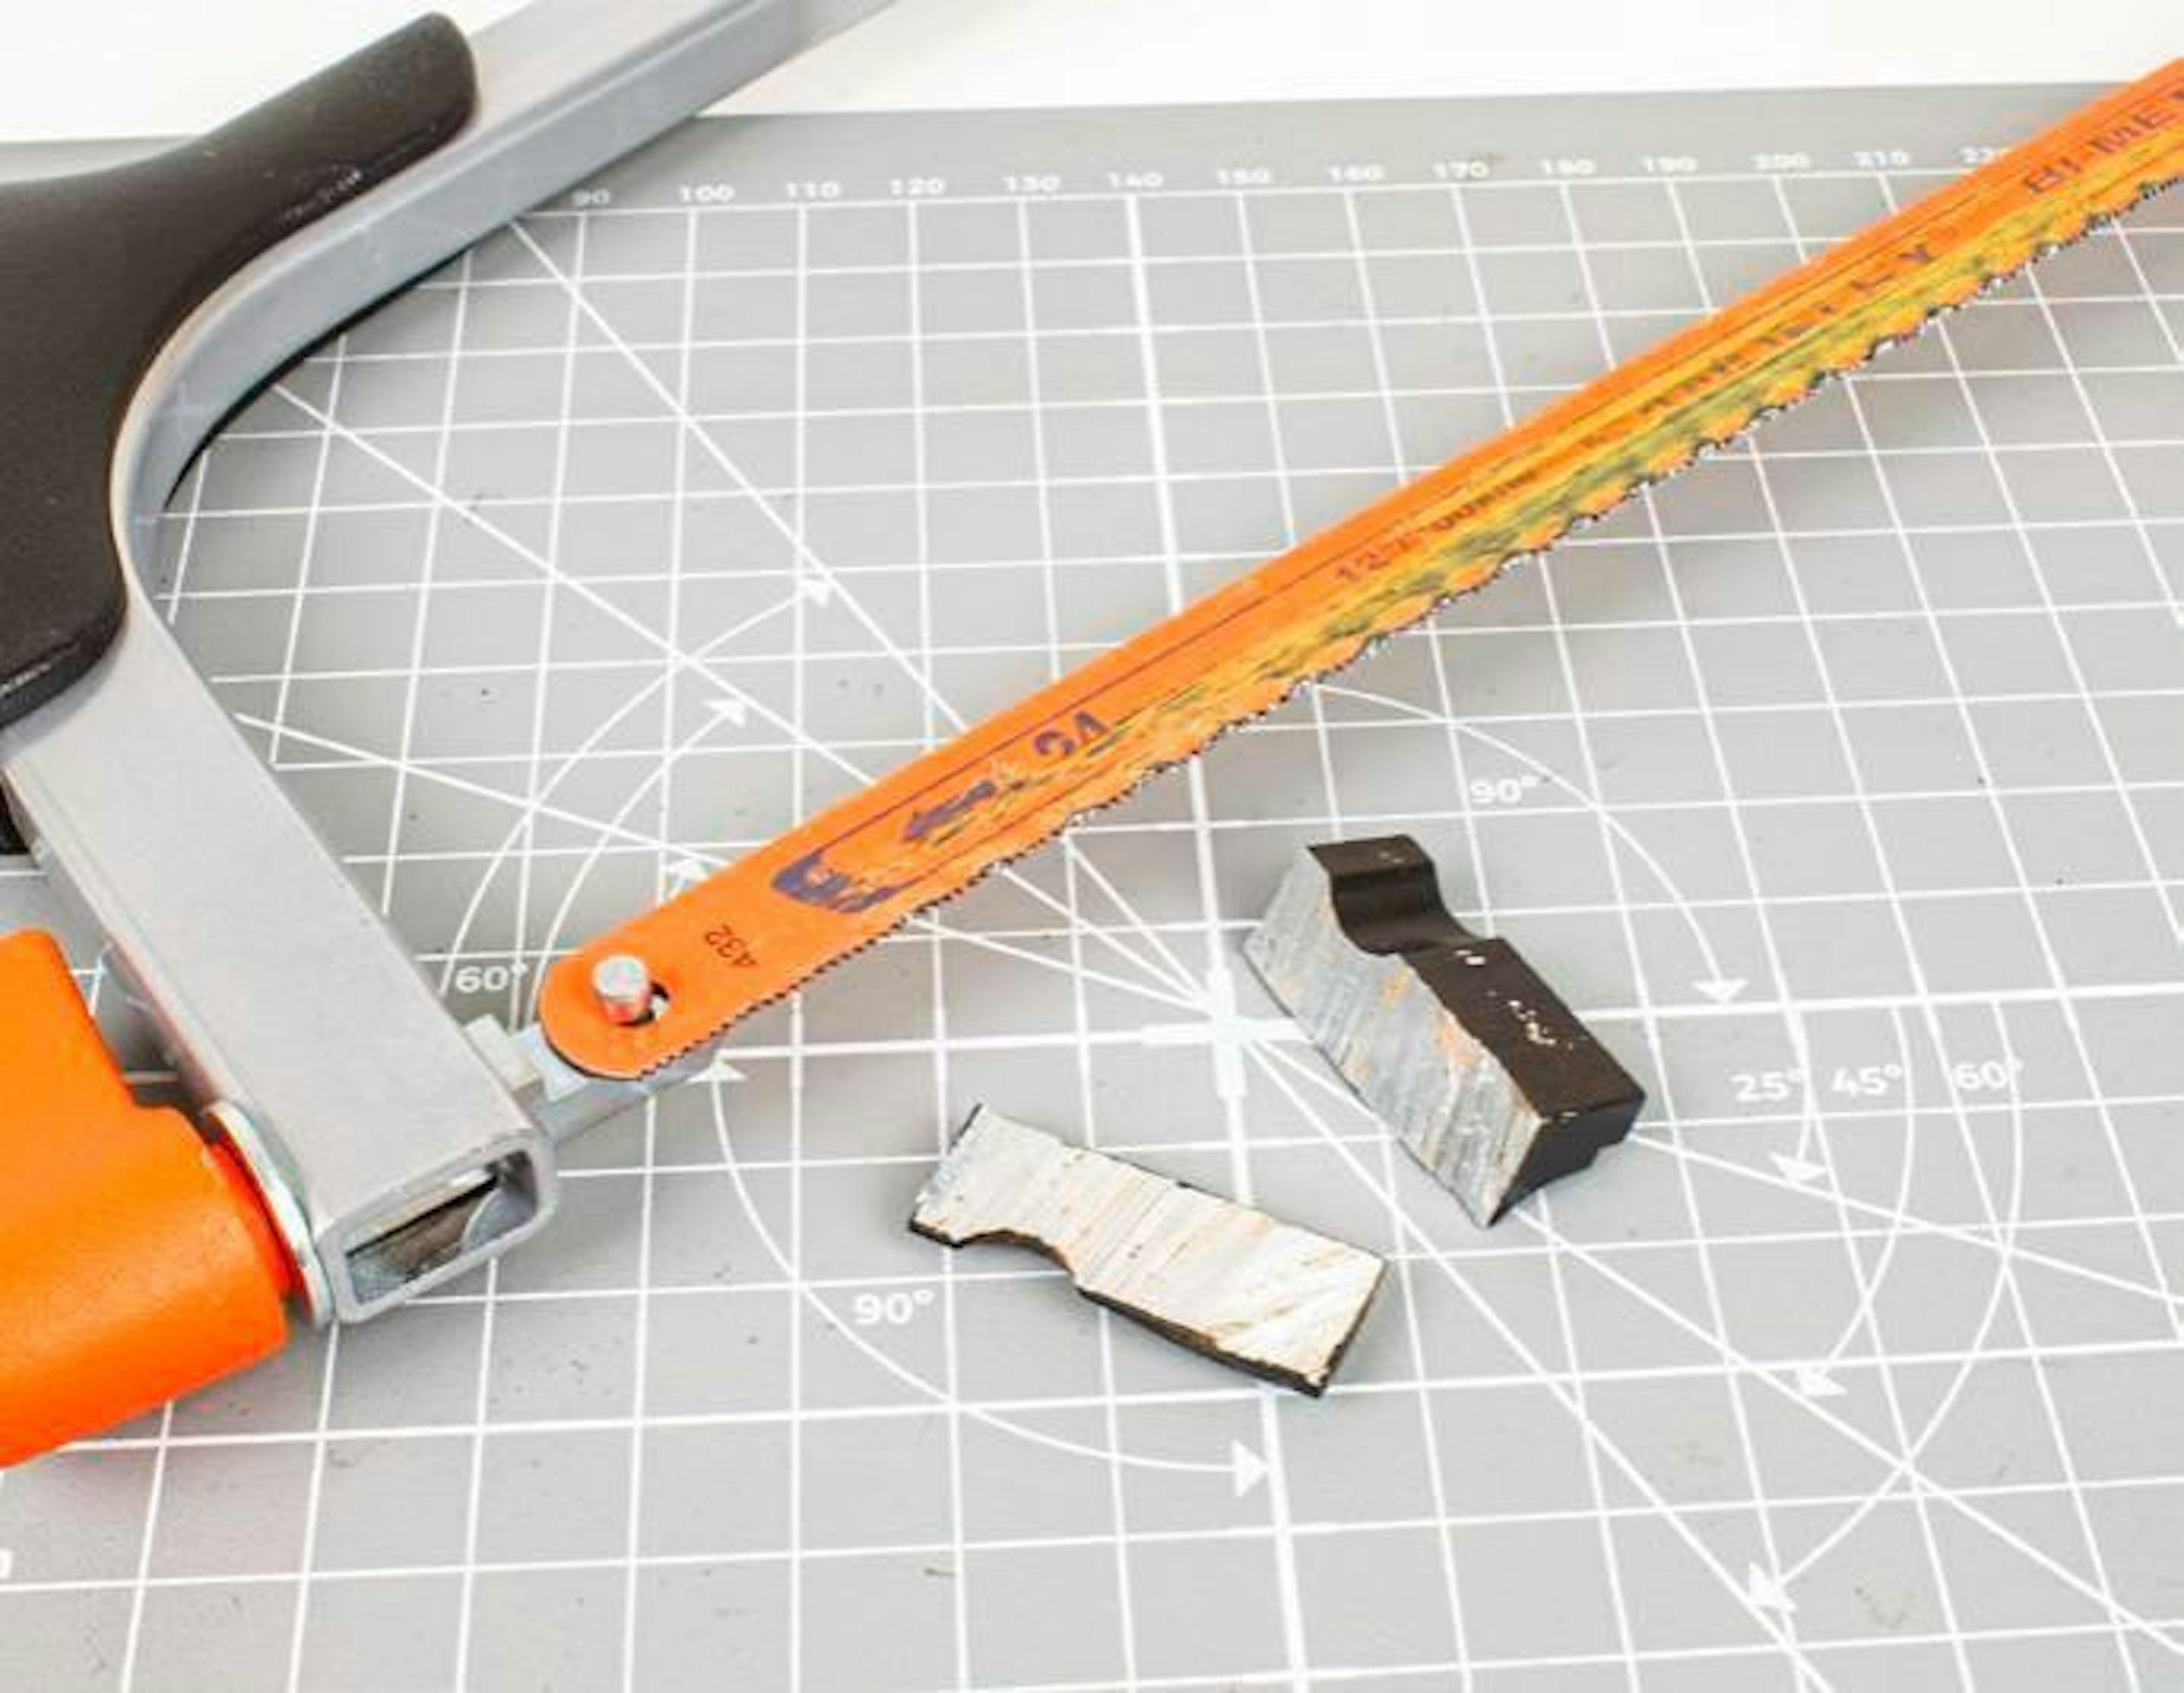
17 I cut away the top 3mm or so of the cast metal ‘coal’, clamping the block in a vice and using a hacksaw to cut through the material. Any rough burrs were removed with a flat file, and all traces of metal swarf were cleaned away.
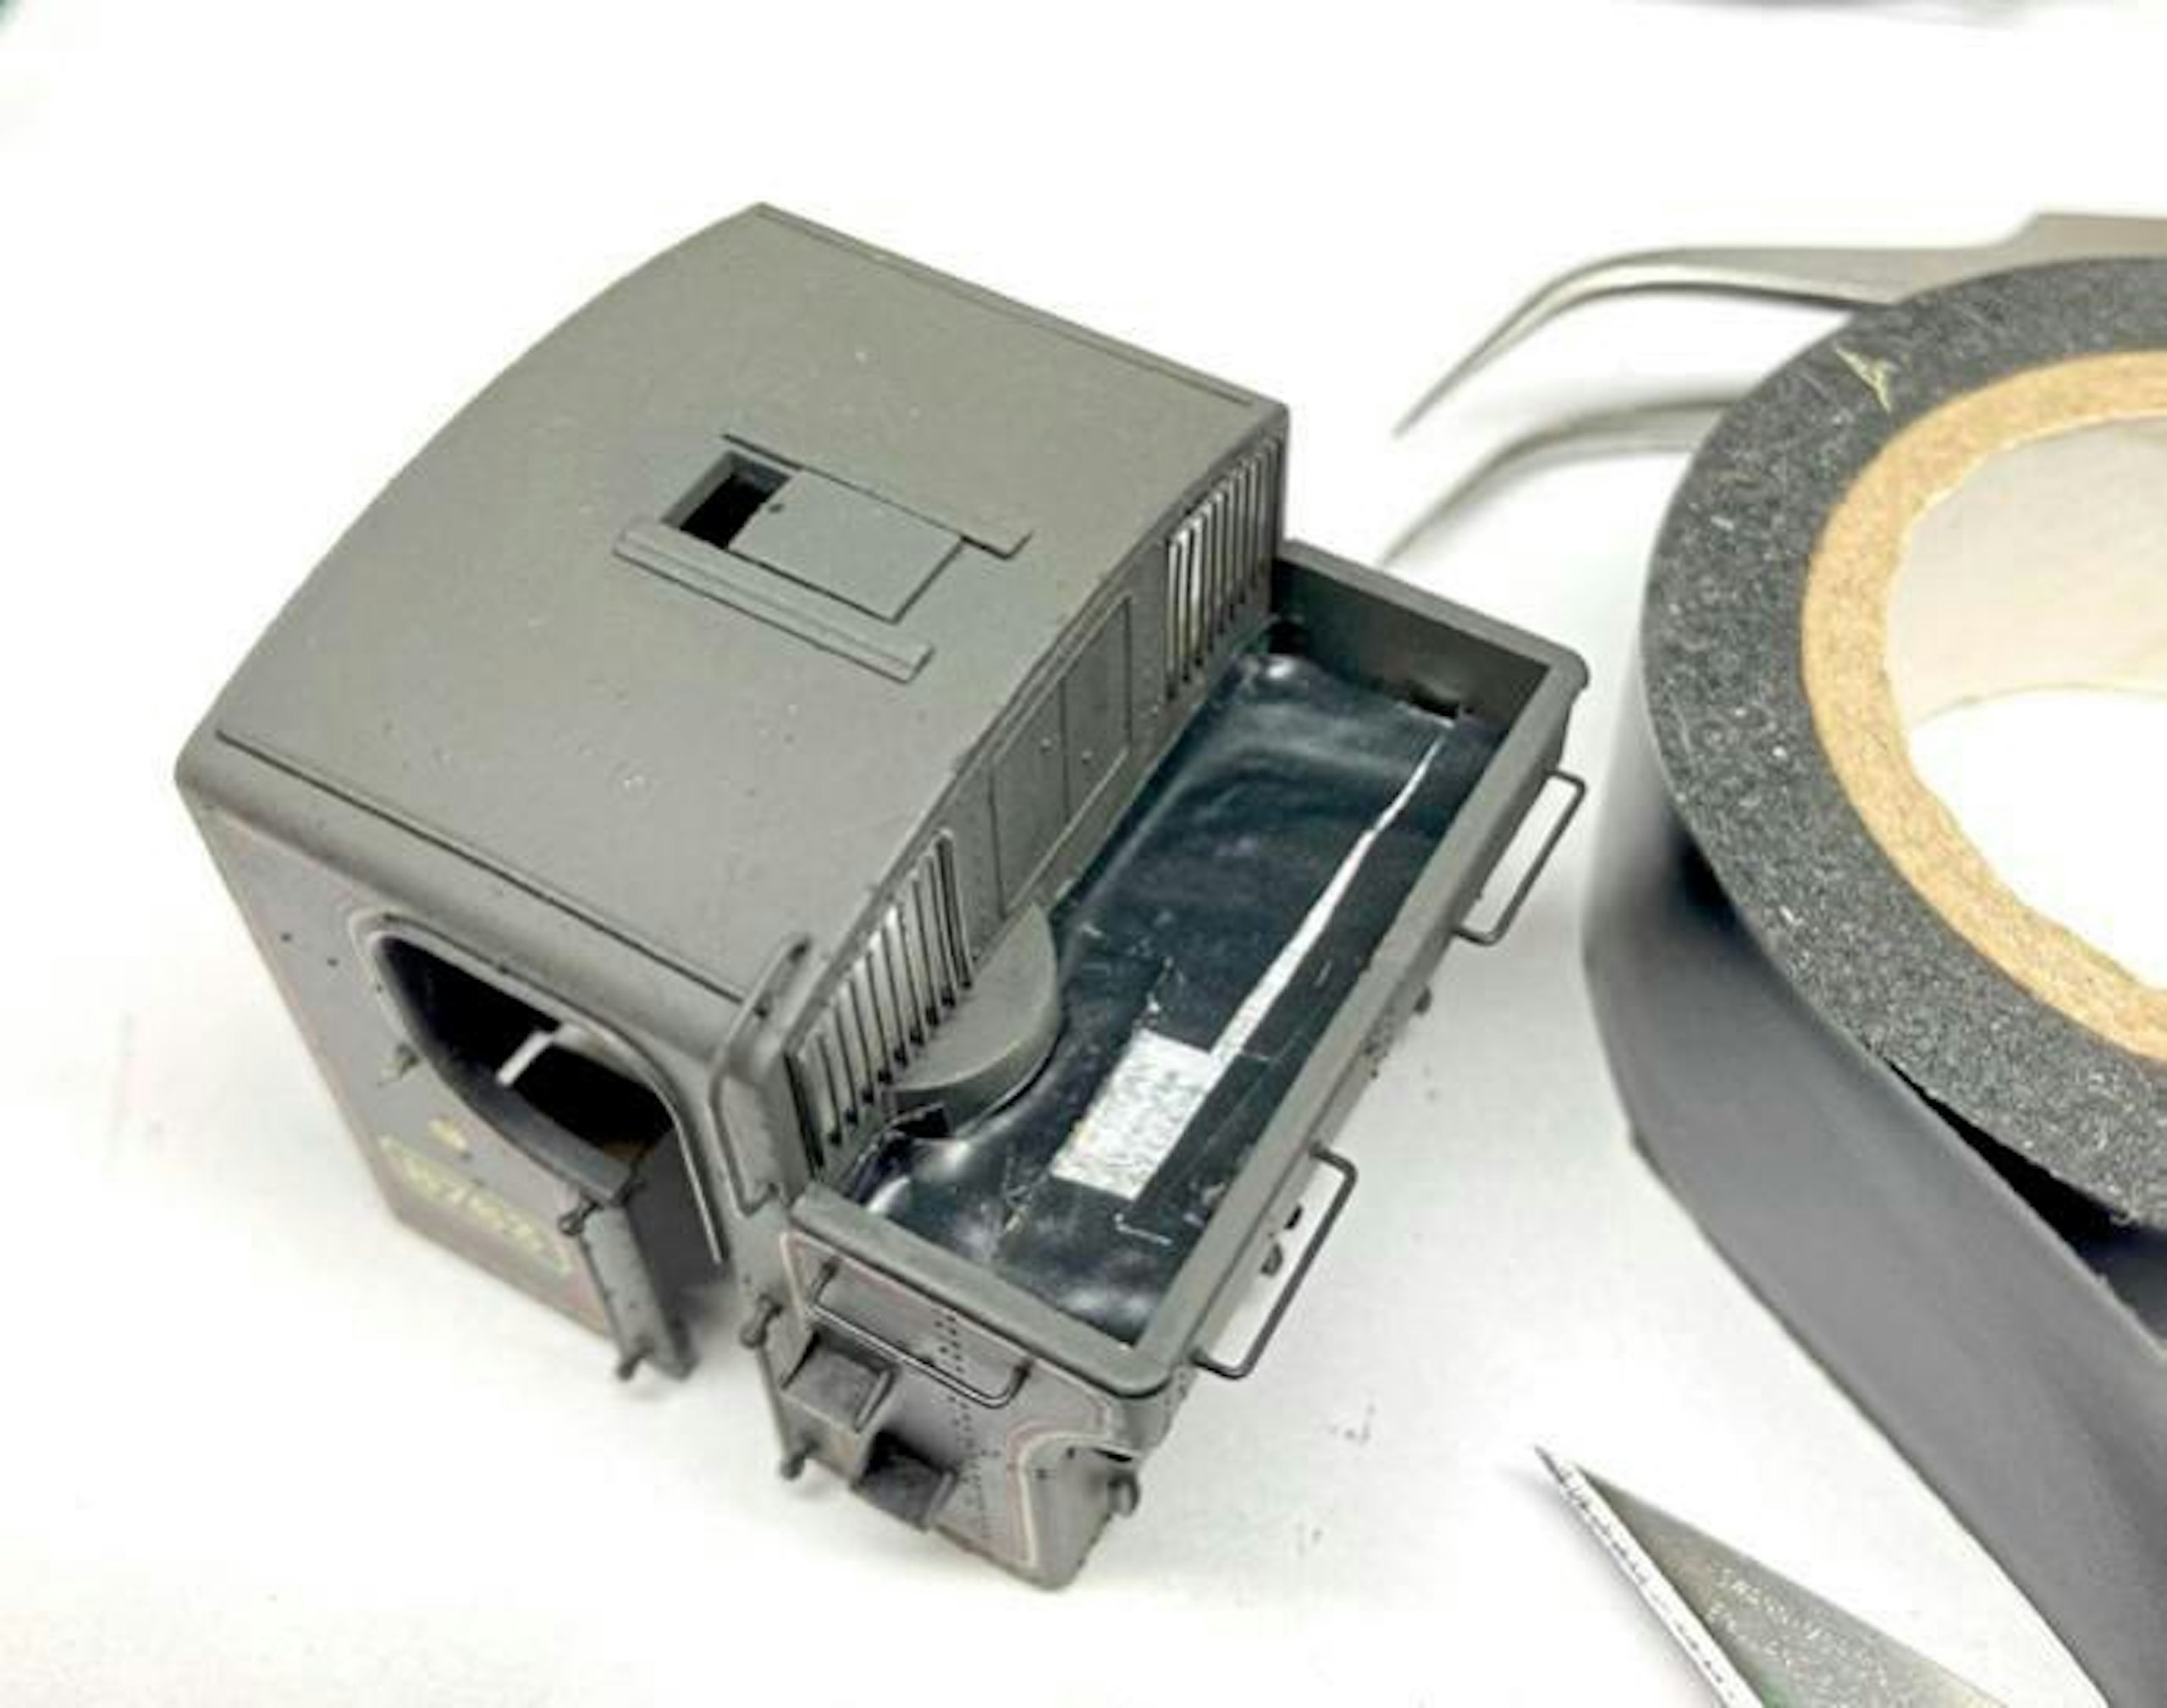
18 The metal block was screwed back into the cab moulding and any gaps around the inner edges of the bunker sealed with strips of electrical insulation tape. This will allow the real coal to sit lower within the bunker.
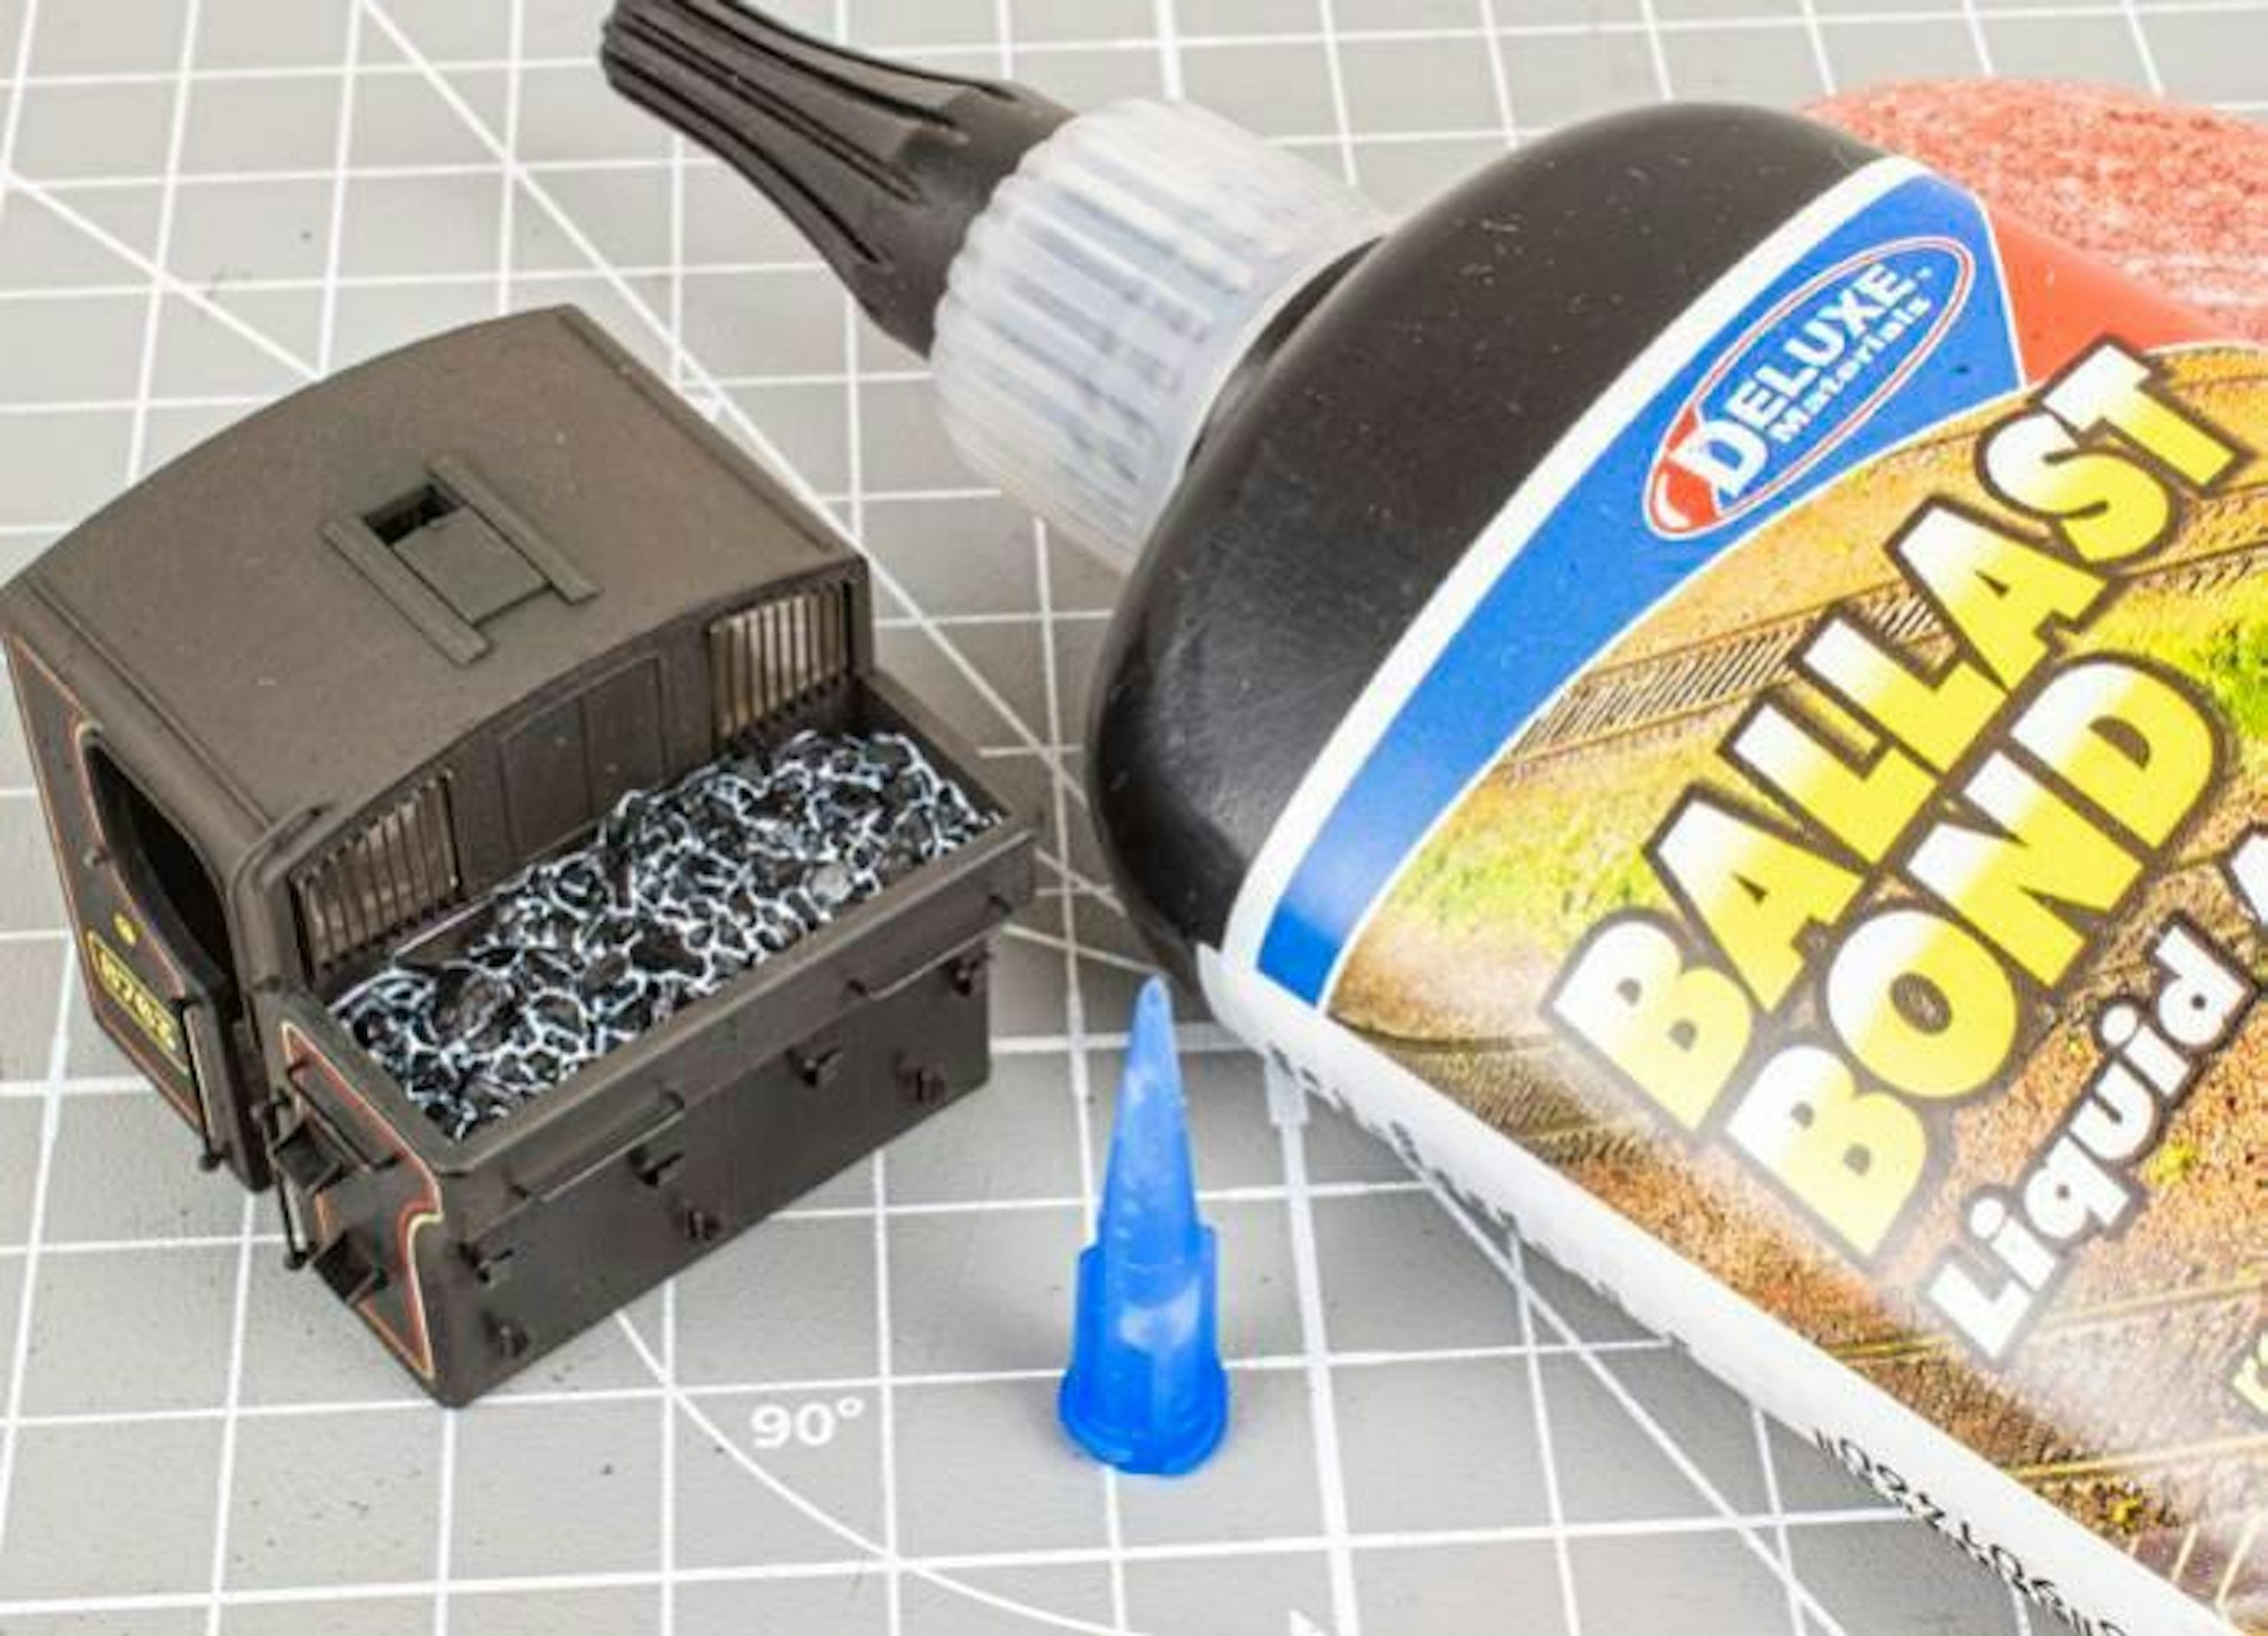
19 Coal was poured into the bunker and secured with Ballast Bond glue via a precision tip. This glue easily penetrates the coal and, after 24 hours, sets hard. The insulation tape prevents the glue from running out the bottom.
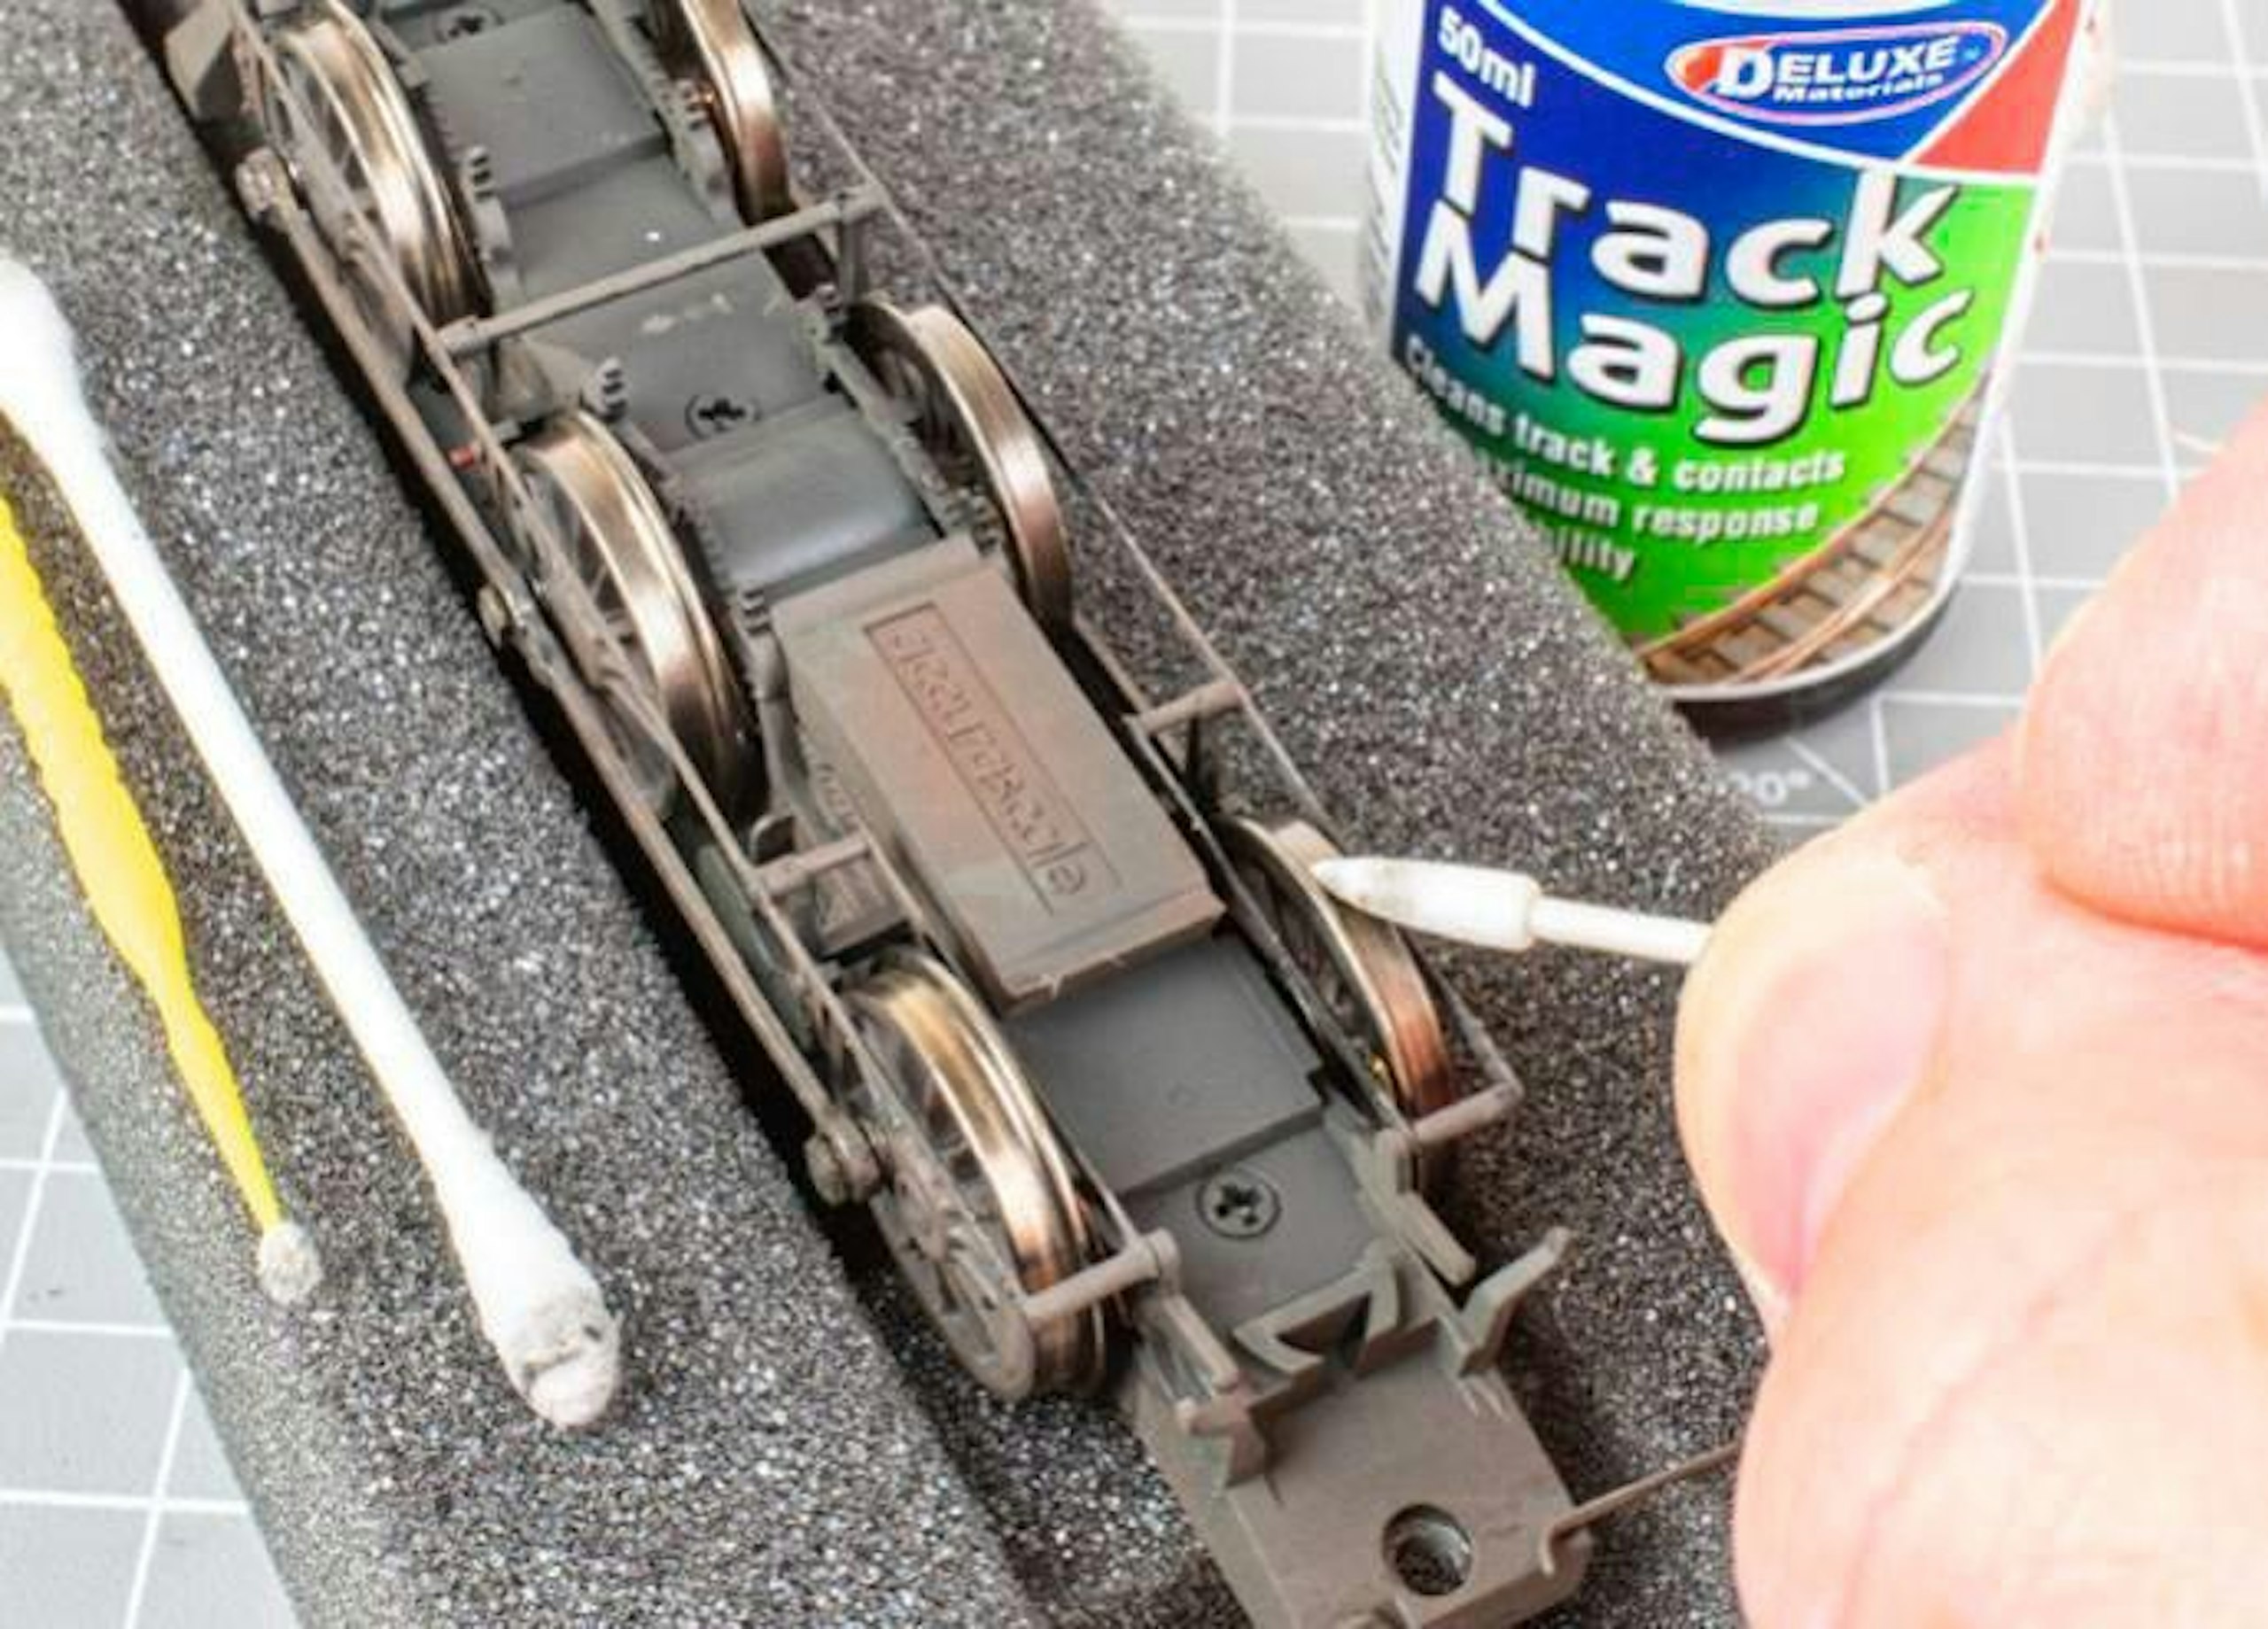
20 While the coal load hardened, I cleaned the wheels using a track cleaning fluid. The wheel treads, flanges and inner faces were cleaned, and the wiper contact faces were checked and adjusted as necessary.
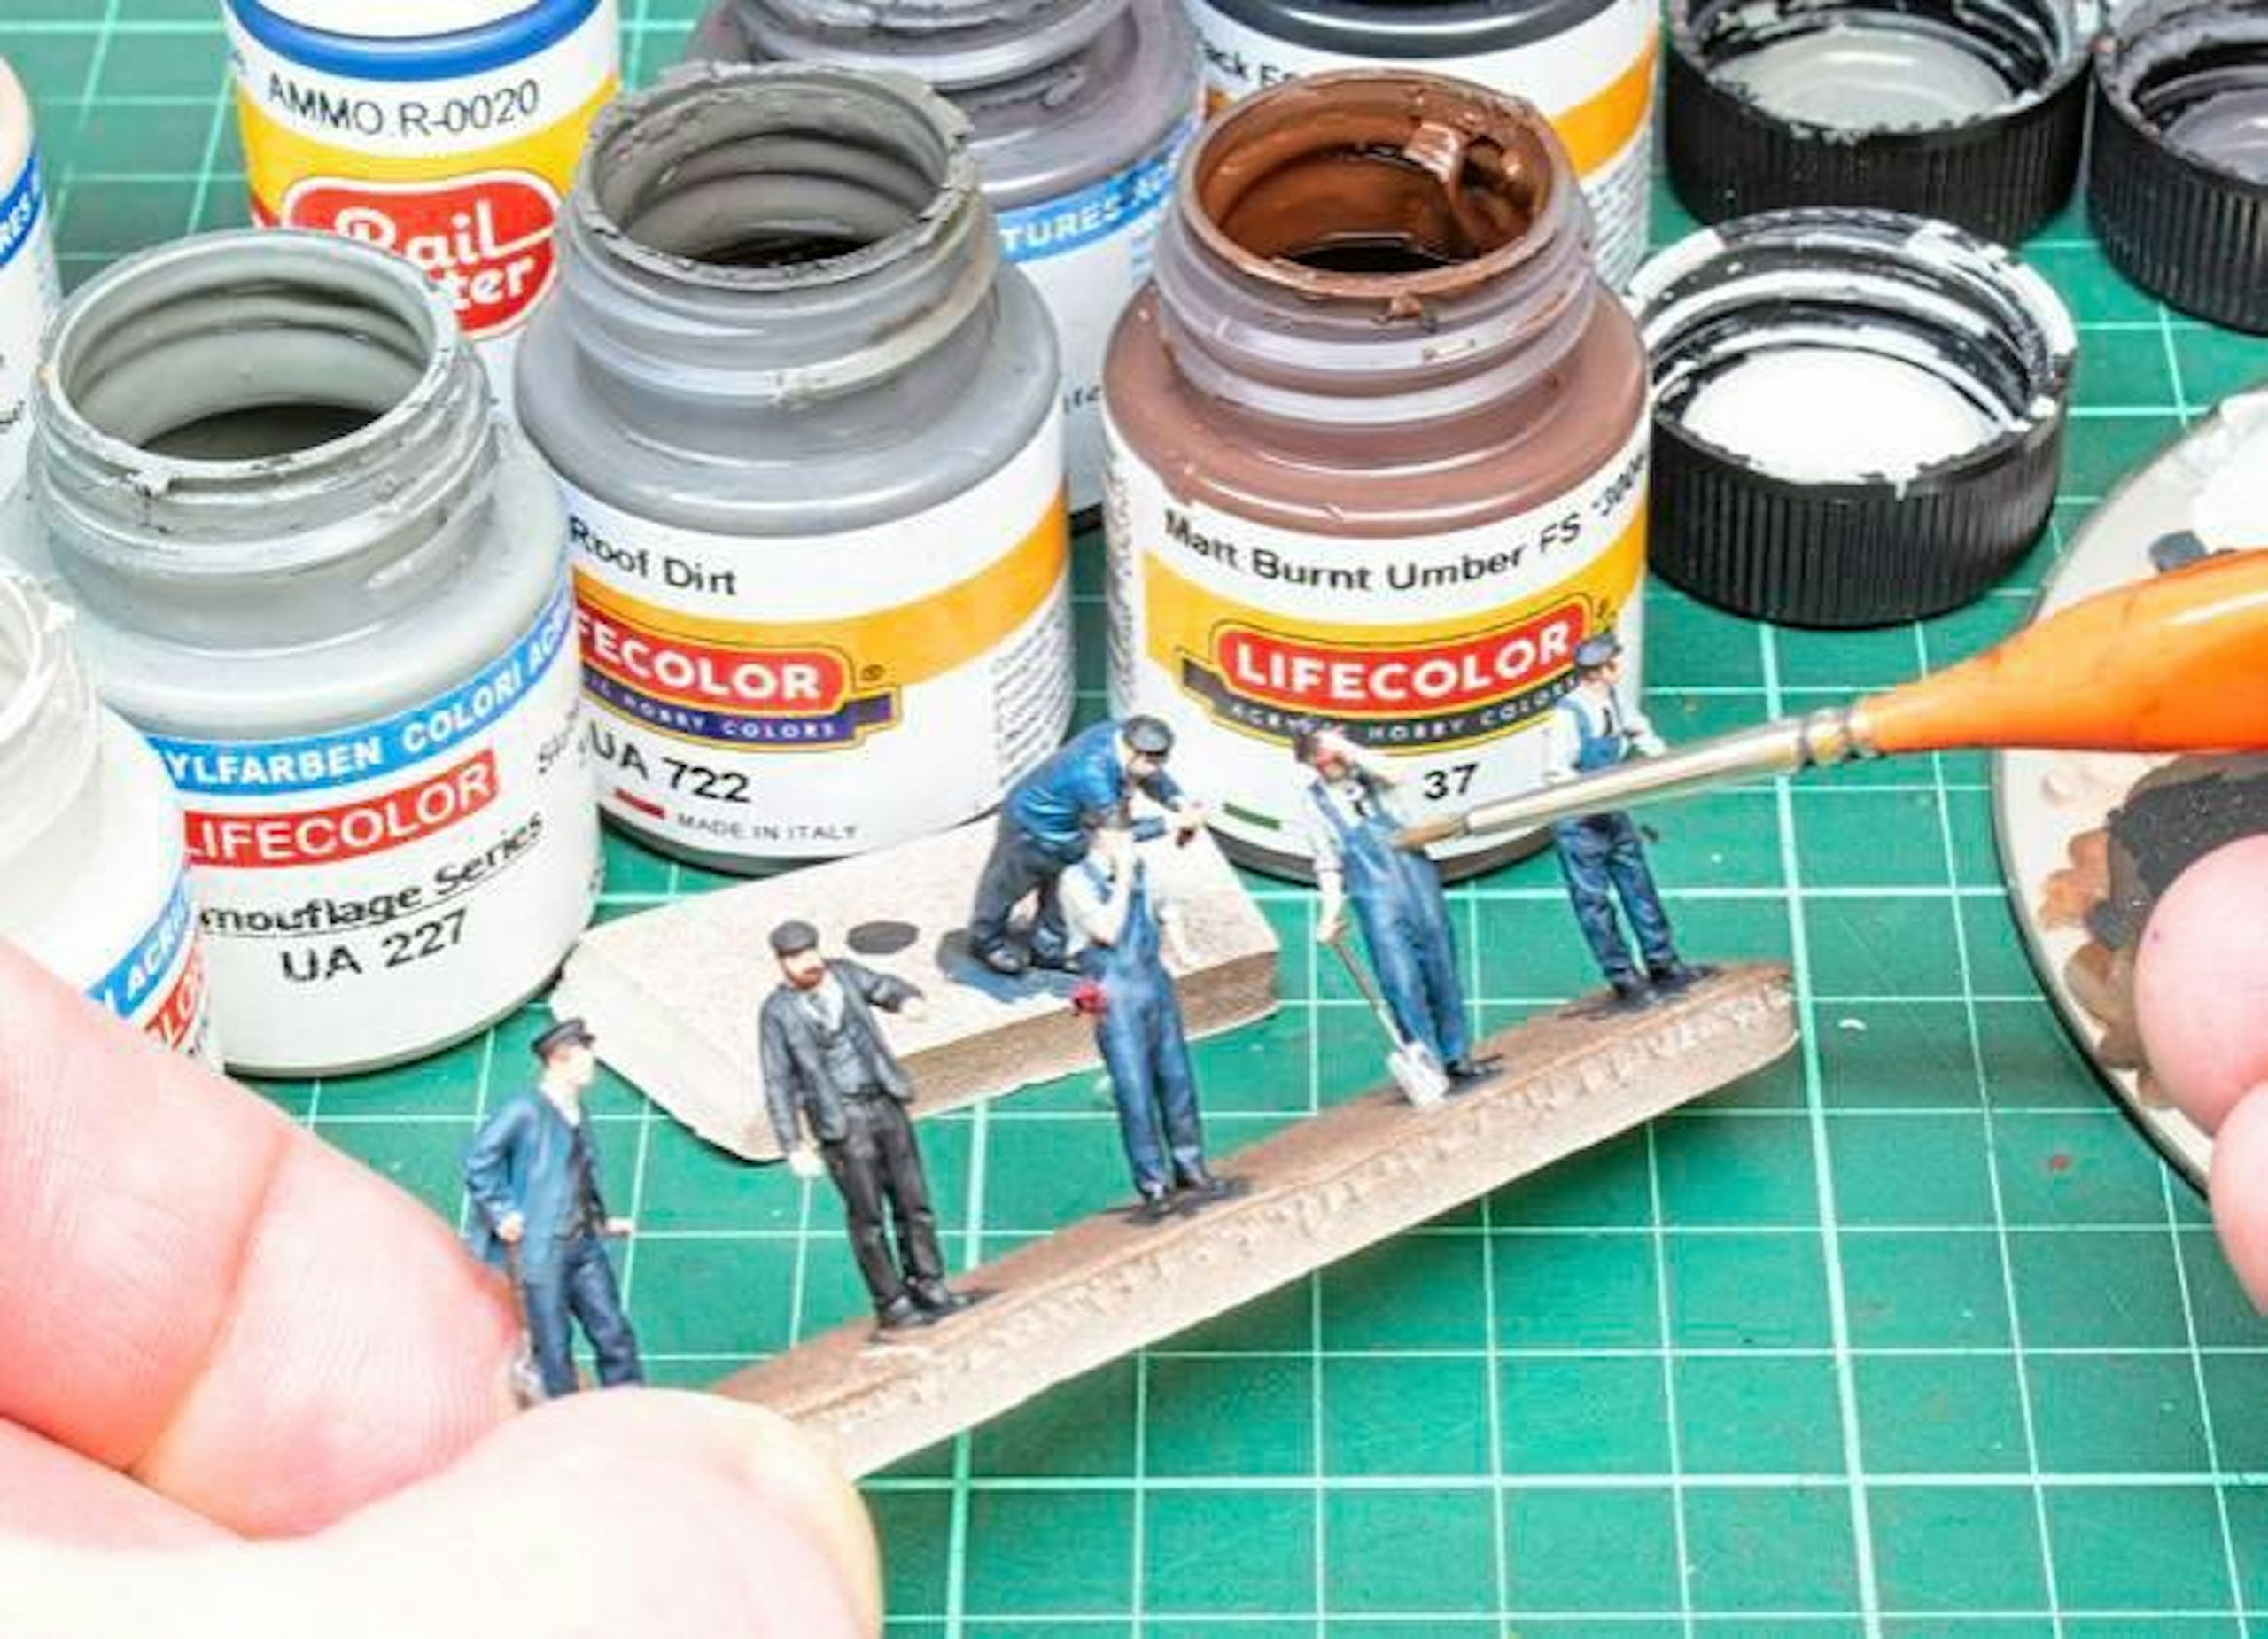
21 No working locomotive is complete without a footplate crew, so I primed and painted a few 3D-printed figures from the Modelu range. Many packs are available, to suit different locomotive types and eras.
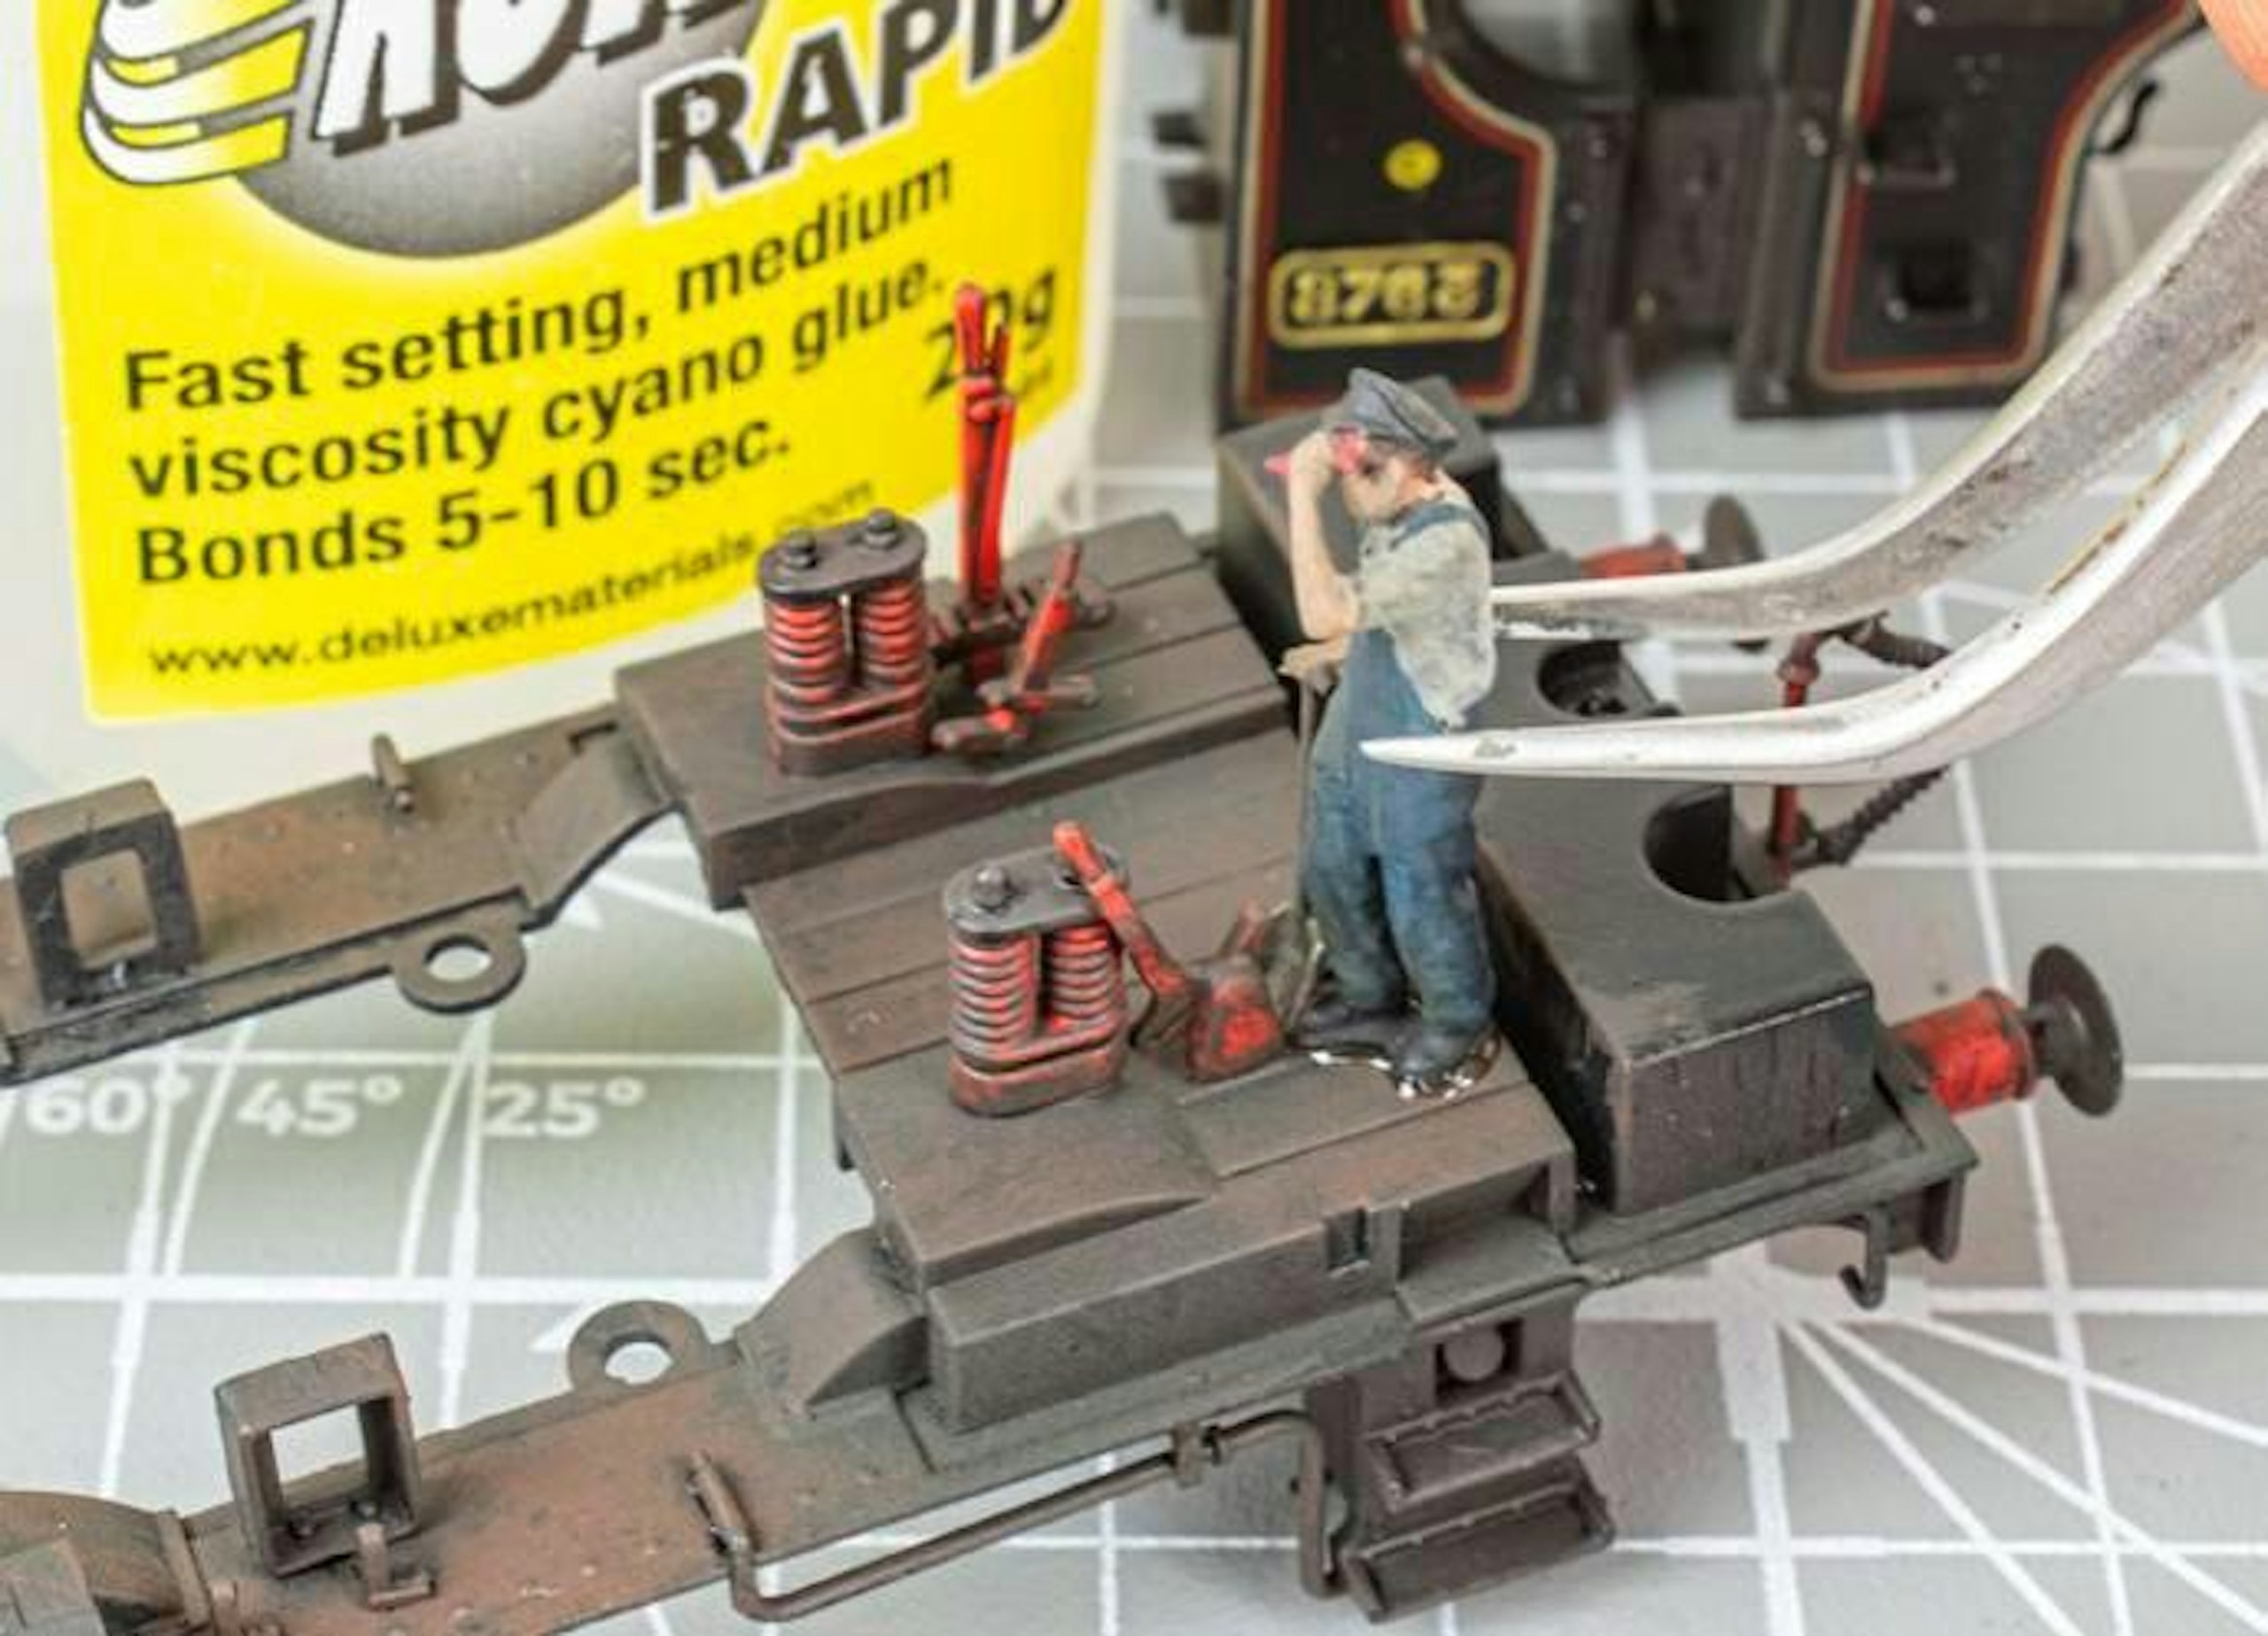
22 In this instance, it made sense to fix the fireman in position before the cab was refitted, although I did check for clearance before he was glued in place. I used cyano glue, but PVA or contact adhesive is also suitable.
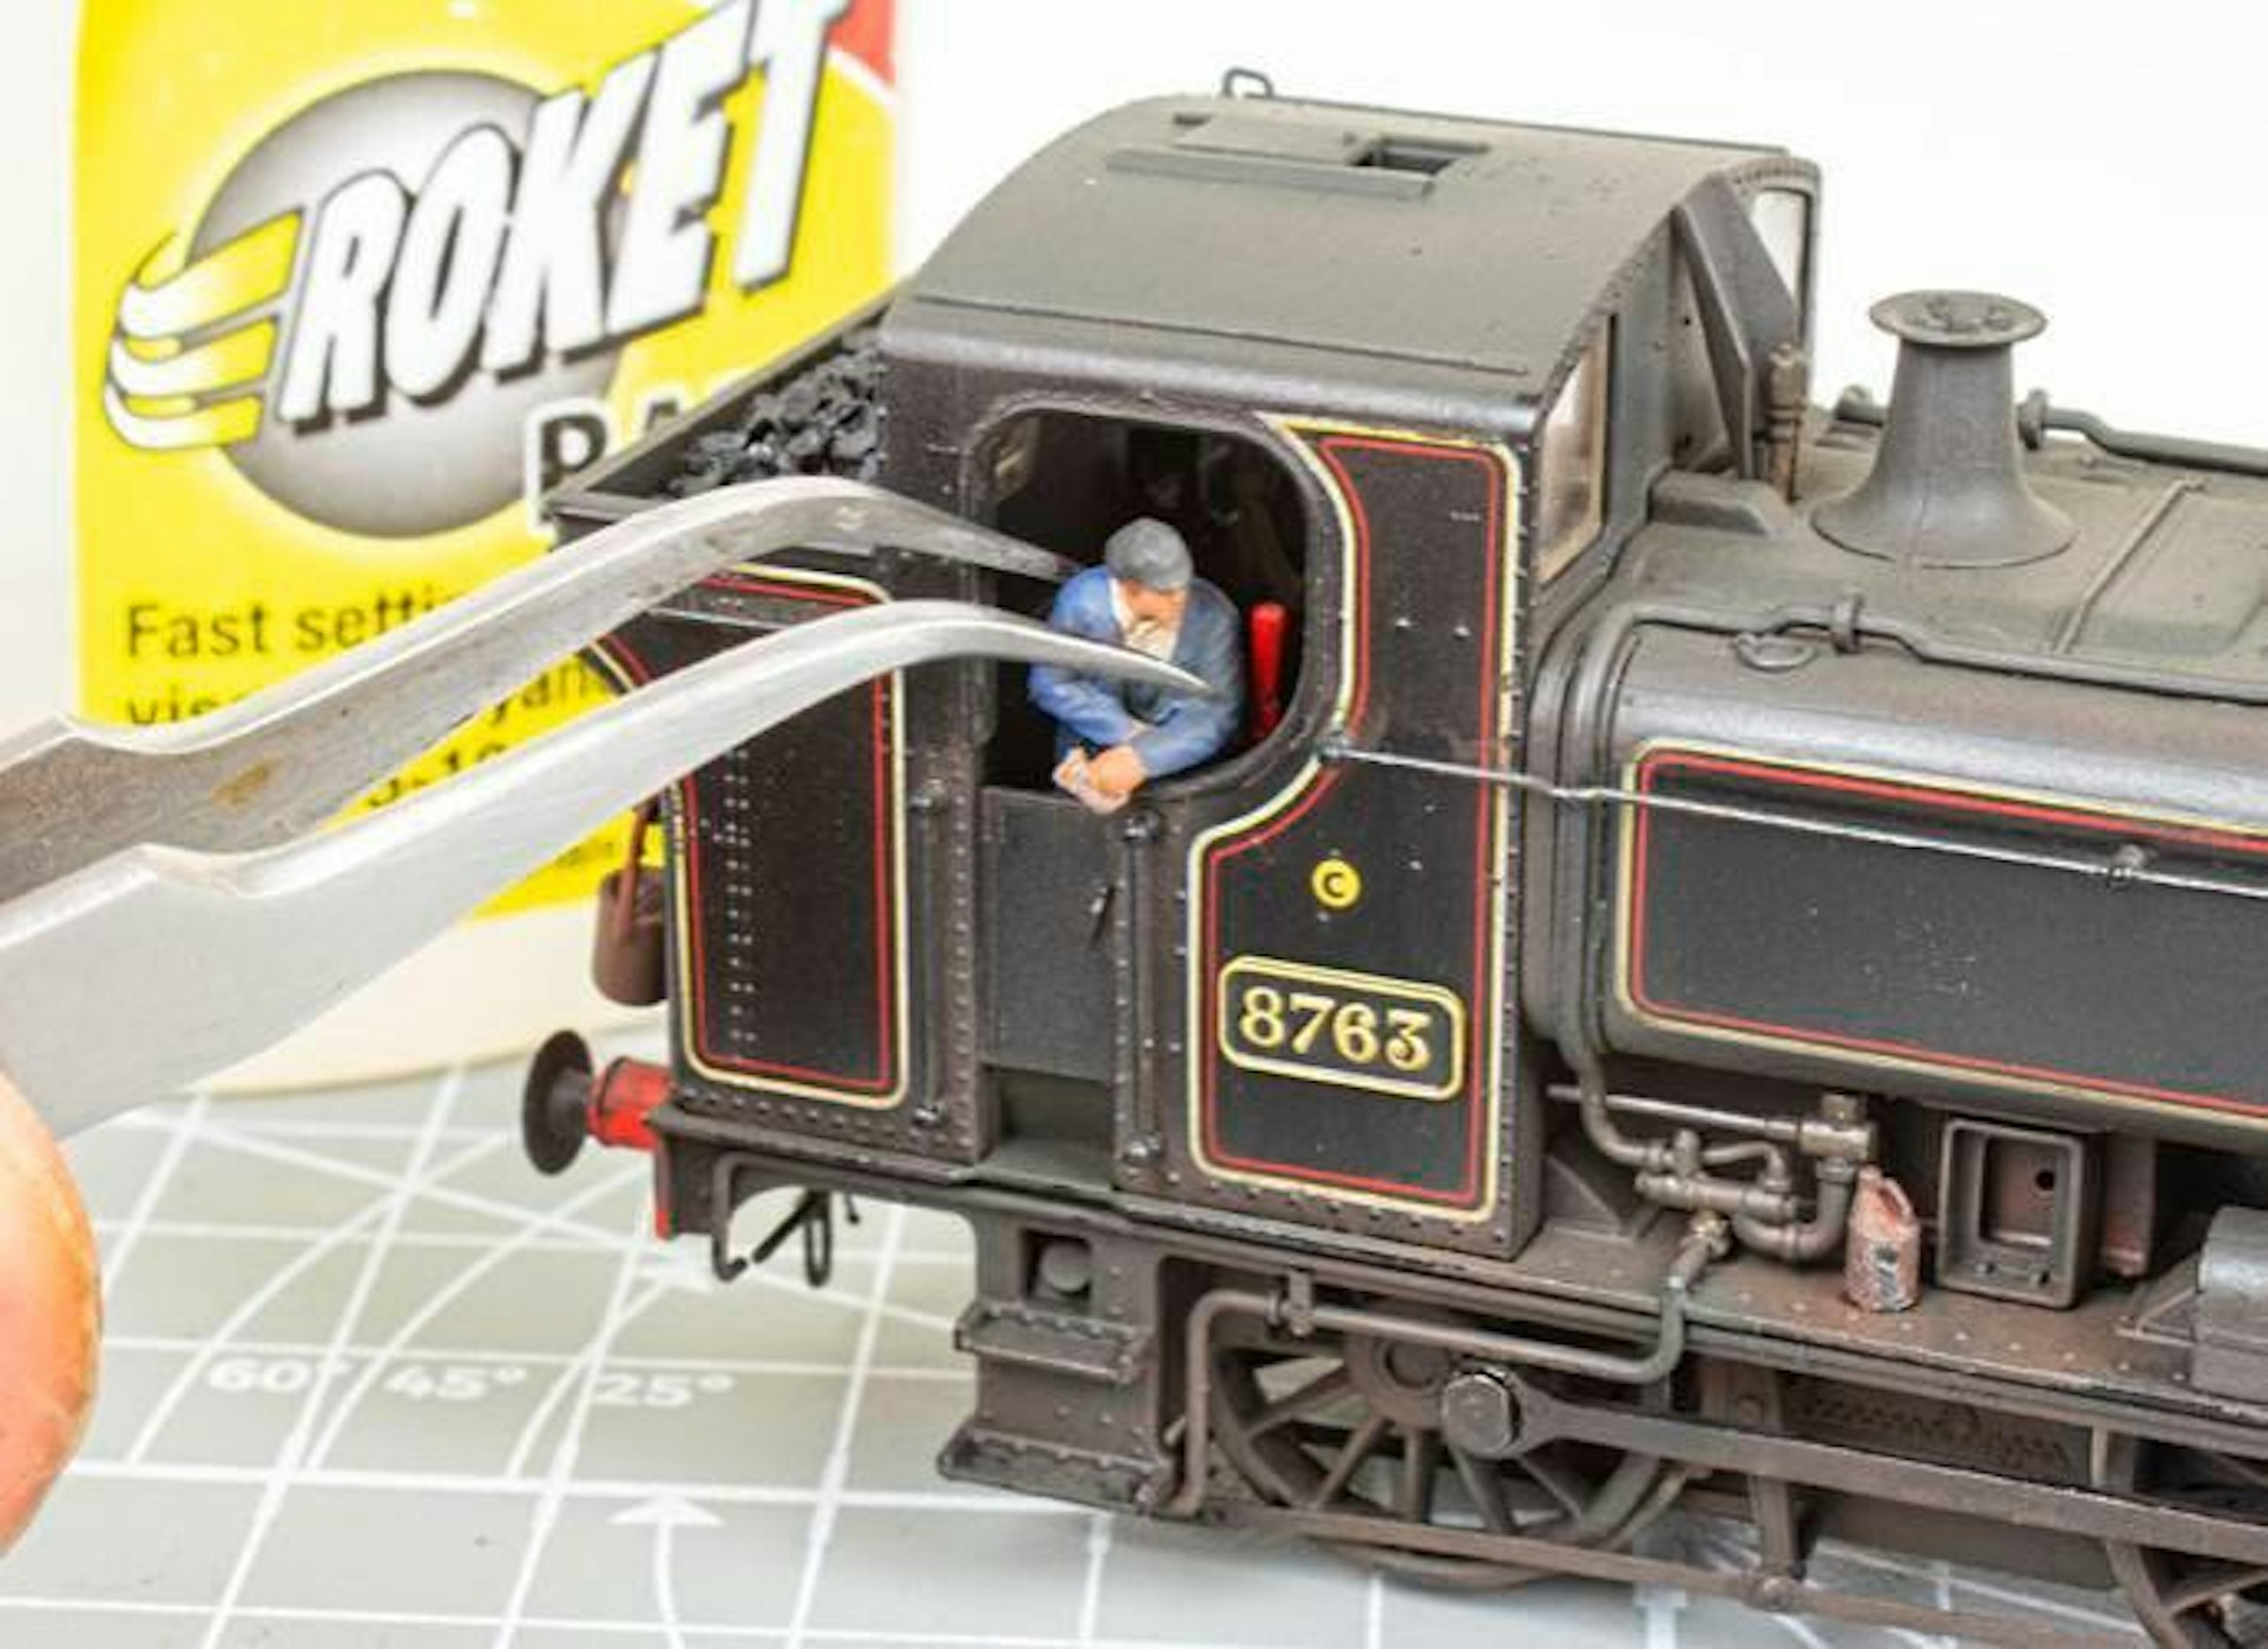
23 The model was fully reassembled before I installed the driver, as he needed to lean against the frame of the cab. After adding a dab of glue to his feet, I carefully guided him through the side of the cab and into position.
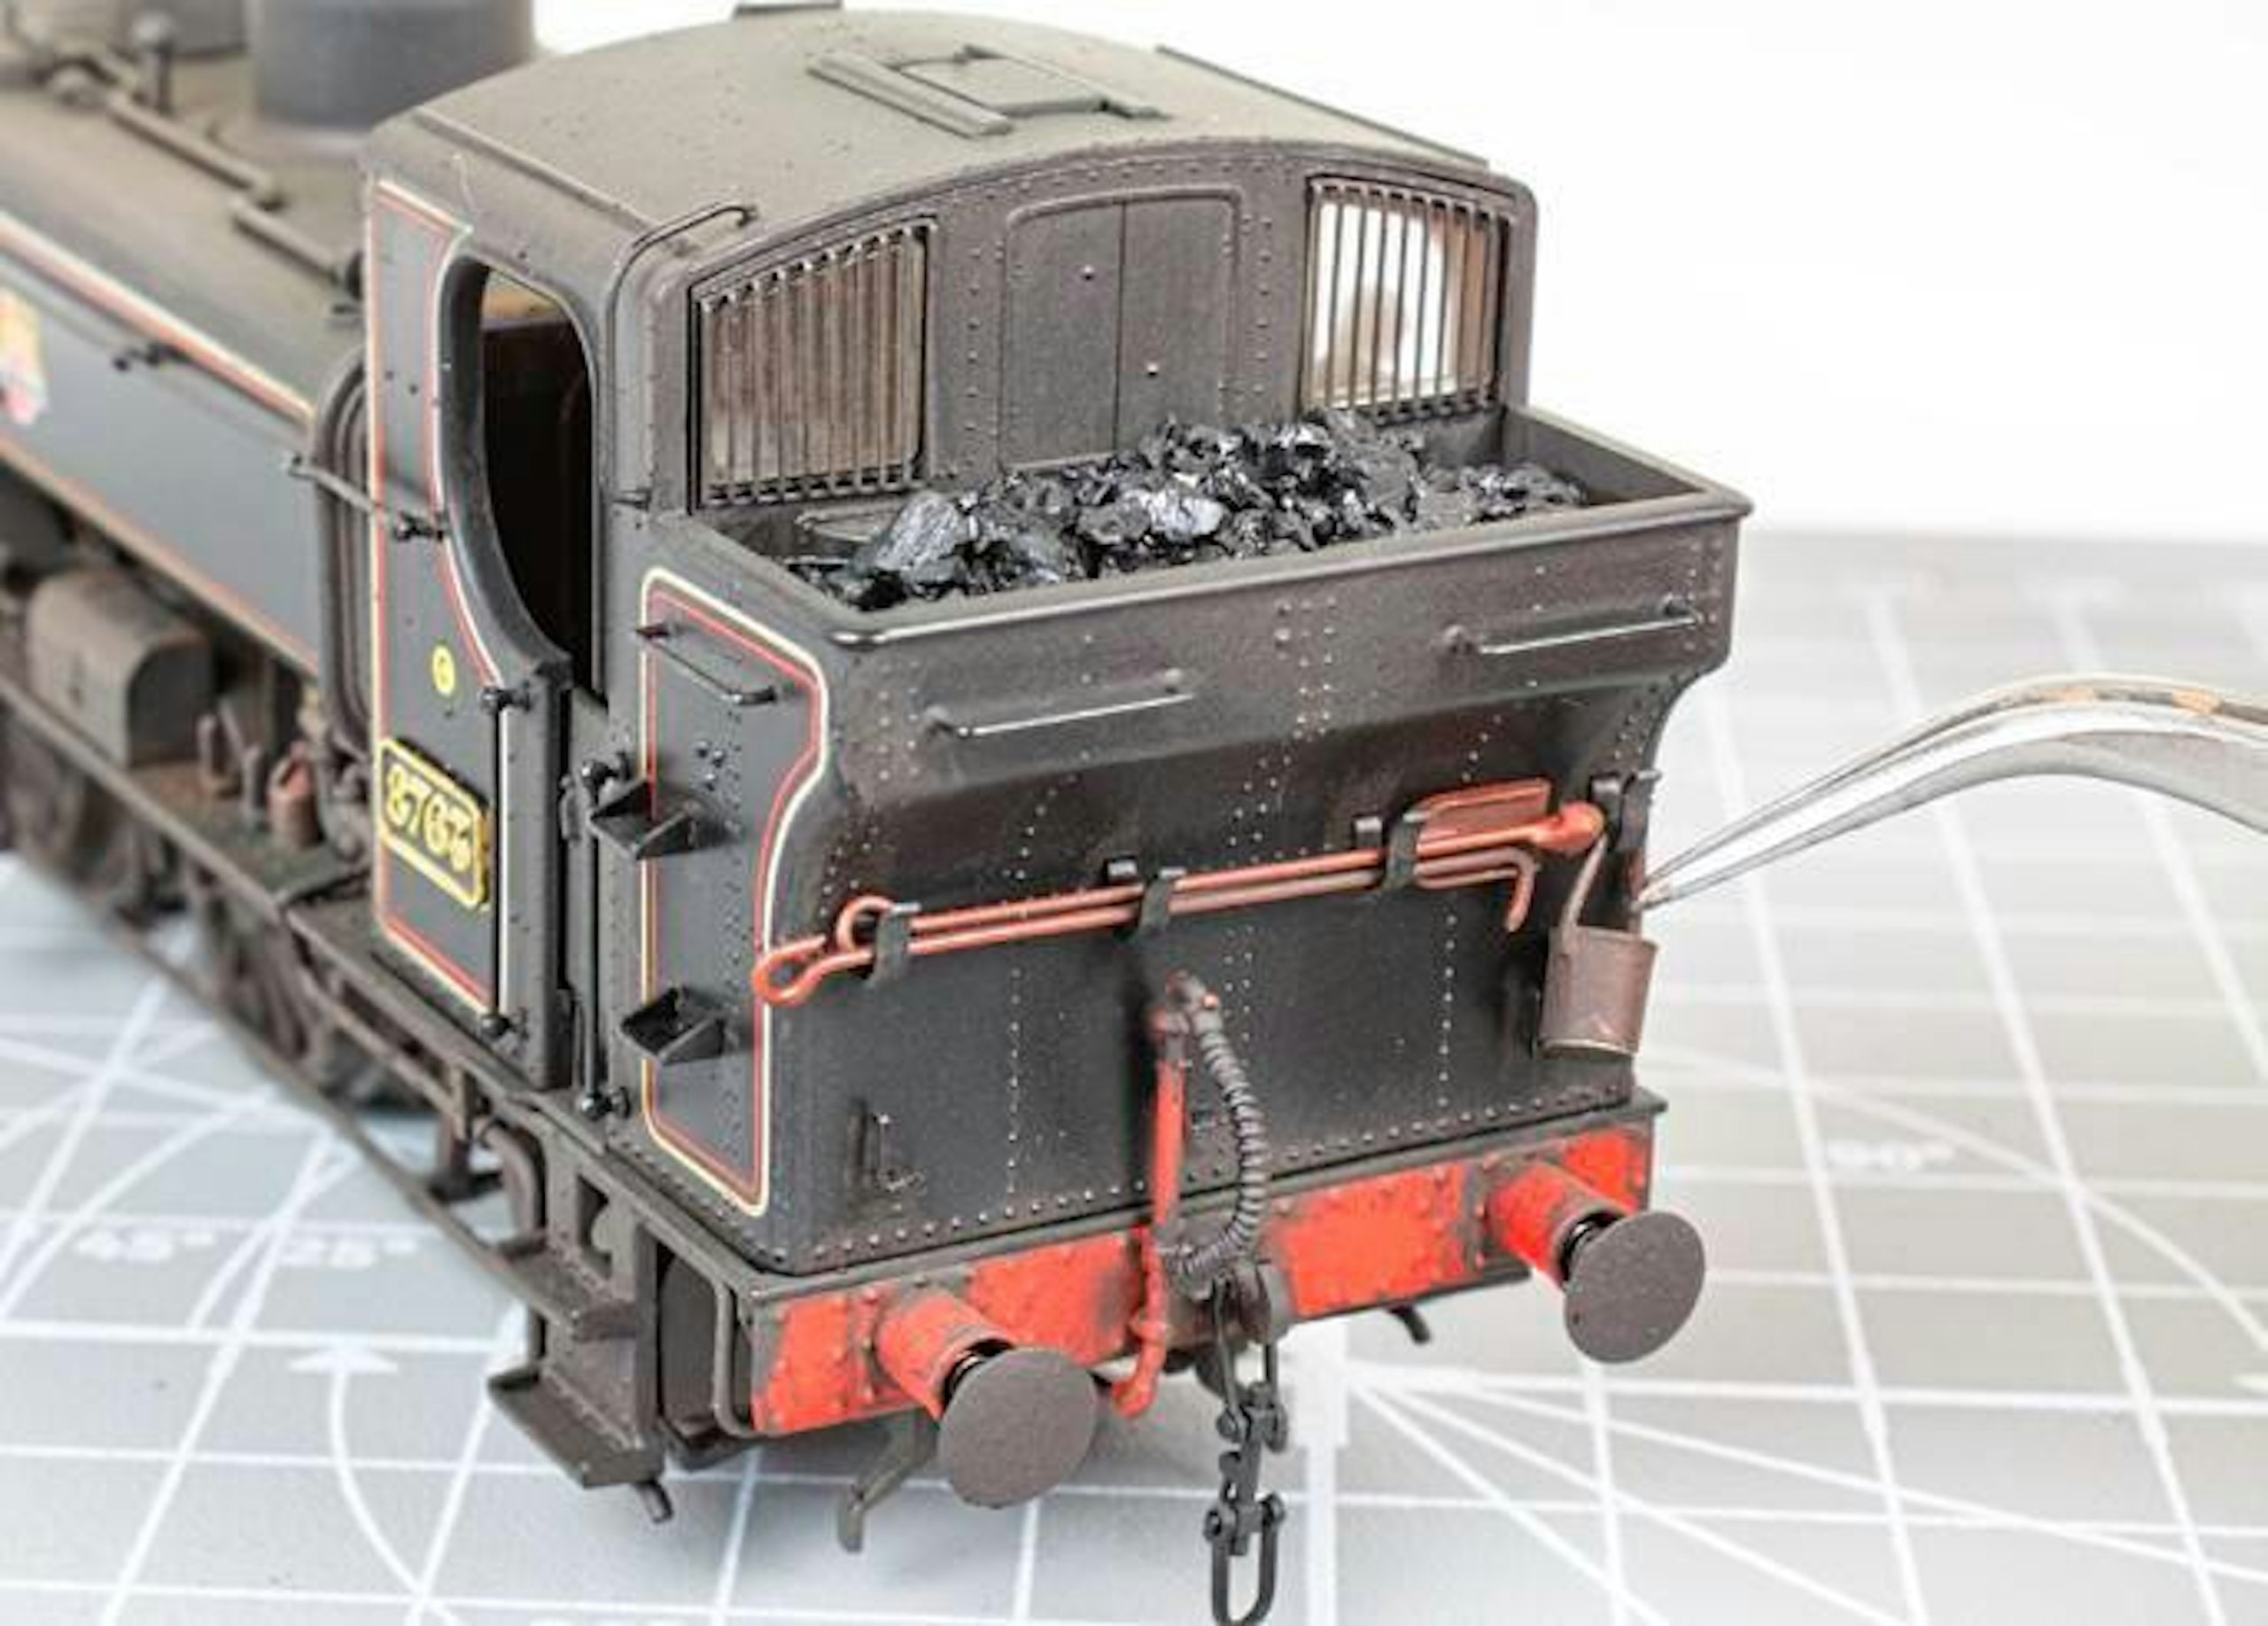
24 A feature of many GWR tanks is the fireman’s set of tools resting in the external brackets. Off-the-shelf options exist, but I made my own from wire – see panel. Once painted, they were fixed in position with tiny drops of PVA glue.
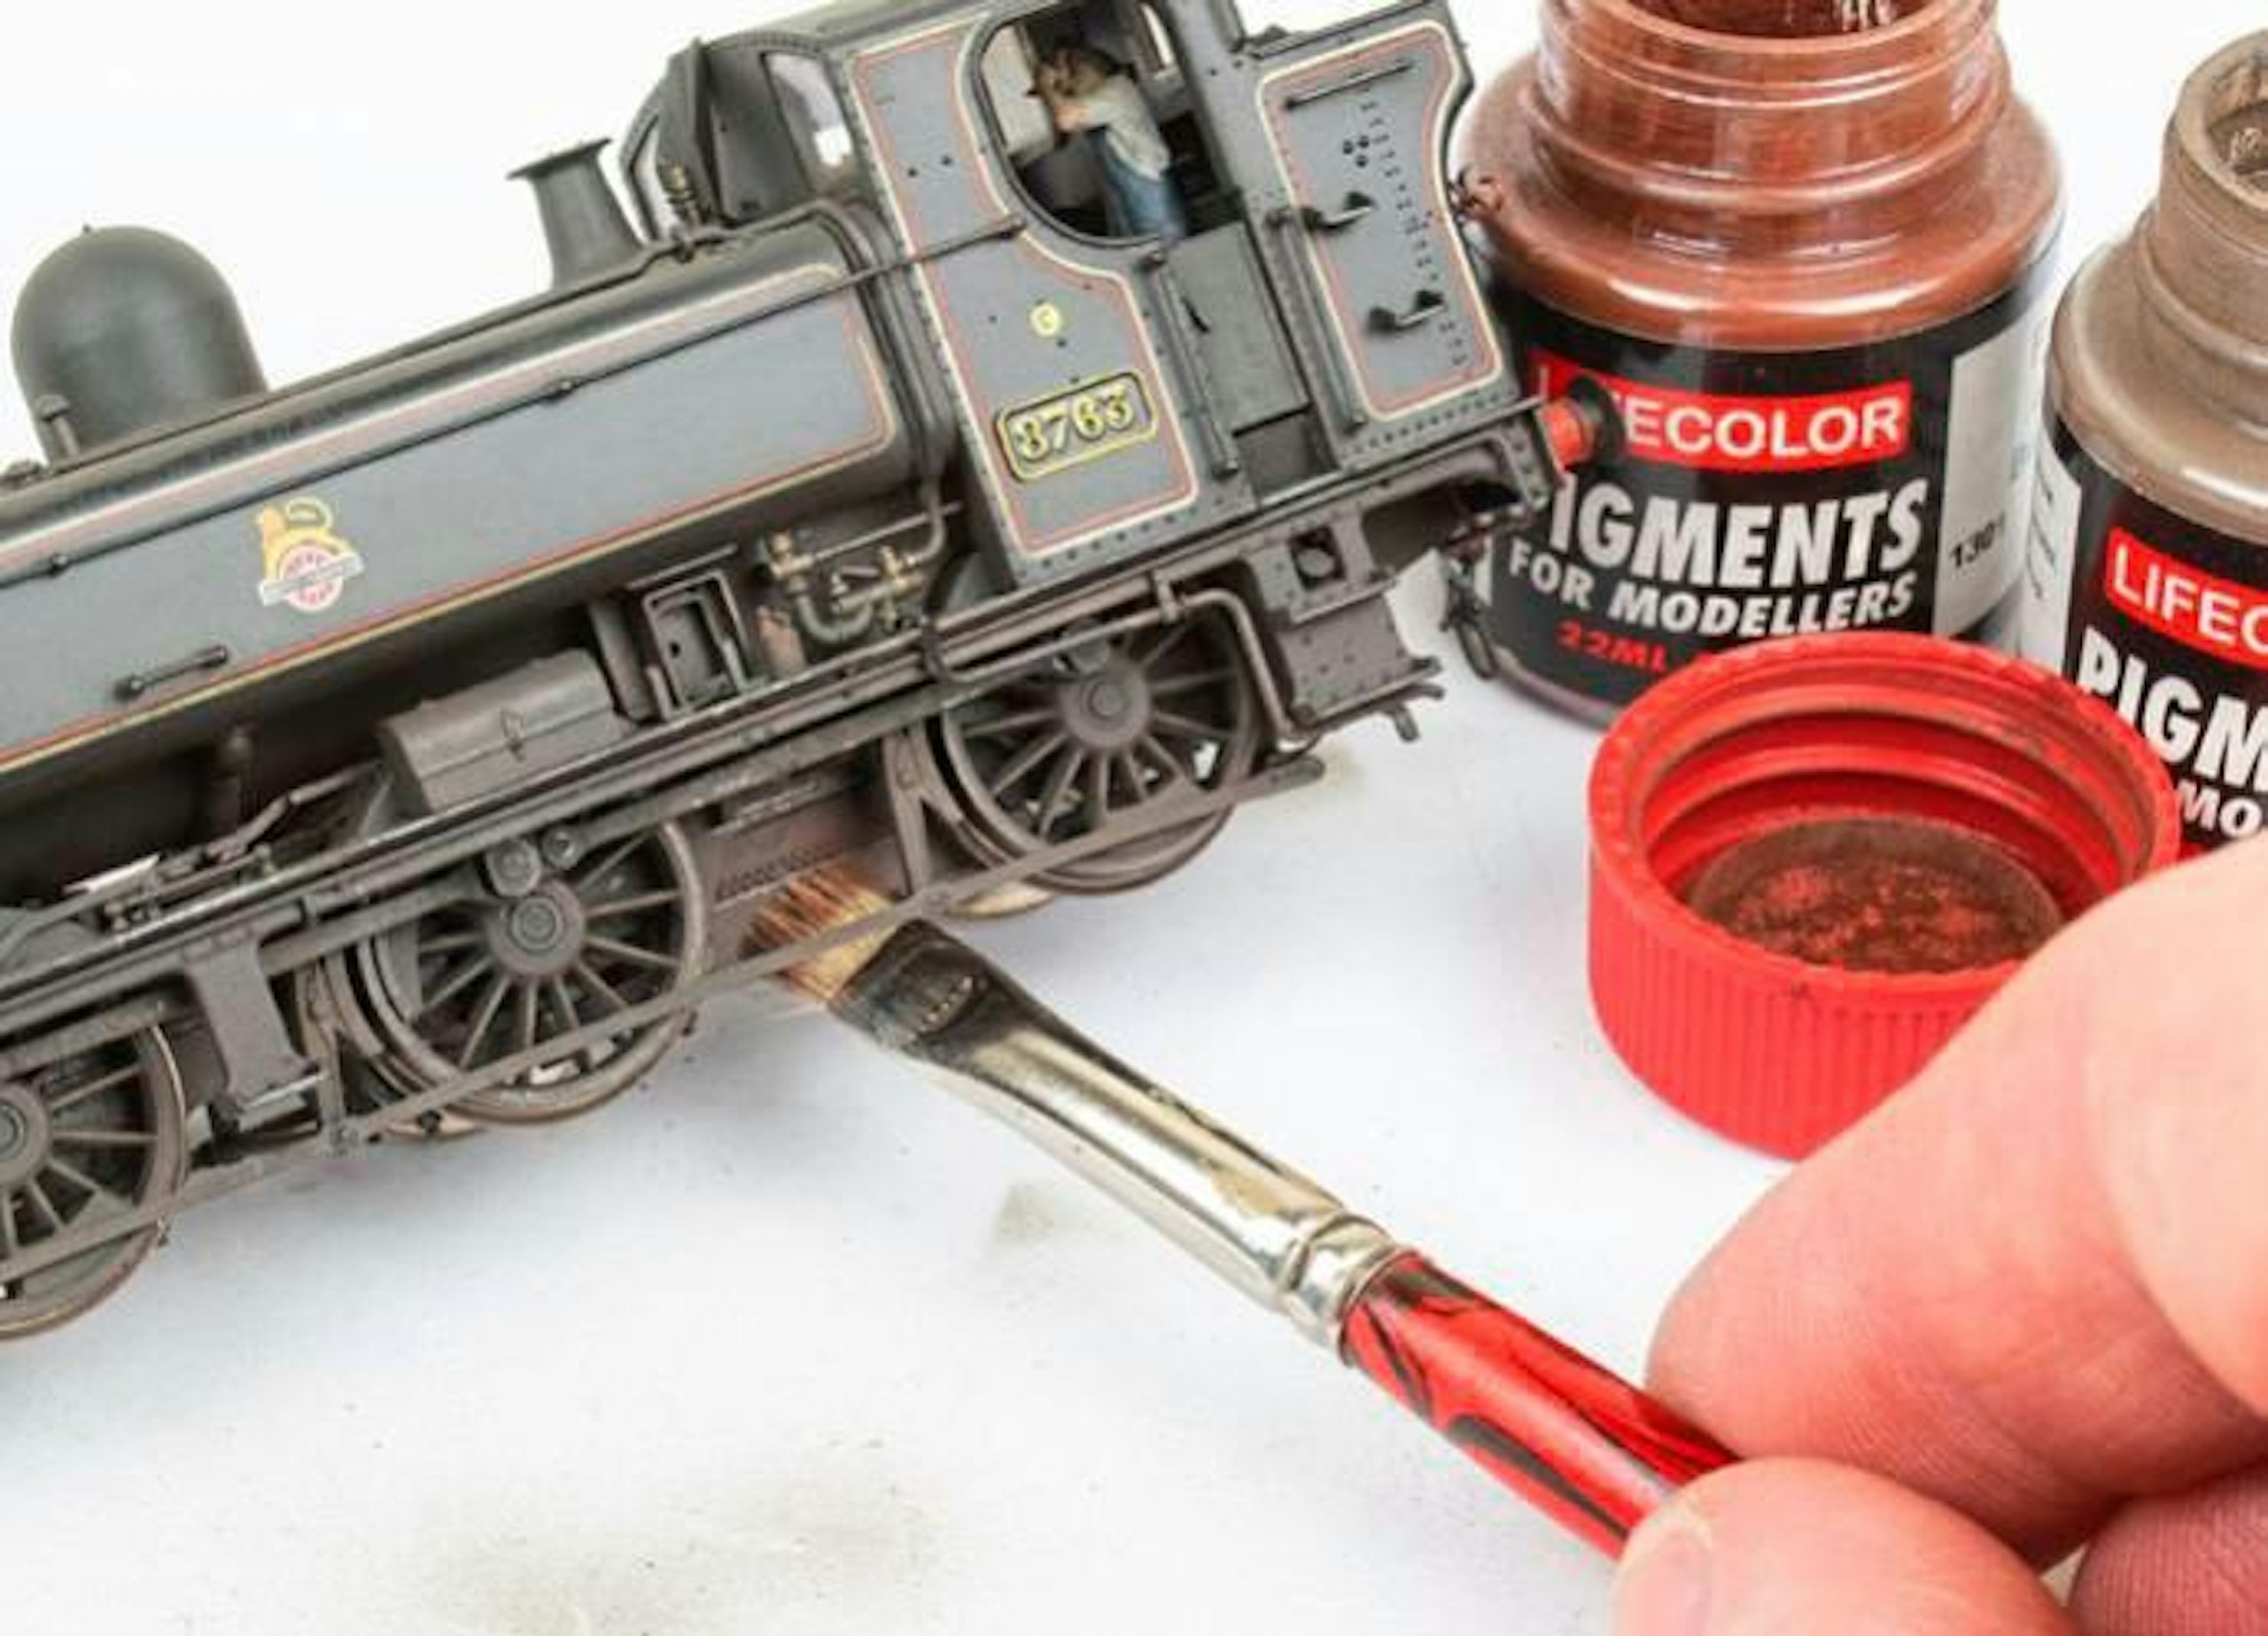
25 LifeColor PG107 Eroding Burnt Rust dry pigment was brushed onto the sides of the ashpan with a dry, stiff-bristled brush. Blended with some PG101 Dark Golan Earth, the pigments were also added to the brake blocks.
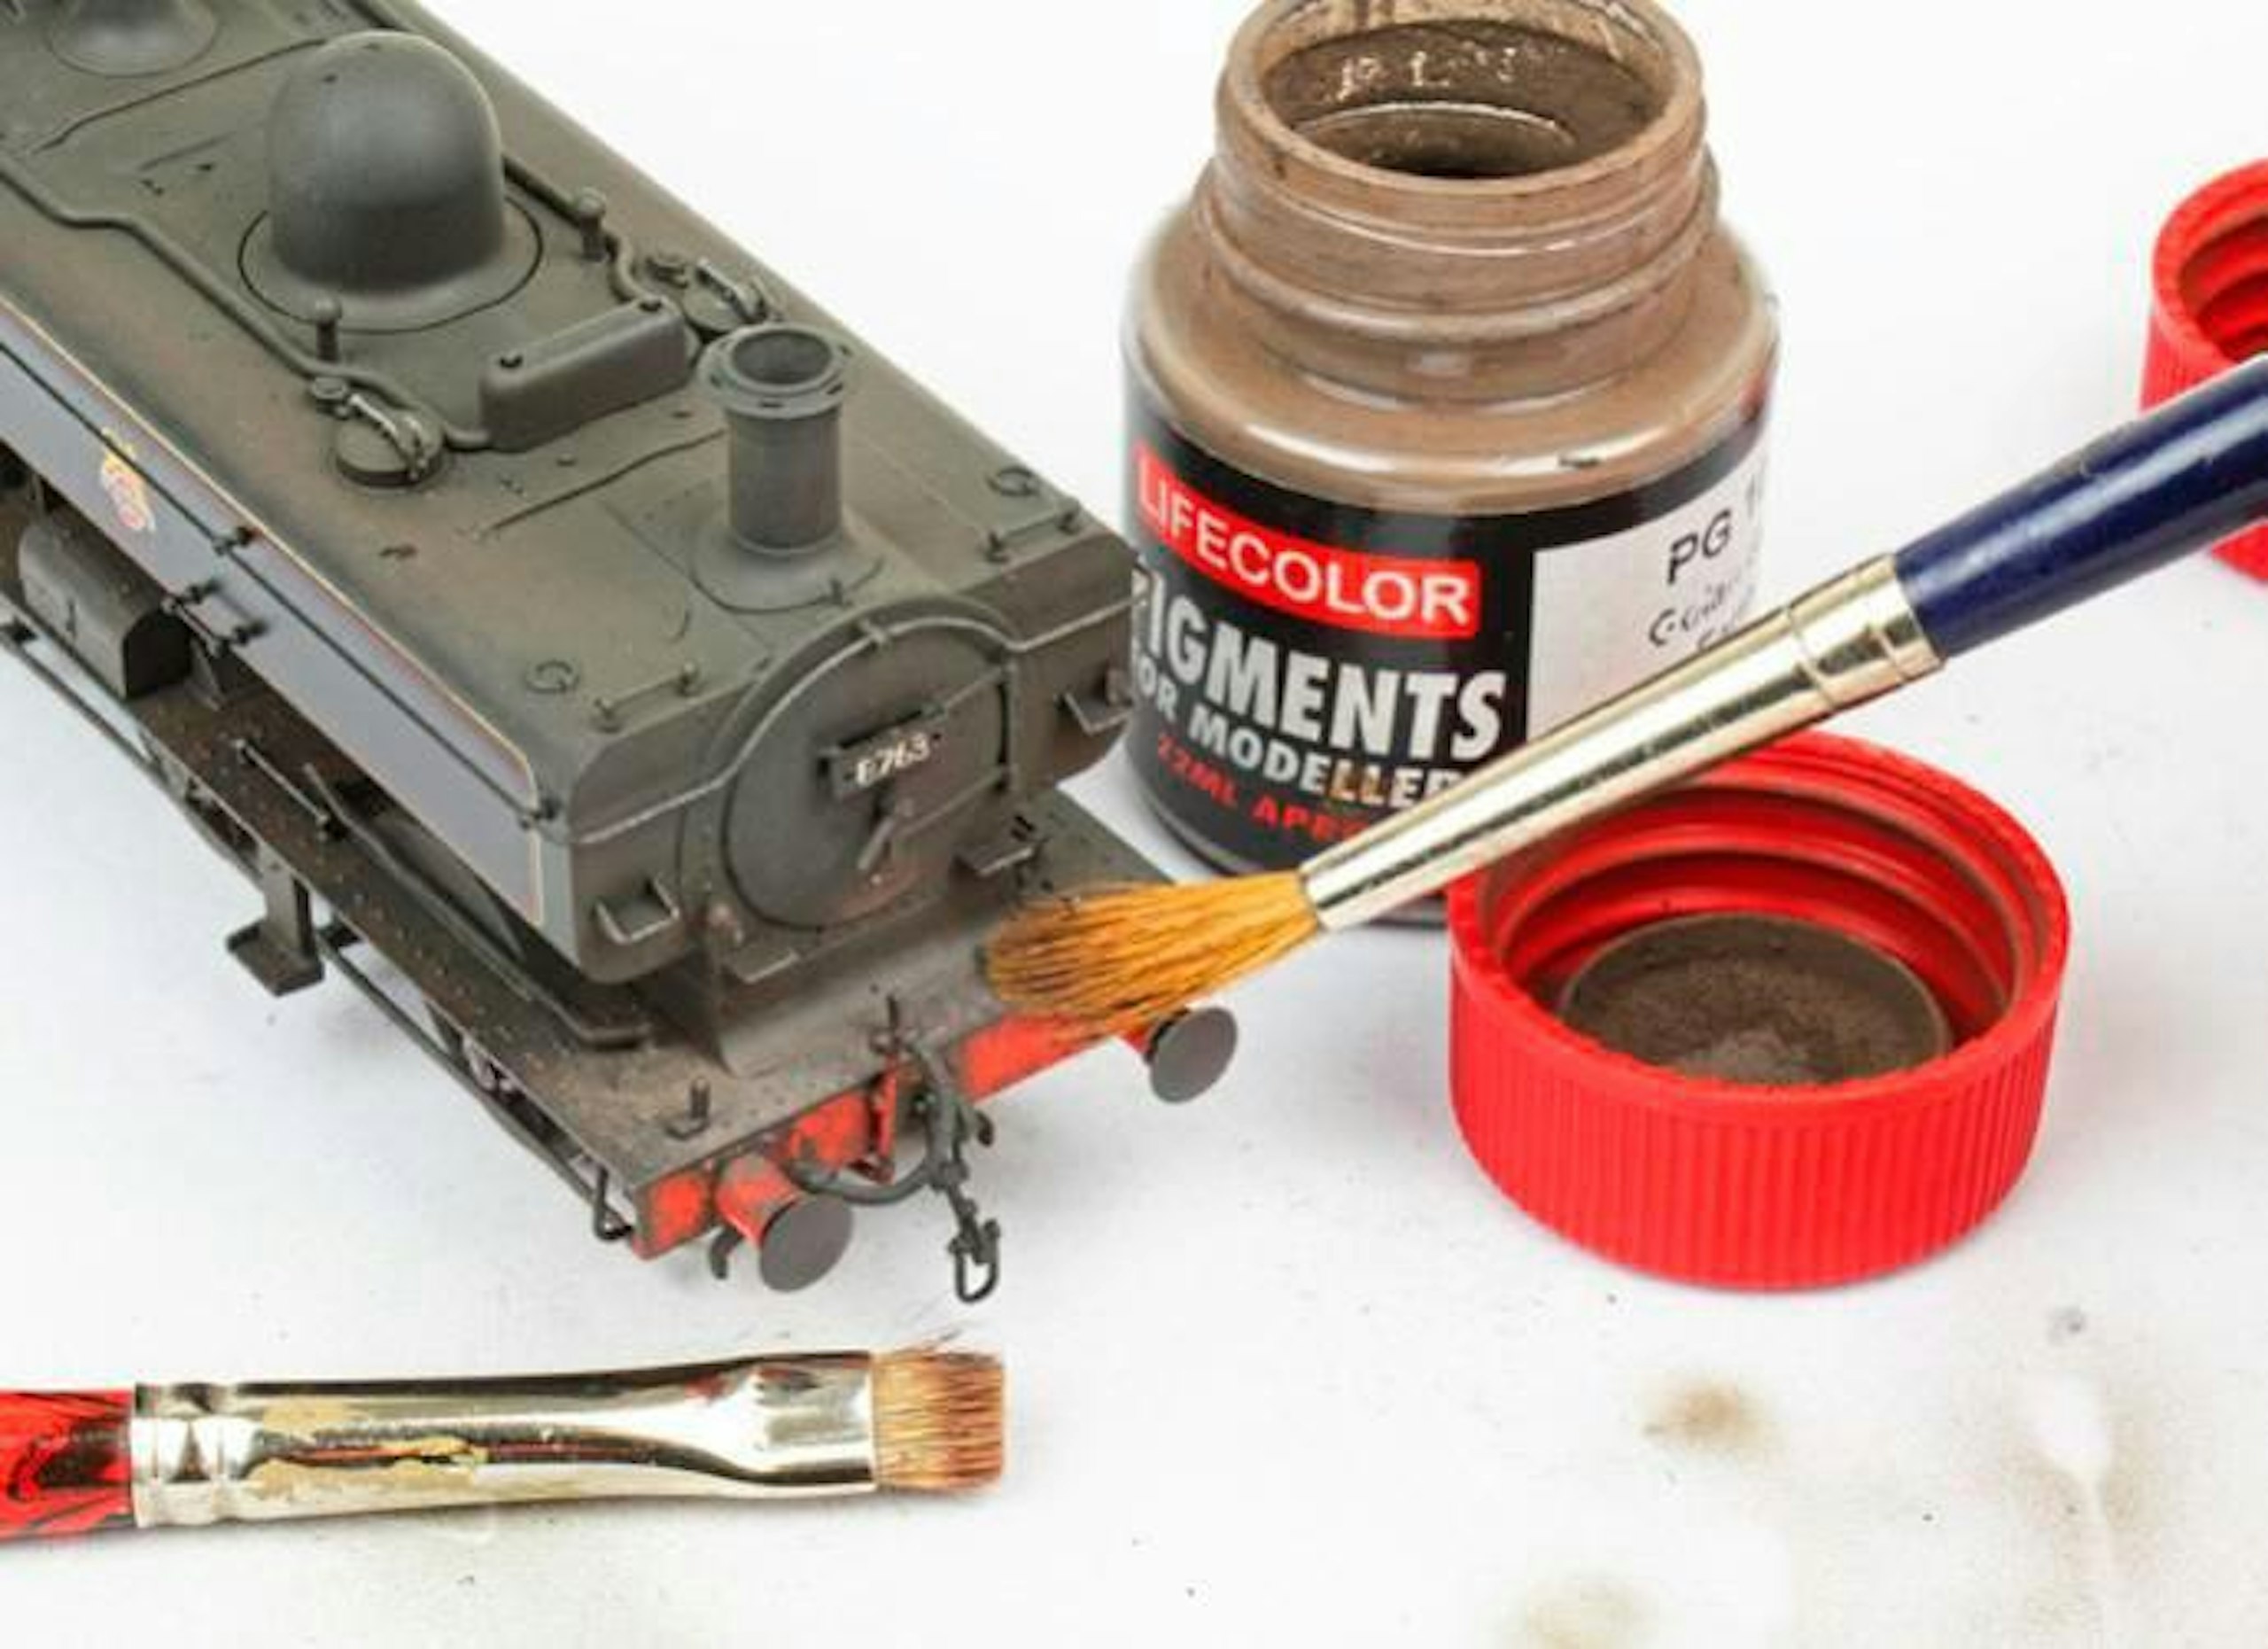
26 The Golan Dark Earth pigment was then dusted onto the running plate below the smokebox door. A brush then swept away excess pigment and created a softer, subtle appearance, blending with the earlier weathering.
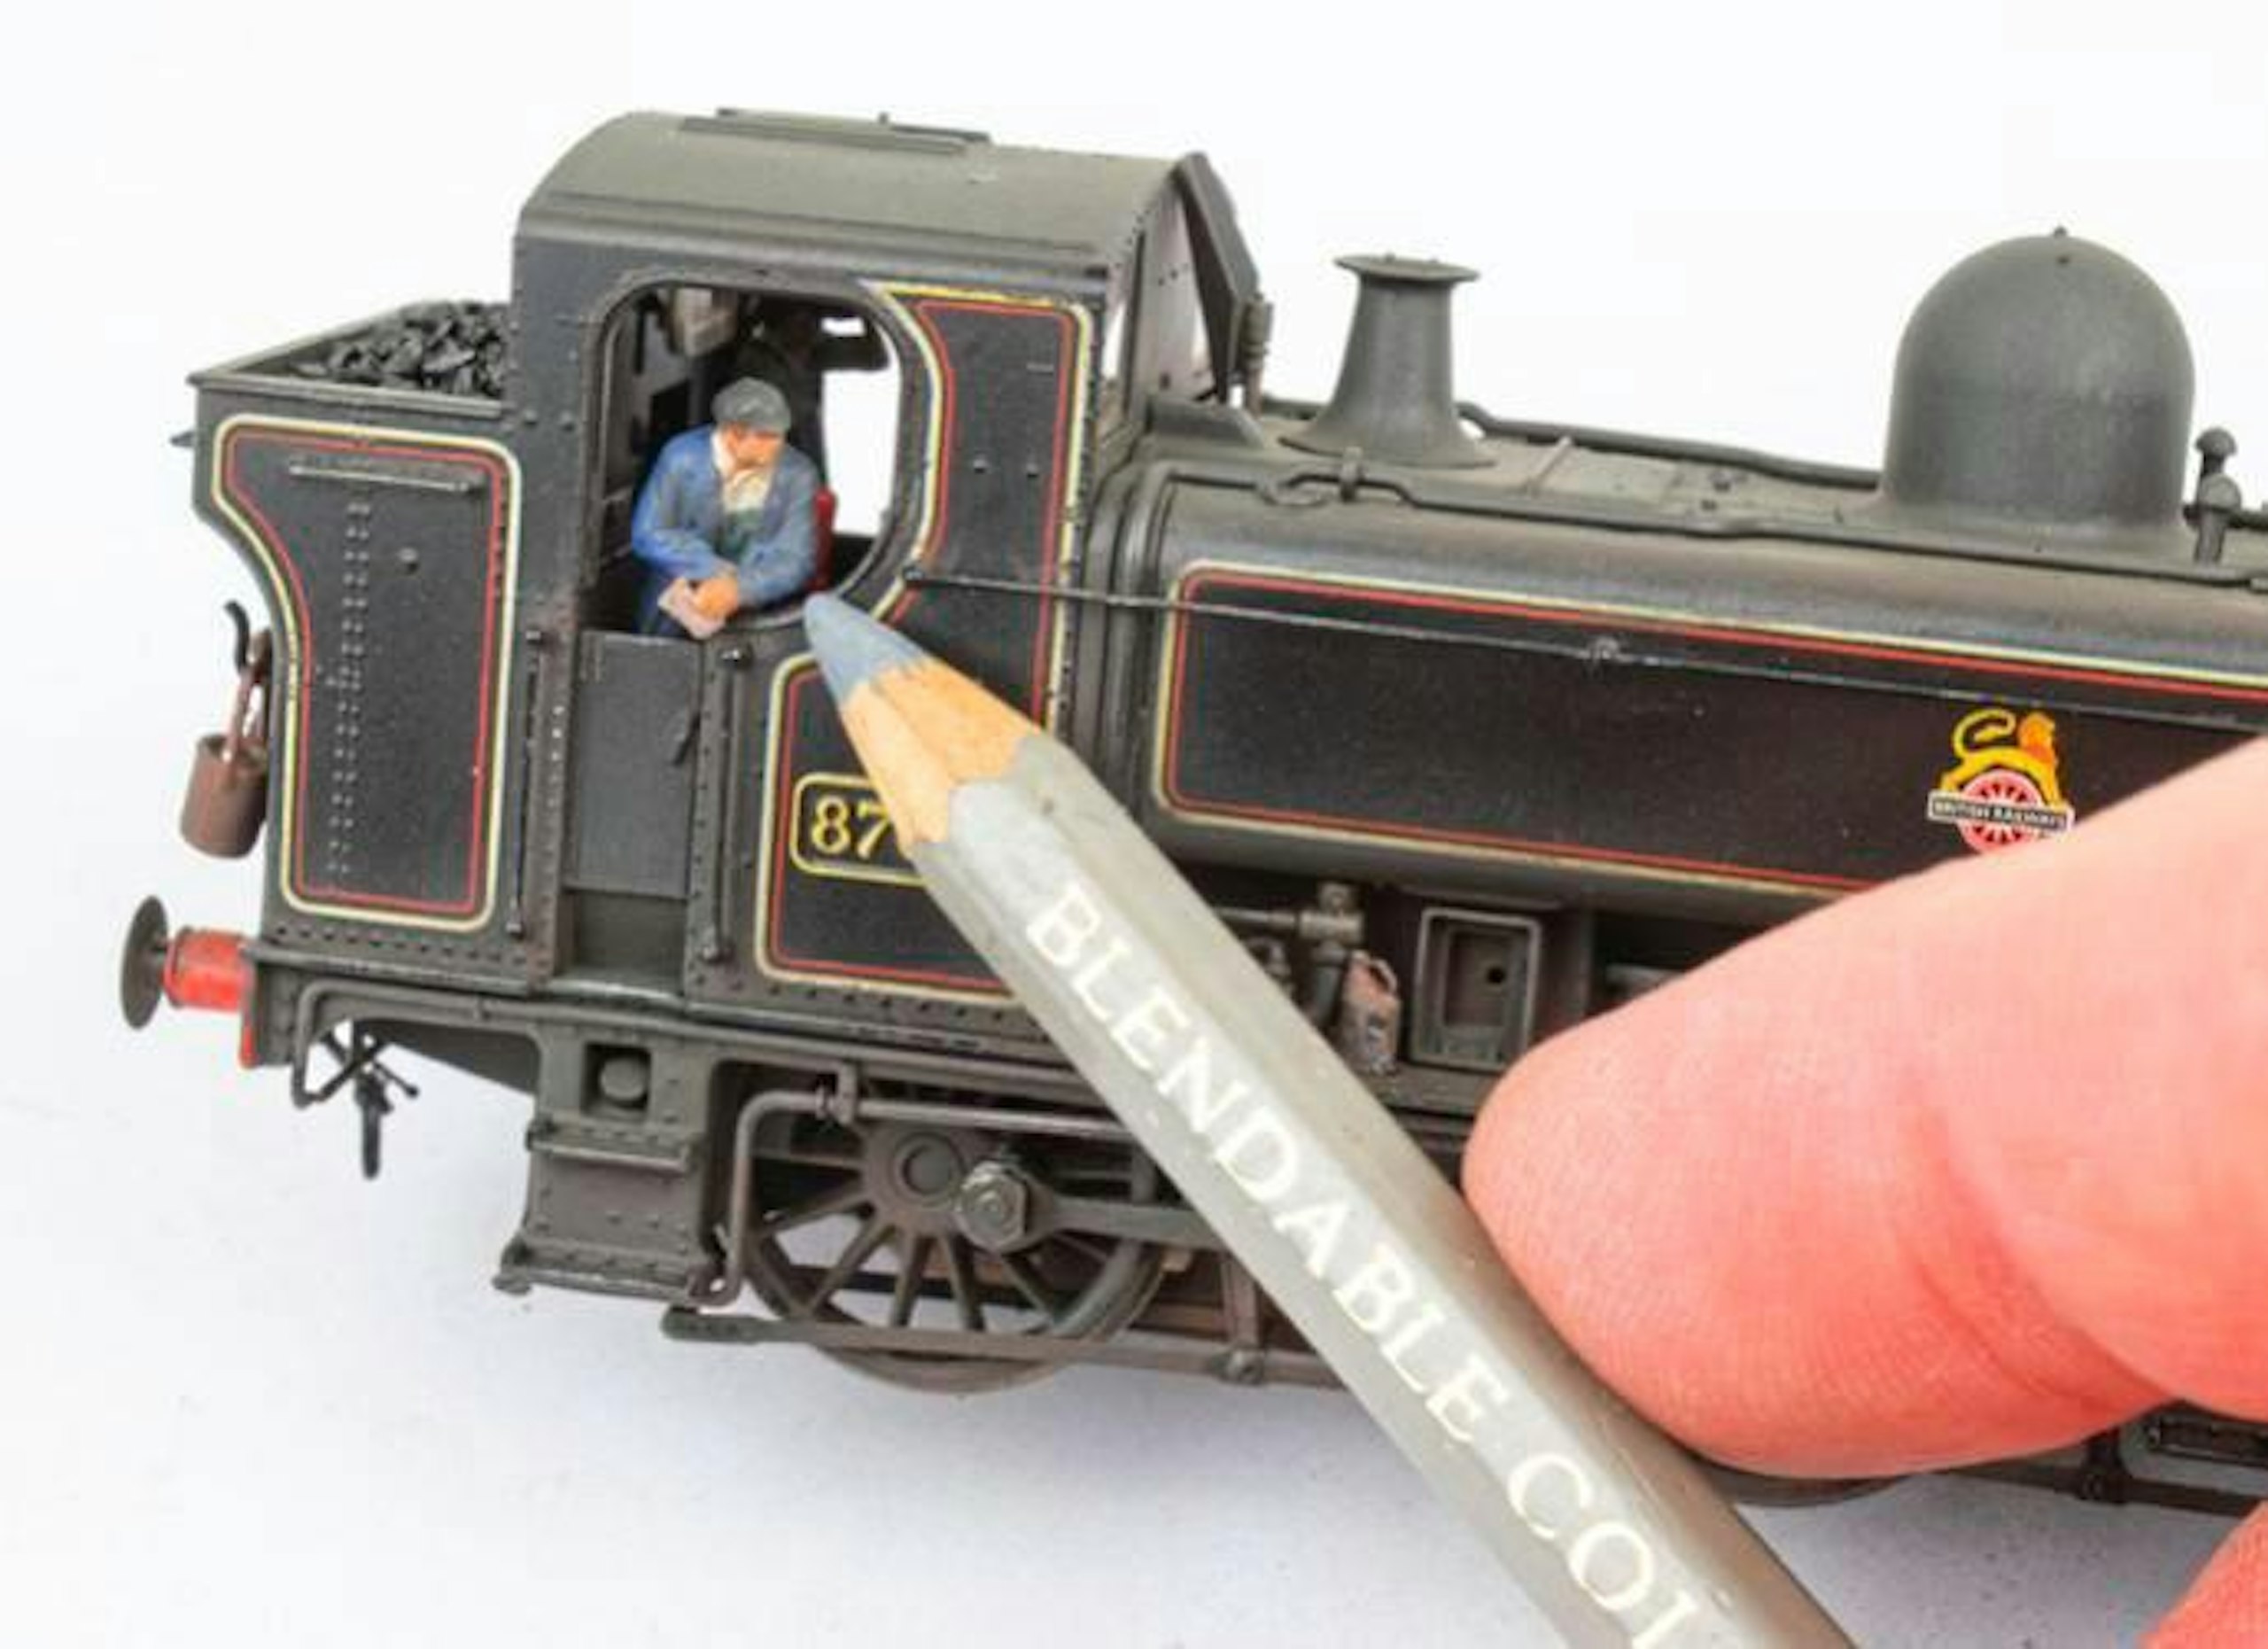
27 There’s no need to seal the dry pigment, as it sticks well to the weathering paint. I then ran the edge of a grey pencil over high-traffic areas such as footsteps, handrails and water filler hatches to mimic burnished metal.
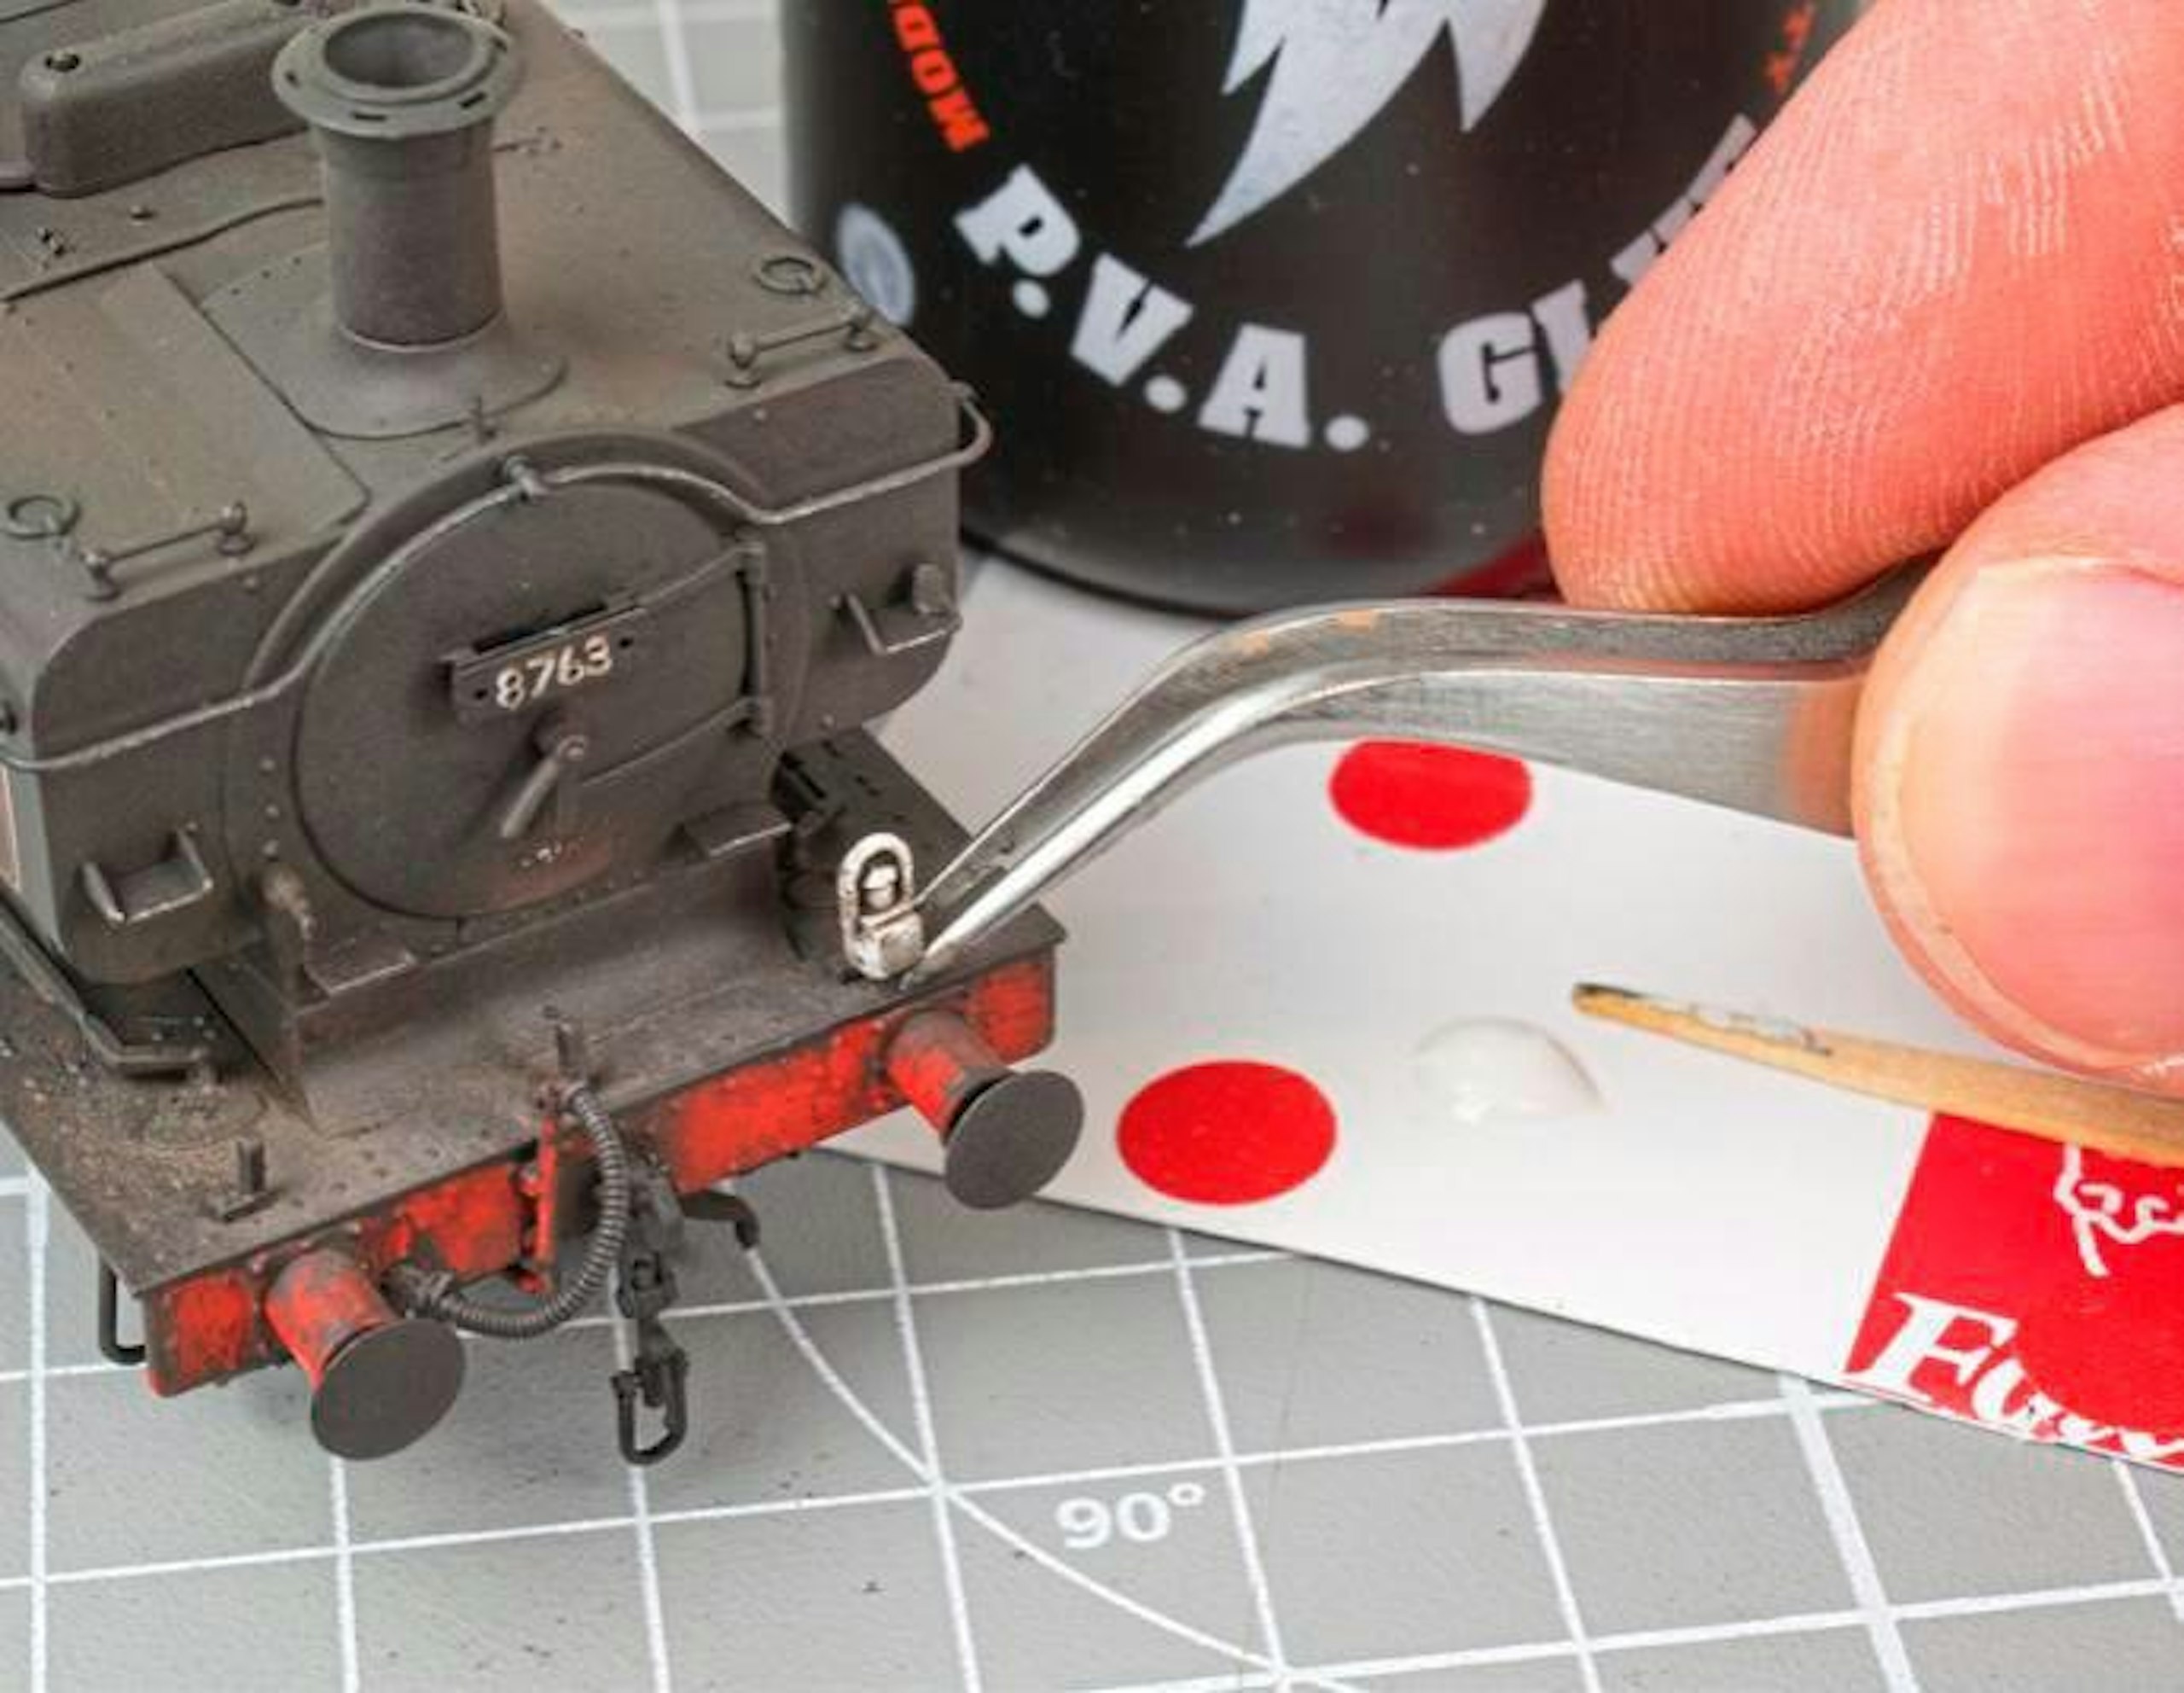
28 The final embellishment was an oil lamp, a pair of which was supplied with the Accurascale model (they’re also available separately from Modelu or Springside). I fixed the lamp with PVA, so it can be removed in future.
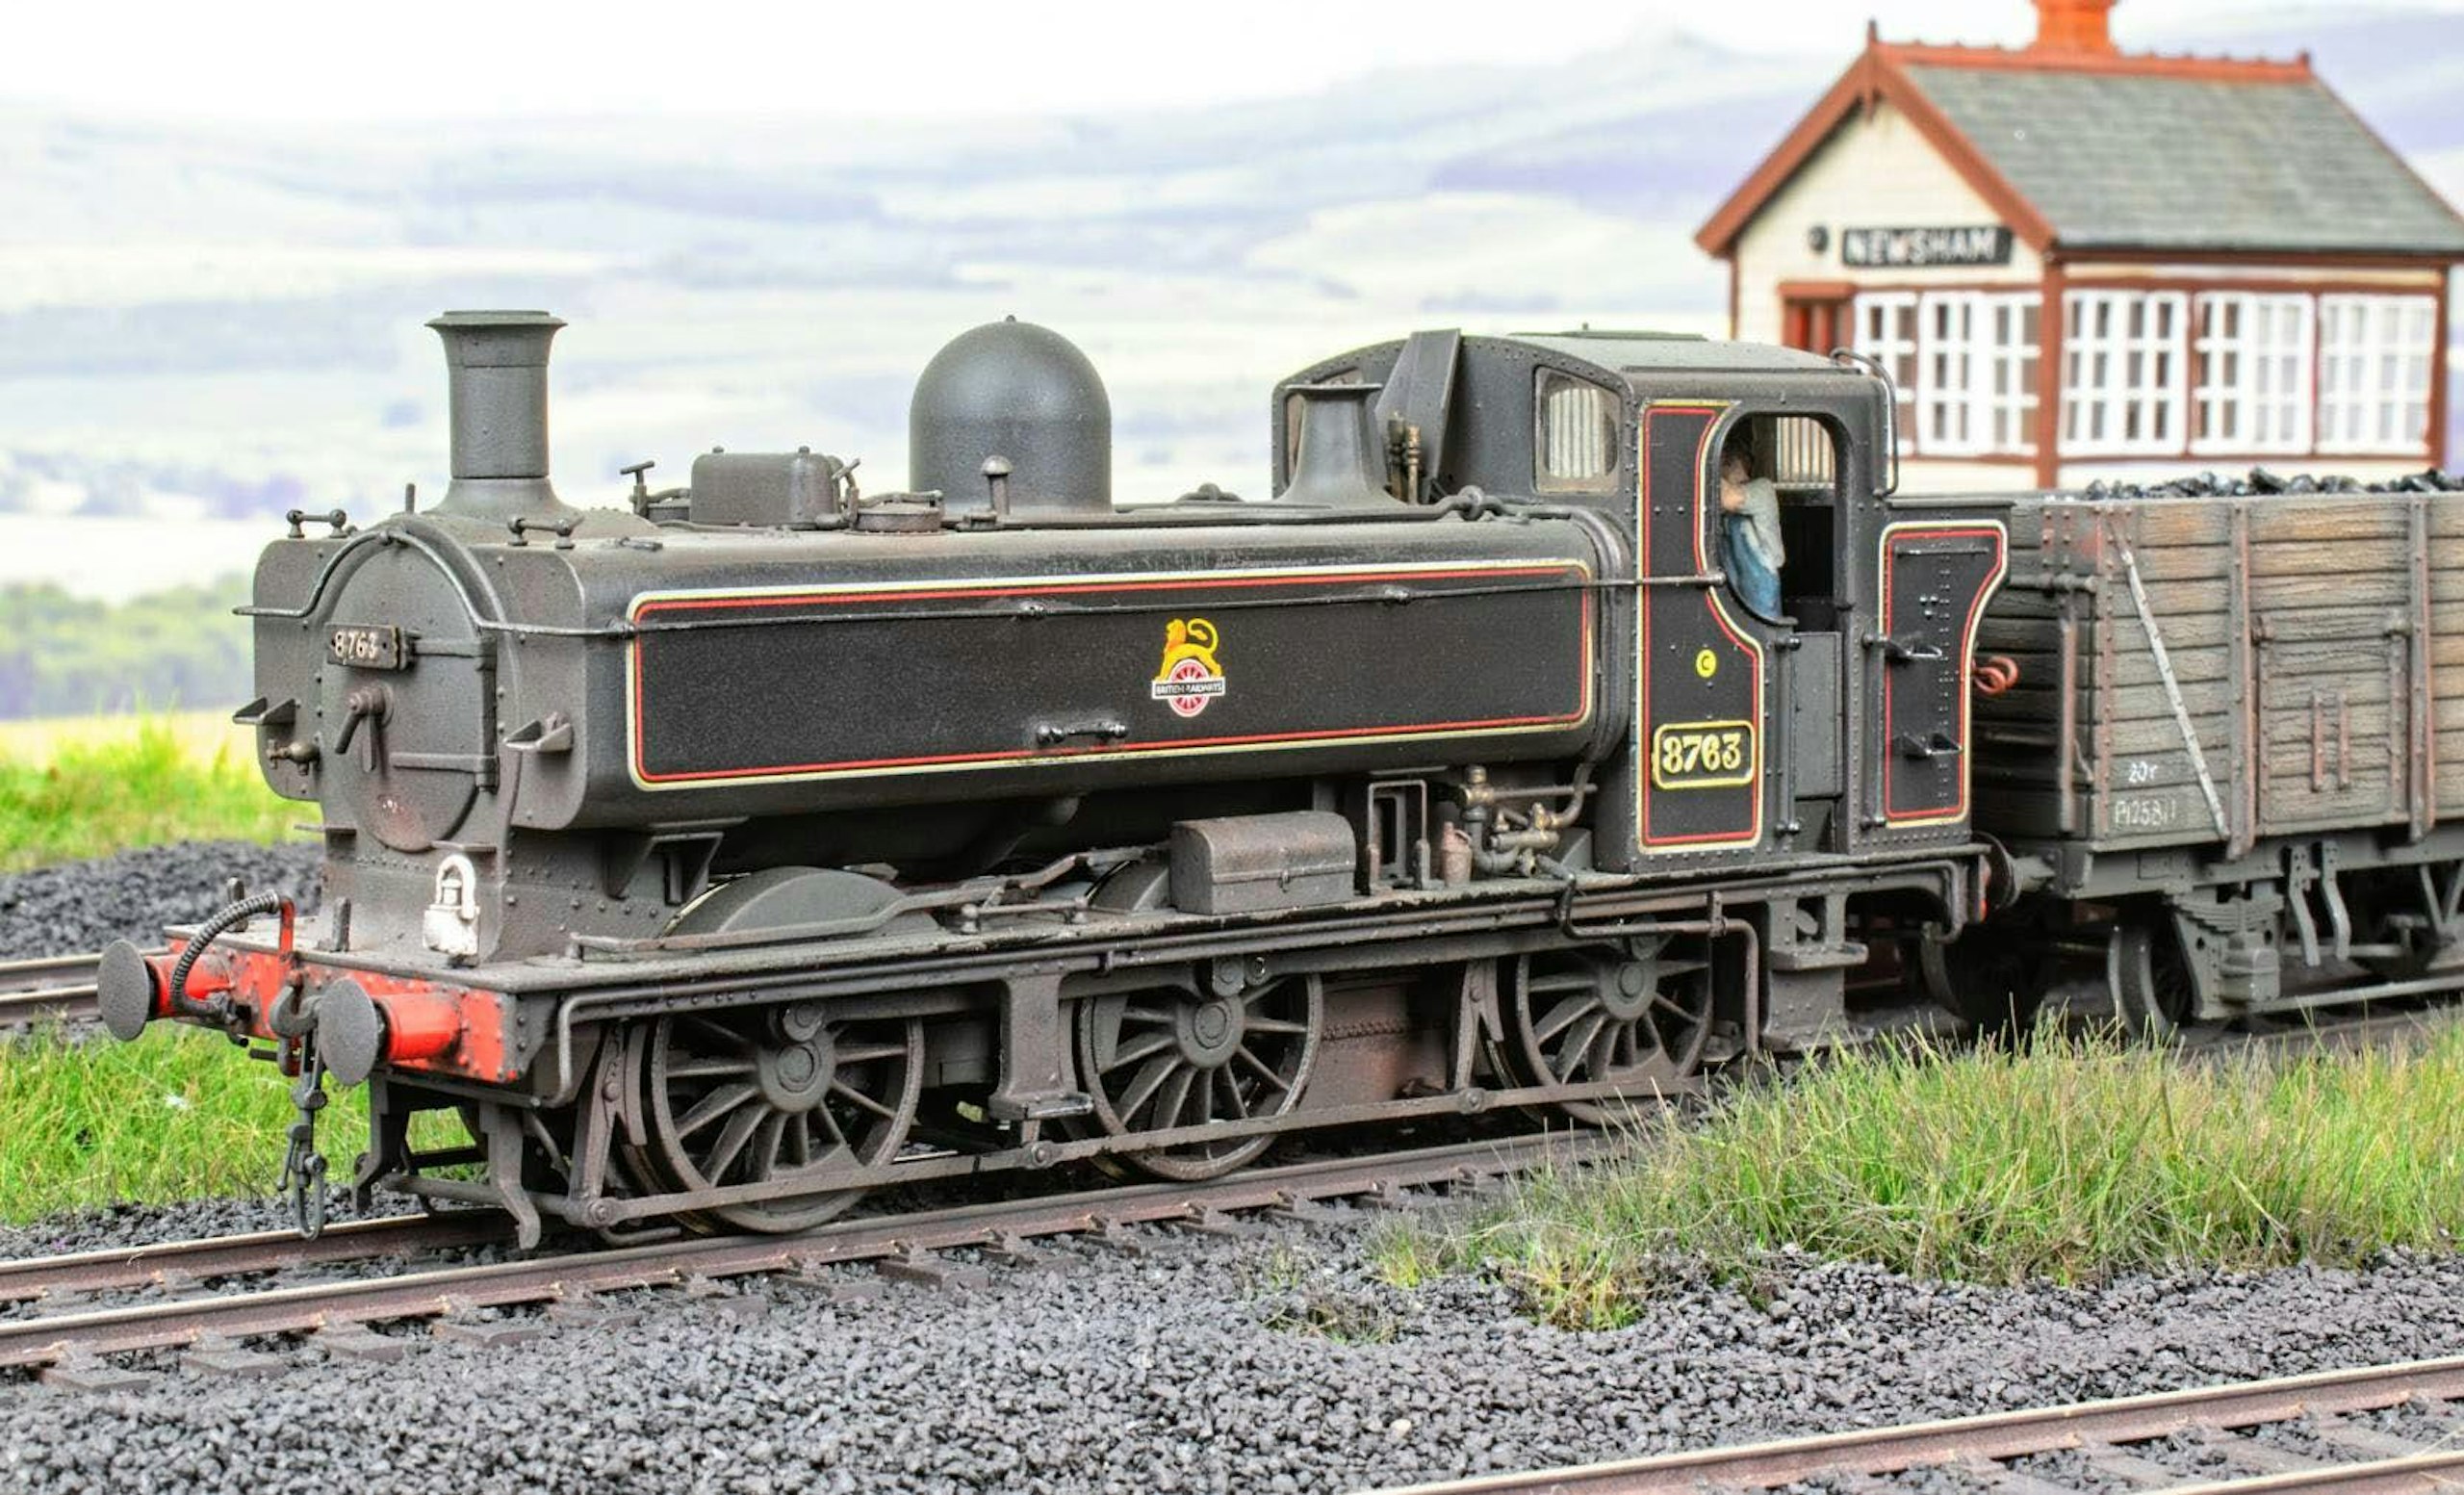
The contrast between the shiny side panels and the gritty appearance of the rest of the locomotive brings the model to life, mirroring how the real 060PTs appeared in real life.
DIY TOOLS
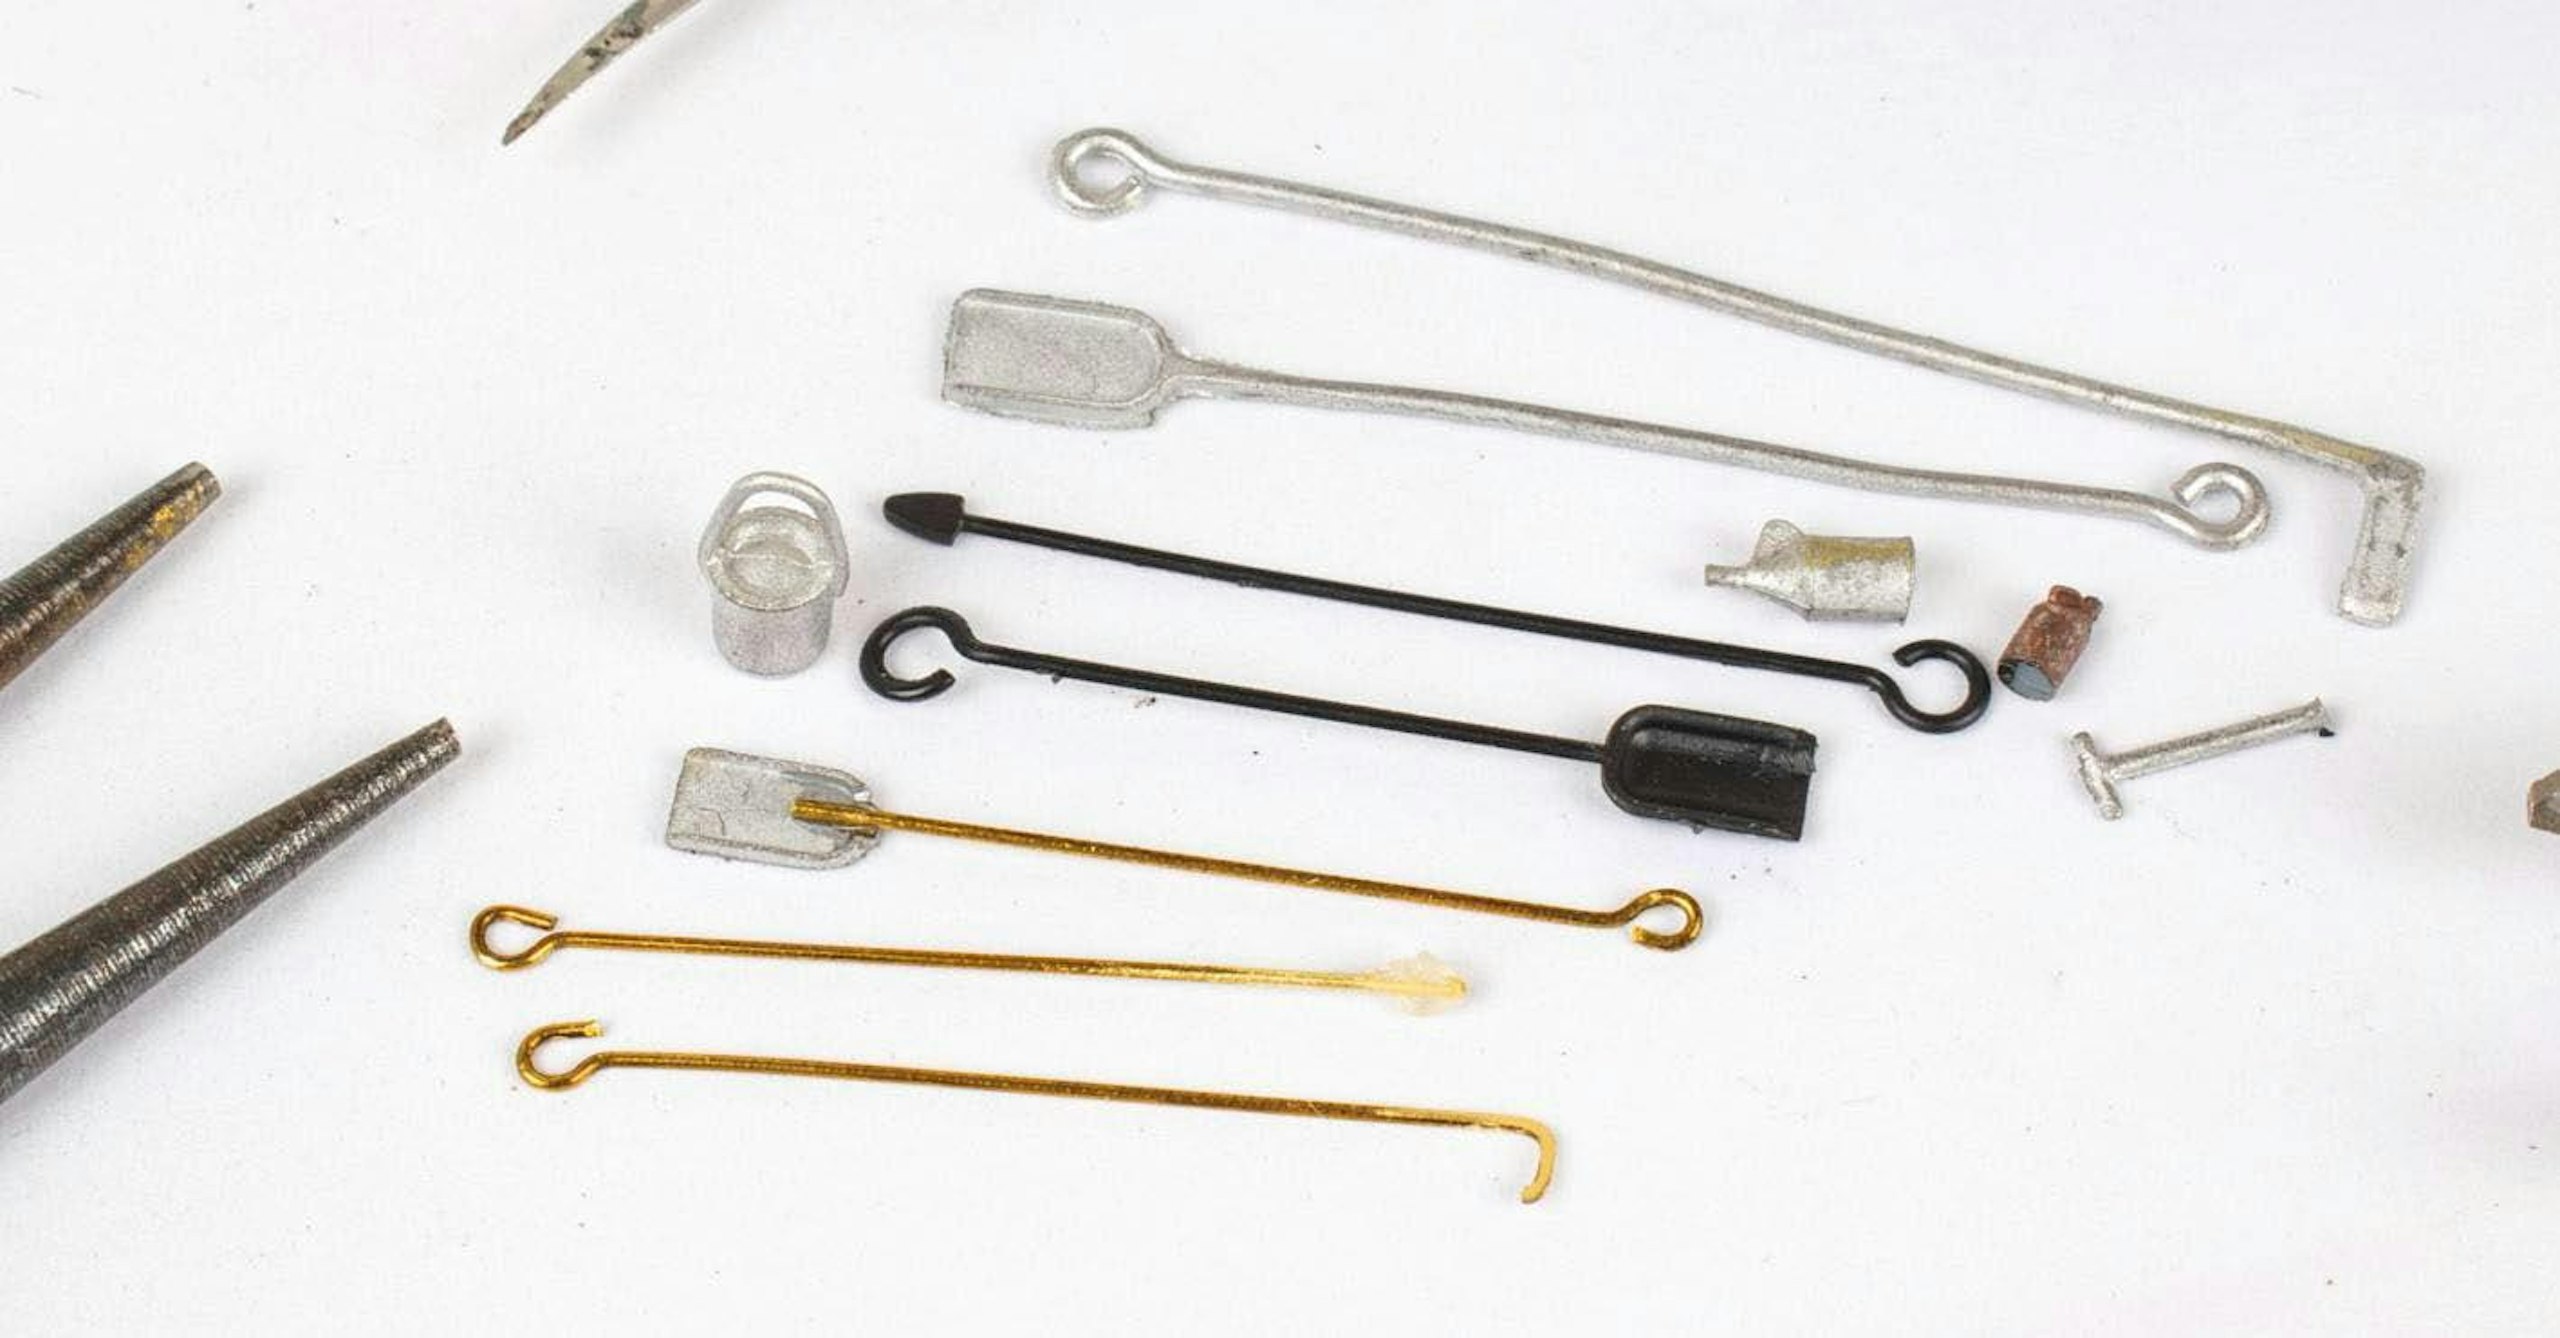
Ready-made fire-iron sets are available from multiple sources, including Springside Models (cast metal) and Modelu (3D-printed). Some RTR models also come with injection-moulded plastic tools, such as Model Rail’s ‘16XX’ – see page 102.
For a more refined appearance (and to save money), I made my own tools from scraps of 0.4mm brass wire, shaped with round-nose pliers. The end of the ‘pricker’ tool was formed from a blob of cyano glue, while the shovel blade came from a broken cast metal tool. The tools were painted with brown and red oxide aerosol primers before being installed on the model.
Subscribe to a Model Rail Print+ Subscription today and you'll get instant digital access, PLUS FREE UK delivery so you will never miss an issue.