Workbench
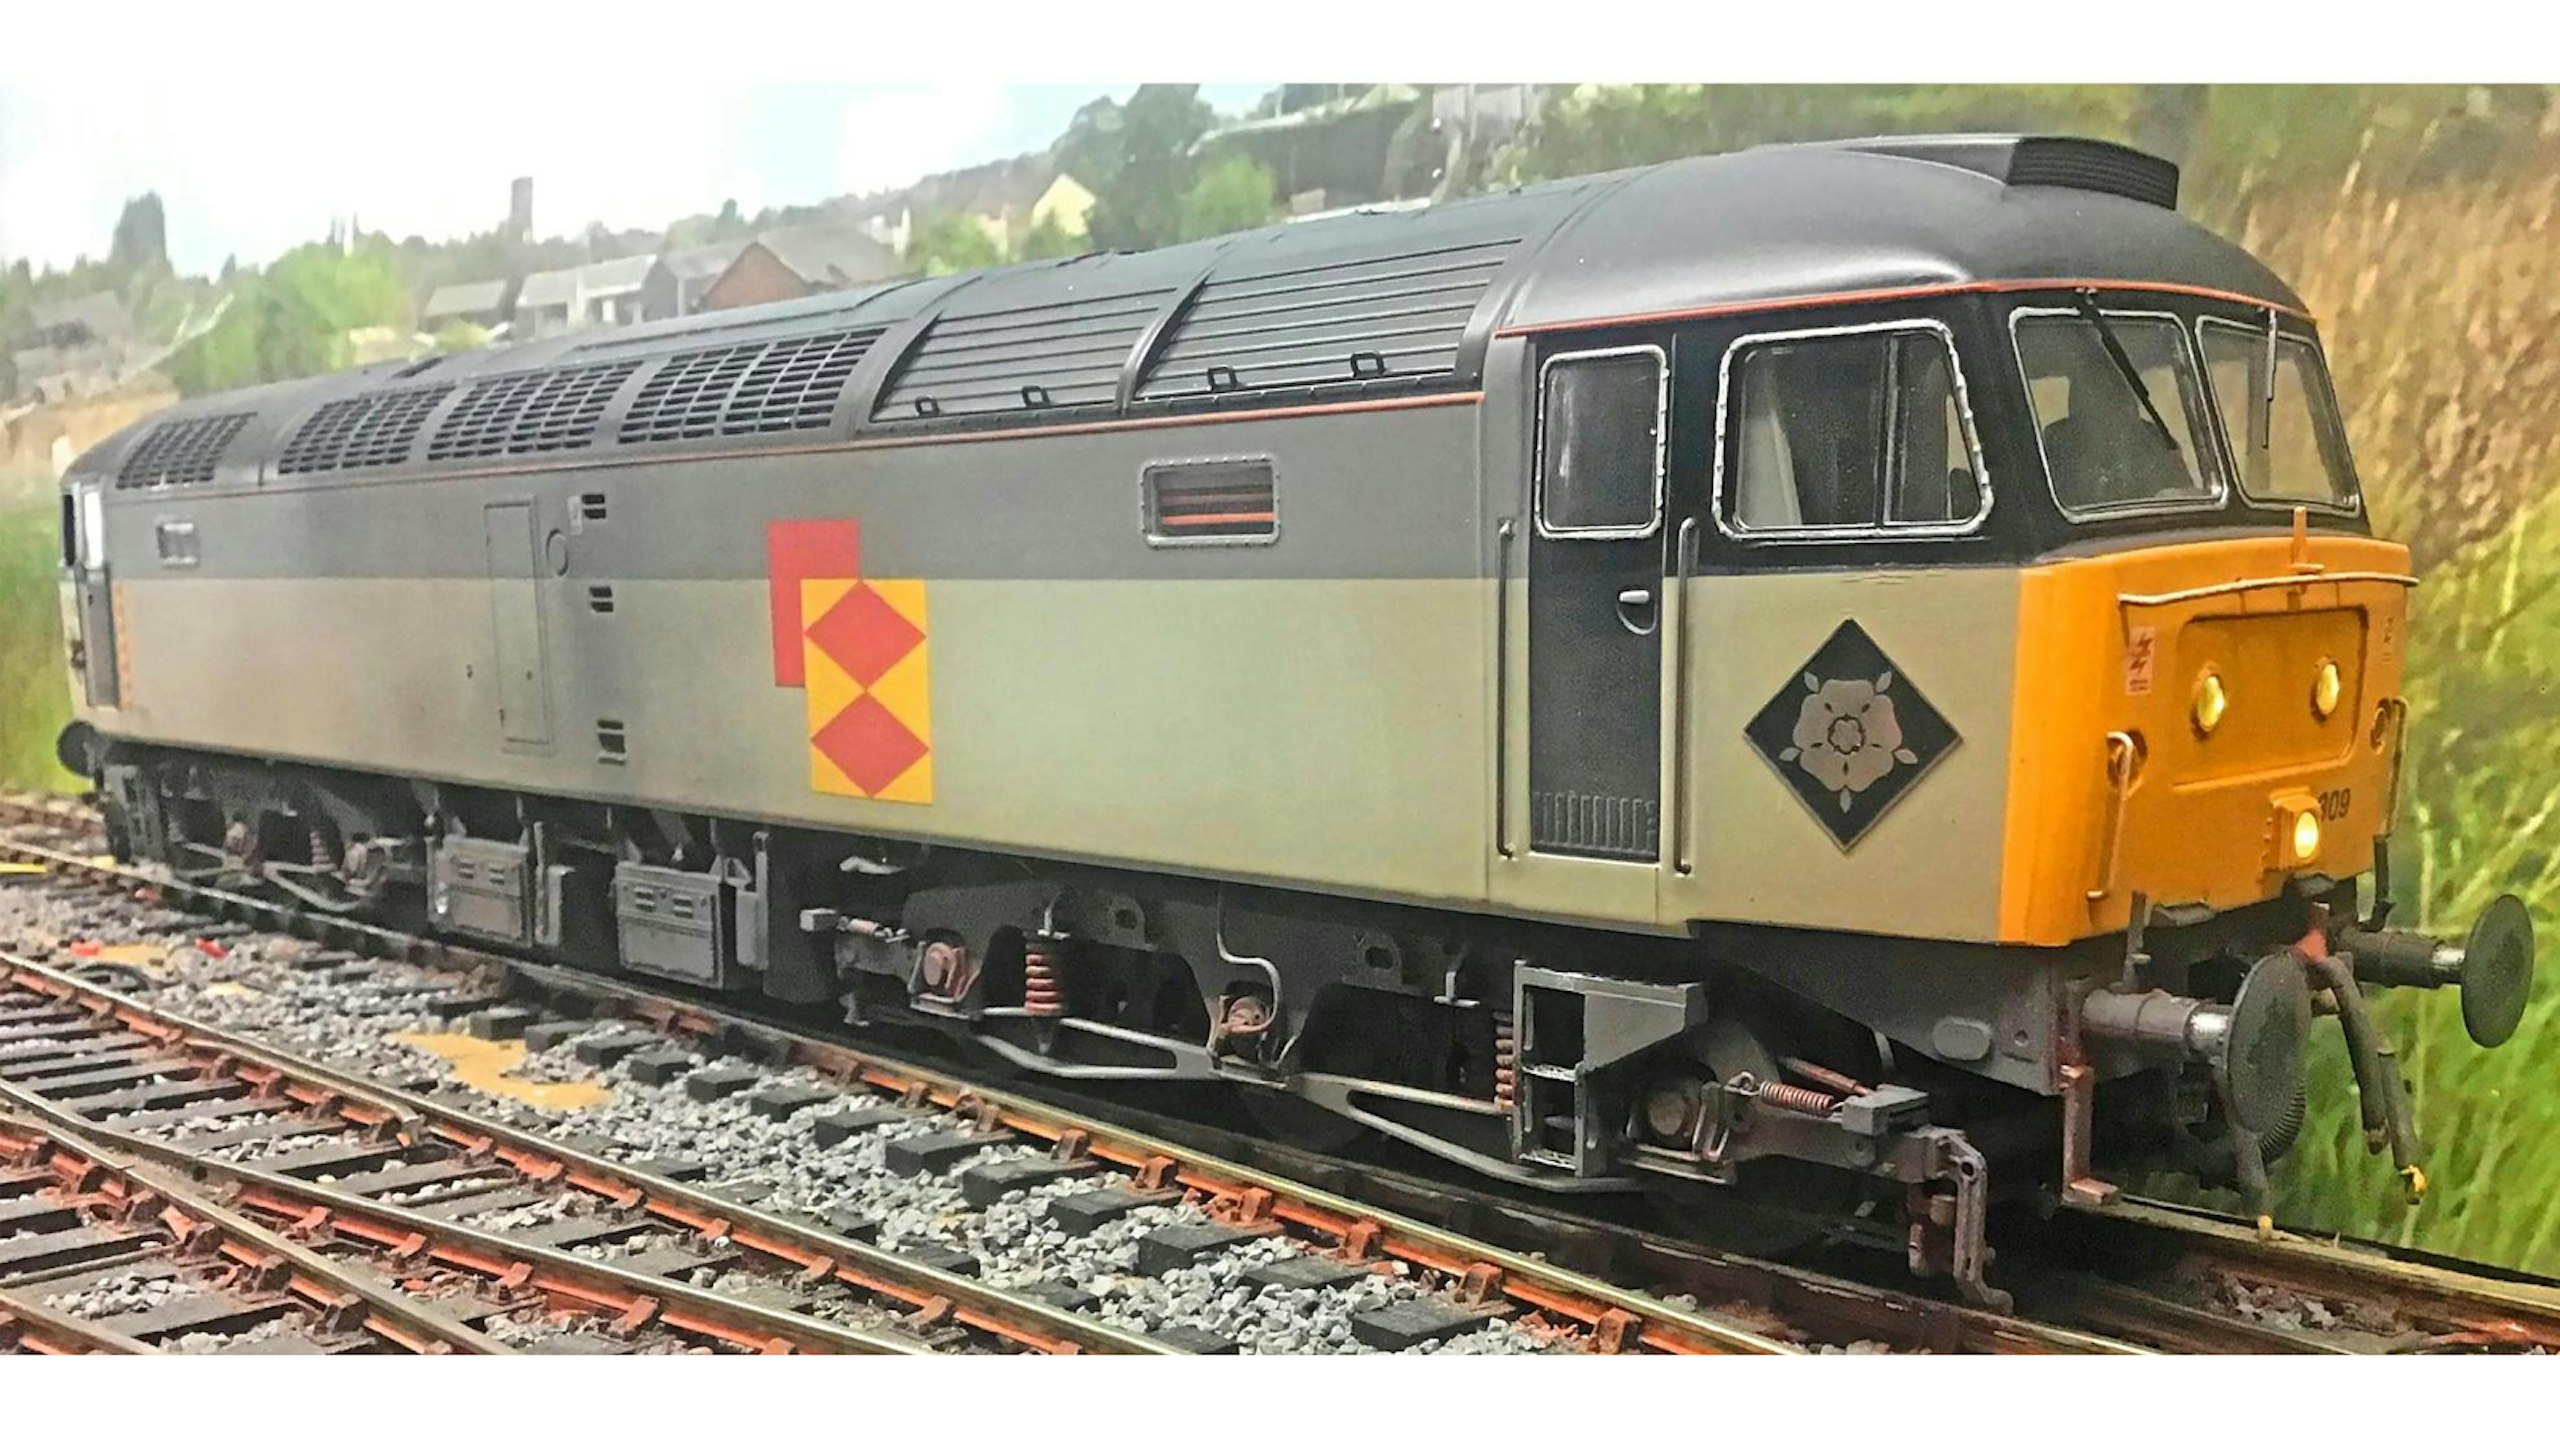
In a bid to introduce some variety to his Brush Type 4 fleet, Dave Lowery employs a simple conversion kit to represent a common late-BR era modification.
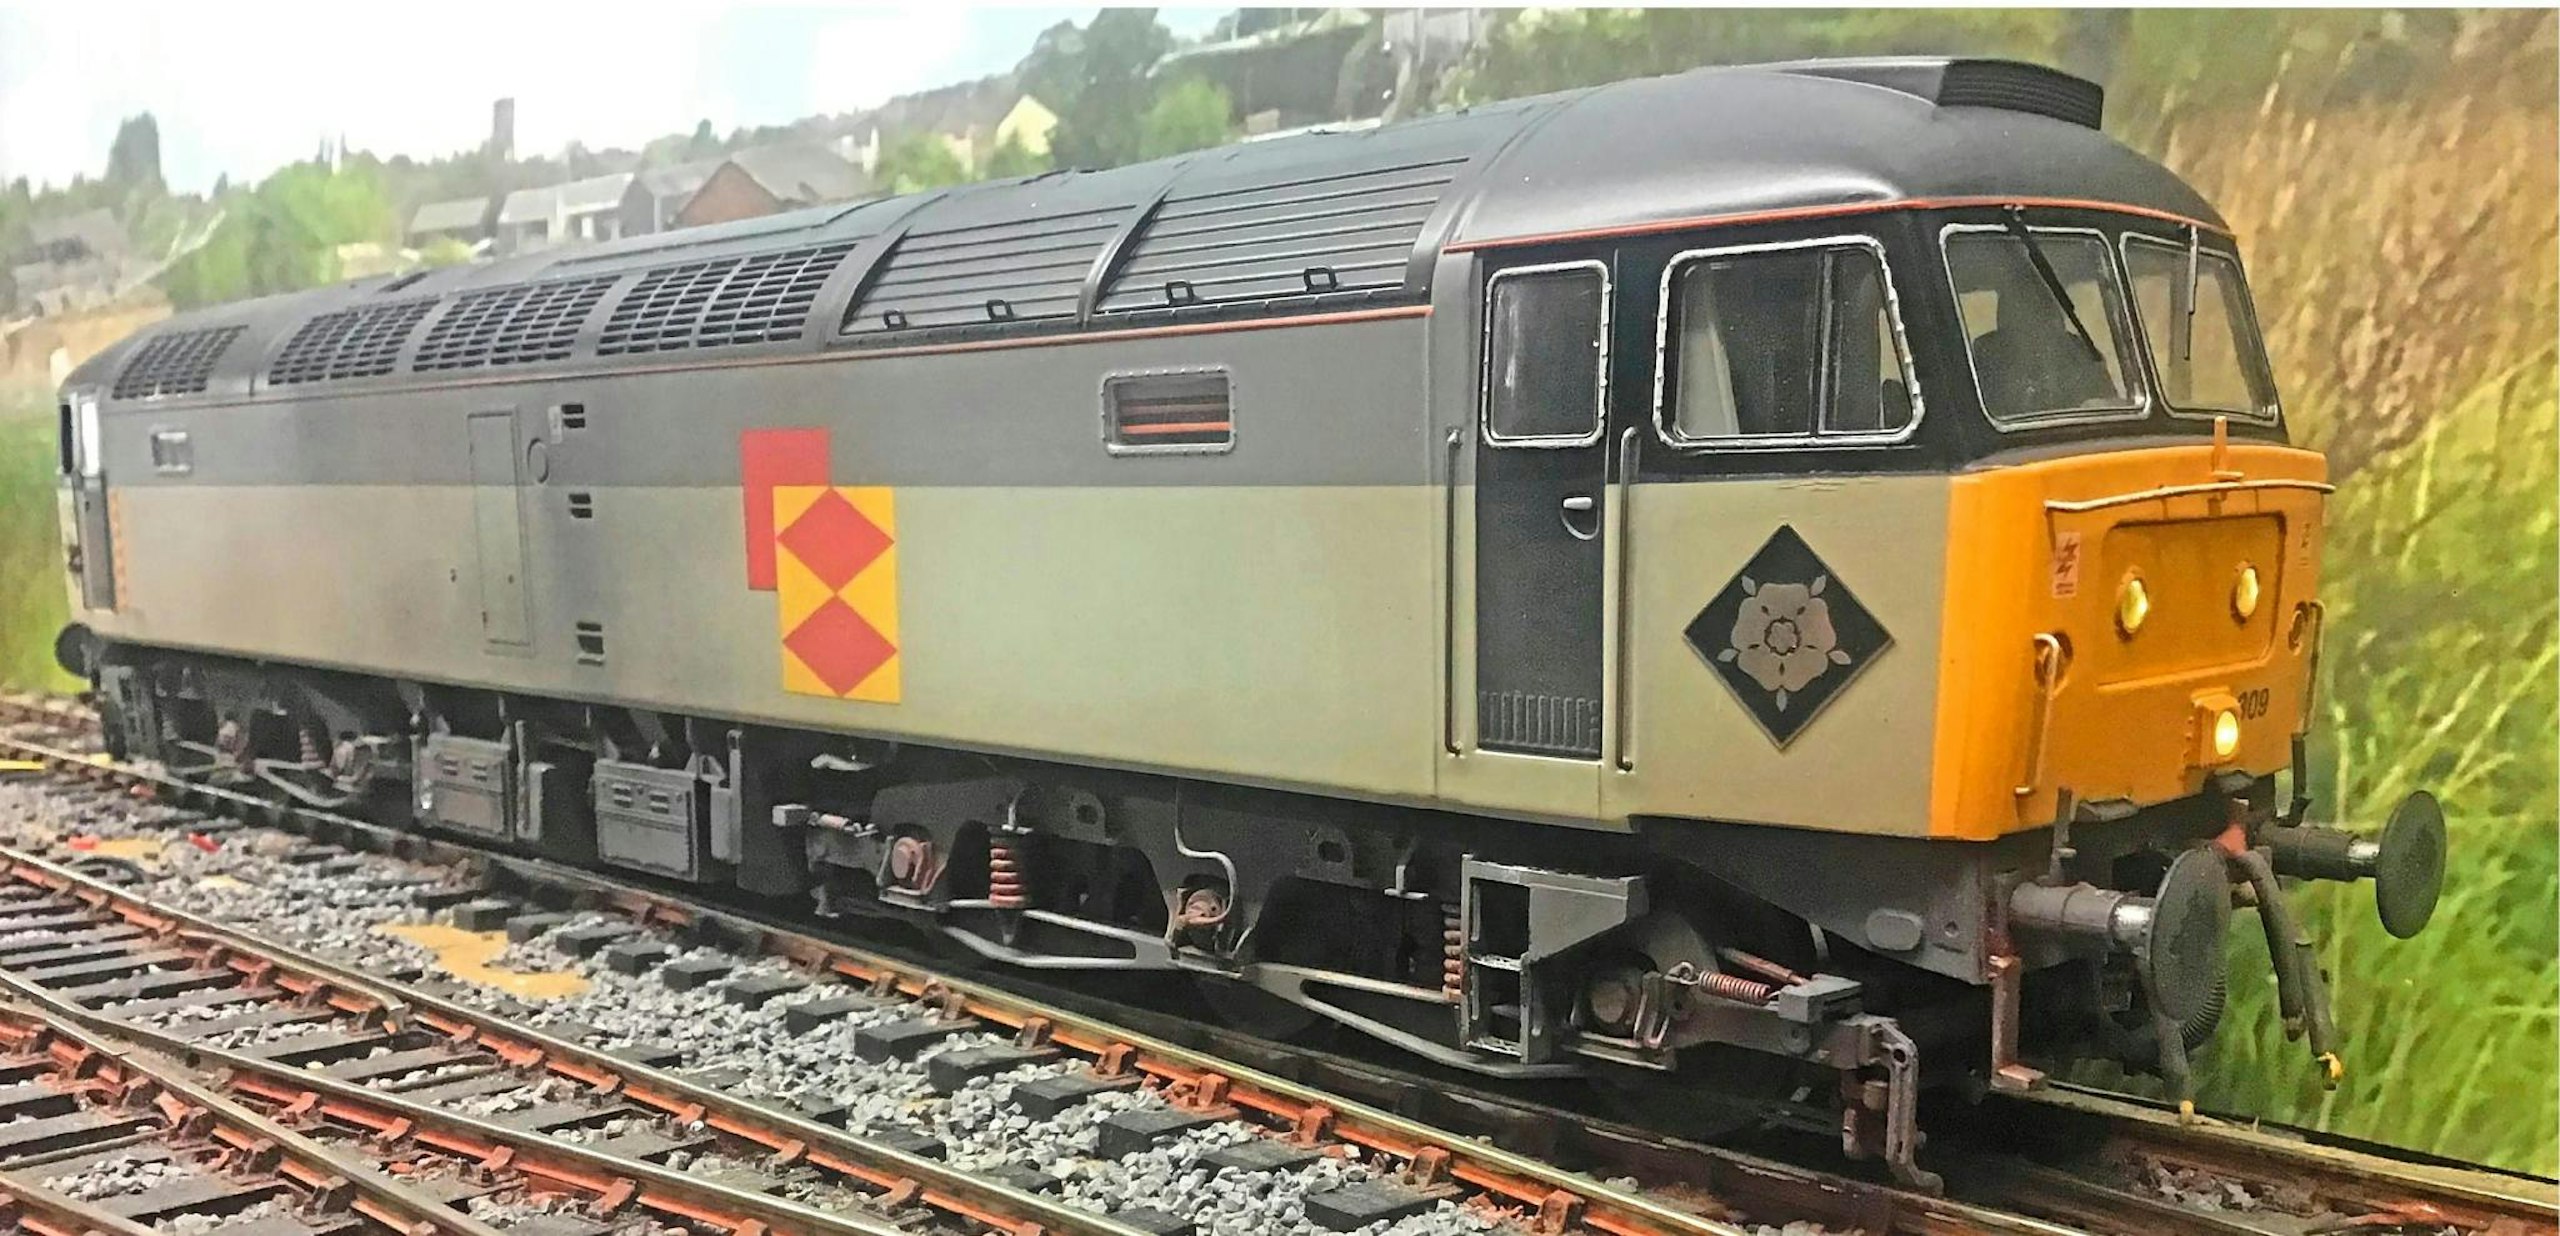

The ready-to-run ‘O’ gauge market has come on in leaps and bounds over the past couple of decades. But while Heljan, and a few other manufacturers, have brought superb models to the table, it’s hard not to think that everybody’s trains look the same!
Unlike ‘OO’ diesel outline locomotives, there just isn’t the same breadth of choice in ‘O’ in terms of sub-classes and representation of detail differences.
The once-ubiquitous British Rail/Brush Class 47 is a perfect example. Modellers working in ‘OO’ have the luxury of choosing between excellent models from Bachmann and Heljan, soon to be joined by Cavalex’s version of course. All three of these products cater for endless headcode panels, cant rail grilles, boiler compartment fittings, fuel tanks, buffers and headlamp combinations, on top of a rainbow of potential colour schemes. Even the Graham Farish ‘N’ gauge Class 47 comes with a wide range of tooling options too!
As good as the Heljan ‘O’ gauge Class 47 is, there is – currently at least – a finite choice of variations, so some good old-fashioned customising is needed to replicate any quirks that your chosen prototype may have sported.
This little project is nice and straightforward, offering the chance to bring a little difference to your locomotive fleet without spending a fortune on parts, hacking a lovely new RTR model to bits, or having to apply a new coat of paint.
NINETIES CUT-BACKS
With the fashions and music of the 1990s now in vogue with the cool kids, it’s a good time to look back at a very Nineties modification carried out to the BR Class 47 fleet. At this time, a sizeable chunk of the Brush Type 4s were allocated to the Railfreight Distribution (RfD) sector and, with privatisation of the state-owned railway on the horizon, operators were looking to extend the lives of ageing BR diesel types.
Various life-extension programmes were under way, some involving heavy repairs, but others were more modest, simply looking at ways of reducing the need for corrosion repairs or improving the conditions for the footplate crew.
In the case of RfD ‘47s’, well over 100 examples had their original raised bufferbeam cowlings removed and the lower edges of the cab sides trimmed in an effort to resolve problematic areas of corrosion and reduce draughts within the cabs. It resulted in a slightly brutal appearance, but it seemed to prove successful, with the InterCity sector following suit with its Class 47/4s.
When the Class 57 re-engineering programme began, the donor ‘47’ bodyshells received the same treatment (if they hadn’t already) as part of the rebuilding process.
For modellers of the late BR and post-privatisation eras, this is a feature well worth recreating, as it opens up the possibility of replicating a huge number of passenger and freight Class 47s. The job is made easier thanks to an etched brass kit from Proto Neo.
The kit provides parts for a pair of replacement bufferbeams or, as the manufacturer describes them, ‘cutaway headstocks’. Whatever the correct term might be, the kit consists of parts etched from 30thou’ (0.76mm) brass, which are pre-cut and only require a little fettling before assembly. Each headstock is made up of twin layers, with the outer face featuring half-etched detail to represent the raised buffer shank mounts and beading around the drawhook aperture.
Some extra, smaller parts are also provided, to allow the buffer mounts to be built up to the required depth (the Heljan buffers are re-fitted later), while holes are preformed to accept the various brake and control hoses.
The twin layers require folding and laminating before installation. I chose to solder the parts for a strong, consistent bond. Given the size of the parts, a powerful iron or, preferably, a mini blowtorch is required to heat the brass sufficiently to allow the solder to flow between the layers. But if soldering scares you, it’s easy enough to use glue, such as epoxy or a contact adhesive like UHU.
A helpful feature of Heljan’s model is the fact that the bufferbeams are held in place with pairs of screws, making them easy to remove as complete units without having to disassemble the whole chassis or cut anything away. The kit takes this into account and provides twin mounting lugs to allow the new headstocks to simply screw into position.
Just like the real thing, however, the lower edges of the cab sides require cutting back. After carefully marking out, I used a coarse flat file to remove the unwanted material, tidying up the edges with a finer-toothed file and abrasive pads. Working gently and keeping the tools away from the outer faces of the bodyshell kept the paintwork intact, so I didn’t have to do any touching up. In fact, a little airbrushed weathering finished things off nicely and disguised the surgery.
PUTTING IT TOGETHER
With the original buffers, brake pipes, corner footsteps and screw couplings reinstated to the new headstocks, the ‘47’ was almost complete.
Like many Heljan ‘O’ gauge diesels, this ‘47’ came without numbers or BR logos, so I could choose my own identity for this RfD Type 4. Railtec does some lovely packs for Heljan ‘O’ gauge models that include all the markings you’ll need for the job. The pack employed here included TOPS numbers (for the cab sides and ends), RfD sub-sector logos, data panels, overhead line warning flashes and a few other useful bits and bobs. For the cast BR ‘double arrow’ logos and Tinsley depot plaques, Proto Neo produce some great etched plates, as do Fox Transfers.
It’s important to spray the areas to receive decals with clear gloss varnish and allow it to cure fully beforehand. This will improve adhesion of waterslide films and render them invisible, thus avoiding the unpleasant ‘silvering’ effect. I masked the glazing before spraying, rather than trying to remove it. I used tape, or you can use a masking fluid, as George did on his Class 153 (see page47).
With the decals applied, they were left to dry overnight before sealing them in place with a light spray coat of satin varnish.
It feels great to put your own stamp on your fleet, and introducing some detail variety makes things much more interesting, not least to viewers of your layout, especially if you have multiple locomotives of the same class.
The late 1990s and early 2000s was a fascinating time on Britain’s railways, with so many tweaks made to classic BR traction types in order to keep them running, so it’s important to replicate such things if you can.
What you will need
SHOPPING LIST
◆ Class 47/57 cut-away headstock kit, etched BR logos and depot motifs
Availability: Proto Neo
Web: www.protoneo.com
Email: protoneo. nameplates@gmail.com
◆ Waterslide Class 47 TOPS numbers, black
Availability: Railtec Transfers
TOOLS
◆ Knife and spare blades
◆ Miniature screwdrivers
◆ Tweezers
◆ Spring clamps
◆ Files
◆ Pliers
◆ Soldering iron and equipment (optional)
STEP BY STEP
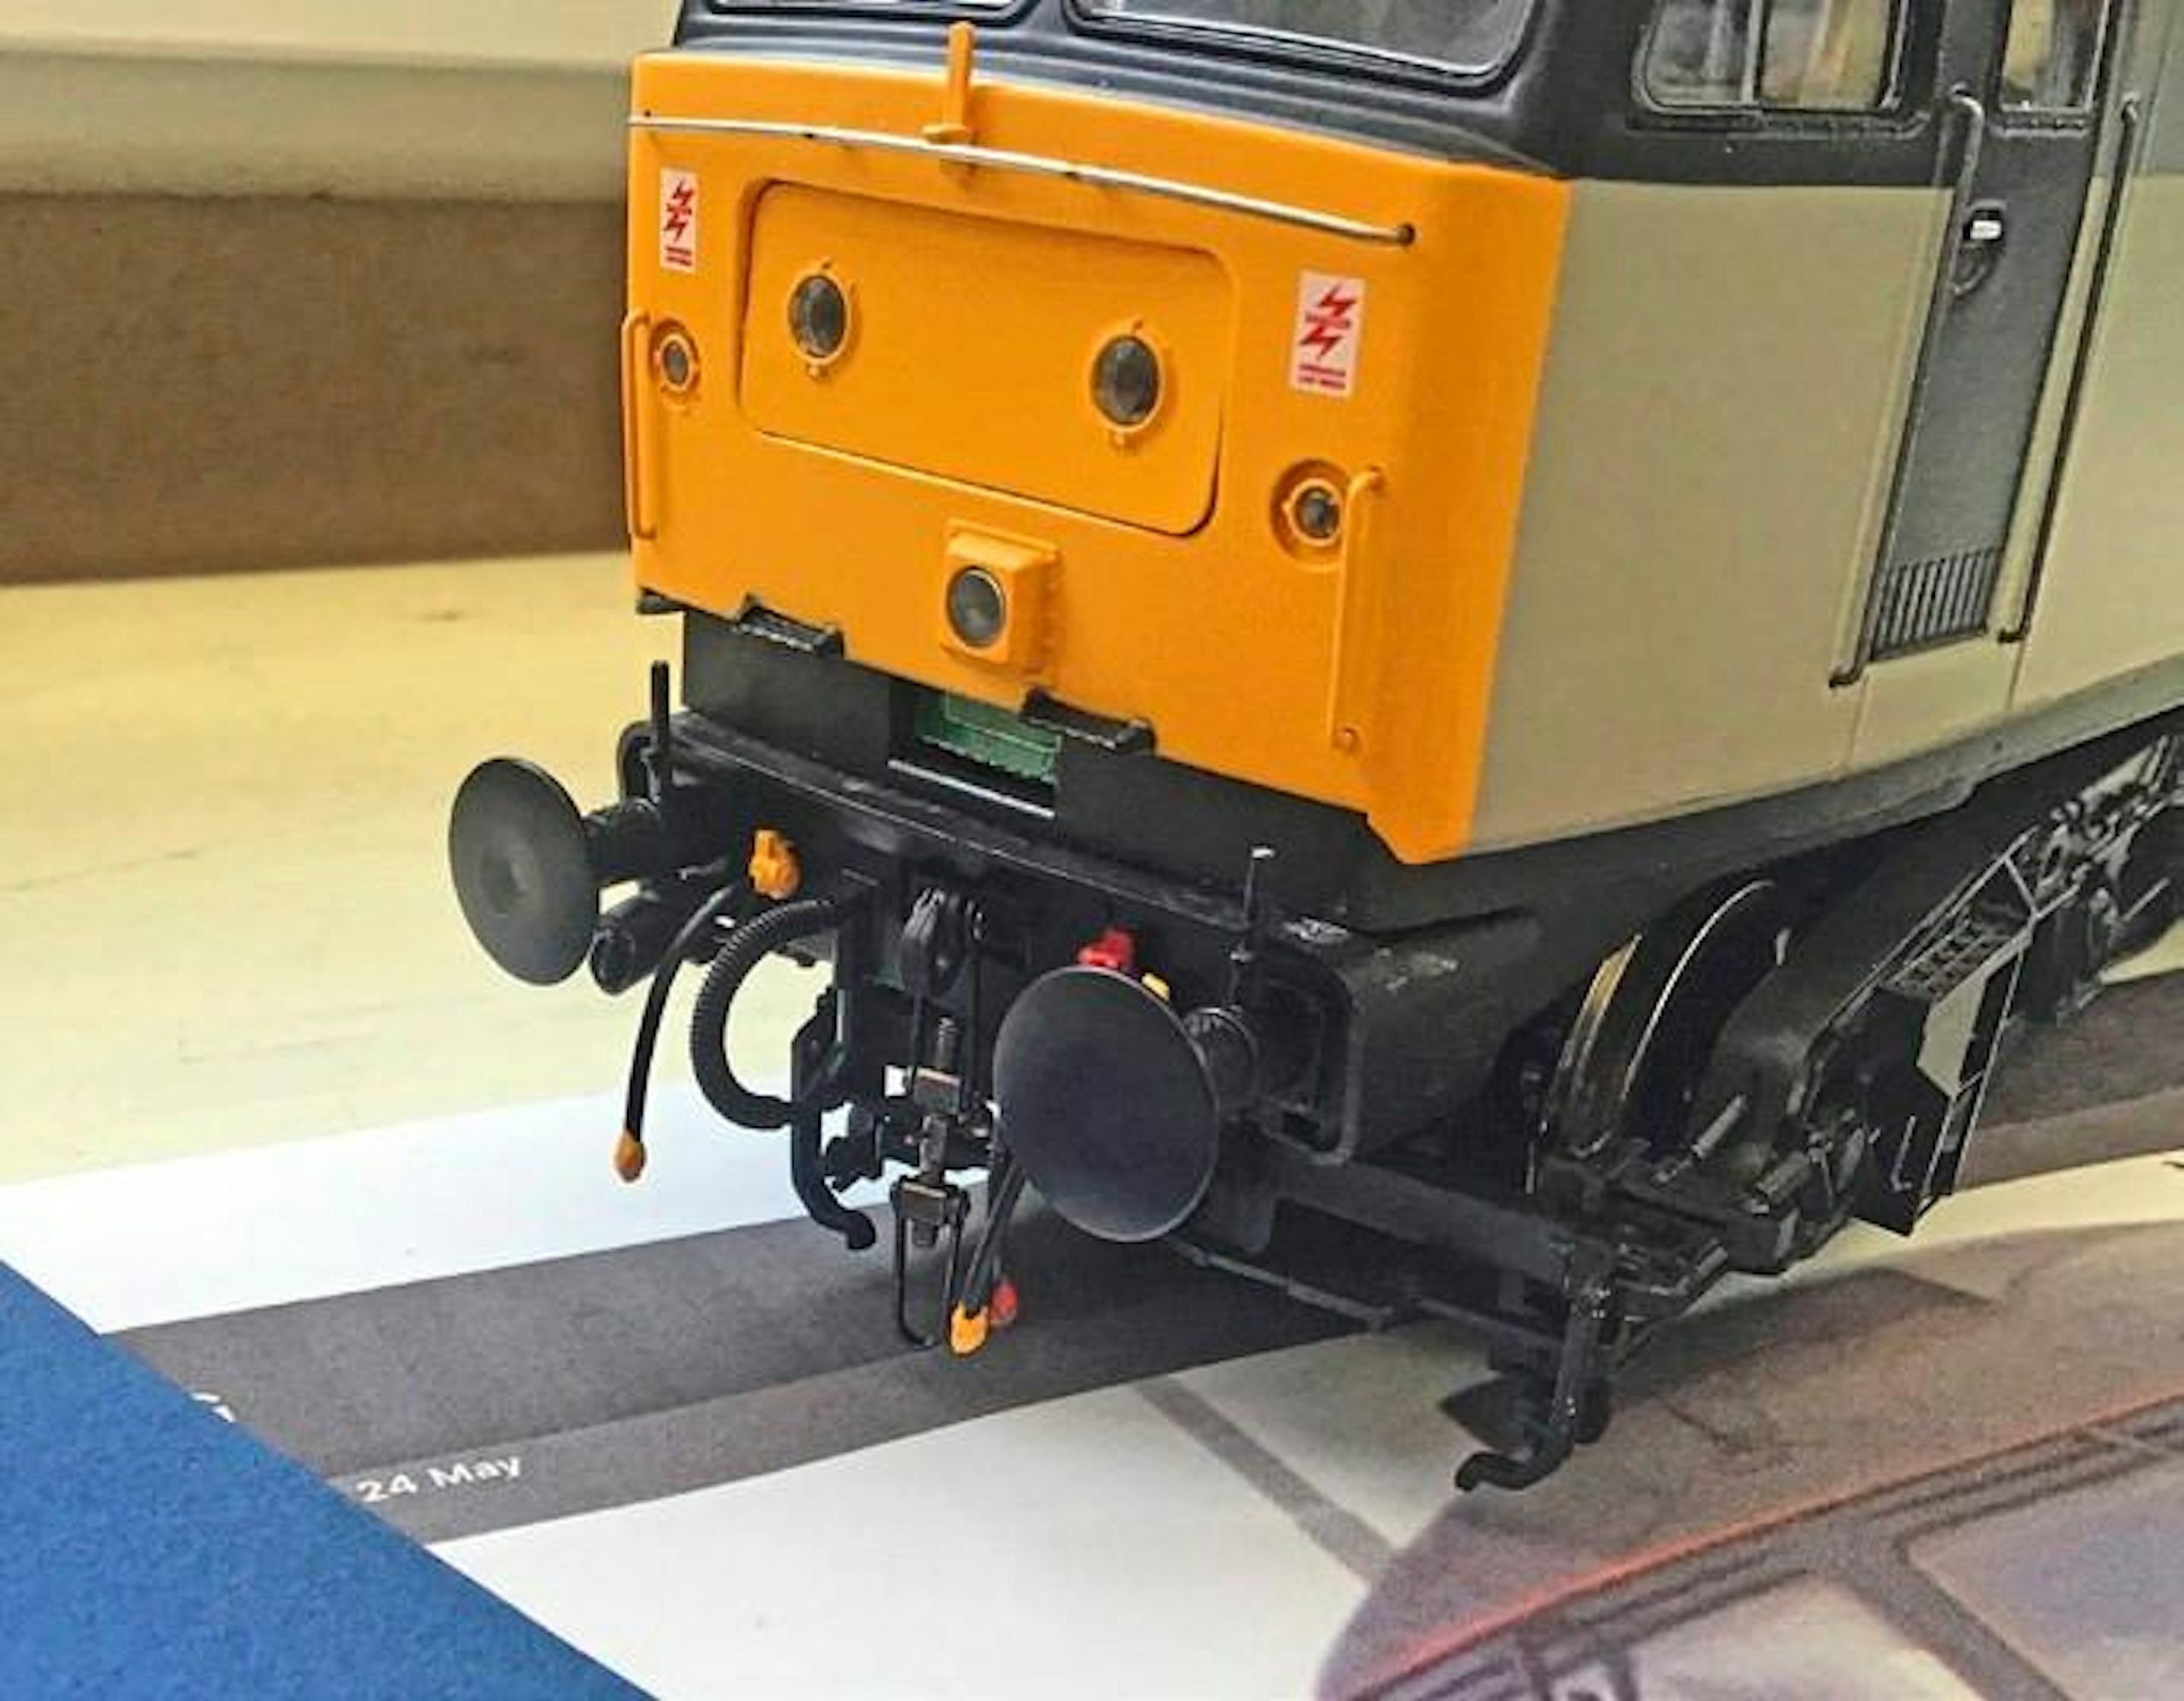
1 The subject for this project is the Heljan ‘O’ gauge Class 47. It’s great, but it has only (so far) been available with the original pattern bufferbeam cowling. As always, sourcing good images of the real thing can be really useful.
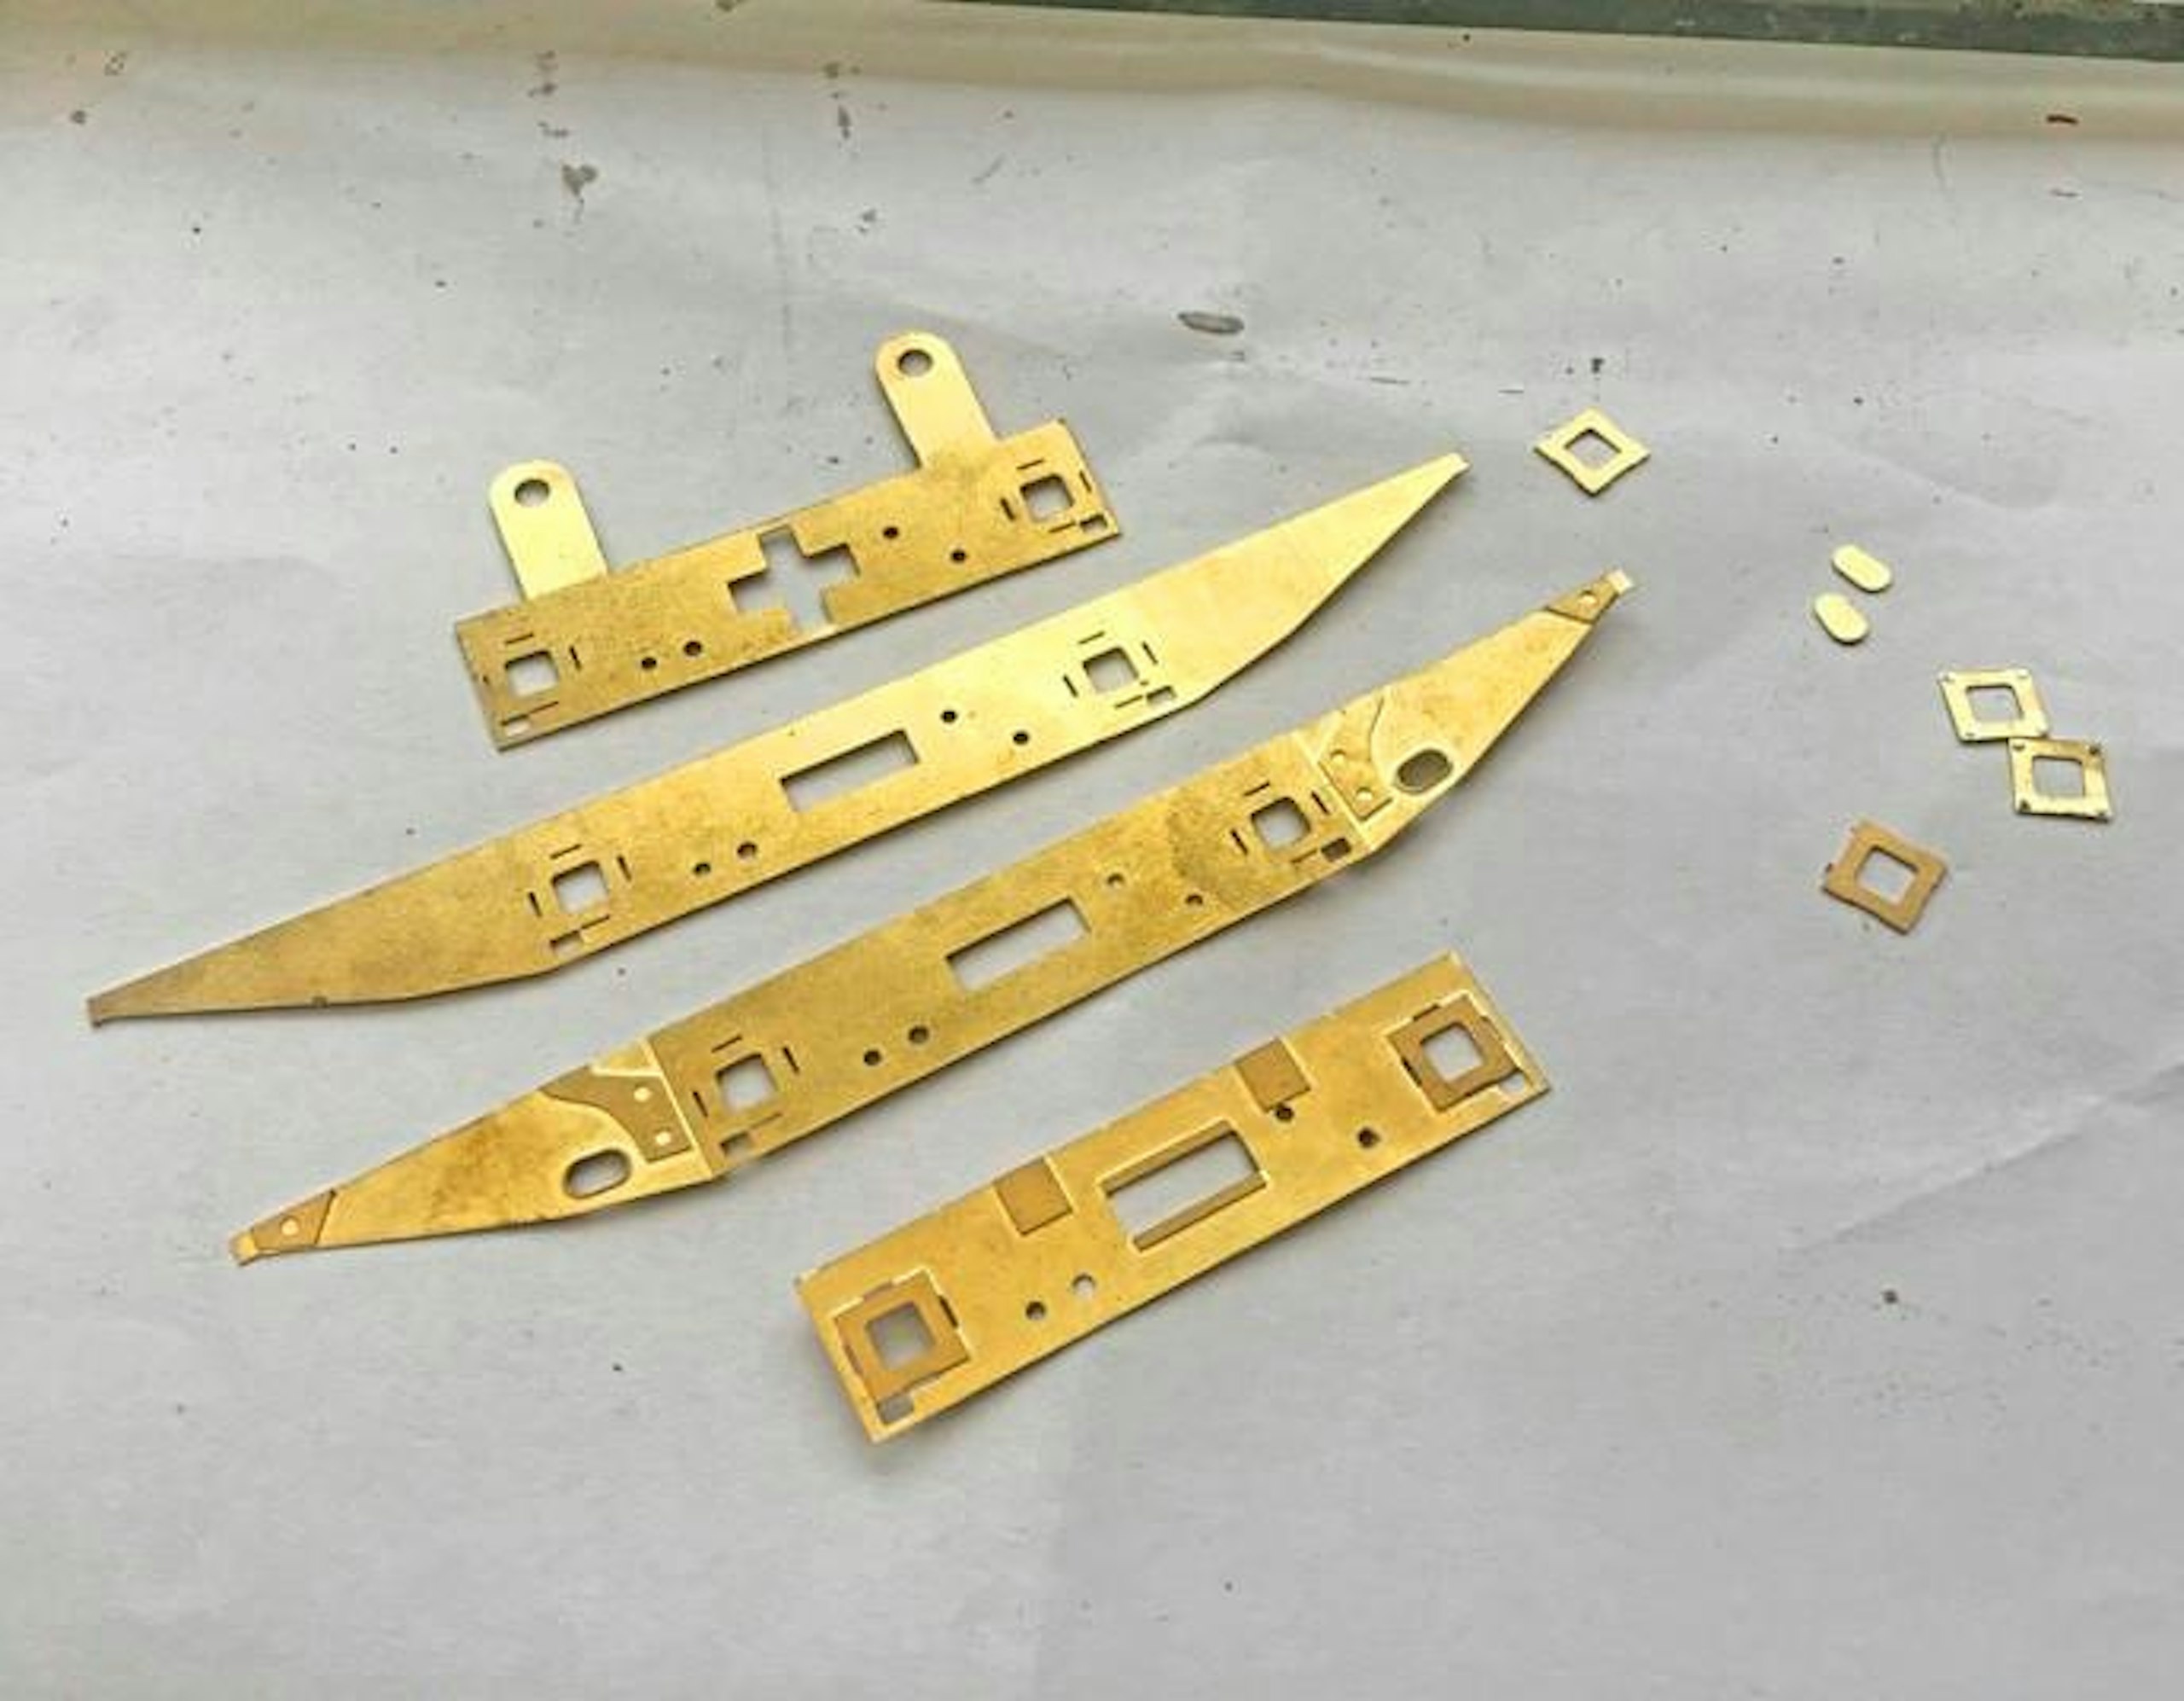
2 The Proto Neo conversion kit provides new headstock parts etched in 30thou’ brass. The parts come pre-cut, so they only need a light fettling of the edges with a file to clean up any ridges from the etching process.
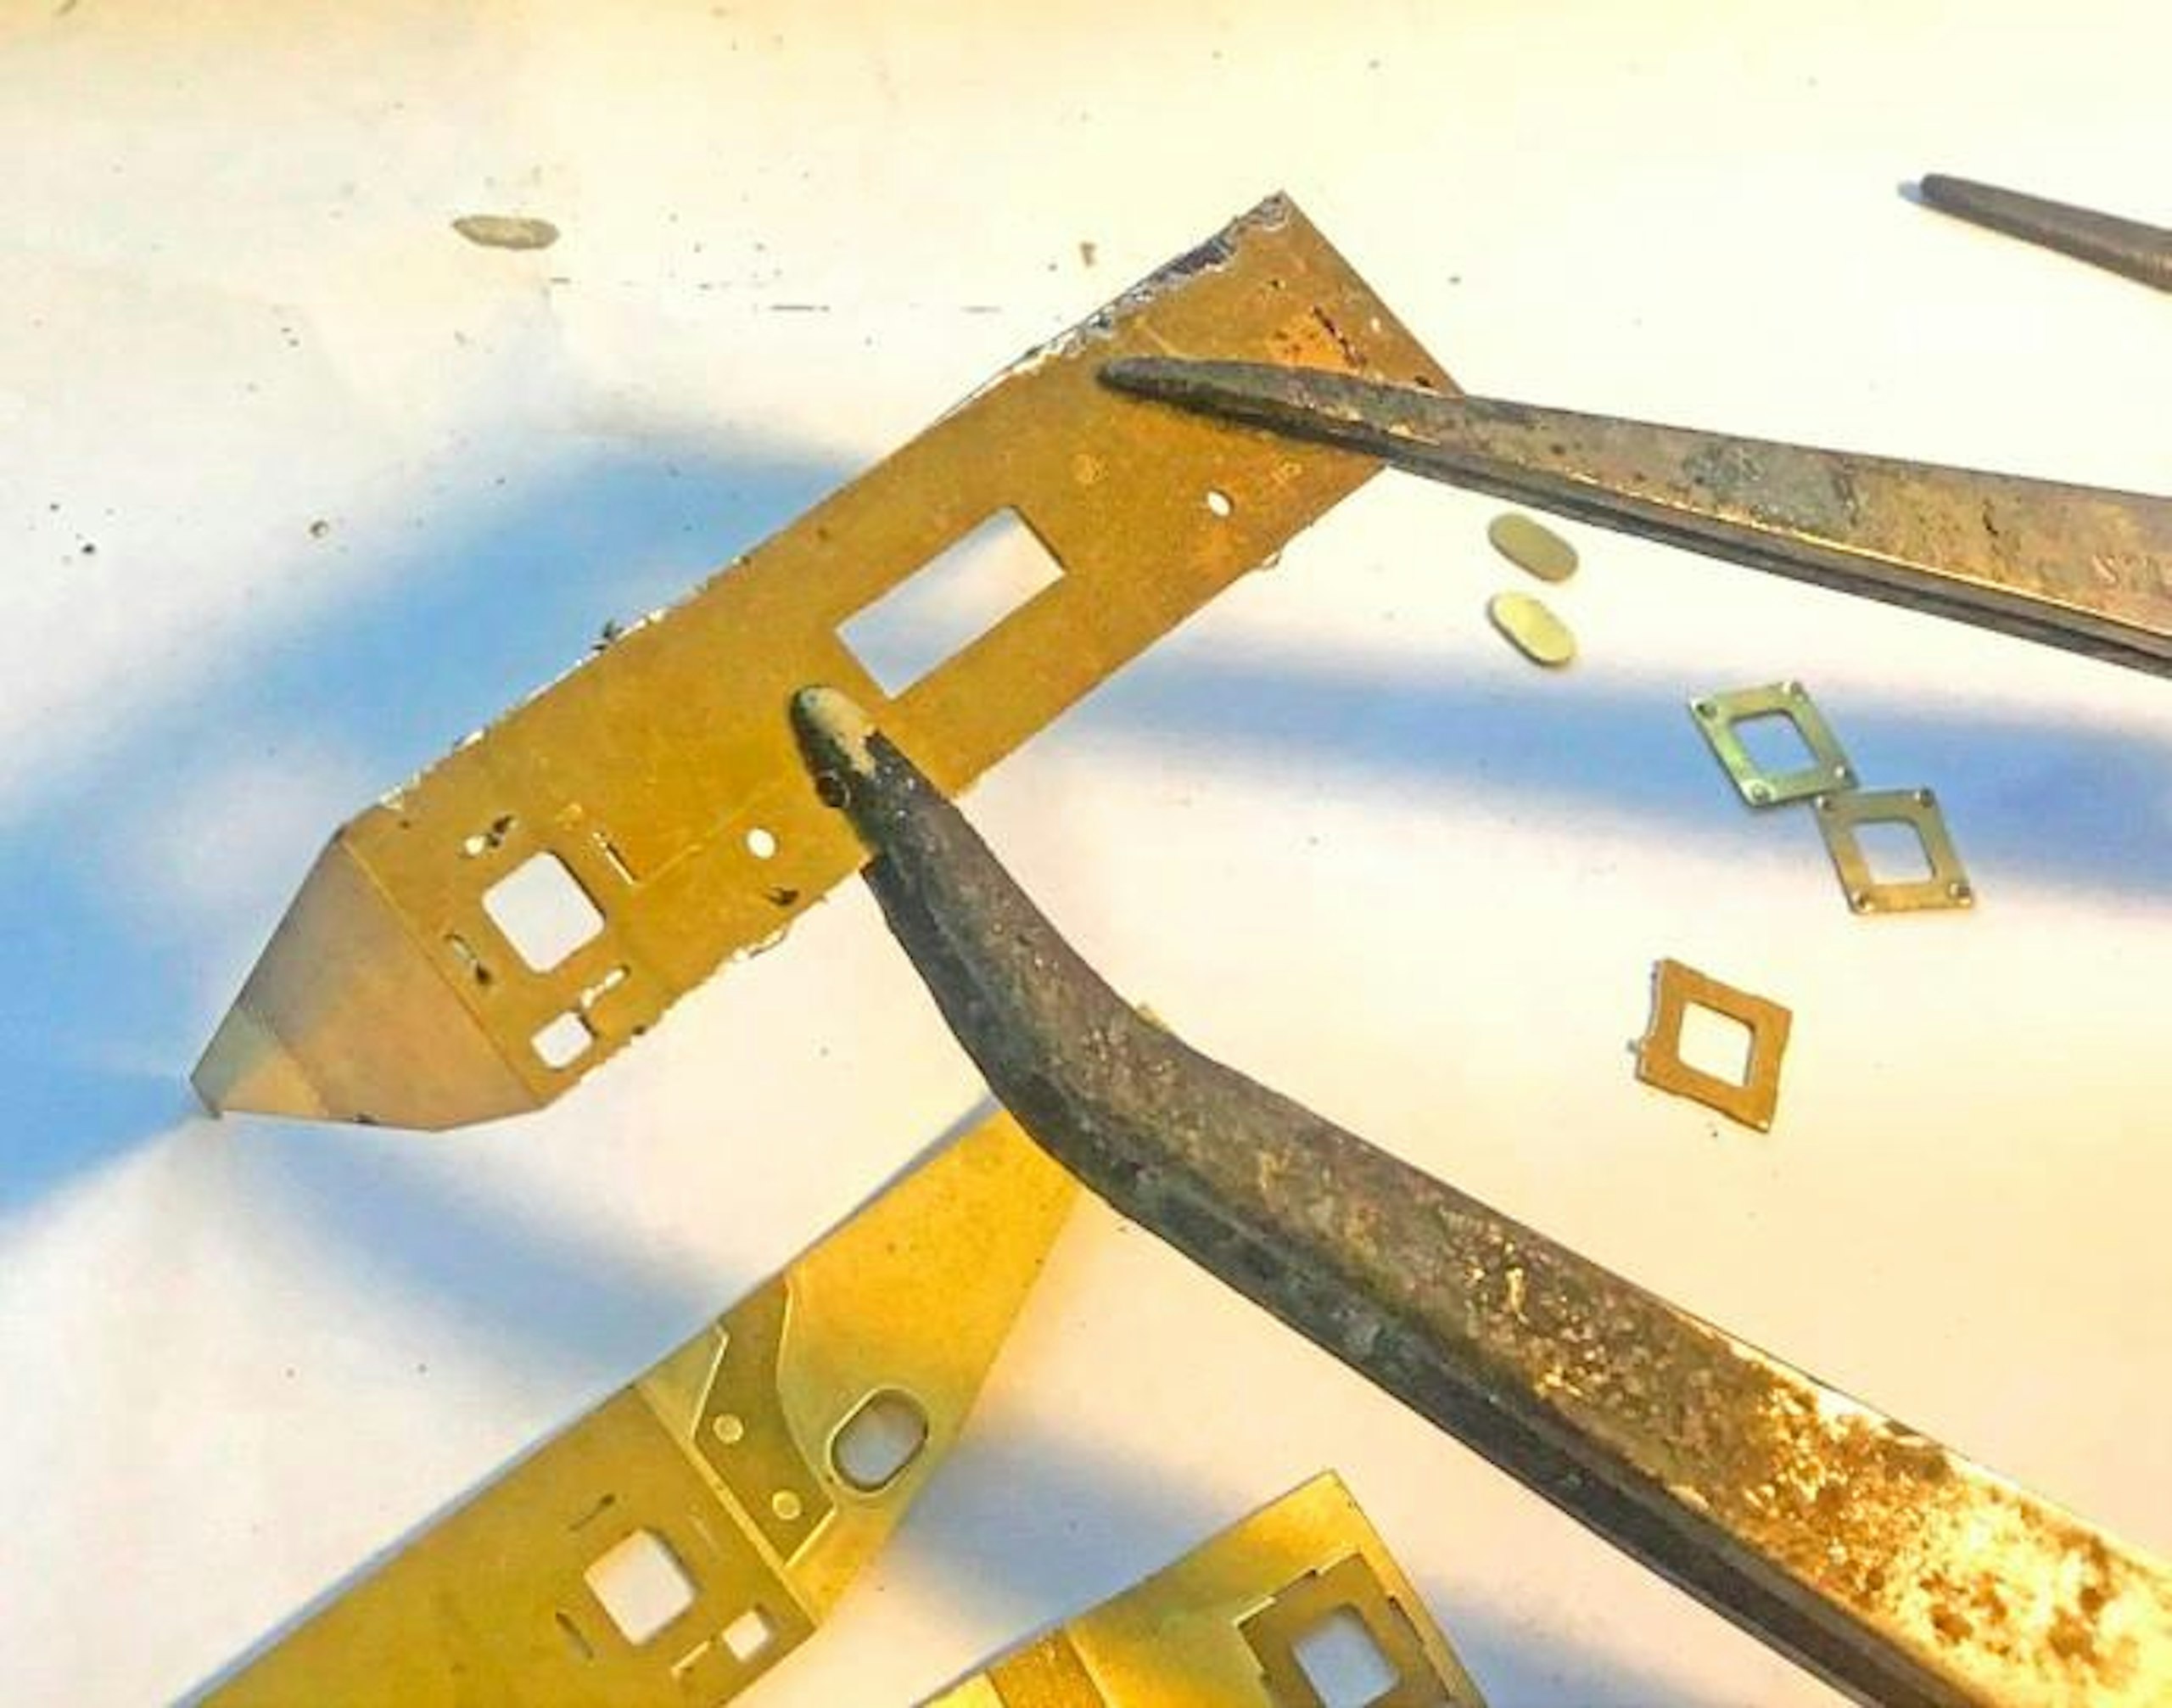
3 It’s good practice to clean etched brass parts with some household detergent to remove any unwanted debris and residues. After folding the parts to shape, the two laminations are aligned and clamped together.
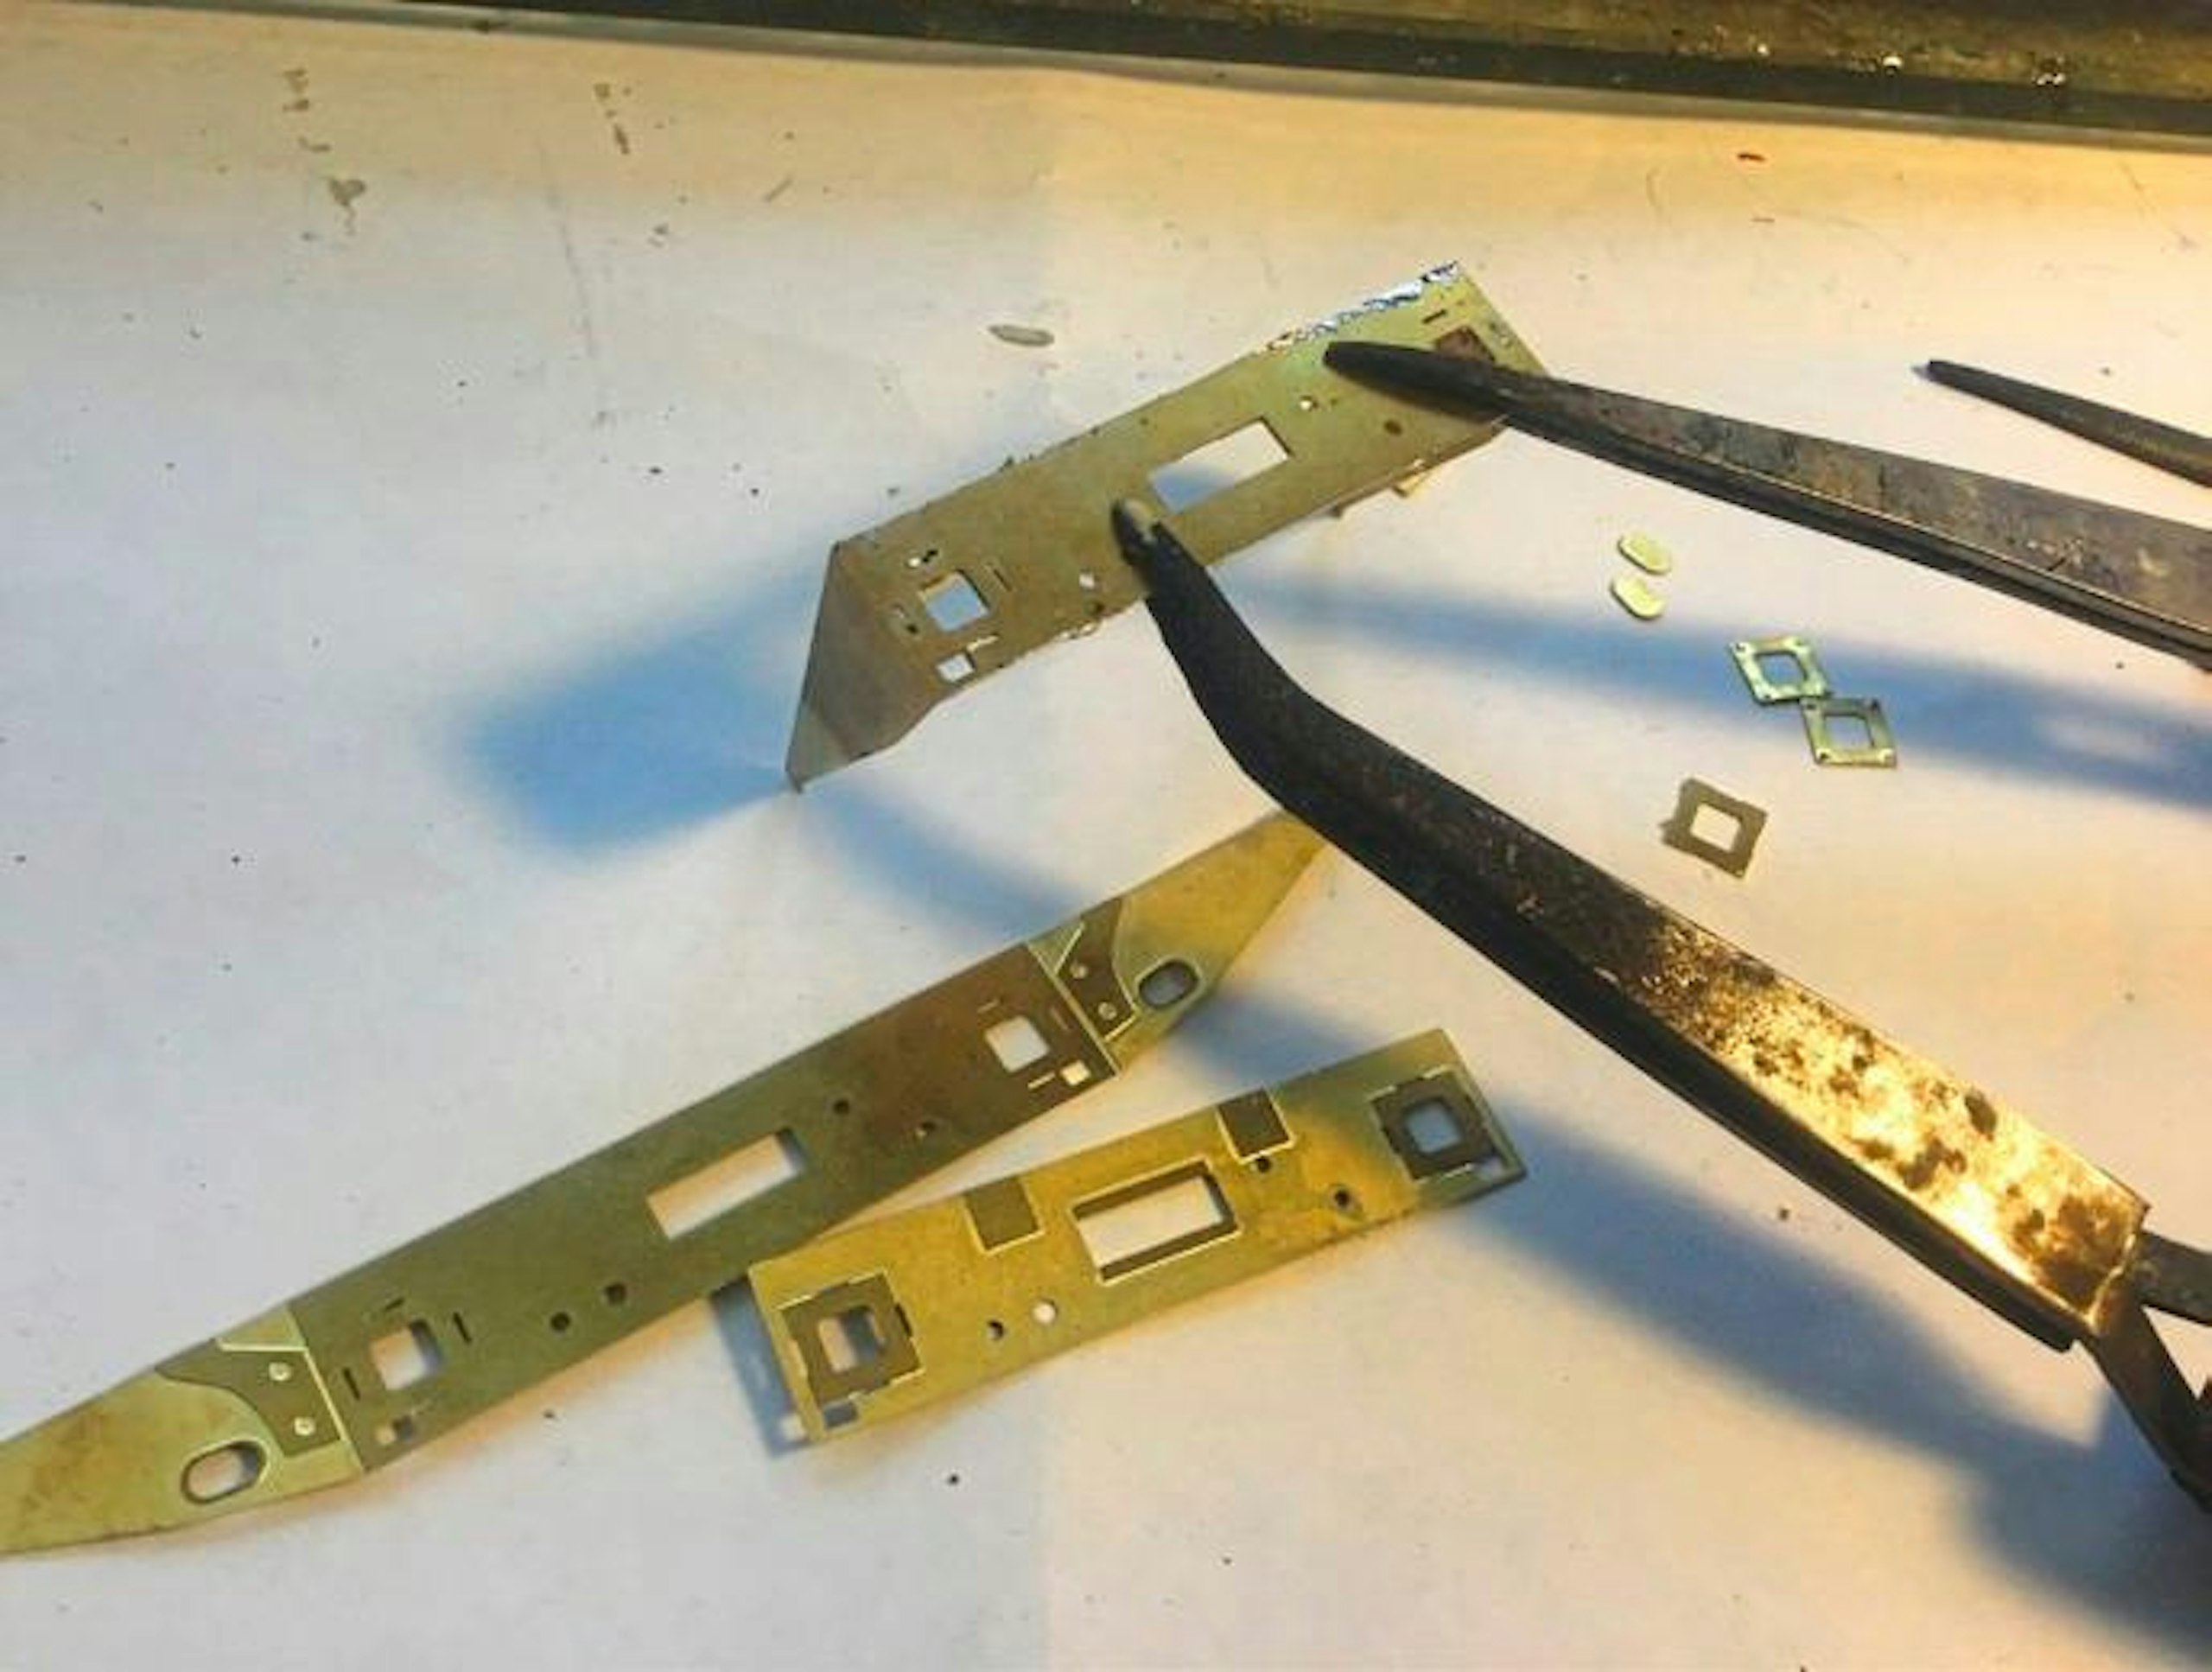
4 I soldered the two layers together, applying the hot iron and molten solder along the edges. If soldering doesn’t appeal, the parts can be readily glued together with epoxy or contact adhesive and clamped securely.
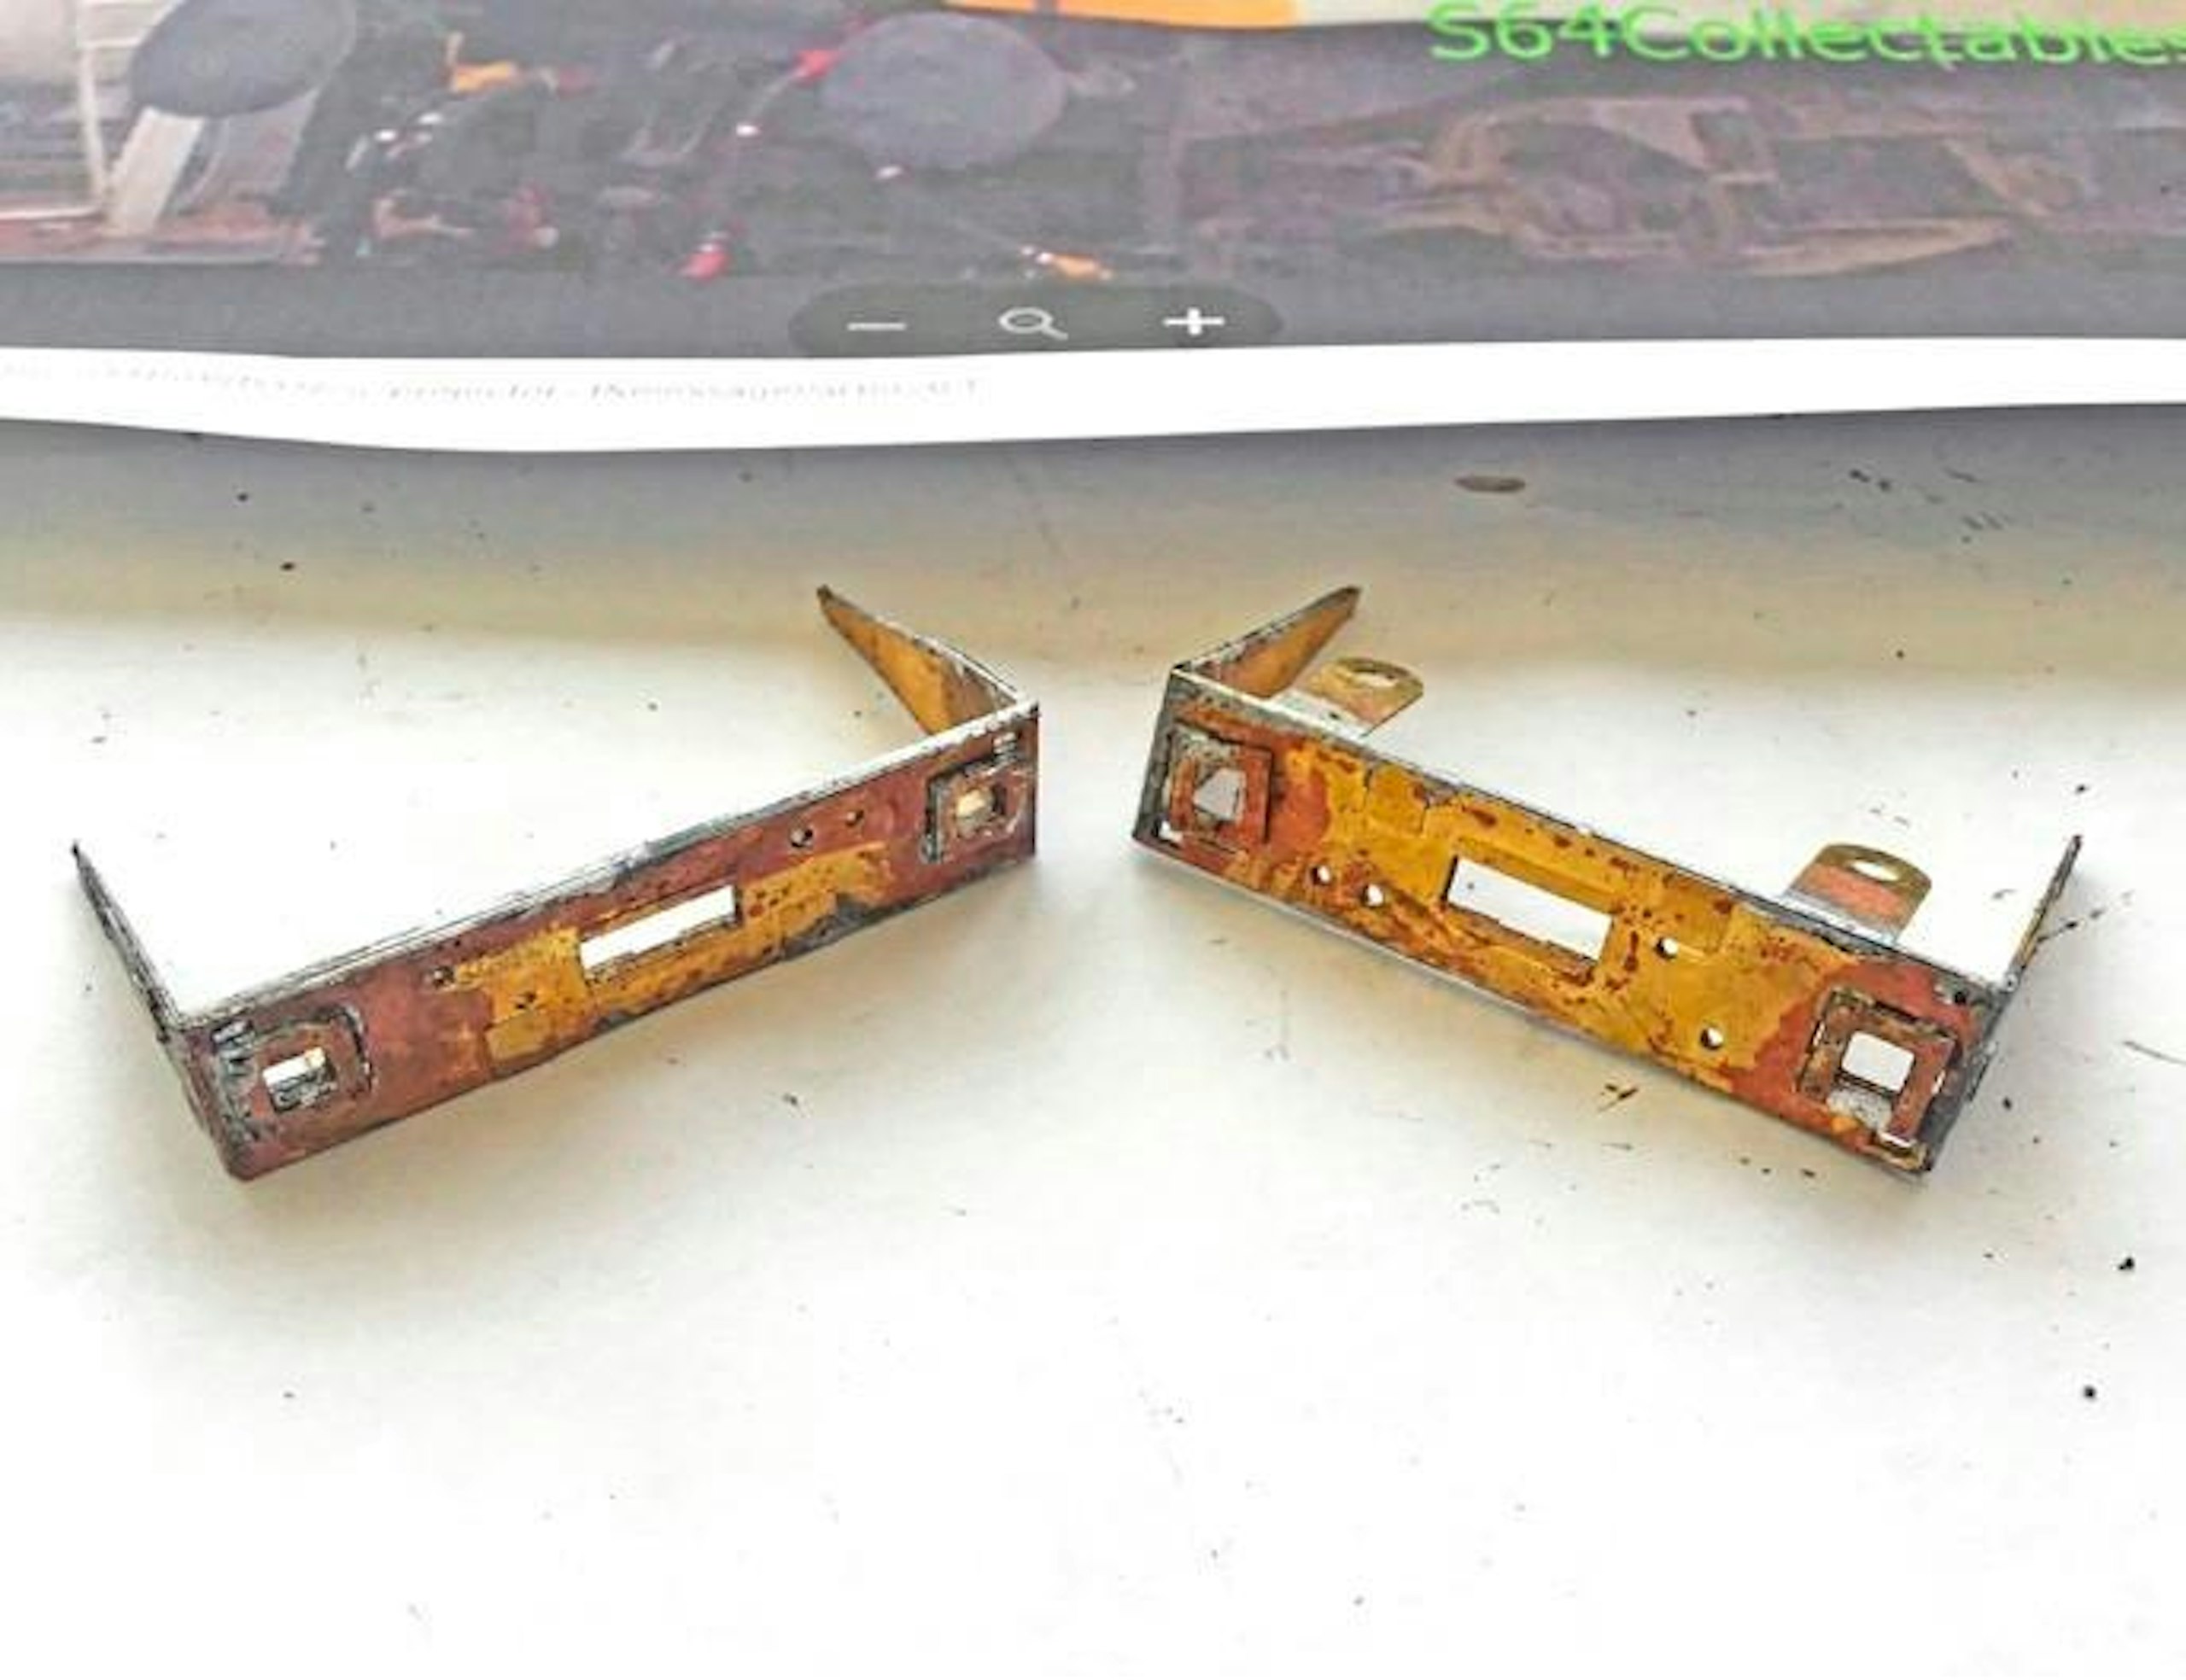
5 Once the twin layers are laminated, the smaller detail parts can be installed, building up the buffershank bases and adding the small oval parts to the side panels. When complete, clean the parts thoroughly.
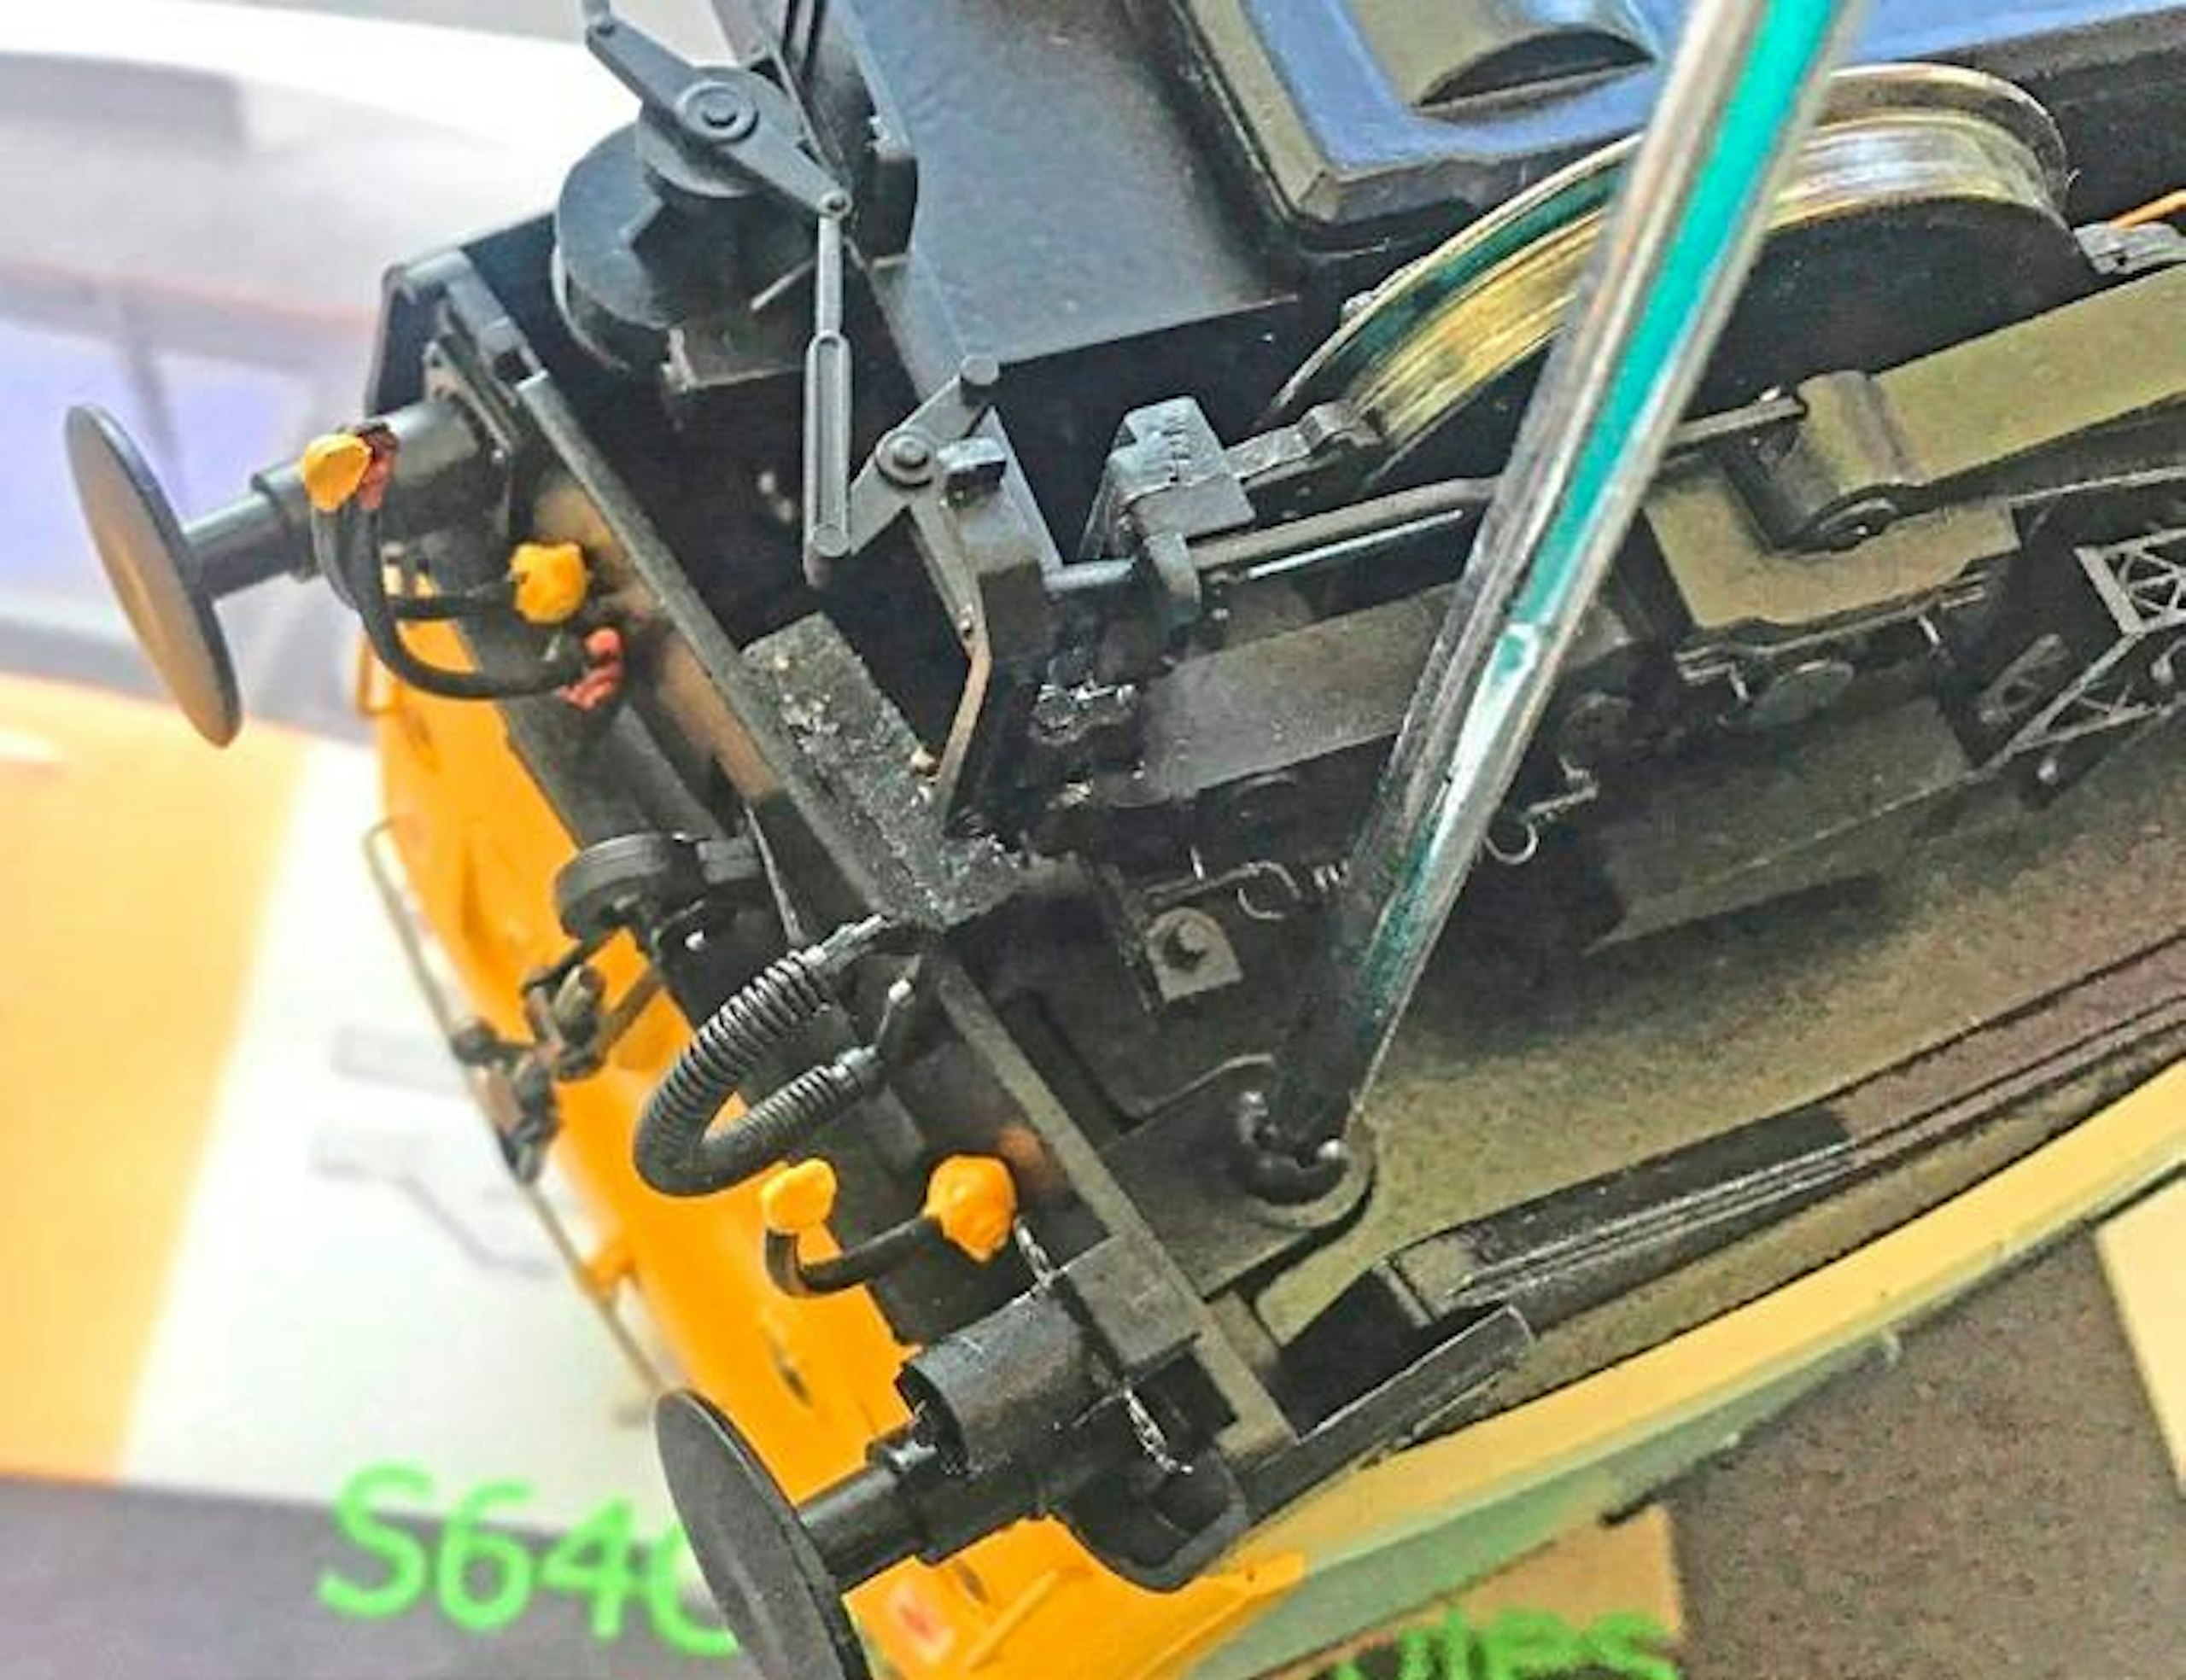
6 The original bufferbeams can be removed from the Heljan ‘47’. The buffers, brake hoses, couplings and footsteps at each corner all need to be salvaged, along with the screws, so keep them in a safe place.
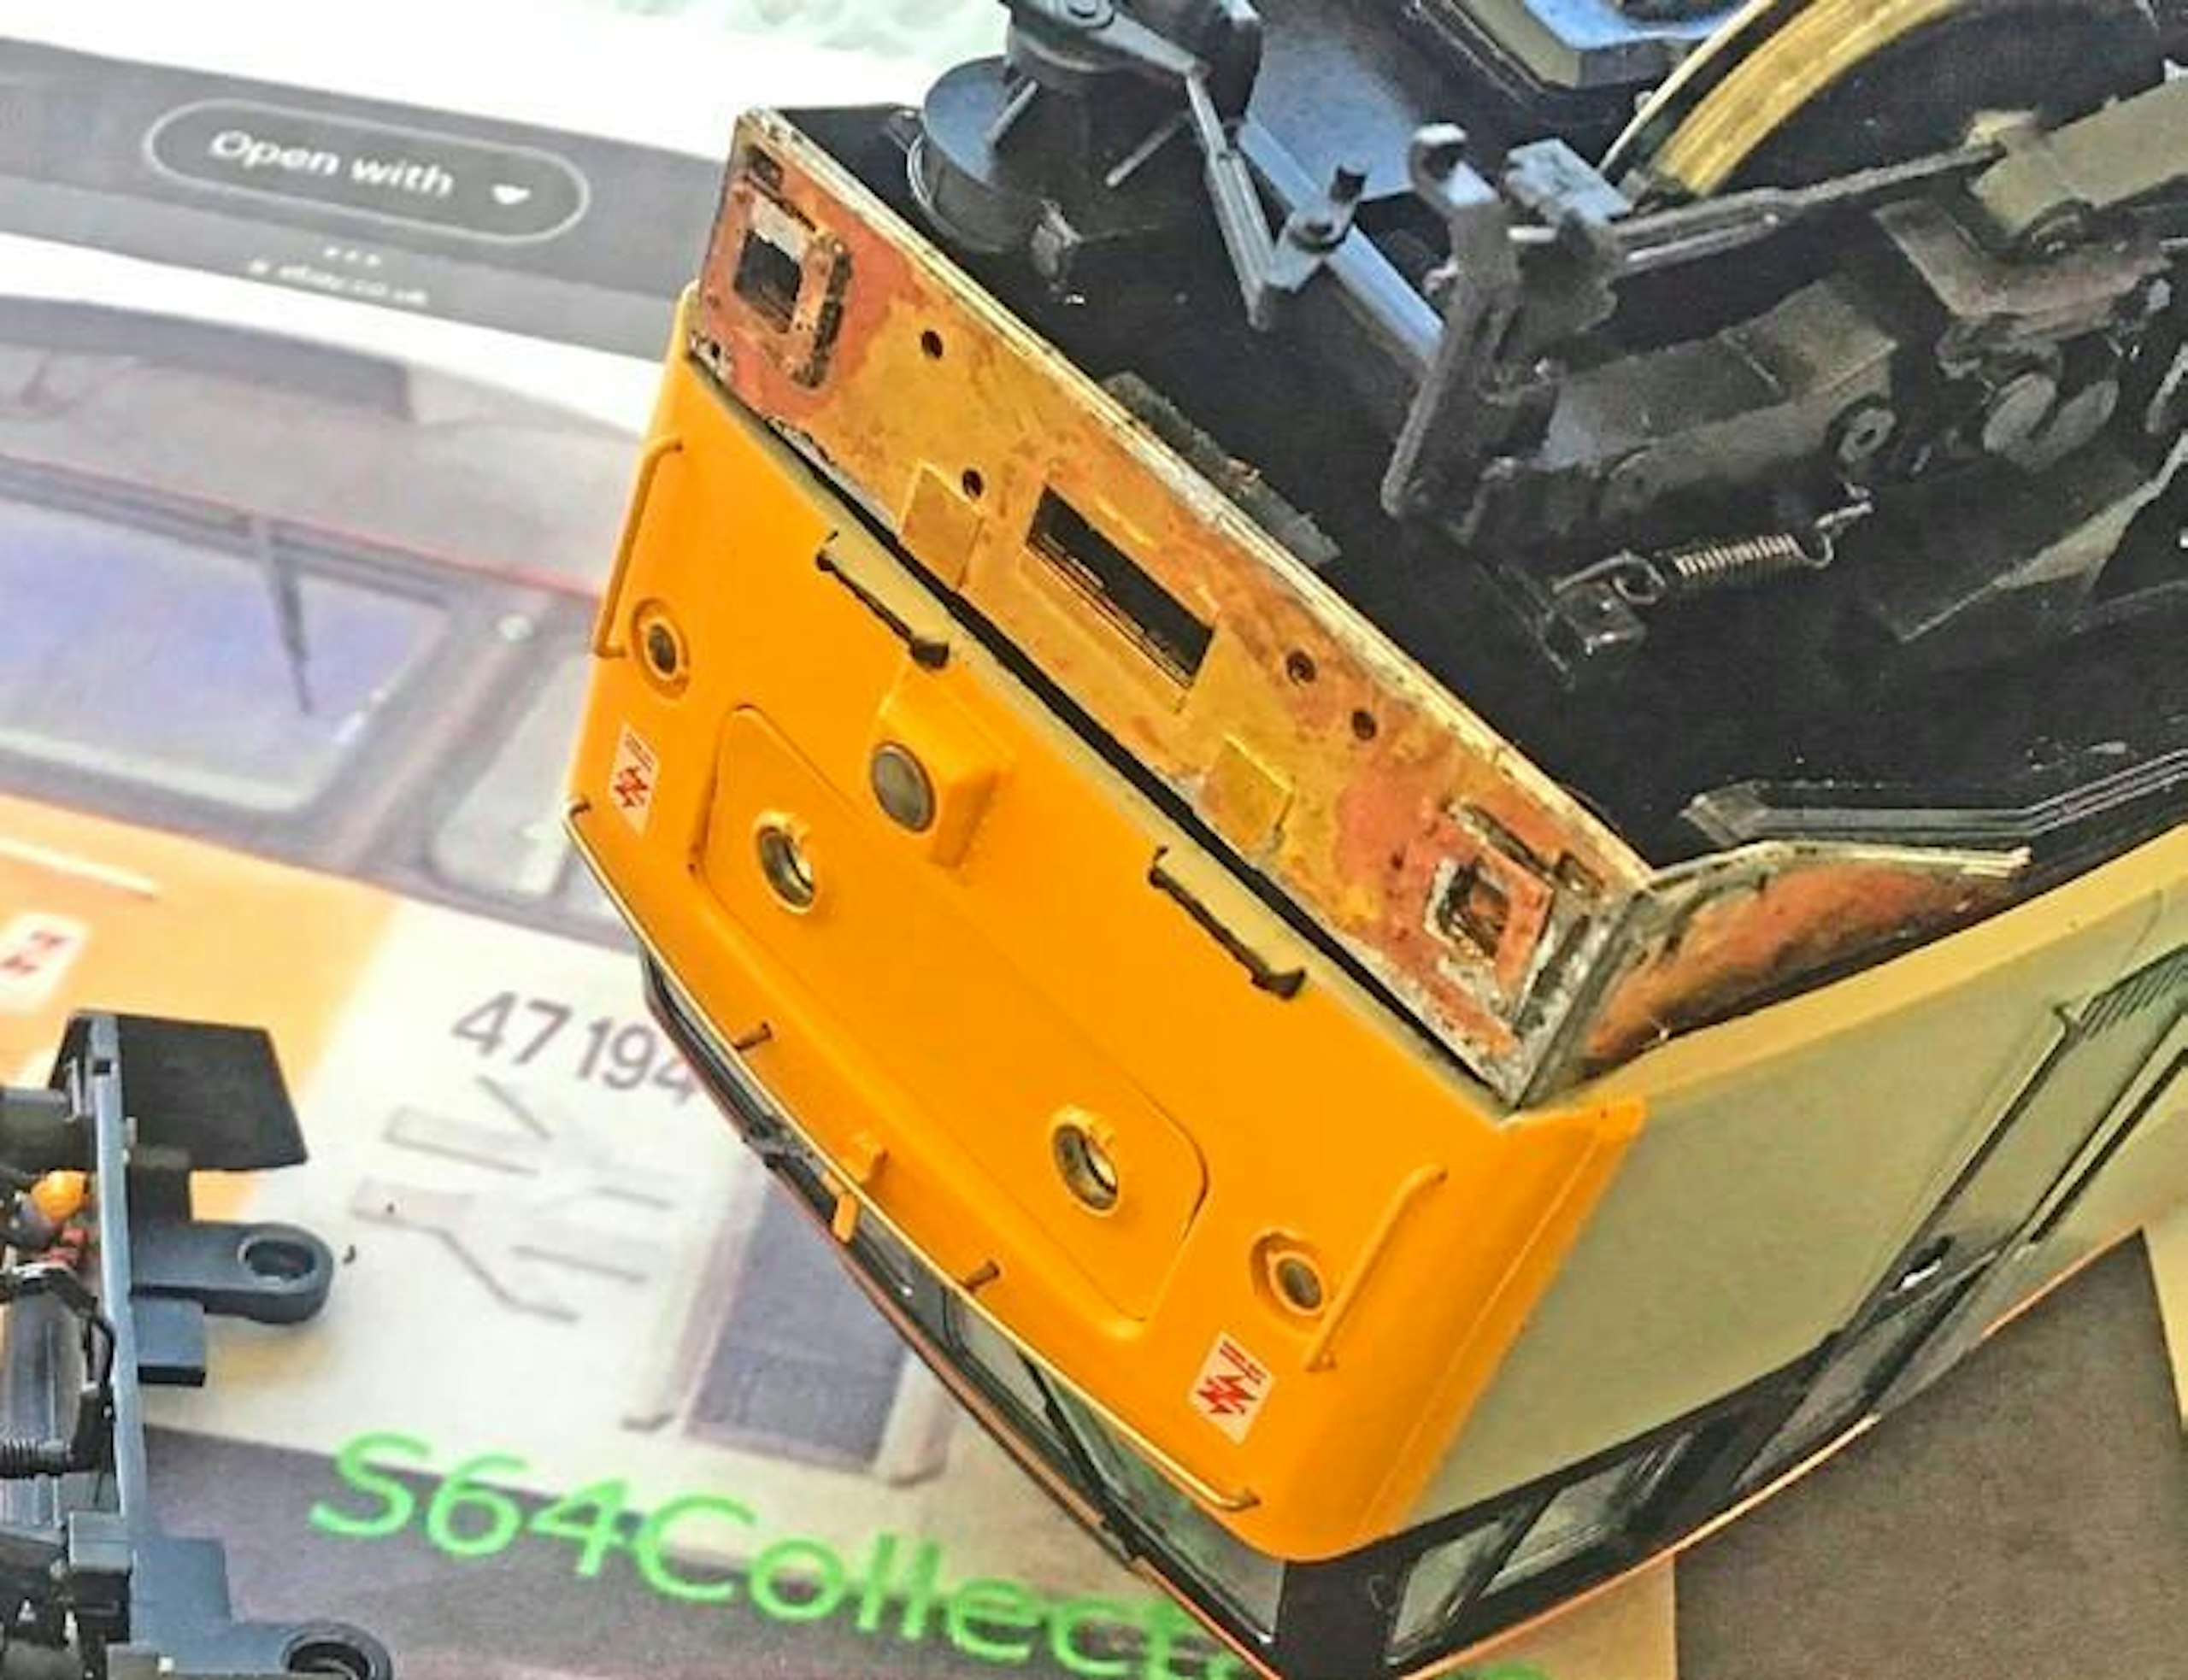
7 With the originals removed, the replacement brass headstocks were test-fitted. You may need to adjust the mounting lugs to ensure the mounting holes line up. I also had to tweak the side panels a fraction to get a perfect fit.
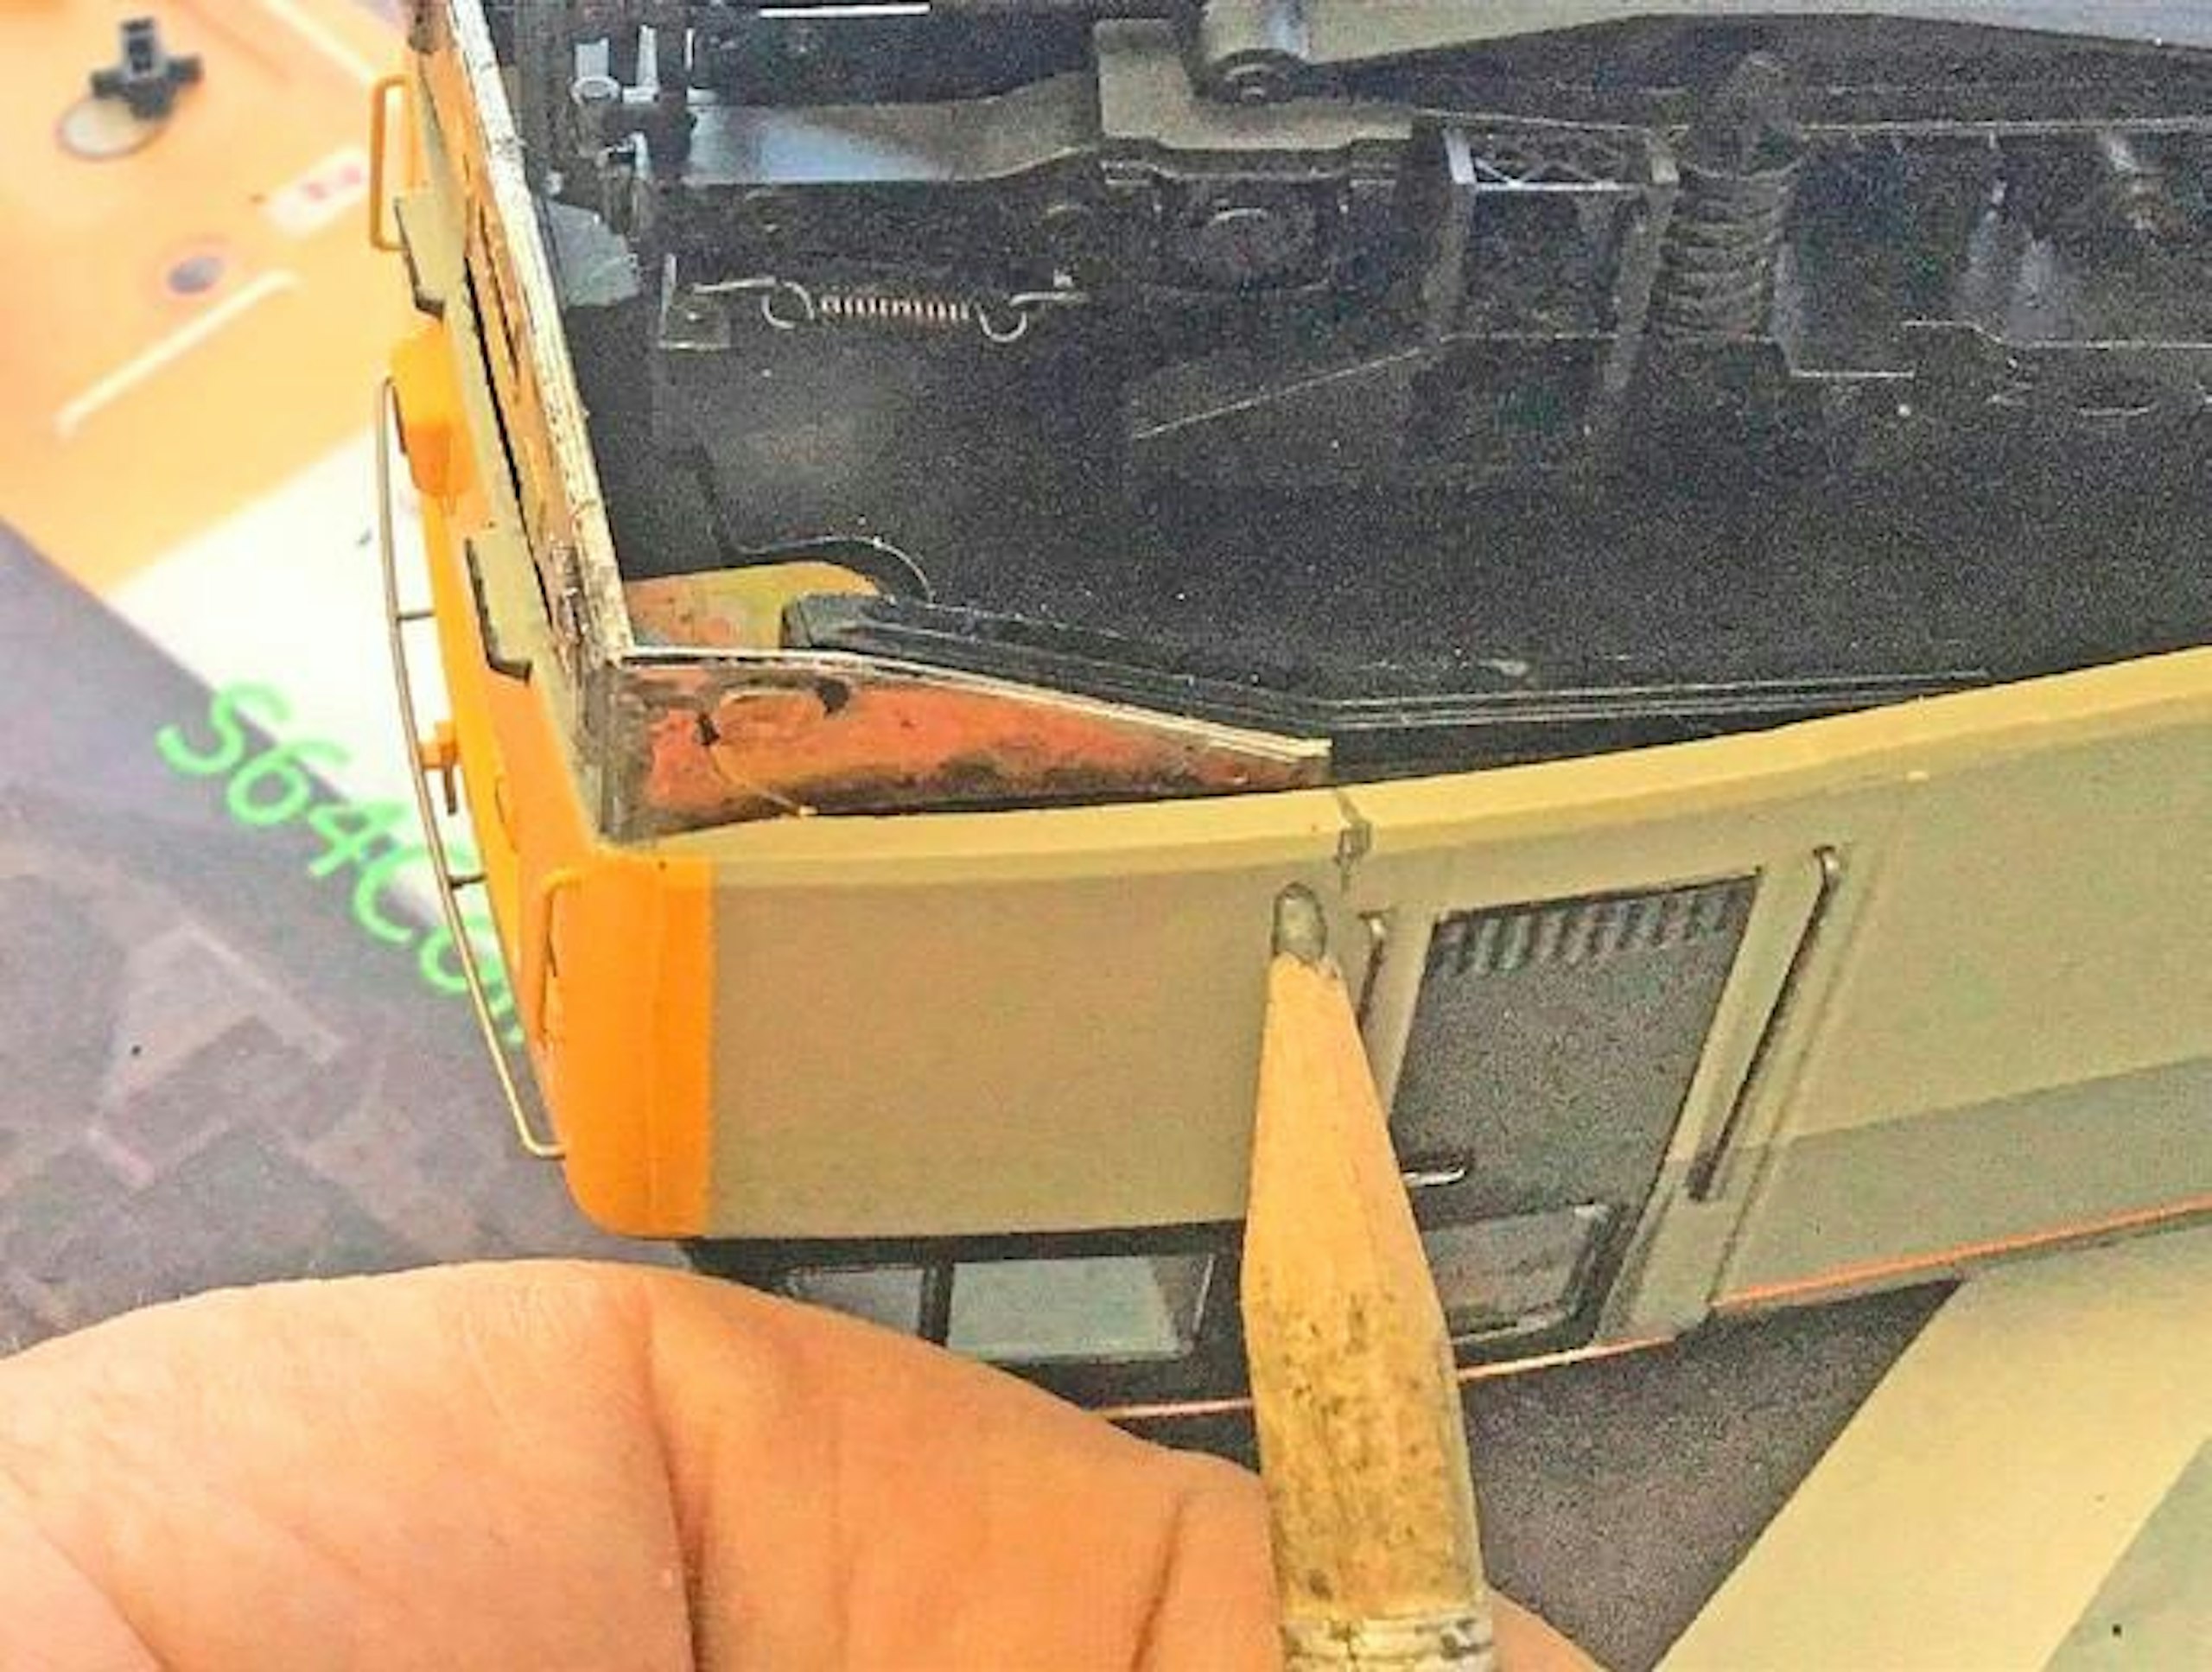
8 Using a pencil, and with the headstocks in place, mark out the areas of the cab edges that will need to be cut away, making use of your reference images. Use a straight edge to mark out the line along the sides.
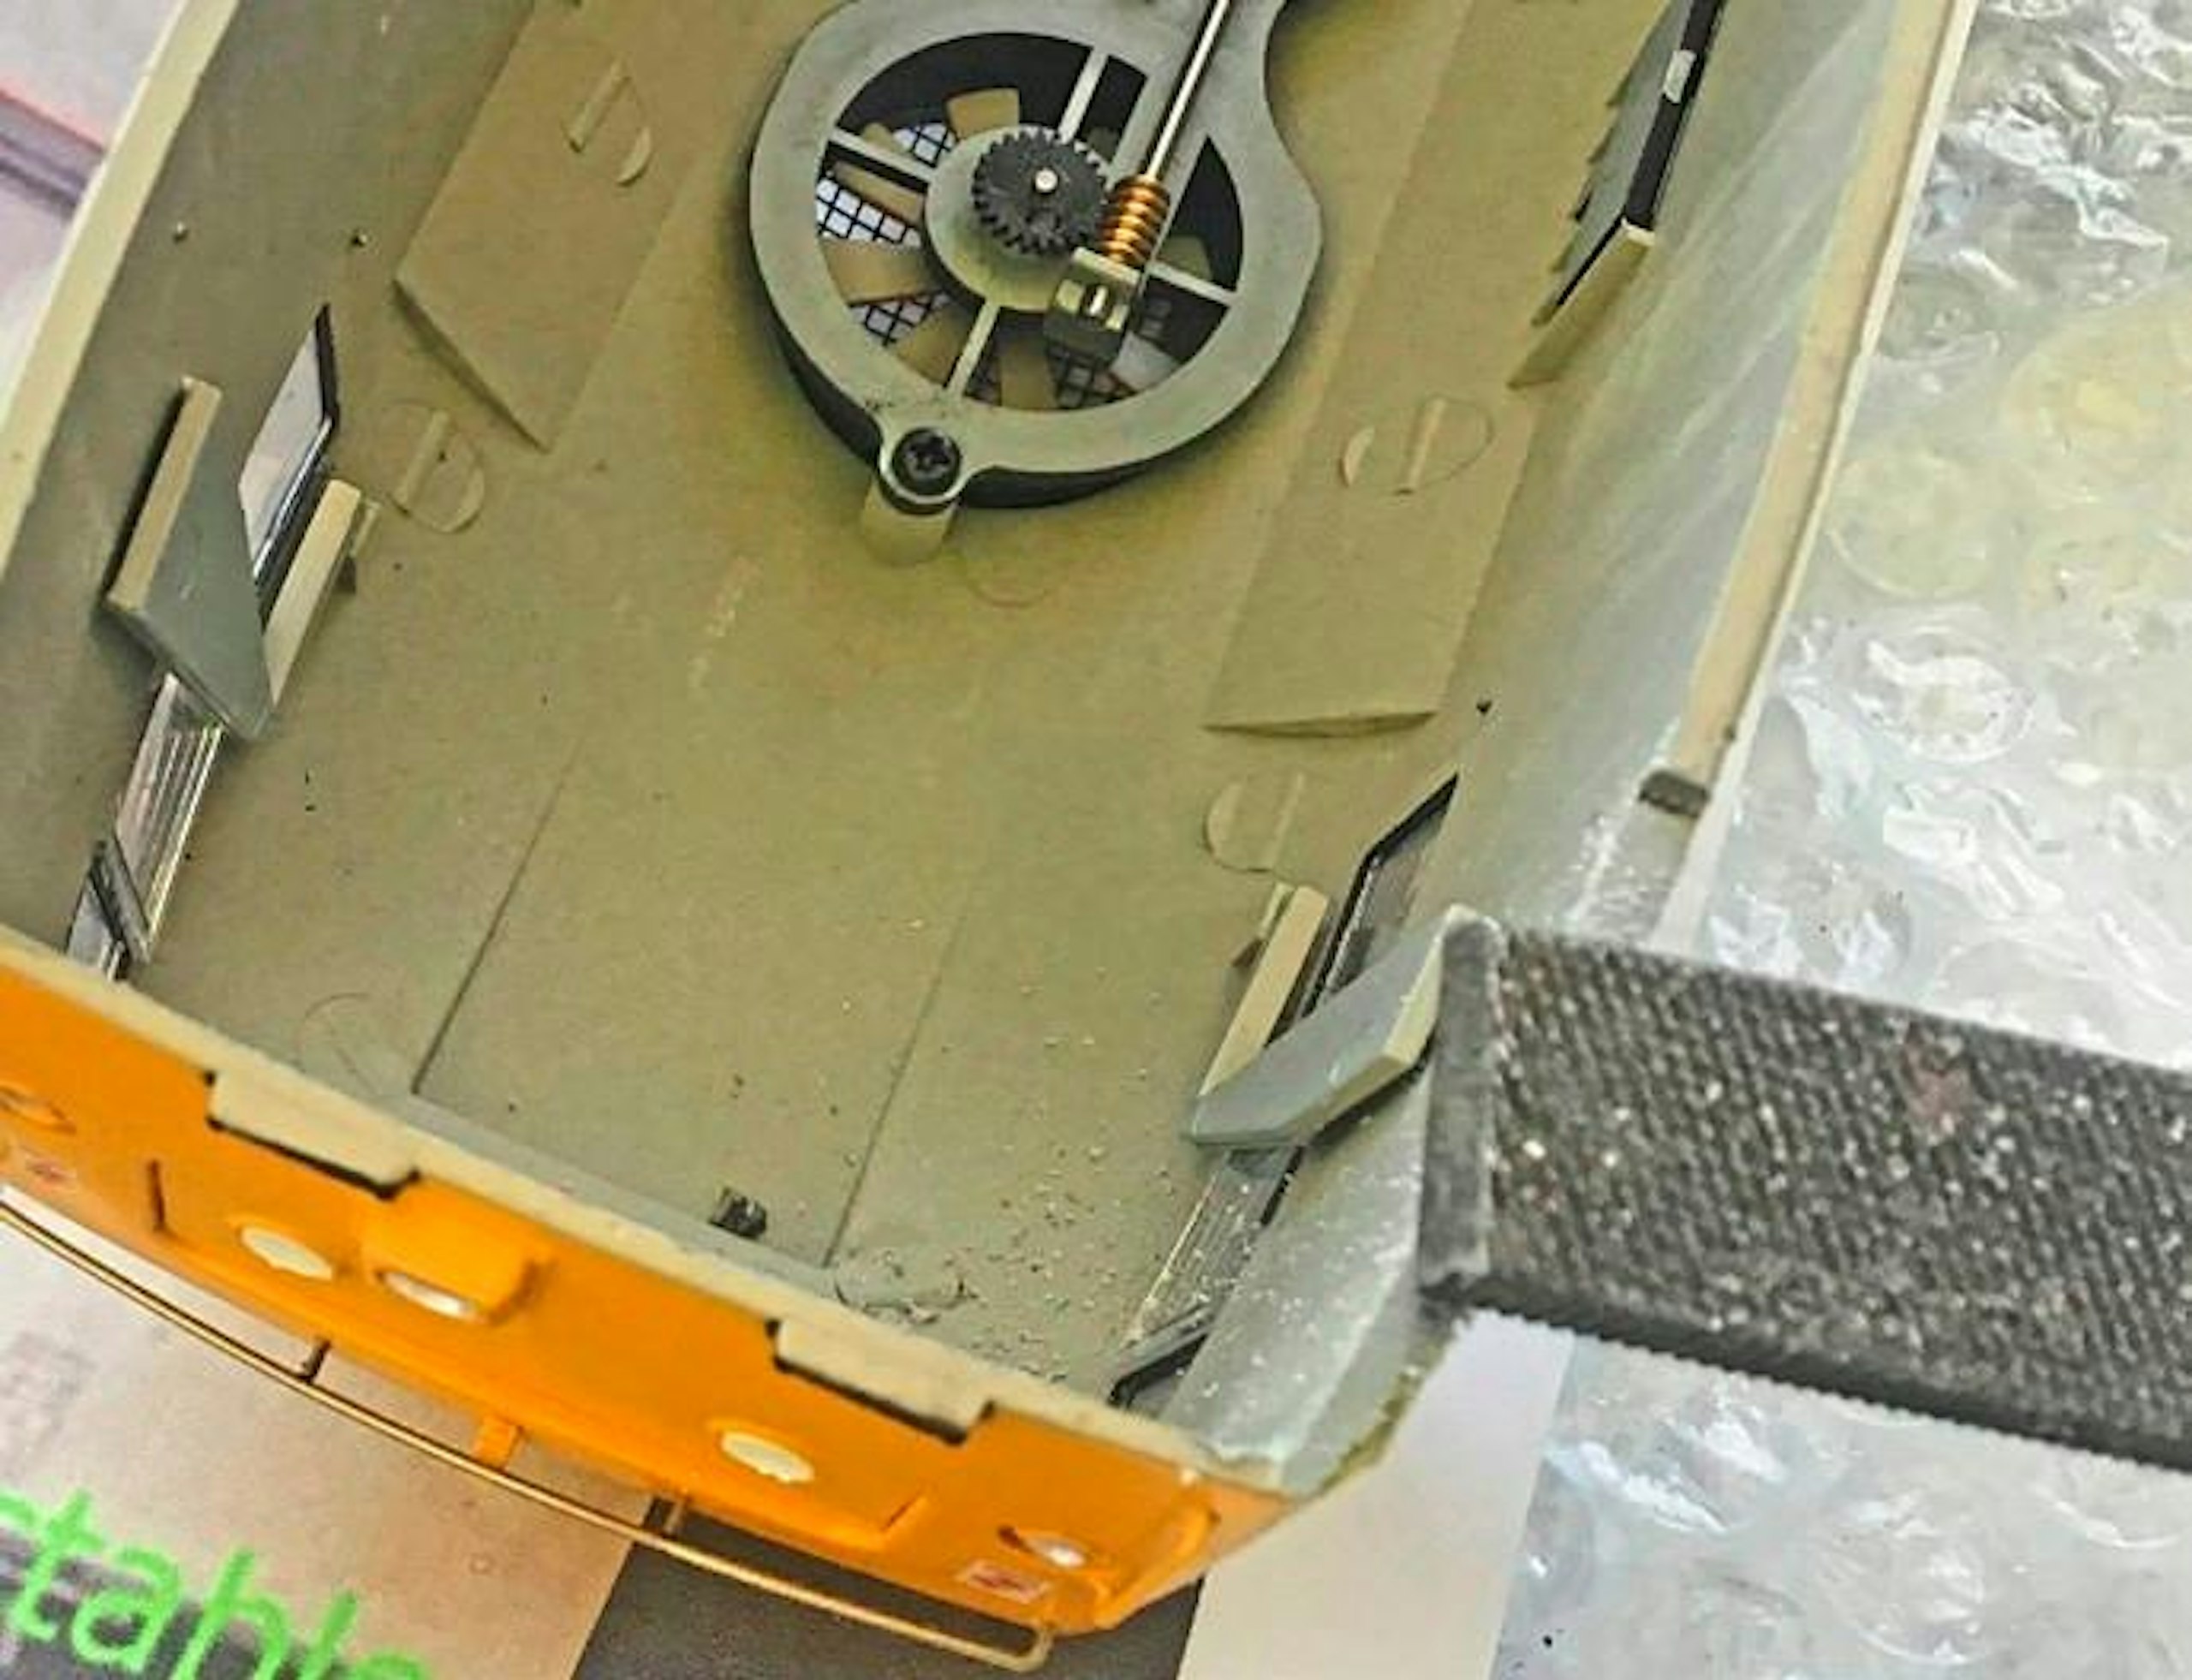
9 With a flat, coarse file, I began cutting away the waste, working up to my pencil lines gradually, while taking care not to damage the paintwork. When complete, the rough tool marks were smoothed with a file and abrasives.
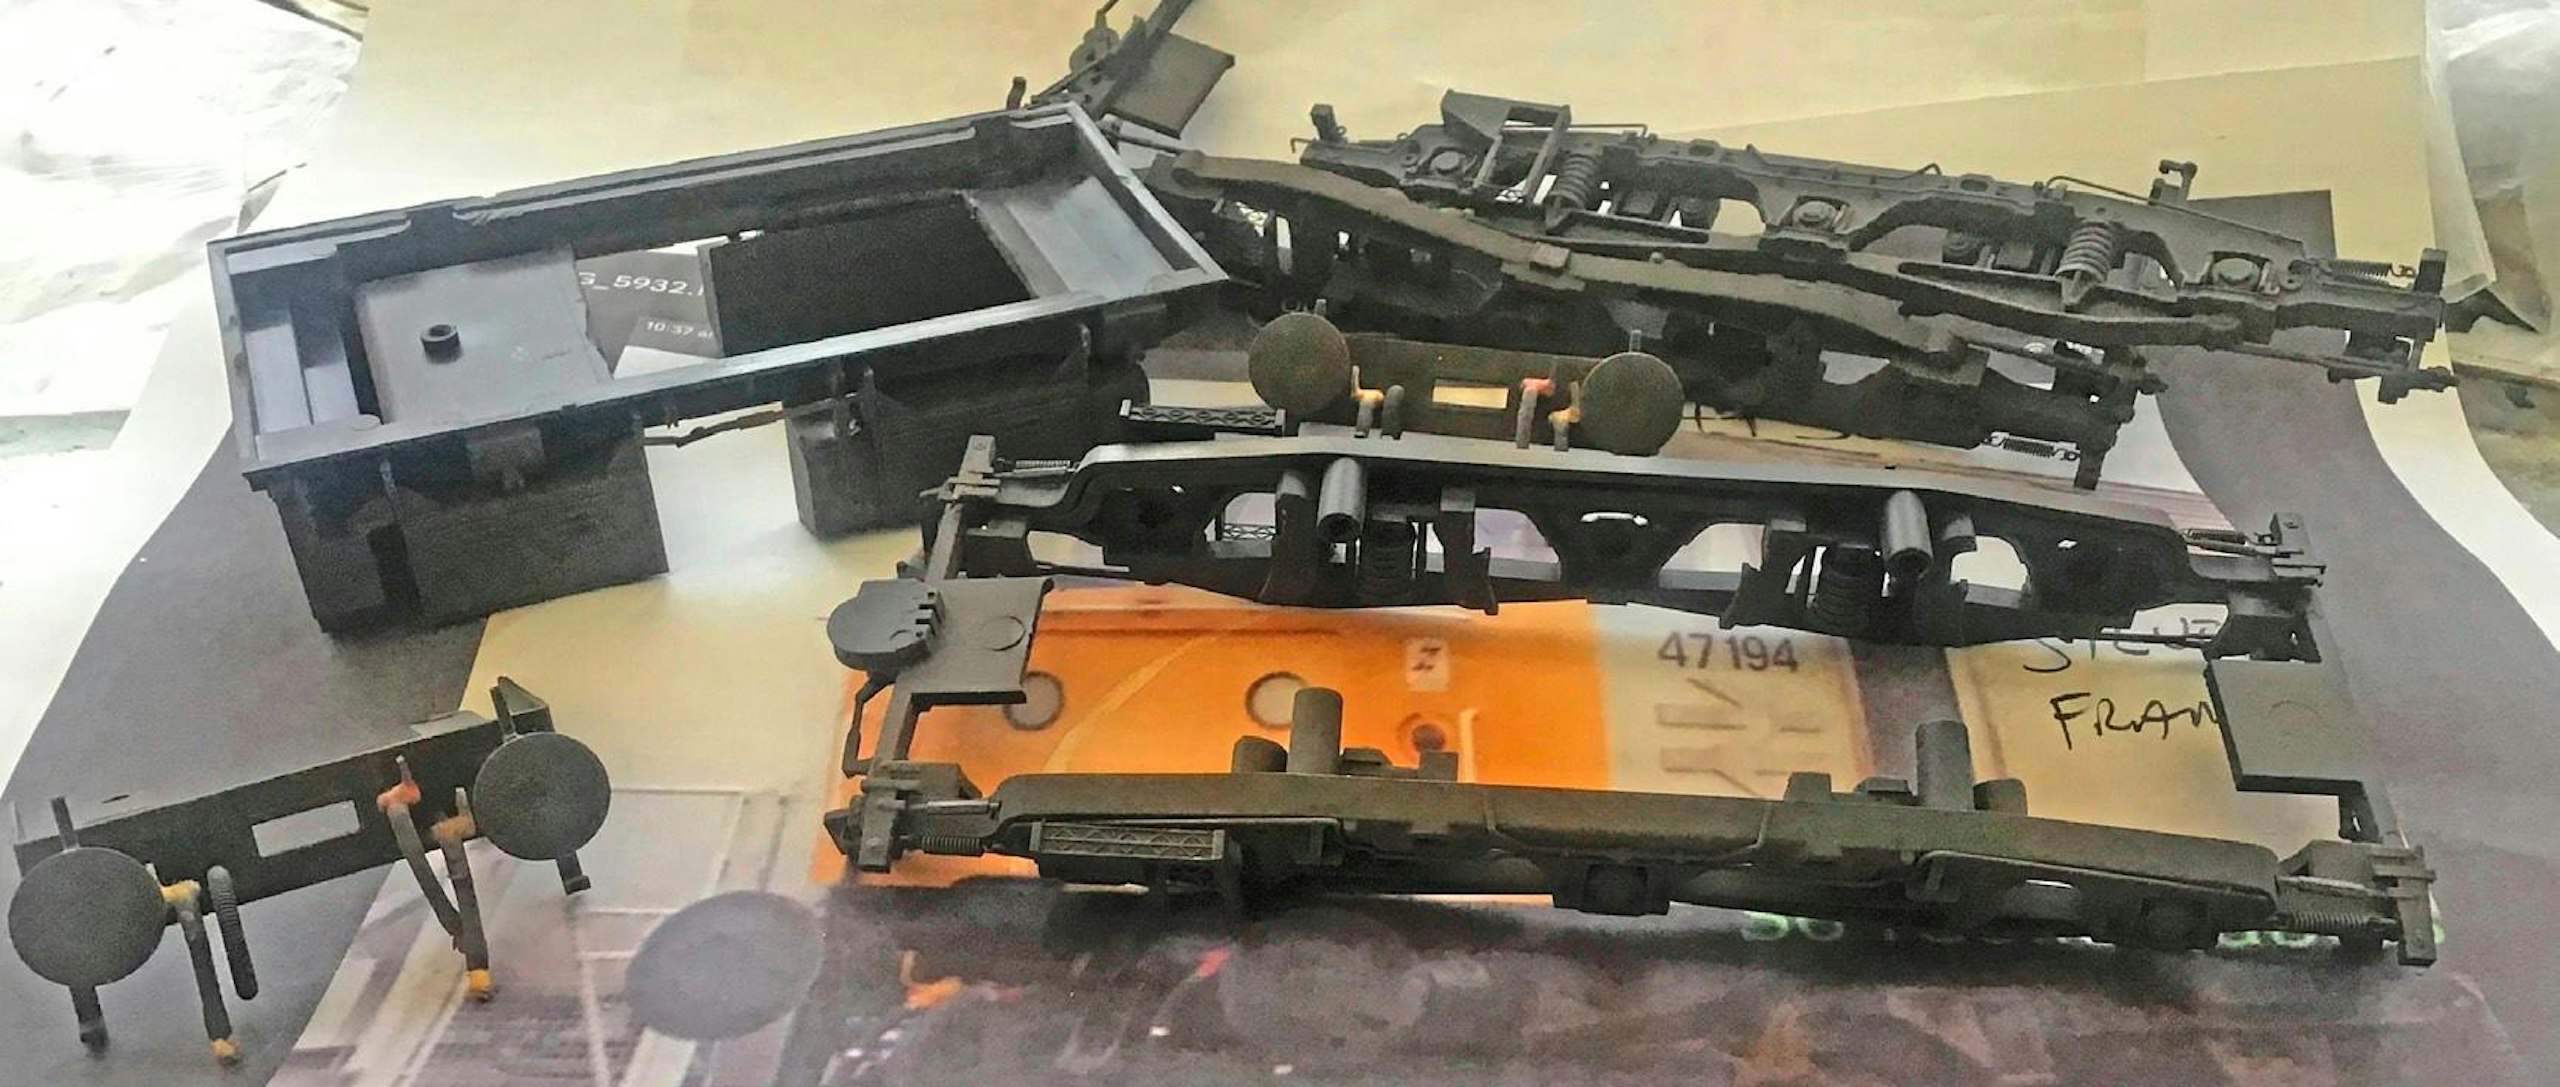
10 The new headstocks were primed and painted satin black using aerosol-based paints. When dry, the Heljan buffers, brake hoses and footsteps were glued in position. All the underframe parts were removed and weathered away from the model, making it easier to achieve an even coating of grime. Much better than those so-called weathering jobs that only touch the outer surface!
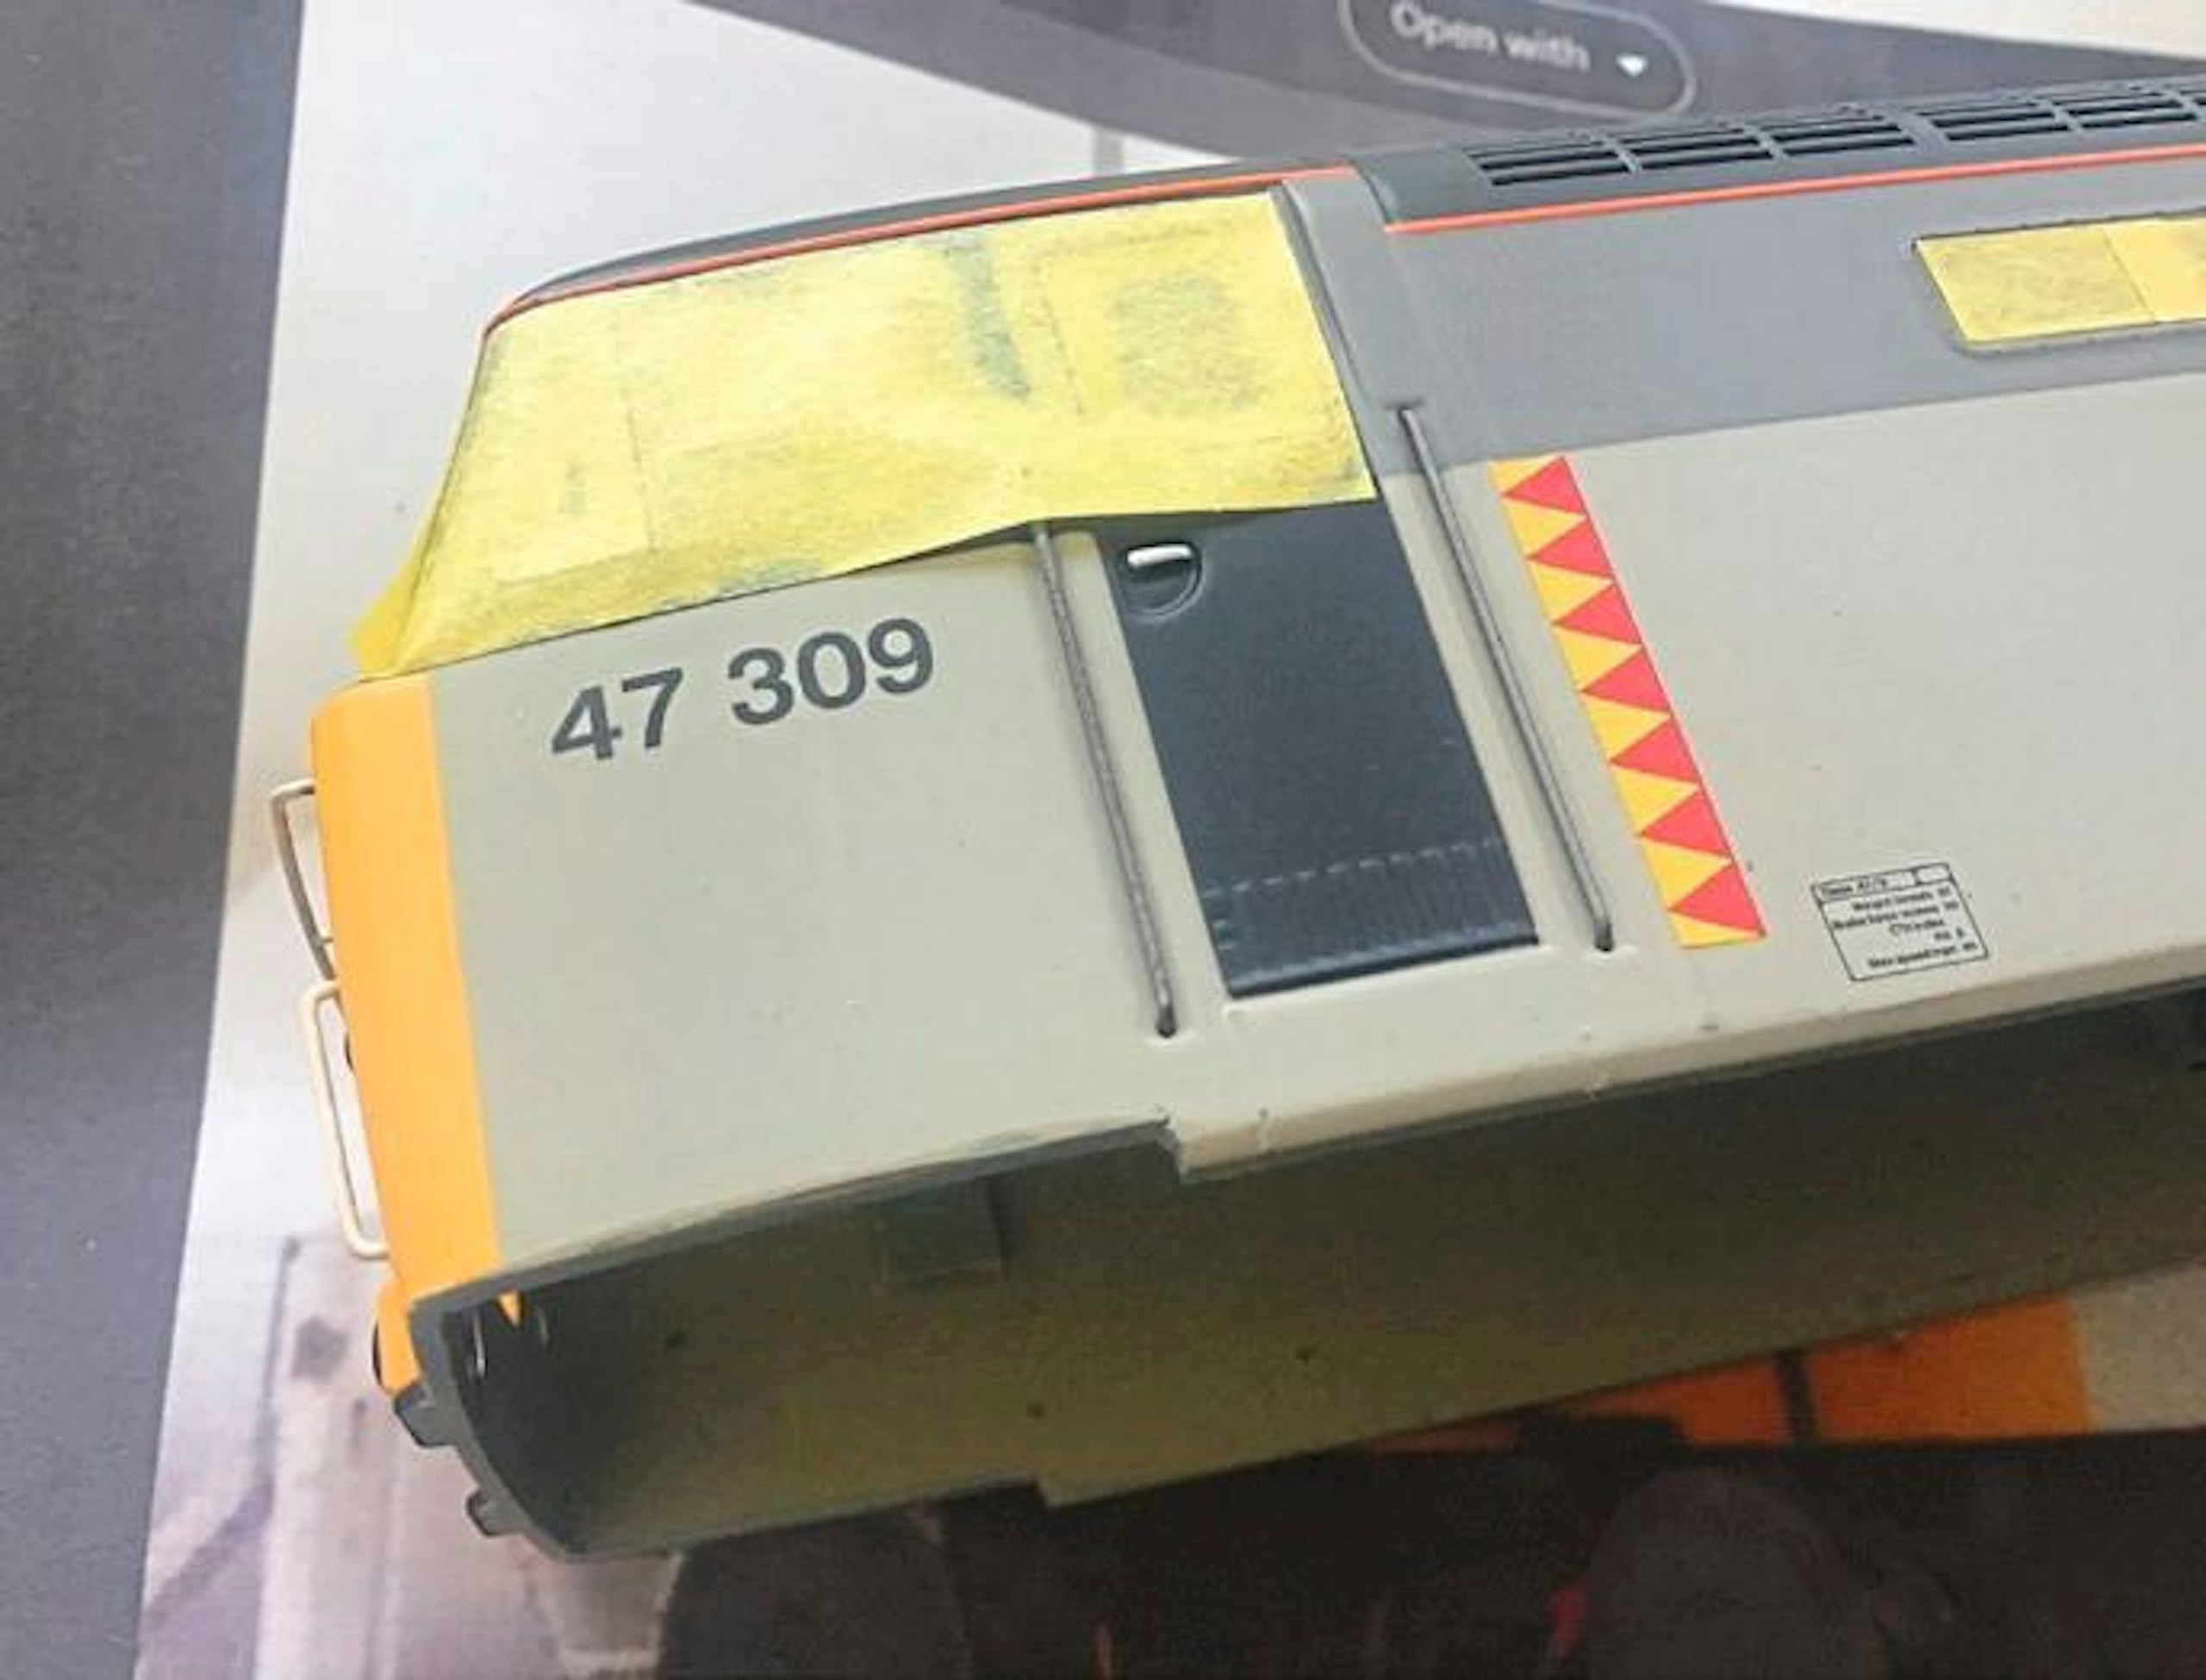
11 This Heljan ‘47’ came without a number or logos, so I applied some waterslide decals following an initial coat of clear gloss varnish. When the decals were dry, satin varnish followed before the bodyshell was weathered.
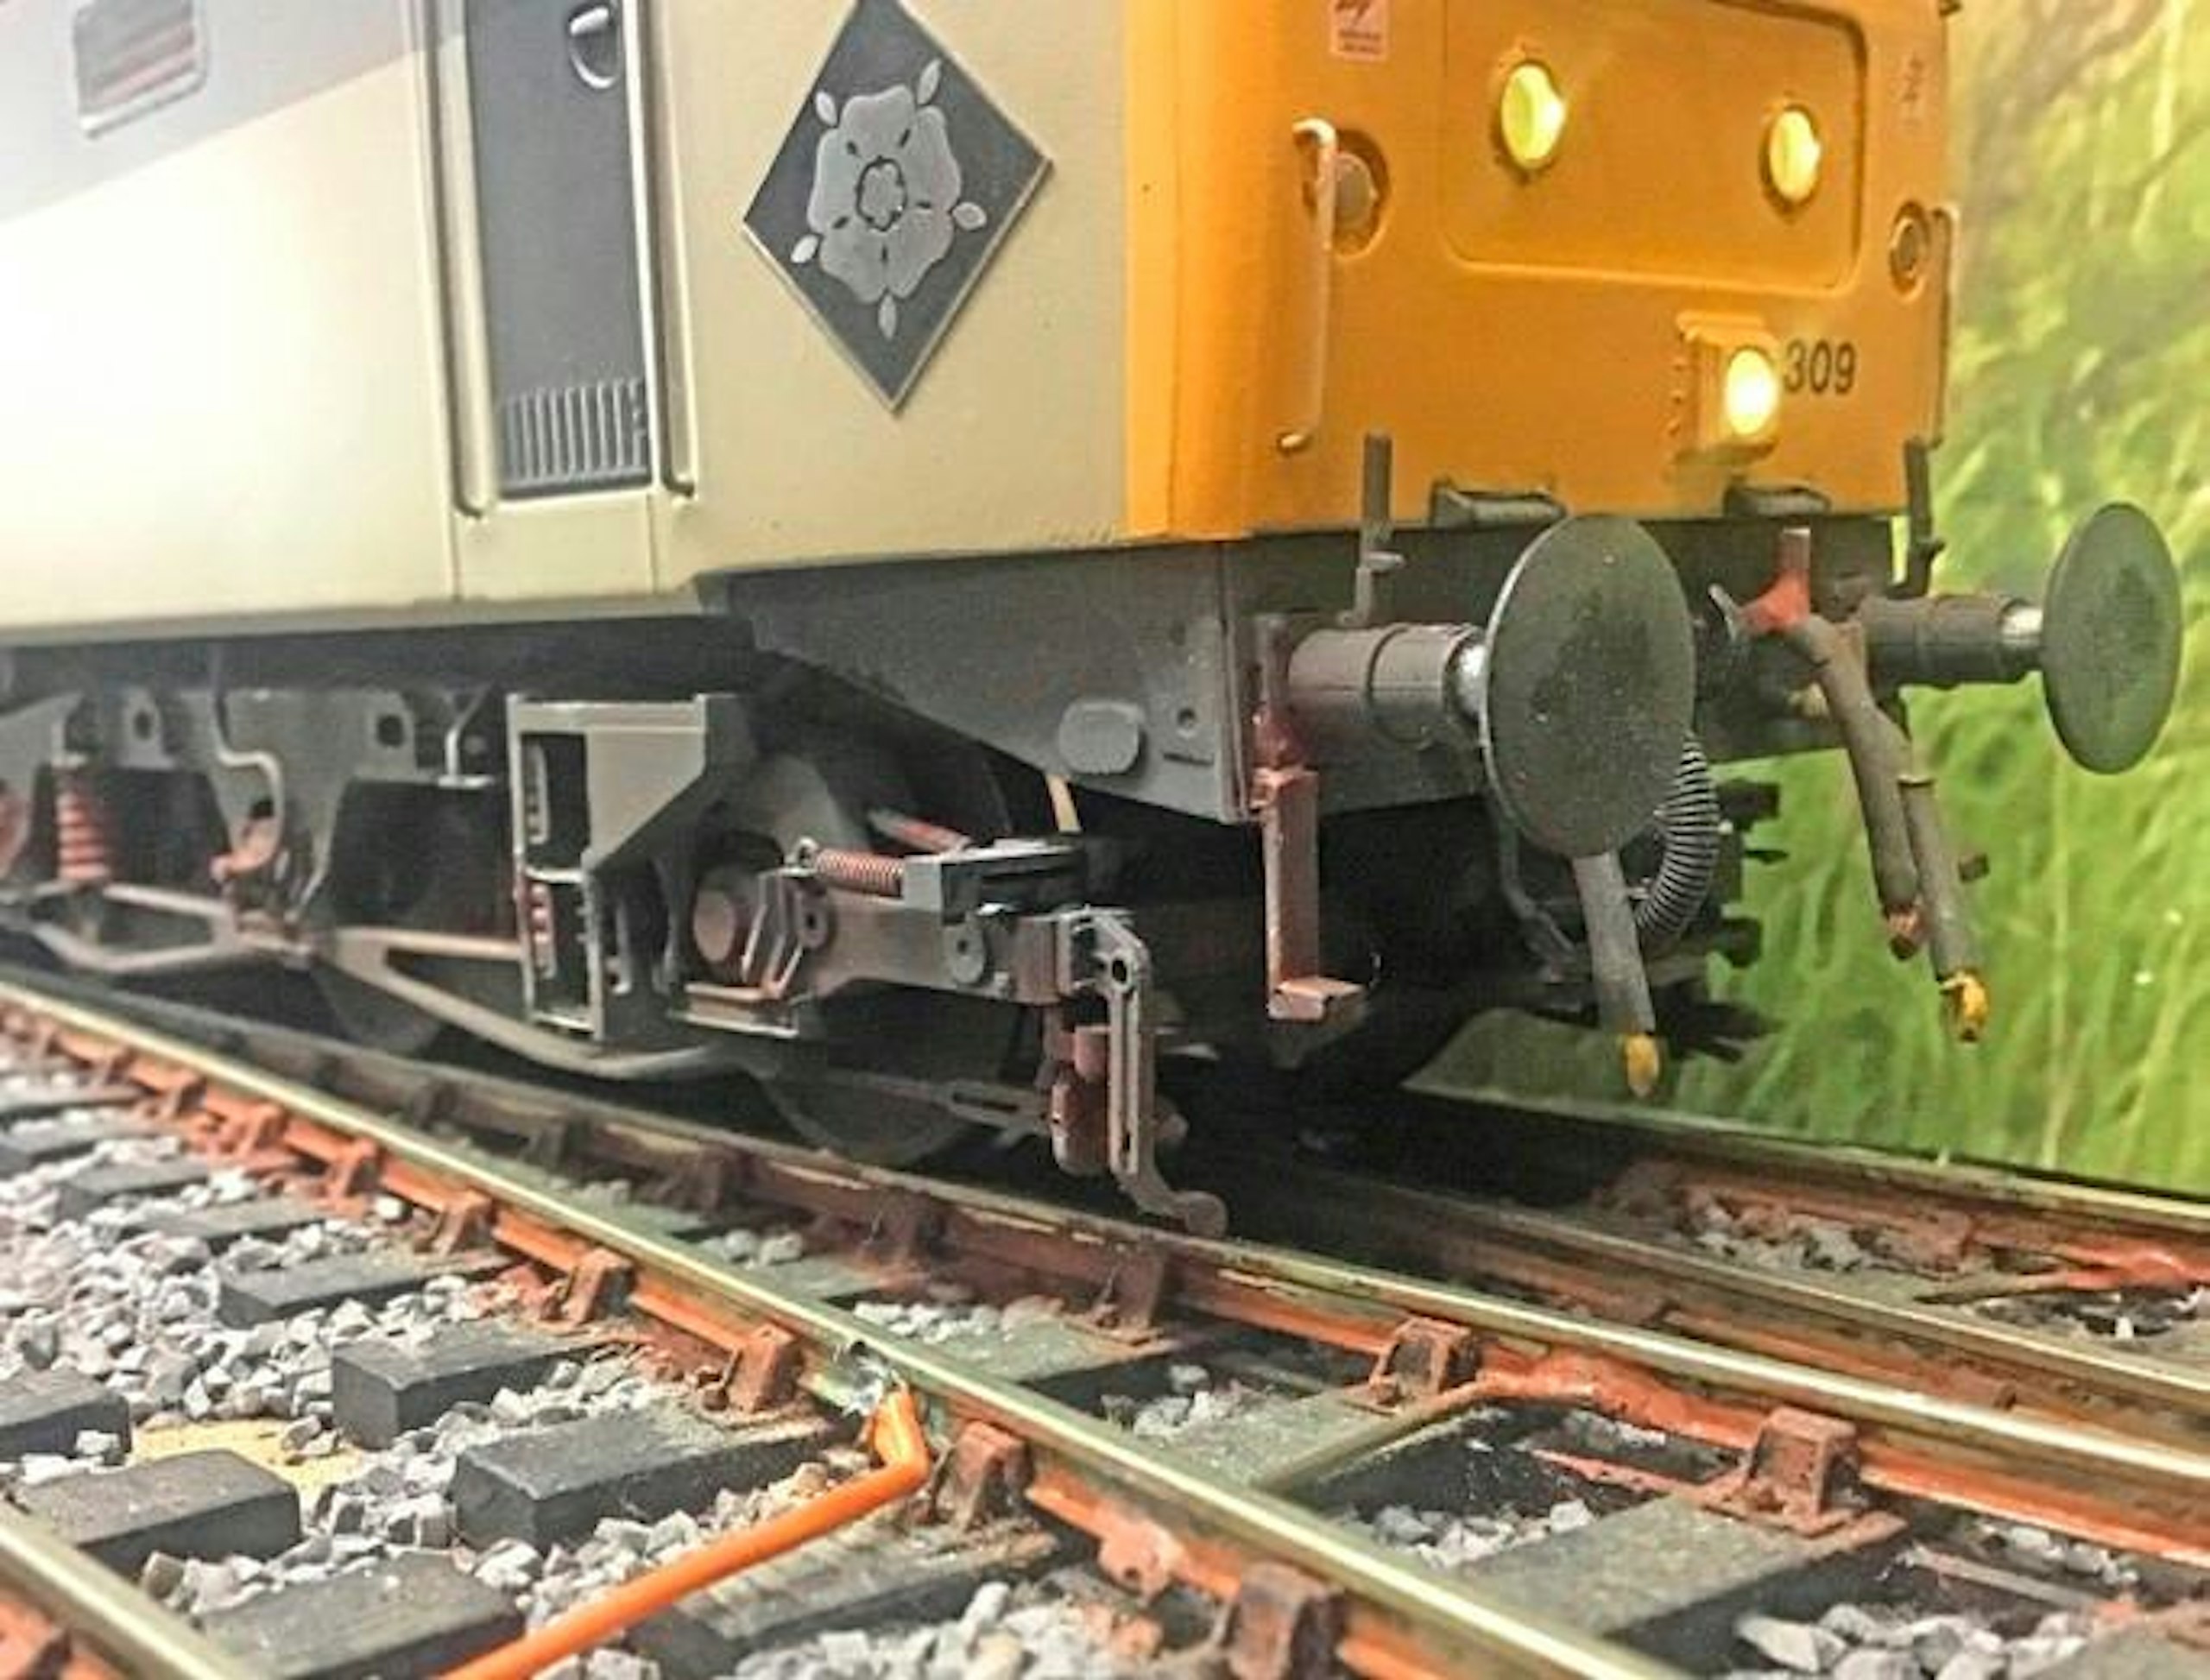
12 With all the details installed, the painted and weathered headstocks were mounted to the chassis using the pairs of original screws. The ‘47’ was reassembled and it was ready for action!
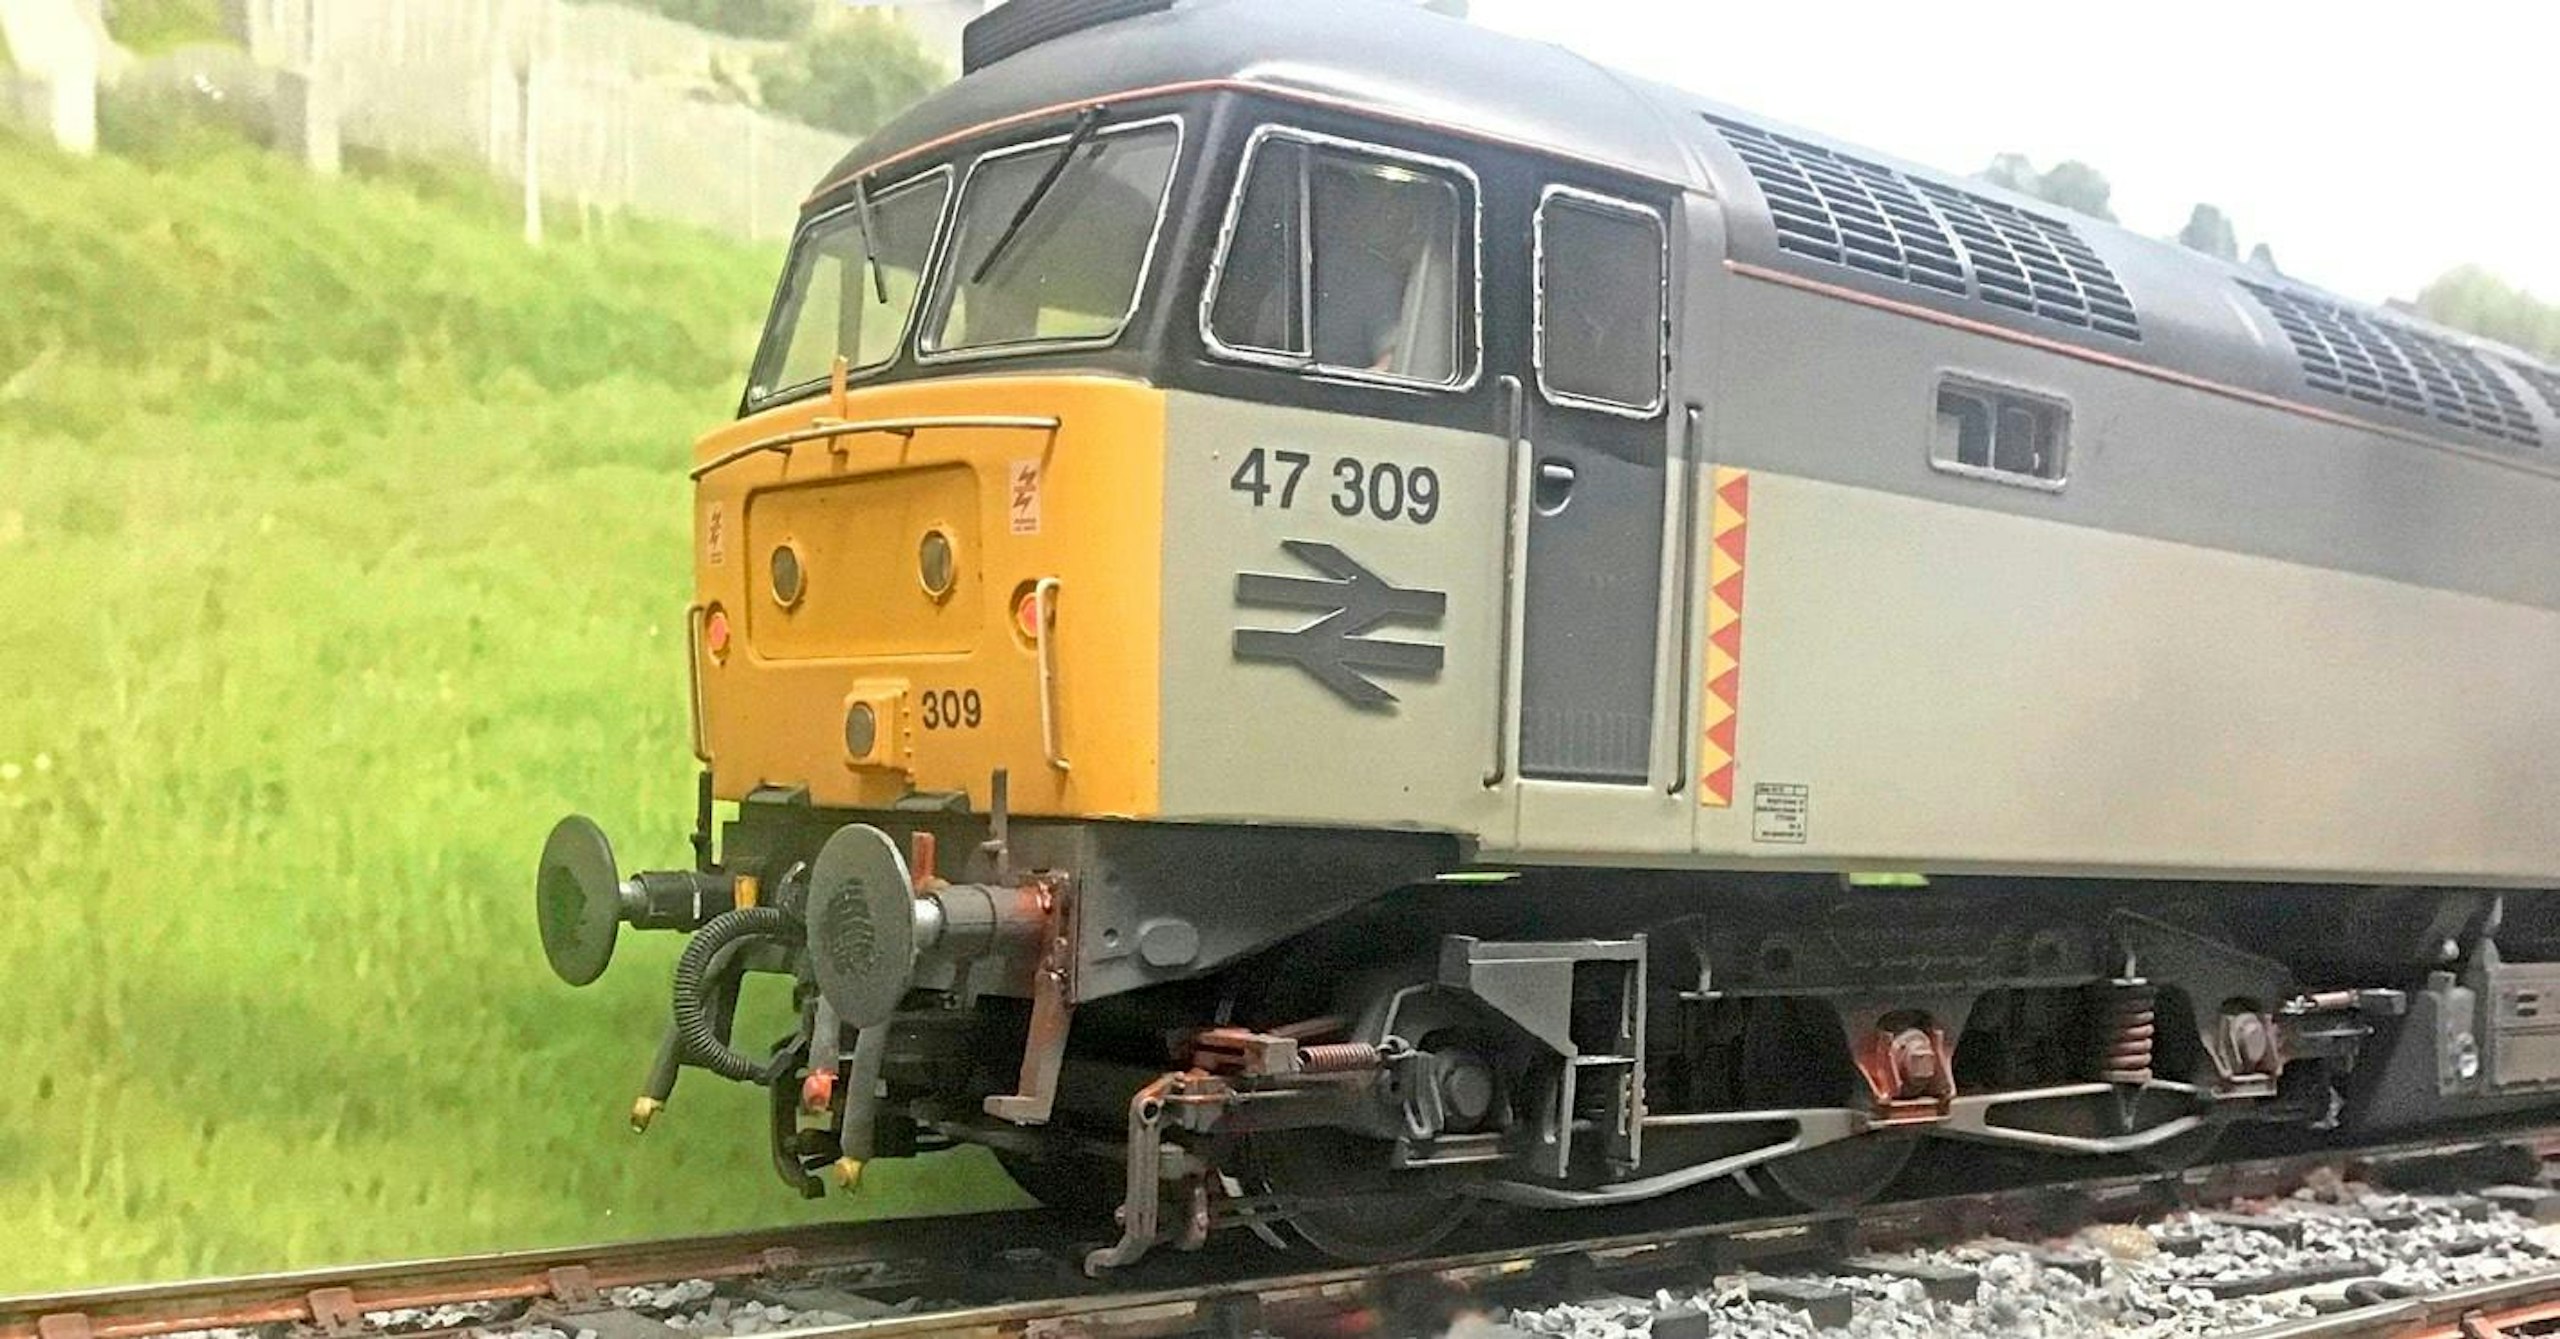
Heljan’s impressive ‘O’ gauge Class 47 has yet to be offered in ‘cut-back’ headstock form, so this quick conversion project helps modellers add variety to their fleet.
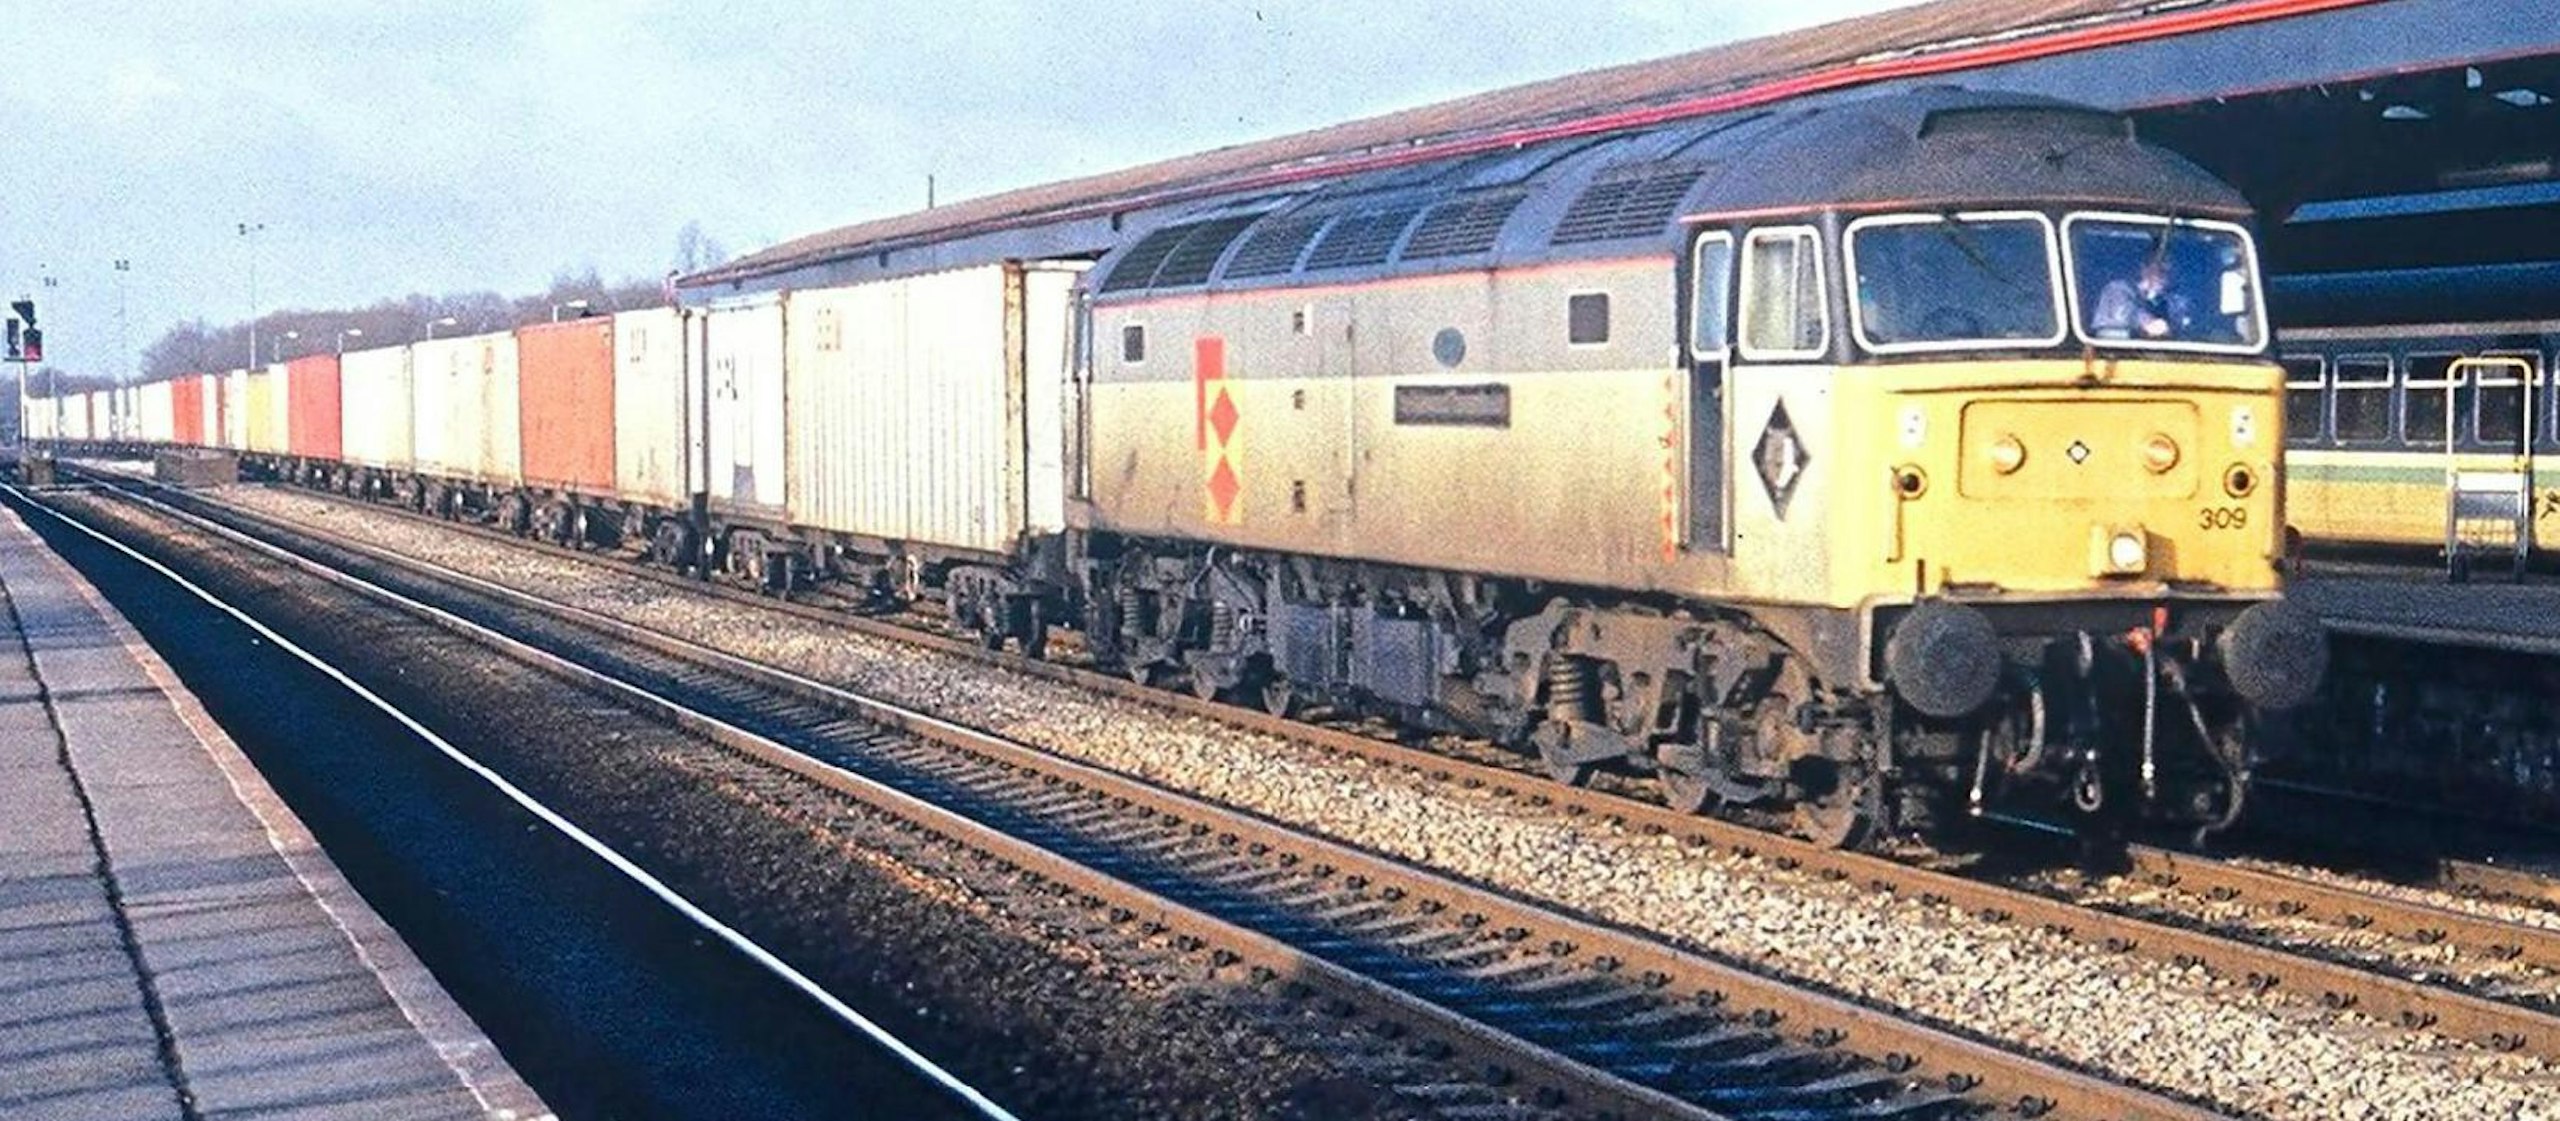
Tinsley depot’s 47309 carries BR Railfreight Distribution livery and still features the original cowled bufferbeam in this view, as it passes through Oxford on a liner train in February 1991. It was named The Halewood Transmission after the Merseyside Ford plant in September 1990. COLOUR RAIL
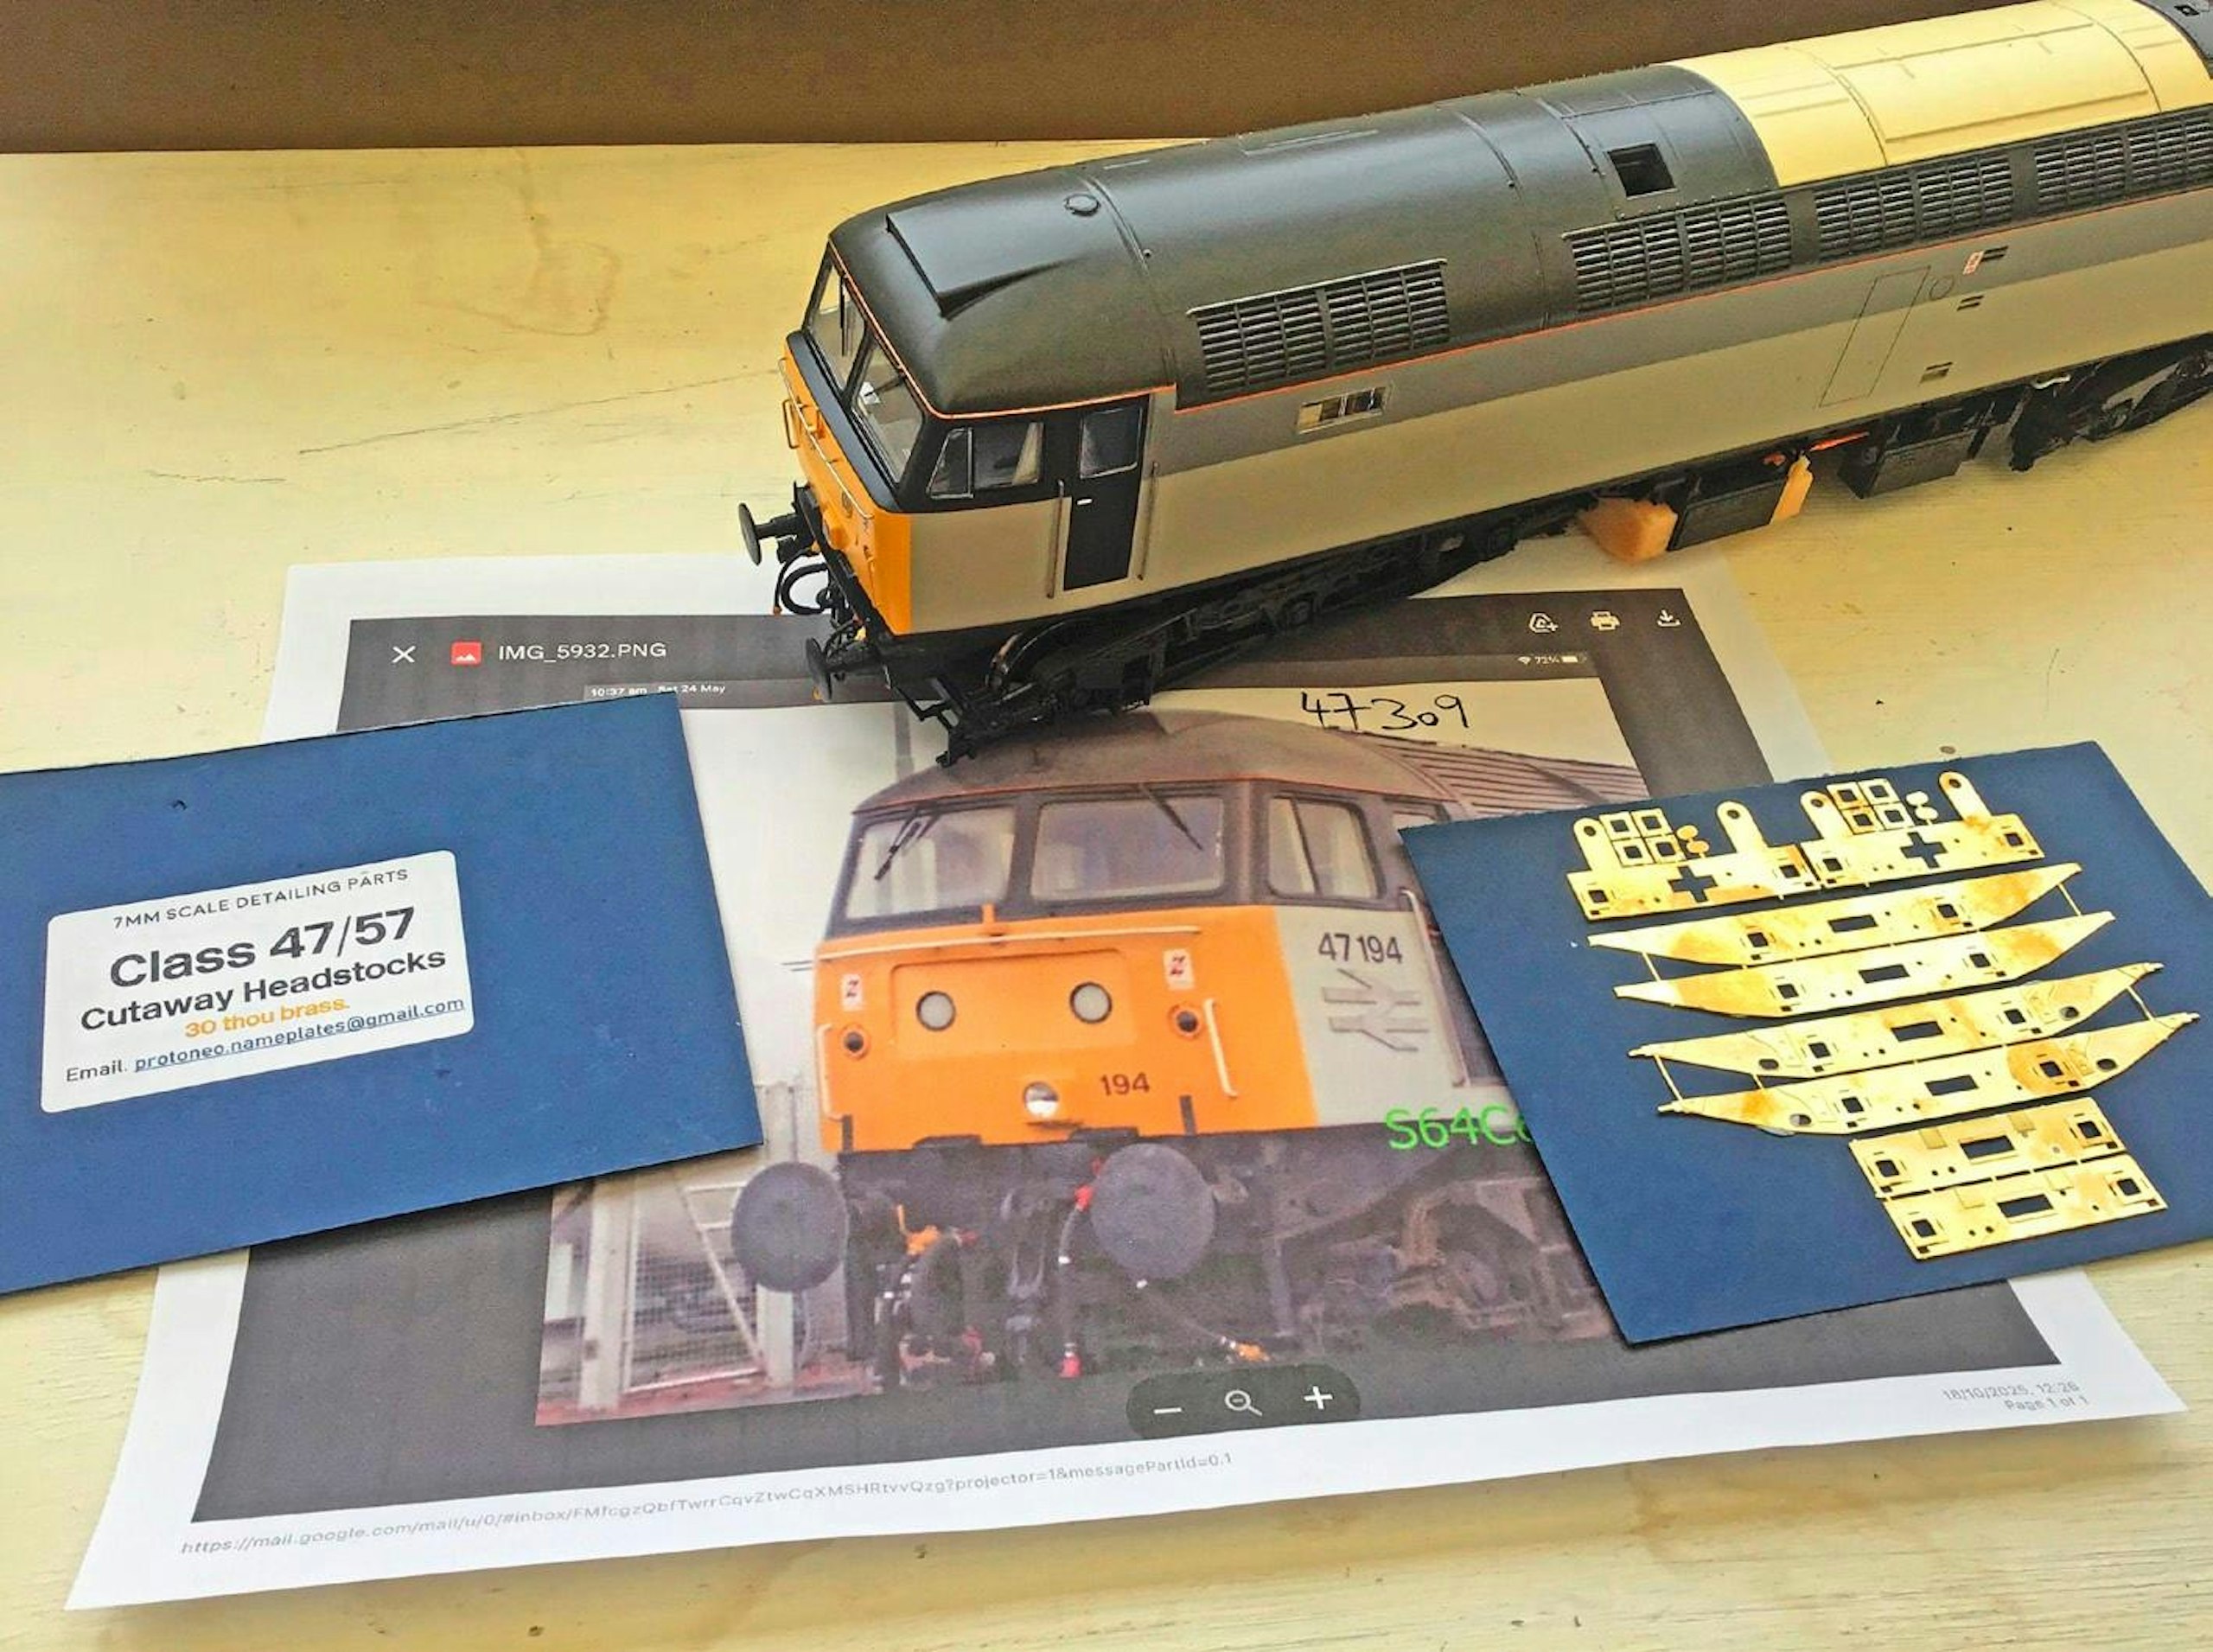
Along with a donor Class 47 and the Proto Neo conversion kit, the other essential resource is a stock of prototype reference images.
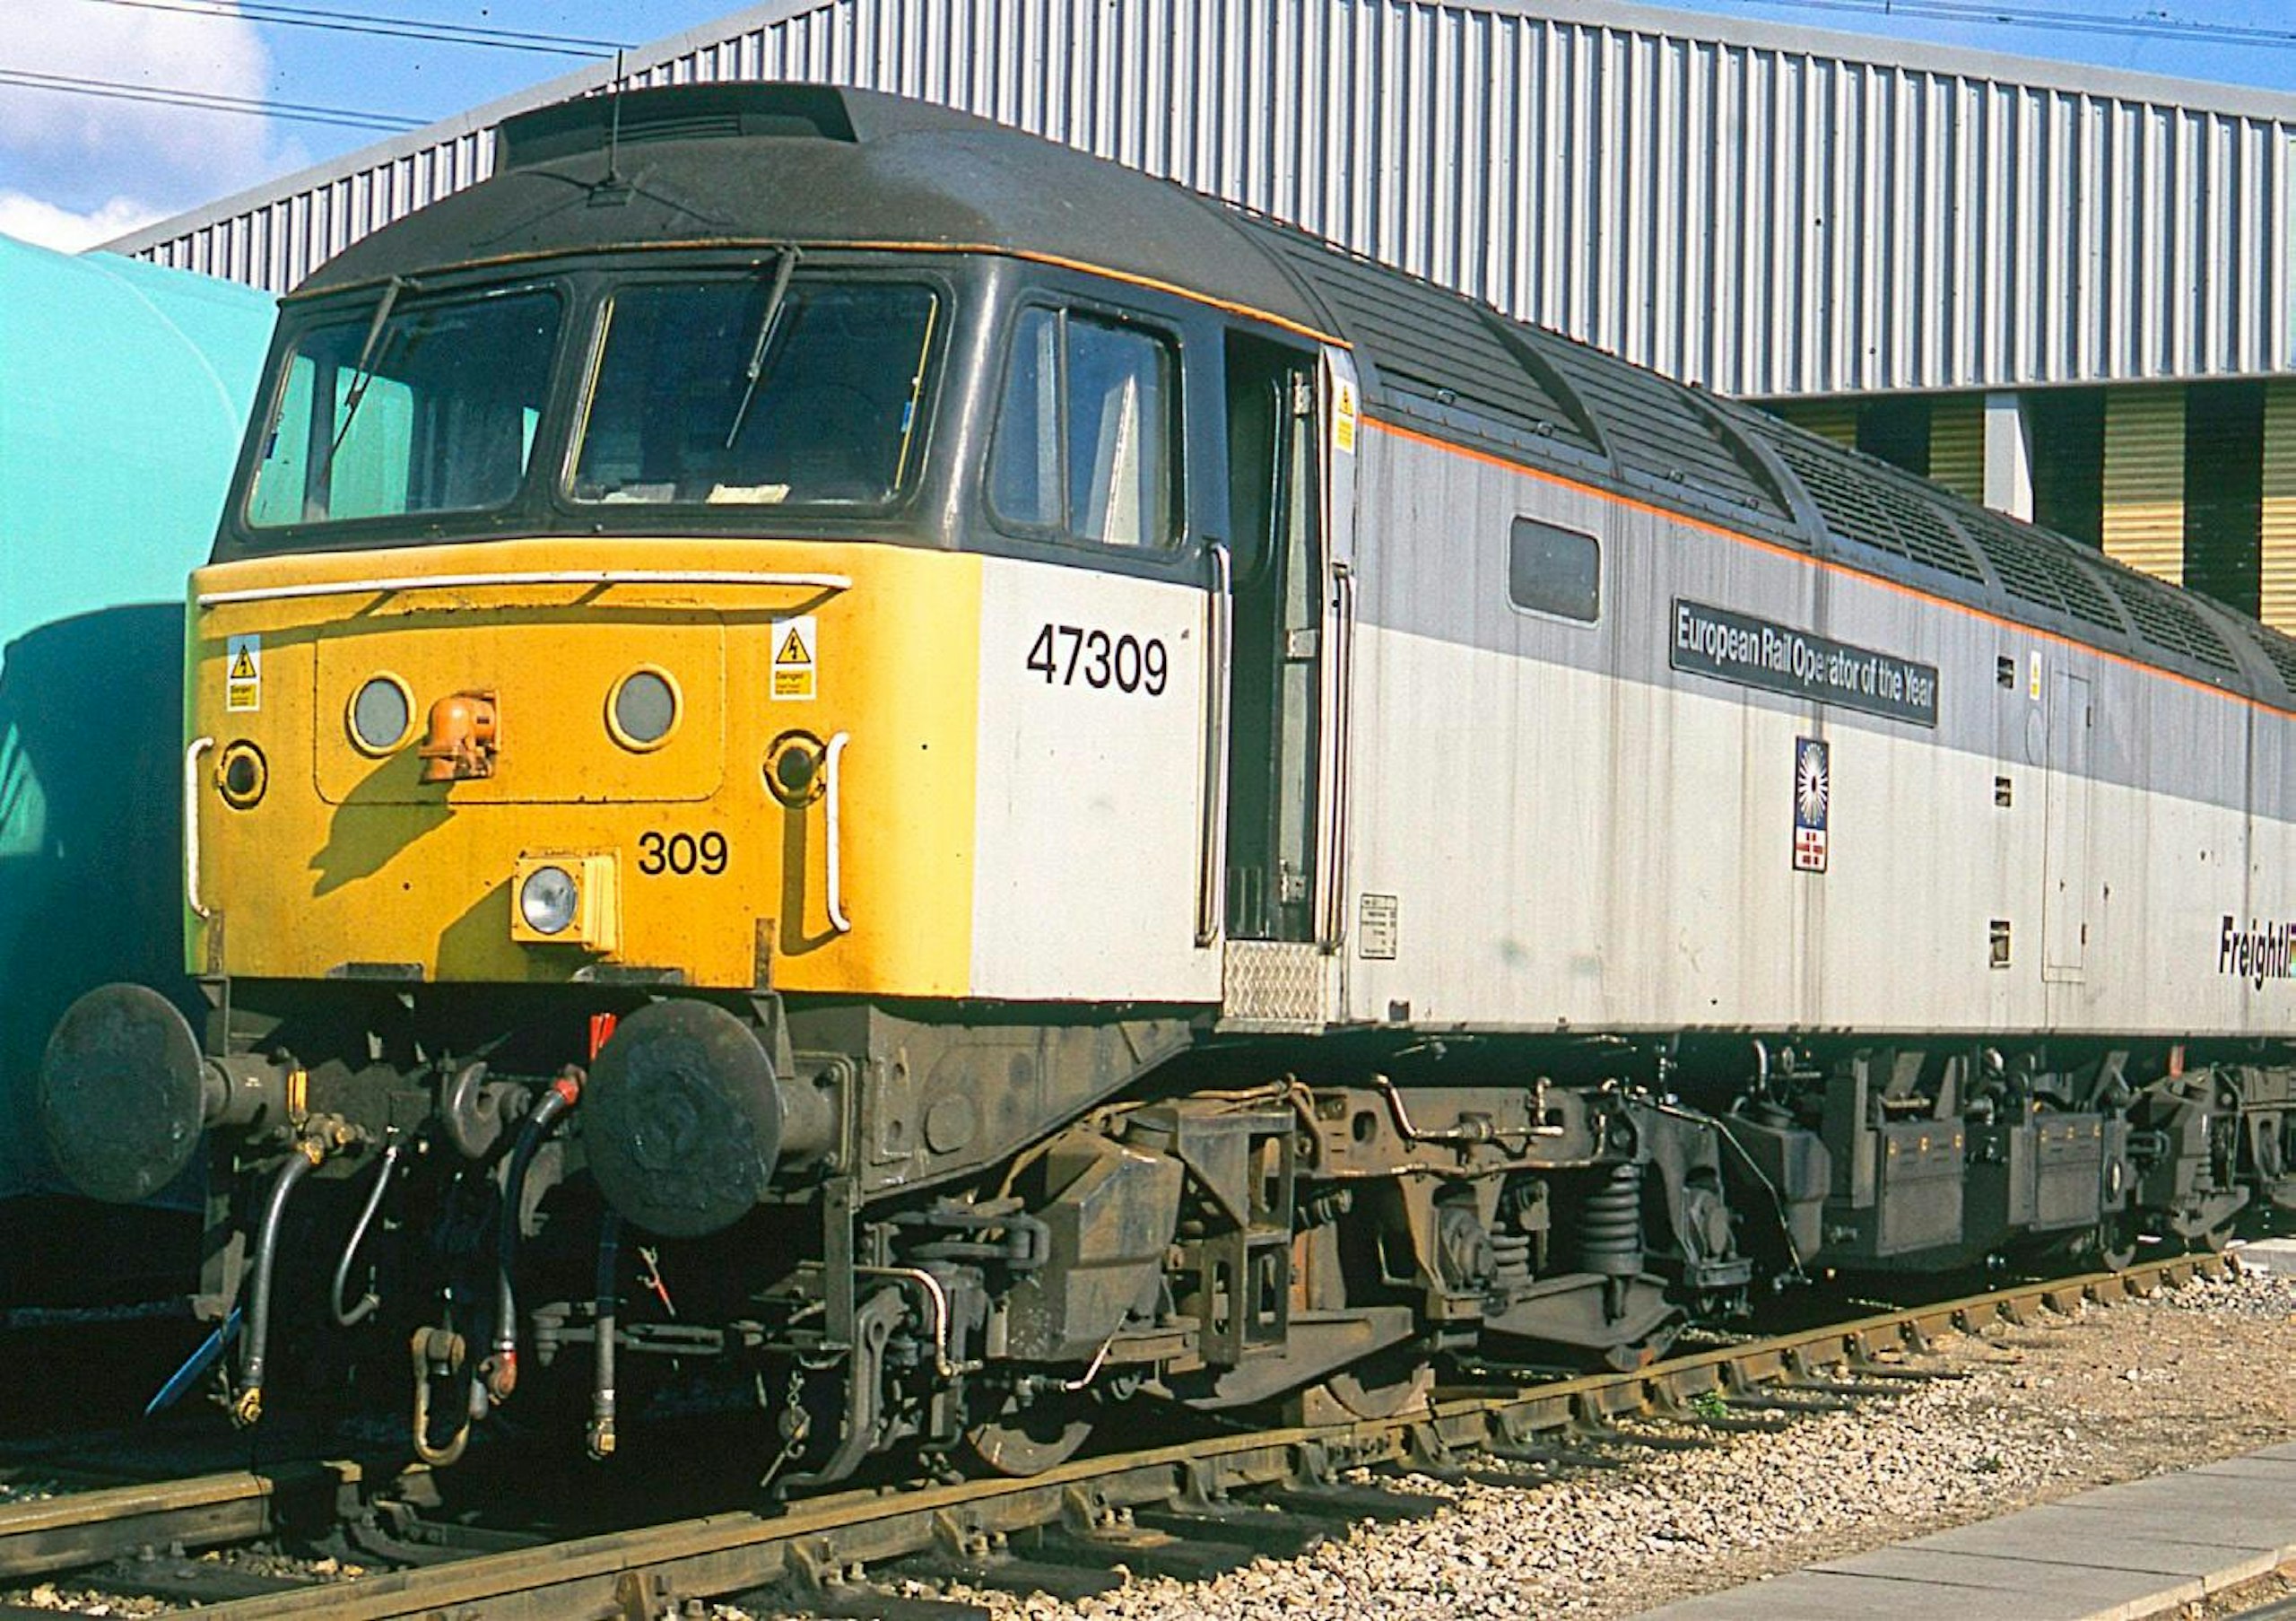
The cutaway bufferbeam treatment was meted out to 47309 in the late 1990s, as can be seen in this view at Loughborough. Following privatisation, 47309 became a Freightliner locomotive and was re-named European Rail Operator of the Year in 1998. A set of large sandboxes was also fitted to each bogie. The end came in 2009, when 47309 was scrapped. COLOUR RAIL
Subscribe to a Model Rail Print+ Subscription today and you'll get instant digital access, PLUS FREE UK delivery so you will never miss an issue.