Workbench
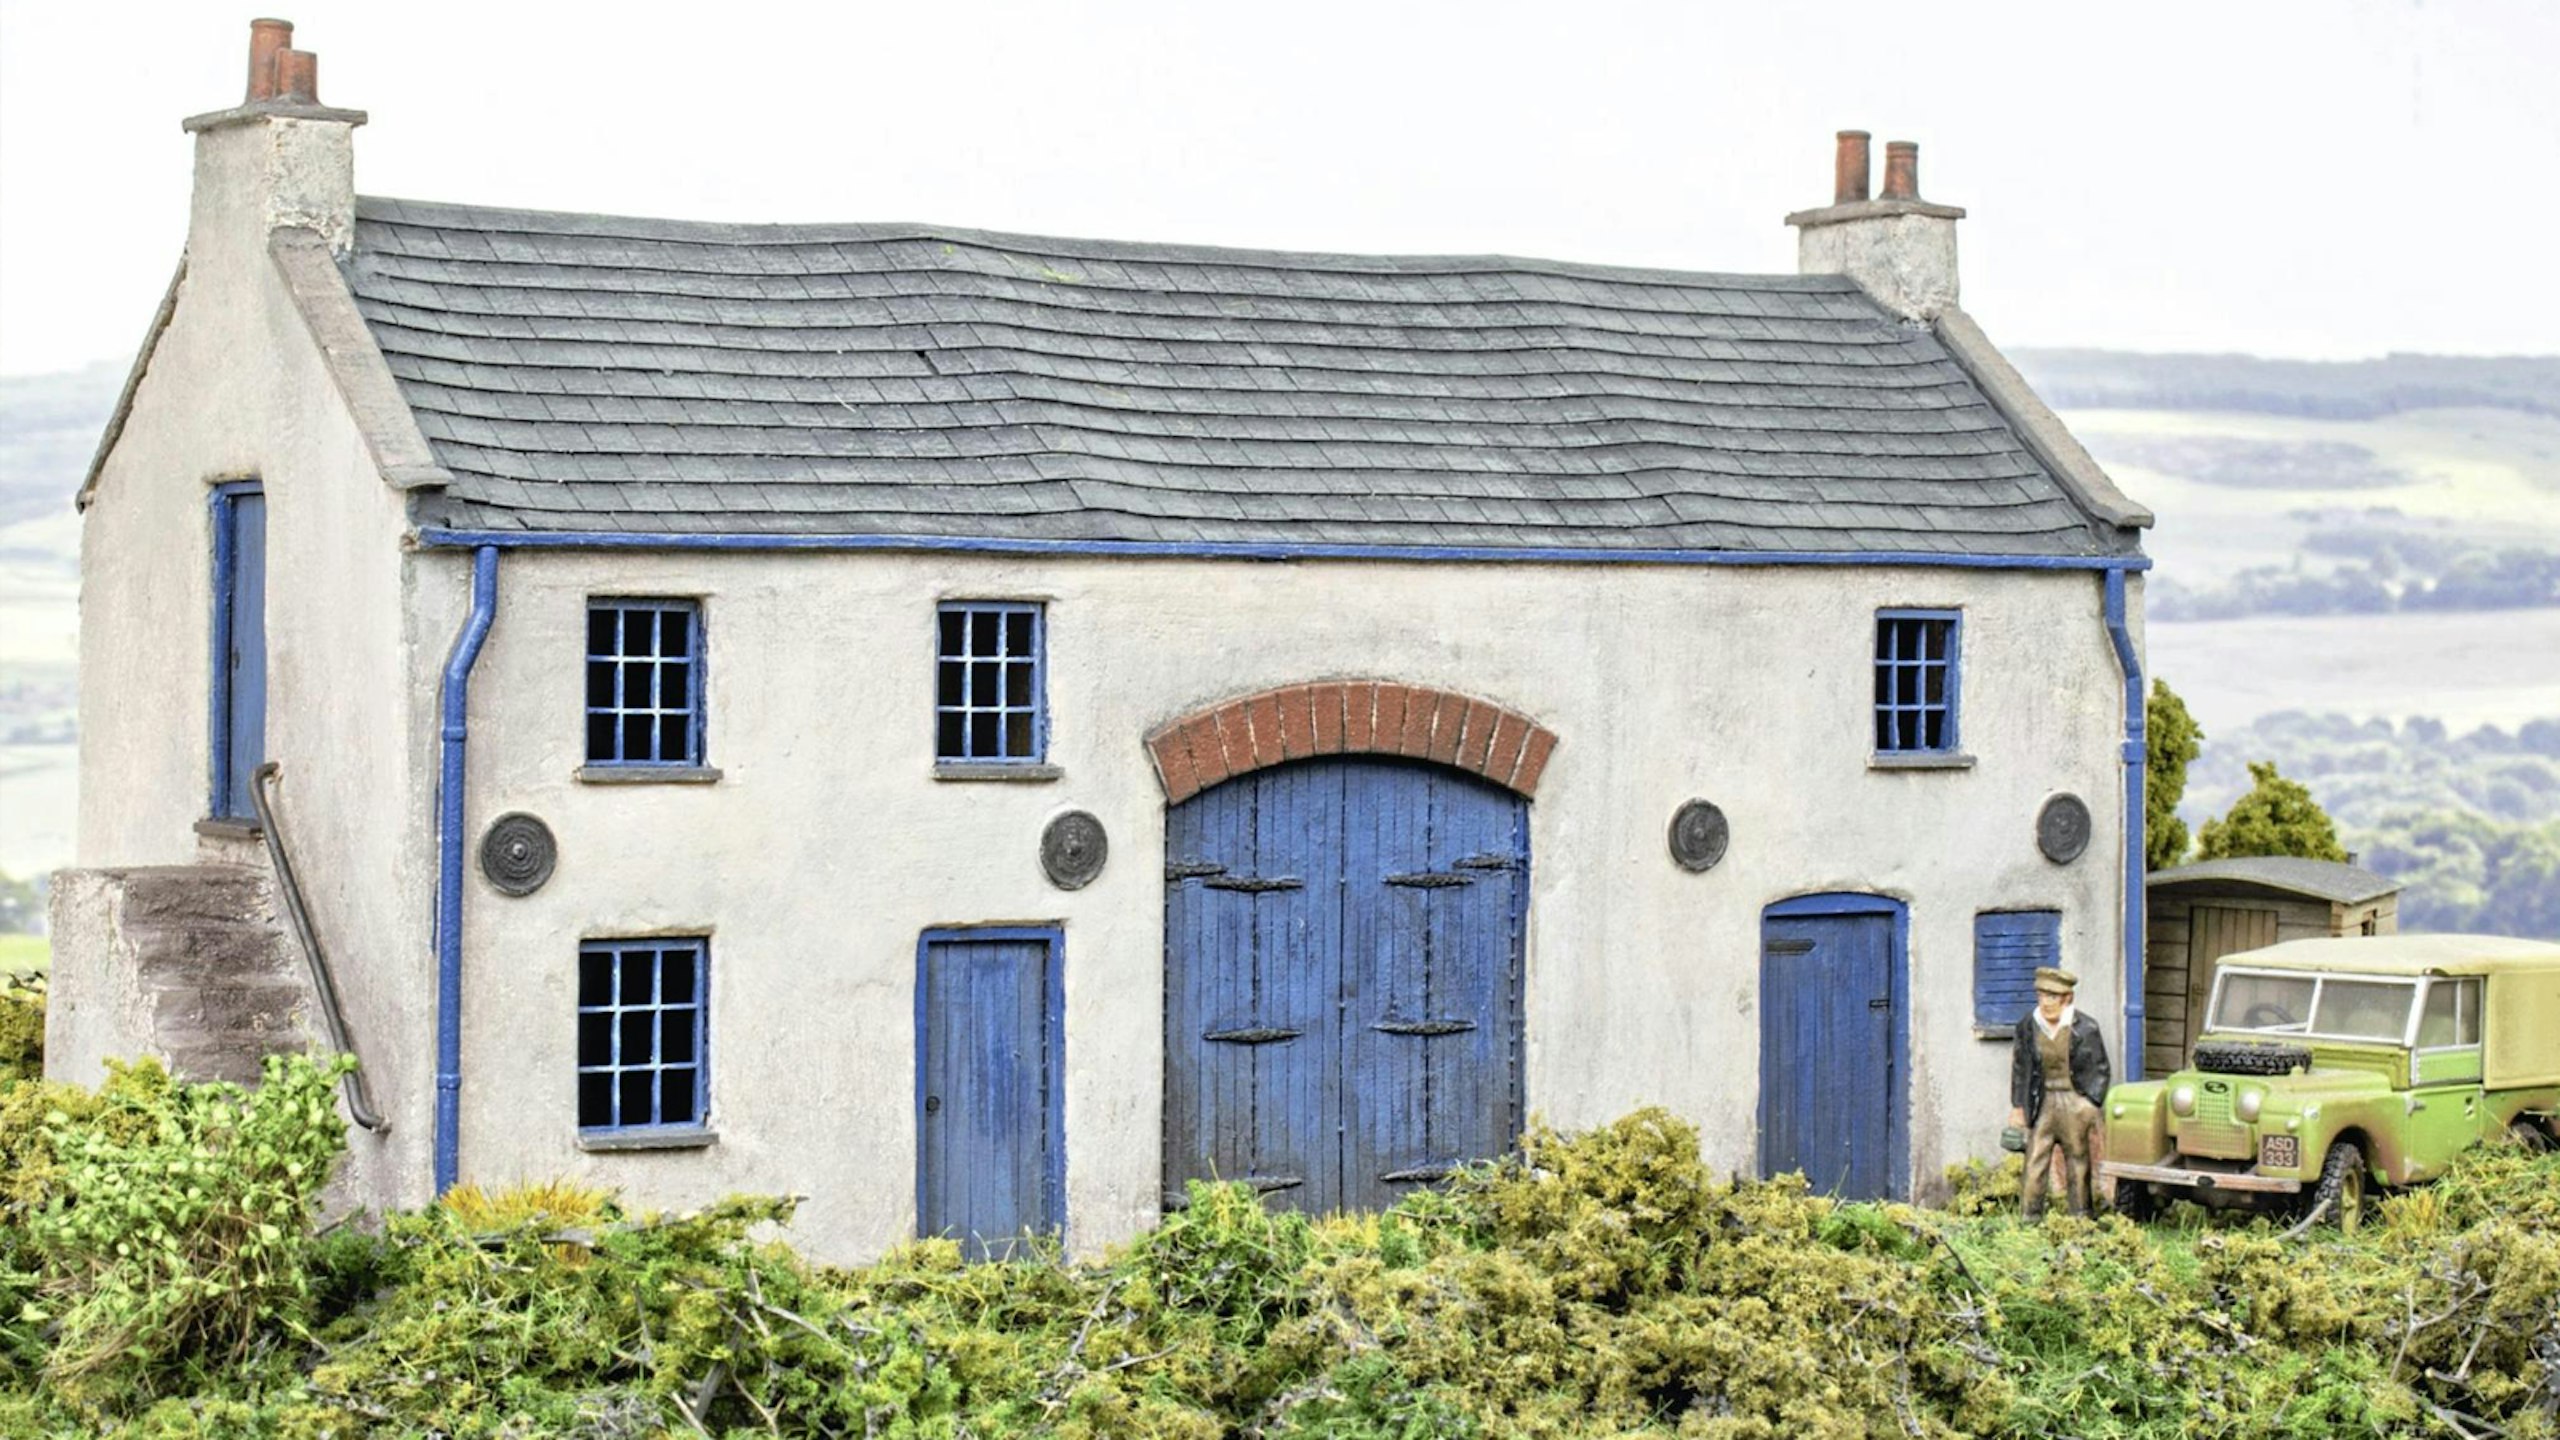
This versatile laser-cut kit offers many possibilities for rural or coastal locations and, as George Dent demonstrates, it can be readily enhanced with the aid of modelling clay.
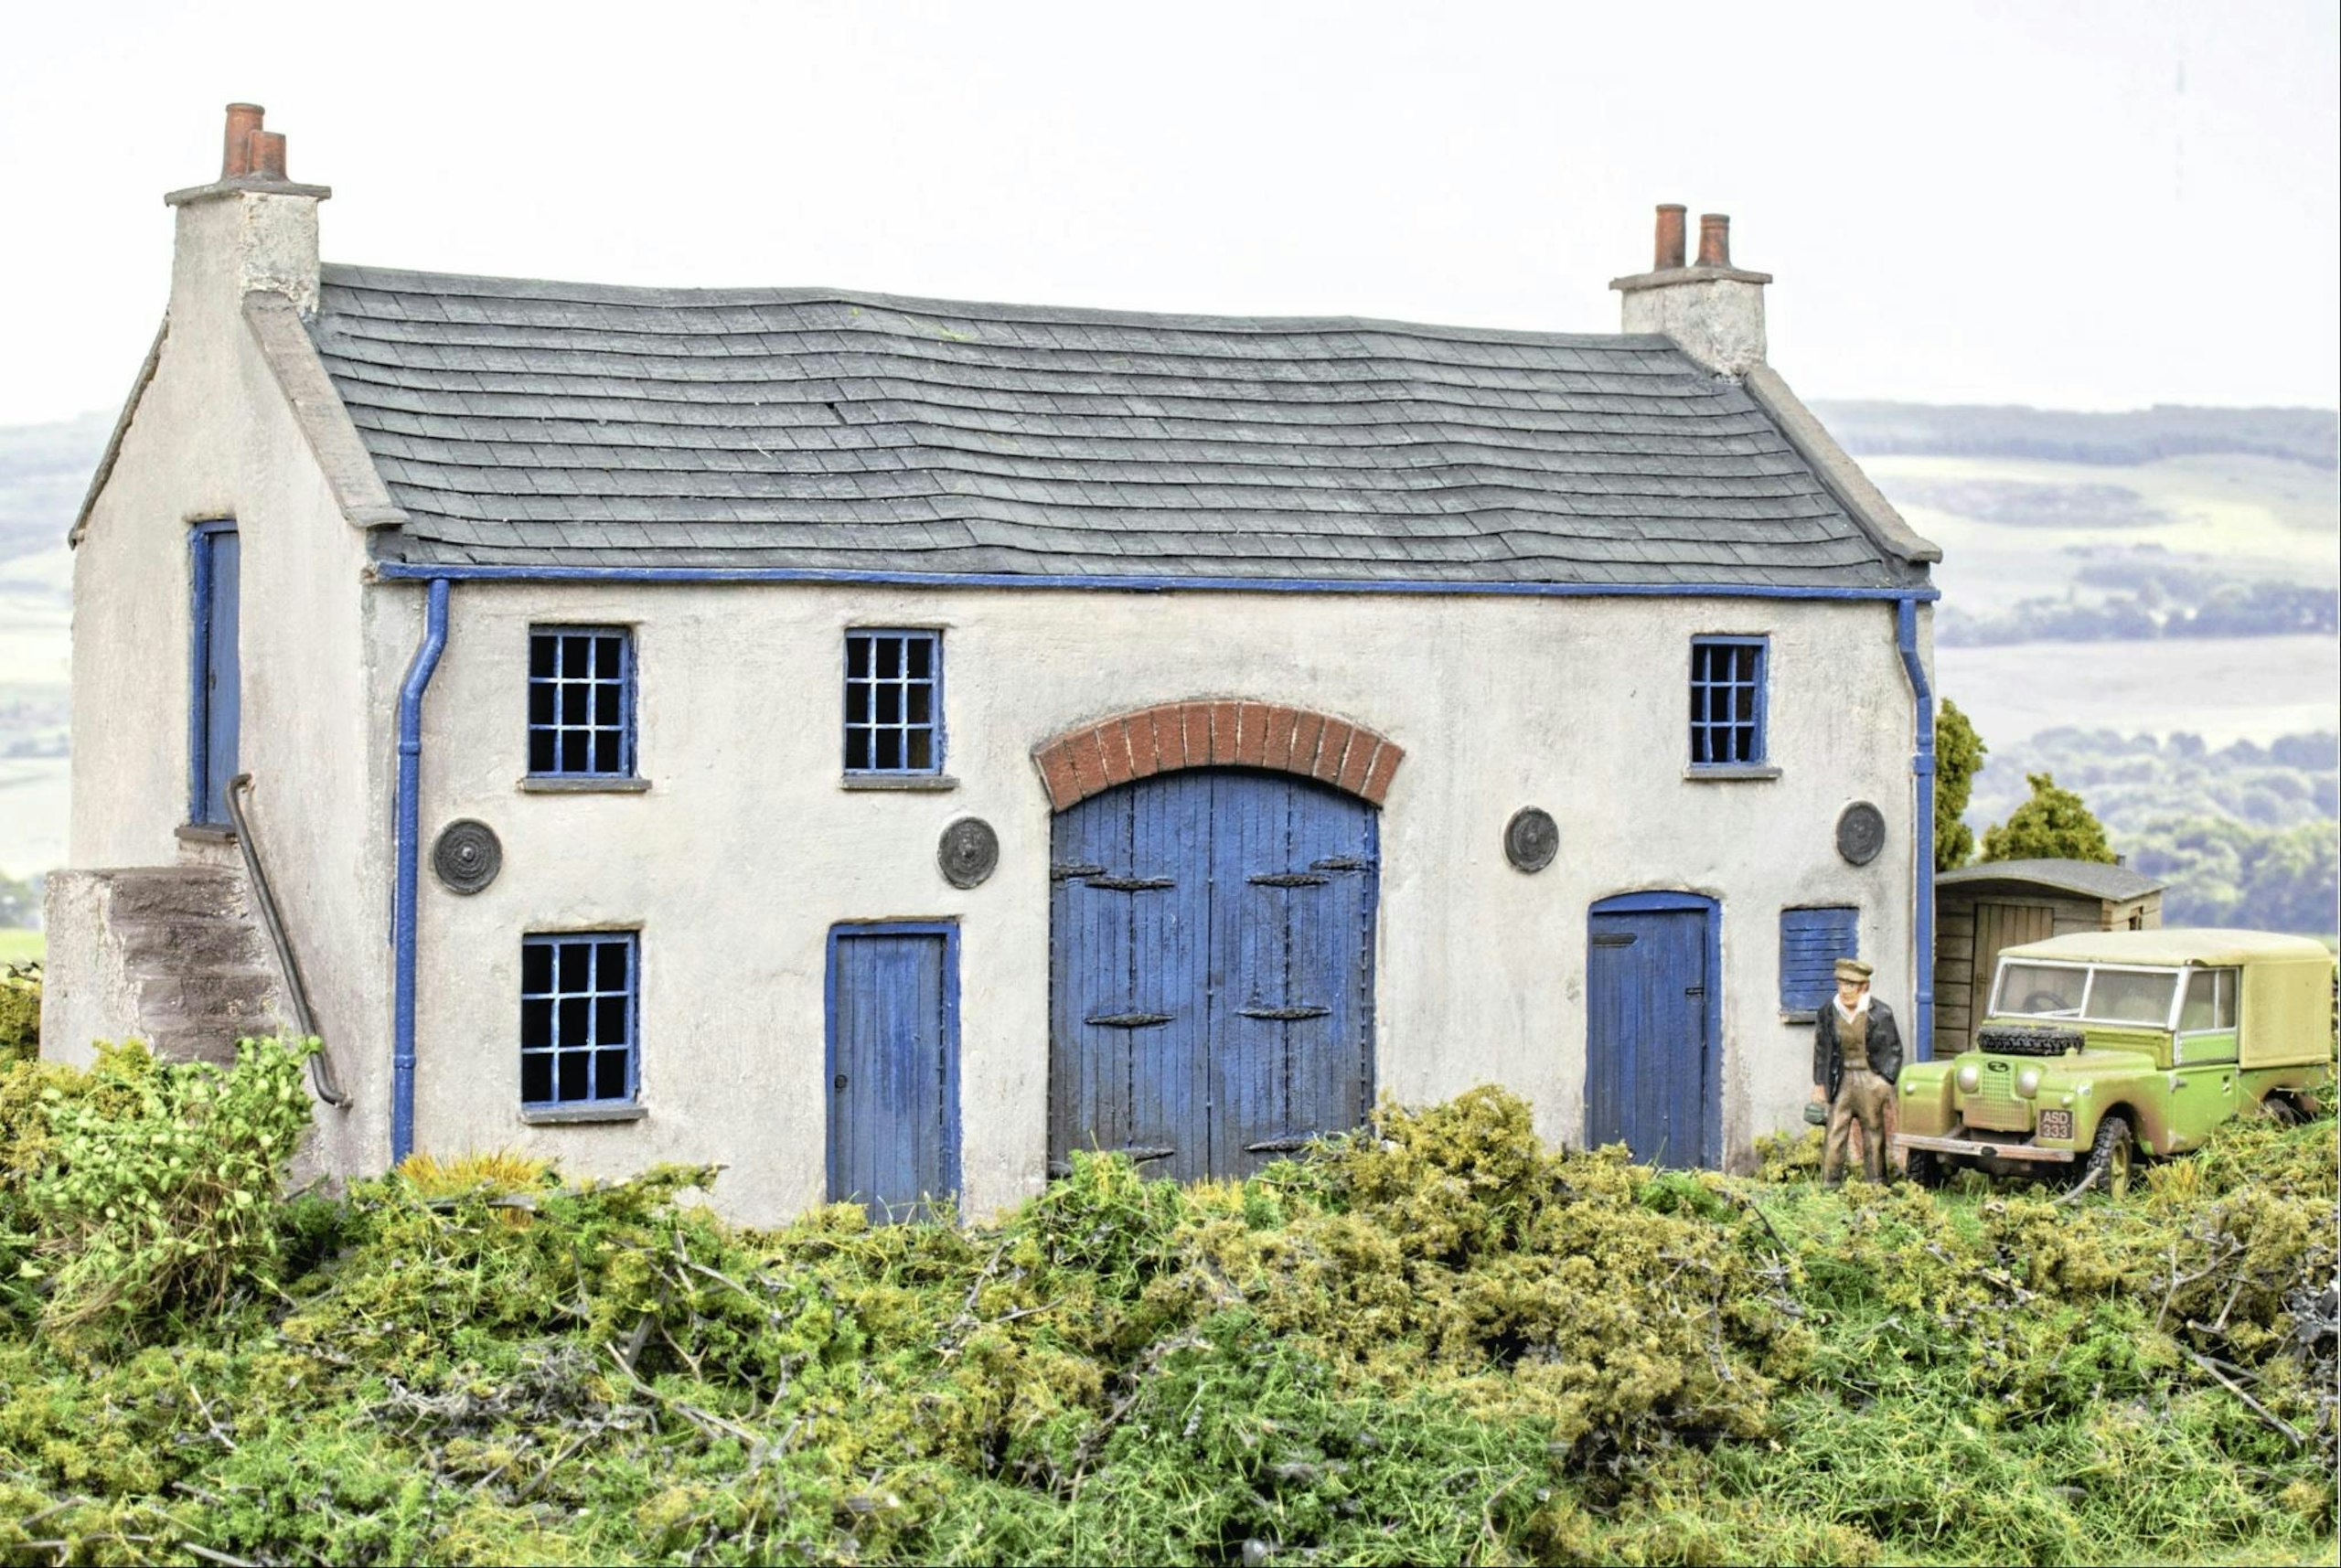

Part of my new year’s resolutions for 2026 was to finish off a host of partially completed projects that have been cluttering up my workshop, with this delightful farm building being one of my priorities.
Built from a Scale Model Scenery kit, featuring laser-cut components in MDF and fibreboard, the main structure was a delight to assemble, with everything slotting together smoothly.
Like most kits from this stable, the main structure is designed to be clad with a set of ultra-realistic printed paper overlays, which feature a white-washed finish over random stone. The prints include suitable weathering and staining, so the finished result should look great.
In fact, I love the design of the building as a whole, as it offers great versatility. Branded ostensibly as a coach house with attendant stable, tack room and upper storey hayloft (accessed via an external staircase), it suits virtually any era from the 1700s to the present.
Furthermore, the building is equally suitable as more of an agricultural barn, with a tractor and implements stored in the shed and maybe the stable in use as a cow byre.
The instructions also suggest its potential use as an industrial structure or even a quayside cottage with a workshop/boat store and net loft.
In my case, I wanted to keep to a farming theme, as it reminds me of a few structures I see on some of my favourite walks in Cumbria. Some of these buildings feature a rendered finish over a random stone structure, with a discernibly rough surface texture, so the printed overlays wouldn’t really work.
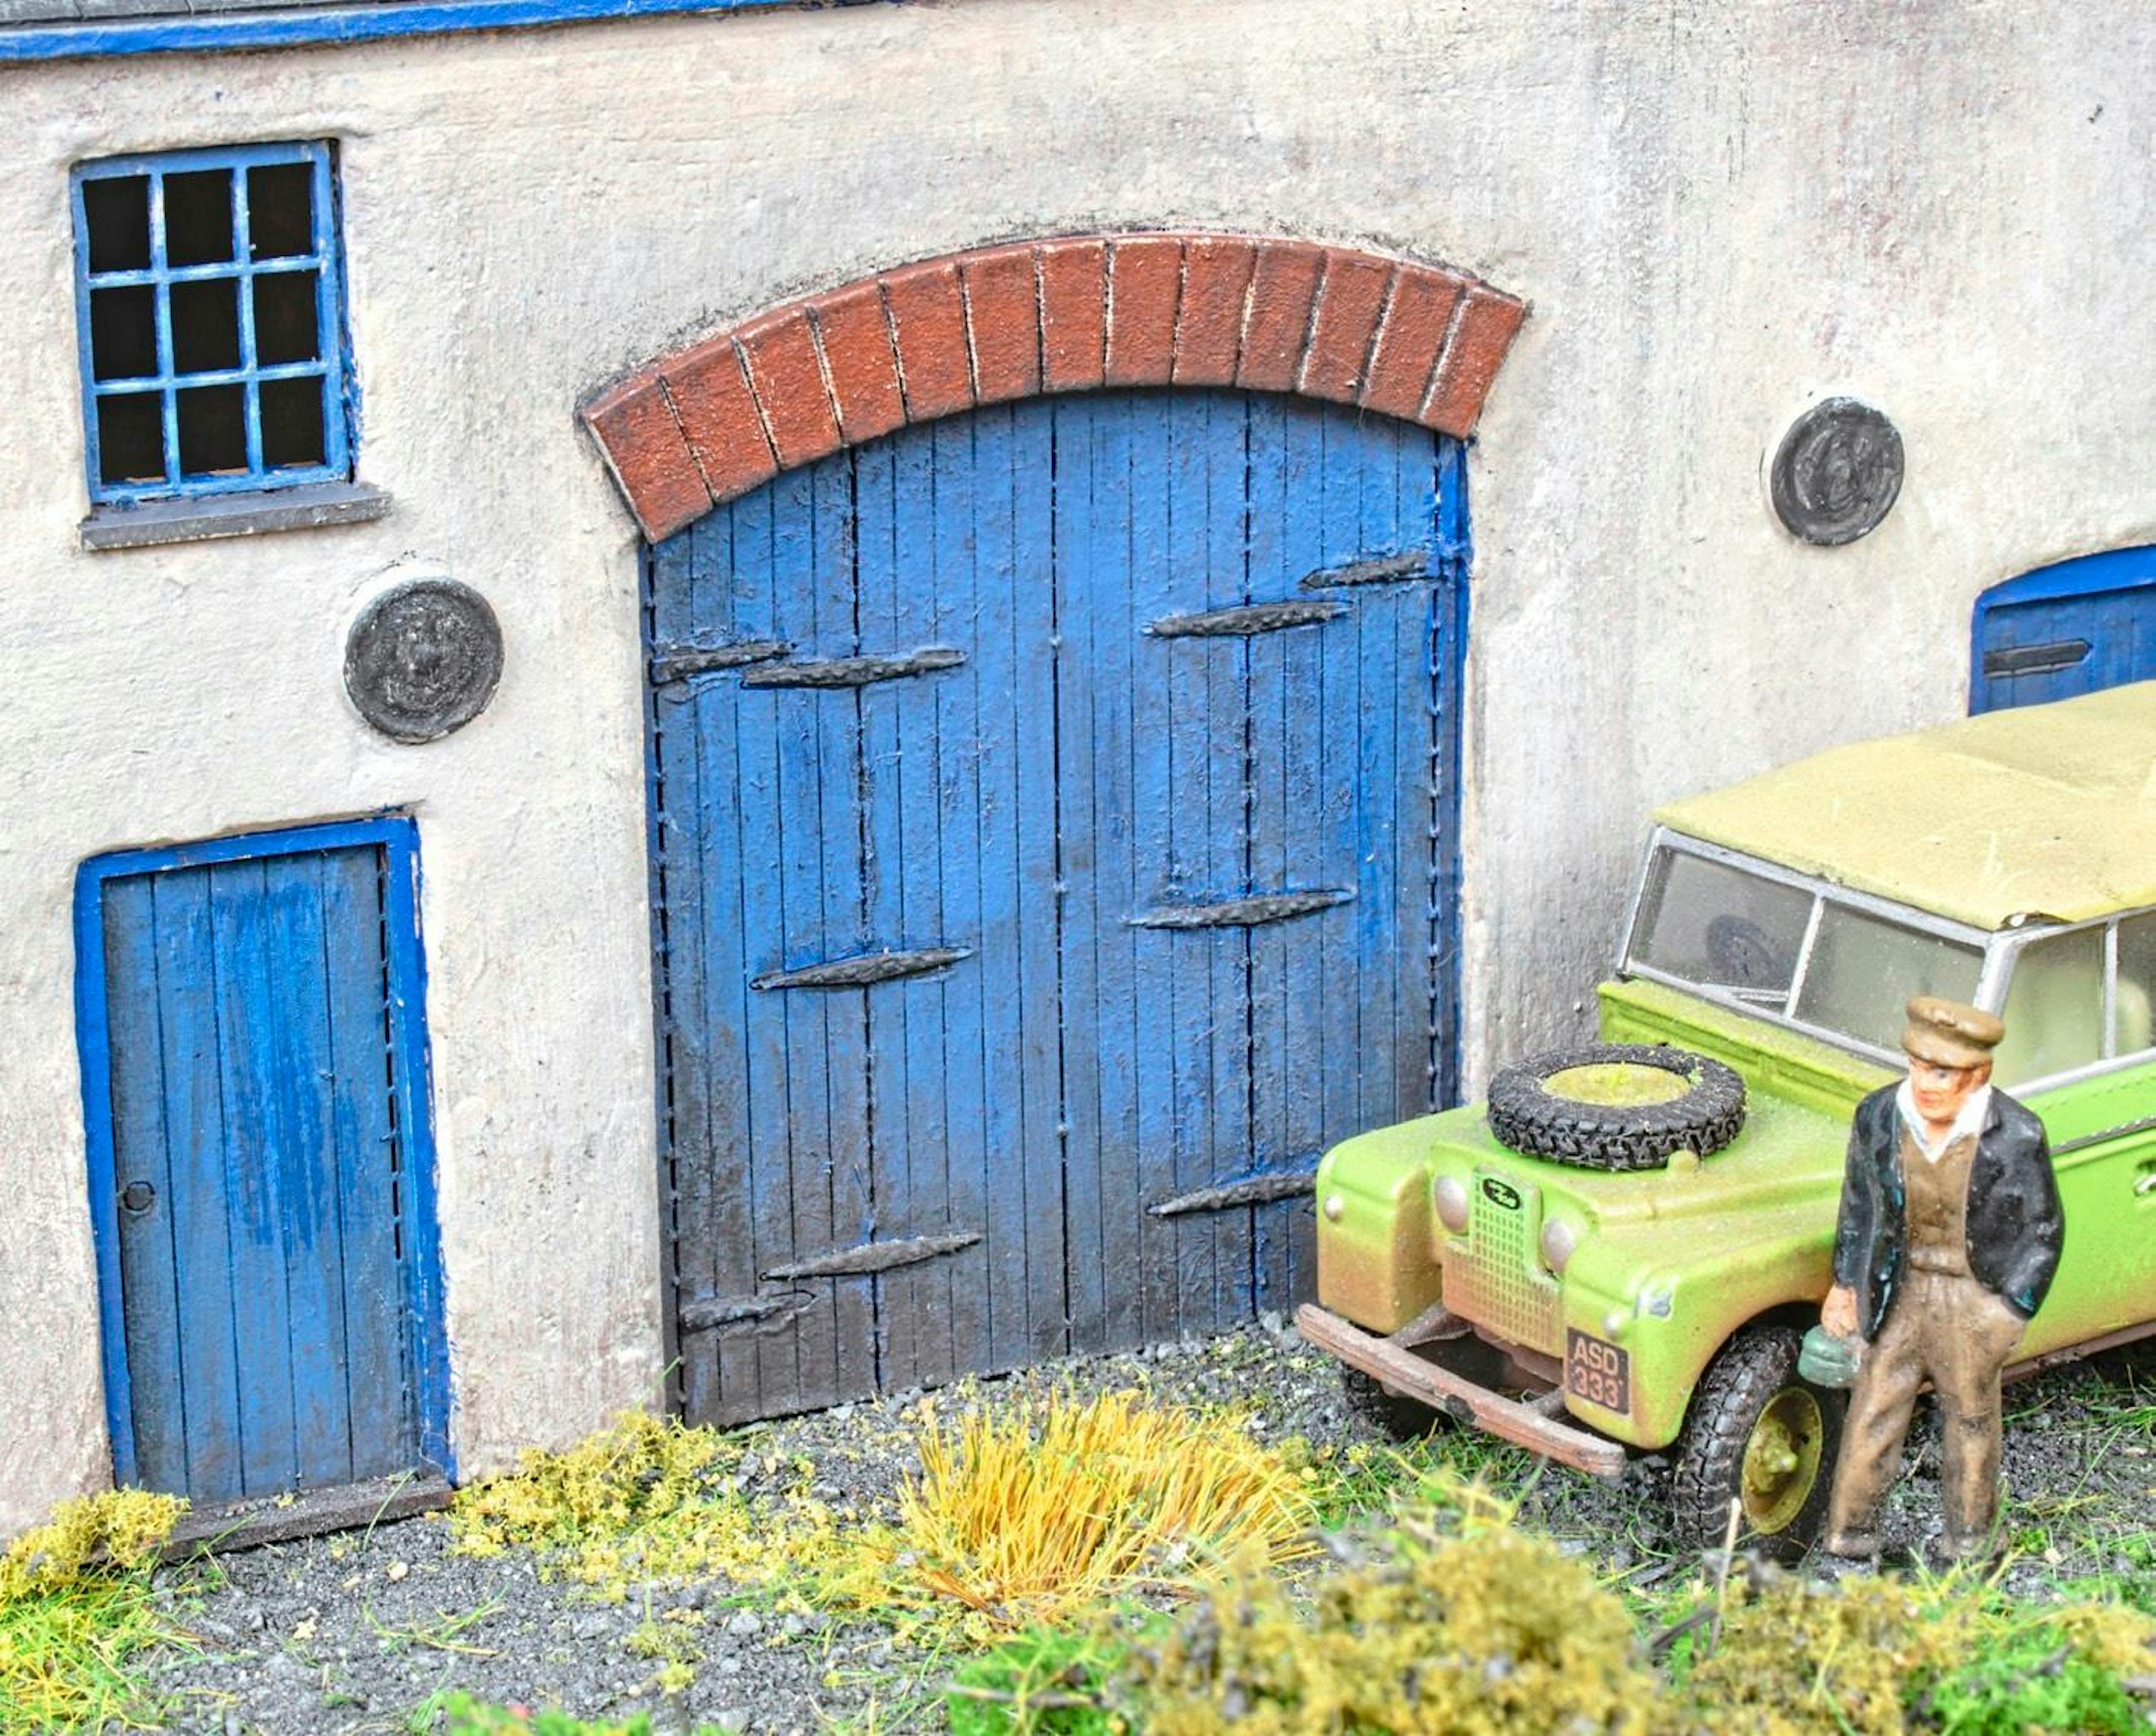
Instead, I opted to apply a real render, using a thin ‘skim’ of DAS white modelling clay, bonded to the MDF structure with the aid of PVA glue. It wasn’t too difficult a job, and the effort was certainly worthwhile, as the clay’s texture and porous nature helped to create an authentic appearance once a few light coats of acrylic paint were applied.
I did add a few extra details, courtesy of some Ratio and Wills plastic parts I had left over from previous projects (brick arches, downpipes and chimney pots), as well as some tie-bar reinforcing plates which give the front and rear elevations a bit of extra character.
It’s worth noting that I deviated from the kit’s recommended assembly sequence. If you intend to add clear plastic glazing, it would be best to paint the window frames separately, add the clear plastic sheet to the rear, and then install into the walls at the end.
However, I opted to forego the plastic glazing as, where the building is to be sited, you won’t be able to tell it’s missing. And, more importantly, there will be no annoying reflections from the layout’s lighting rig.
I’m delighted with the finished model, although there is much more I could have done. The doors are easy to pose open, so there’s the potential to really go to town on the interior of the shed, in particular. But sometimes it feels great to just finally finish a project, given that assembly started back in 2024!
What you will need
SHOPPING LIST
♦ DAS white modelling clay, Wolverine PVA glue, Deluxe Materials Super ‘Phatic and Roket Rapid adhesives
Availability: Scale Model Shop
Web: www.scalemodelshop.co.uk
♦ Wills SS46 Building Detail Pack A, Ratio 521 Industrial Brick Arches
Availability: Peco stockists
Web: www.peco-uk.com
♦ LifeColor acrylic paints and brushes
Availability: The Airbrush Company
Web: www.airbrushes.com
TOOLS
♦ Craft knife and spare blades
♦ Cutting mat
♦ Needle files and abrasives
♦ Steel rule and set square
♦ Tweezers
♦ Small palette knife
♦ Drill and bits
♦ Mini vice
♦ Paintbrushes
STEP BY STEP
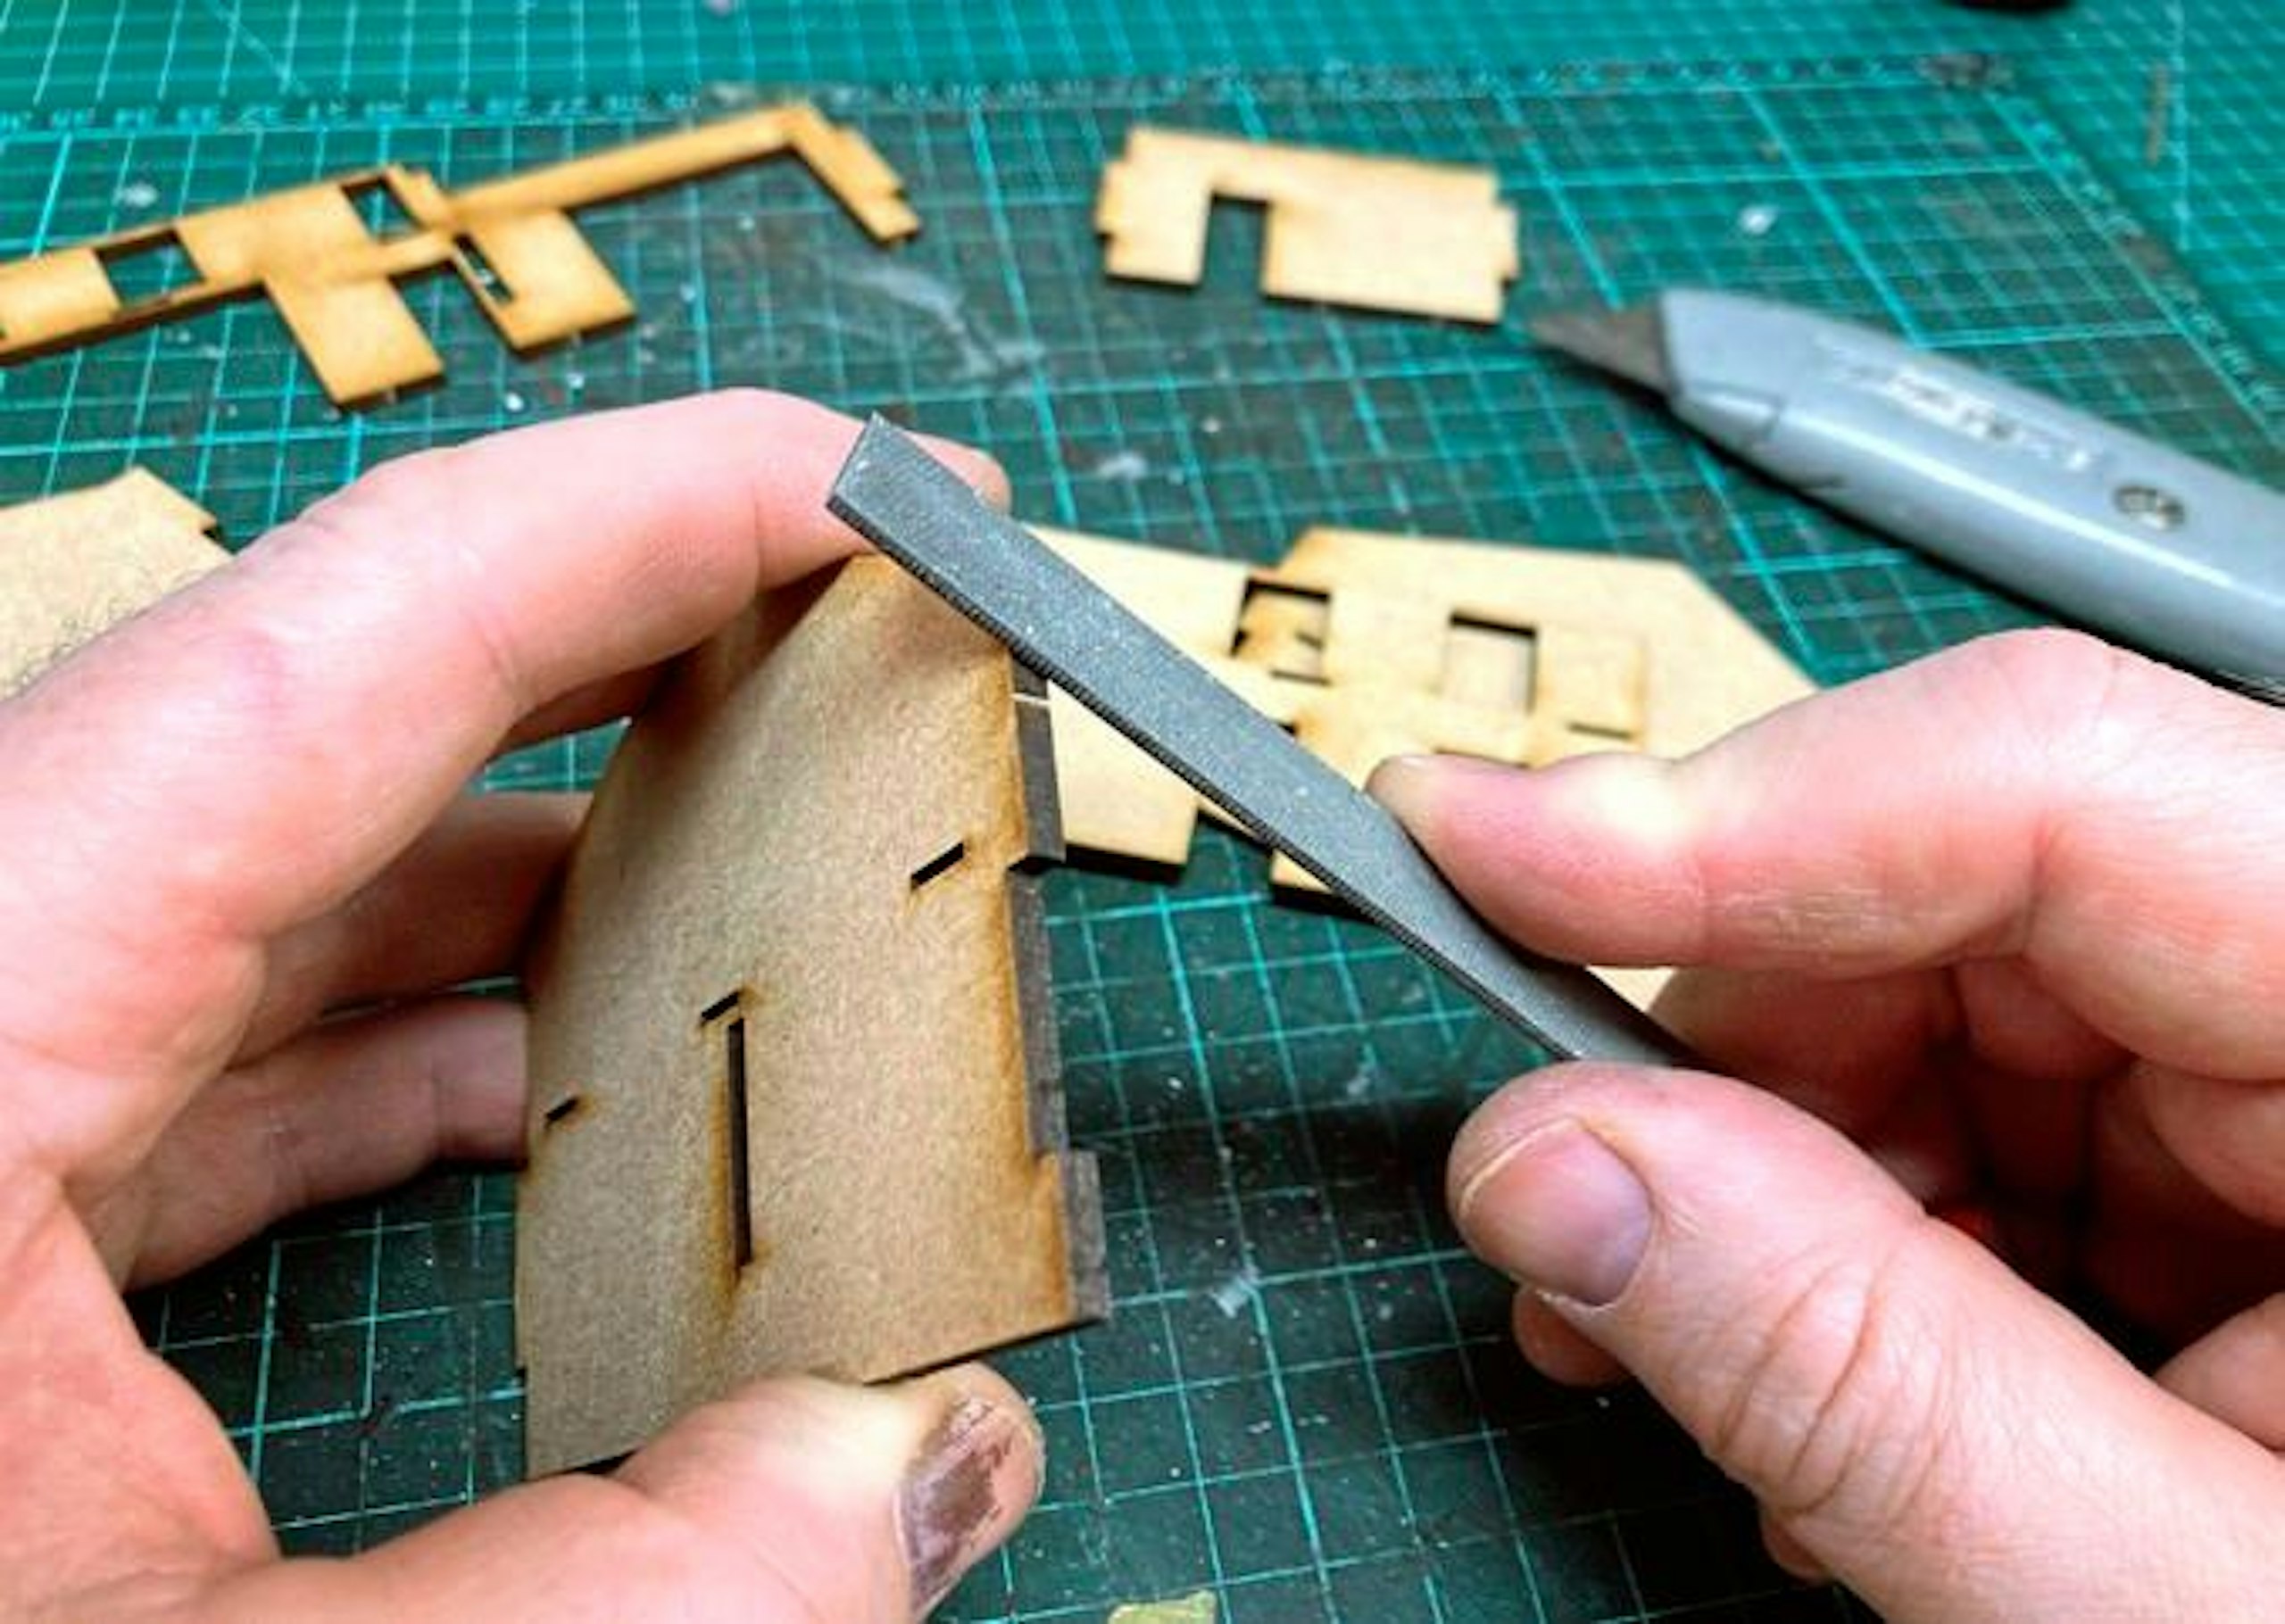
1 The parts are cut from various thicknesses of MDF and fibreboard. The MDF parts form the main structure and, before slotting the walls together, I filed the edges smooth, removing carbon deposits to ensure strong bonds.
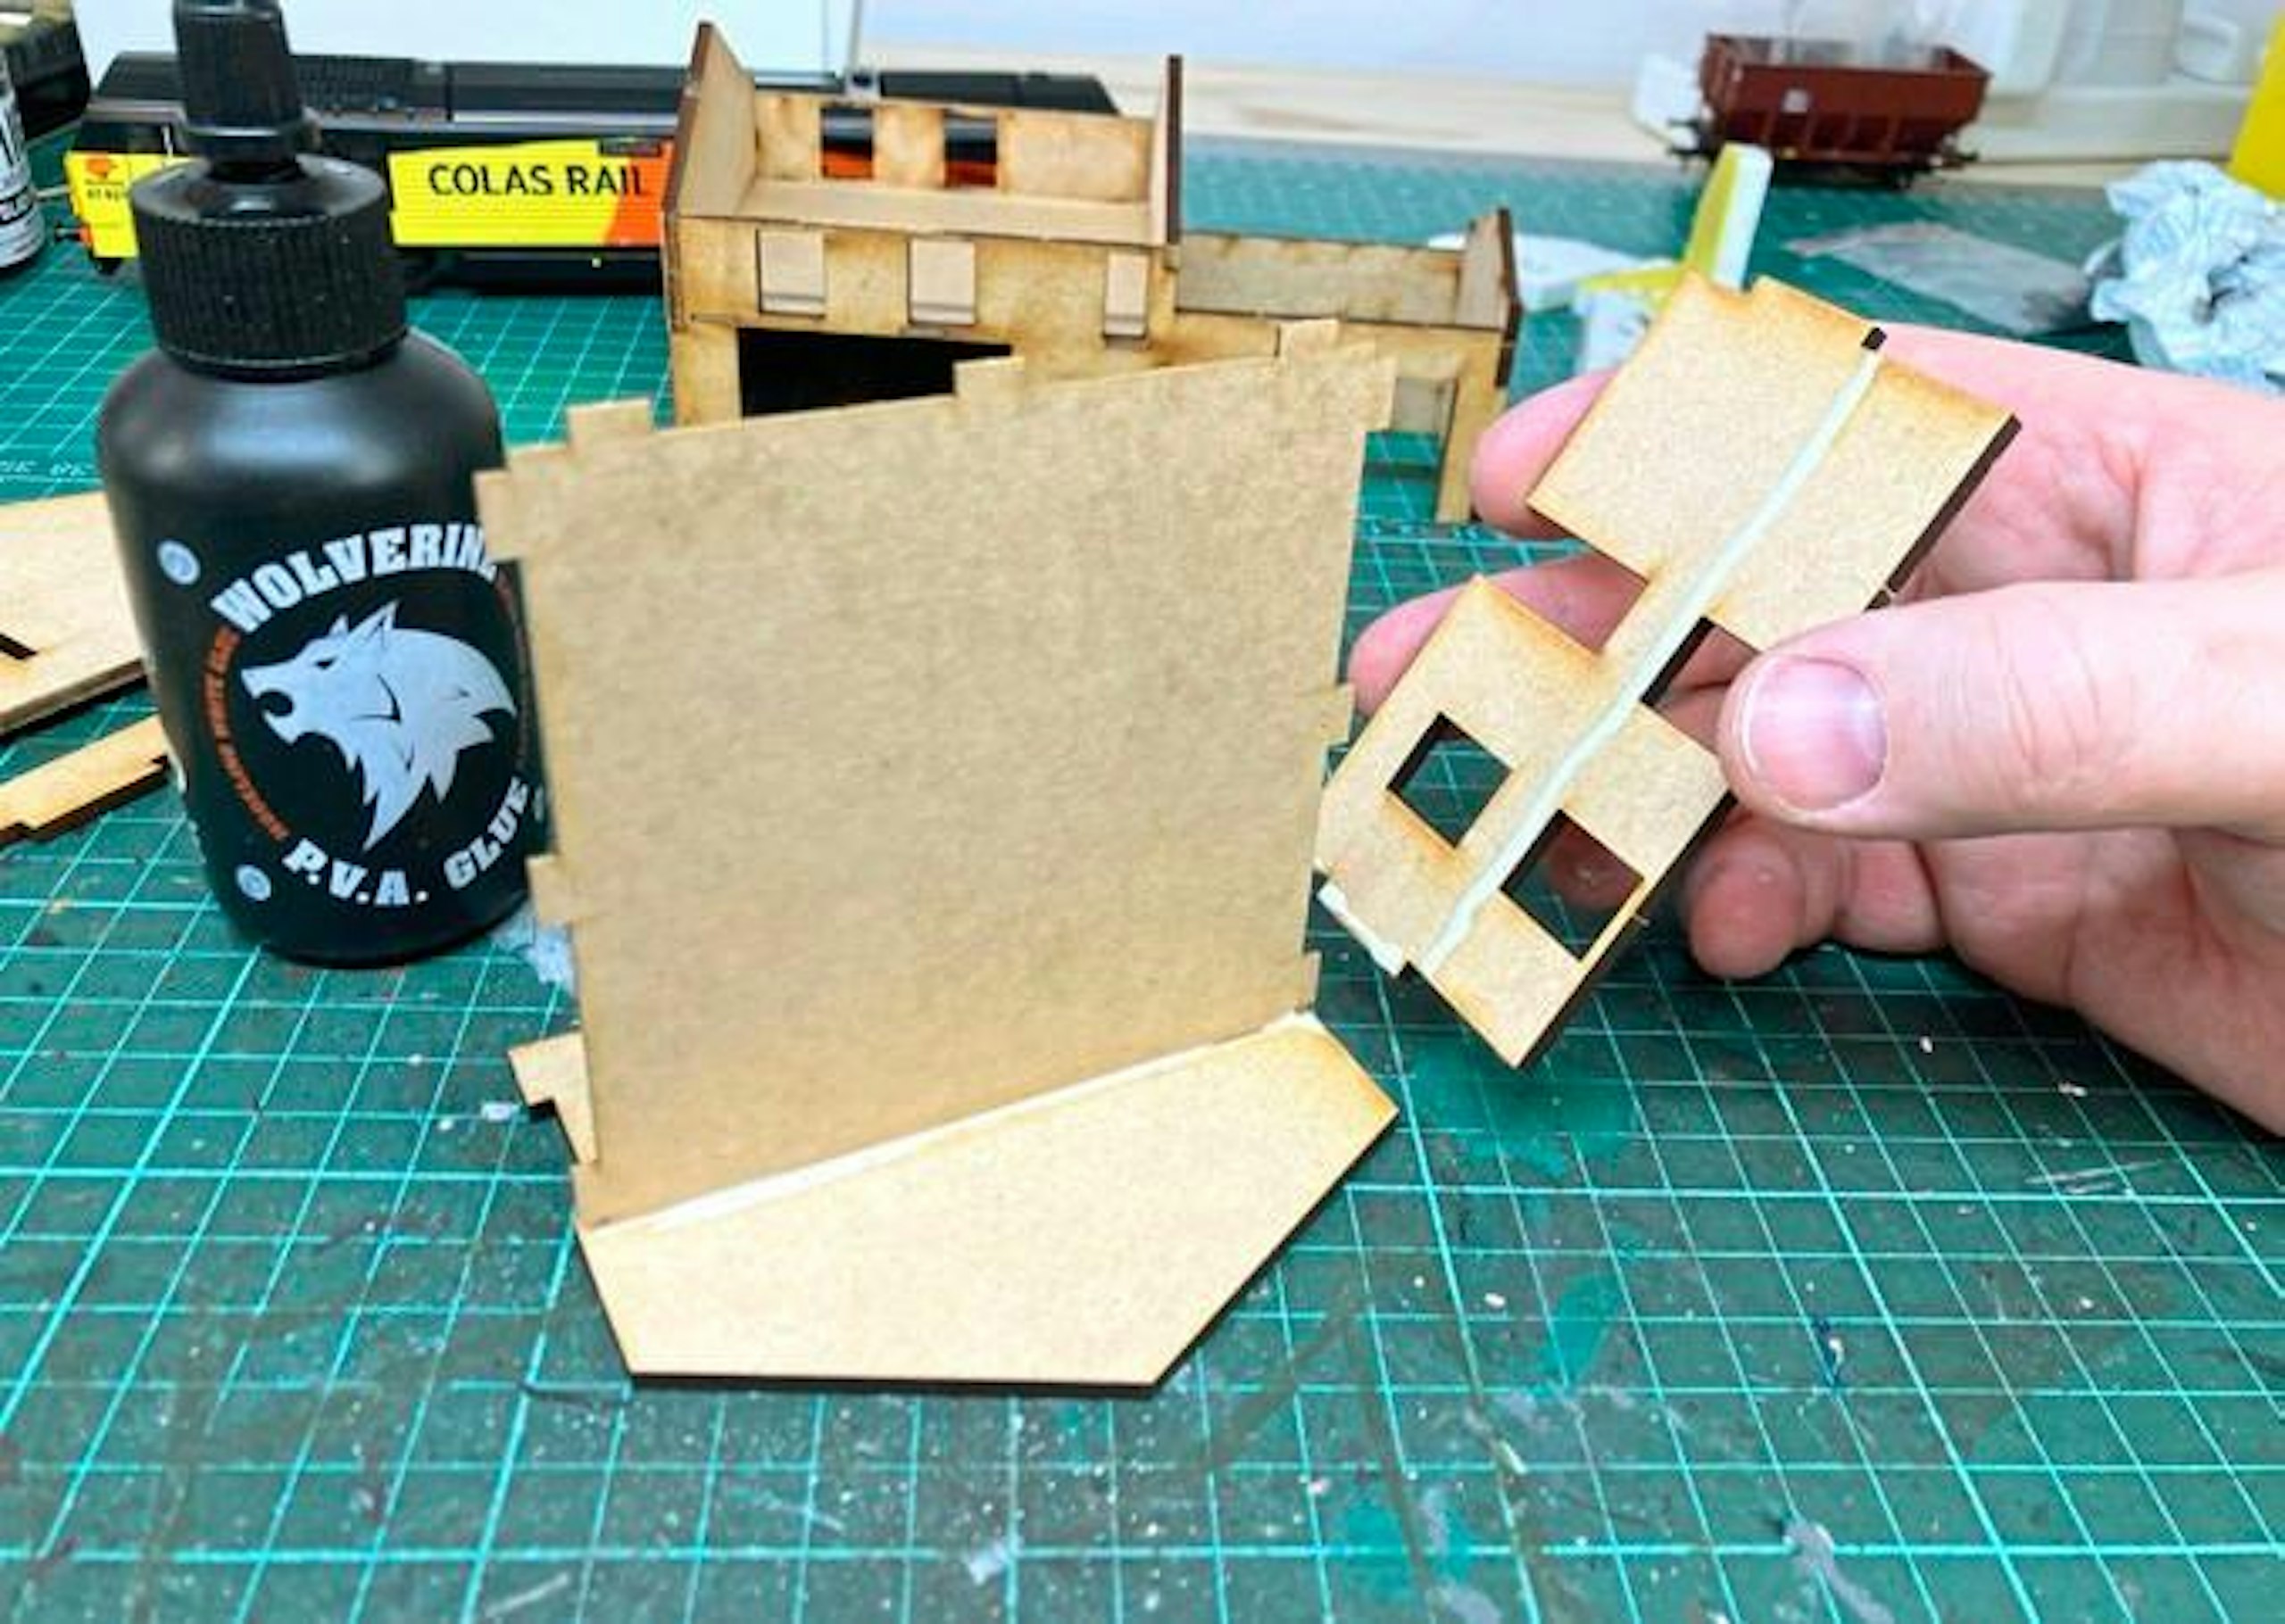
2 After a ‘dry’ trial assembly, to familiarise myself with how the parts go together, the walls were glued together, following the kit’s detailed instructions. This is a different kit, using the same tab-and-slot assembly method.
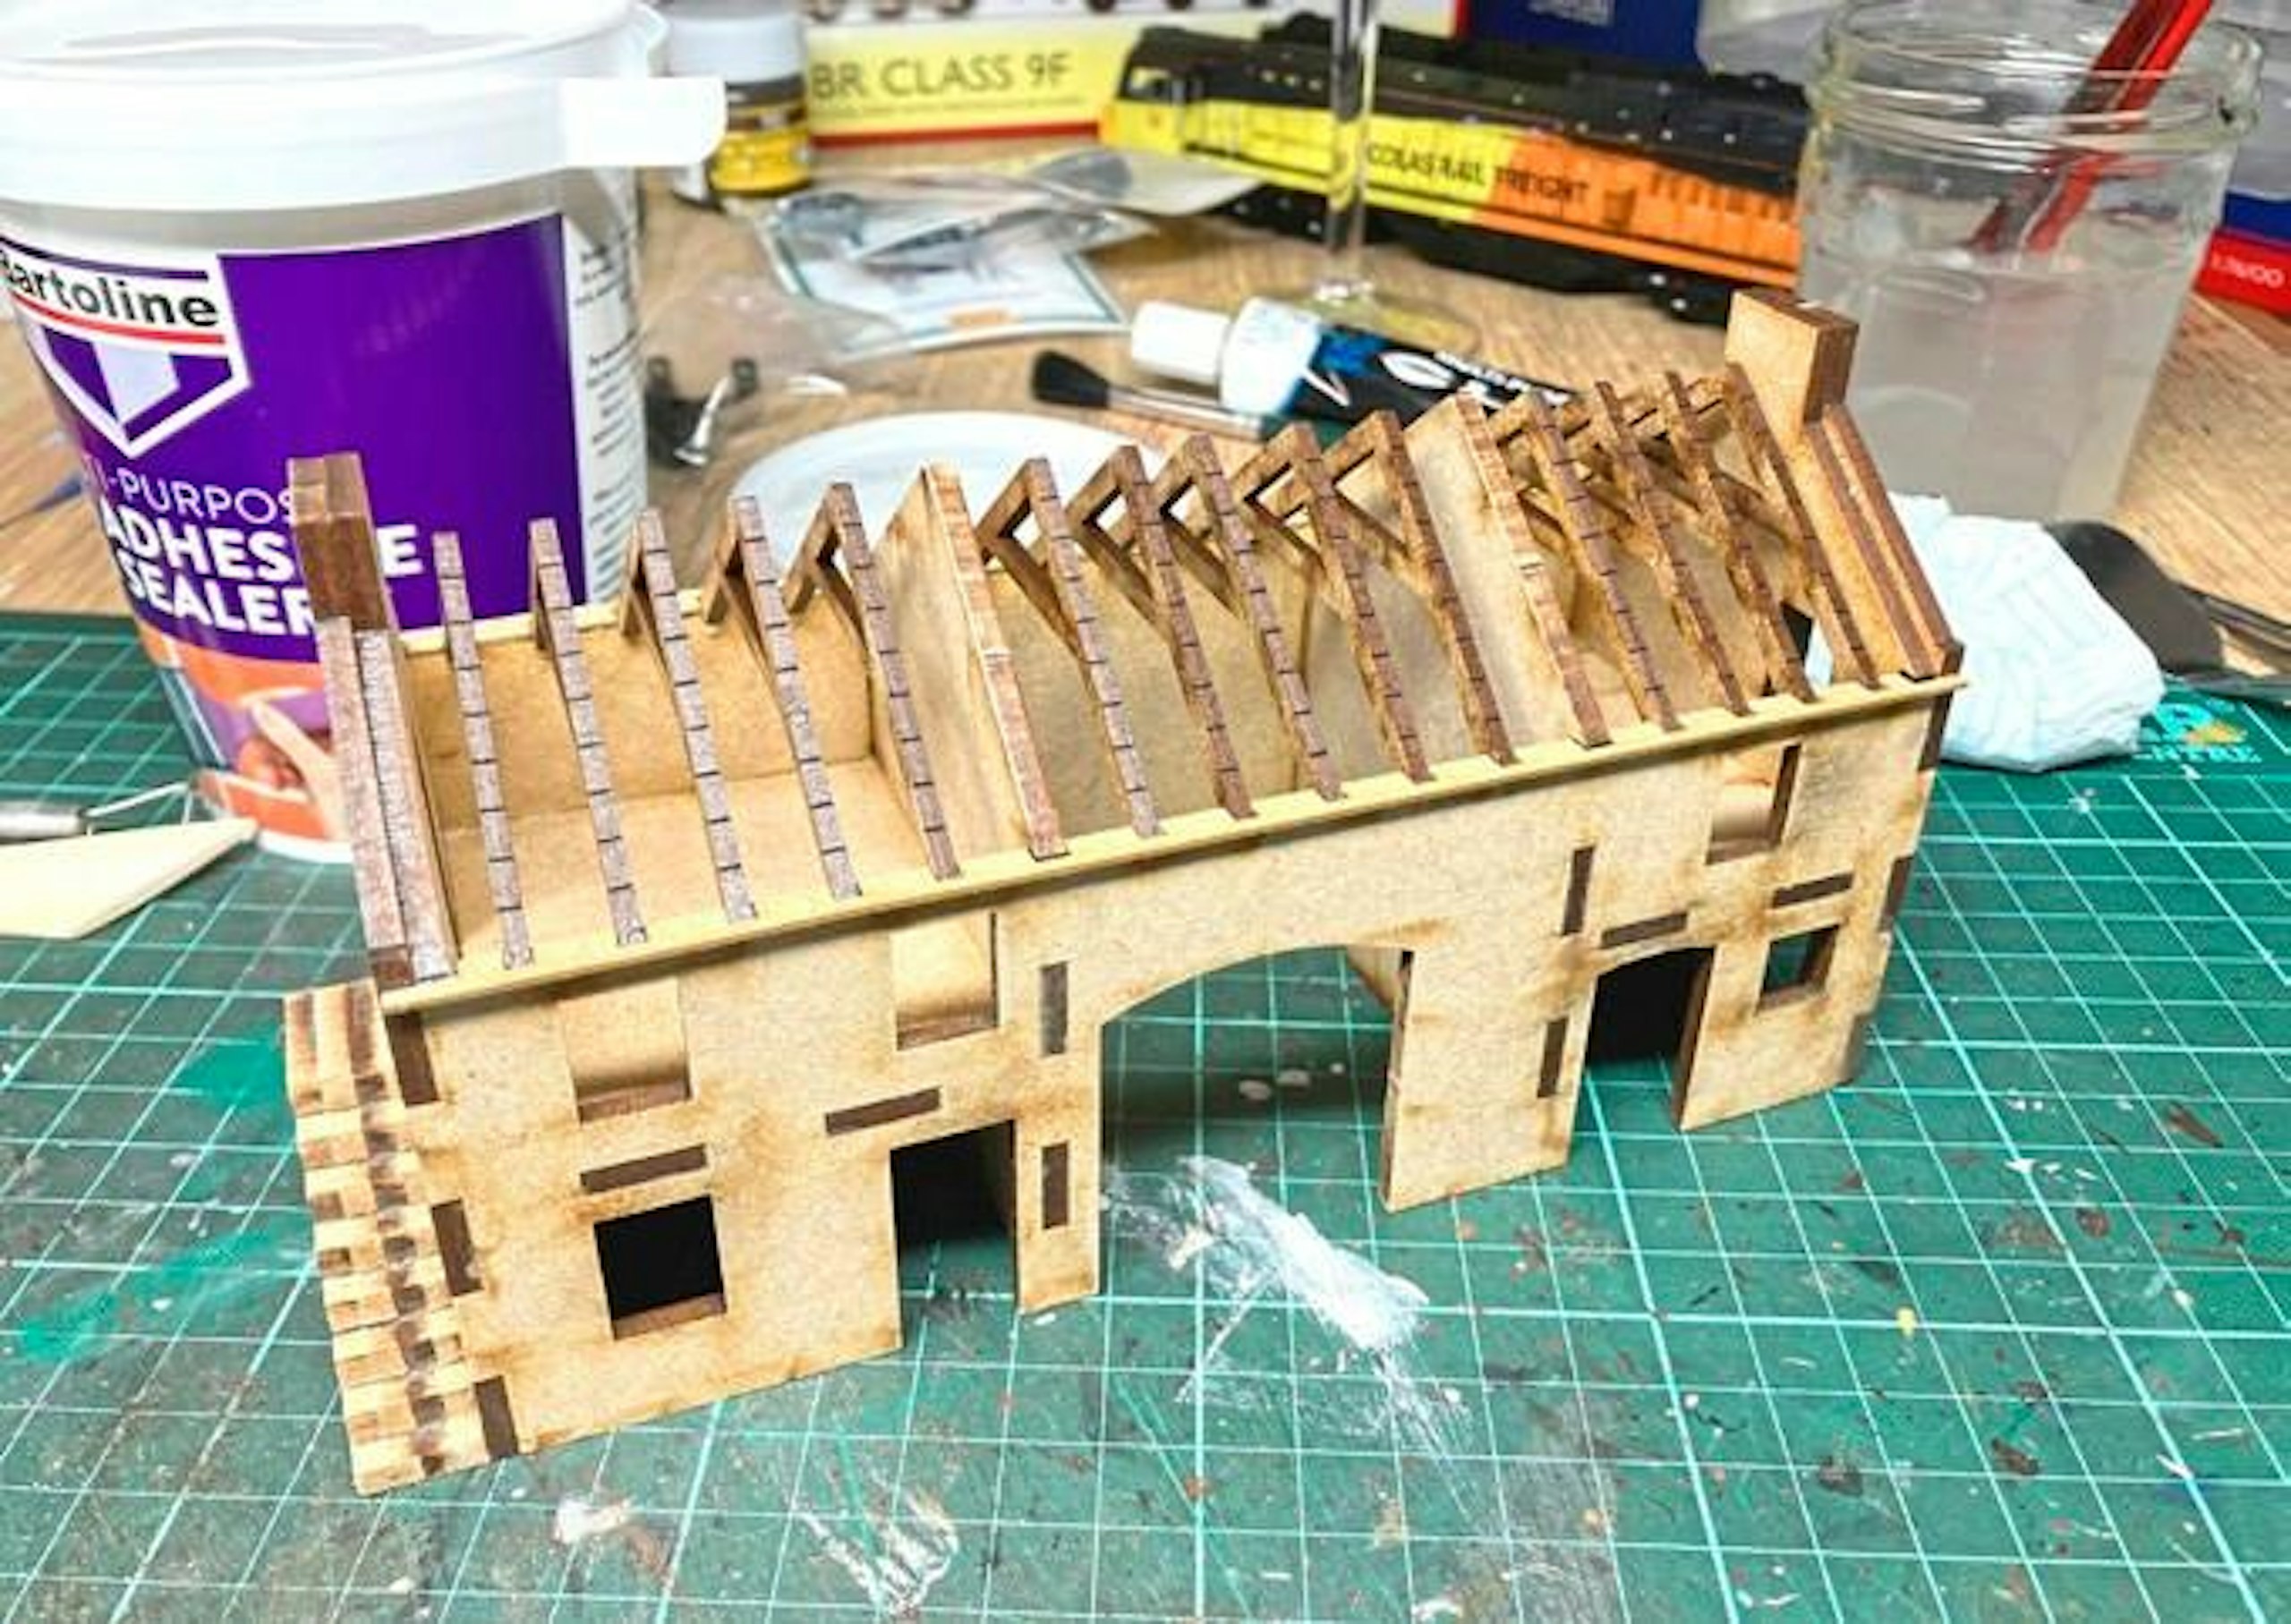
3 Wolverine PVA glue sets quickly, allowing assembly to proceed at pace. After an overnight rest, I sanded the exterior walls to ensure all was flat. Instead of applying the kit’s printed paper overlays, I had a different idea.
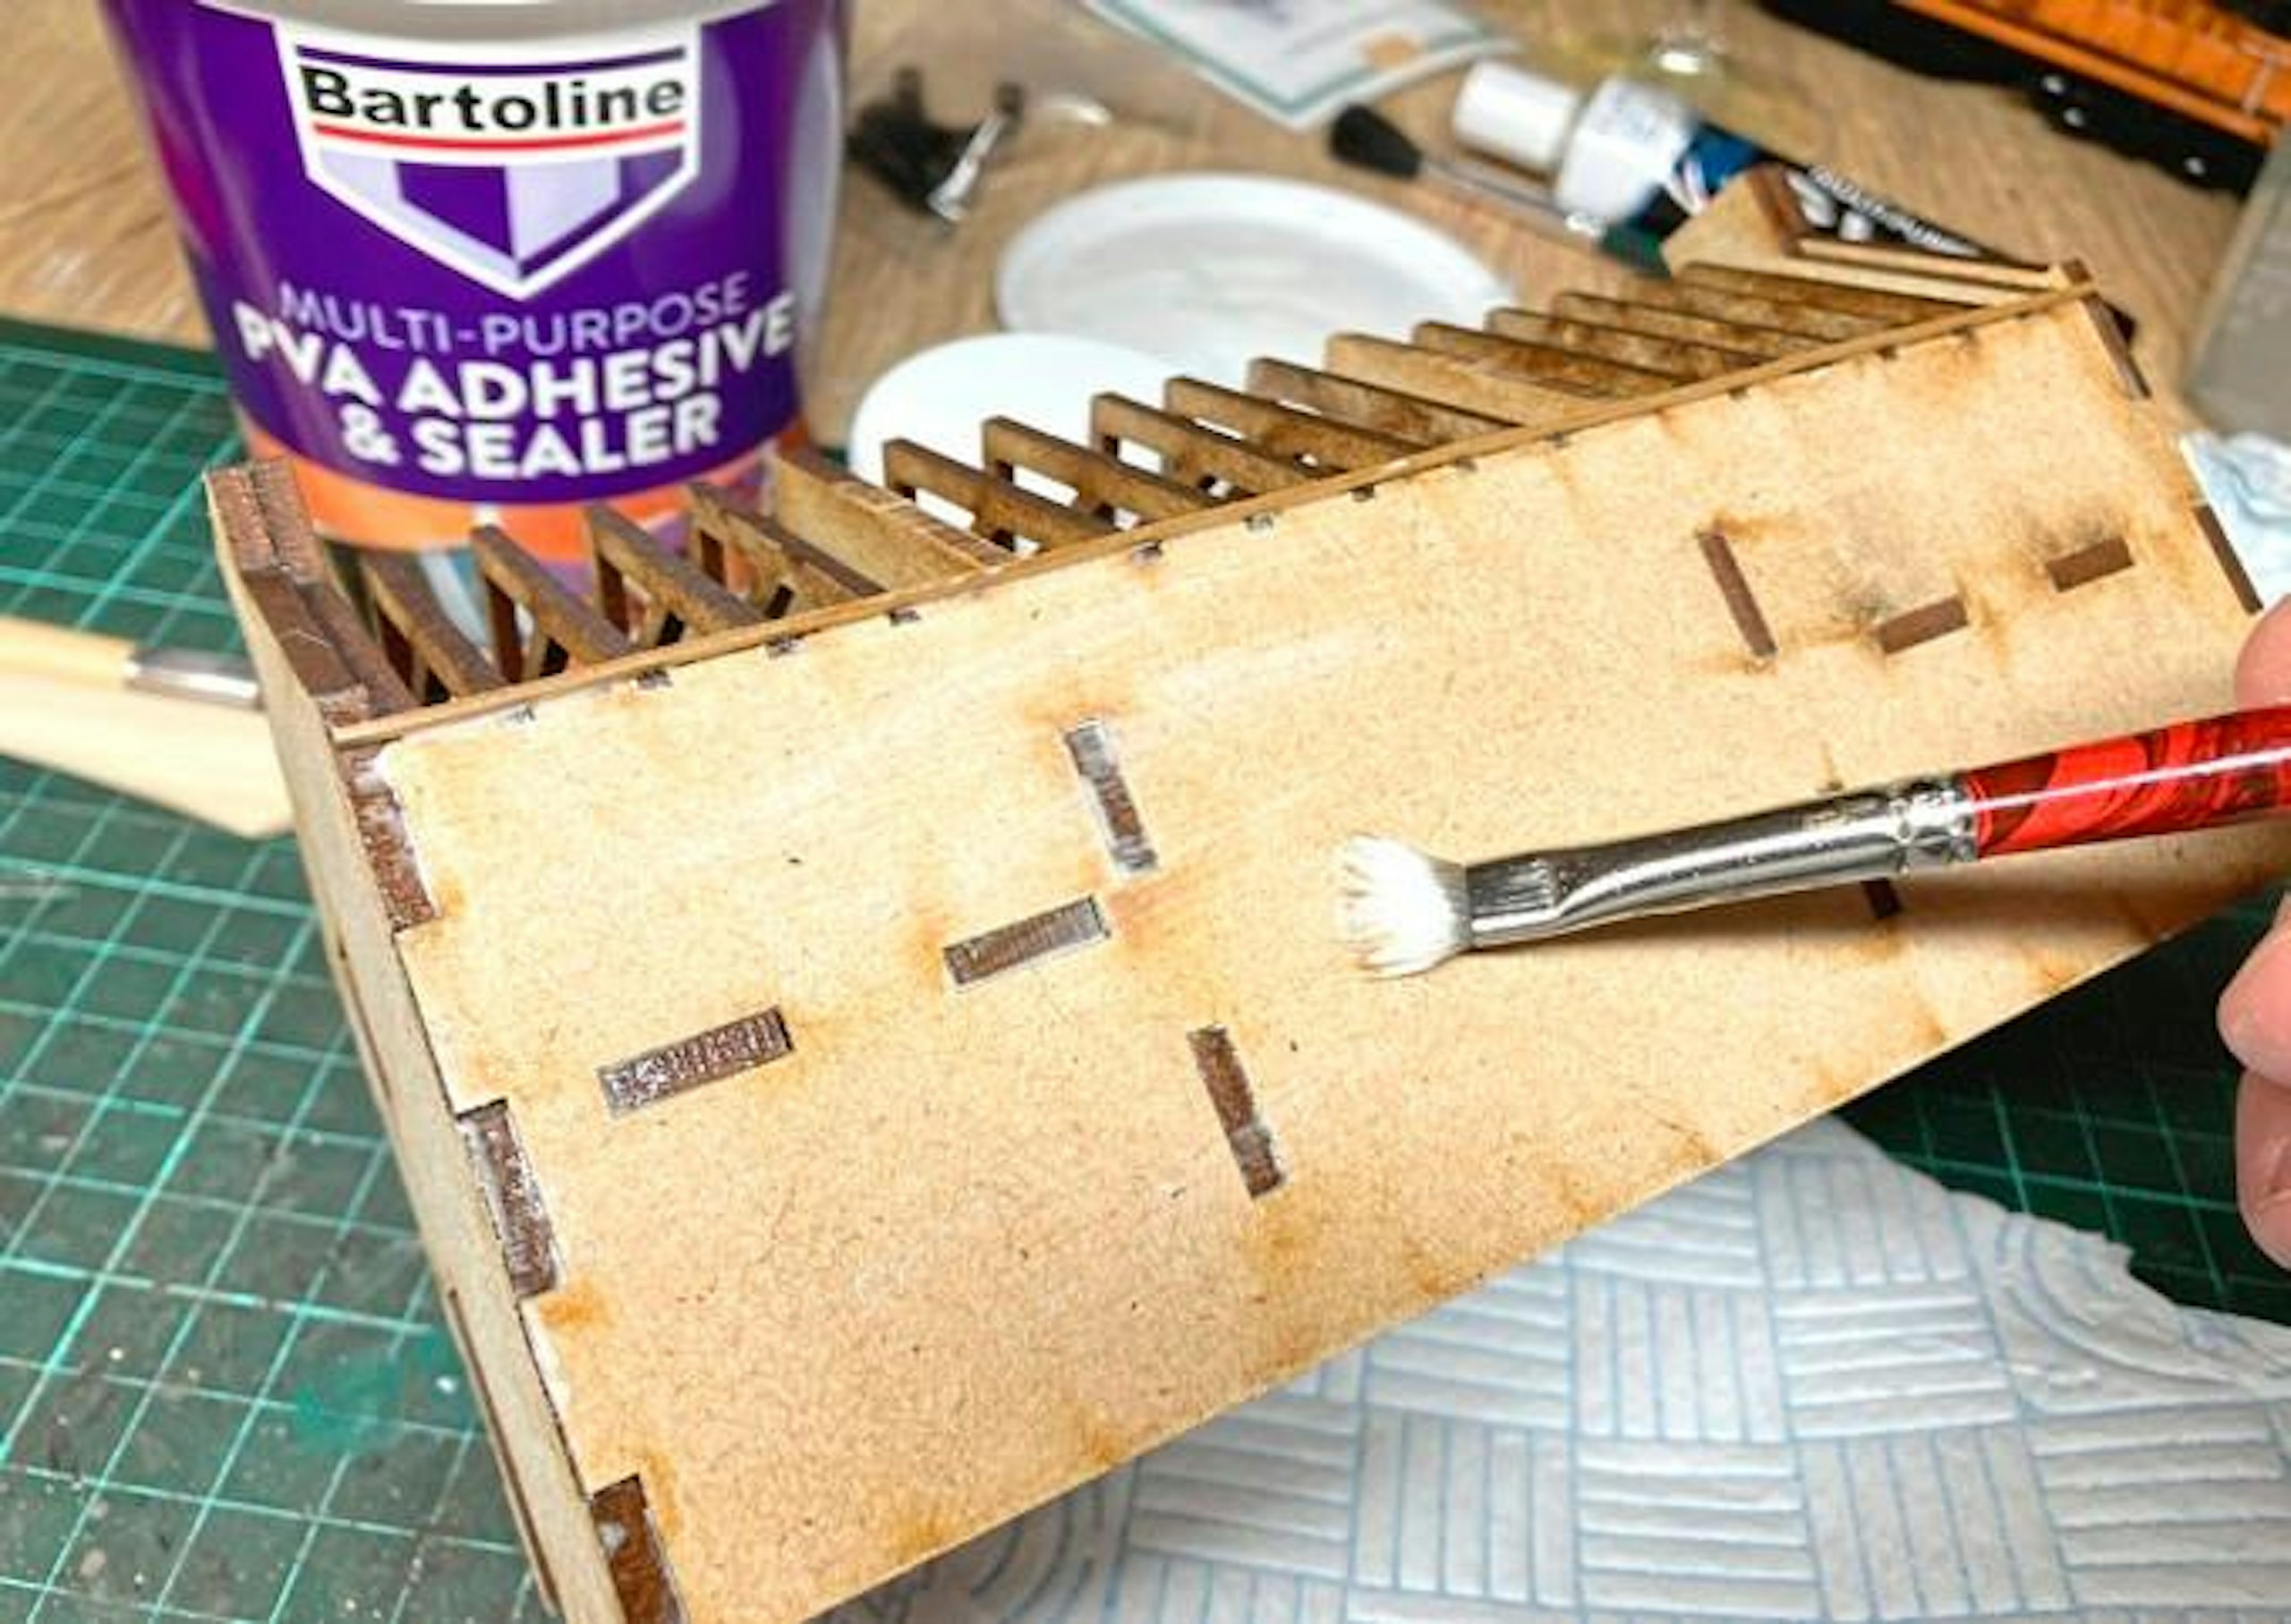
4 Using a cheap tub of PVA adhesive and sealer, available from hardware stores, I gave the exterior of the model a thin, even coating, working on one elevation at a time. The glue was allowed to turn tacky.
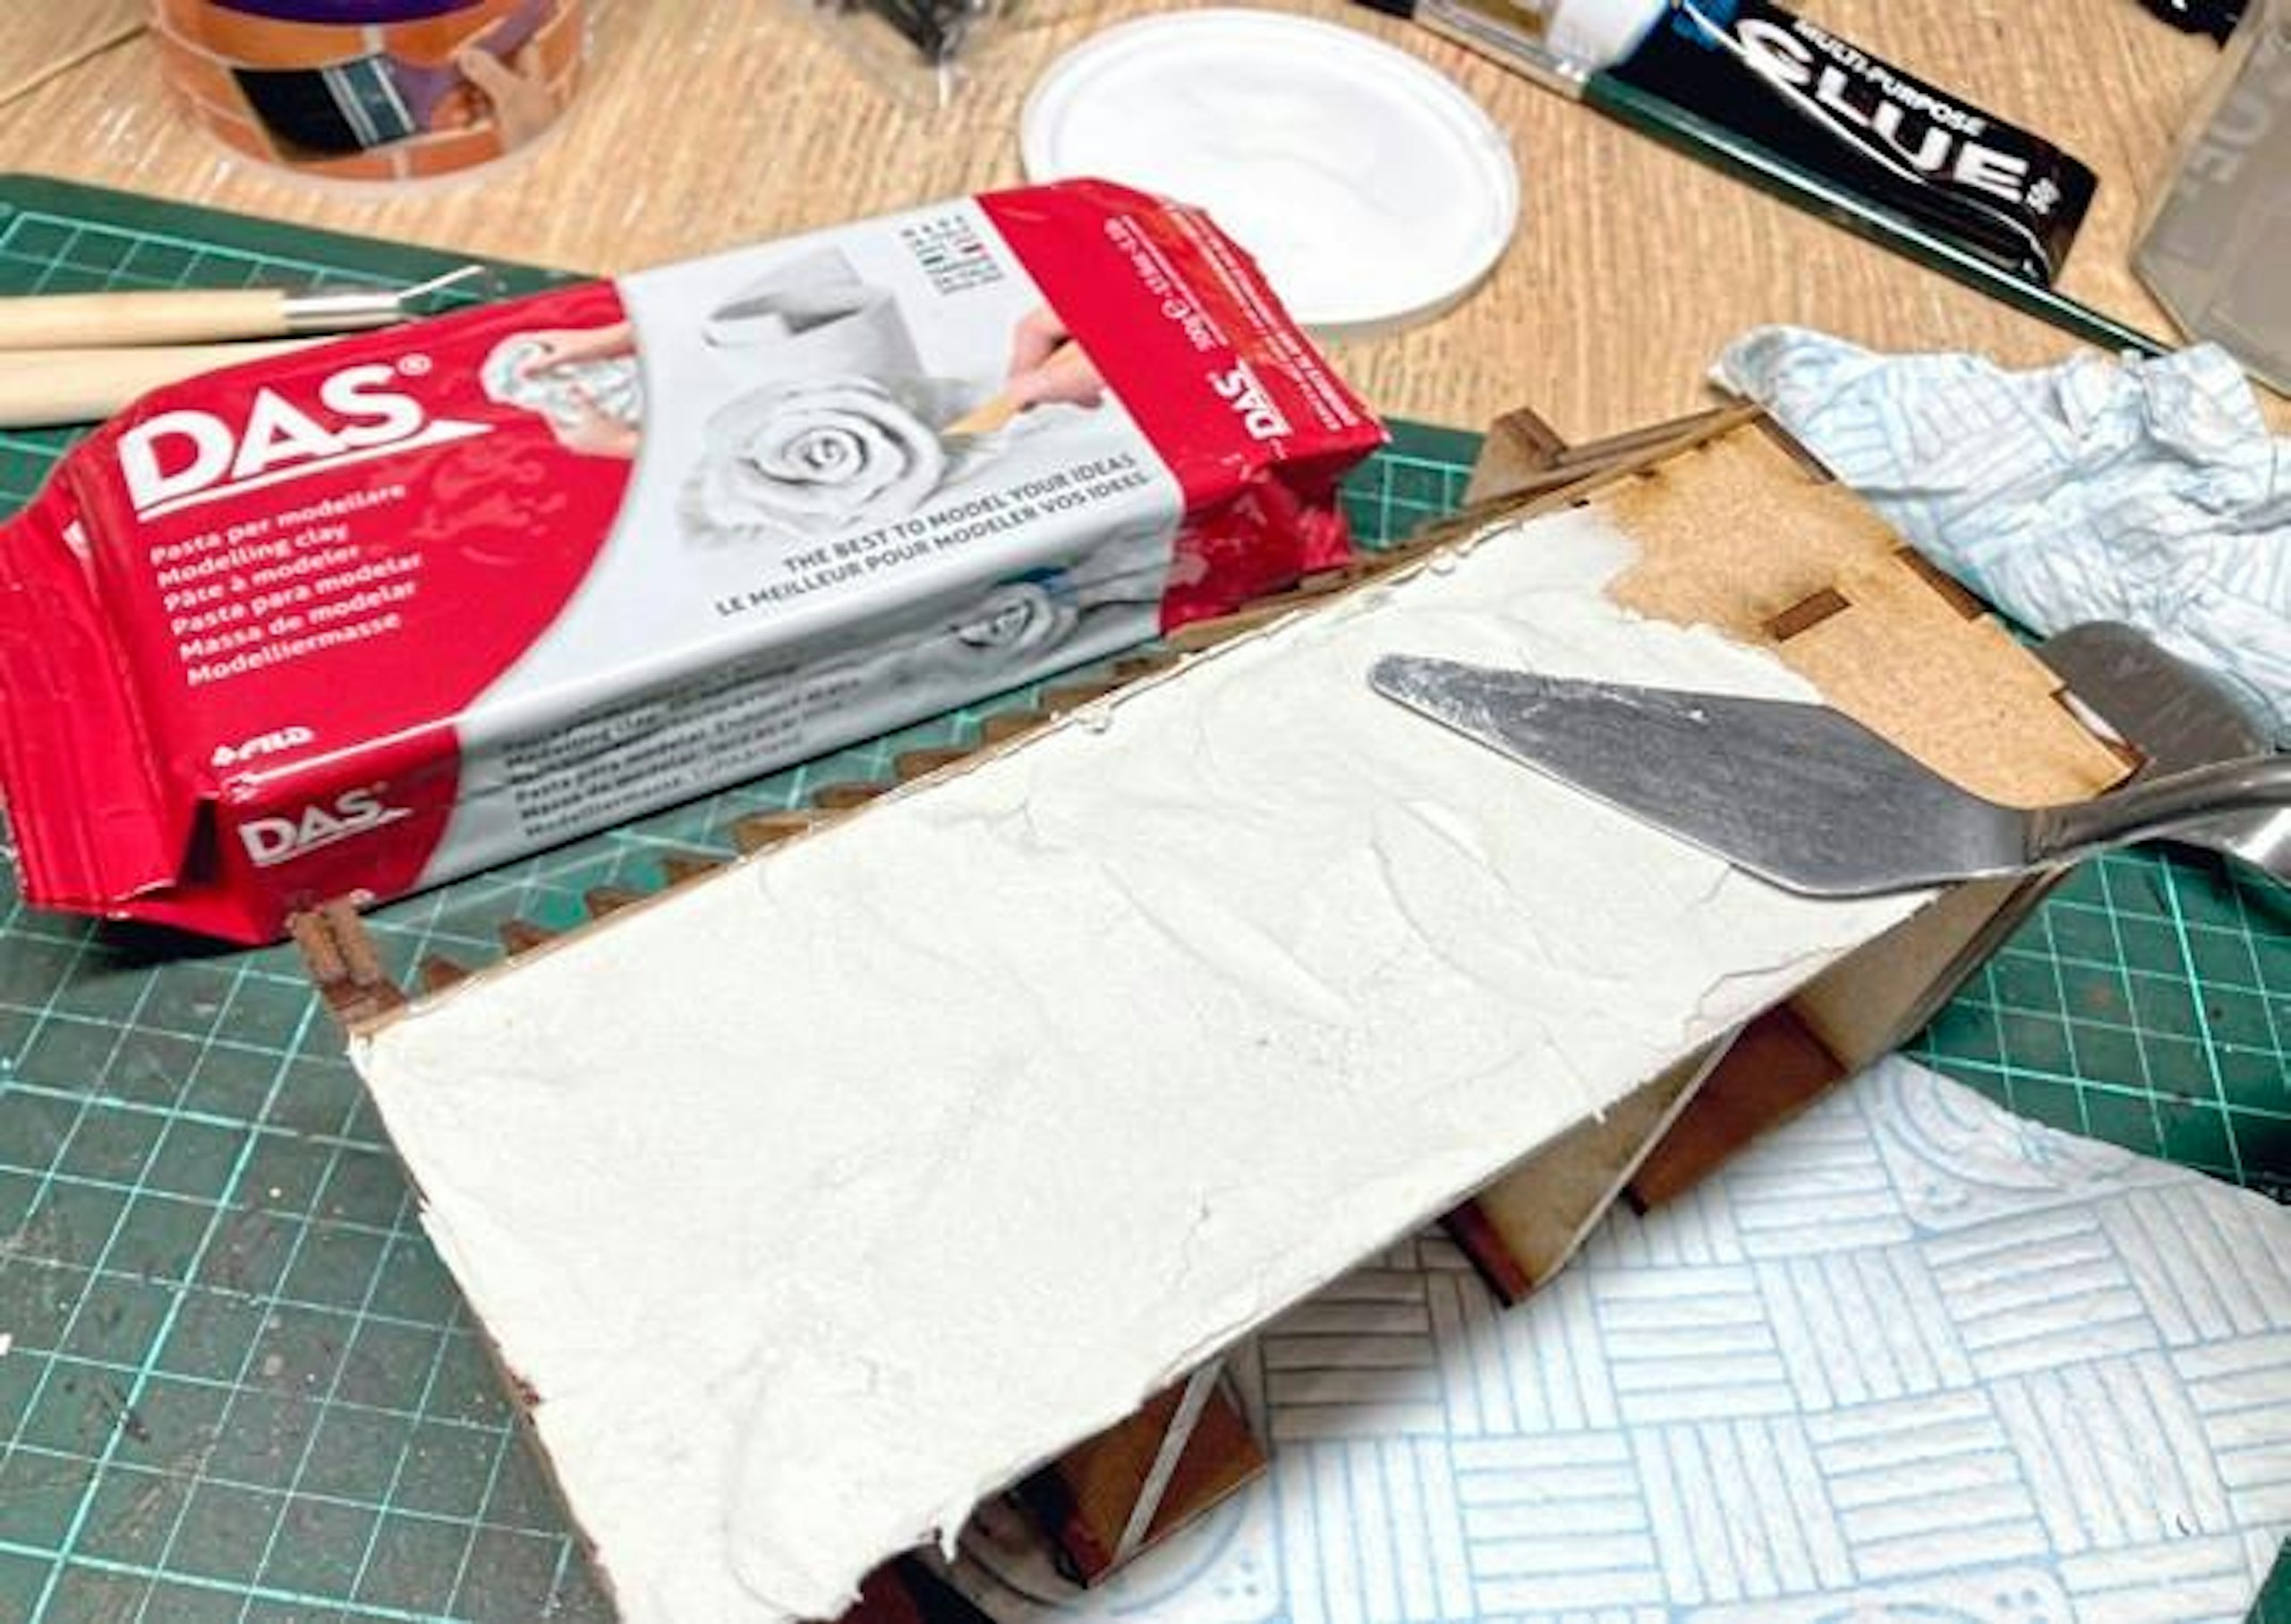
5 I spread a thin layer of DAS white modelling clay over the entire elevation, working it into the surface with my fingers, then using a small palette knife to smooth it out. Dipping the knife in water makes the clay more workable.
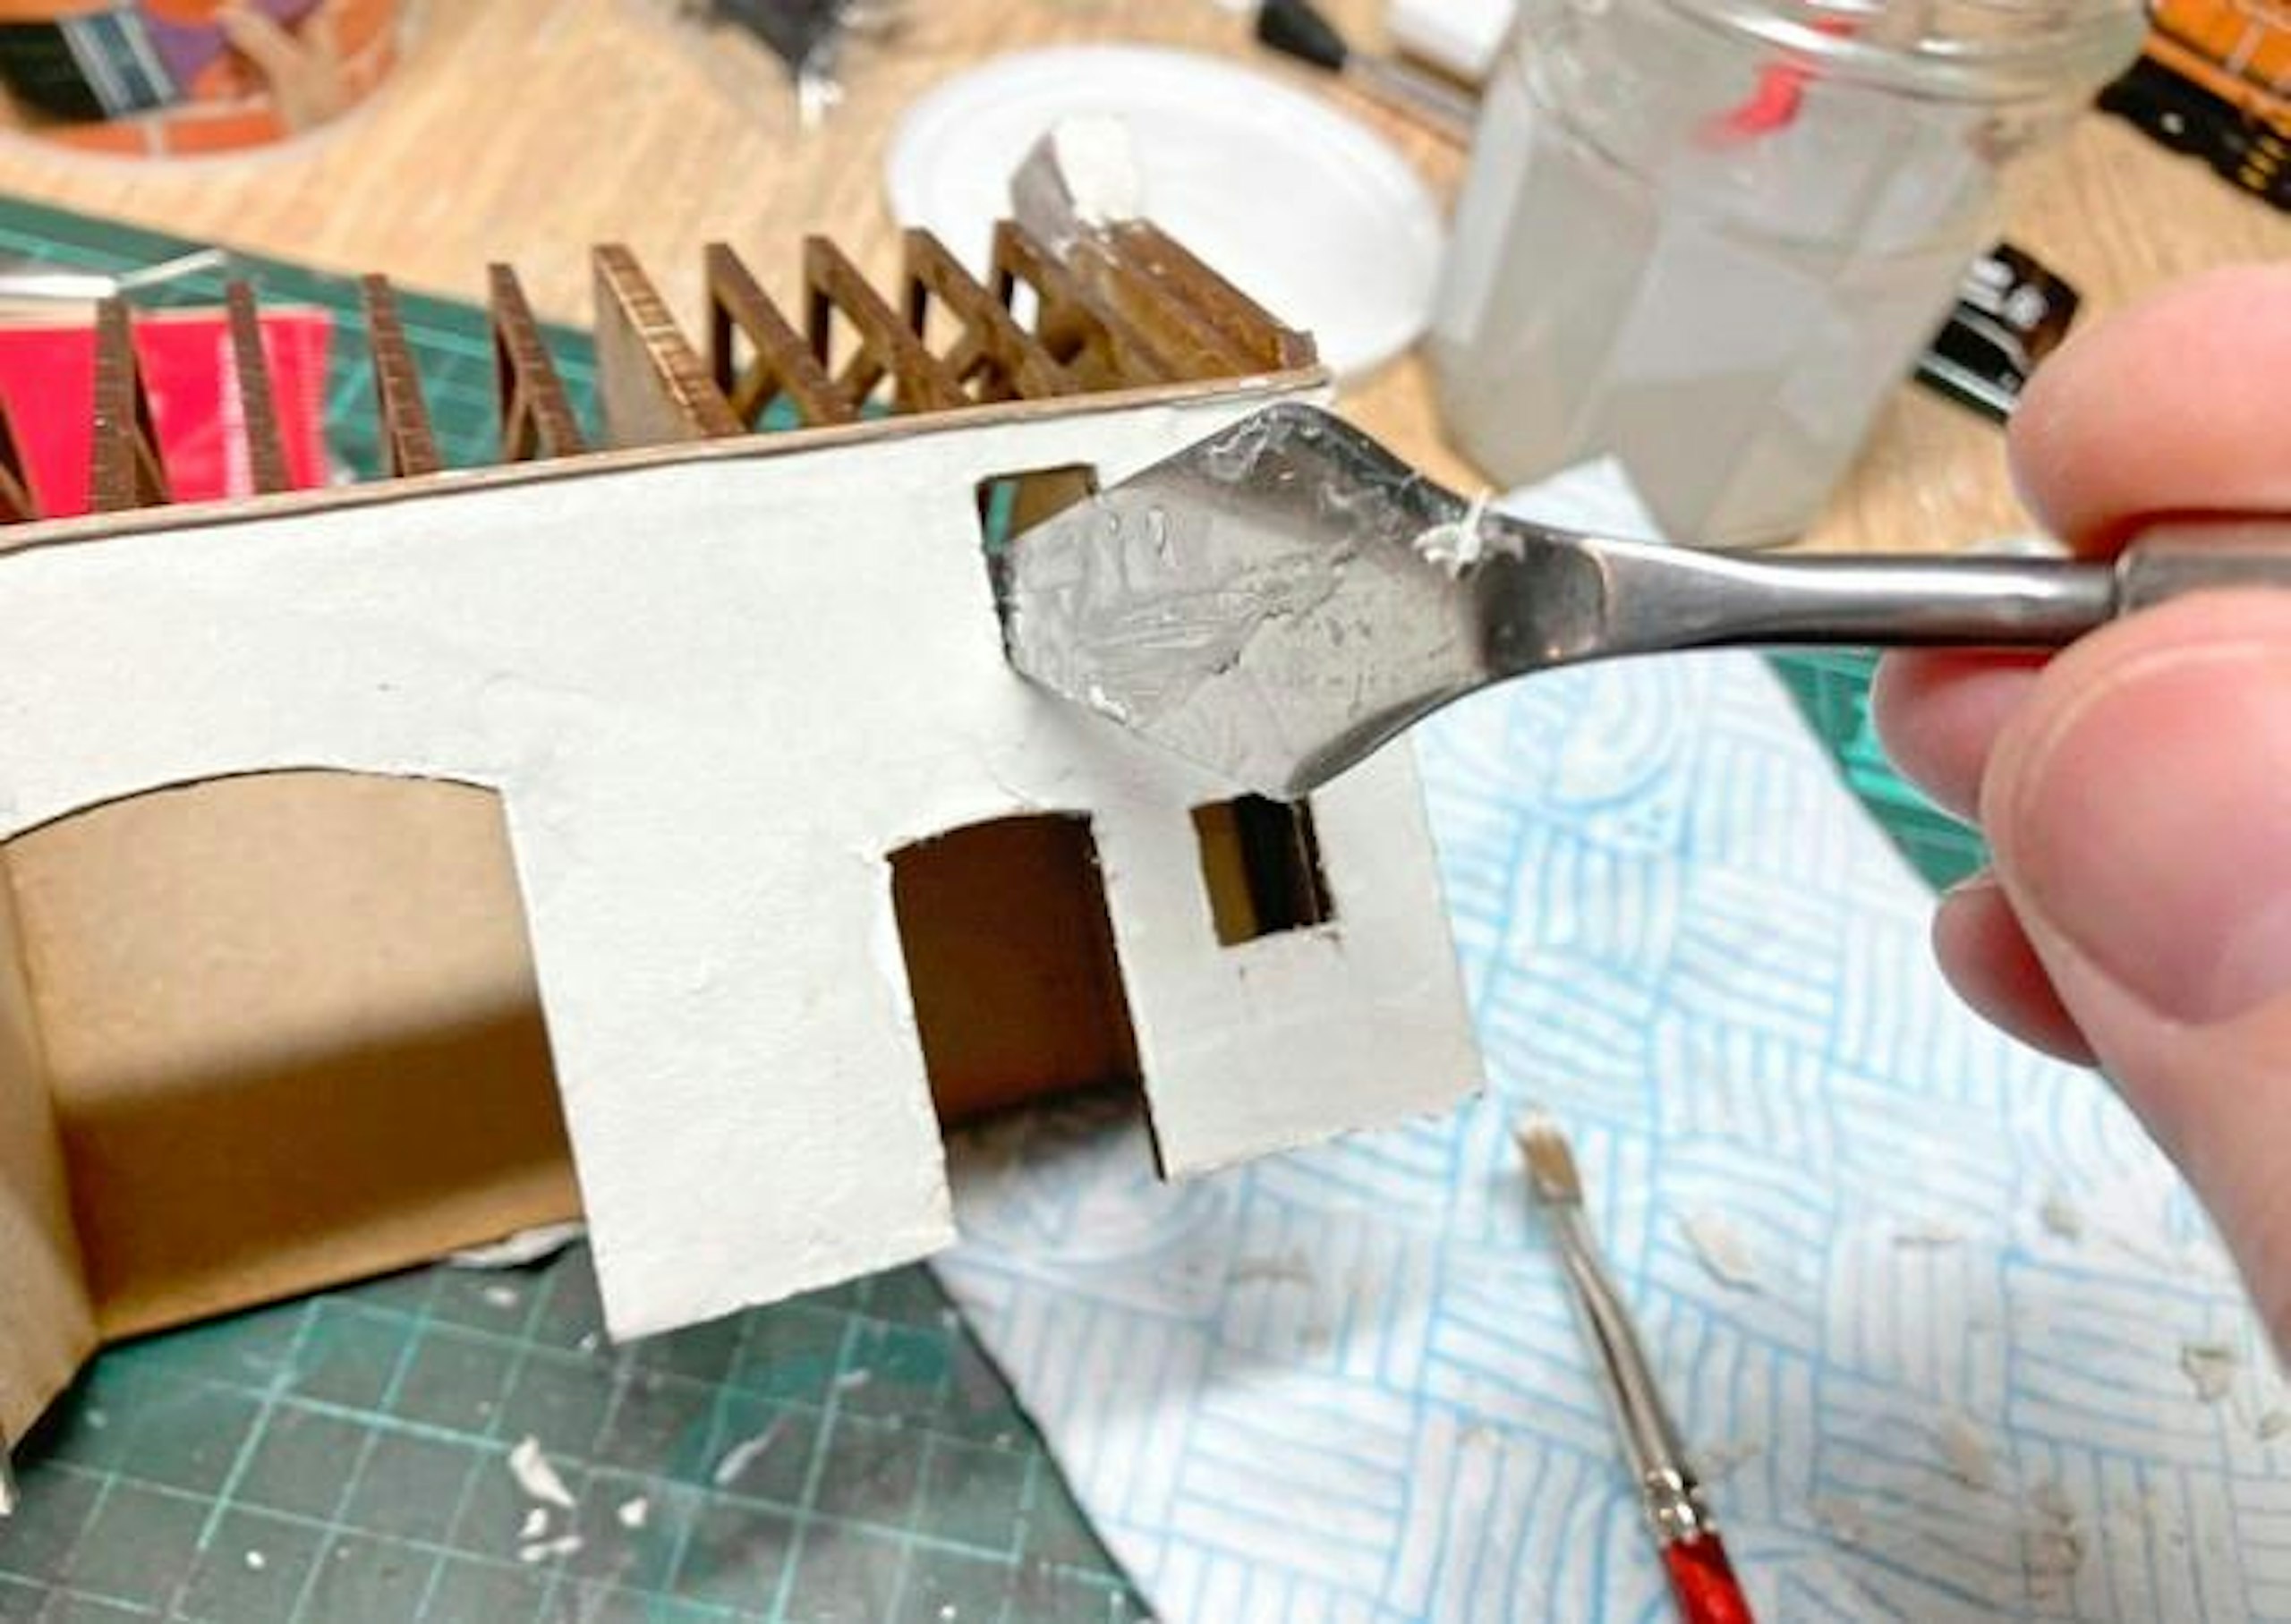
6 It took time to get the layer of clay even and smooth. The edge of the palette knife was used to trim the clay around the window and door apertures, and to work it up against the gutter strips, adding a little water as necessary.
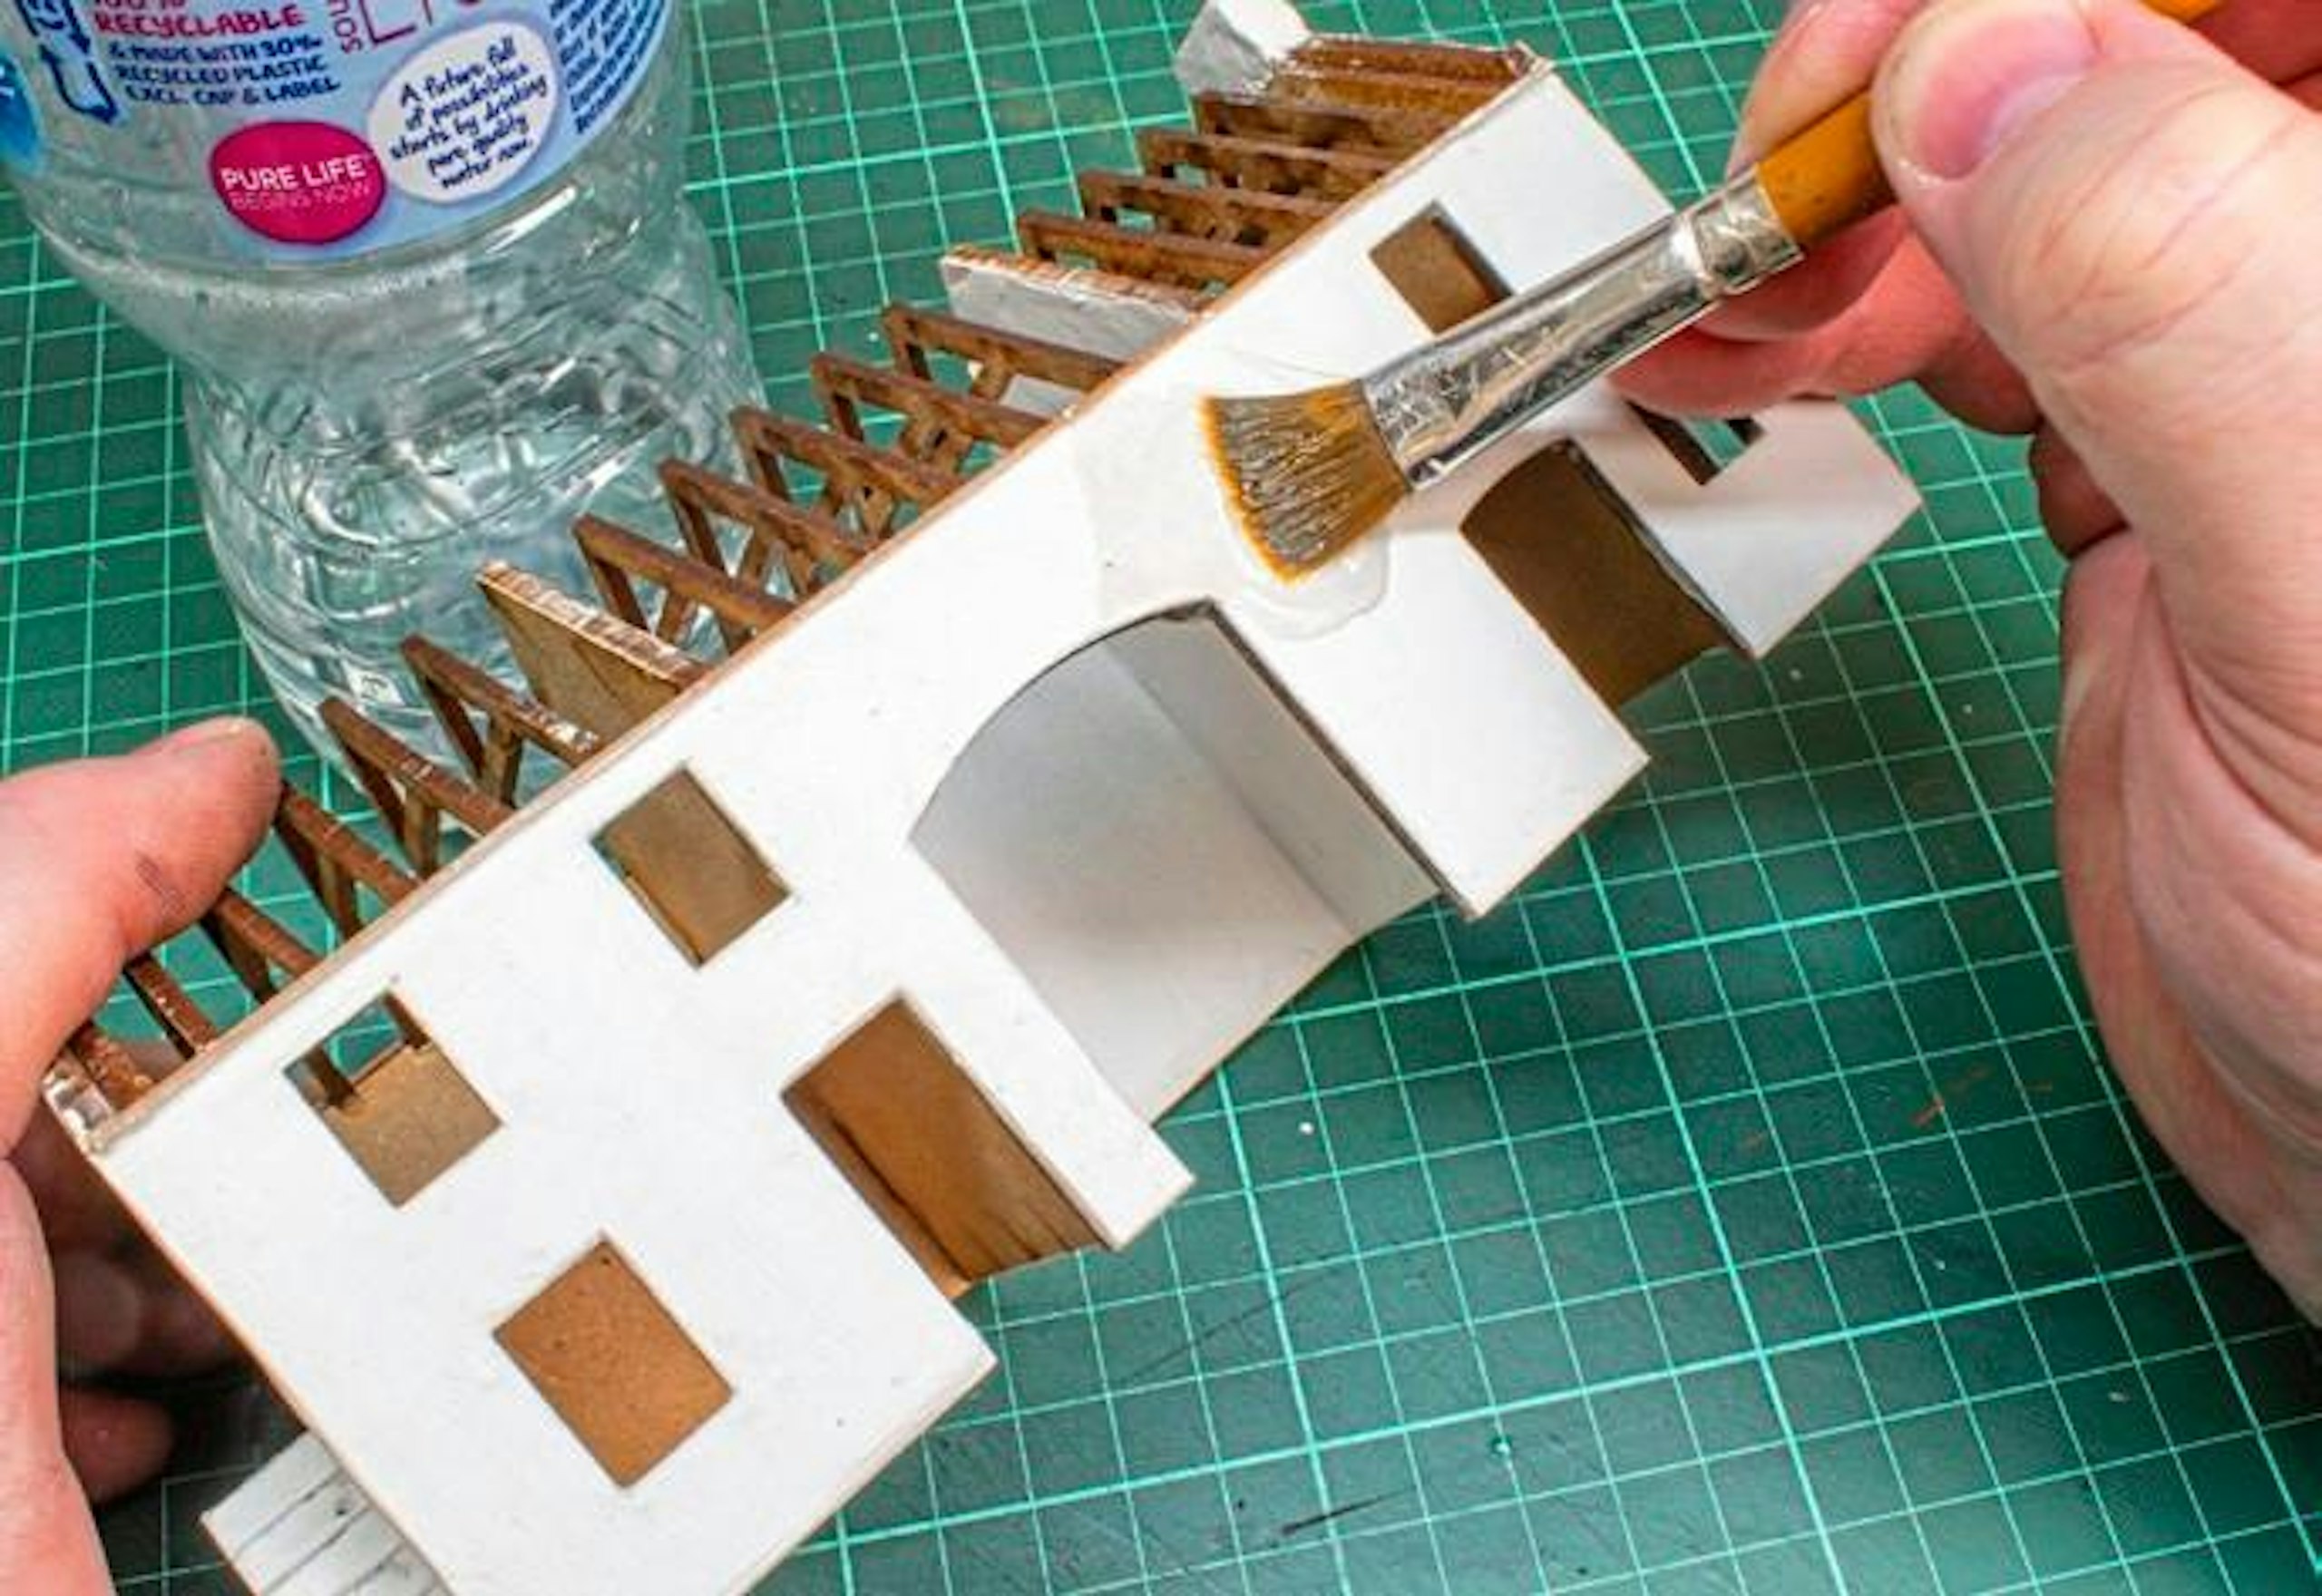
7 Once happy that the ‘rendering’ was even and neat, a stiff, flat brush was employed to stipple the surface, aided by a little more clean water, to bring some natural, random texture. The process was repeated over all four walls in turn.
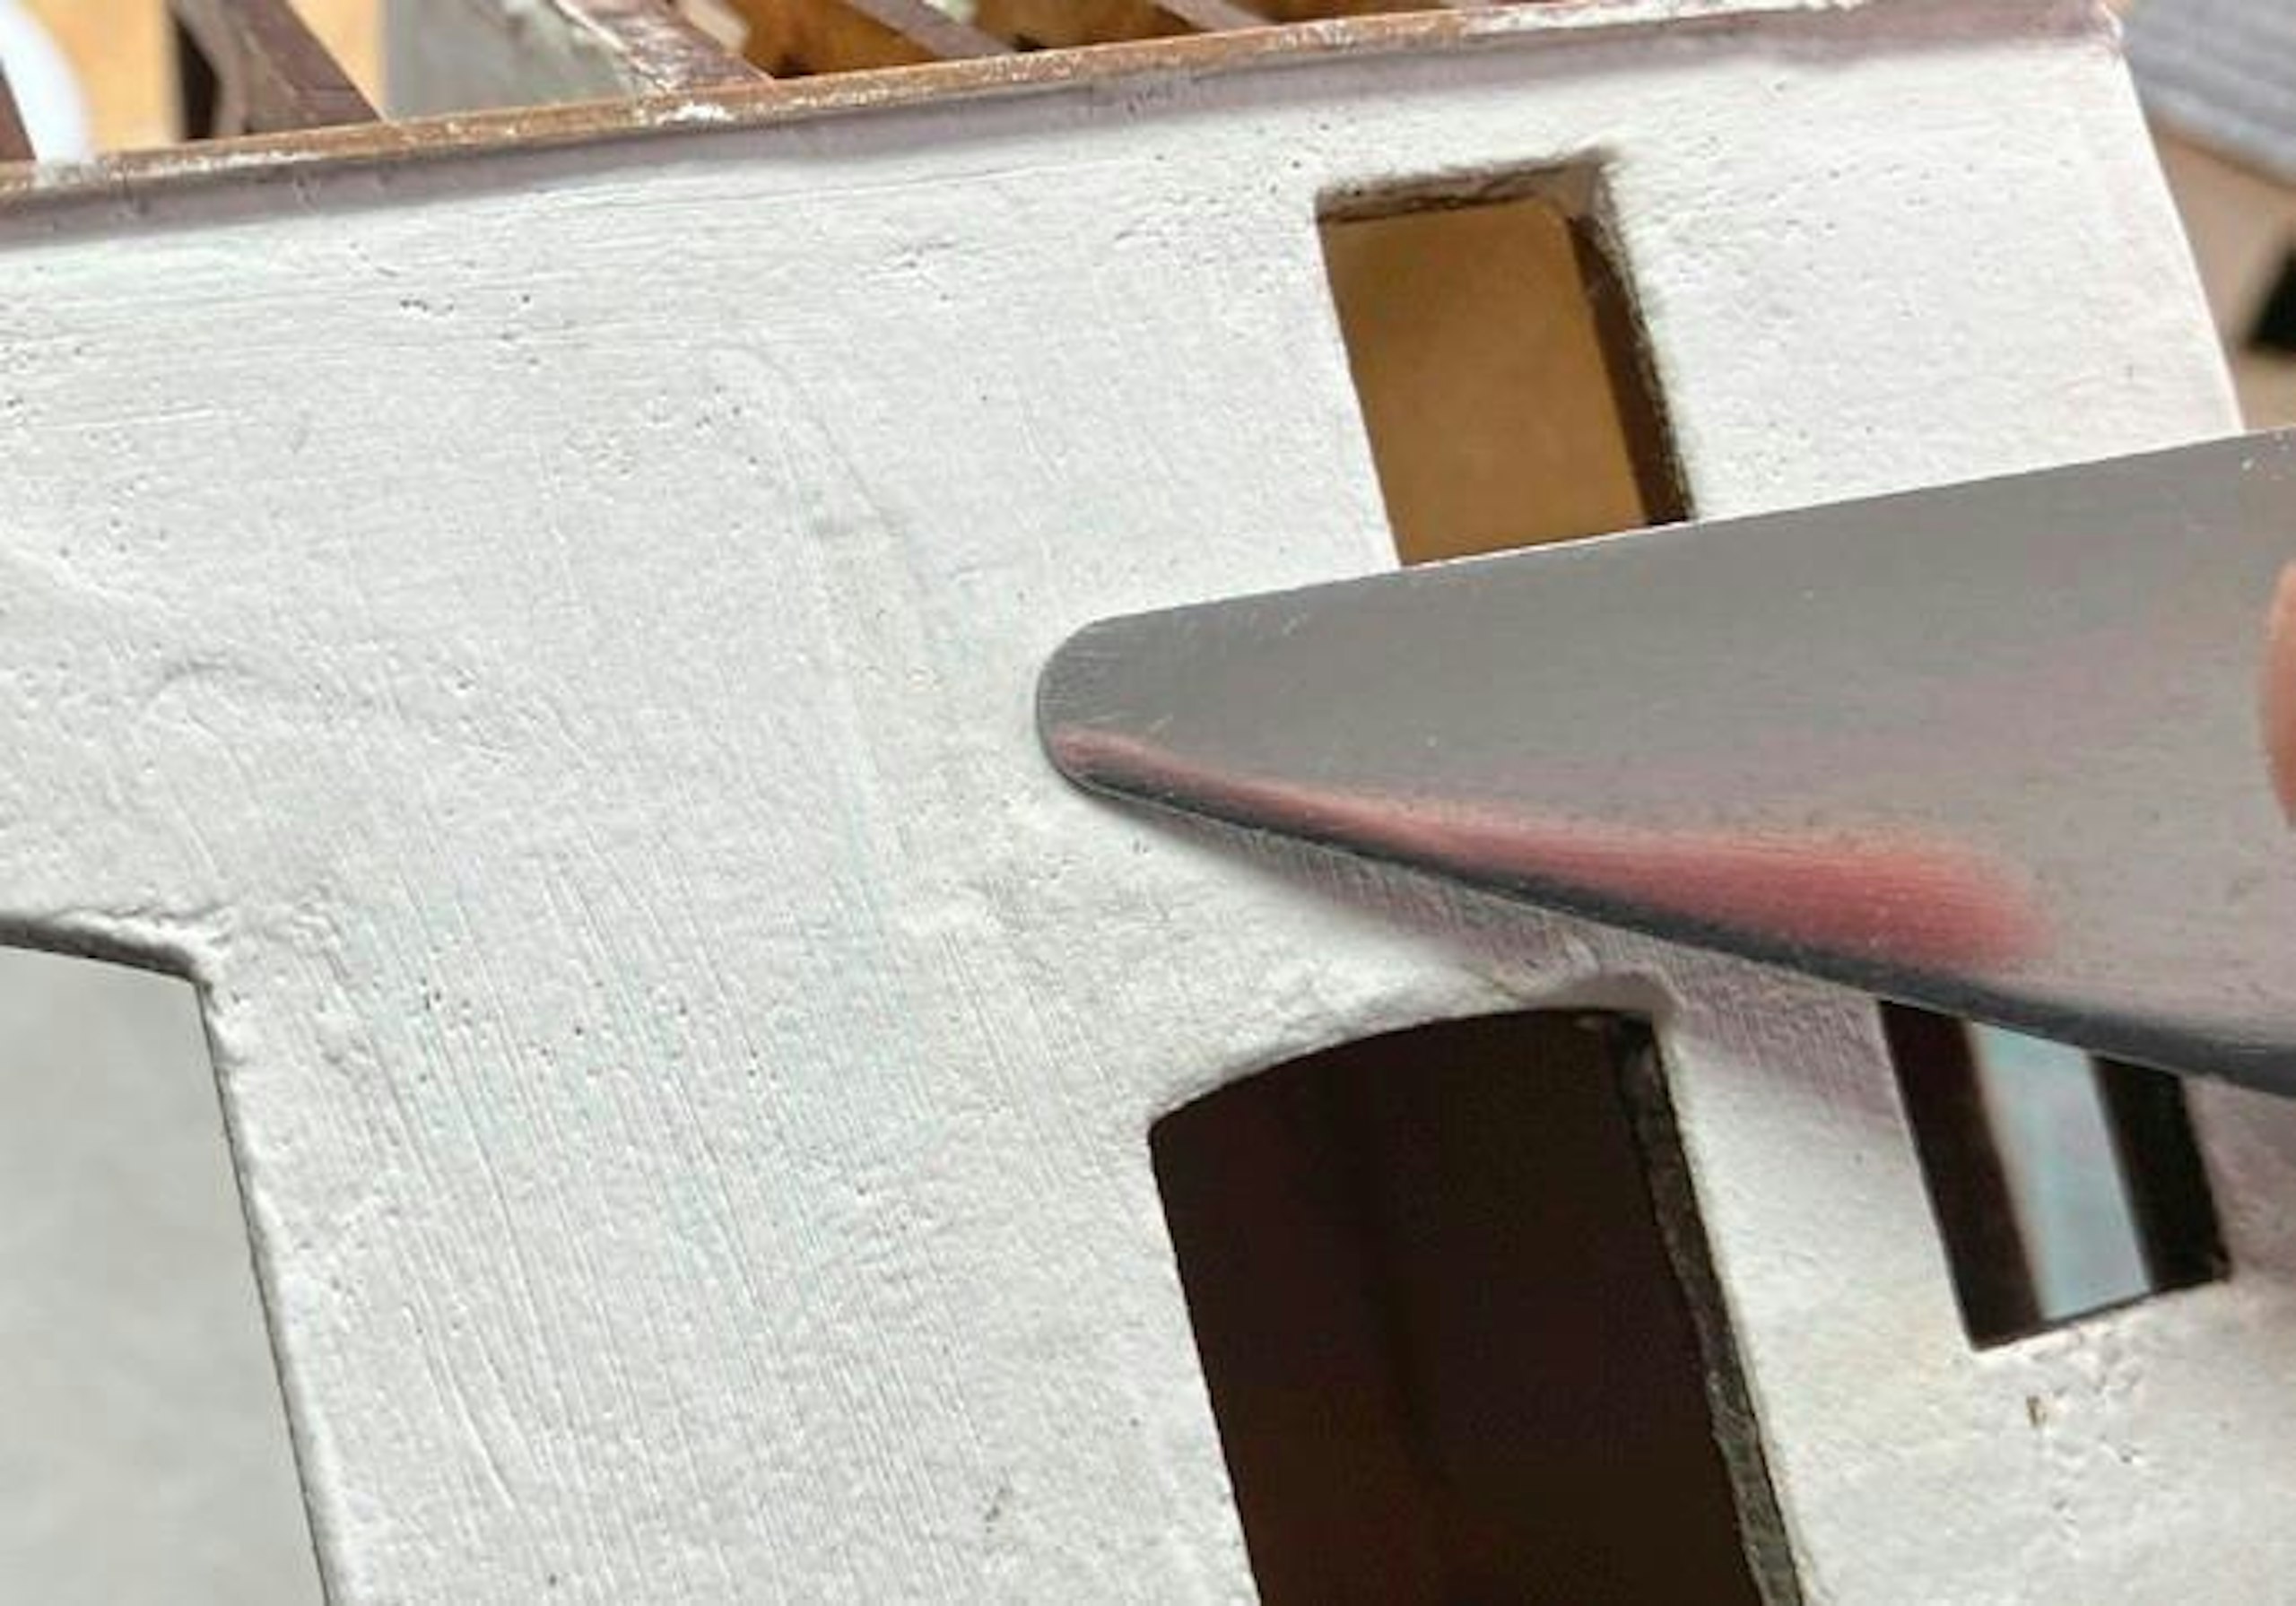
8 With all exterior walls (and some of the interior) treated, the model was left to dry out for a few days. Upon inspection, some areas of shrinkage were identified, especially in the recessed slots where the walls meet.
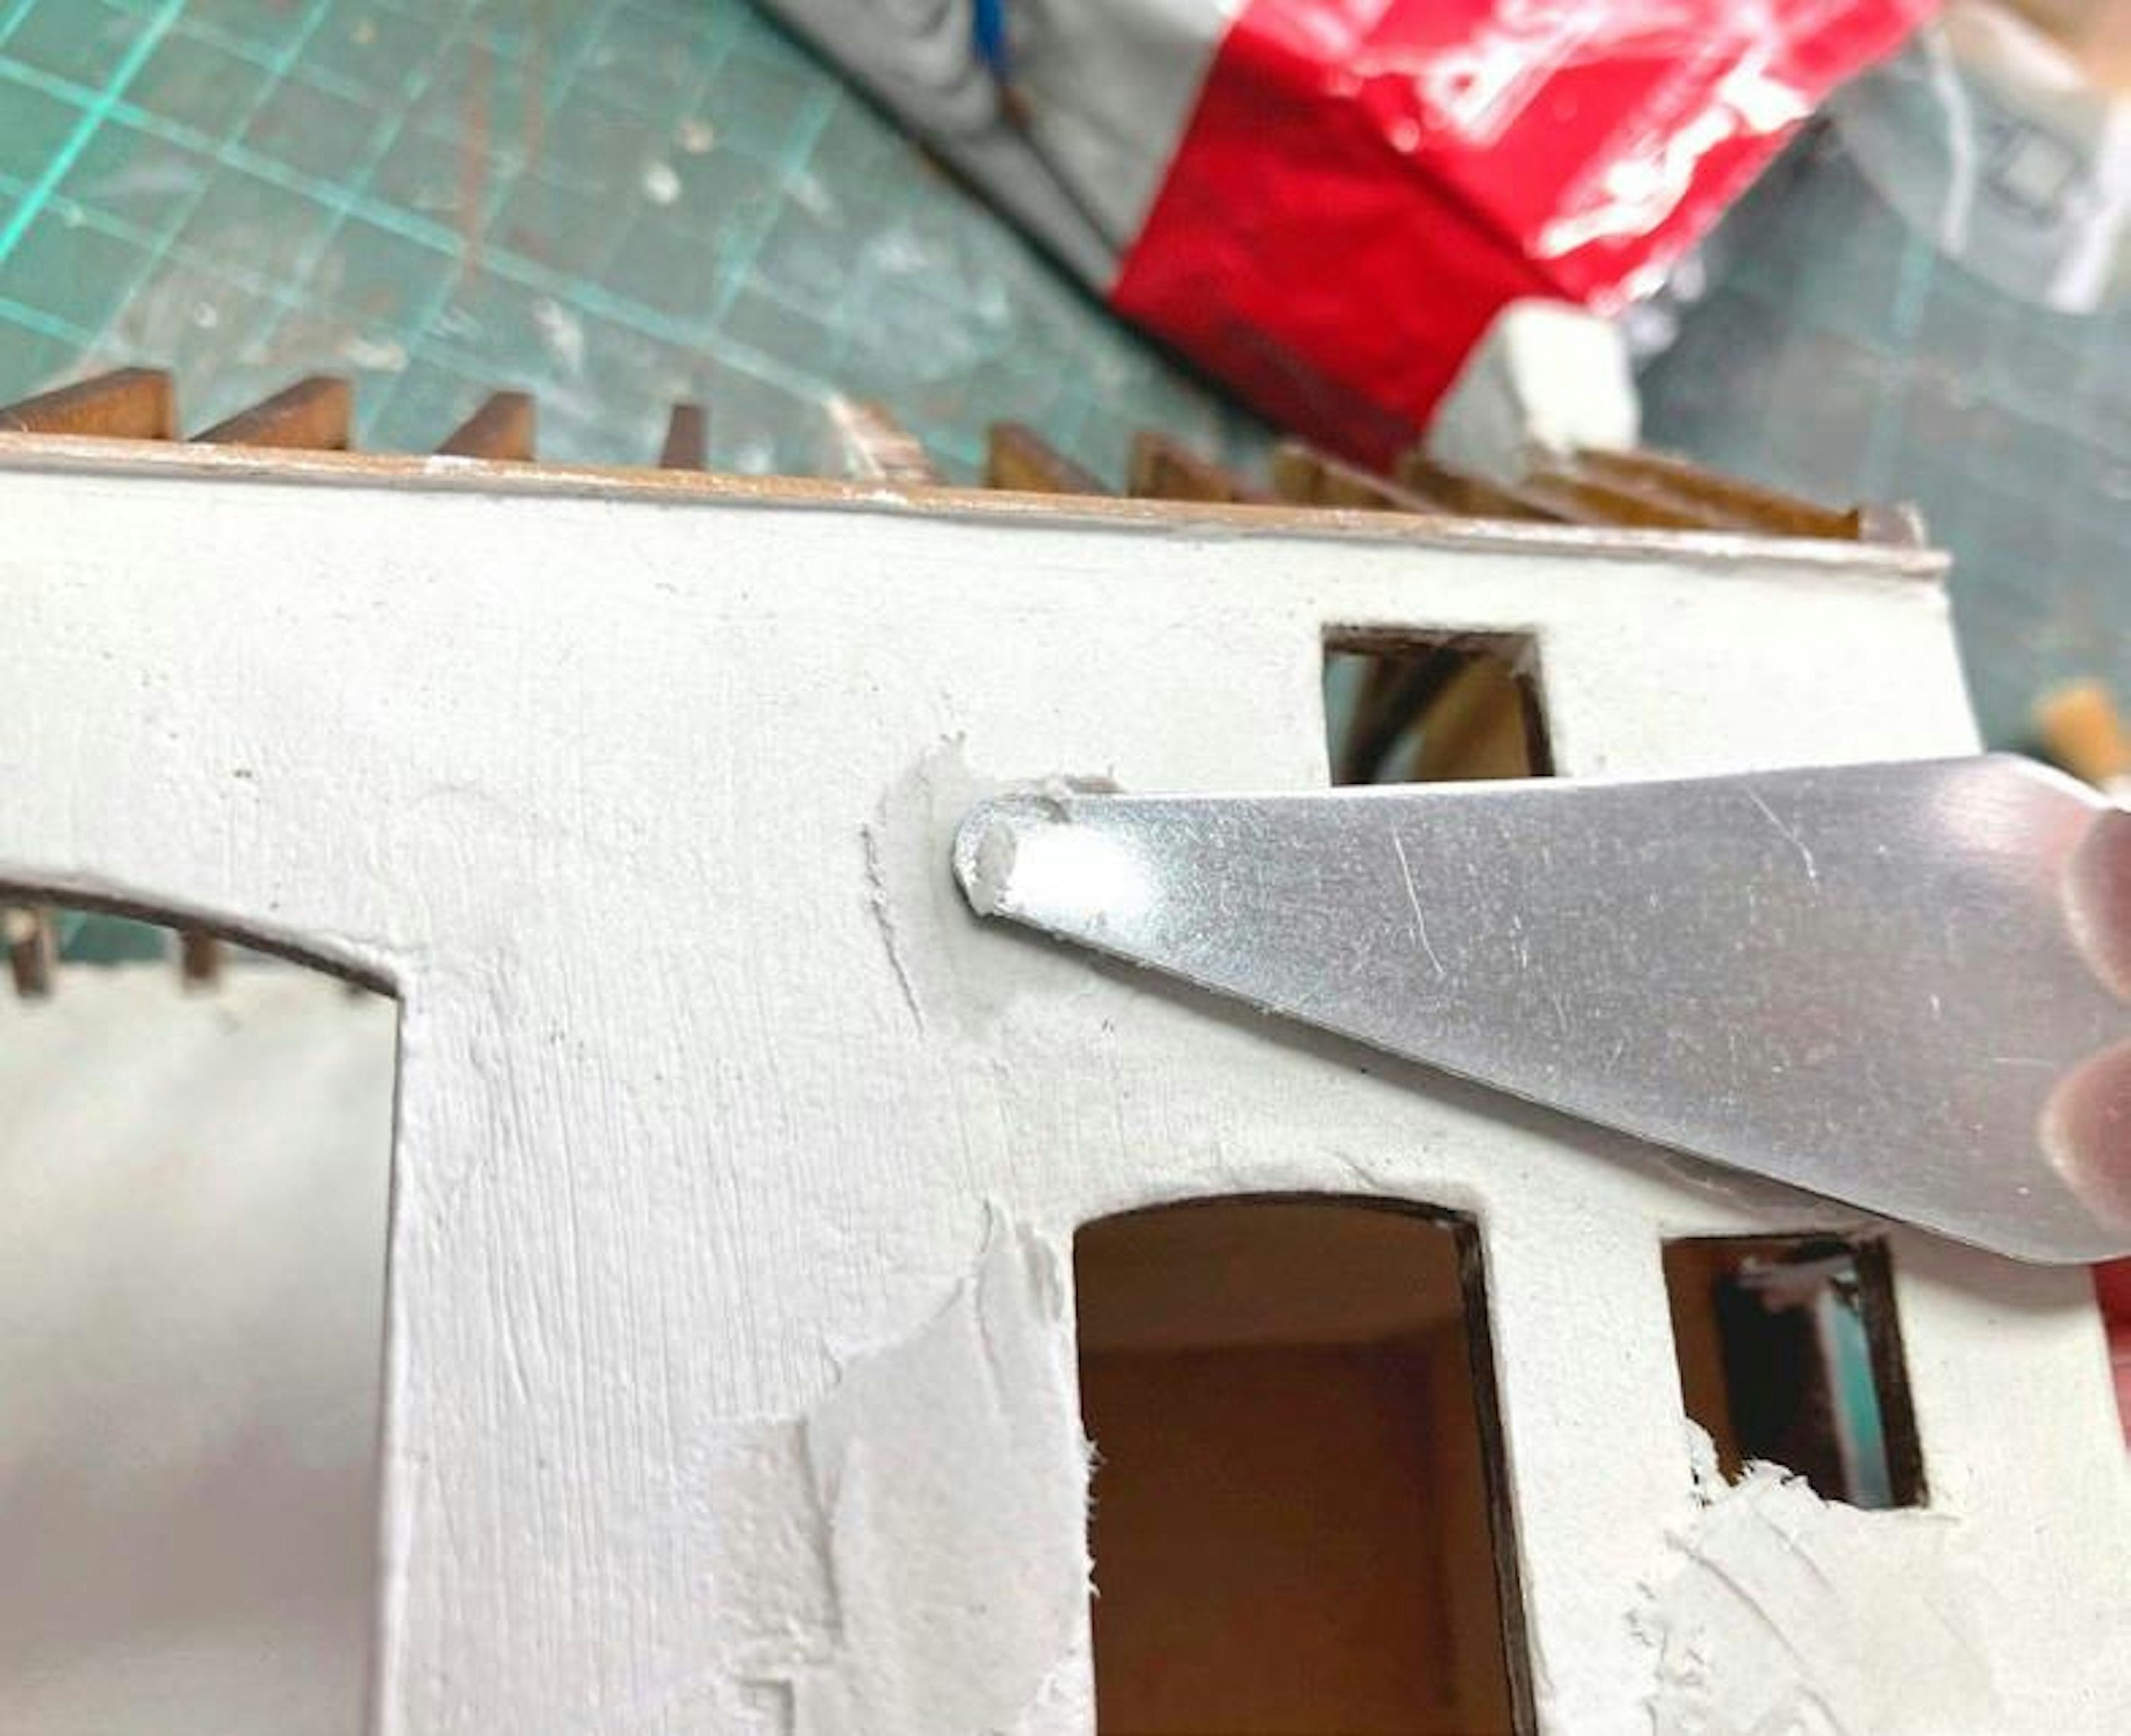
9 Small blobs of fresh DAS clay were worked into these areas, spread with the palette knife and smoothed out with a little water. The stippling with the stiff brush was reprised to ensure consistent surface texture.
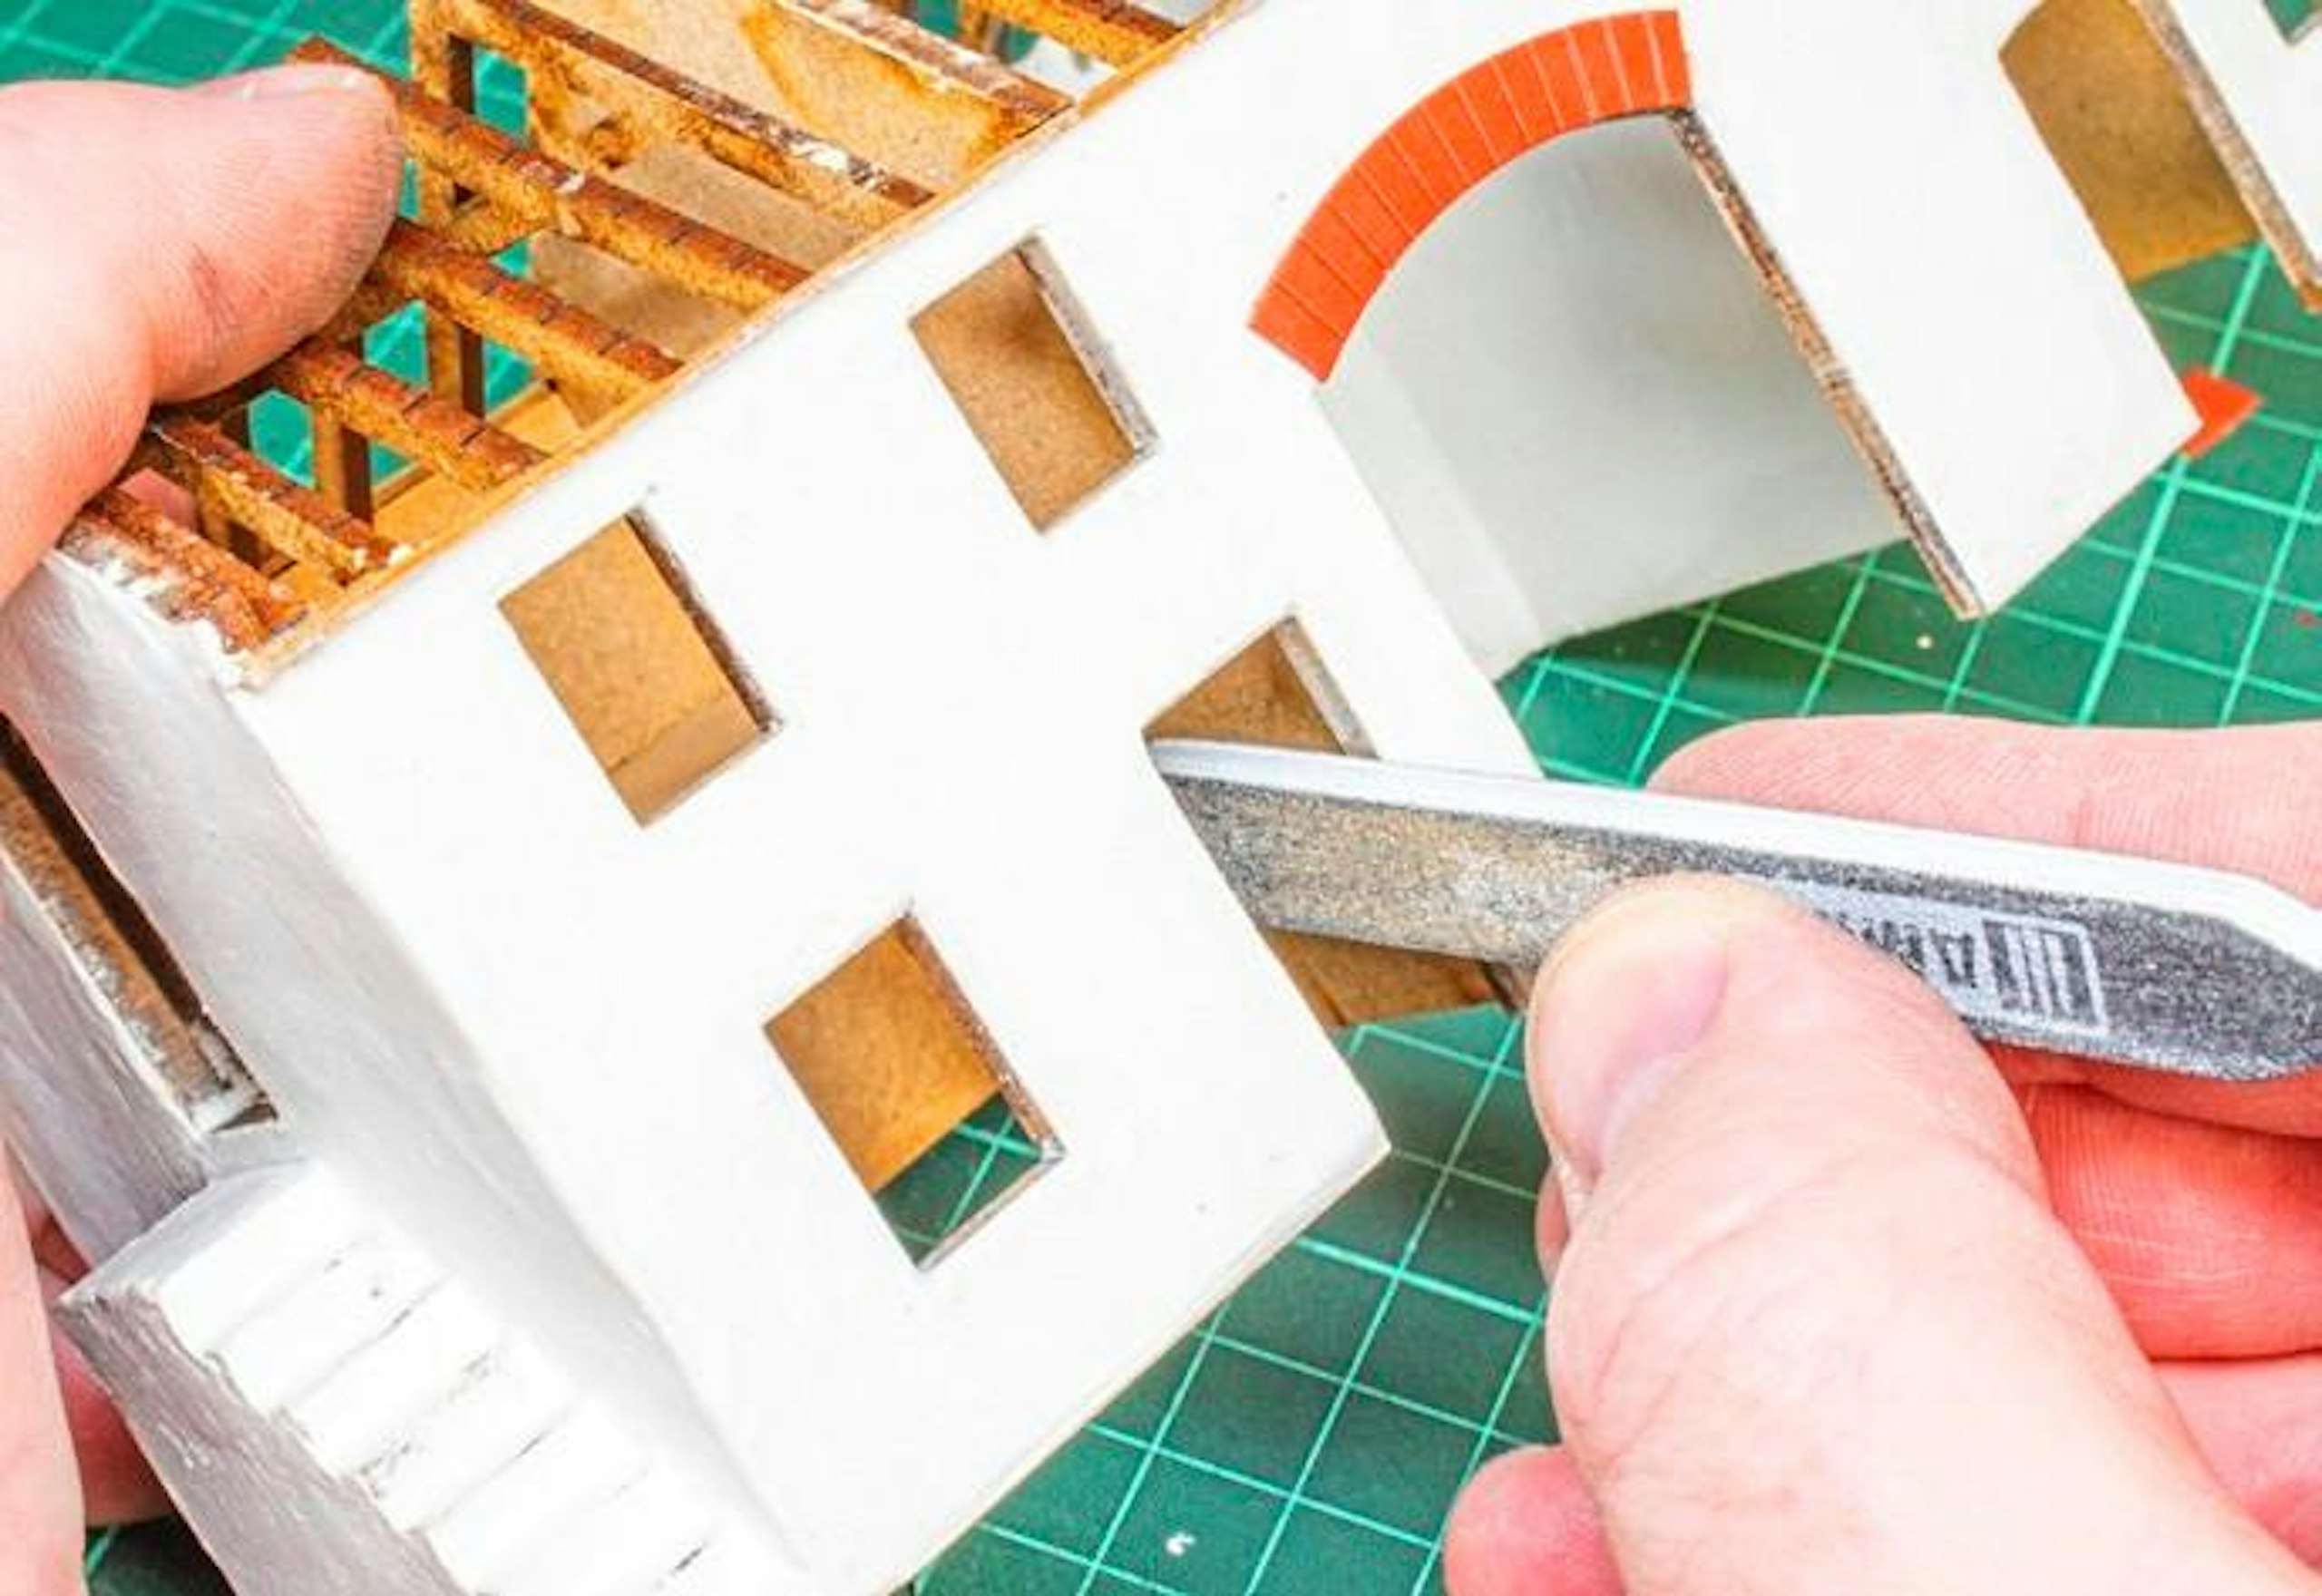
10 When completely dry, the walls were tidied up with coarse sanding pads where necessary, especially in the door and window openings, checking everything is square. The steps of the external hayloft access were also tidied up.
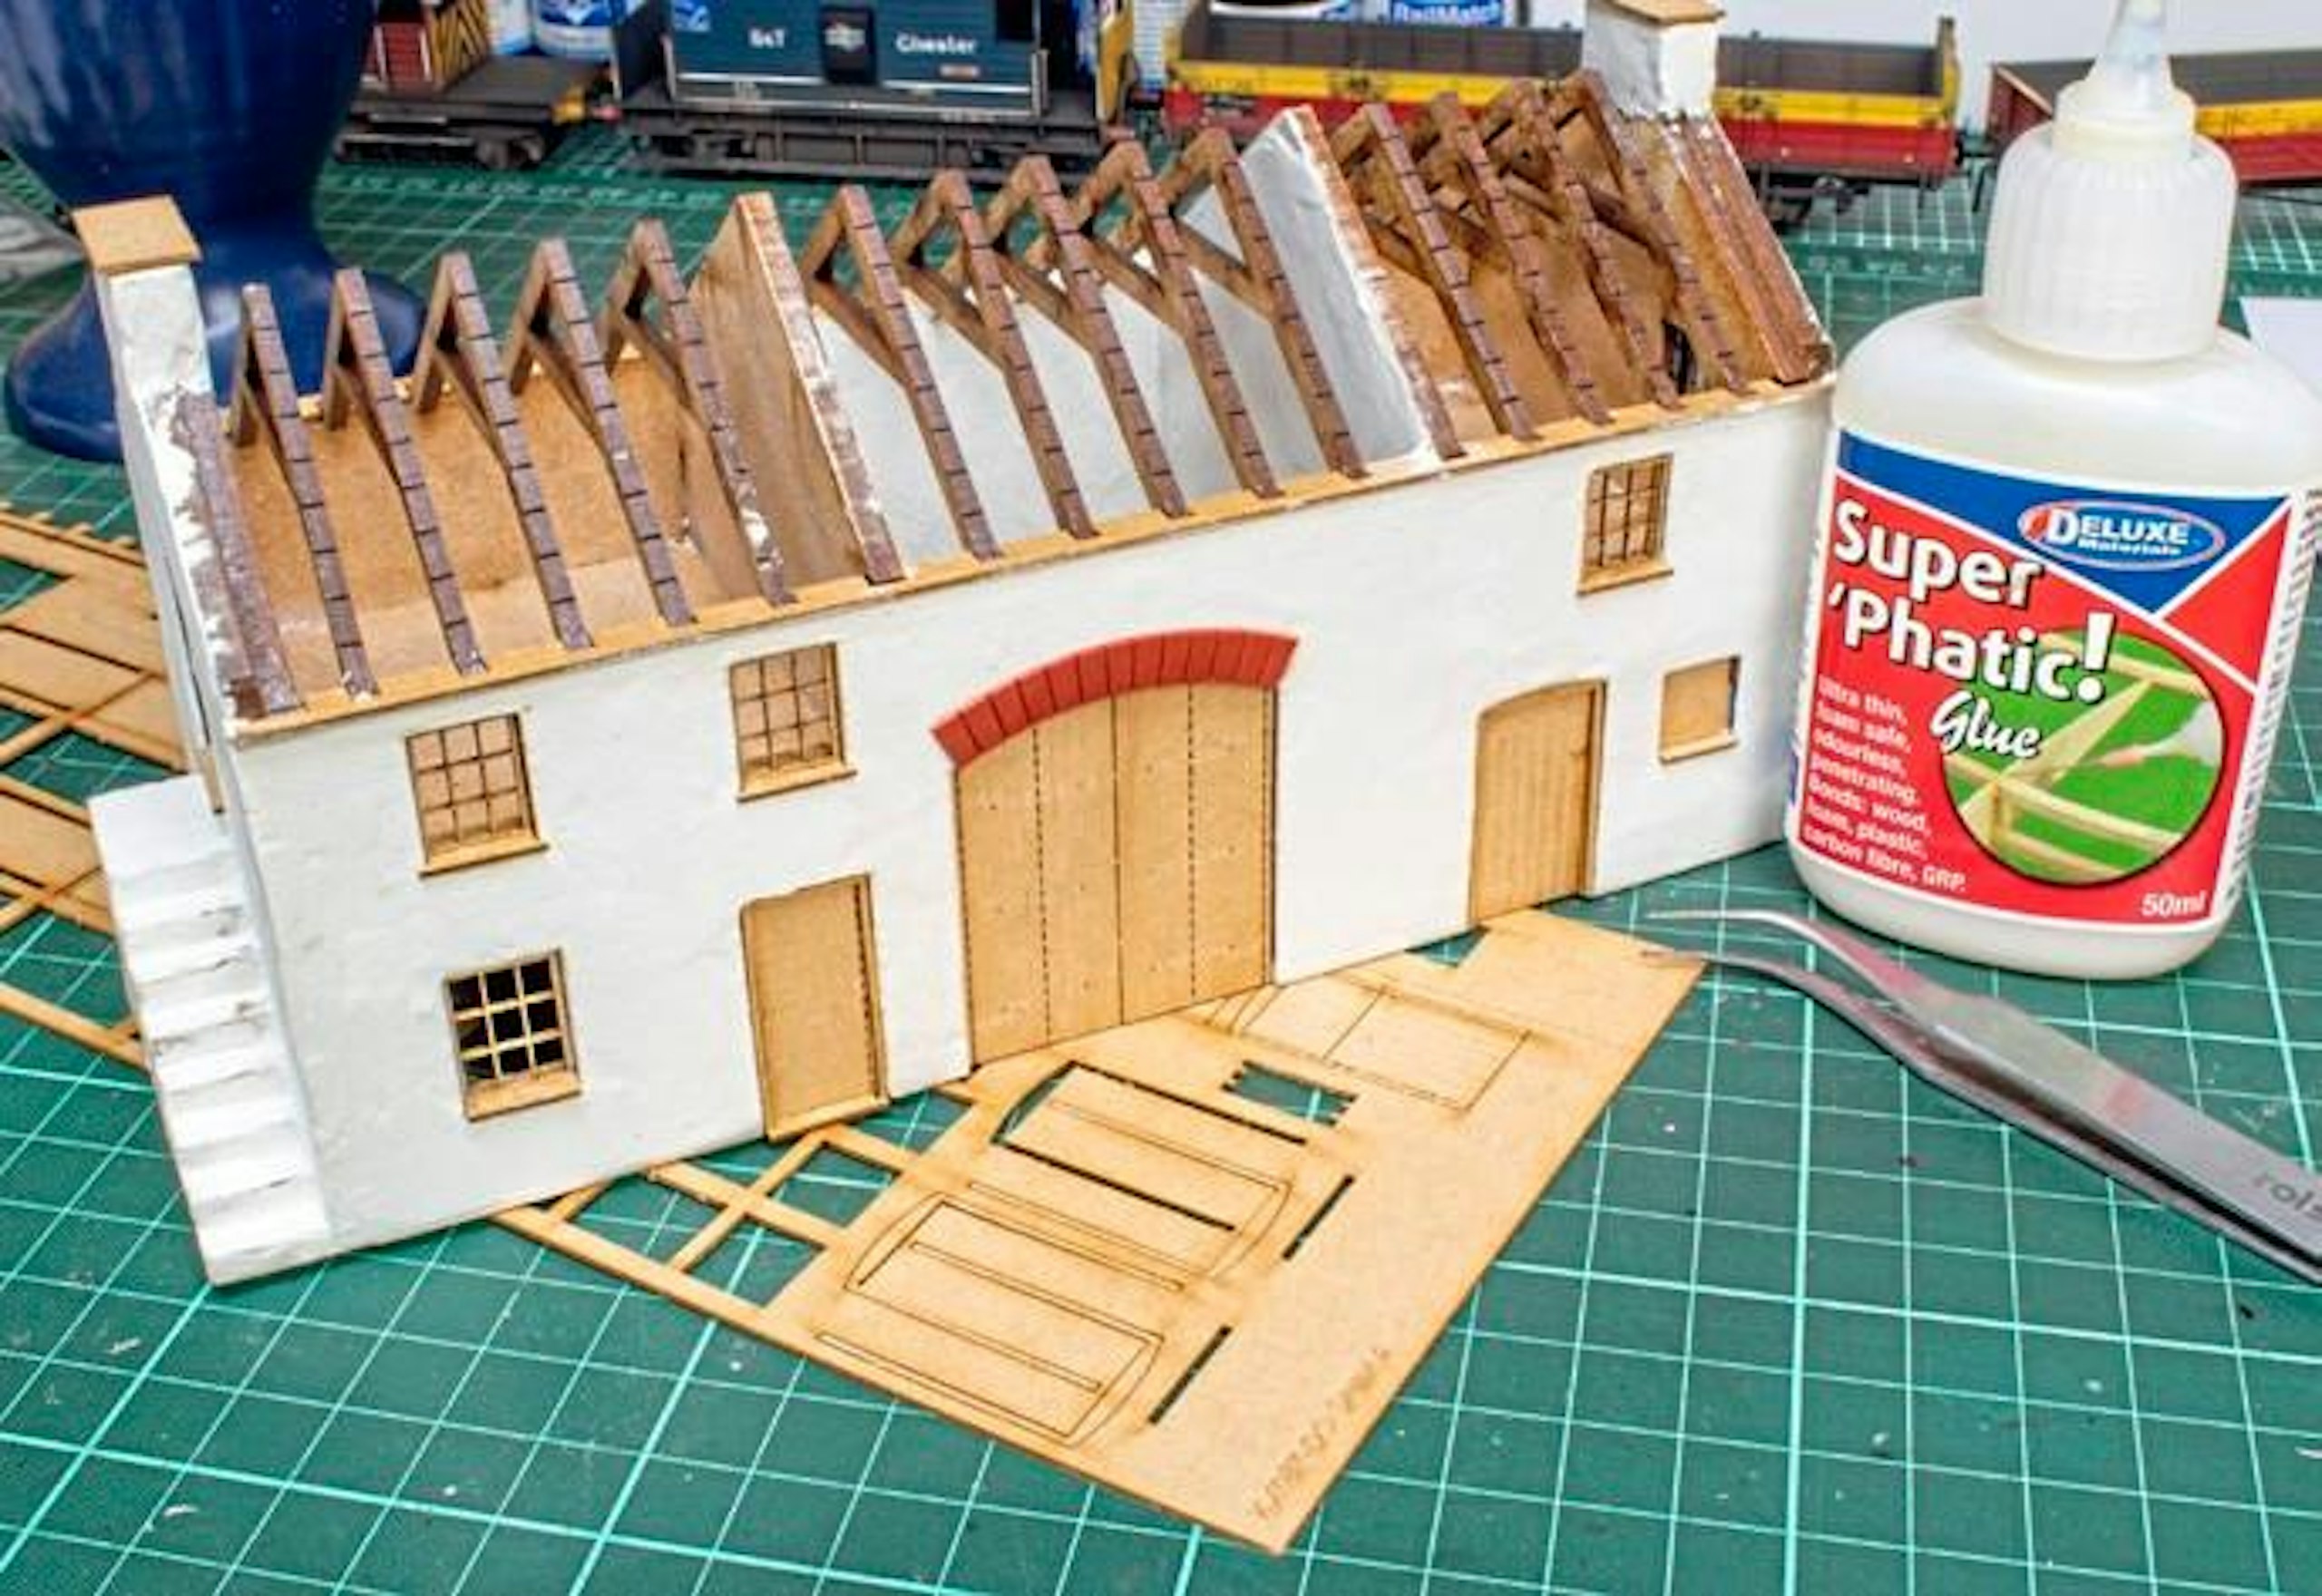
11 The doors, windows and frames can be added, the parts being built up from several layers before fixing into place. Super ‘Phatic glue is great, as it’s thin and sets in minutes. I added a plastic brick arch from a set of Ratio detailing parts.
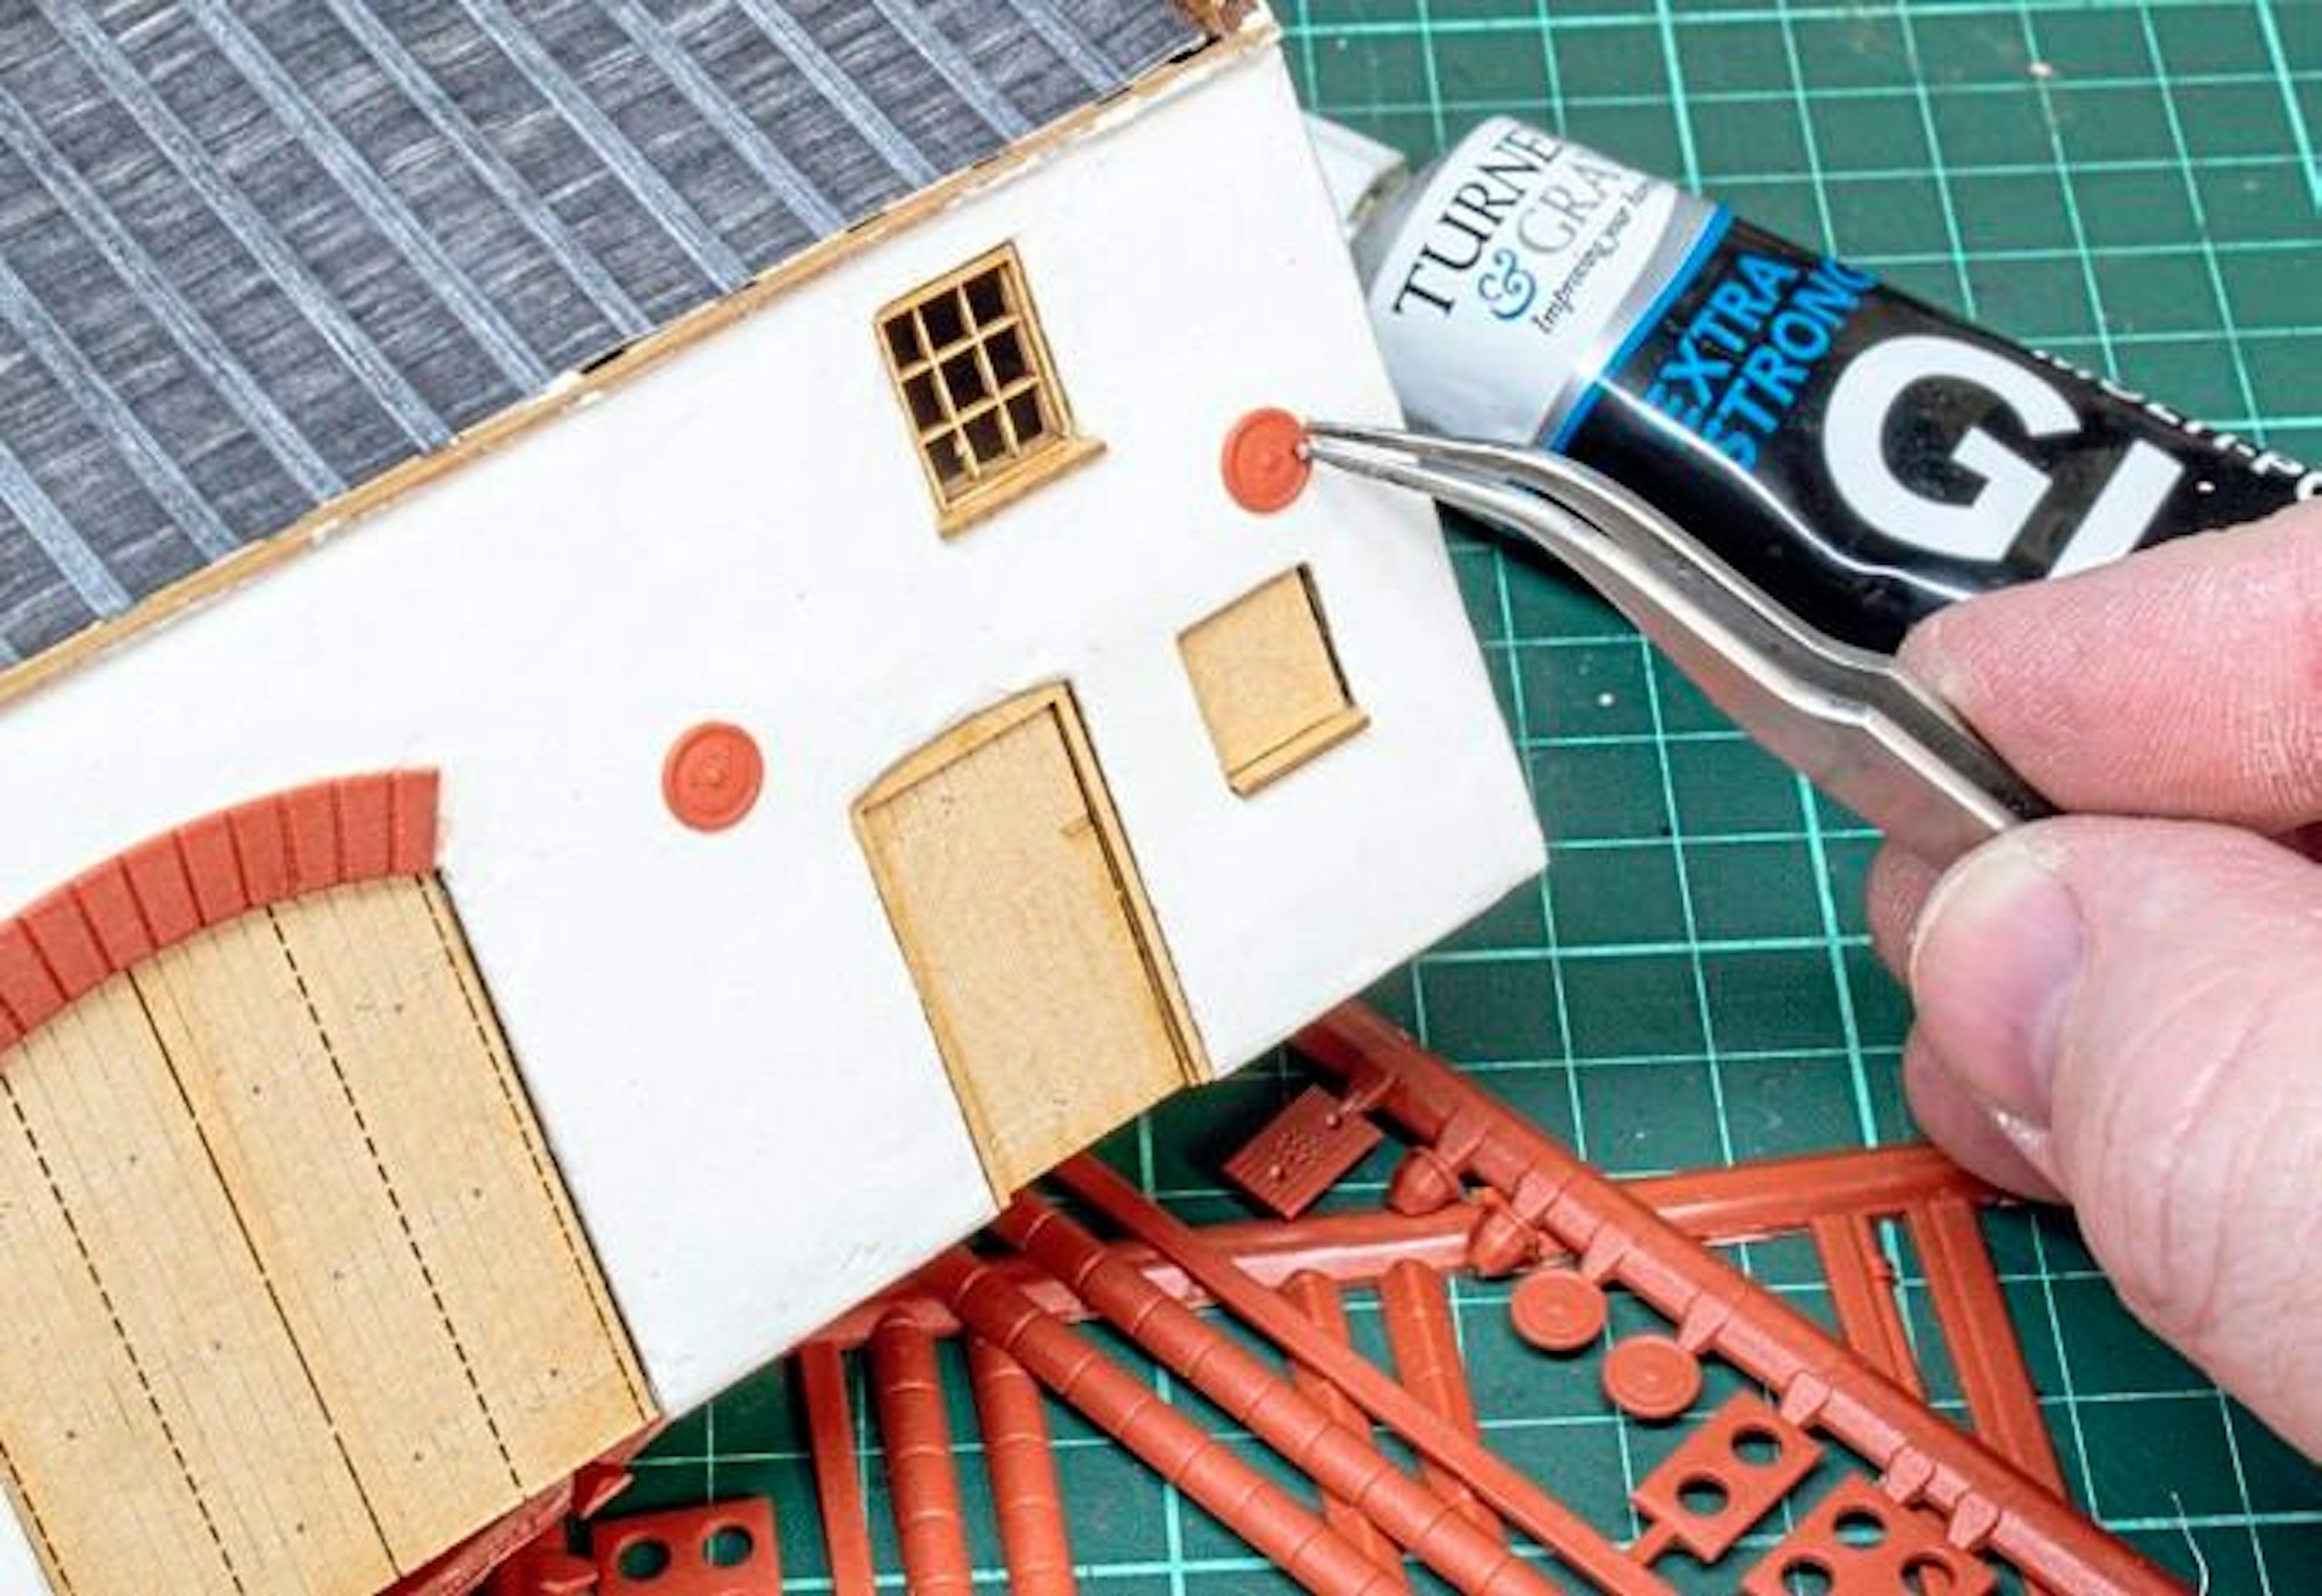
12 A Wills building detail pack provided some useful plastic wall tie-bar plates, which bring added visual interest to an old building like this. They were installed with contact adhesive. The Wills kit also provided some useful chimney pots.
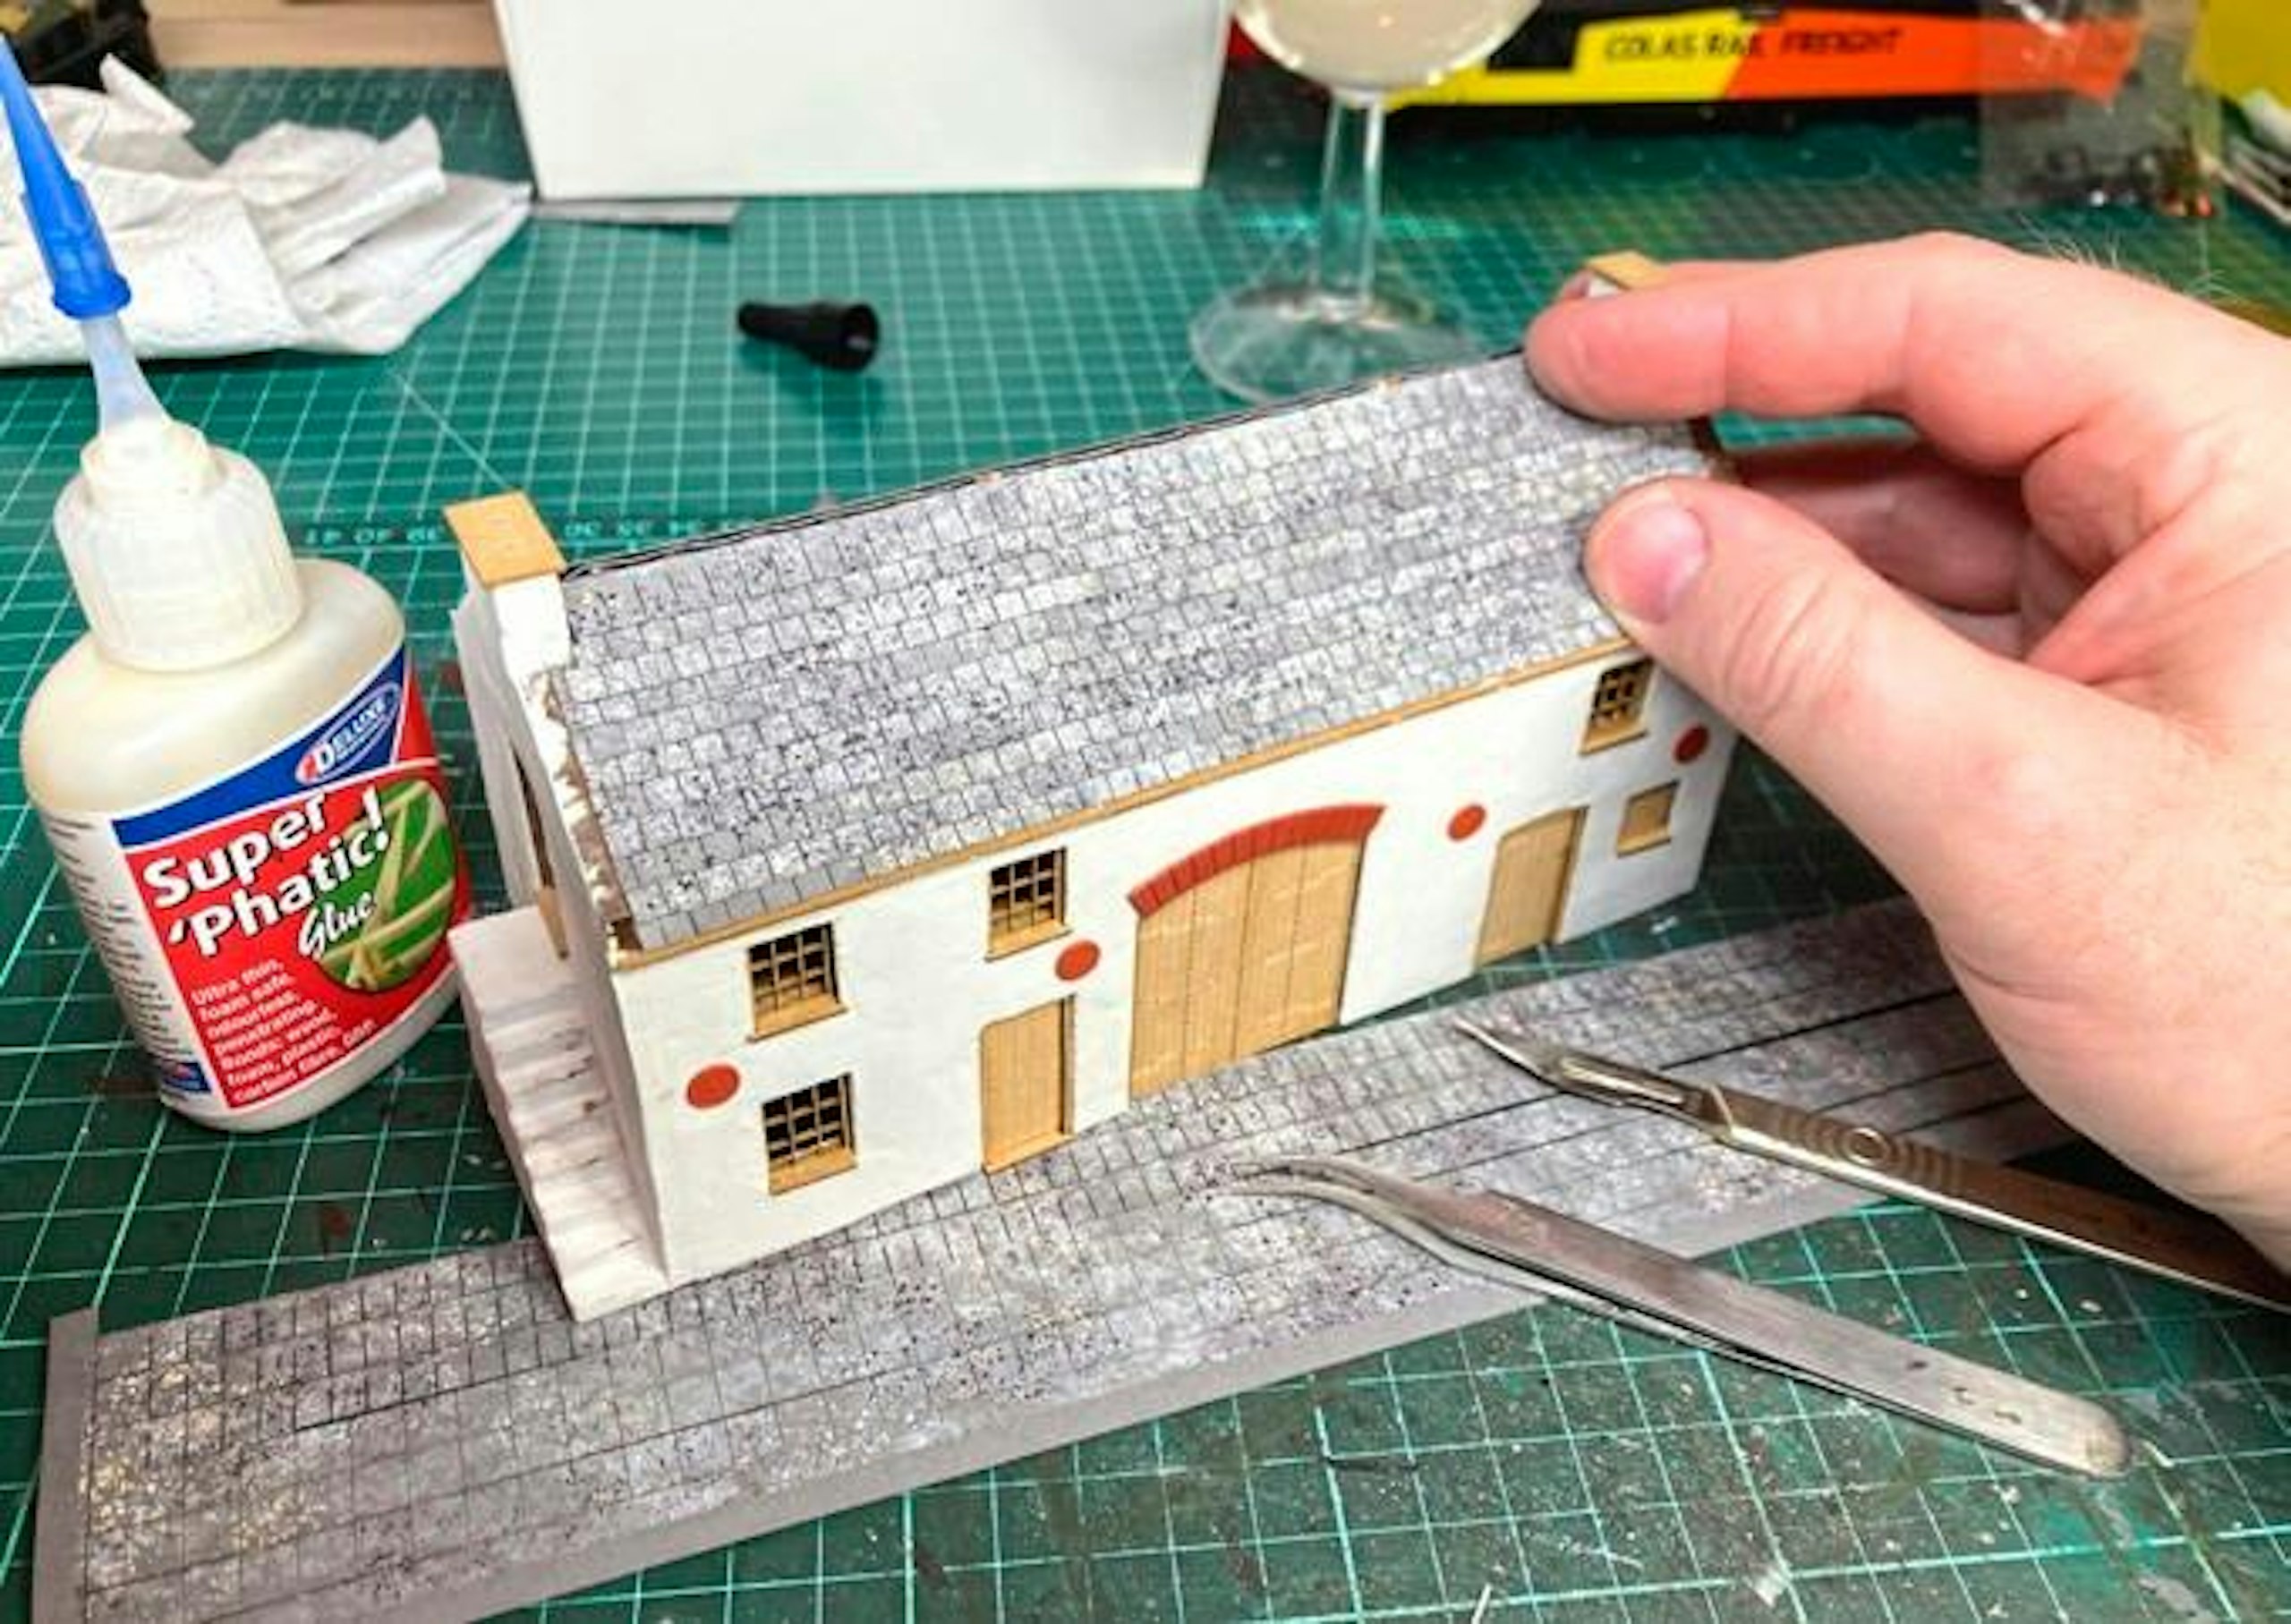
13 The kit is supplied with a sheet of laser-cut roof slate strips, which are laid in overlapping fashion, from the base upwards, just like real slates. They really look the part. Each strip was fixed in place with Super ‘Phatic glue.
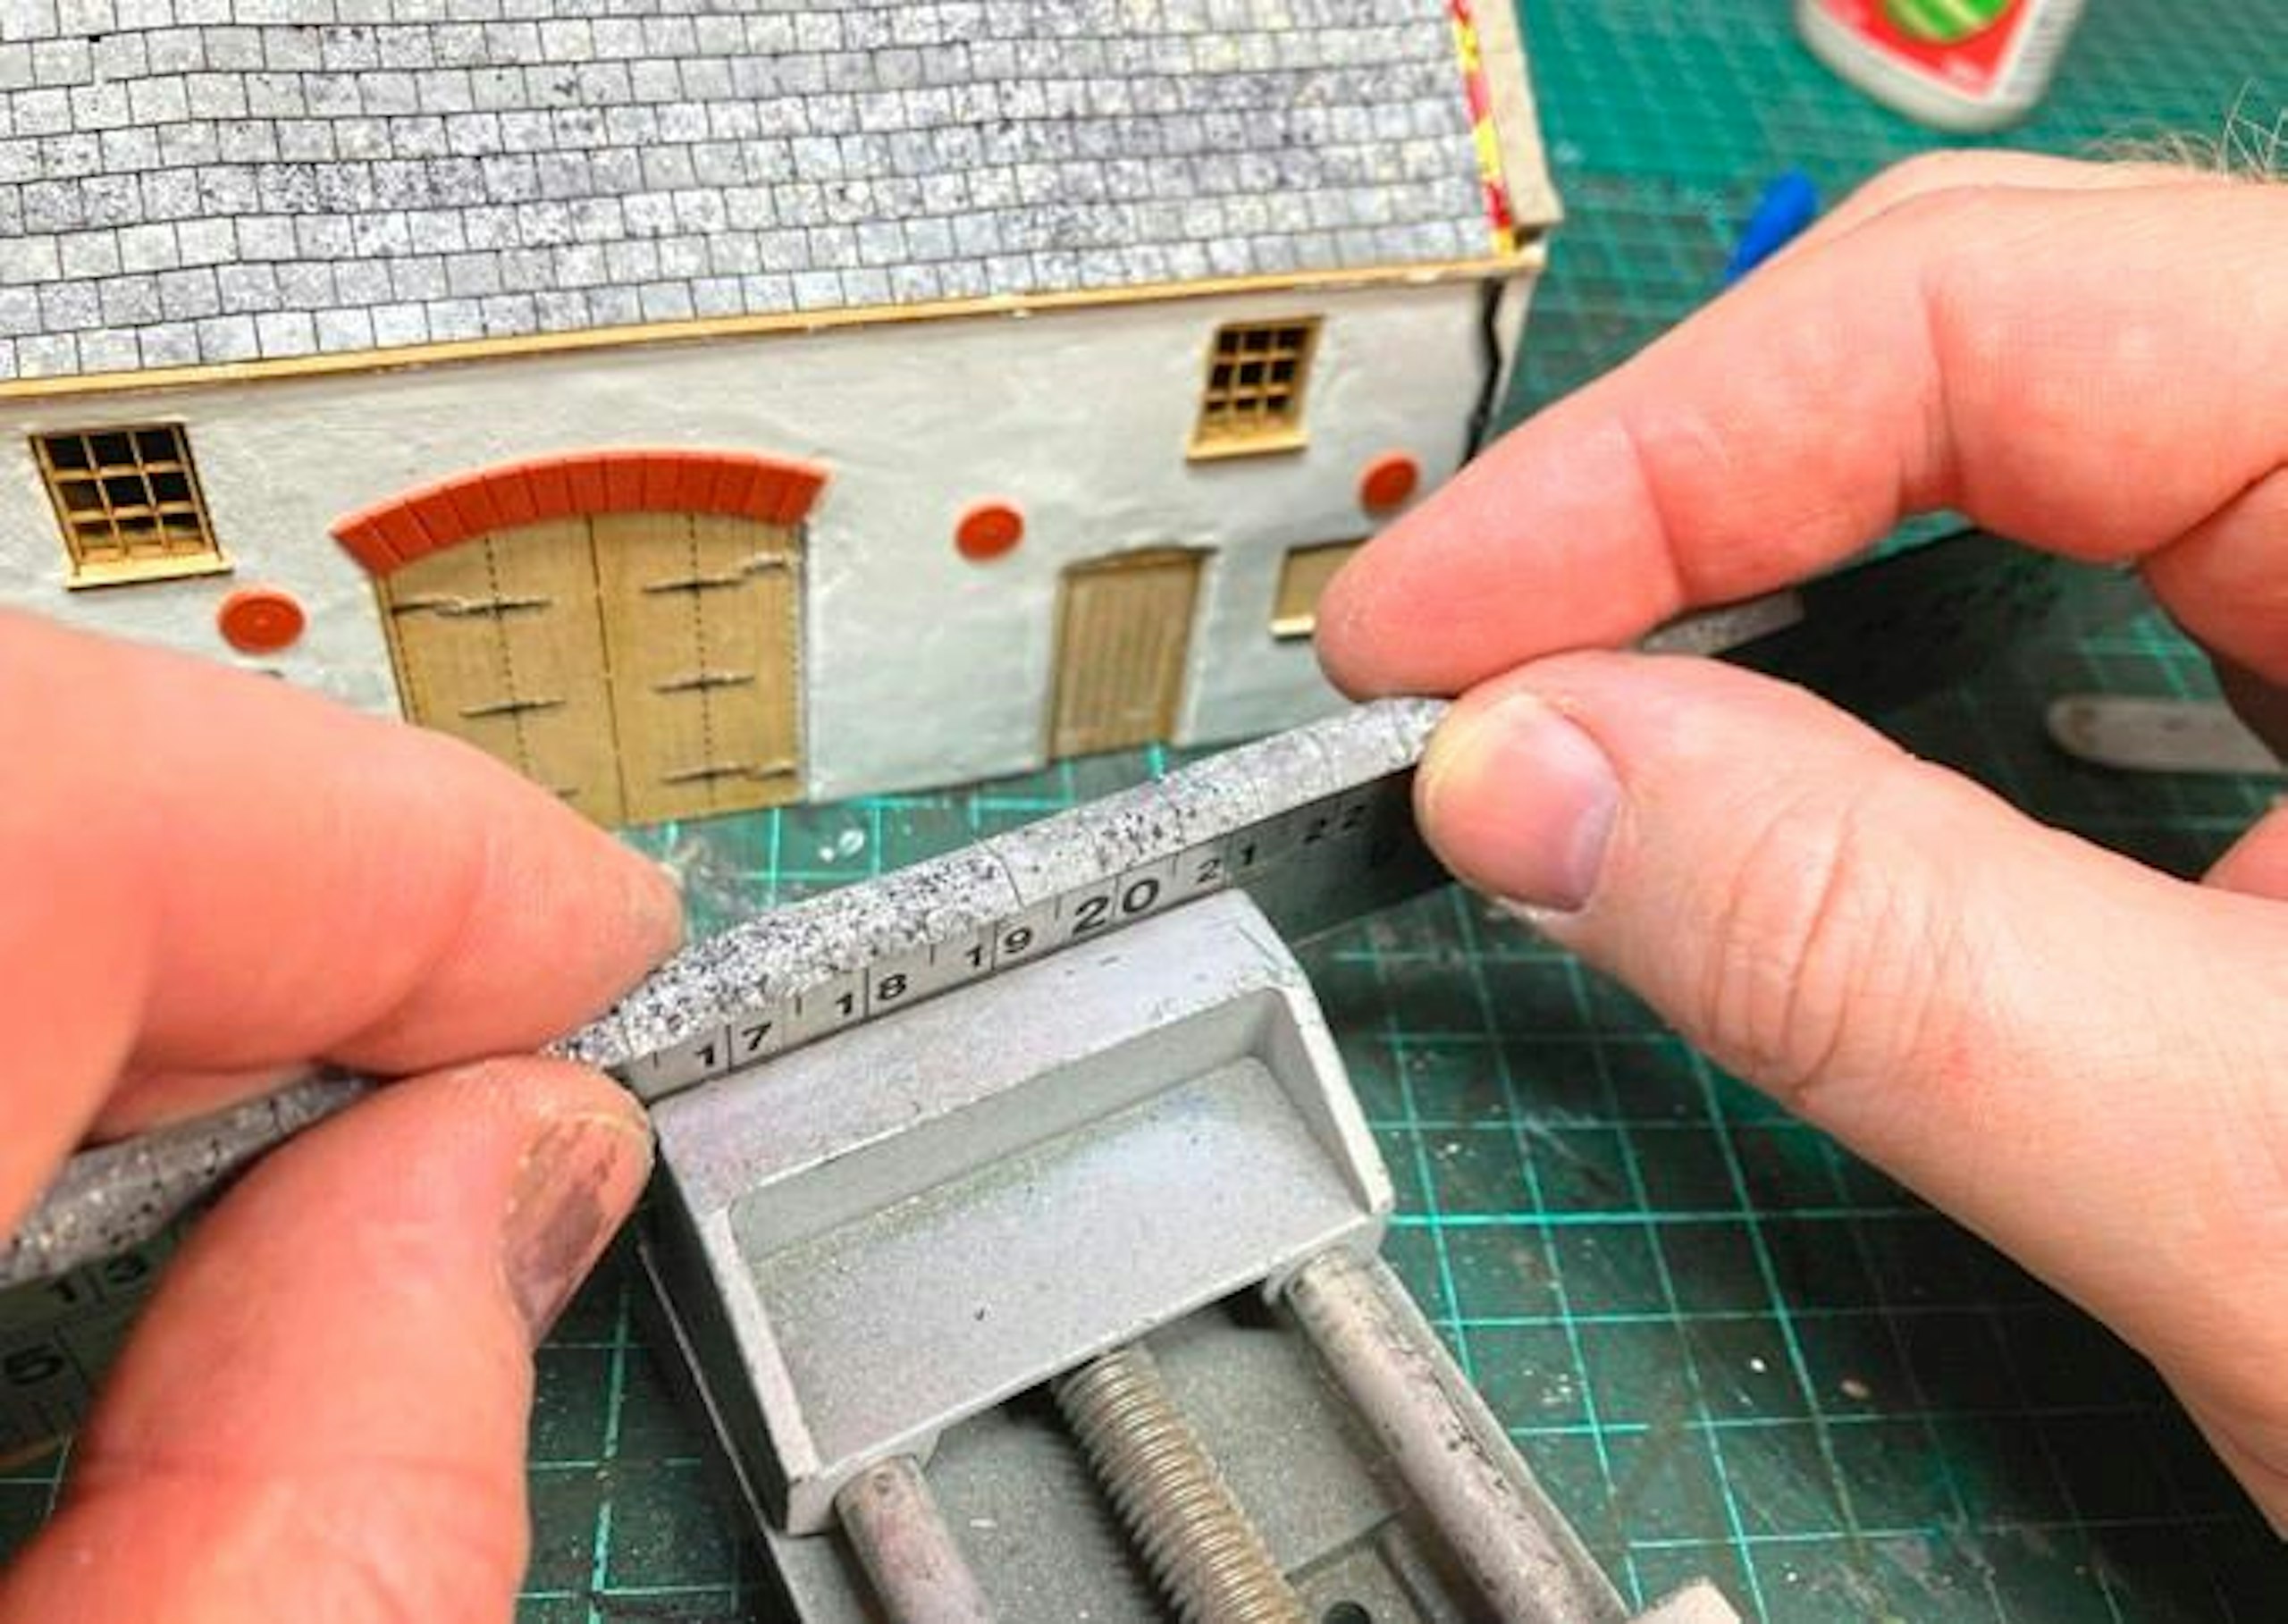
14 To form the ridge tile strip to a suitable profile, I mounted a steel rule in a mini vice and gently bent the thin card over its edge. This proved more effective than scoring the material first, as it gained a more gentle profile.
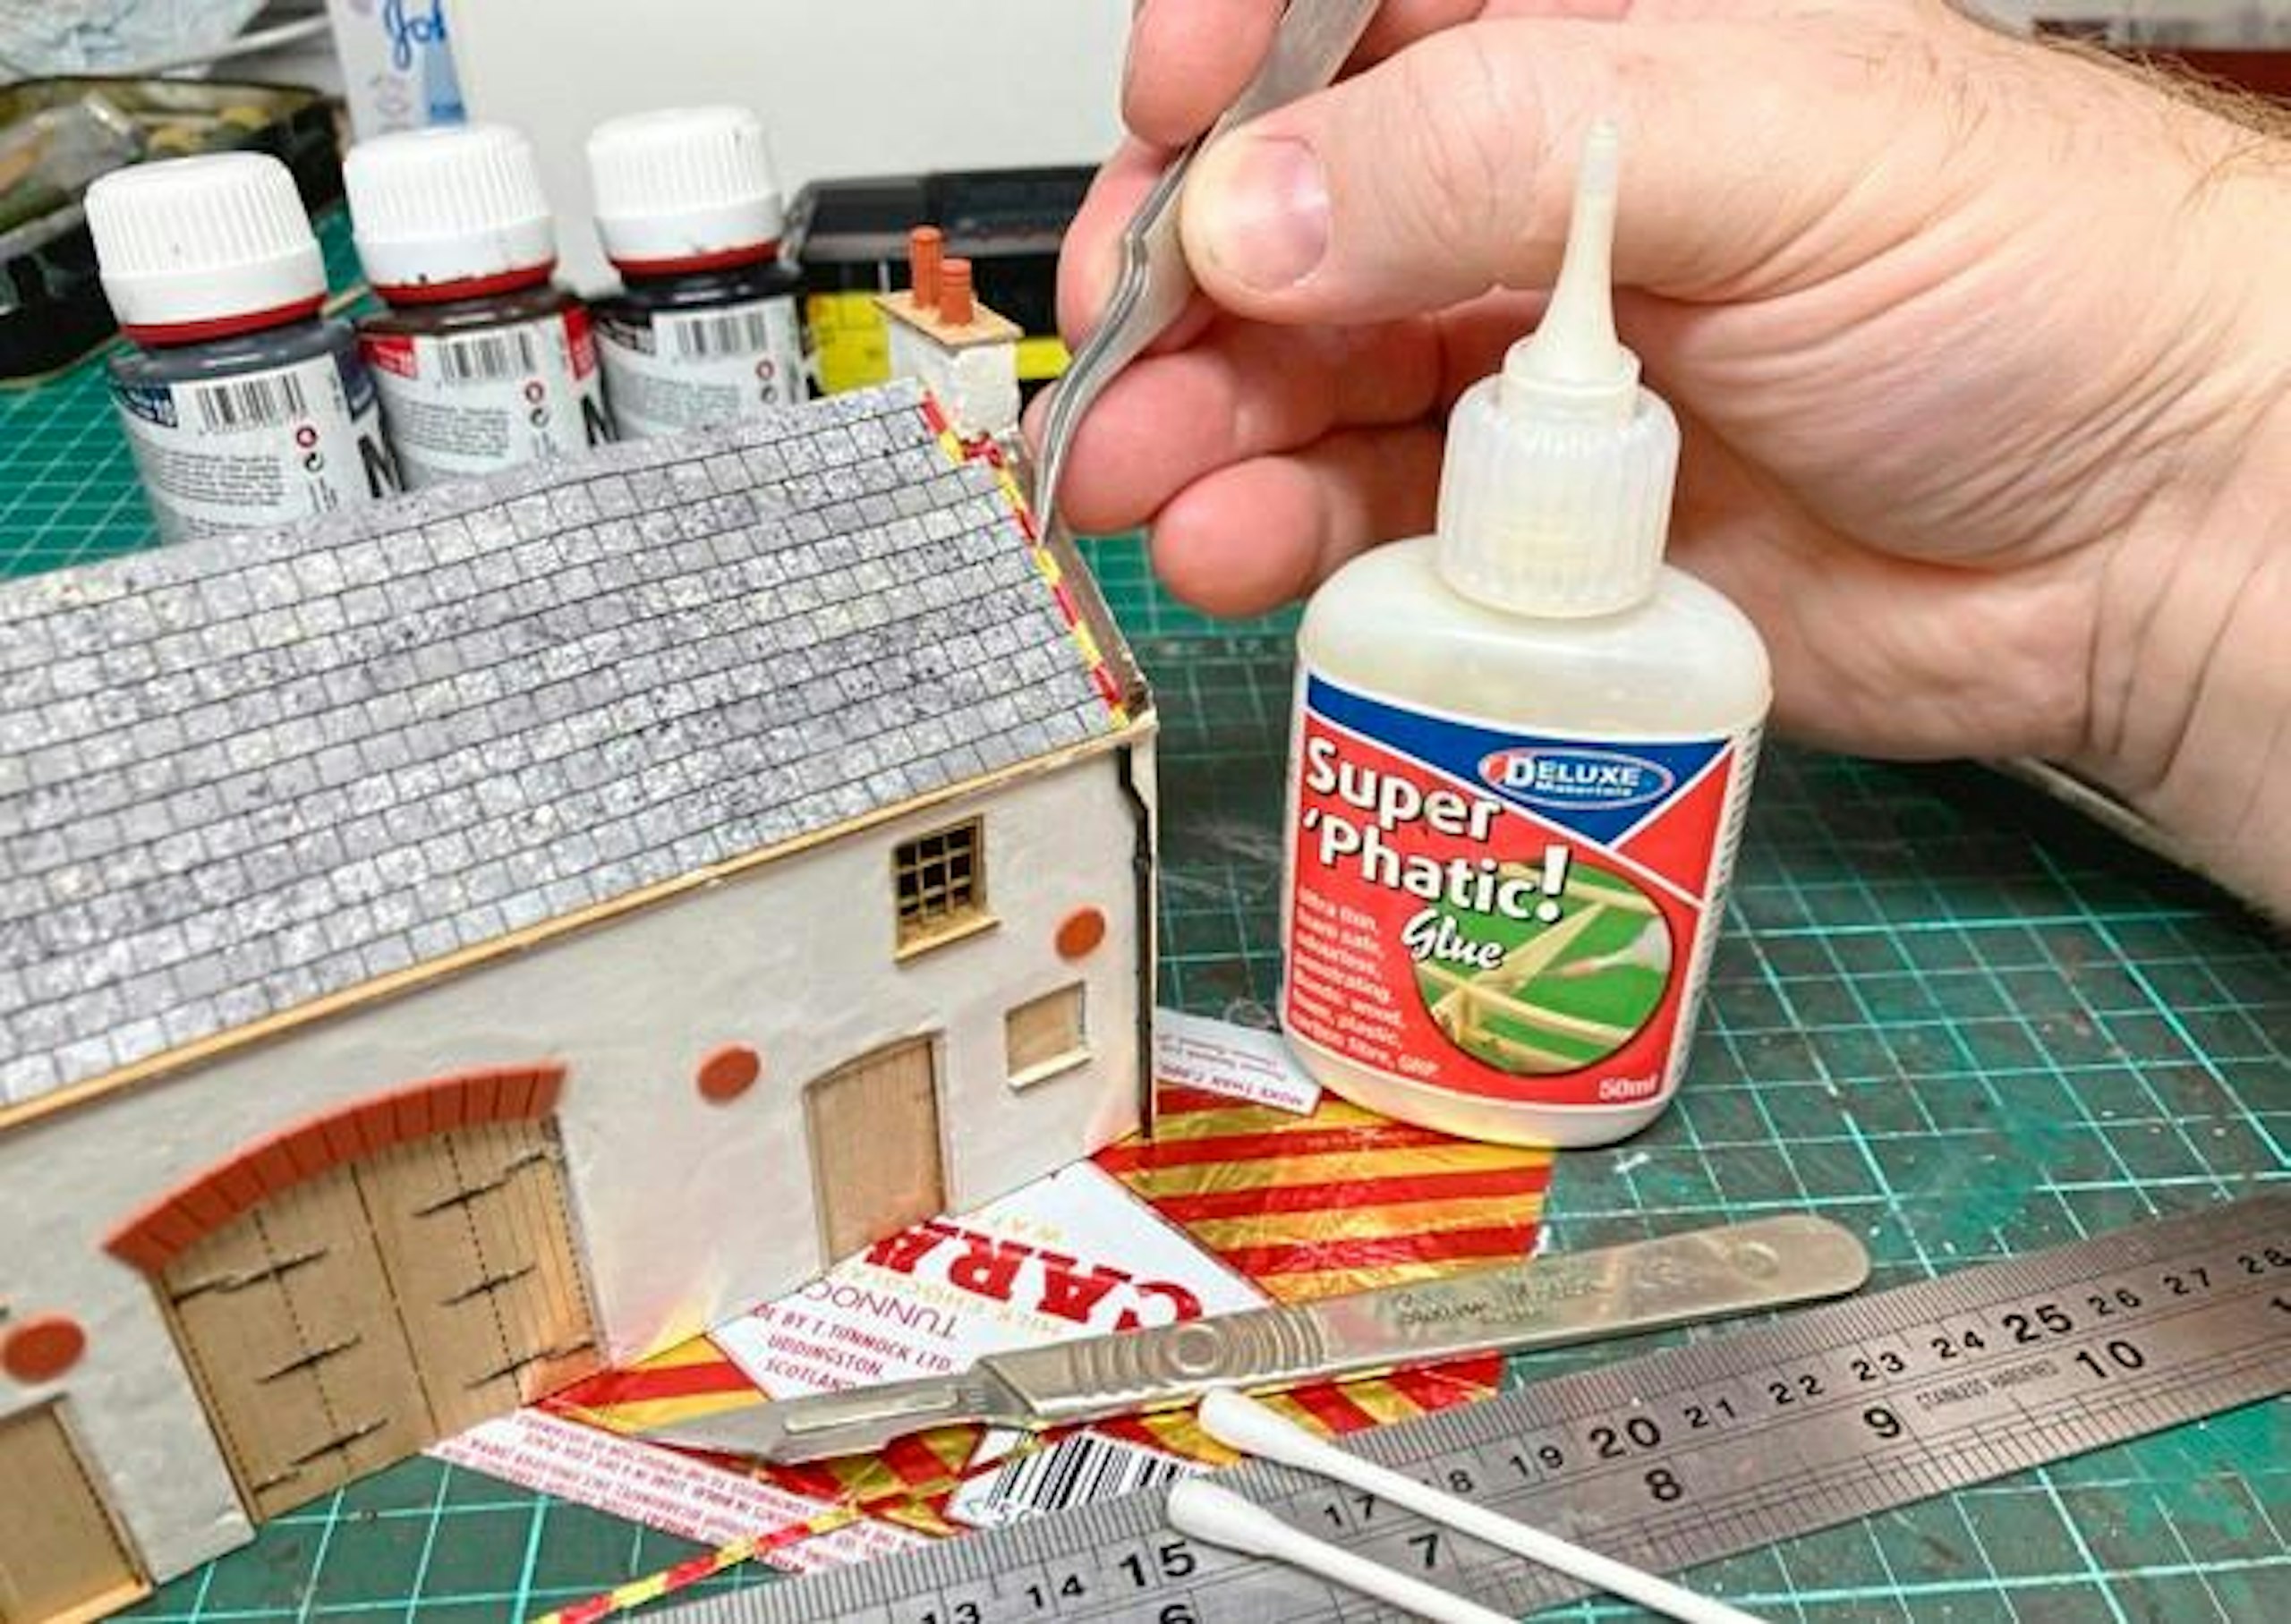
15 The ridge tile strip was trimmed to length and fixed in place. Foil-backed paper (from biscuit wrappers) was cut into strips and fixed in place to mimic lead flashing along the edges of the roof and around the chimney stacks.
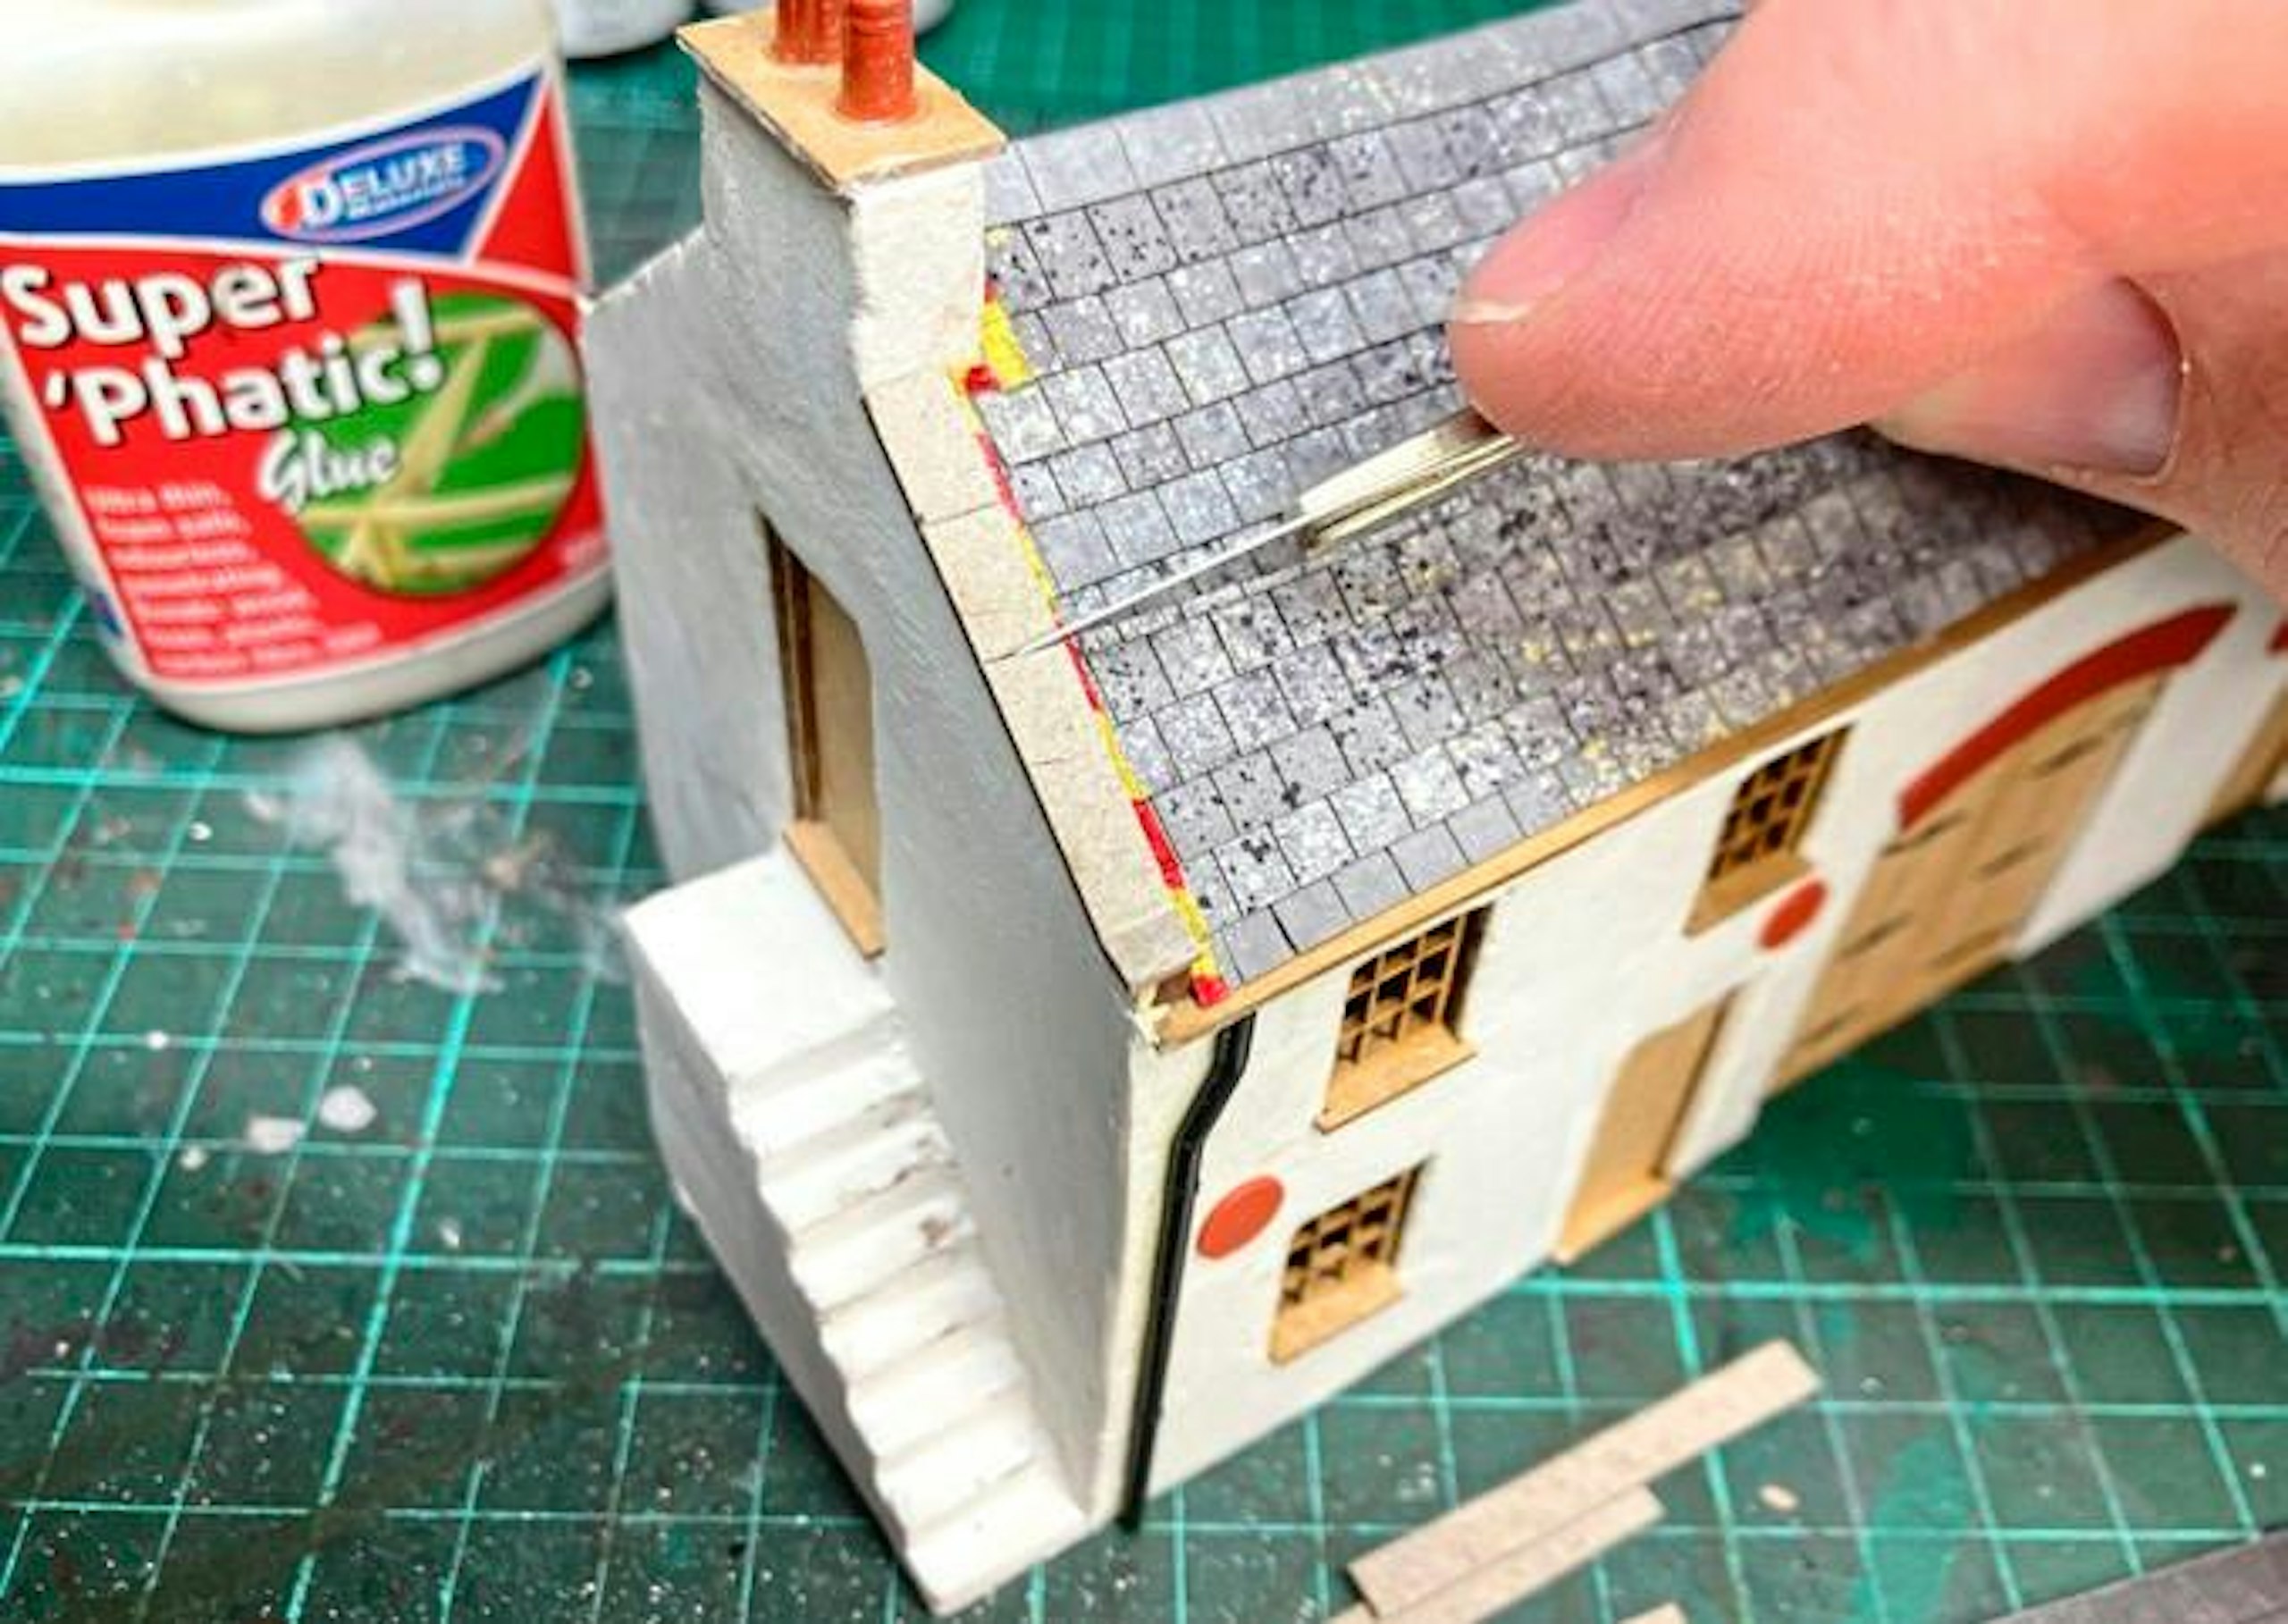
16 Using some leftover strips of card, I added some stone coping strips along the top edges of each gable end, scoring individual stone detail in situ.
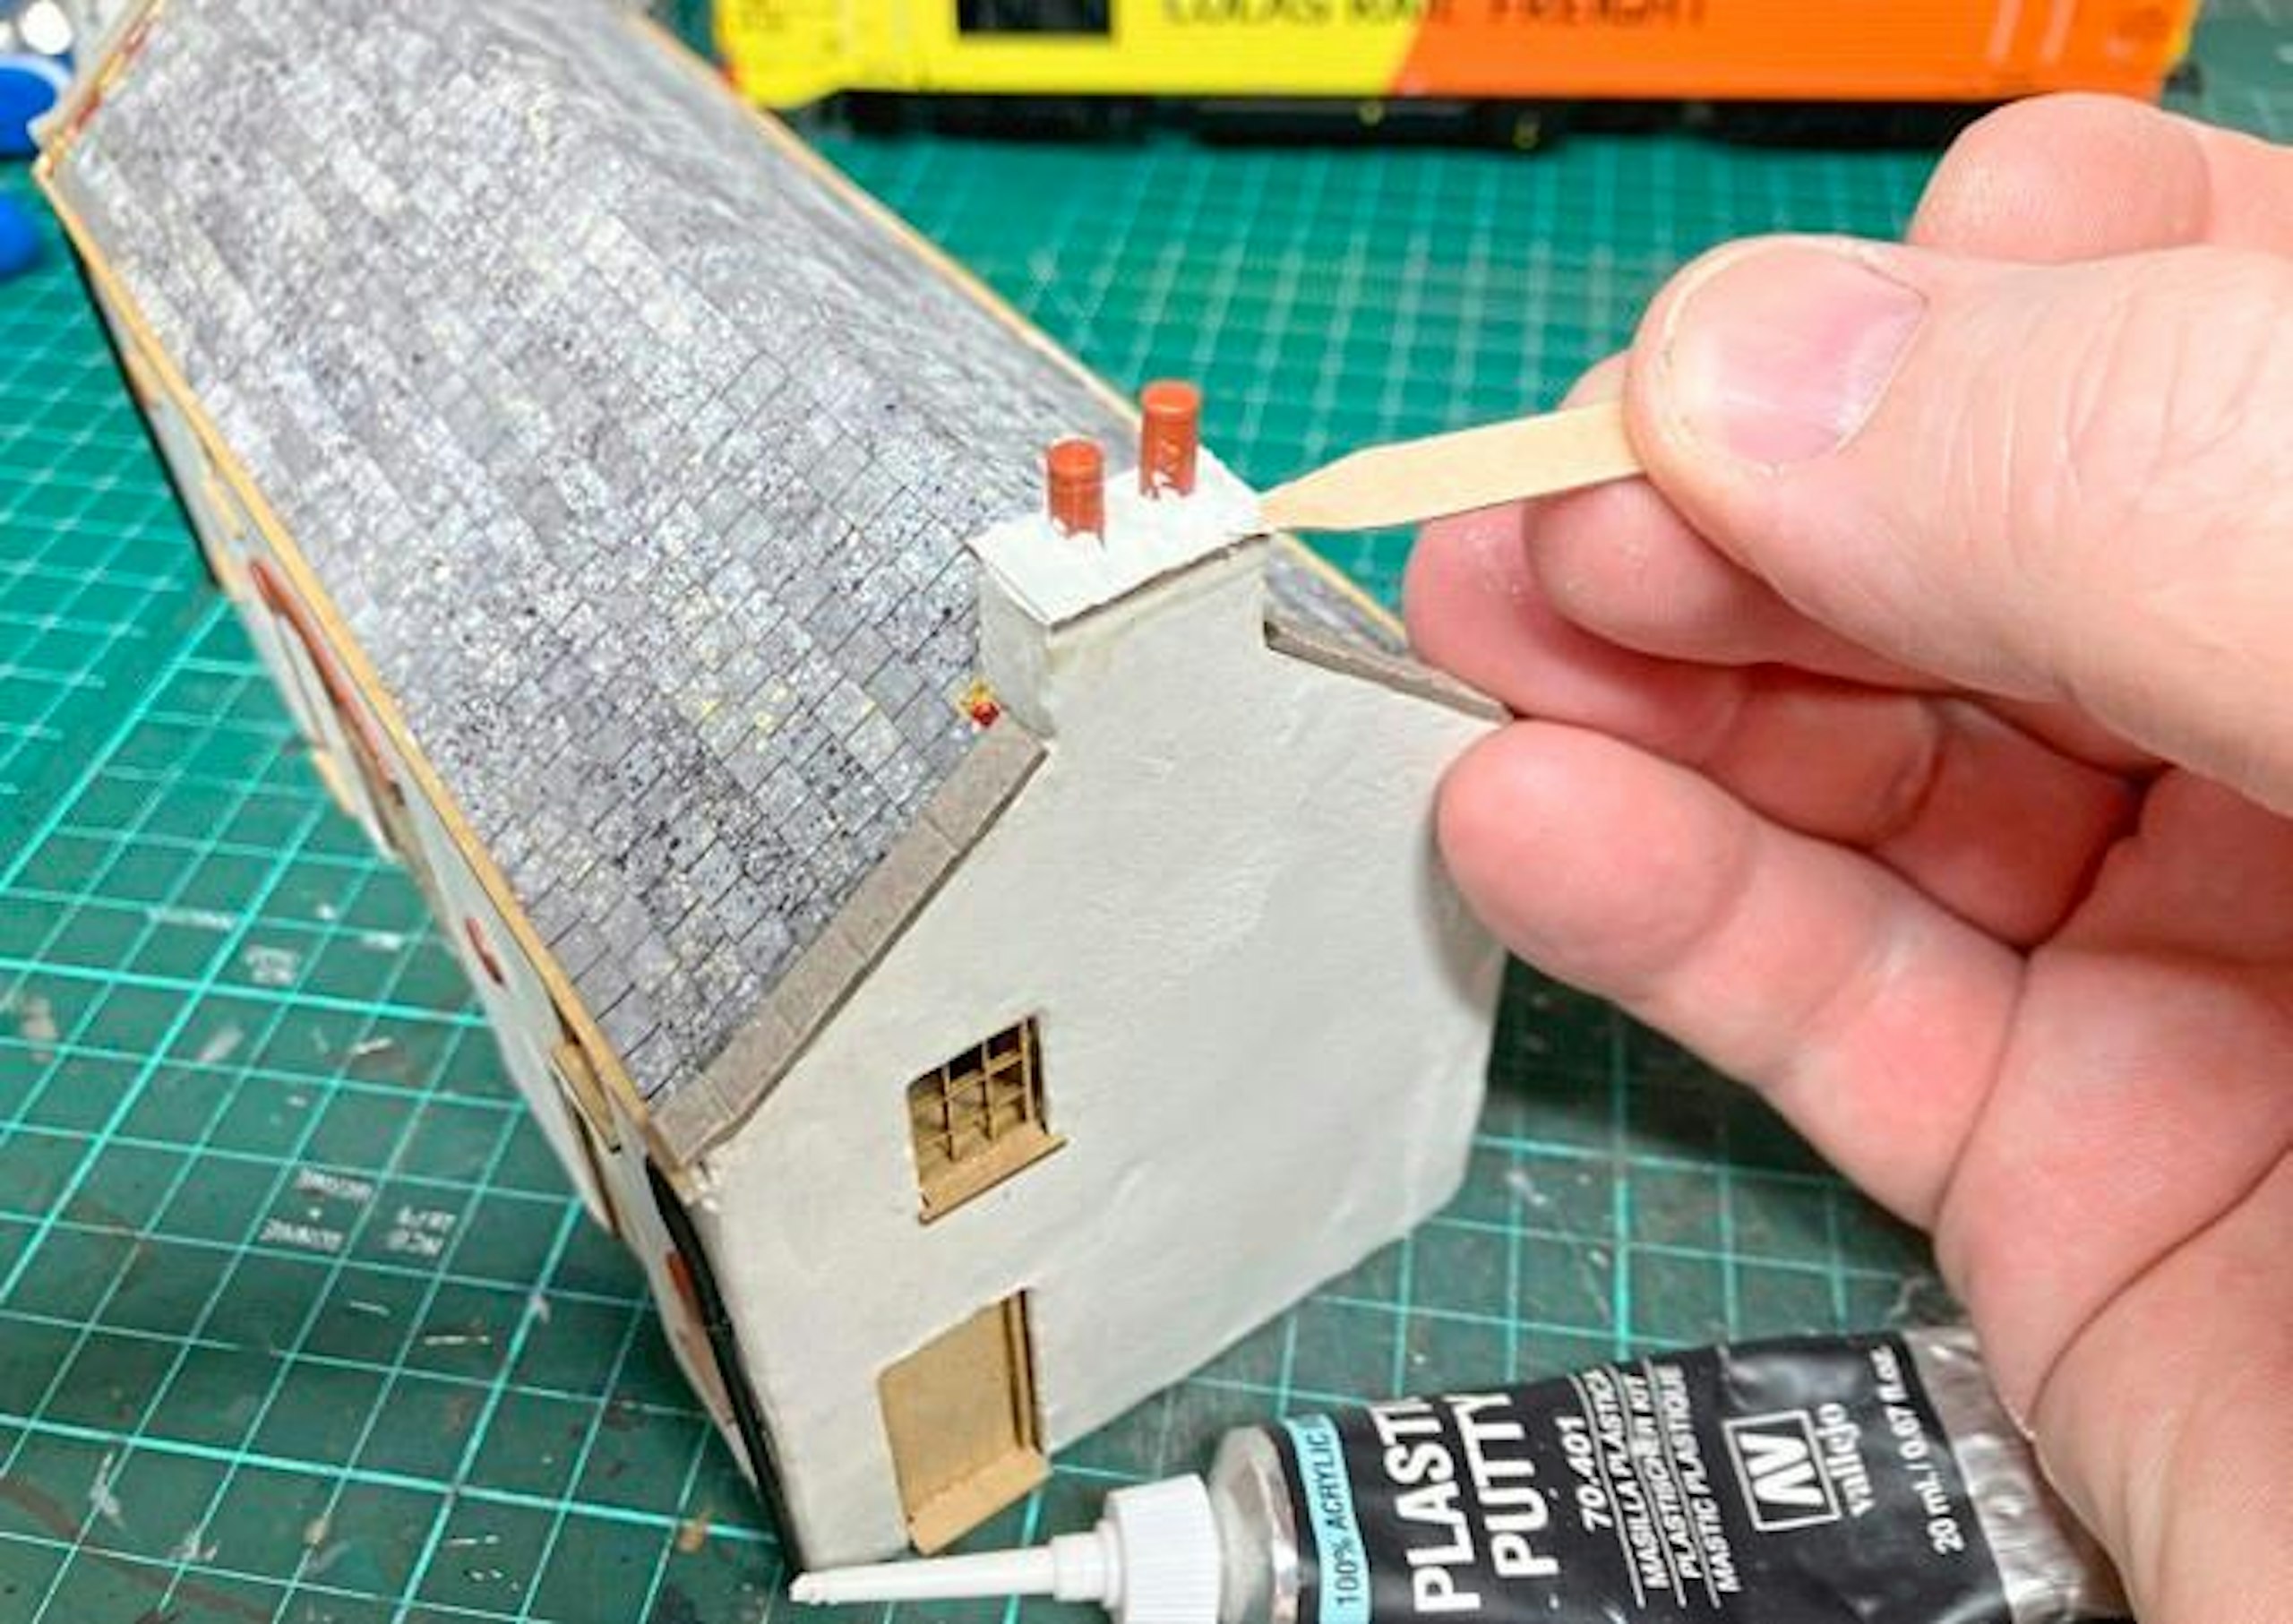
17 After adding pairs of plastic chimney pots from the Wills detailing pack, I packed them with a layer of acrylic plastic putty, spread with a makeshift spatula, whittled from a wooden coffee stirrer.
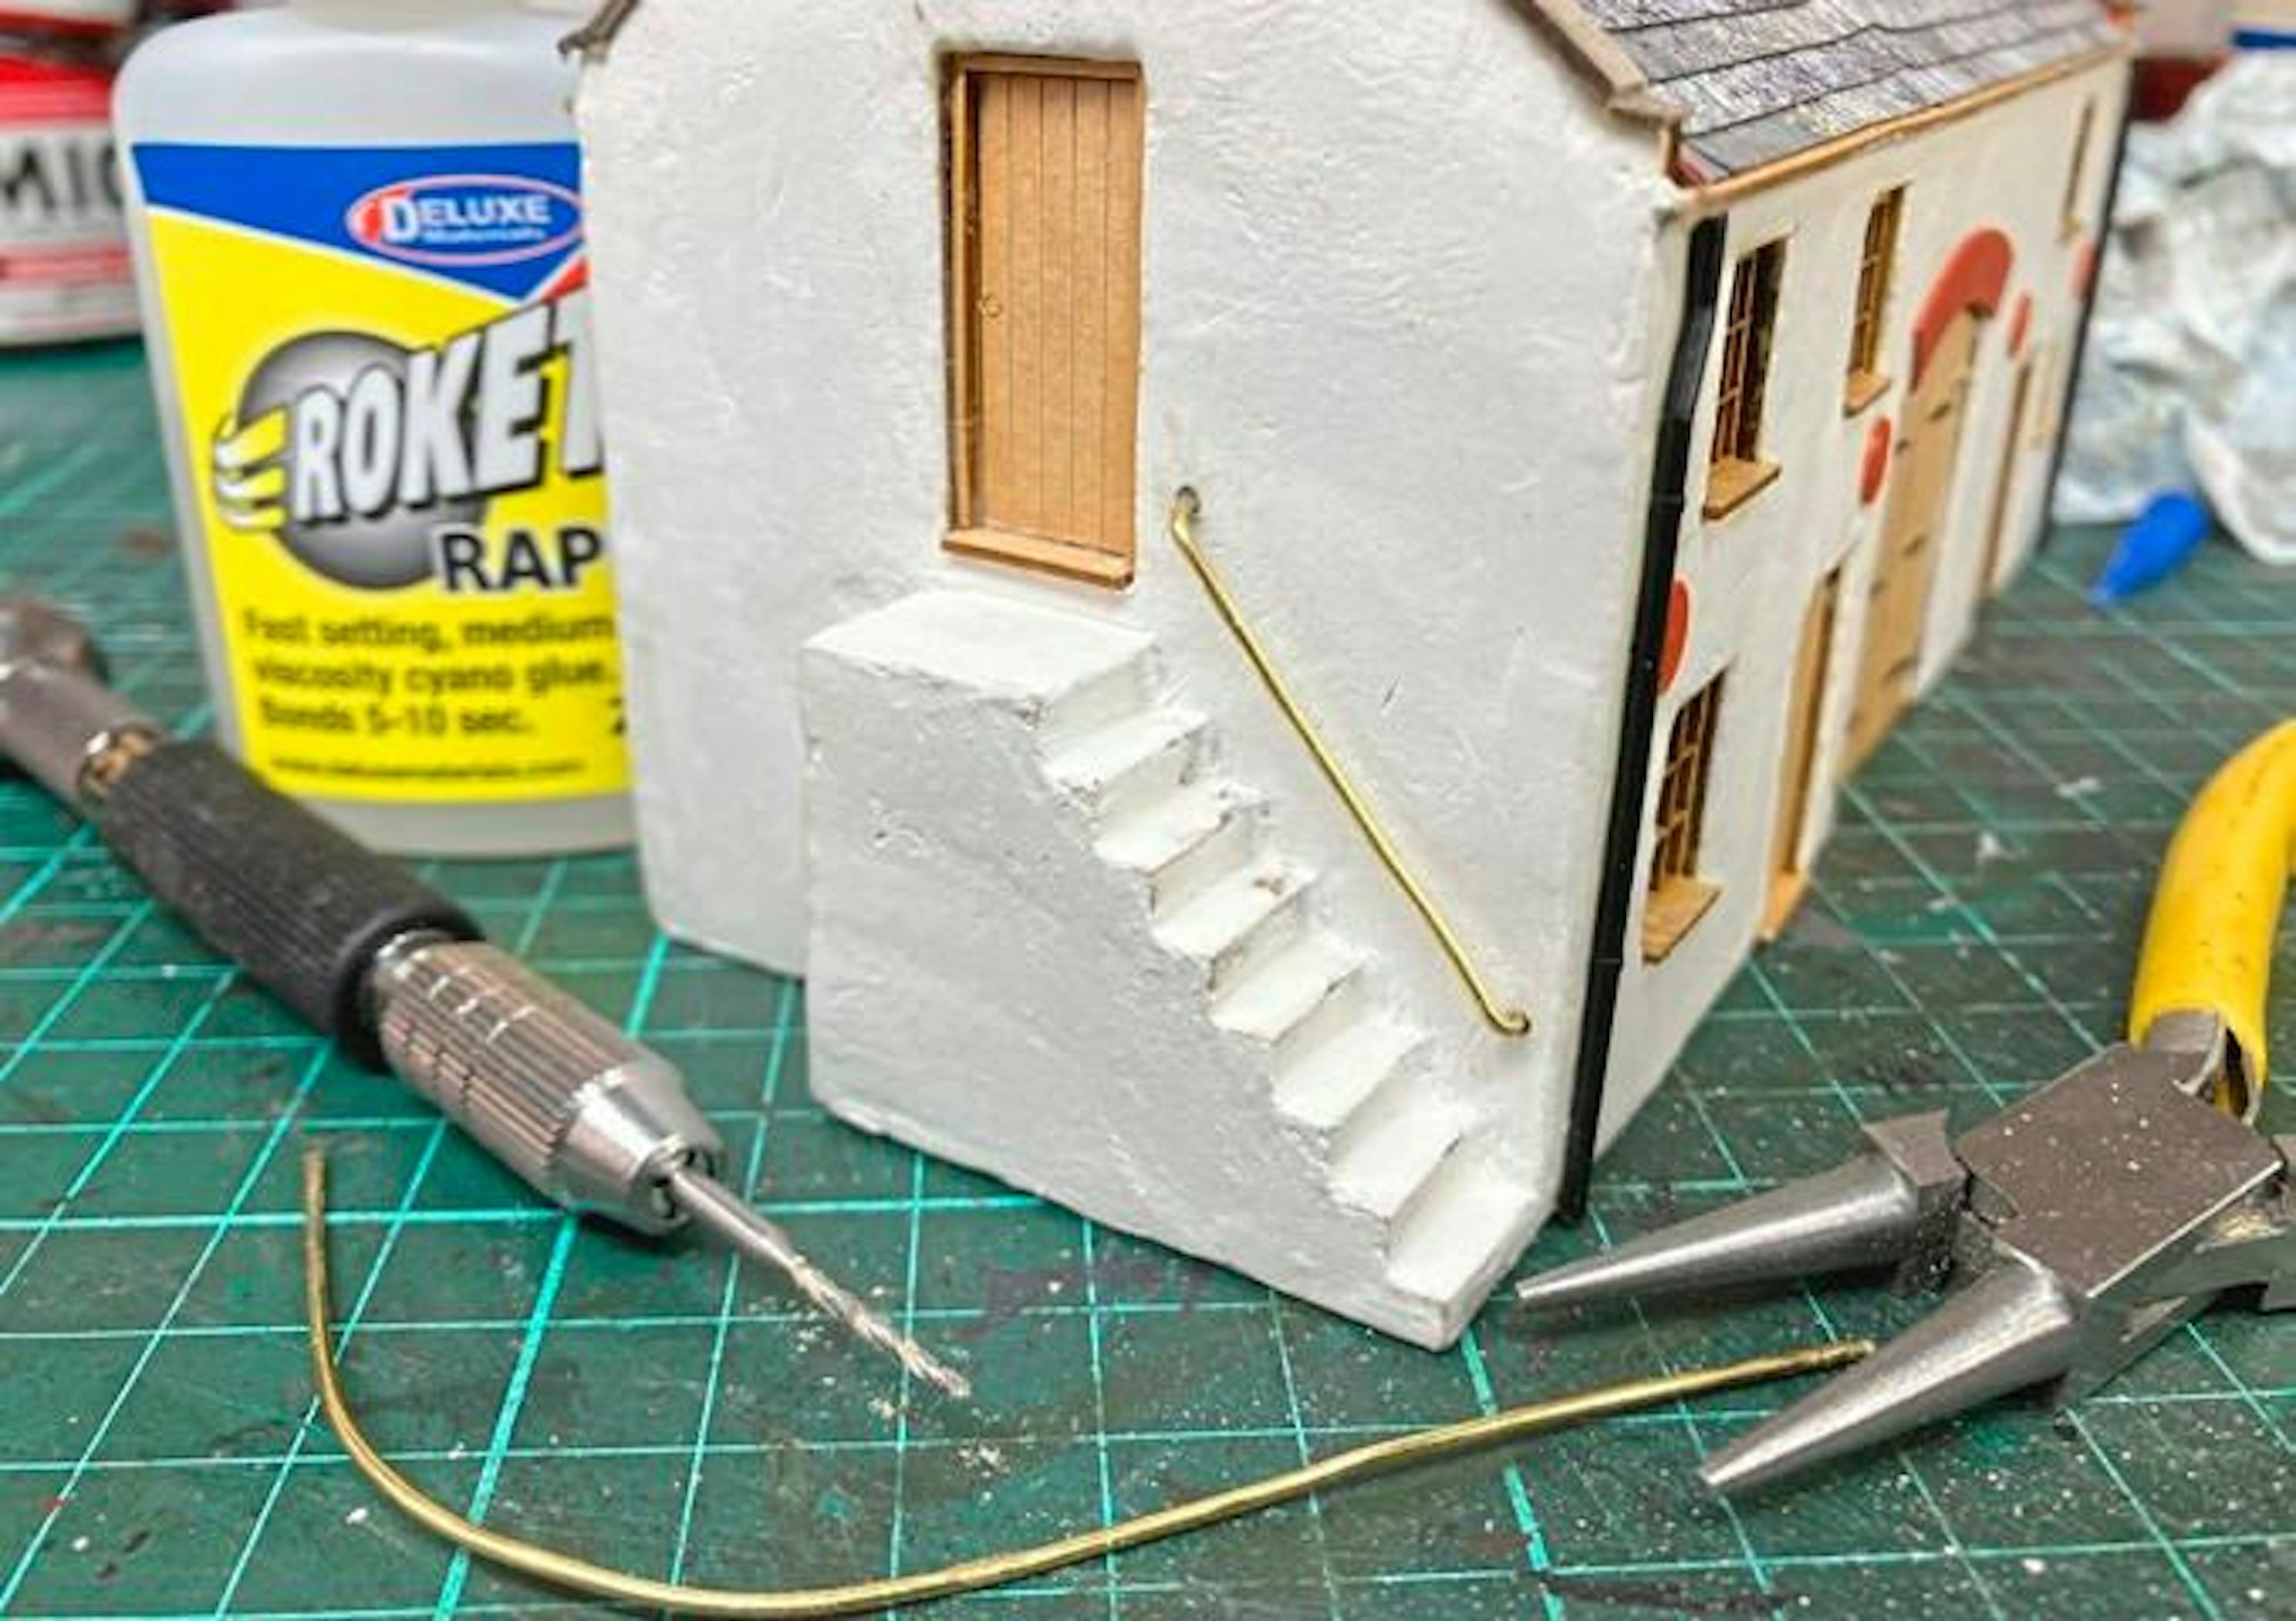
18 The stairway to the hayloft looked a bit hazardous, so I’ve suggested the addition of a makeshift handrail using brass wire, fixed into a pair of drilled holes. Plastic downpipes were added, leftover from an unidentified kit.
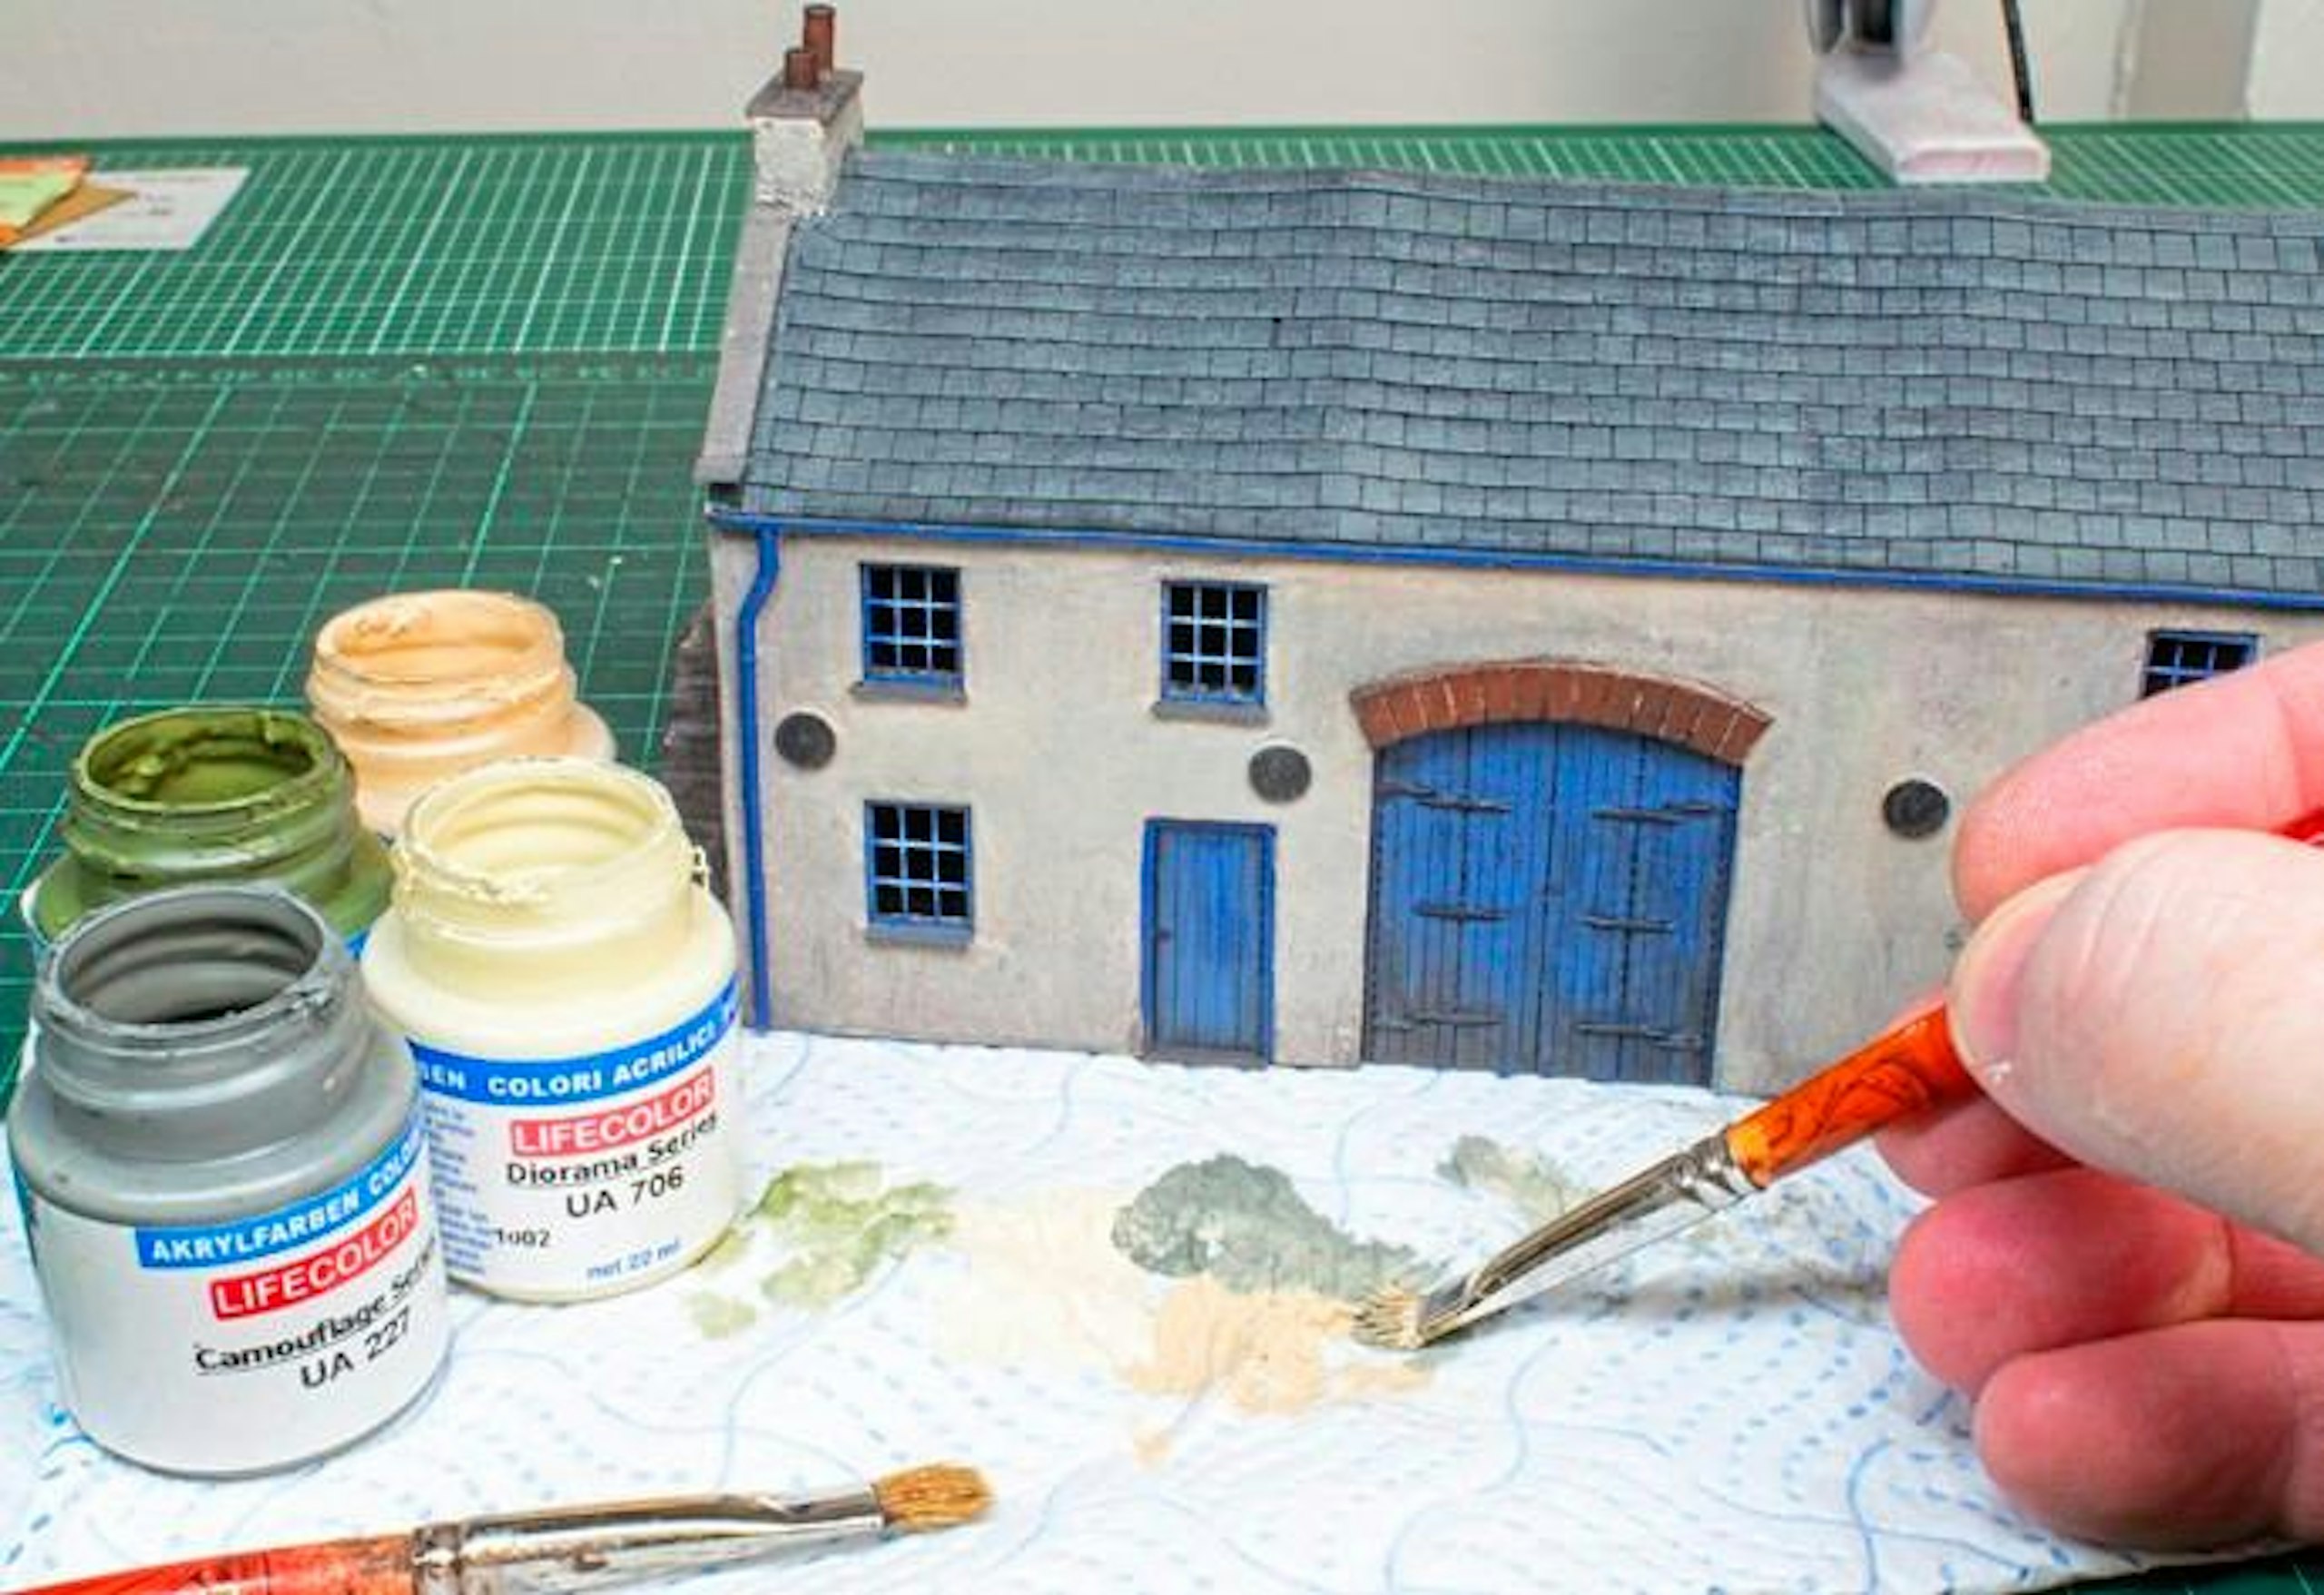
19 Painting commenced, using LifeColor acrylics, which work well on the porous surfaces with no need for priming. I created various blends of creams, light greys and added a little olive green for the main walls.
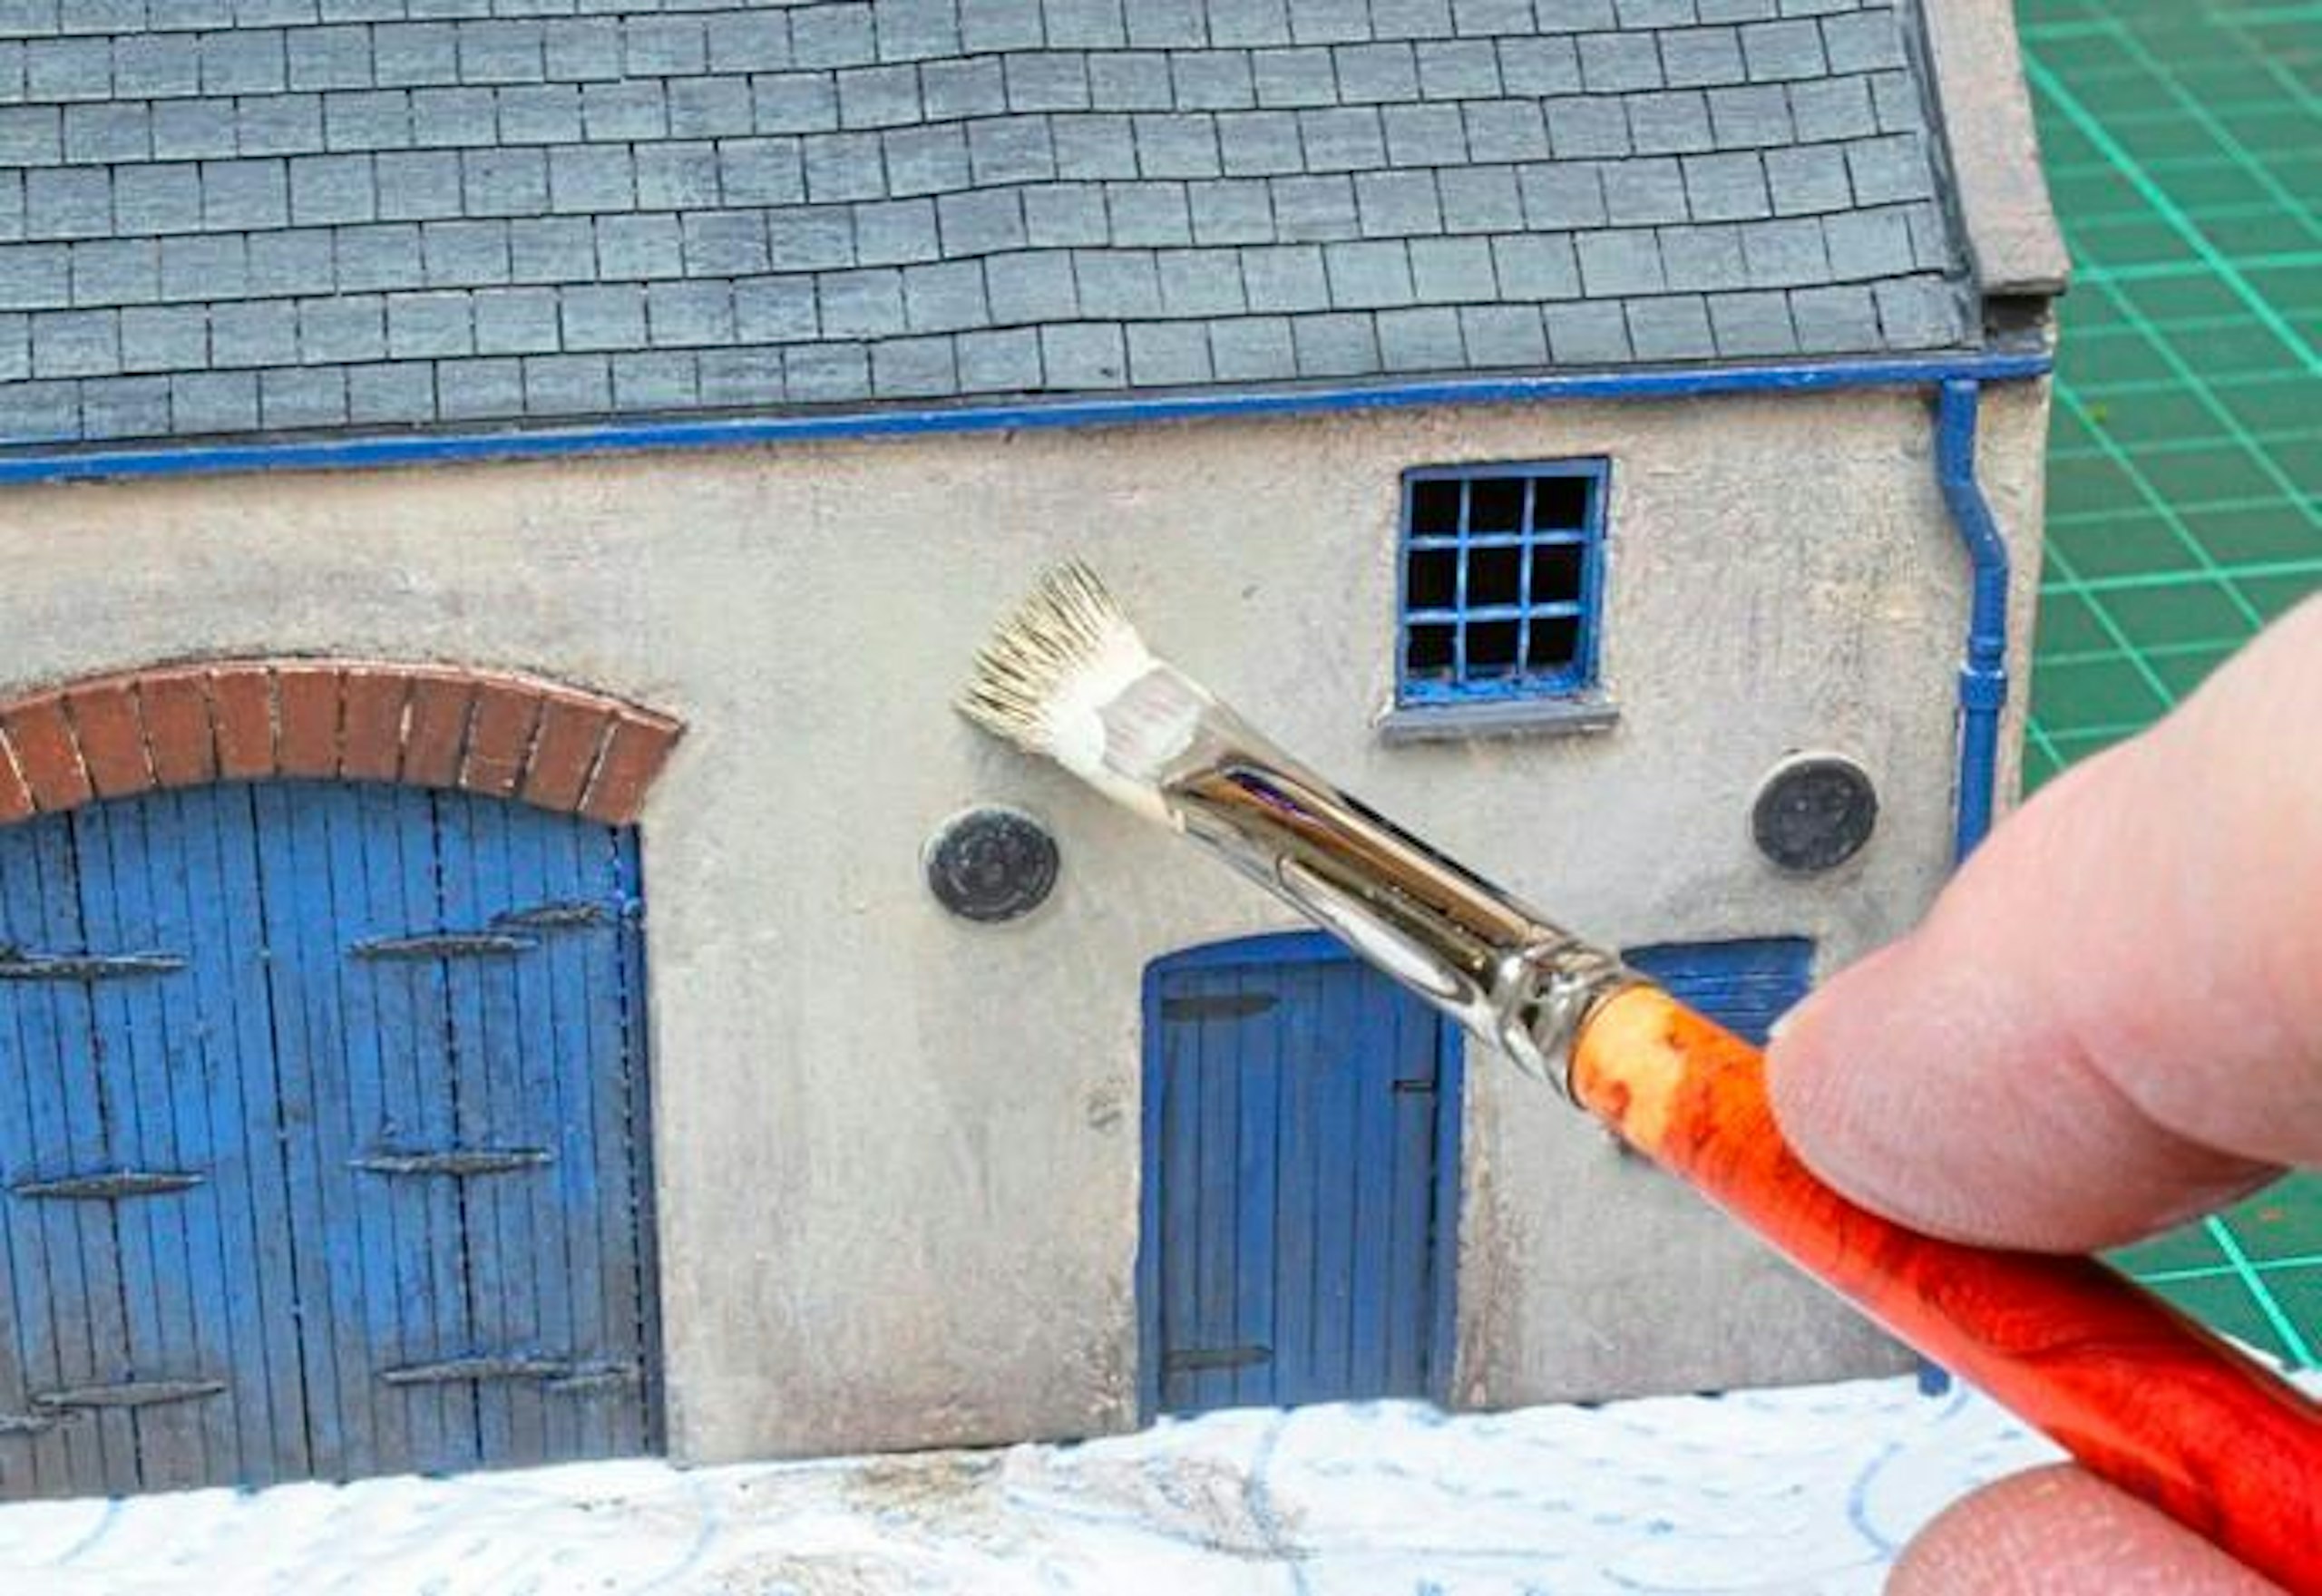
20 The walls were treated over a few light coats, applied in a mix of regular brush strokes and stippling action, to create a random blend of tones and textures. The addition of a hint of green suggests algae and moss deposits.
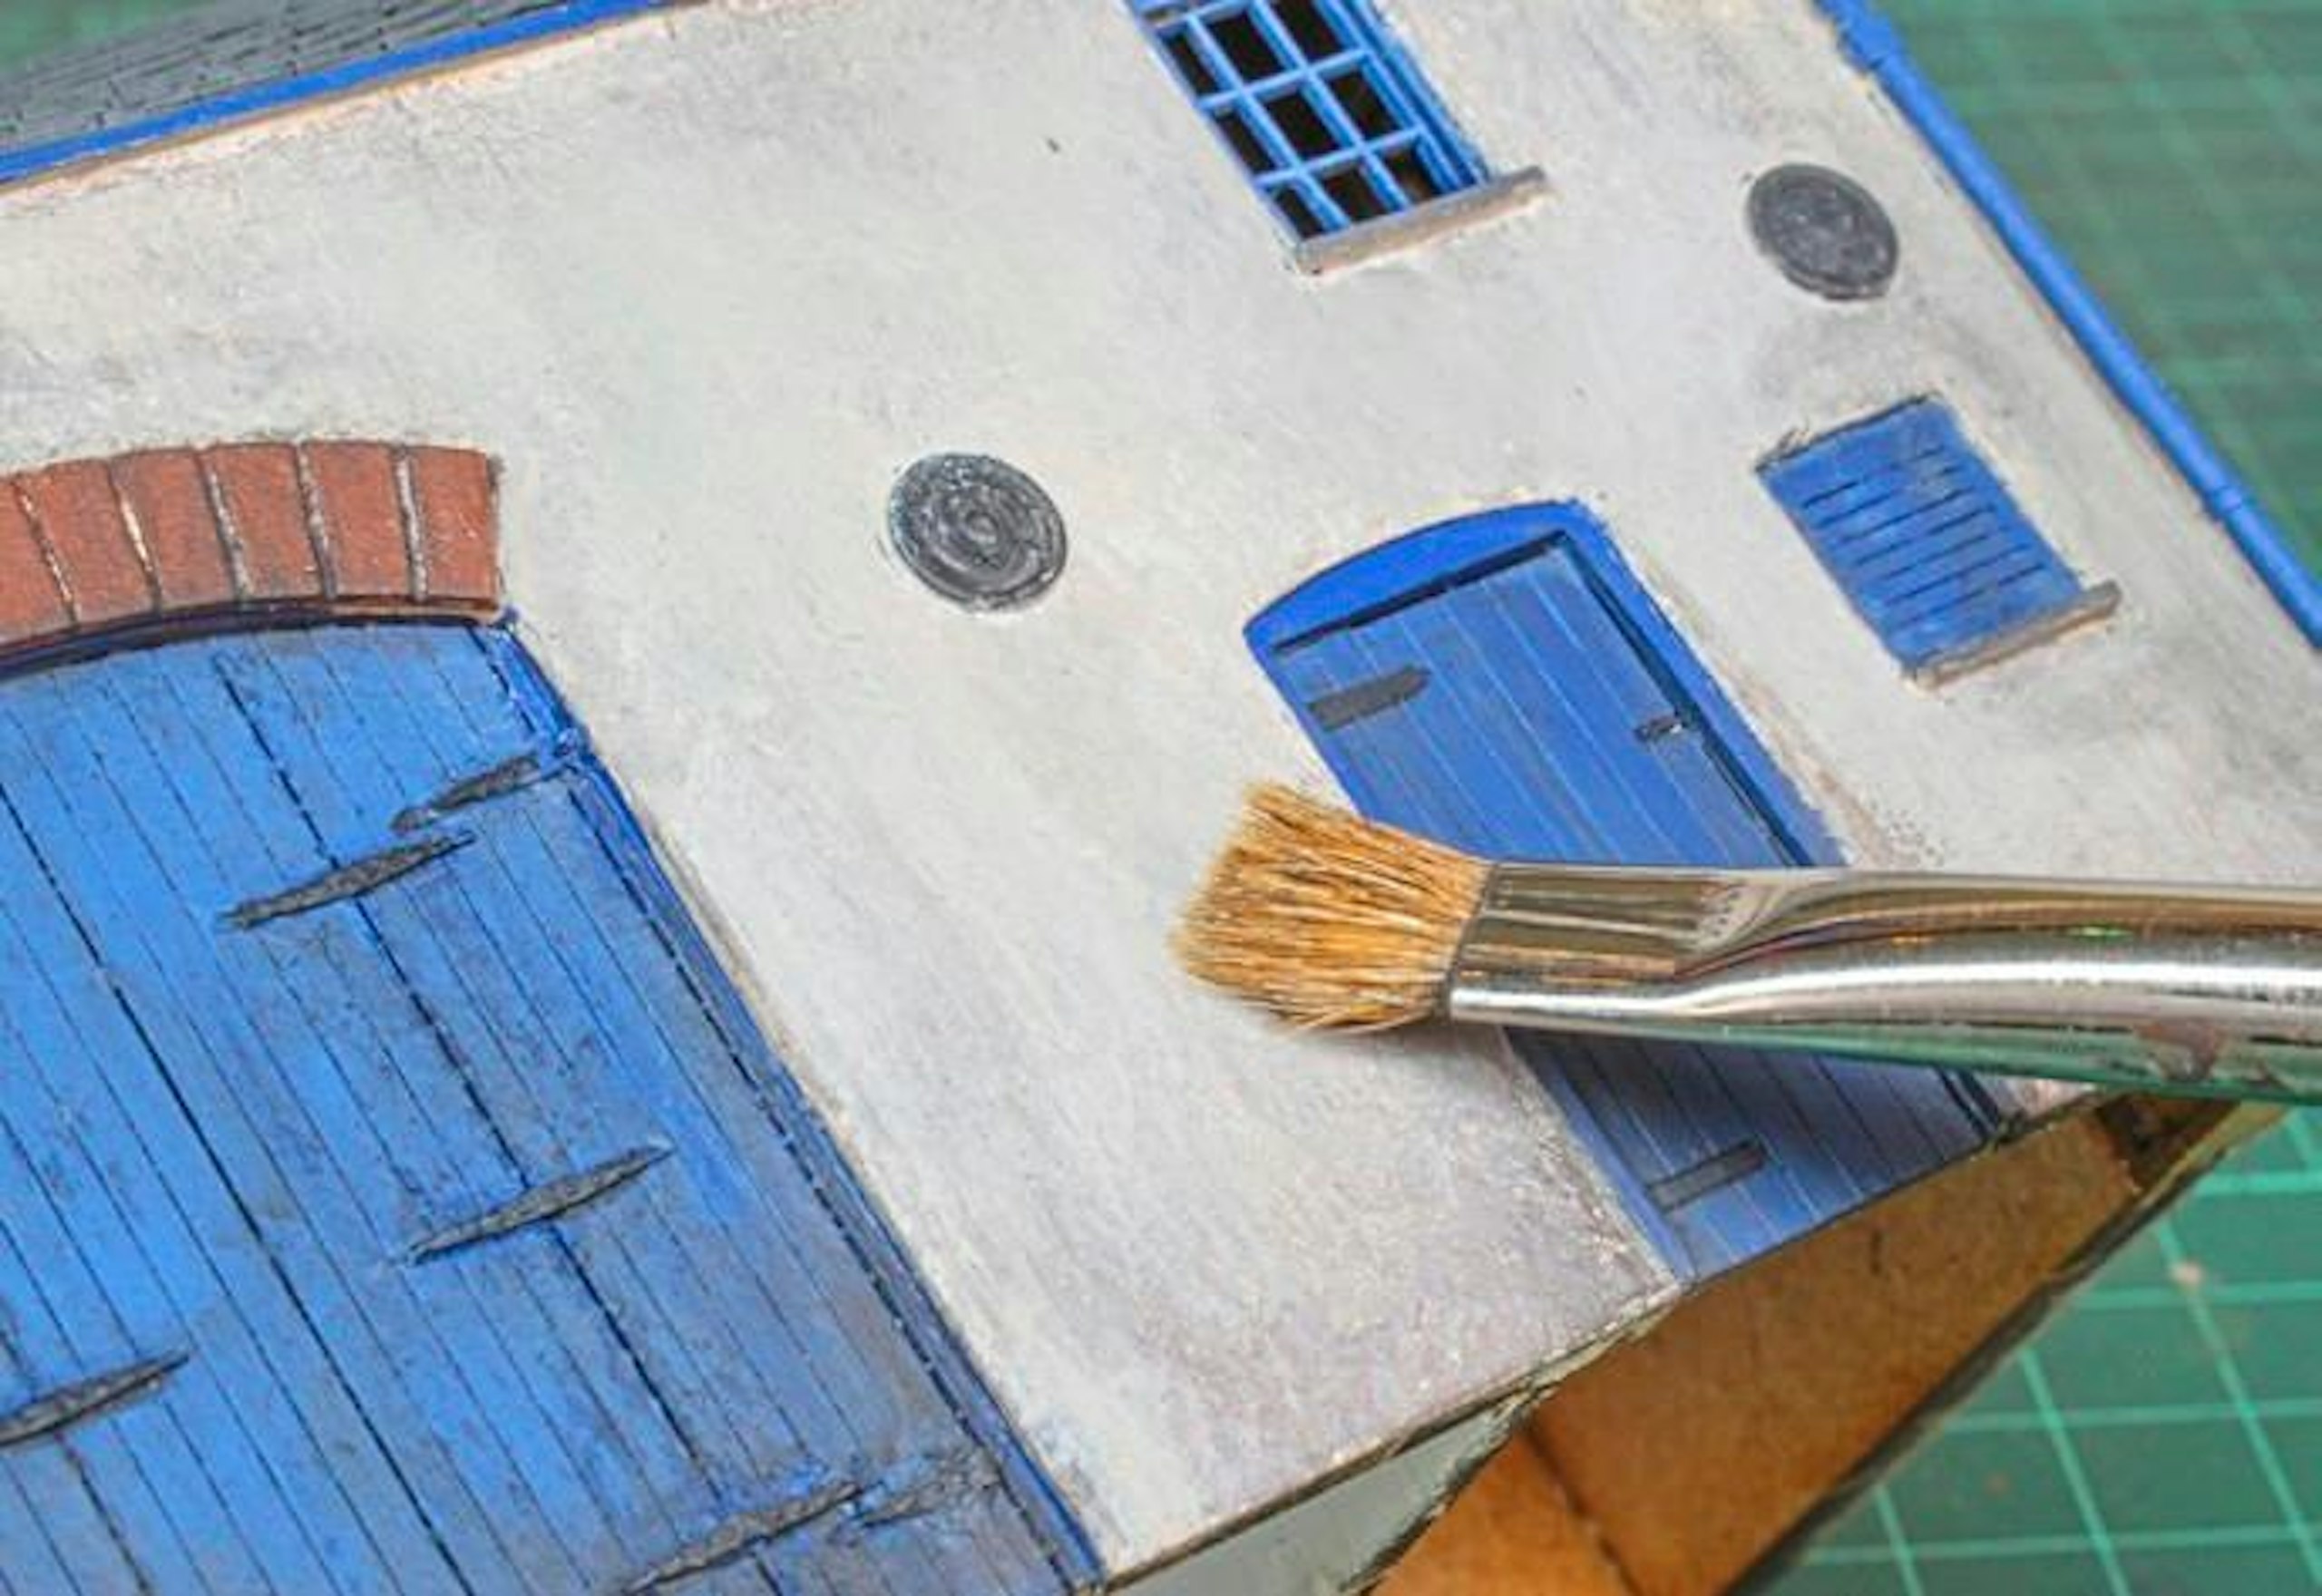
21 The final touches to the render were achieved with a dry-brushing action, with all but a trace of paint wiped off the bristles of the soft, flat brush. The texture of the DAS clay will collect the traces of colour in random areas.
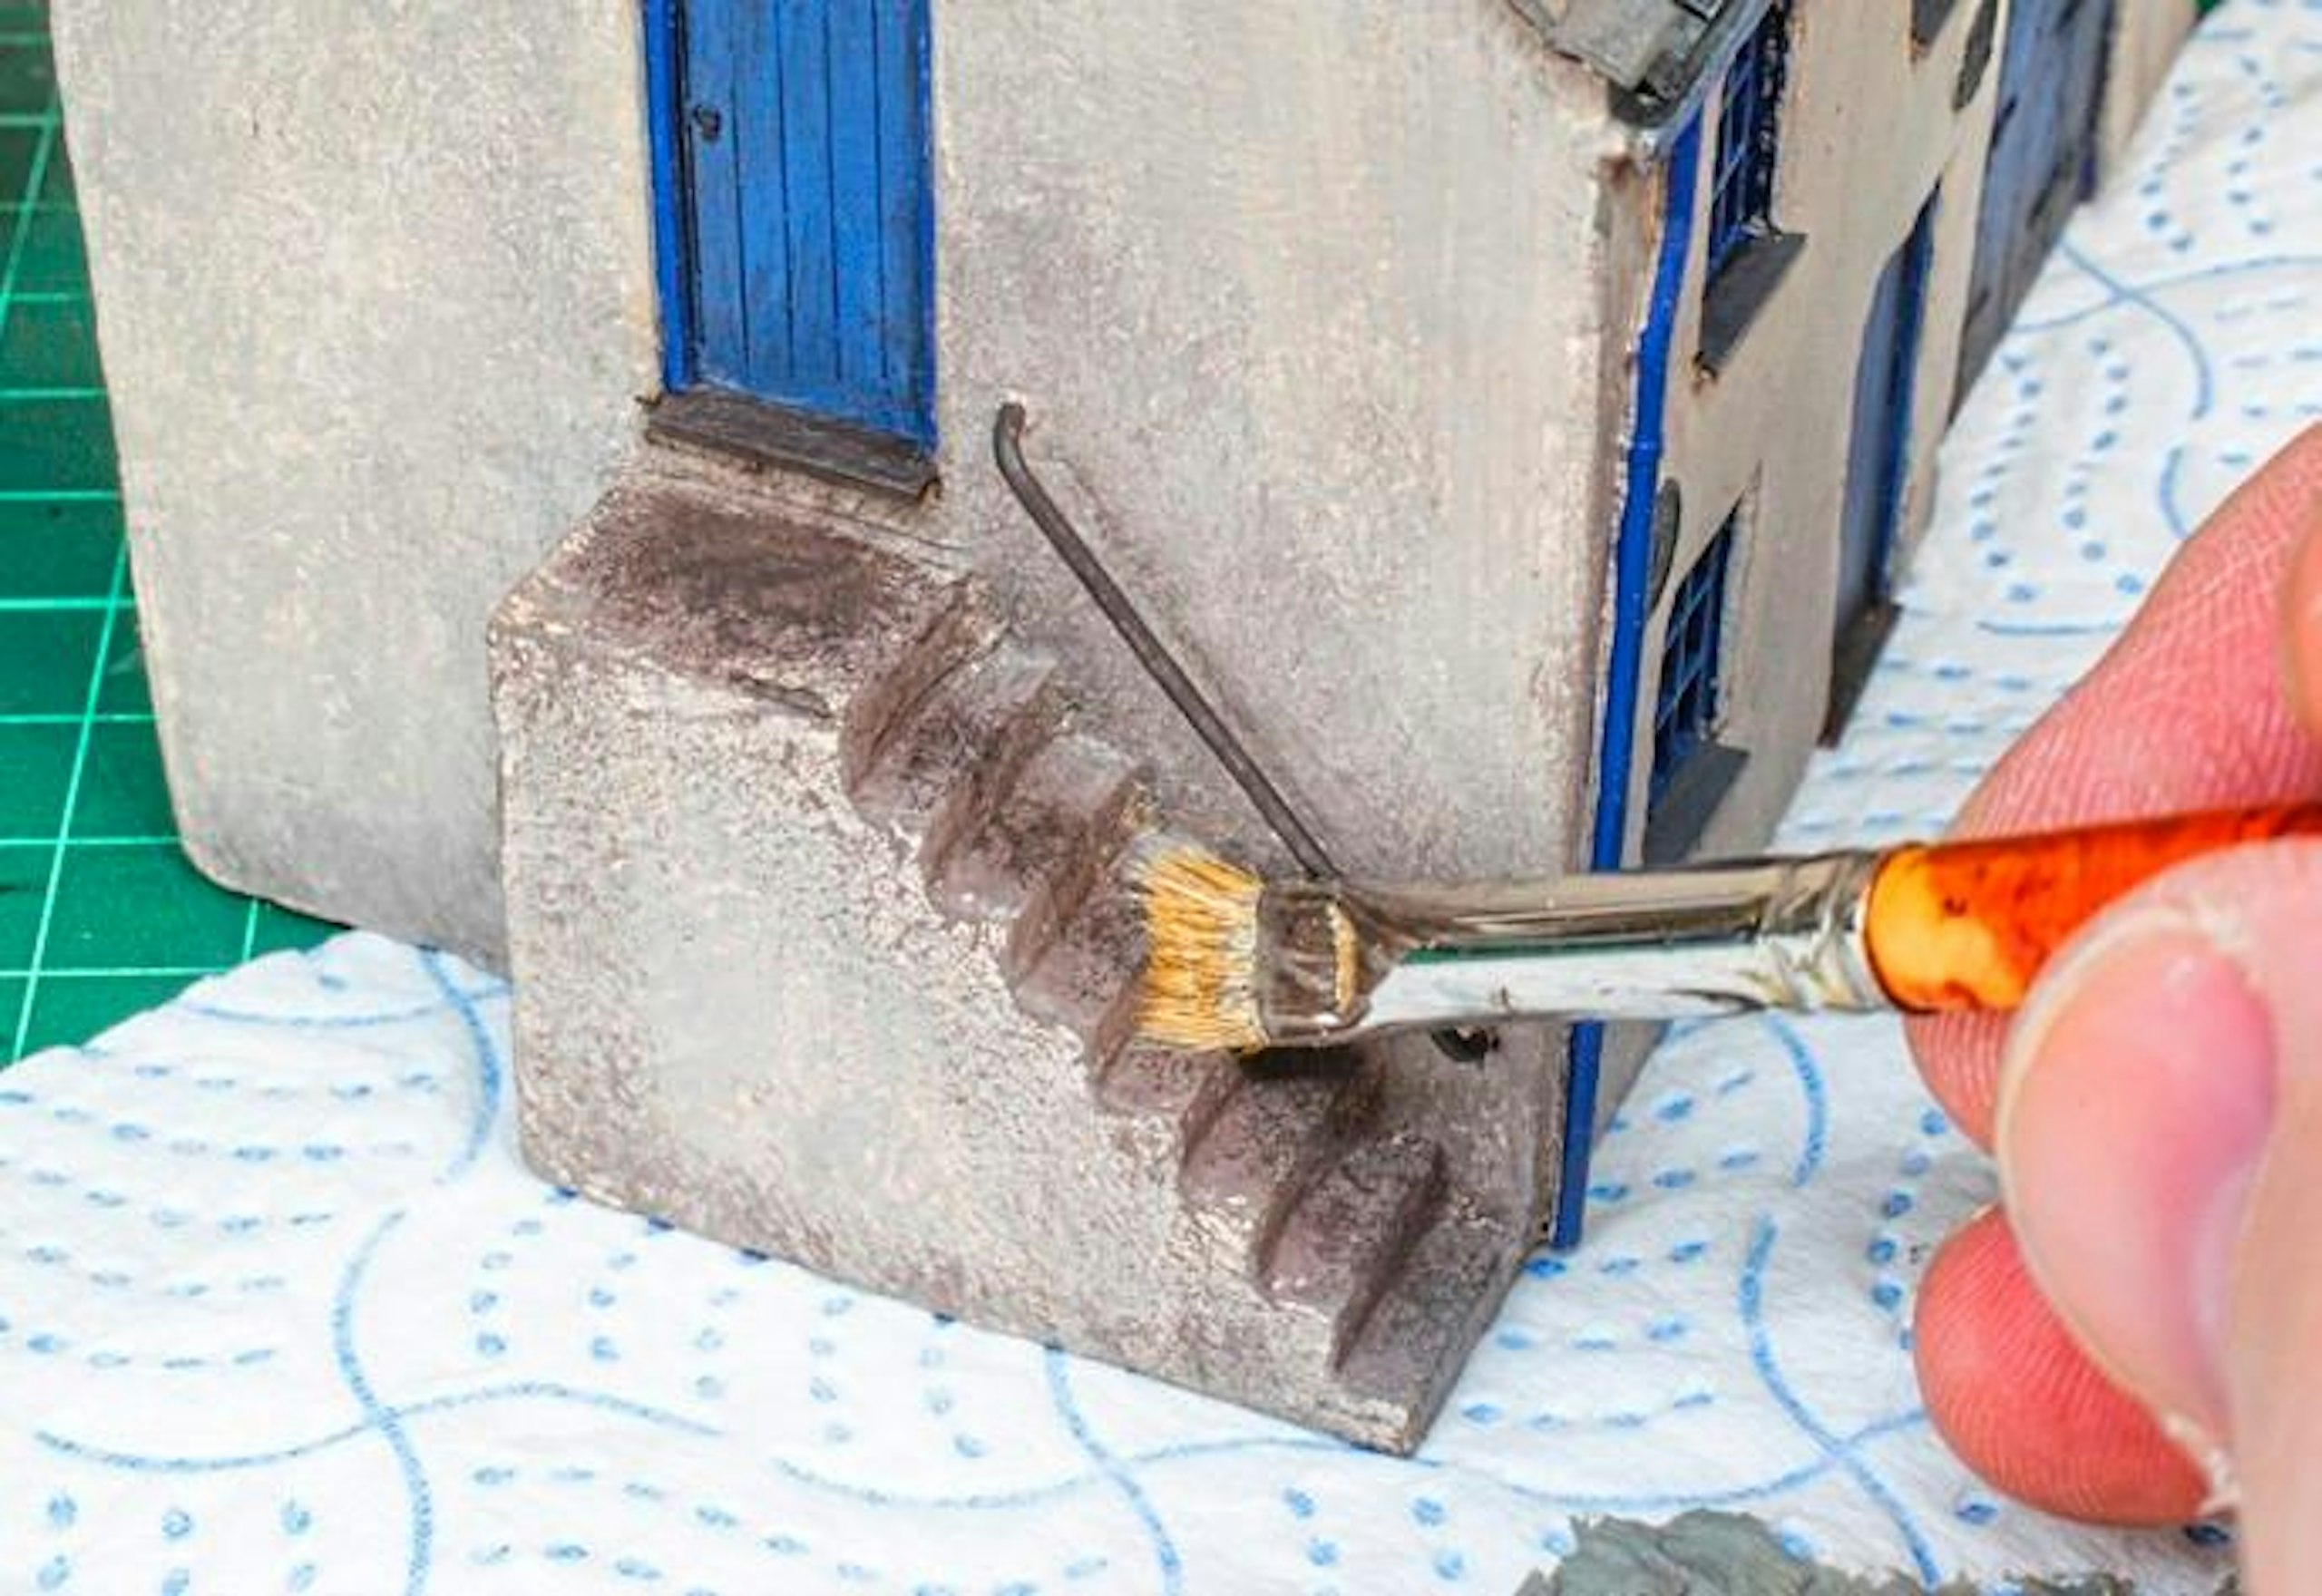
22 After picking out all the doors, windows and guttering in blue, the roof slates were painted with a blend of grey acrylics, dry-brushing with lighter shades to finish it off. Weathering commenced with further dry-brushing.
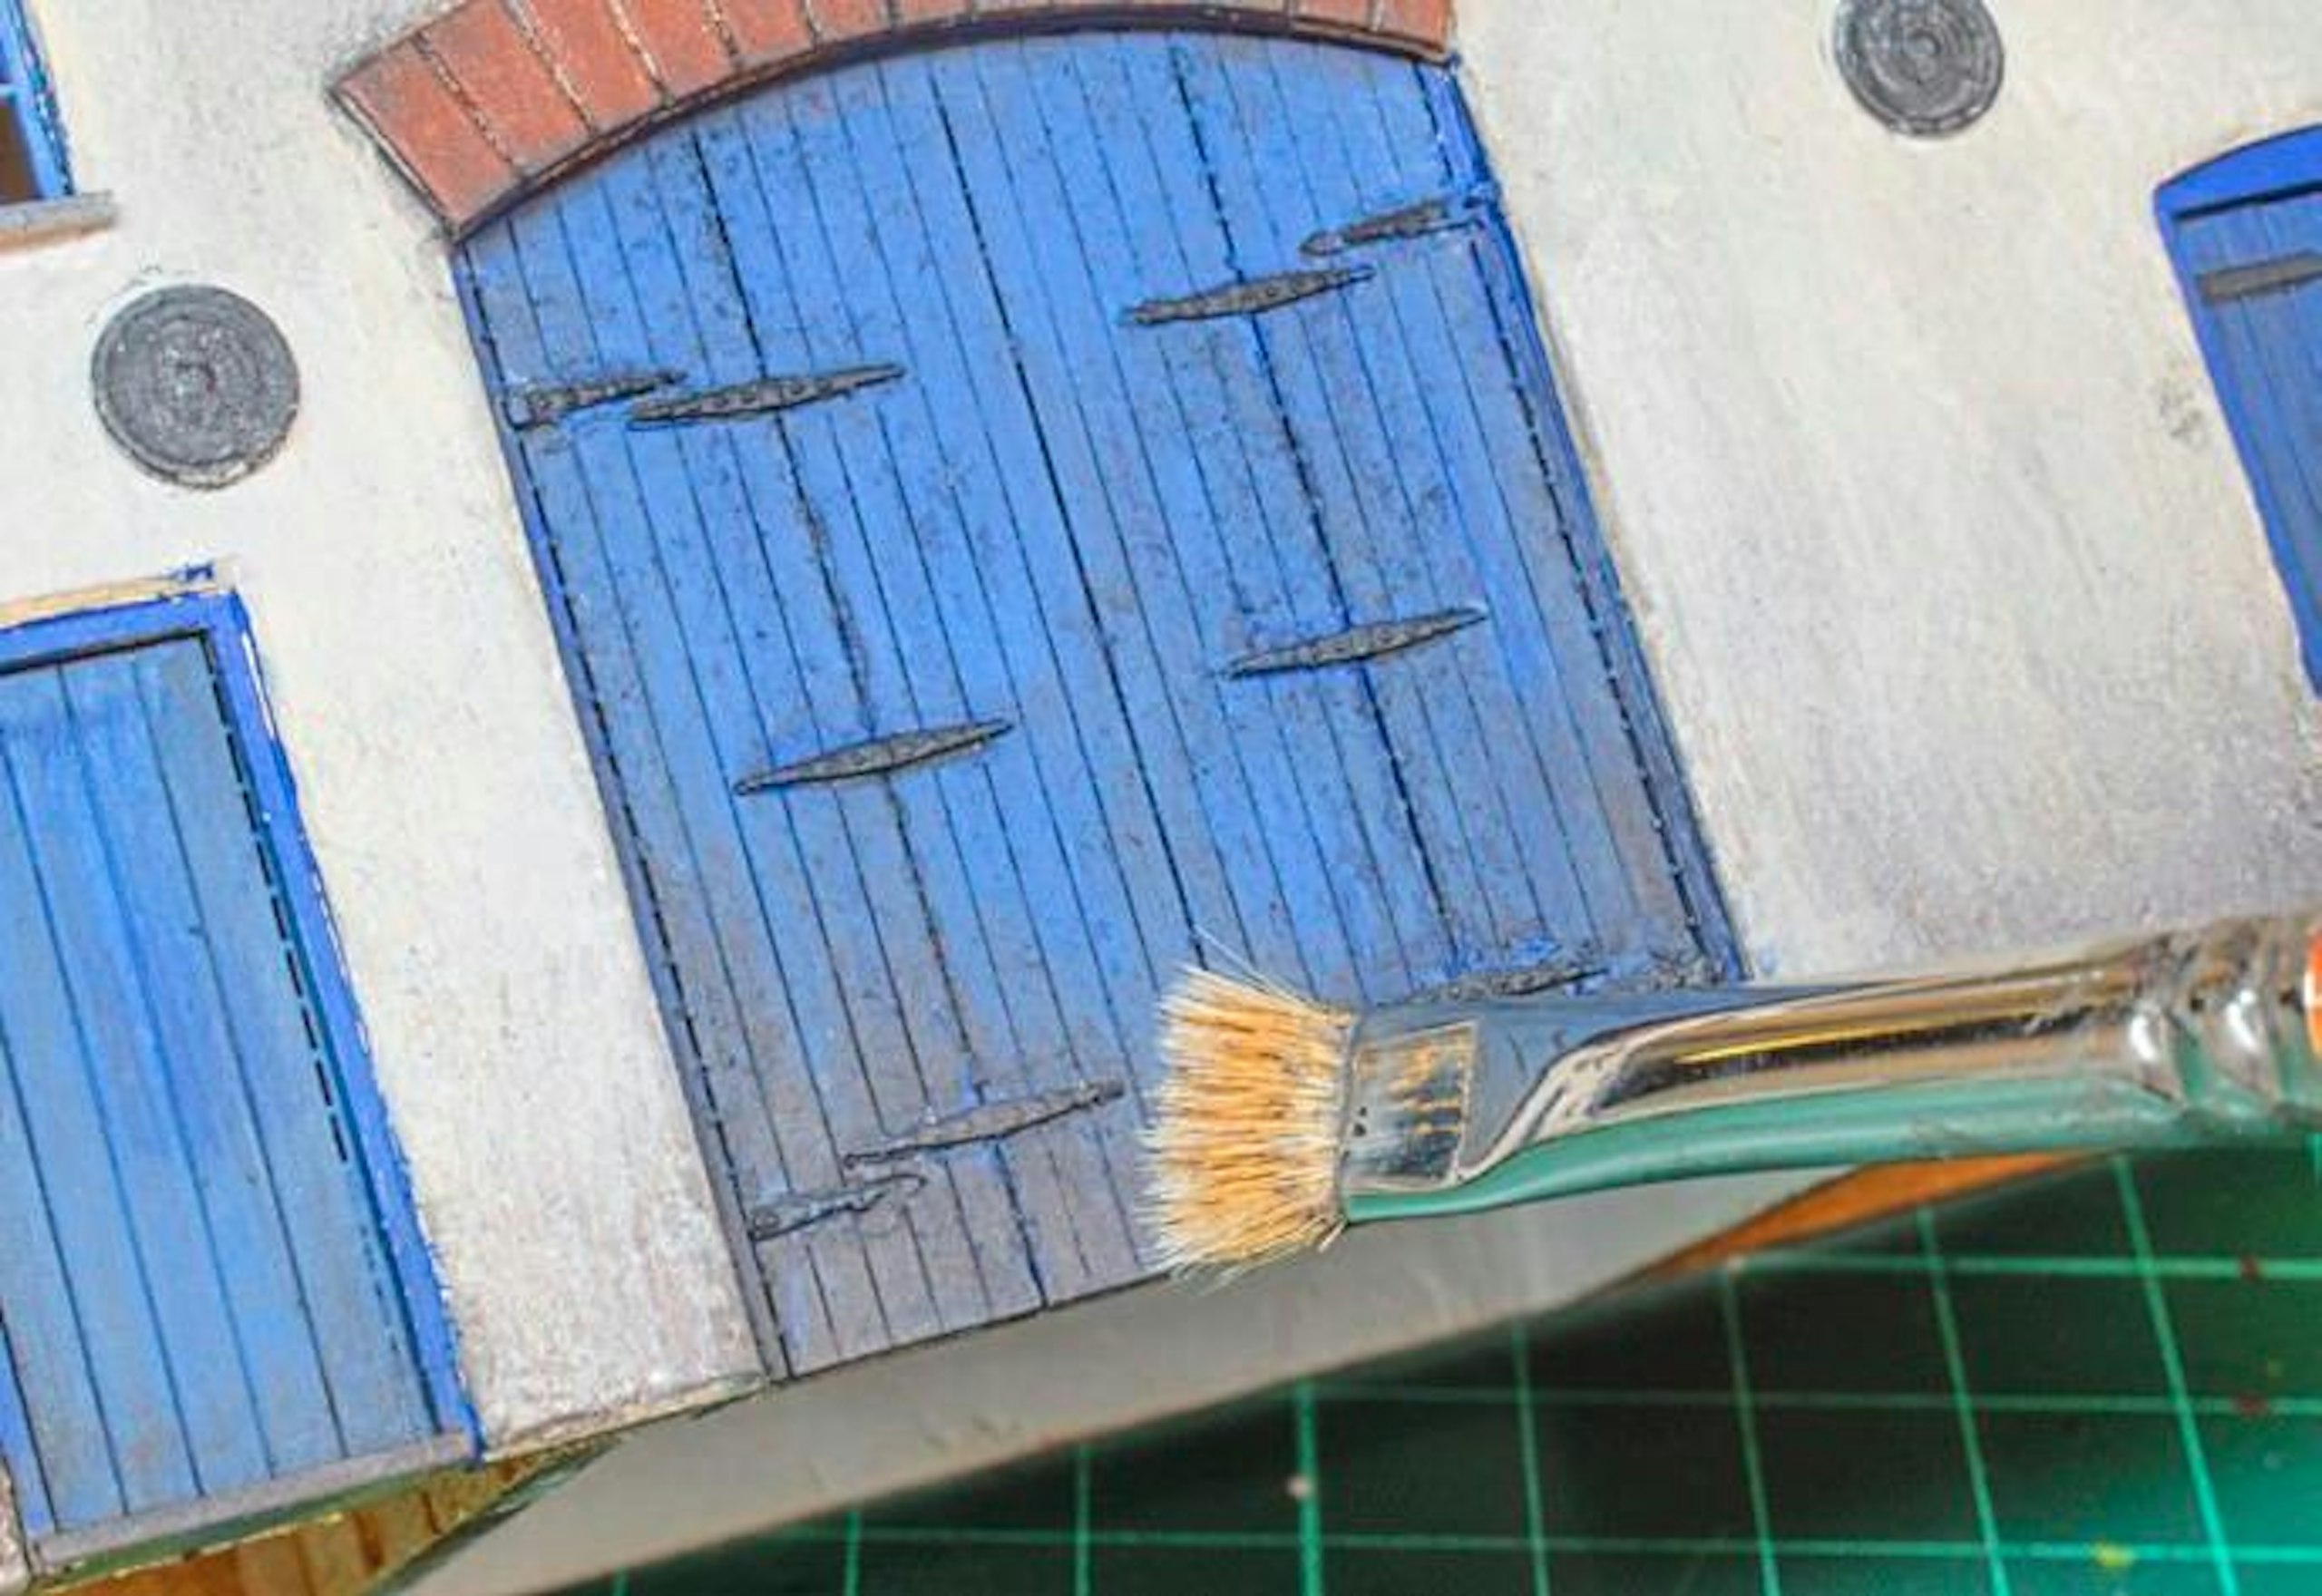
23 The dry-brushing was concentrated over the roof, steps and the lower edges of the walls, plus the doors, especially to the carriage shed. The surface relief in the plank and hinge detail really came to life.
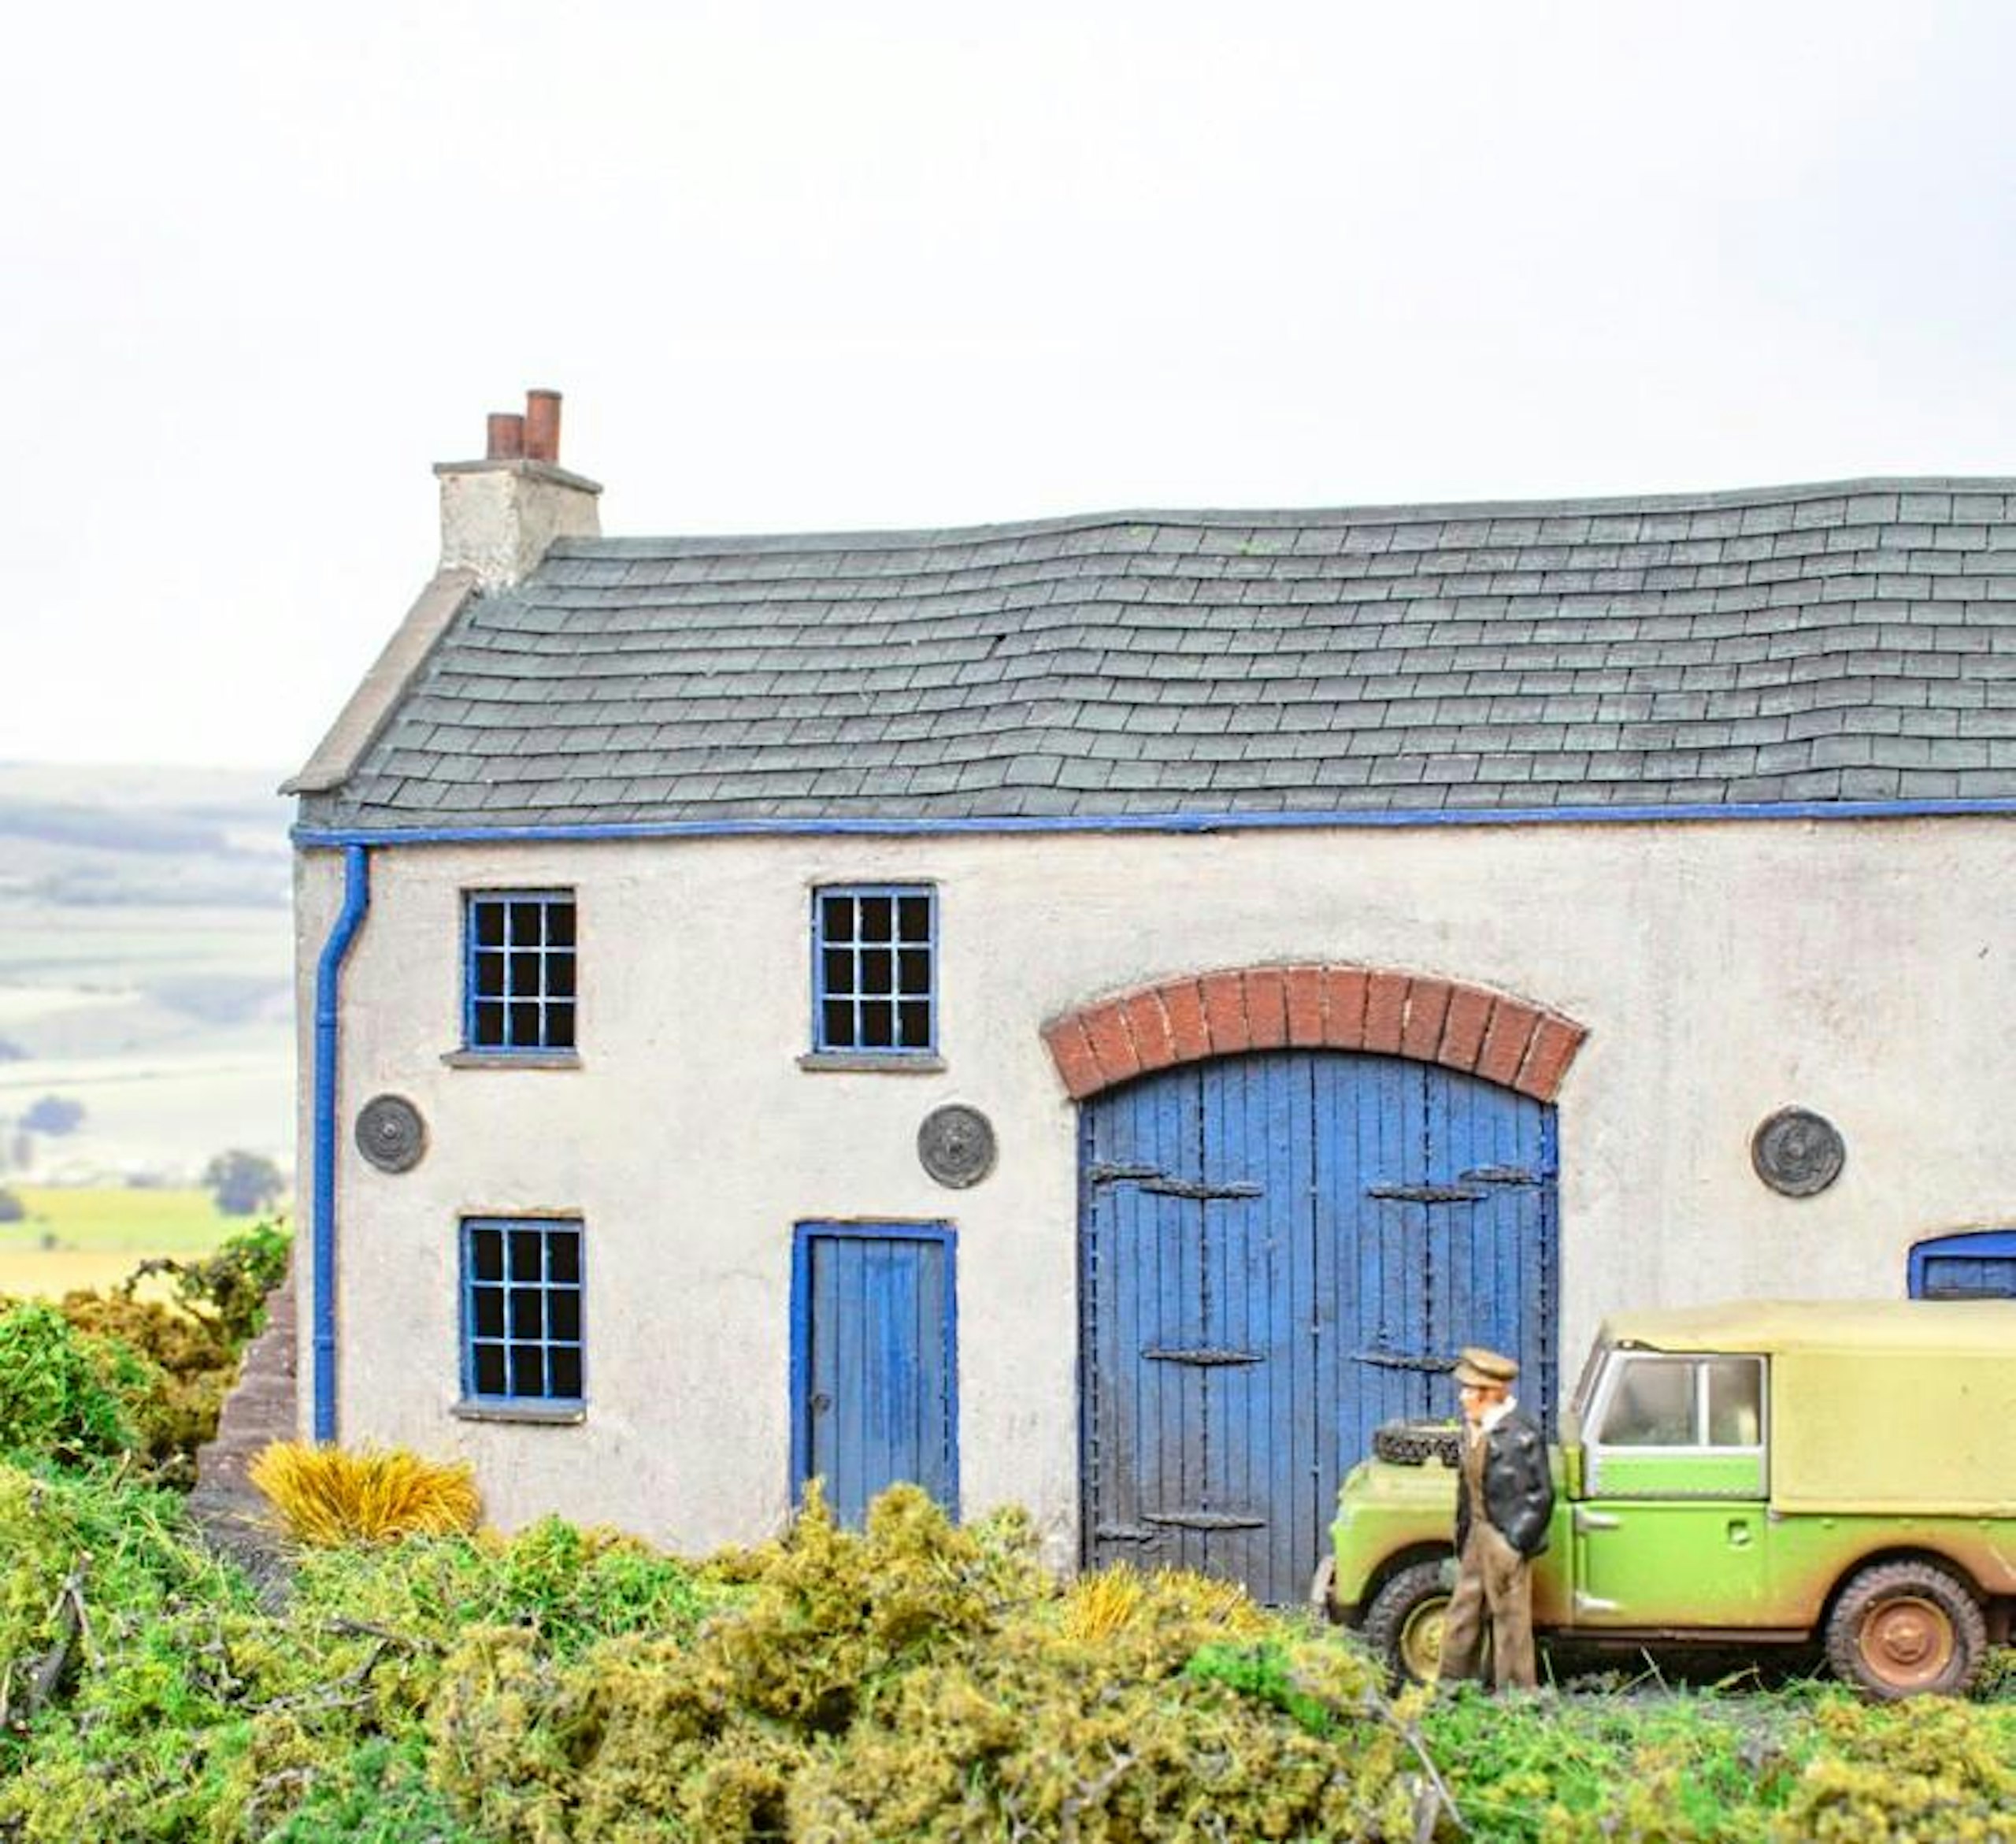
The addition of a few extra detailing parts have helped to personalise the structure.
Subscribe to a Model Rail Print+ Subscription today and you'll get instant digital access, PLUS FREE UK delivery so you will never miss an issue.