HOW TO
One of George Dent’s favourite diesel types gets the weathering treatment…
PHOTOGRAPHY: GEORGE DENT

I’ve written before in Model Rail about my childhood affinity for the BR Class 31s, as they were a daily sight in my locality, heading expresses to and from Liverpool Lime Street, hauling Speedlink freight services or busily shuffling engineers wagons.
Never the most glamorous or popular of BR’s classic diesels, the Brush Type 2s nonetheless proved their worth on a diverse range of tasks, with many operational in preservation and the odd main line-registered example still continuing to provide useful service.
Having owned model ‘31s’ from Hornby-Dublo, Airfix and Lima during my youth, I’ve had plenty of experience in detailing and upgrading work, as well as dealing with temperamental power units. Hornby’s updated model from the mid-2000s was a significant upgrade, but the new releases from Bachmann and Accurascale in 2024 raised the bar even higher. With a few examples of the Accurascale model in my collection, from both the original production run and this year’s follow-up batch (featuring a few key improvements), I’ve been dying to find the time to give them a weathered finish and a few embellishments.
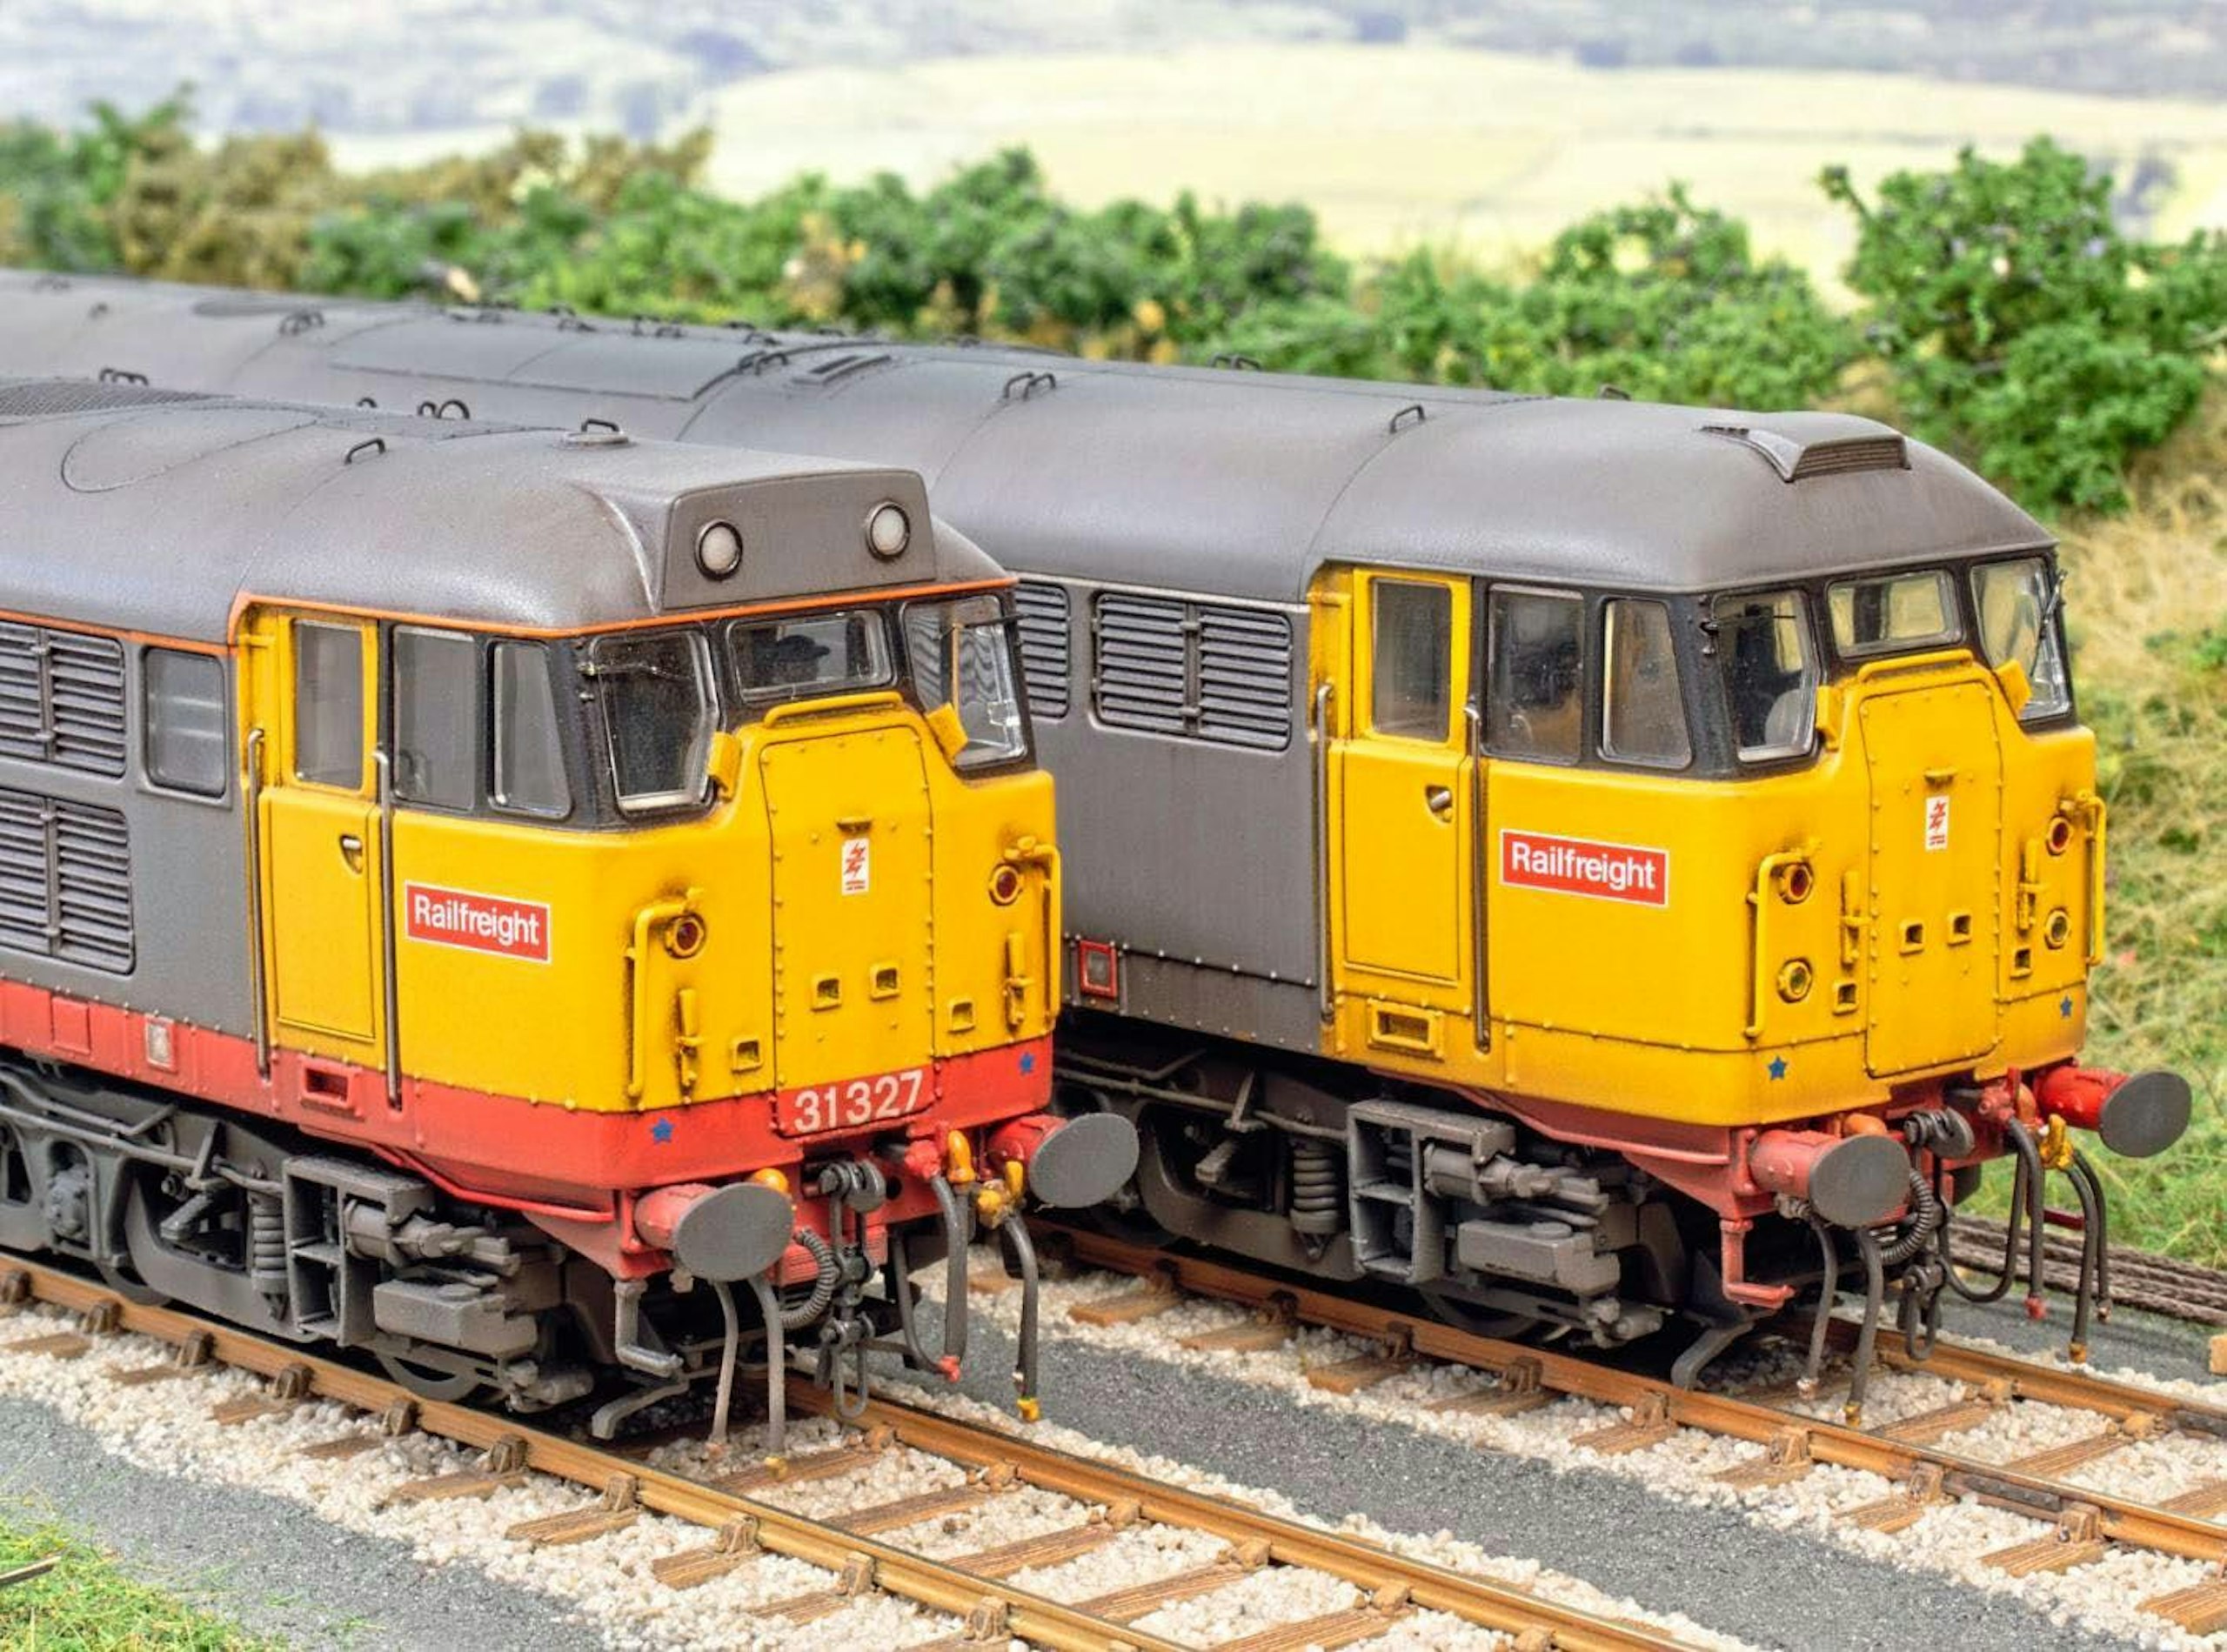
The Class 31s suited the original BR Railfreight livery well, with the later ‘red stripe’ version adding vibrancy.
Happily, a bit of unexpected spare time over the summer allowed me to tinker with a trio of the Type 3s: one of the original Mirrlees-powered Class 30s in green livery, plus a pair of Railfreight grey Class 31s in post-1980 refurbished condition.
In the October issue, I explained how 31301 was renumbered to the one-off 31327 Phillips-Imperial, recapturing some fond childhood memories of the real locomotive and an old Lima model I received for my 15th birthday.
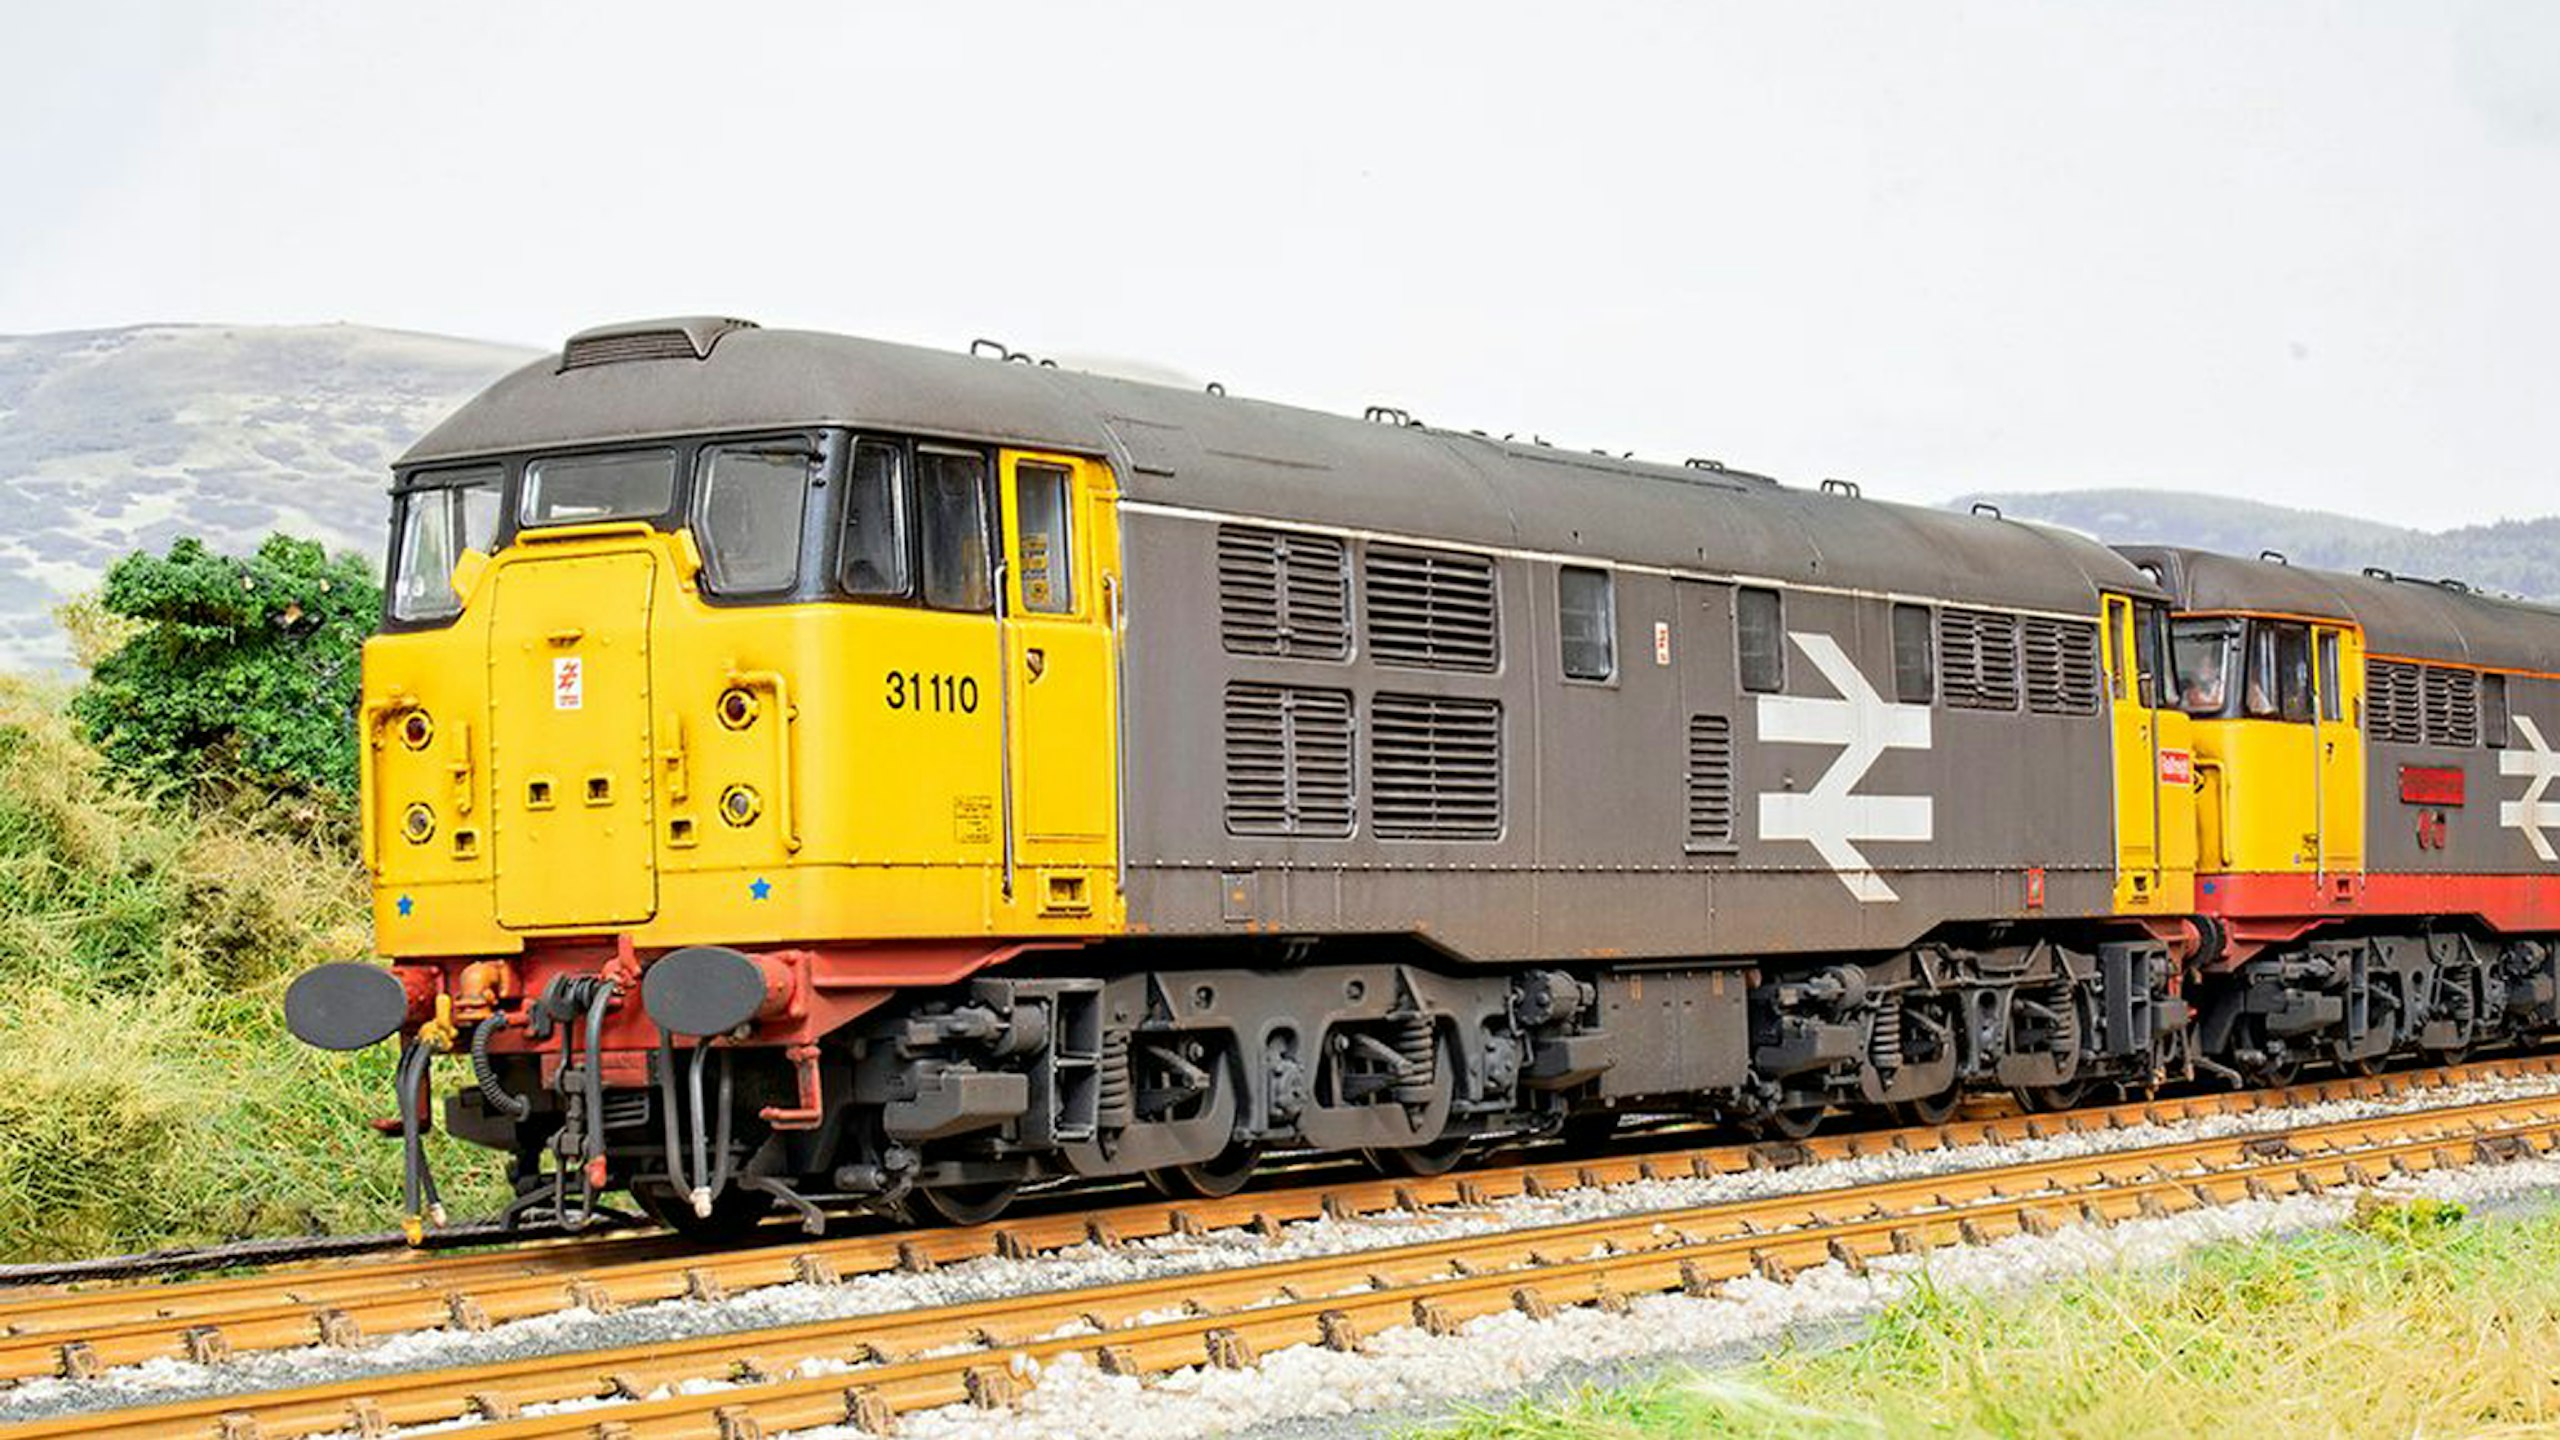
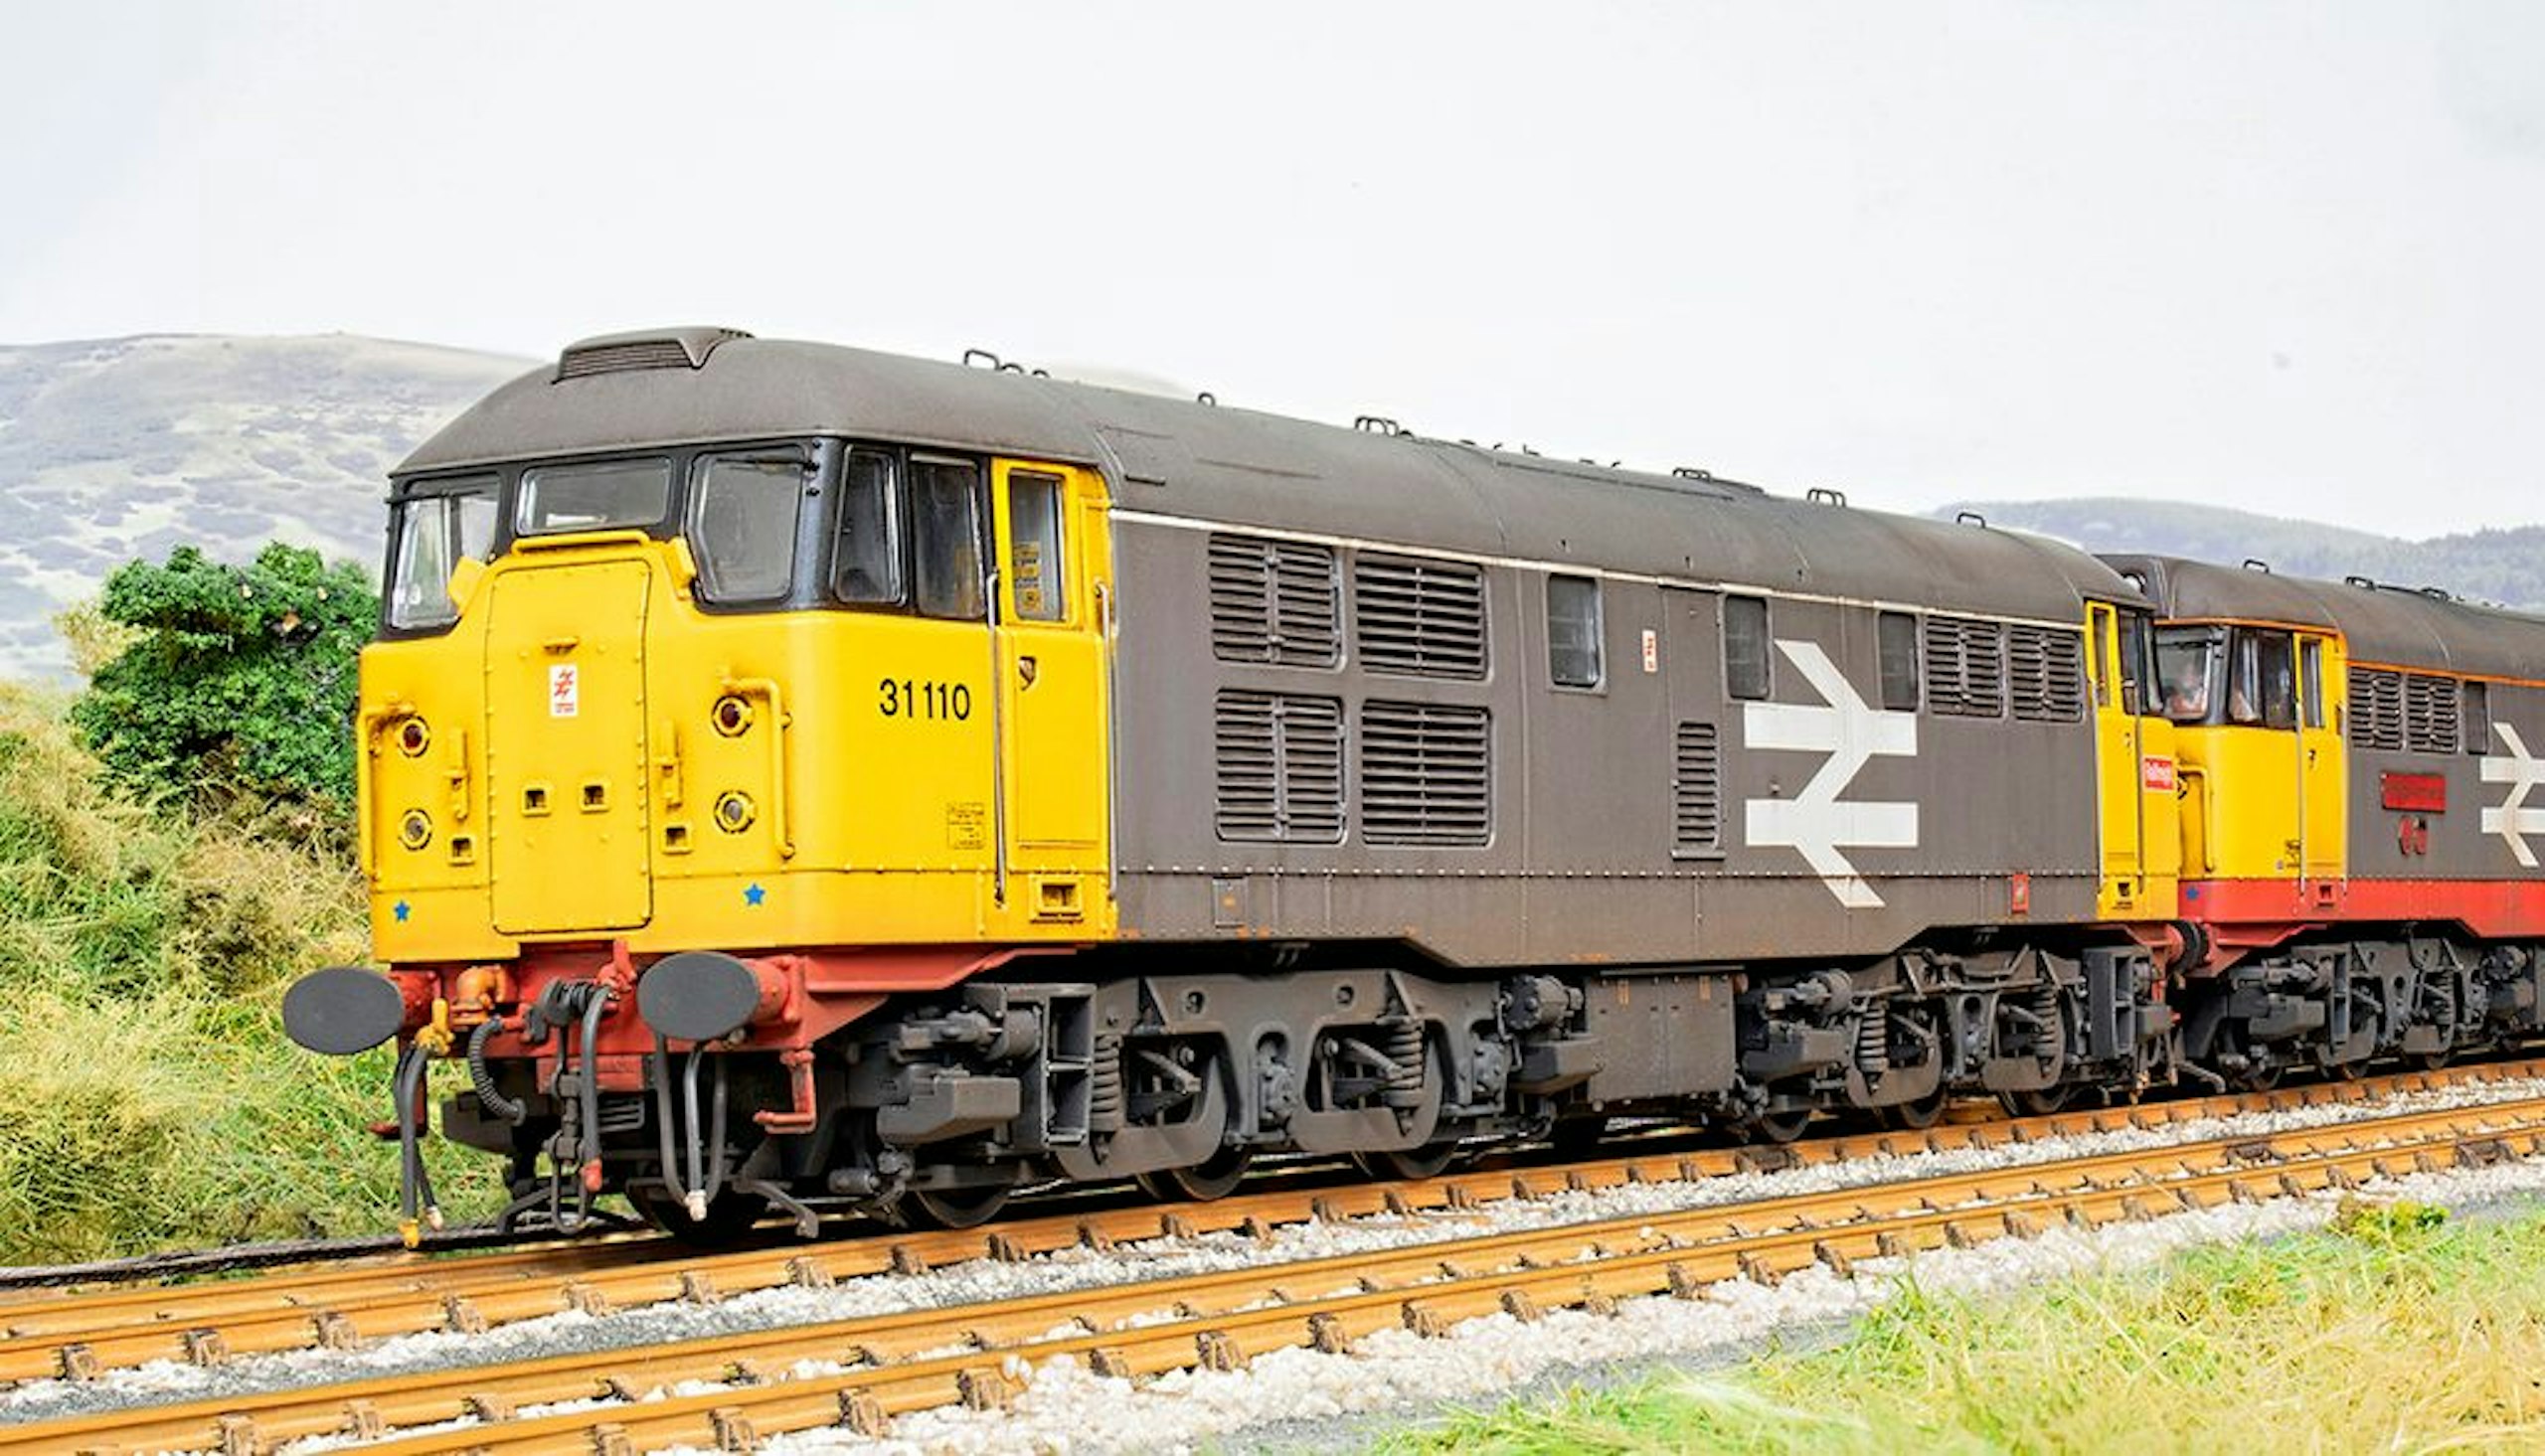
Another regular childhood spot was ‘skinhead’ 31110, often seen pootling about Arpley Yard, which Accurascale kindly produced in their initial batch (thanks guys!), so at least I didn’t have to re-number this one too.
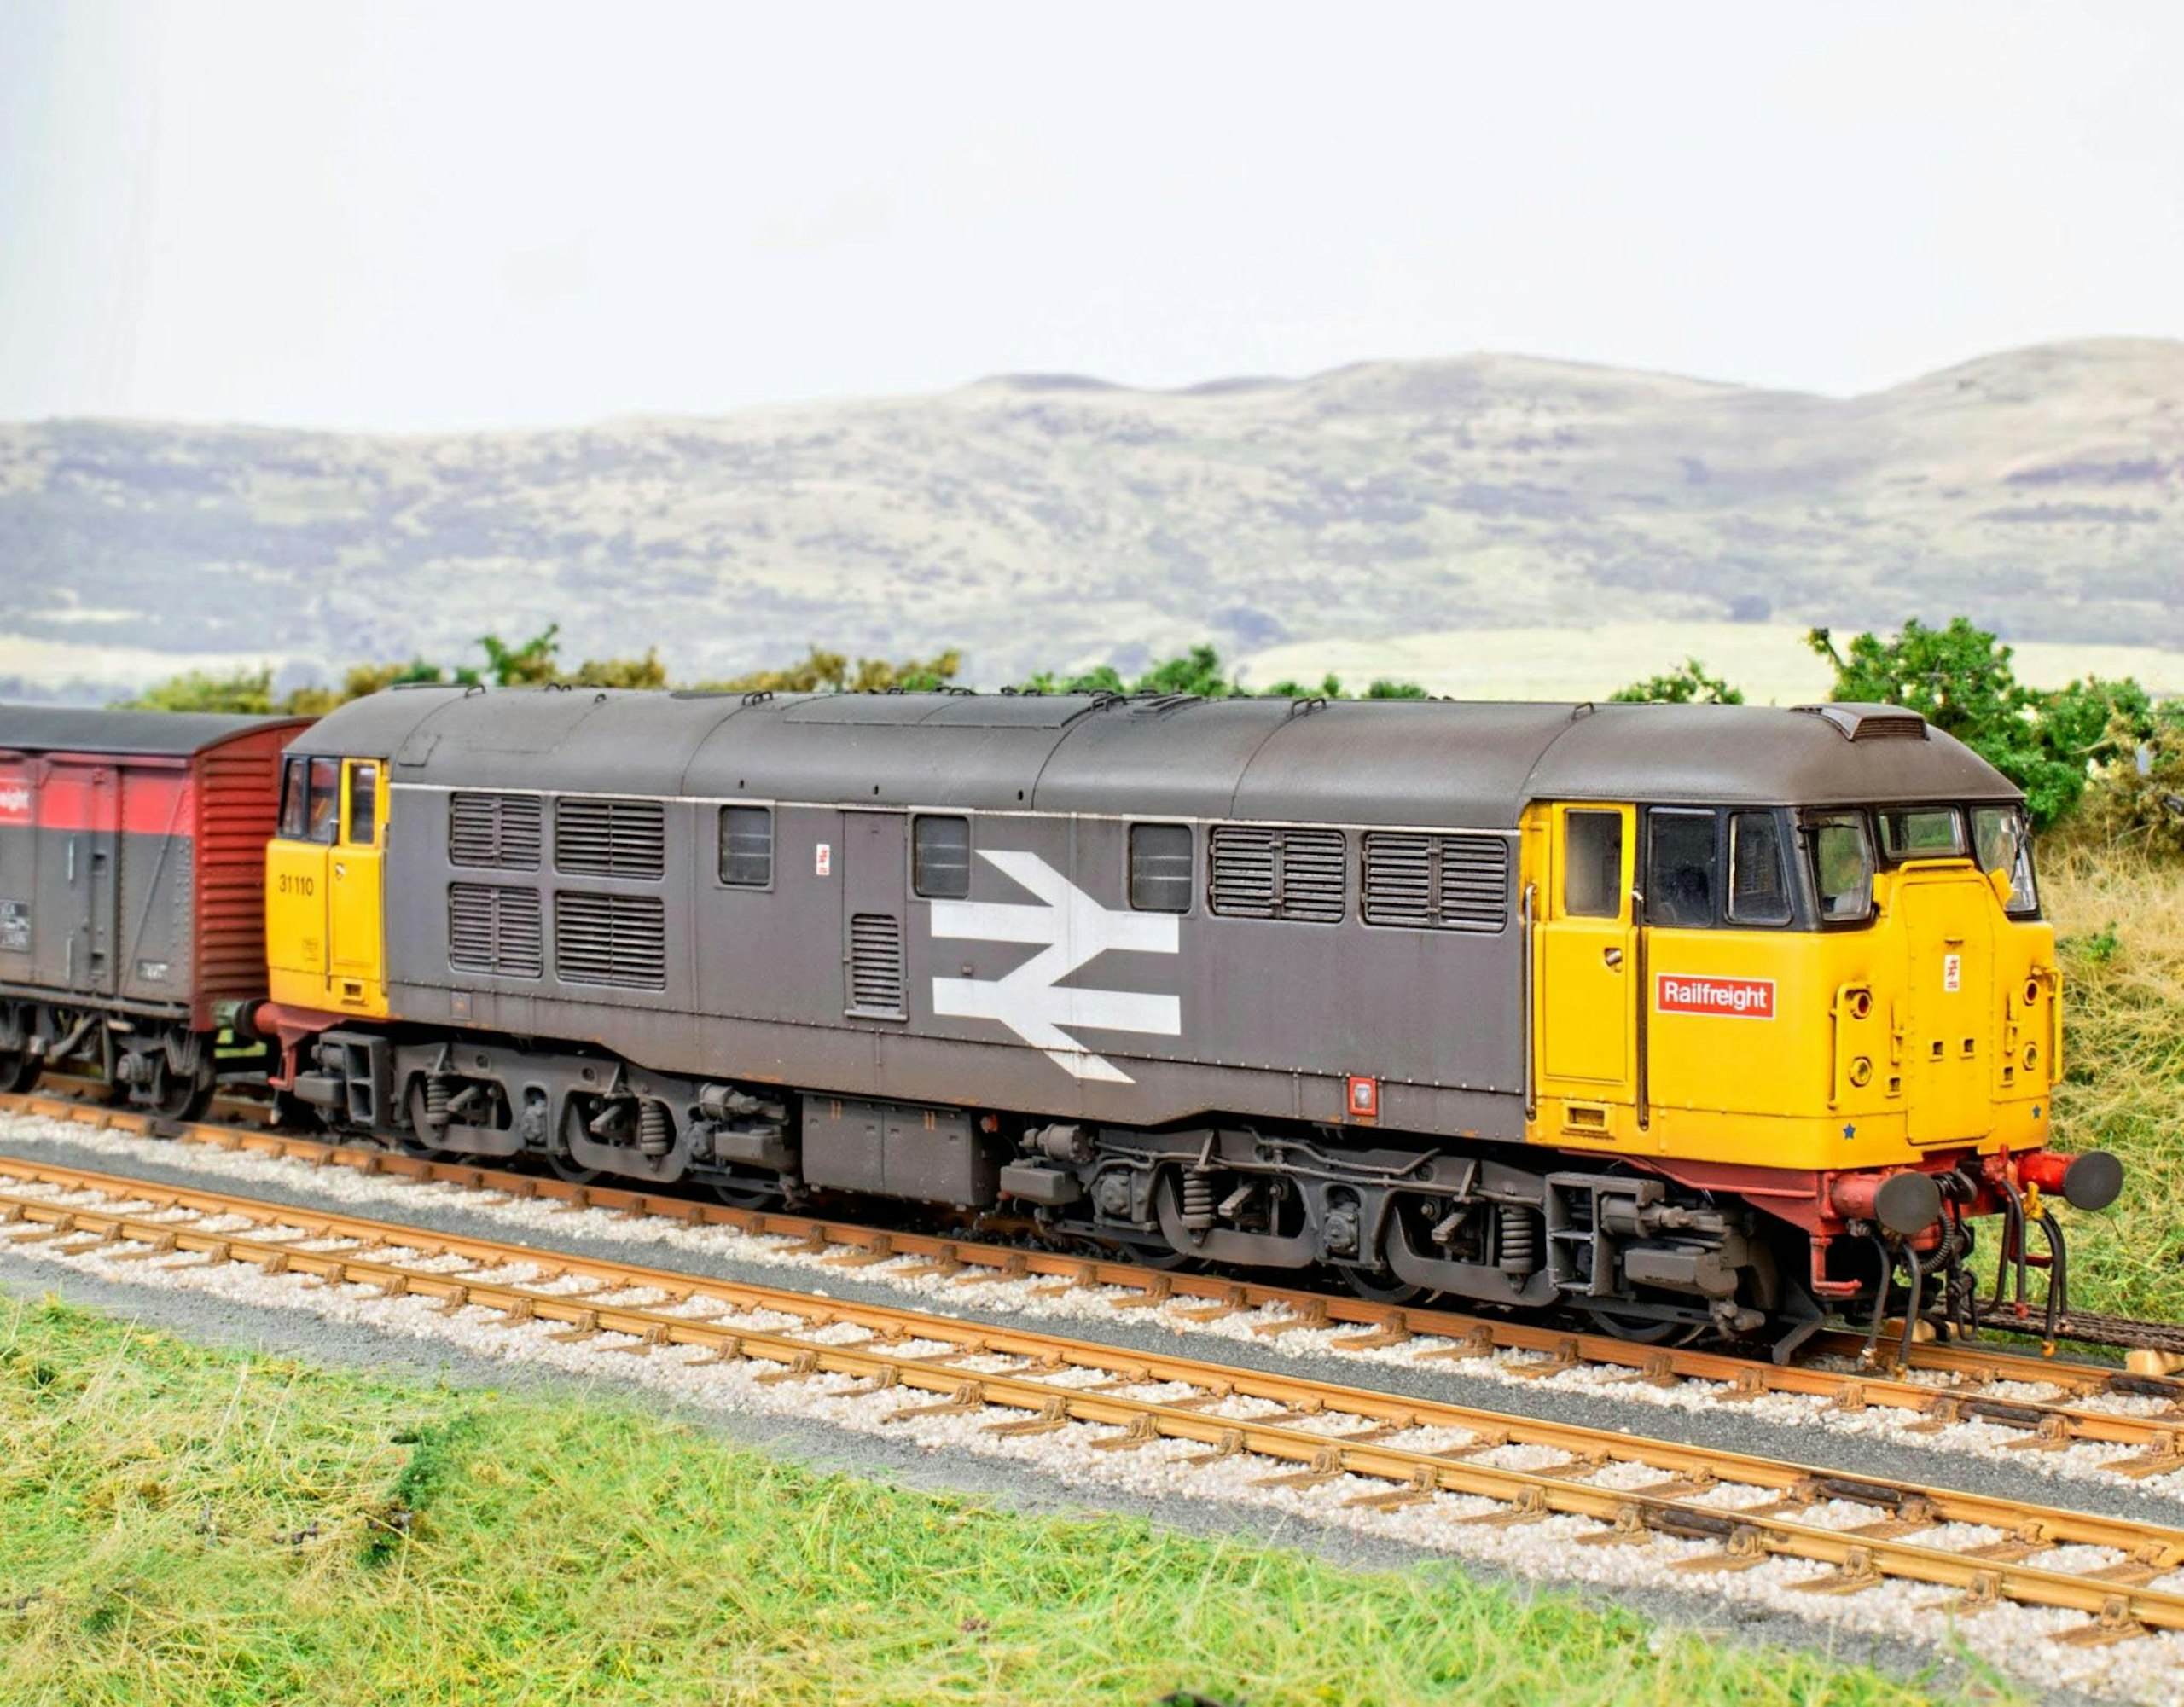
At the time of writing, several models from Accurascale’s second Class 30/31 production run are still available from retailers or direct from the manufacturer’s website.
Apart from the change of identity for 31327, the lion’s share of work involved weathering and adding the supplied optional detail fittings. The only new items required were footplate crew, which were a mix of Modelu and Preiser figures, painted in period-specific uniform colours and installed into the cabs. Talking of which, I spent time giving the interiors a grimy, careworn appearance to match the exteriors and allow the superb level of detail to be more visible.
I aimed to show the Railfreight locomotives in the kind of condition I recall from my early teen years, as captured in what primitive photographs I have from the time. Generally, the sides and ends of the body were fairly clean, but with plenty of ingrained dirt trapped within all the various recesses and seams. Those characterful front ends, with the set of inset steps and plated-over door panels, naturally attracted a lot of detritus during their operational life. Roofs and underframes would be noticeably grimier.
In the case of D5501, in its 1960s condition, I went for a slightly heavier coating of dirt on the body, acknowledging the fact that it was likely operating alongside steam traction and collecting more in the way of soot and coal dust.
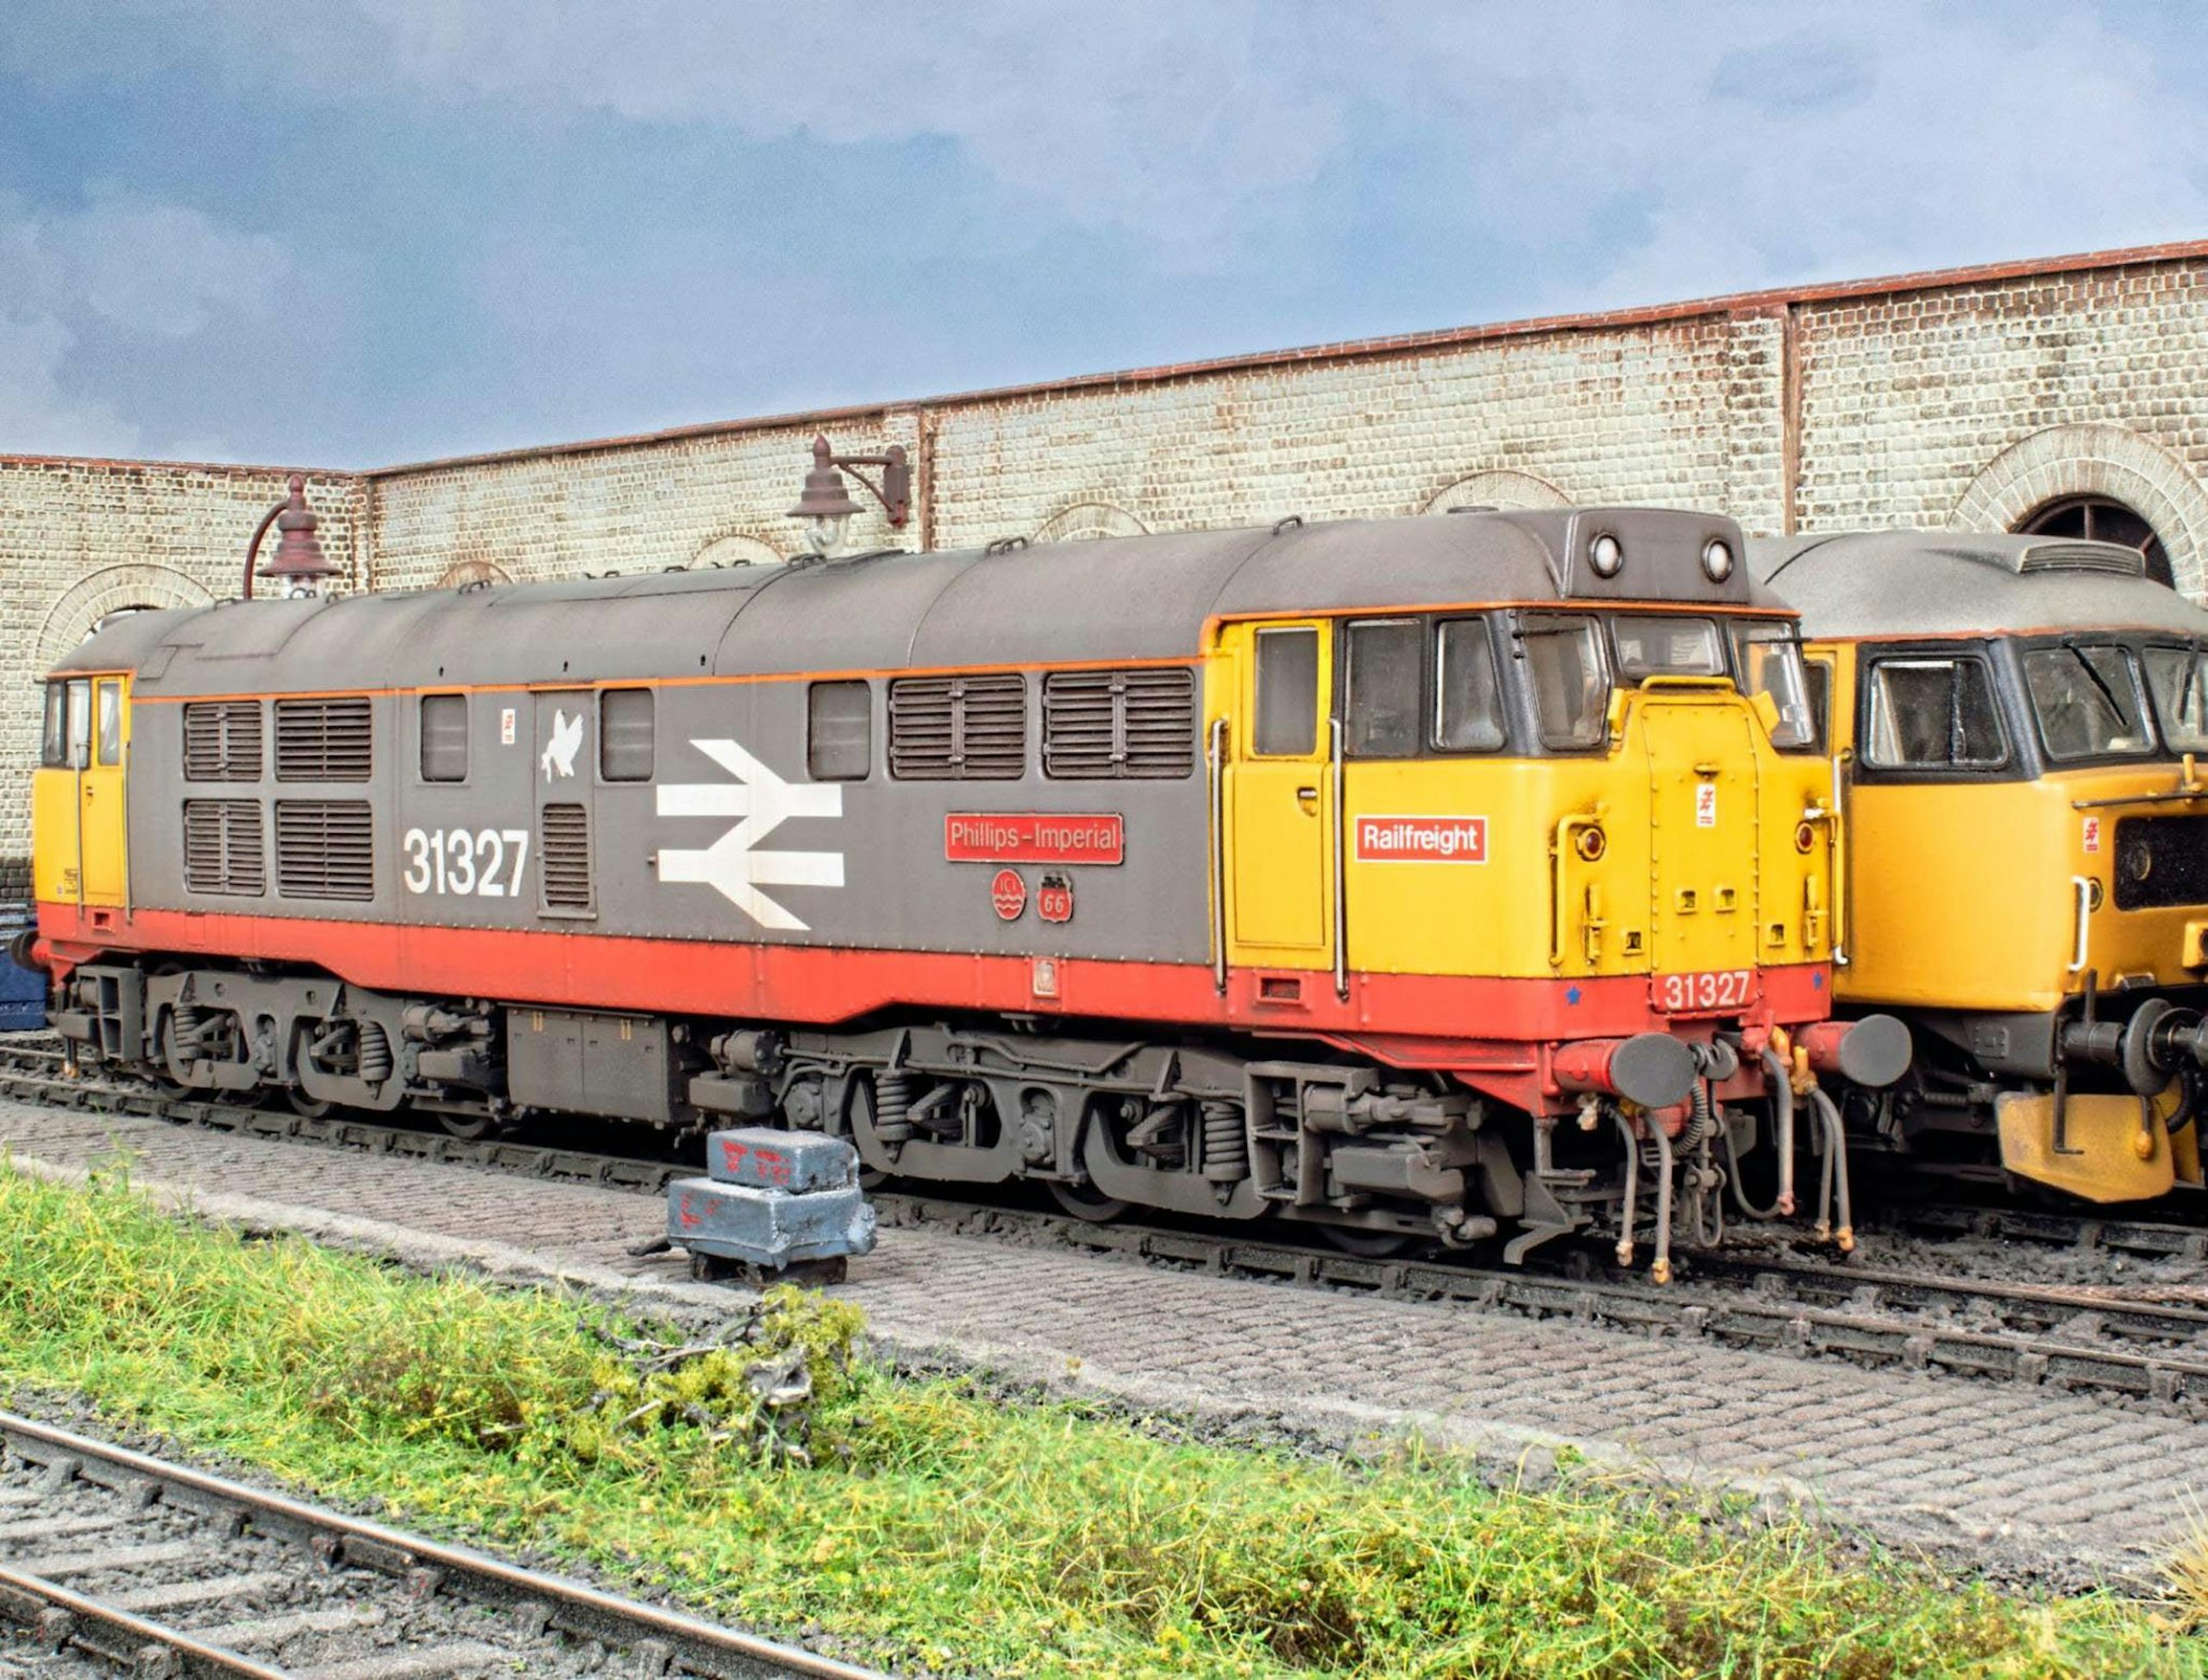
George’s customised ‘31’ depicts a unique named example from the late 1980s.
Much of the work was achieved with my favoured enamel weathering washes, which settle effectively into and around surface relief and can be manipulated and removed with ease, with dry cotton swabs or rags or, if necessary, with a matching formula of enamel thinners. I always use a specific enamel wash thinners, not paint thinners. Wash thinners are formulated to be milder and less likely to remove or damage underlying paint.
Do test the washes on an inconspicuous area first. I find Bachmann models in particular are susceptible to enamel weathering washes, and I’ve inadvertently removed printed logos and numbers during weathering (see MR352). In the case of these Accurascale models, however, there were no issues with the MIG and AMMO enamel washes.
With the Railfreight duo ready for service, I can turn my attention to a couple of BR blue ‘31/4s’ waiting patiently for their turn in the queue. As I write (in late September), a handful of versions of Accurascale’s latest Class 31 batch were still listed on the manufacturer’s website and across a number of retailers, albeit in limited numbers.
I for one am eagerly awaiting Accurascale’s third batch, which is due early next year, with another interesting Railfreight-liveried ‘31’ among the line-up.
What you will need
SHOPPING LIST
◆ MIG/AMMO enamel weathering washes and thinners, masking tapes, cotton swabs, glue
Availability: Scale Model Shop
Web: www.scalemodelshop.co.uk
◆ RailMatch enamel paints and thinners, Deluxe Materials Glue ‘n’ Glaze and Track Magic
Availability: Gaugemaster
Web: www.gaugemasterretail.com
TOOLS
◆ Modelling knife and spare blades
◆ Tweezers
◆ Fine-nose pliers
◆ Drill and bits
◆ Paintbrushes
◆ Cotton swabs and rags
◆ Airbrush and accessories
◆ Low-tack masking tapes
STEP BY STEP
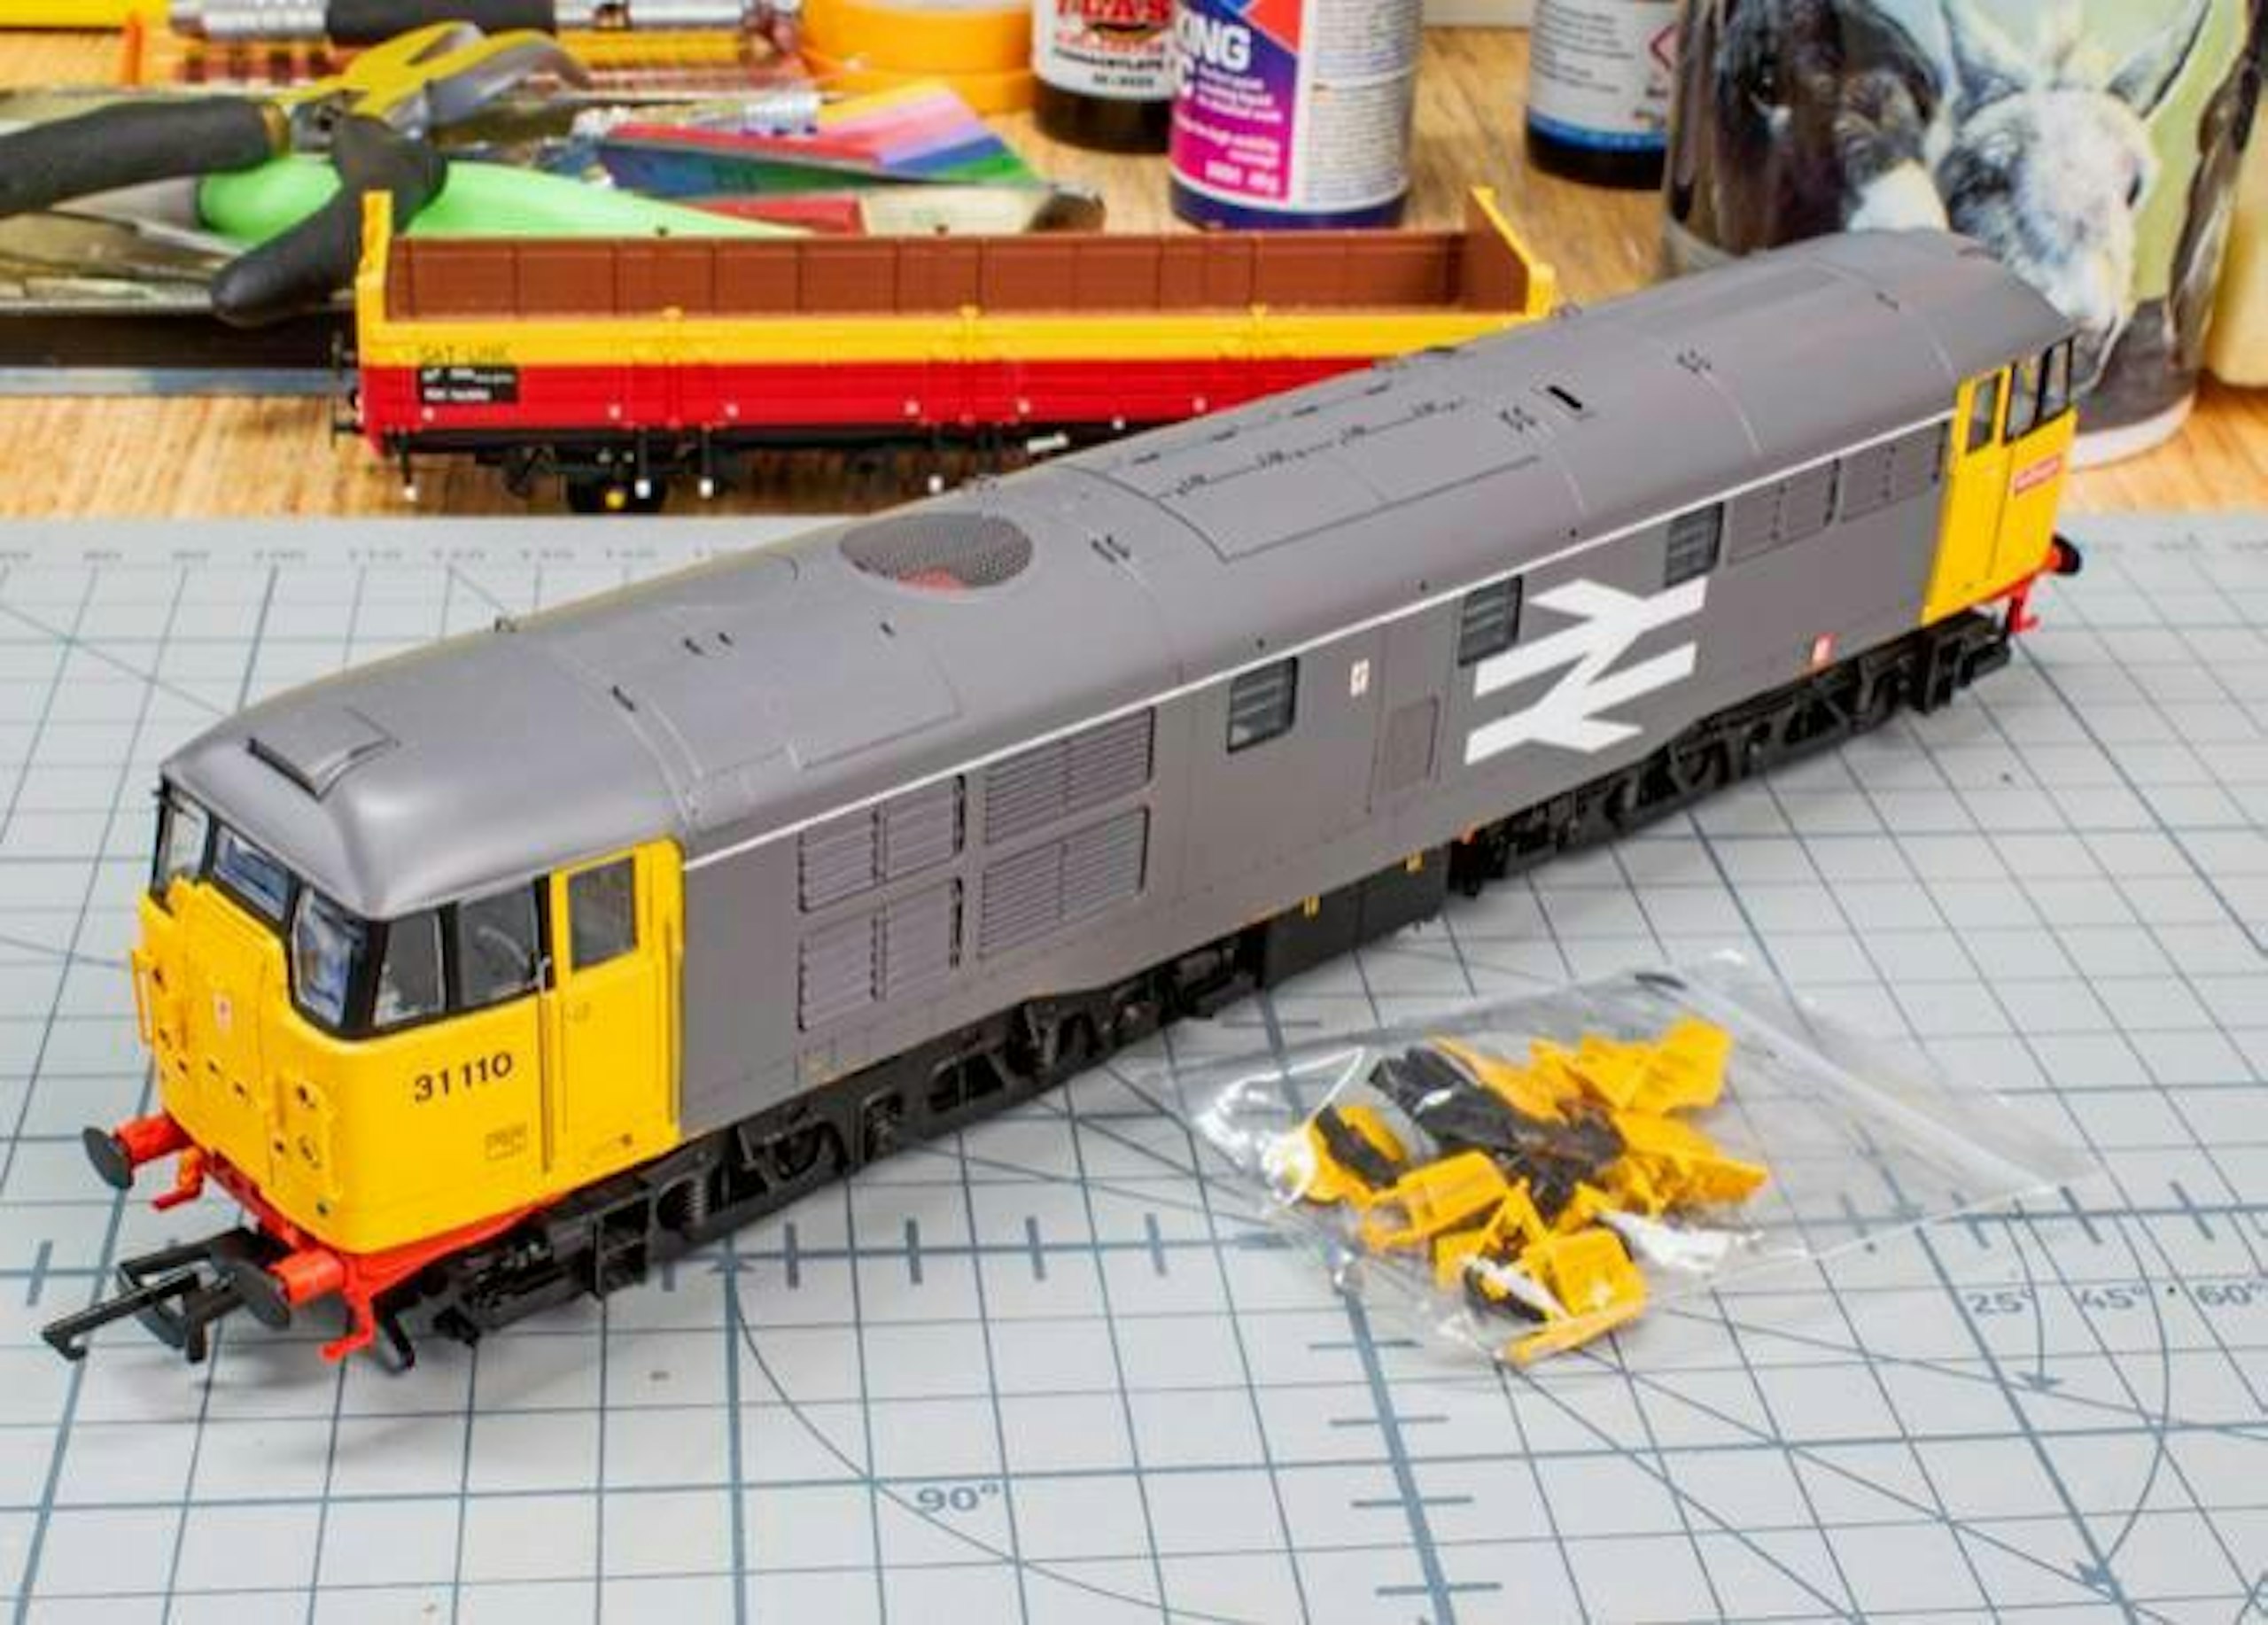
1 Fresh from the box, the Accurascale Class 31 looks great. But I don’t recall seeing the real 31s anywhere near this clean, so a weathering job was a must. Extra details are supplied, but I’ll fit them later.
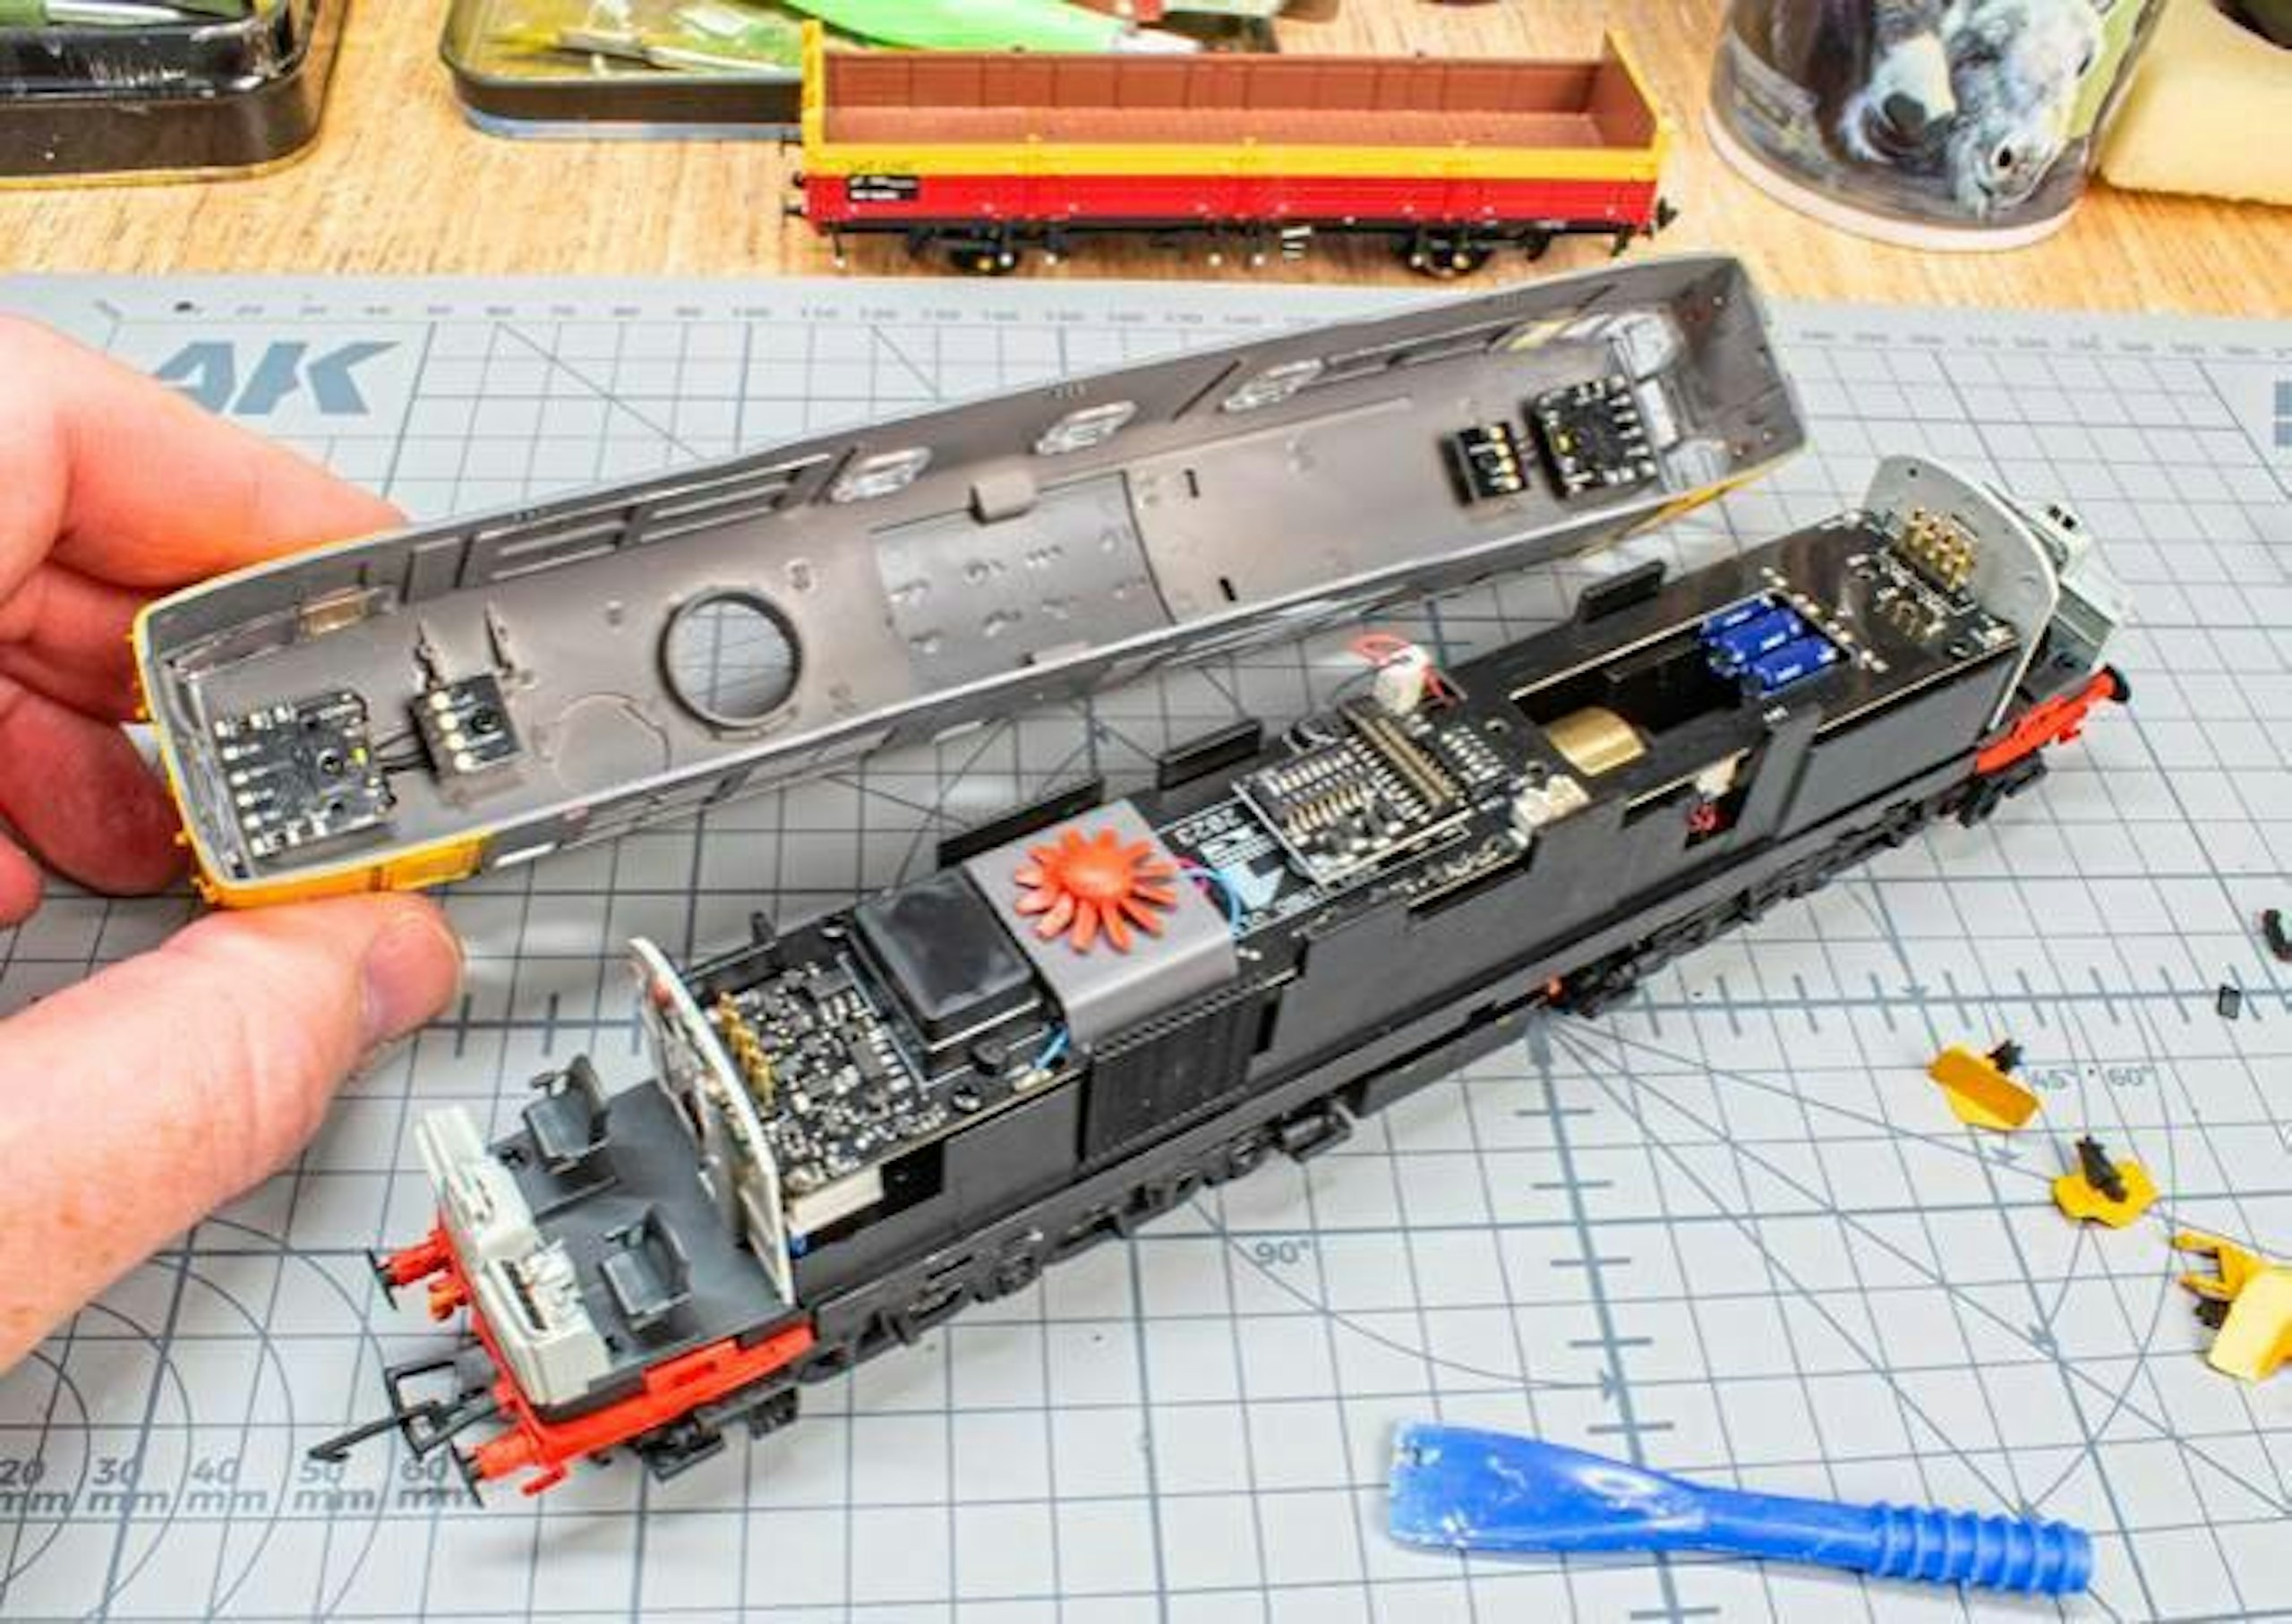
2 First task is to remove the bodyshell, which is a simple clip fit that can be released with the aid of a plastic glue spreader inserted between body and chassis in the centre of each side. There are no fiddly wires to unplug. Joy!
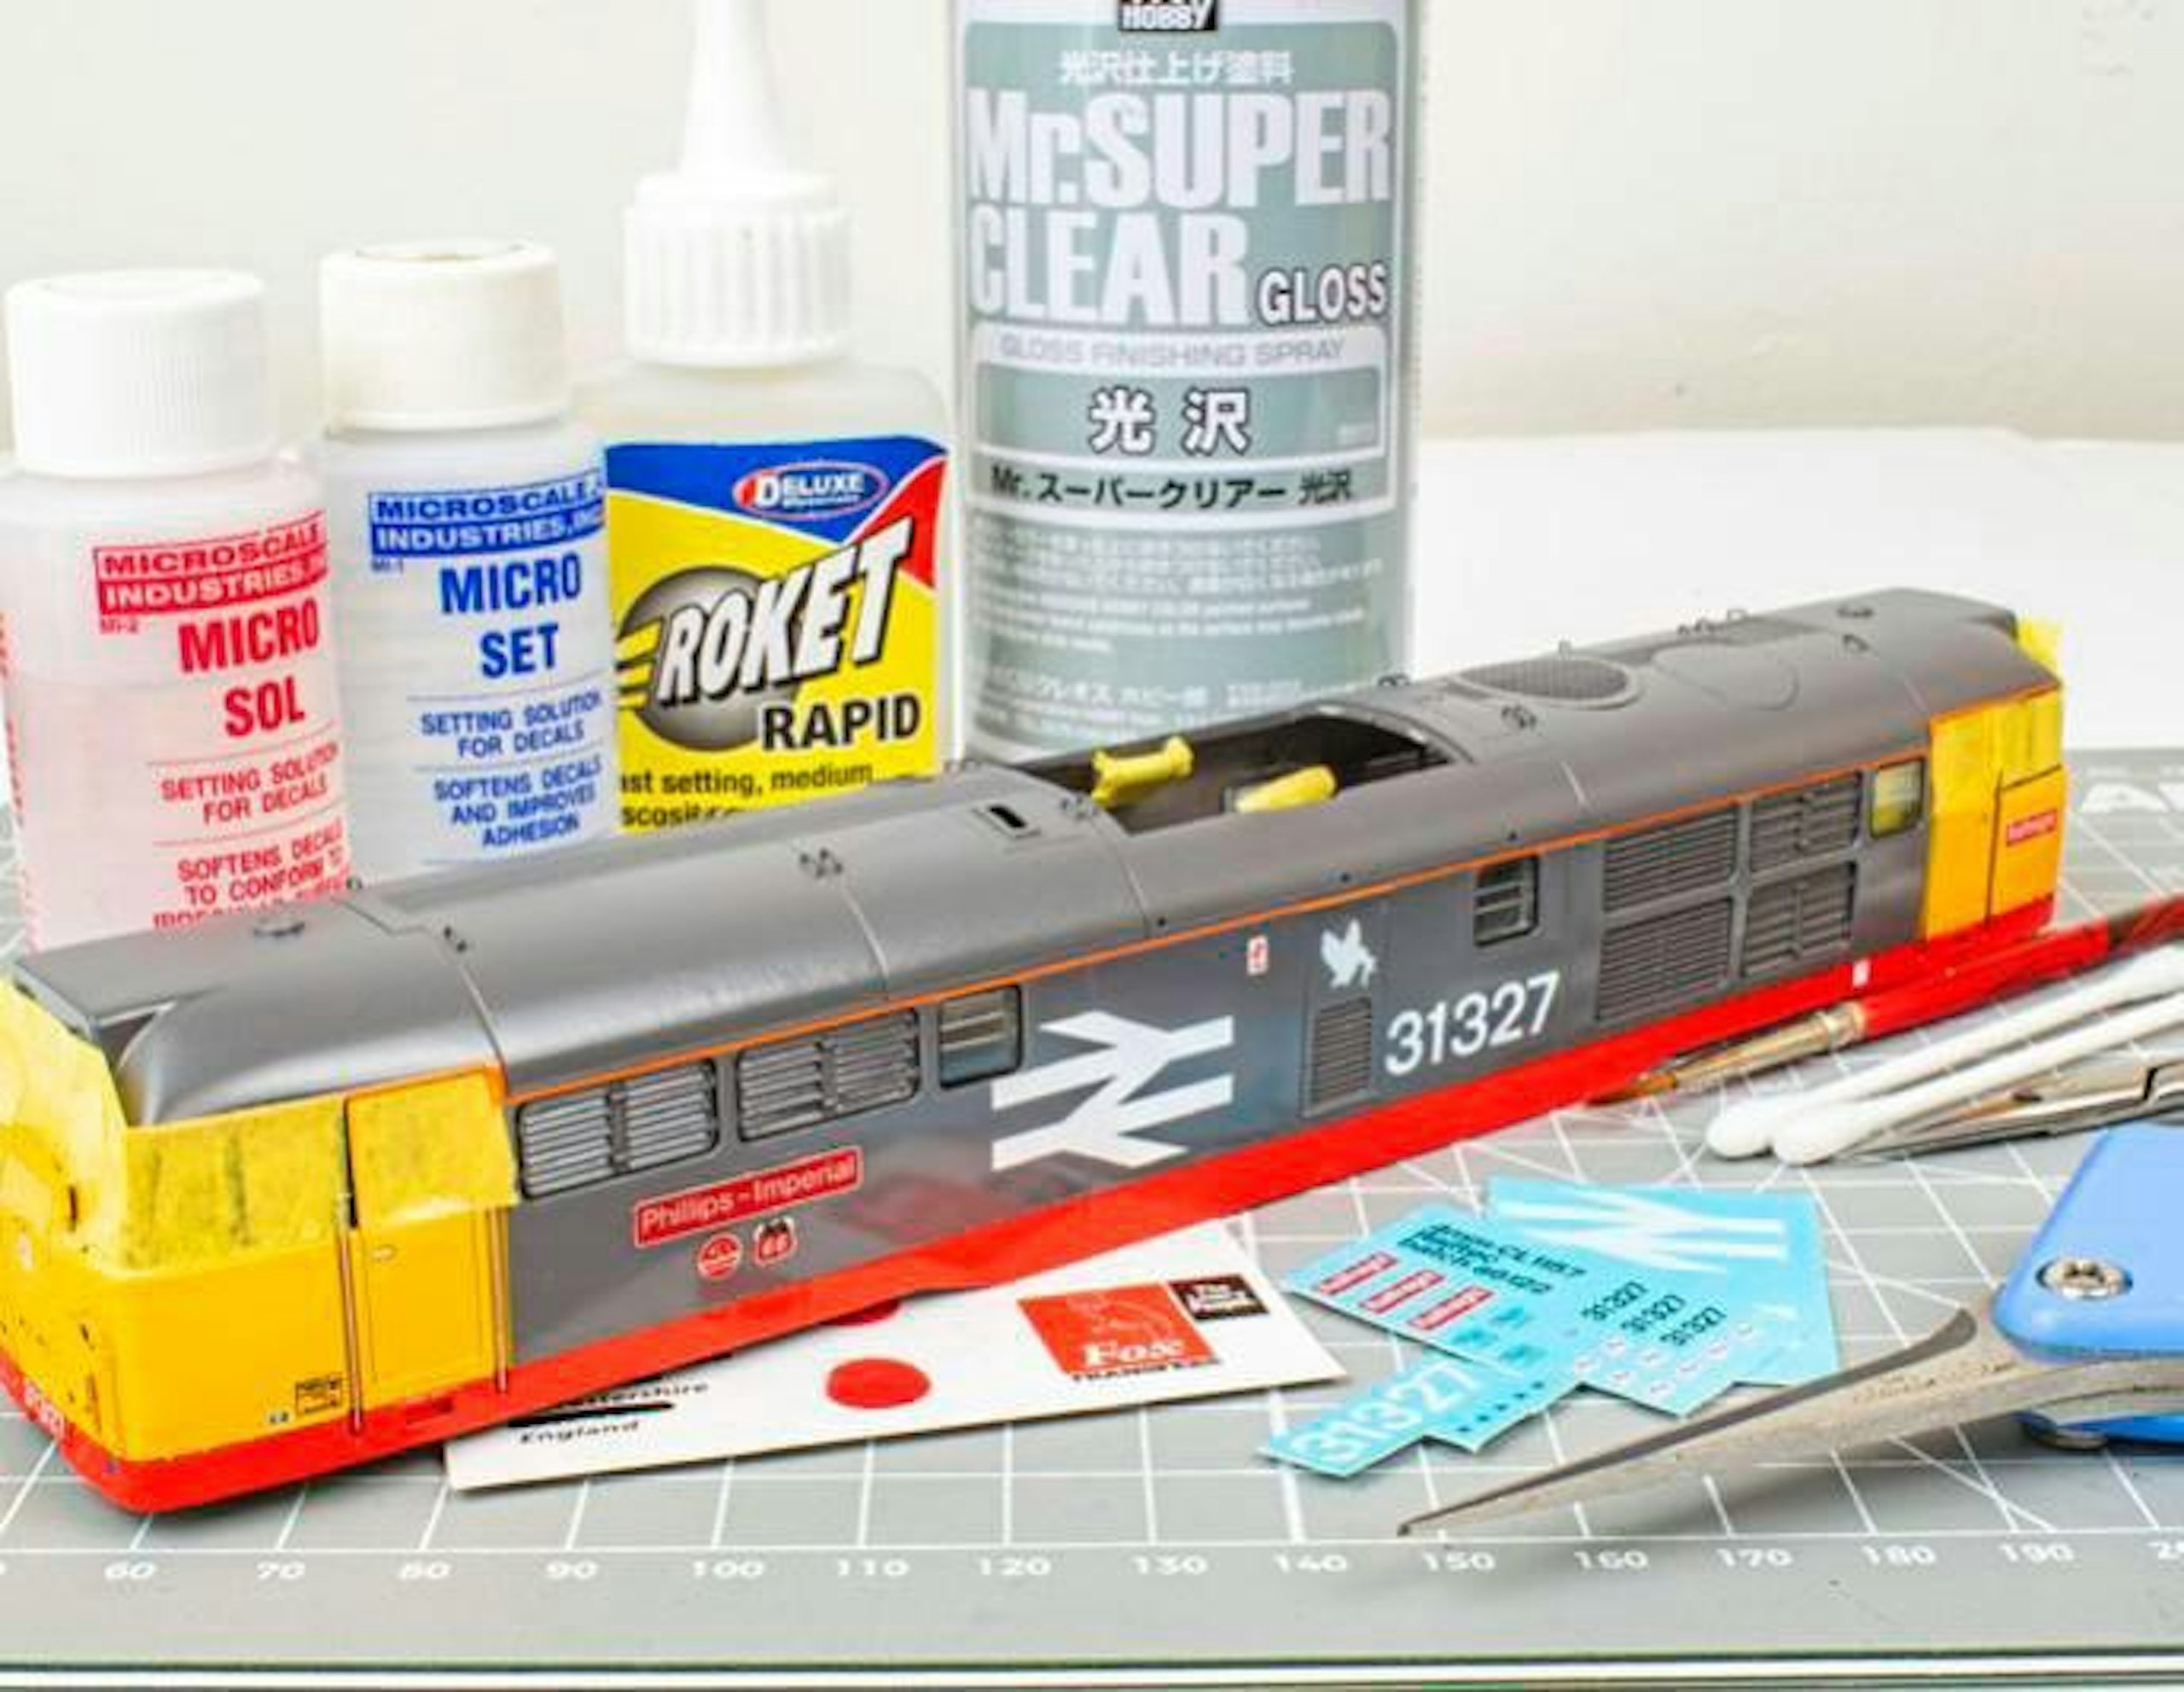
3 A quick reminder that I customised one of my Accurascale ‘31s’ last month, giving 31301 a new identity as the unique 31327. New decals came from Railtec and etched nameplates from Fox Transfers. See how it was done in MR357.
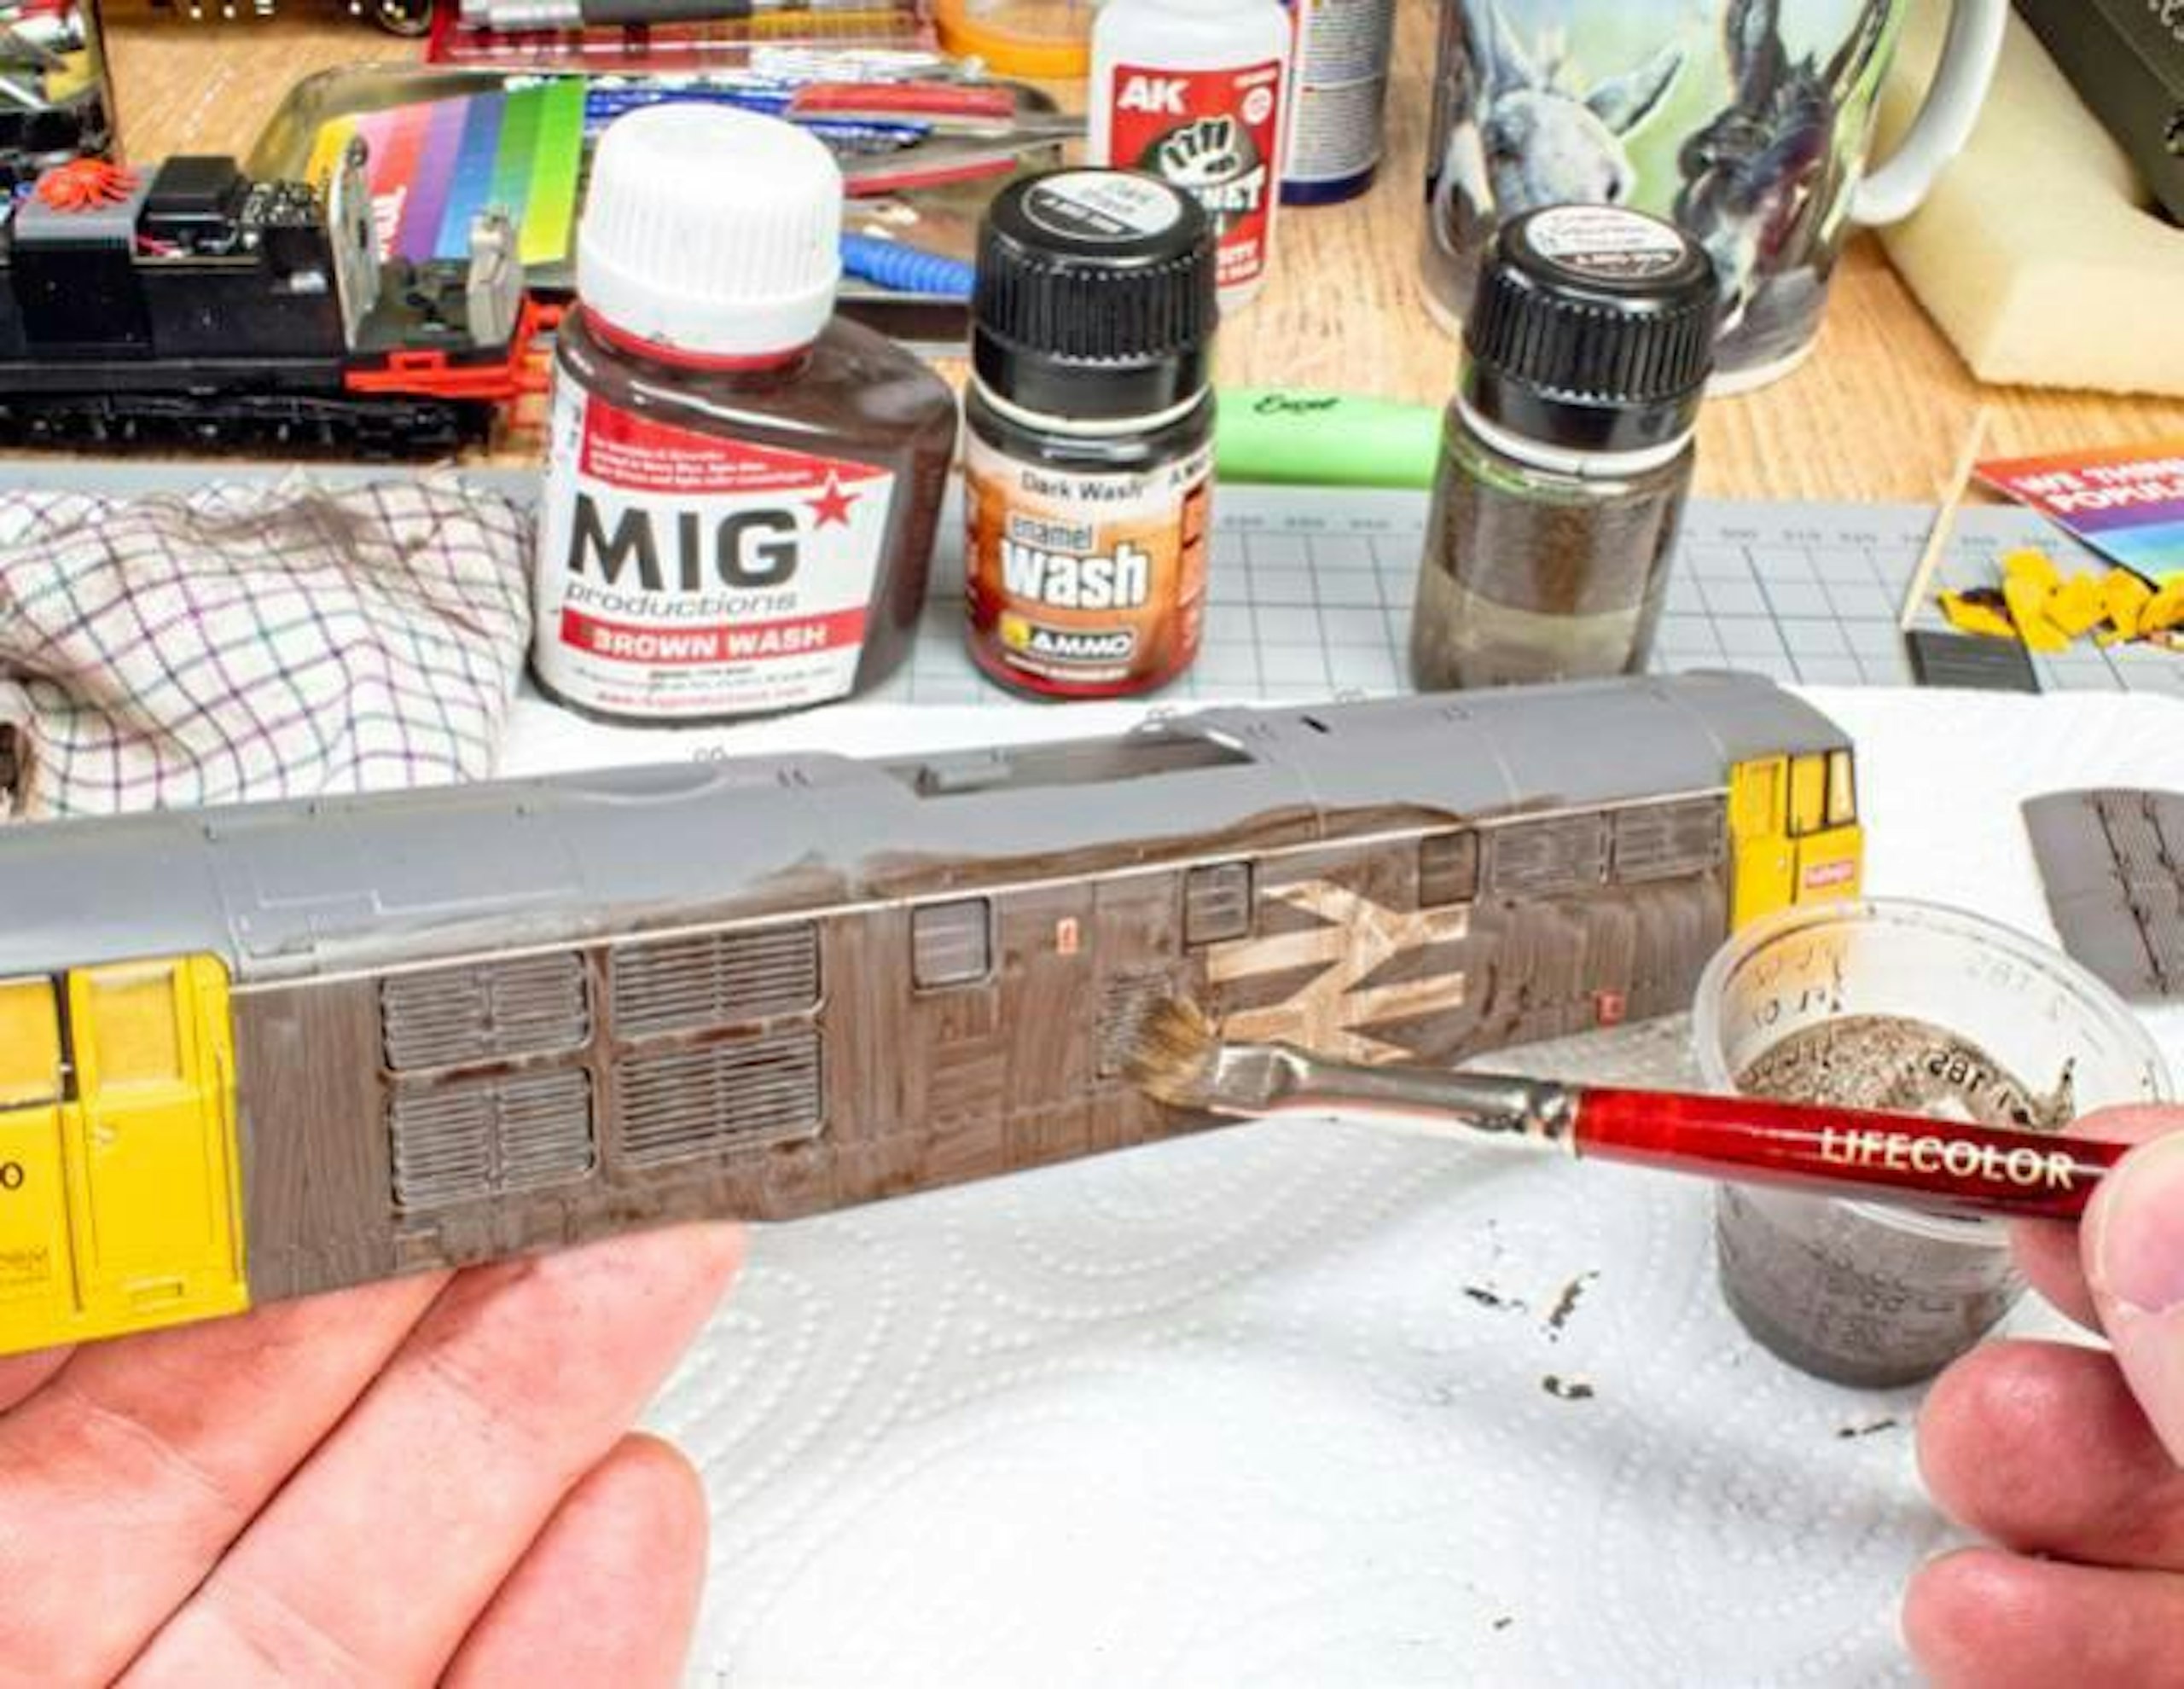
4 Weathering began by creating a dirty brown shade of weathering wash using MIG/AMMO enamel washes, brushed over a section of the body at a time and allowing it to begin drying (it starts turning to a matte sheen).
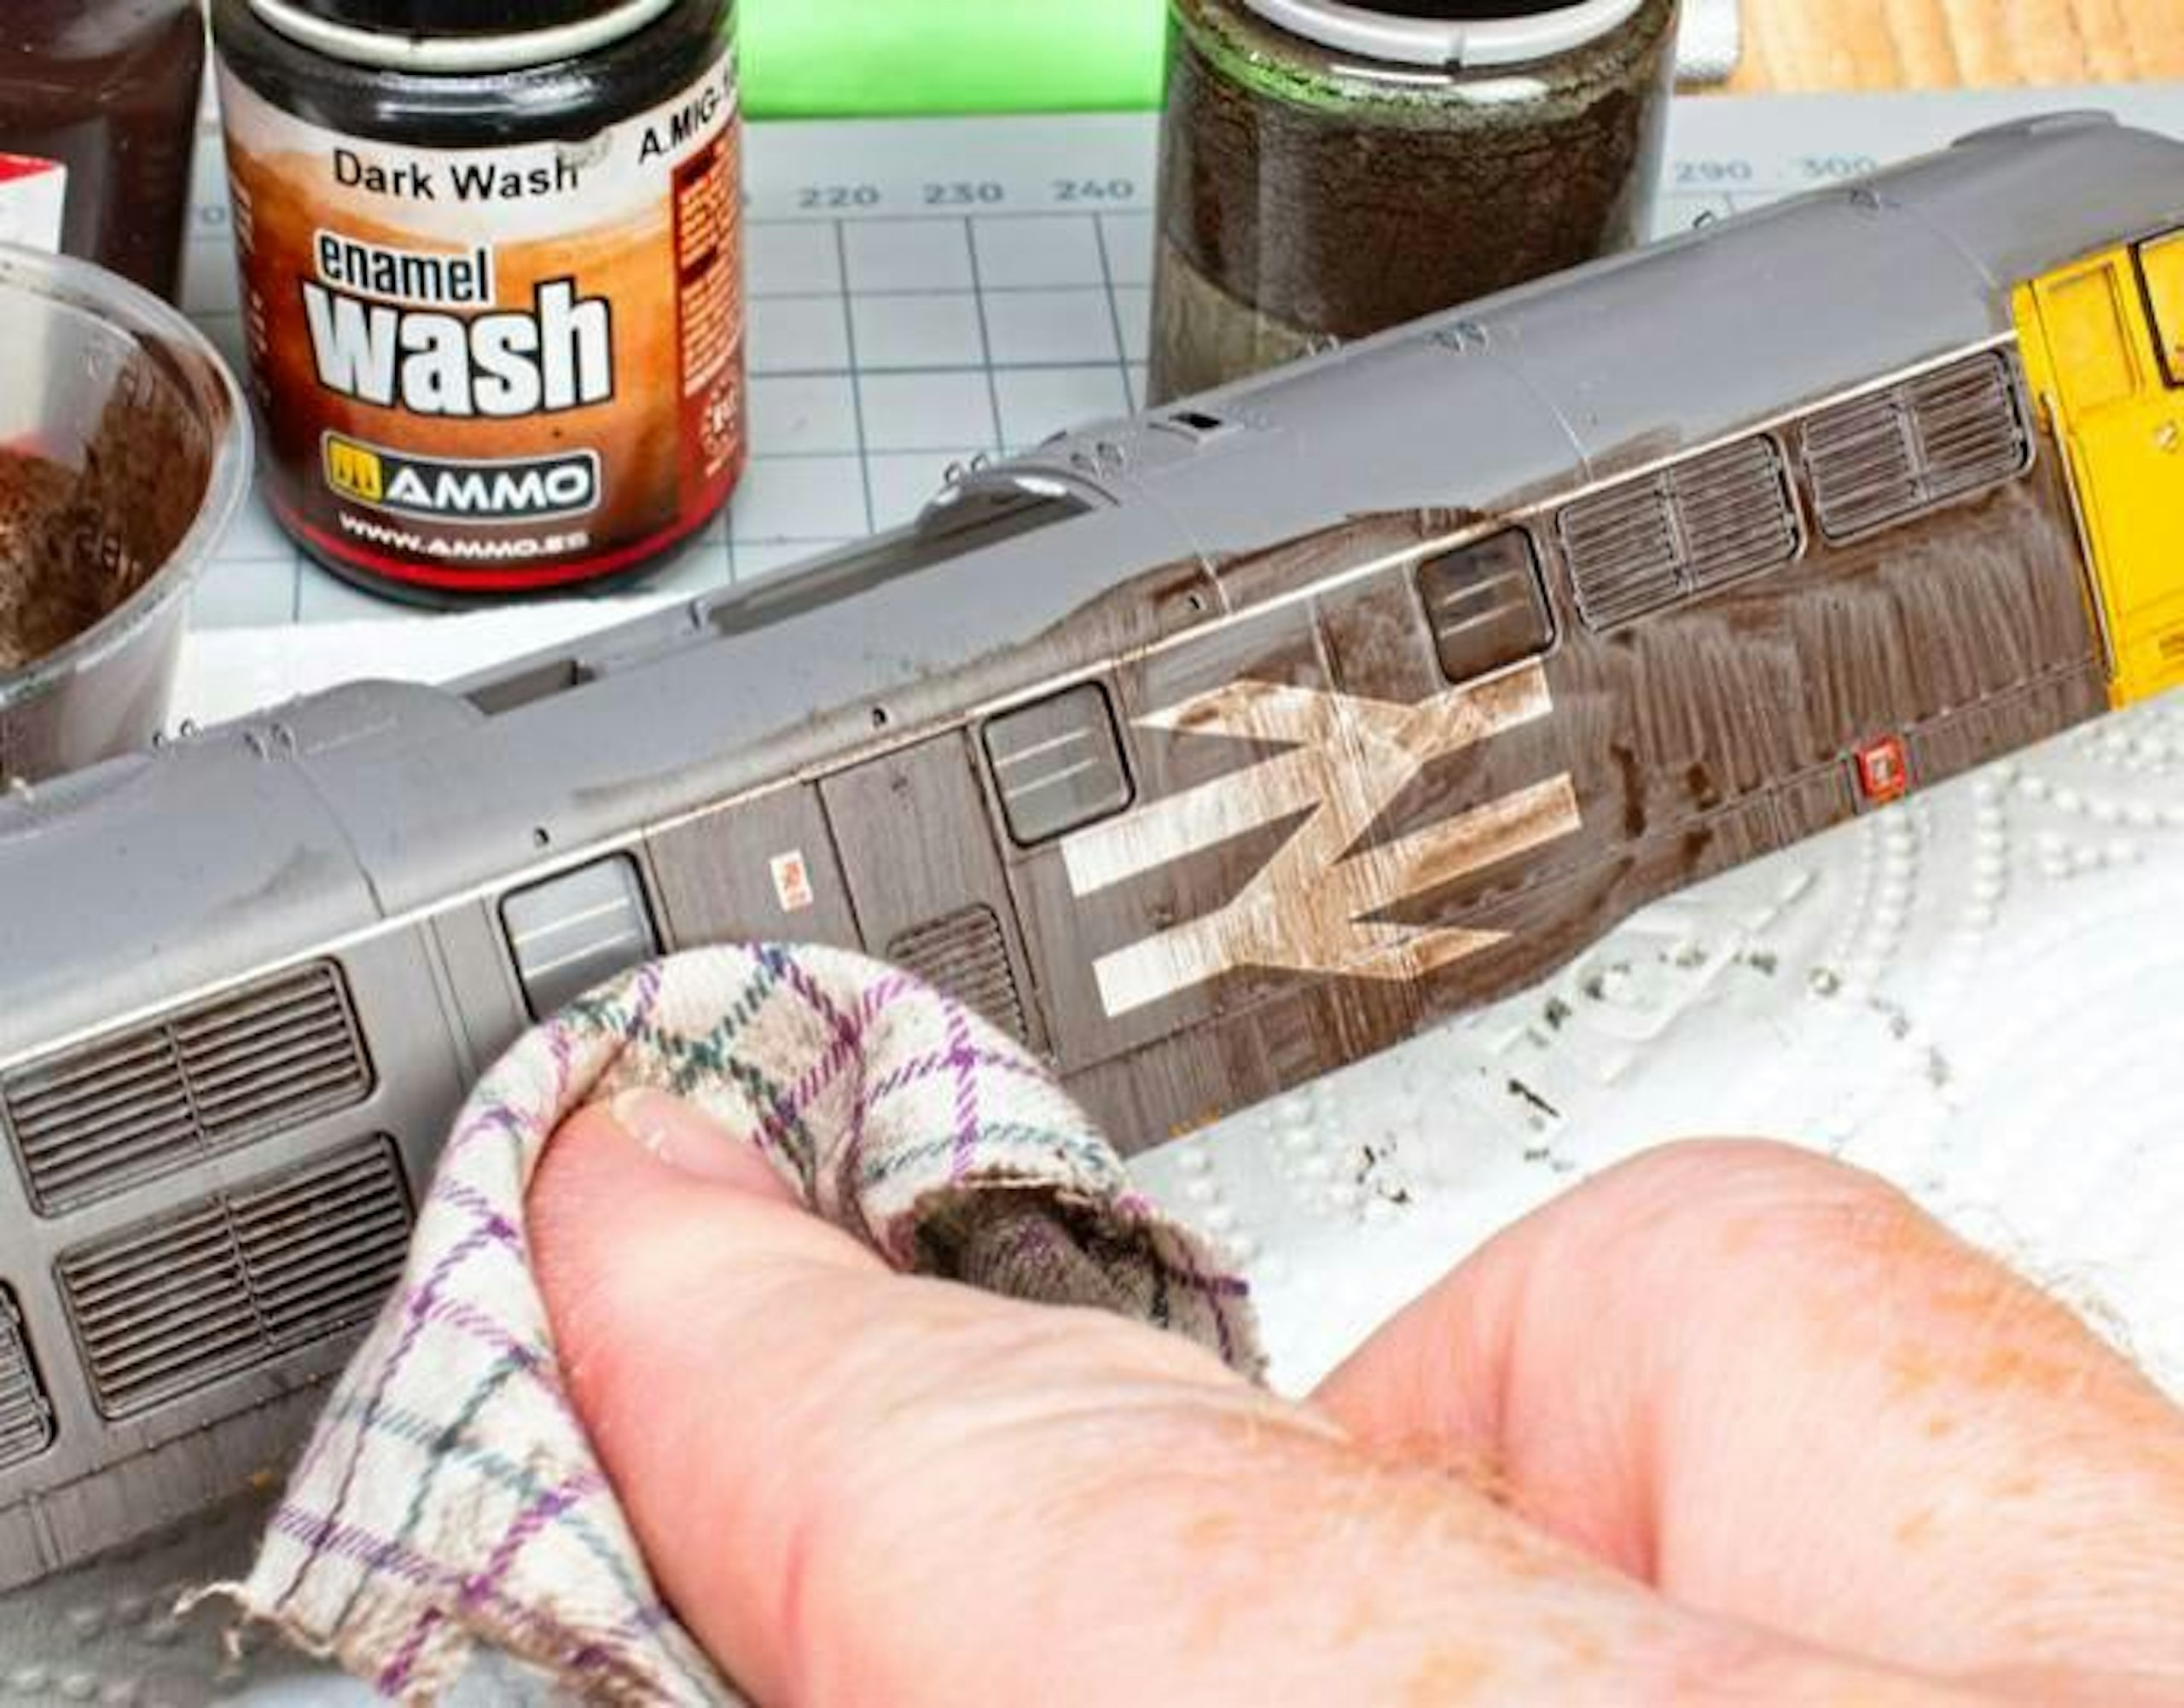
5 With a small piece of cotton rag (an old shirt is ideal), I began wiping away the bulk of the wash in vertical strokes relative to the body, leaving the dark pigment within the grilles and louvres, door seams and other recesses.
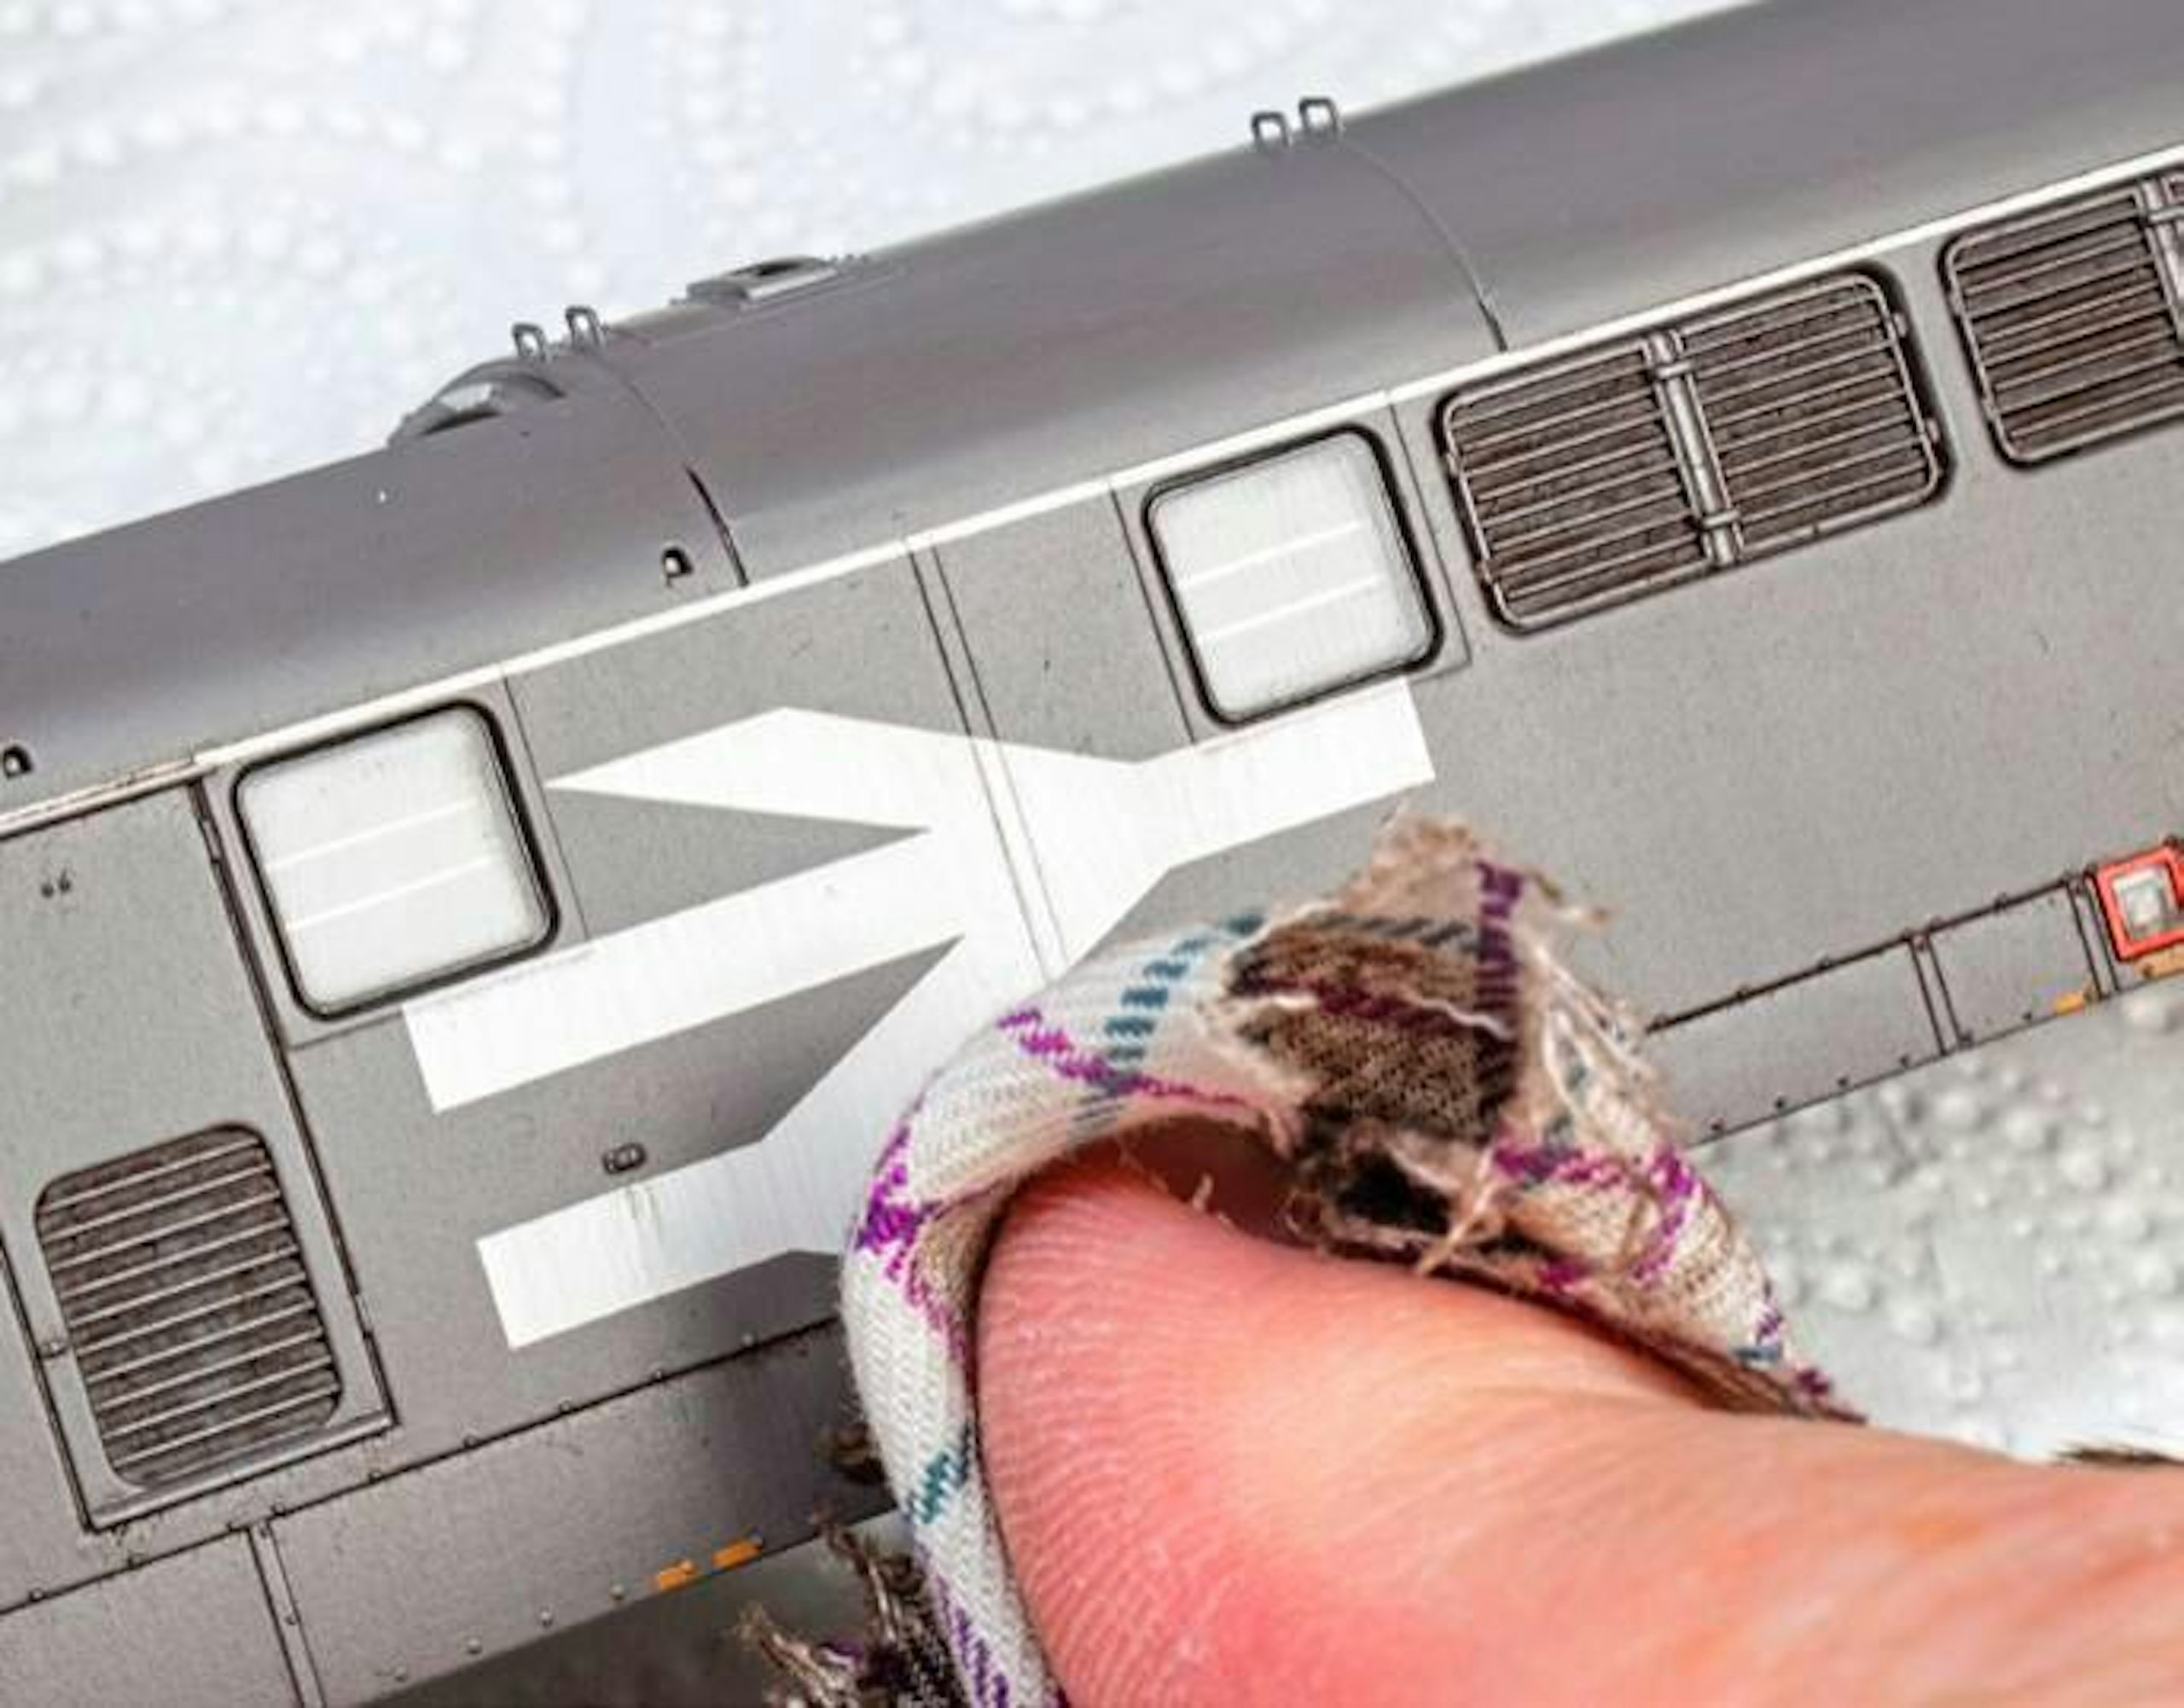
6 Enamel washes take hours to dry completely, so you have plenty of time to keep wiping with the rag until the desired effect is achieved. Switch to a clean rag as soon as it becomes clogged. Subtle streaking effects can be created.
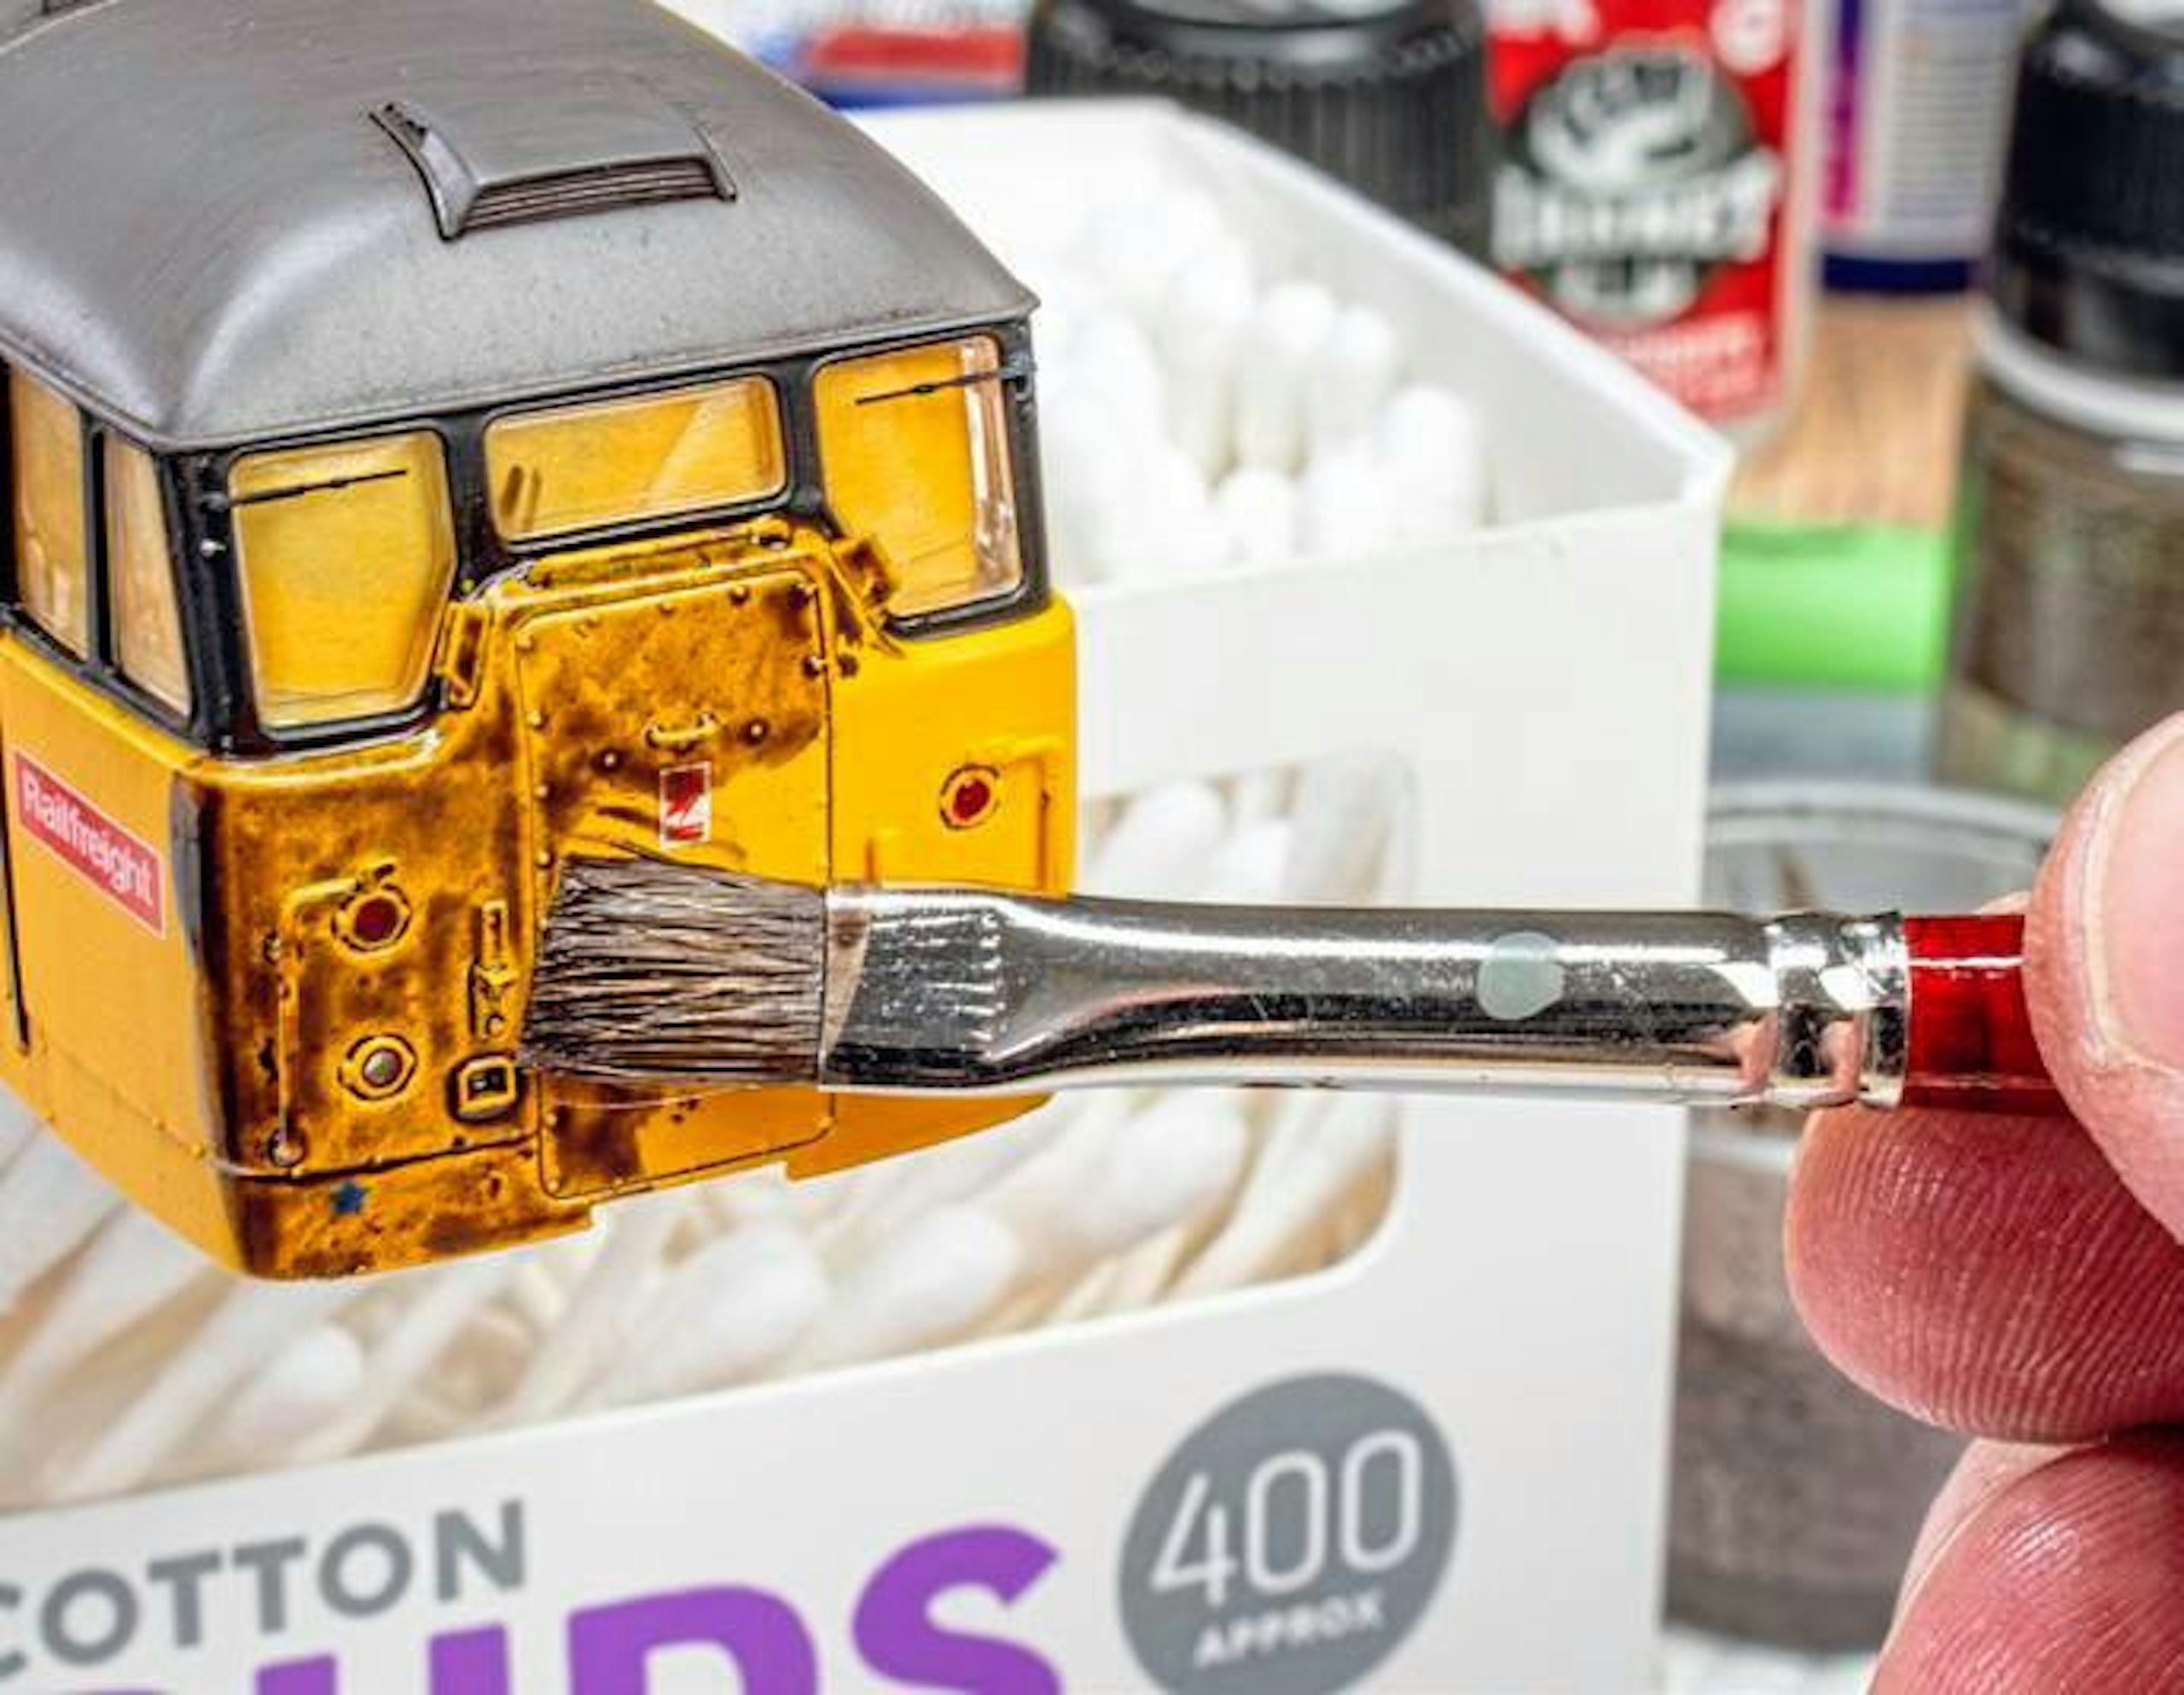
7 The process was repeated around the body sides and ends, one at a time. The ends of a ‘31’ are ideal for this, thanks to the recessed steps and panel seams.
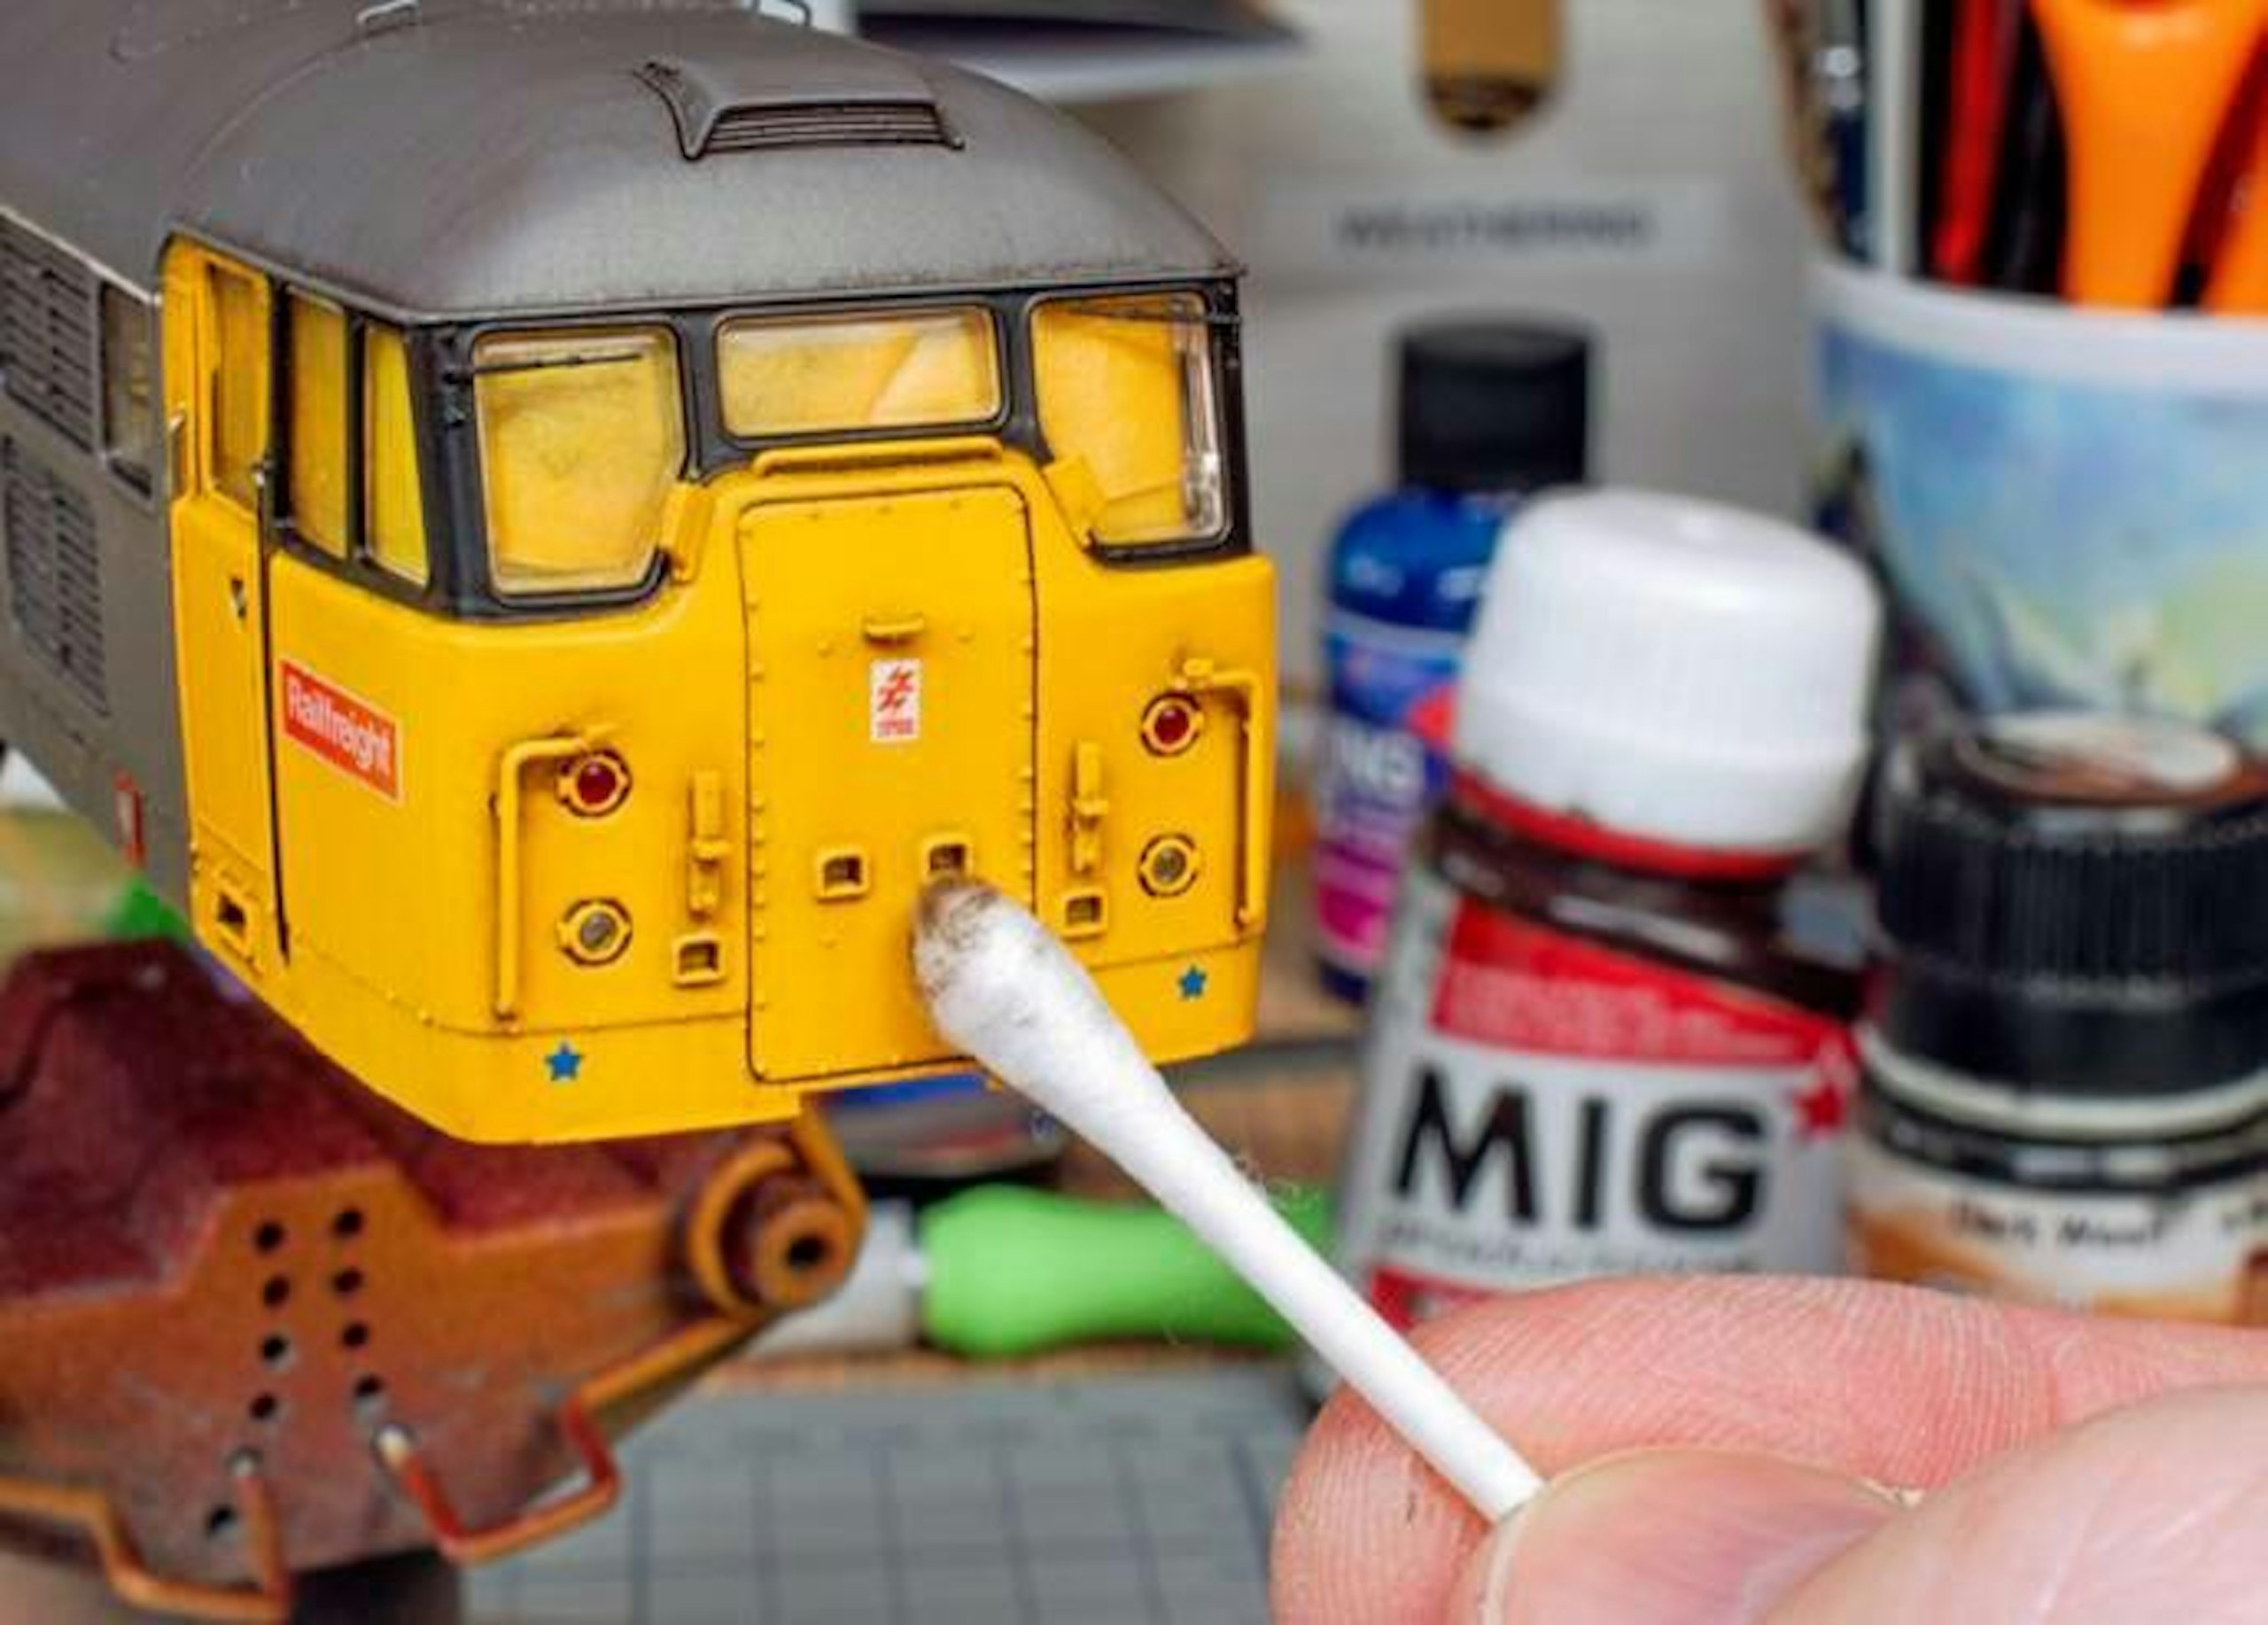
8 As you can see, most of the wash was removed, leaving the pigment to enhance the surface detail and introduce some subtle shading. Cotton buds were used on the cabs, as a rag could damage the finer details.
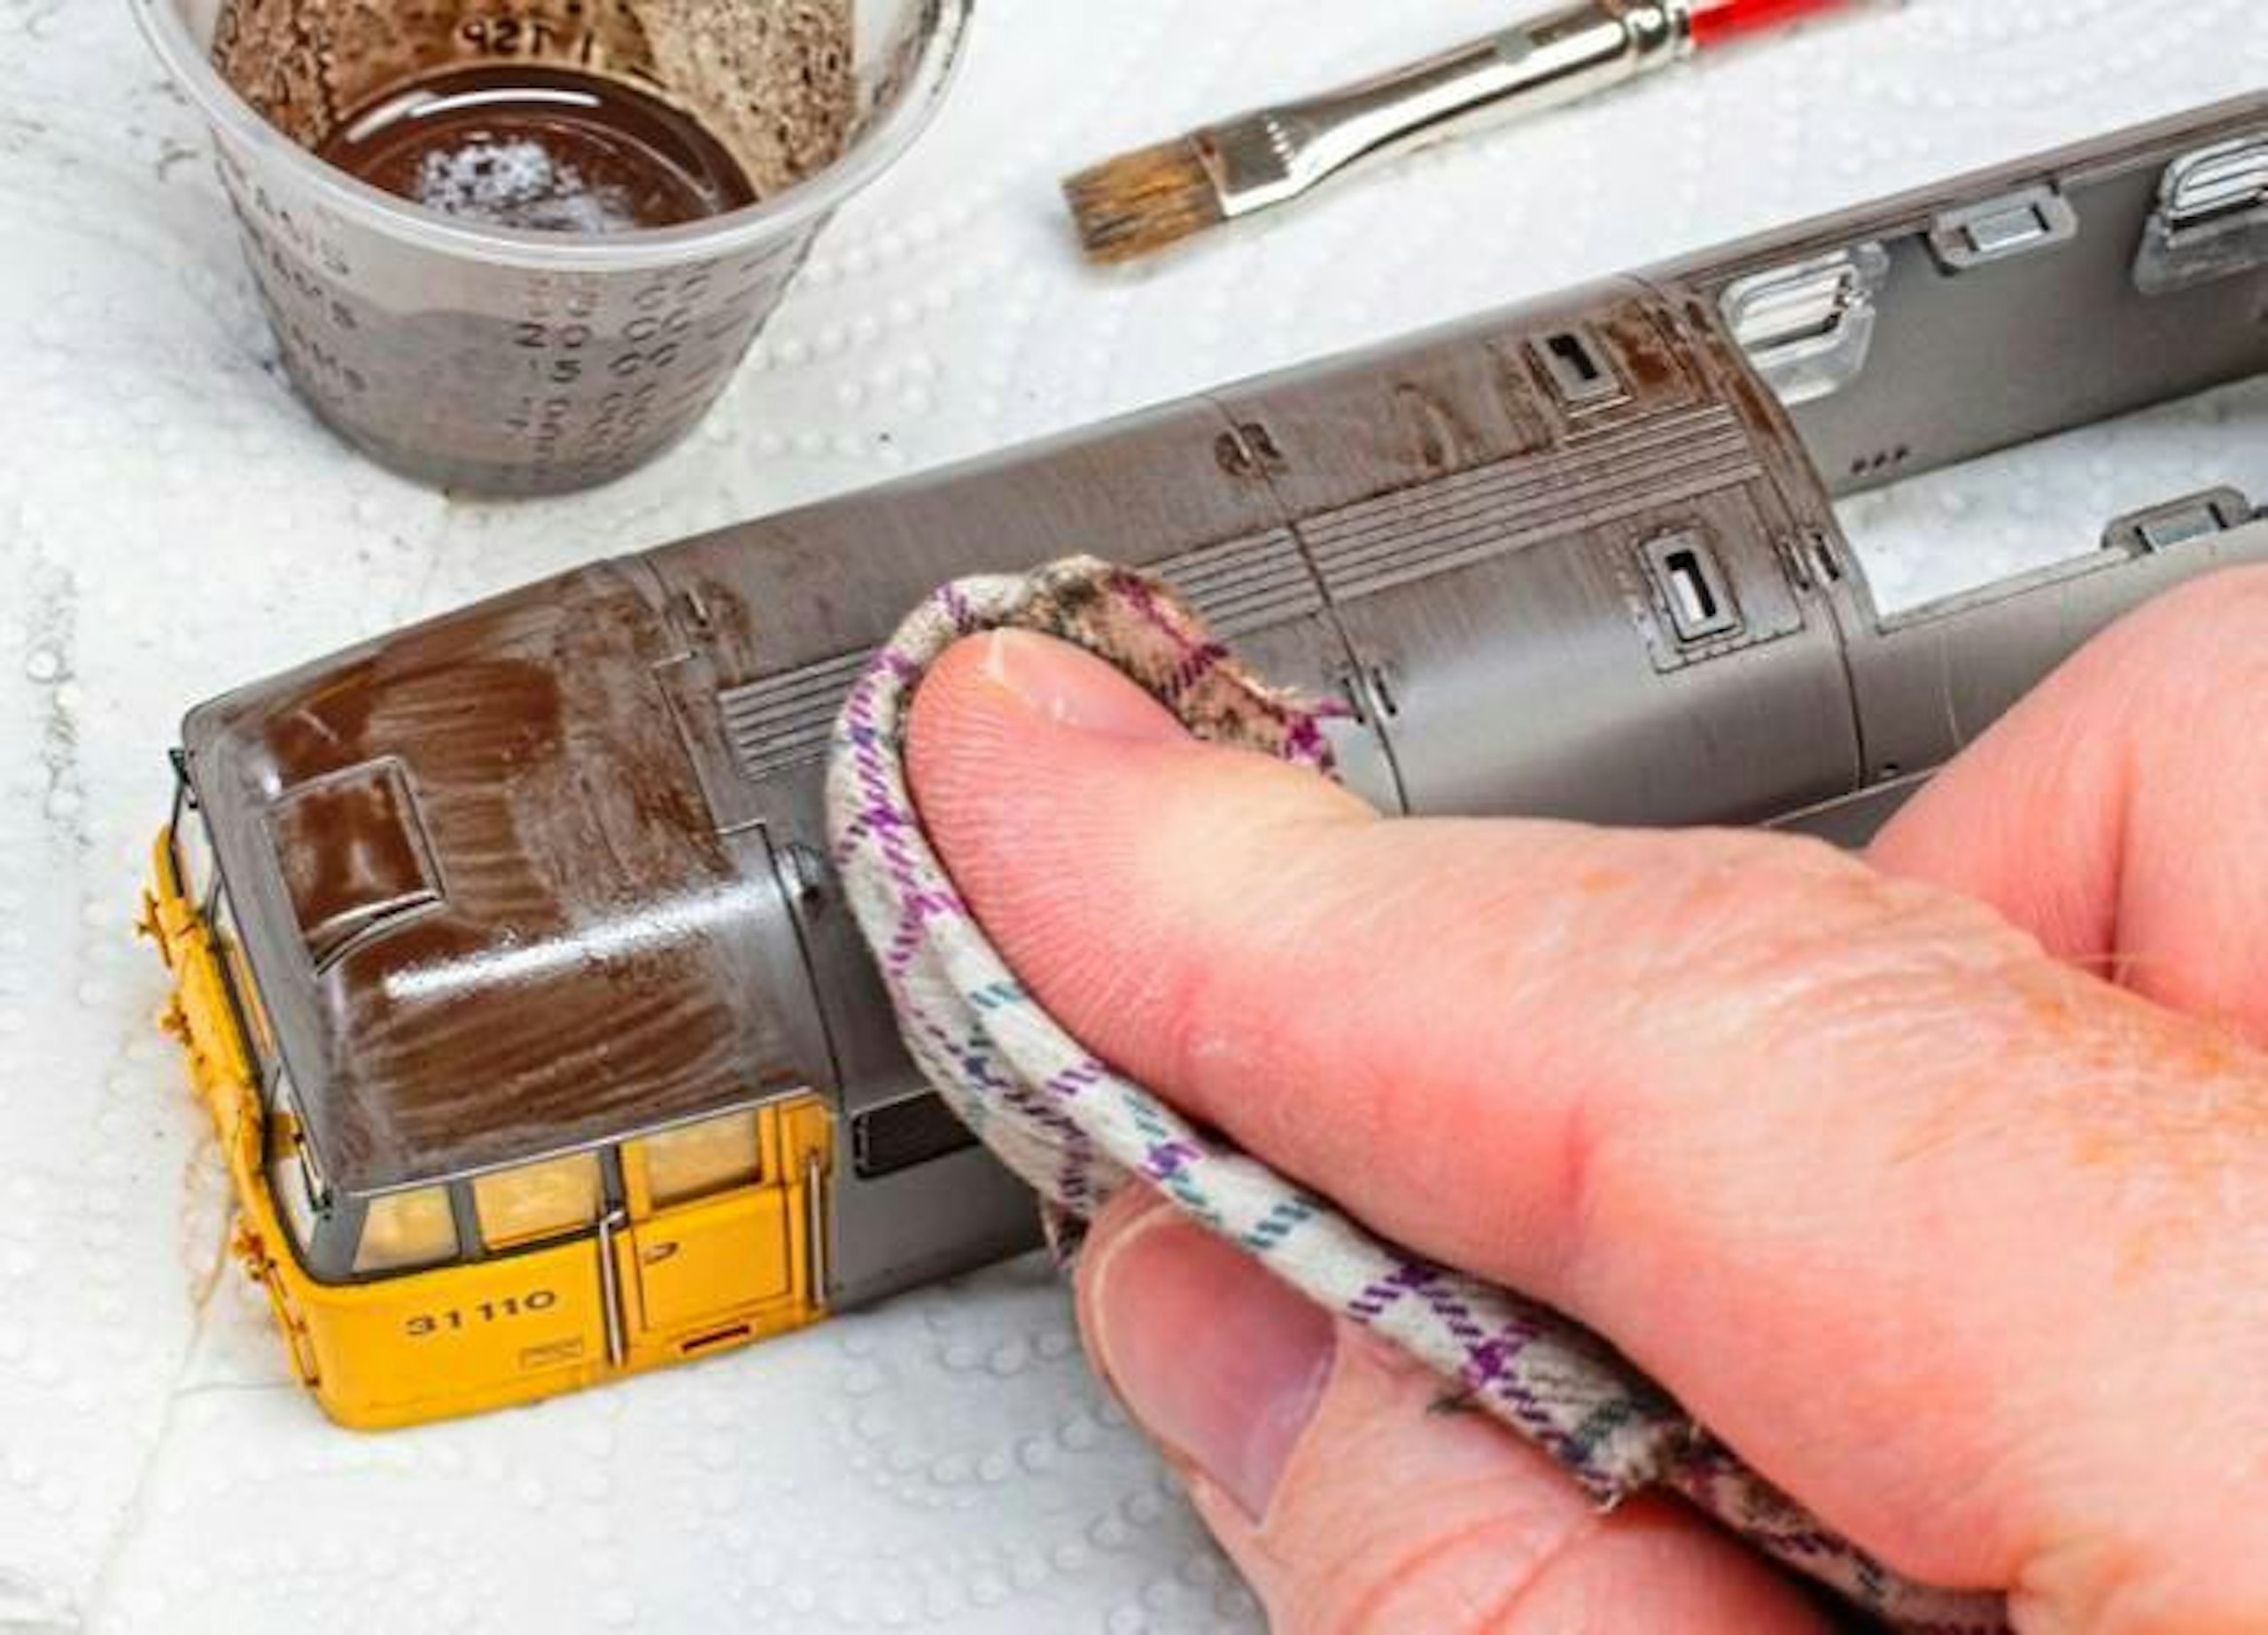
9 With the sides and ends treated, the wash was brushed over the roof, working it into the panel seams, before wiping most of it away with a rag, working laterally so any remaining streaks look like weather staining induced by gravity.
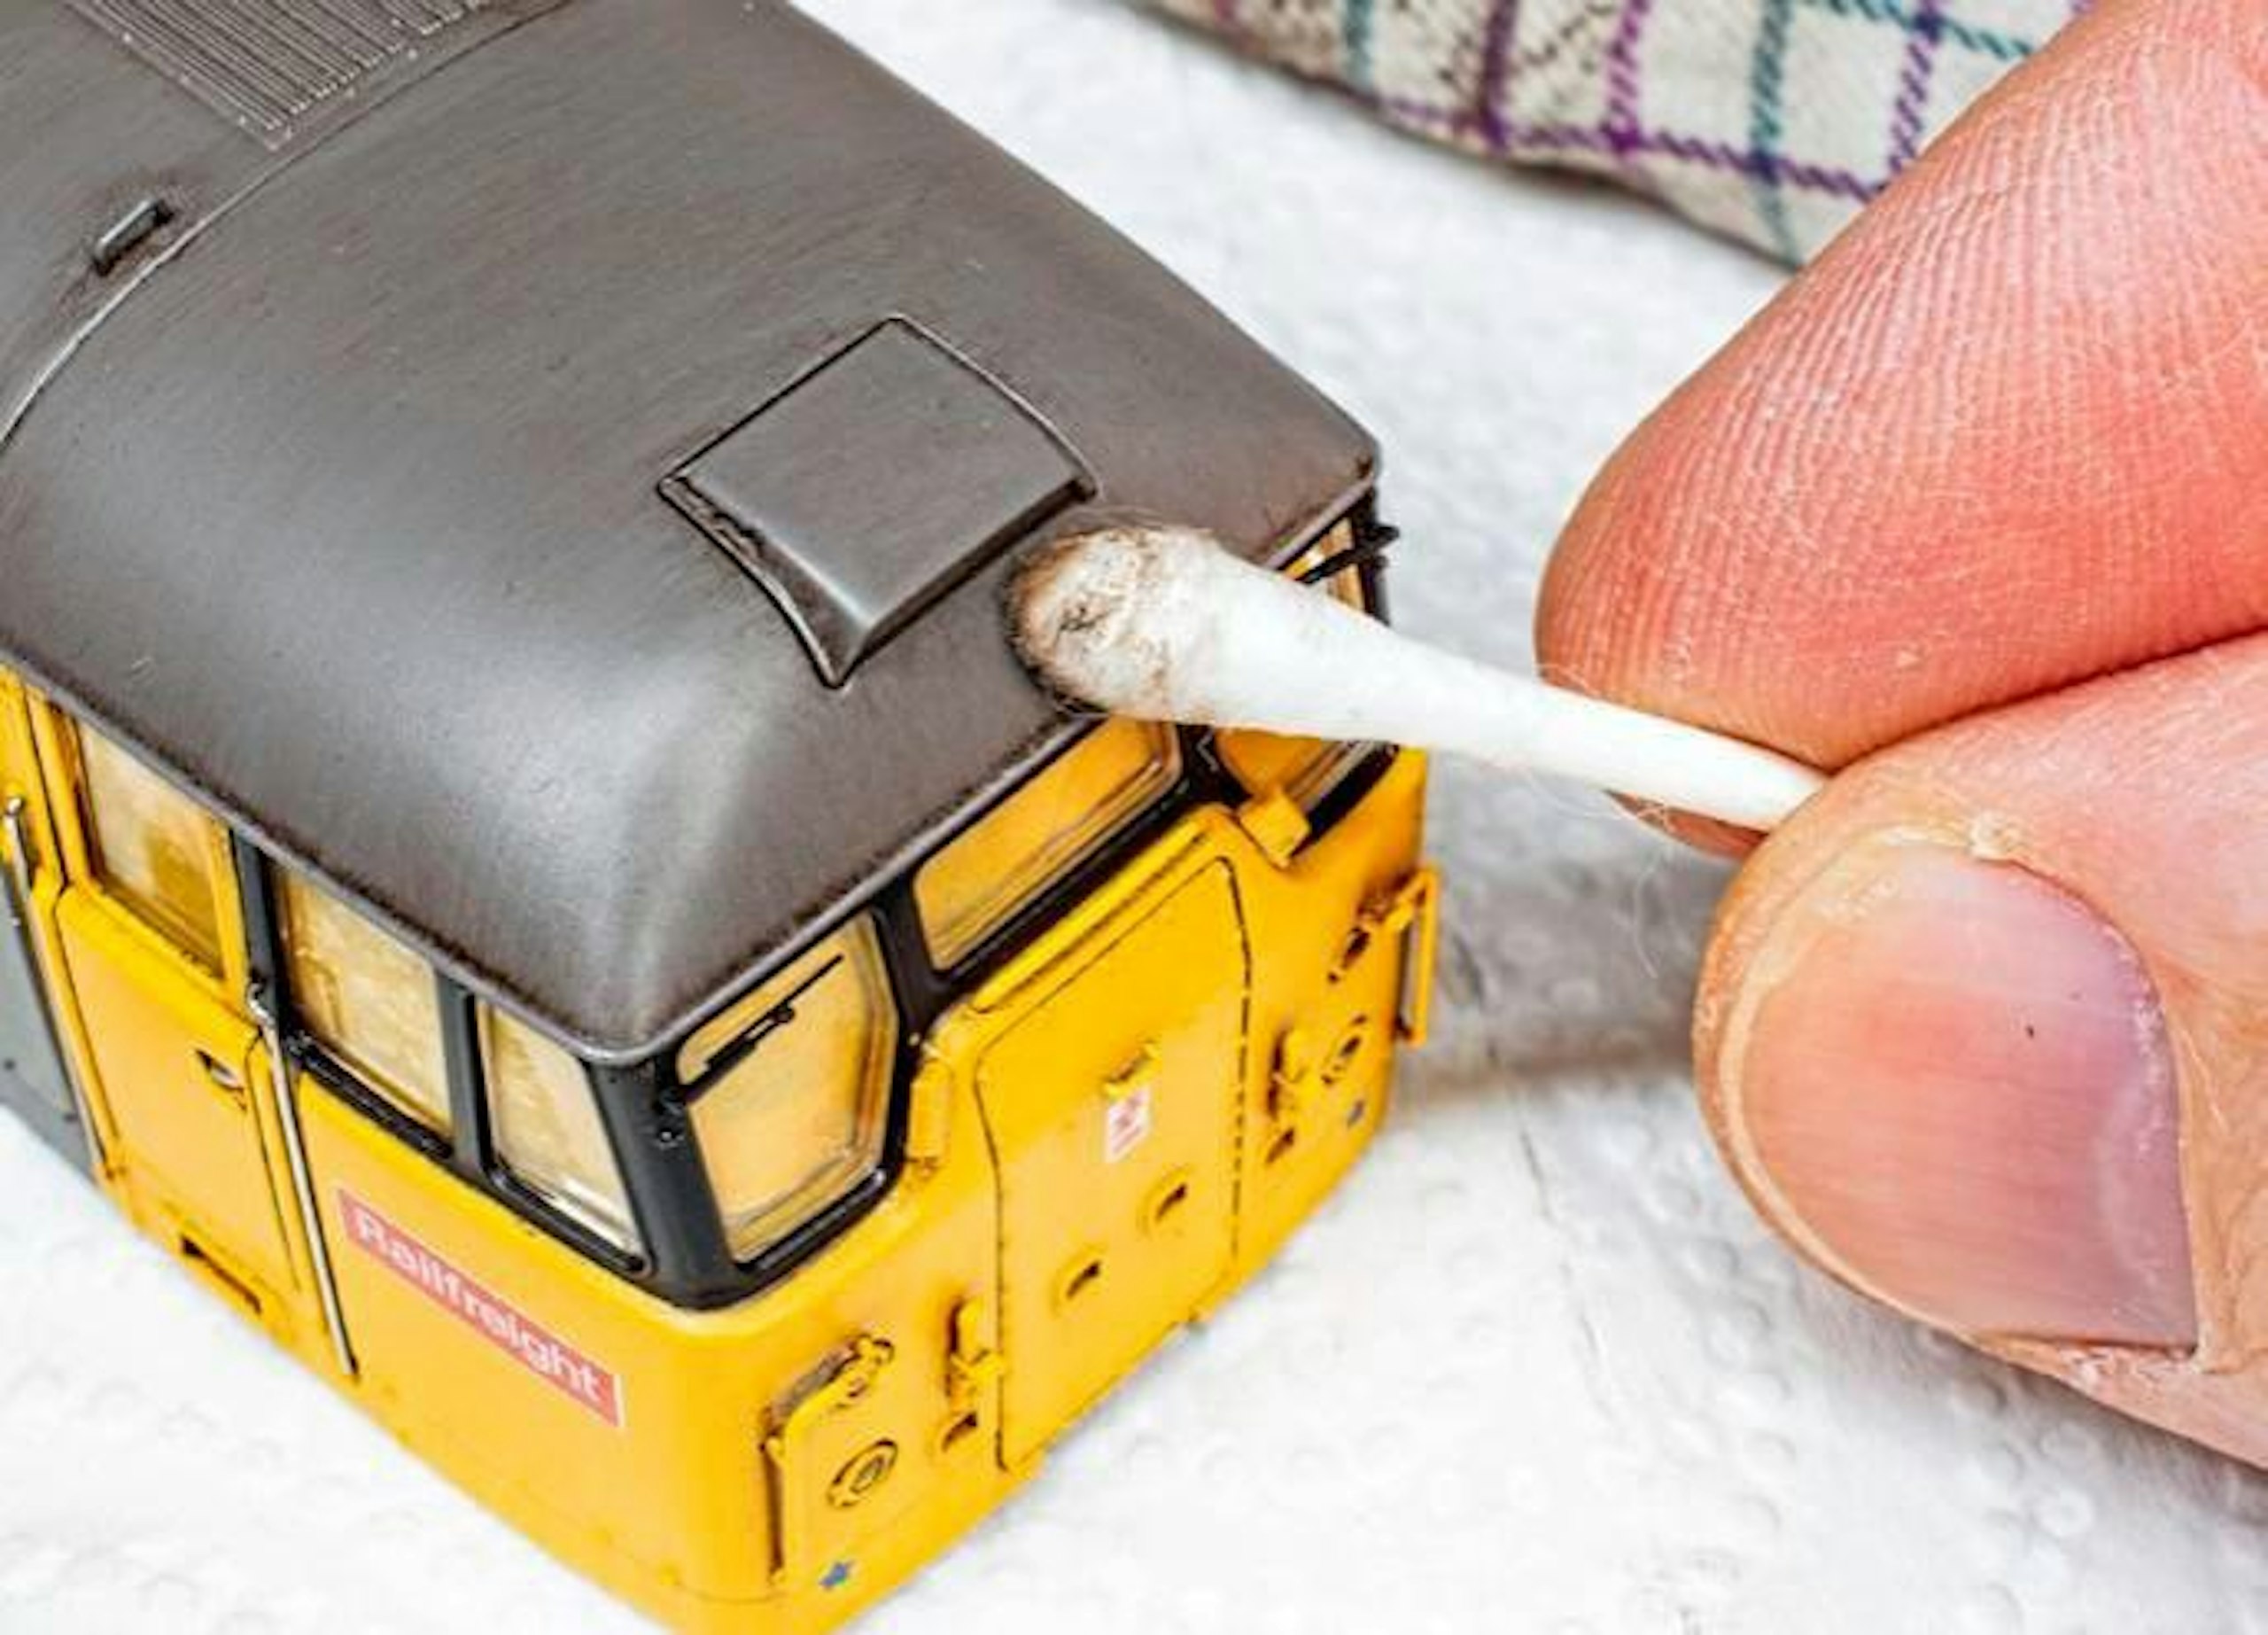
10 The rag removed the bulk of the excess wash, but cotton swabs are better for creating more subtle effects, especially over the cab roofs. Note the dark staining retained around the horn vent and within the gutter rail.
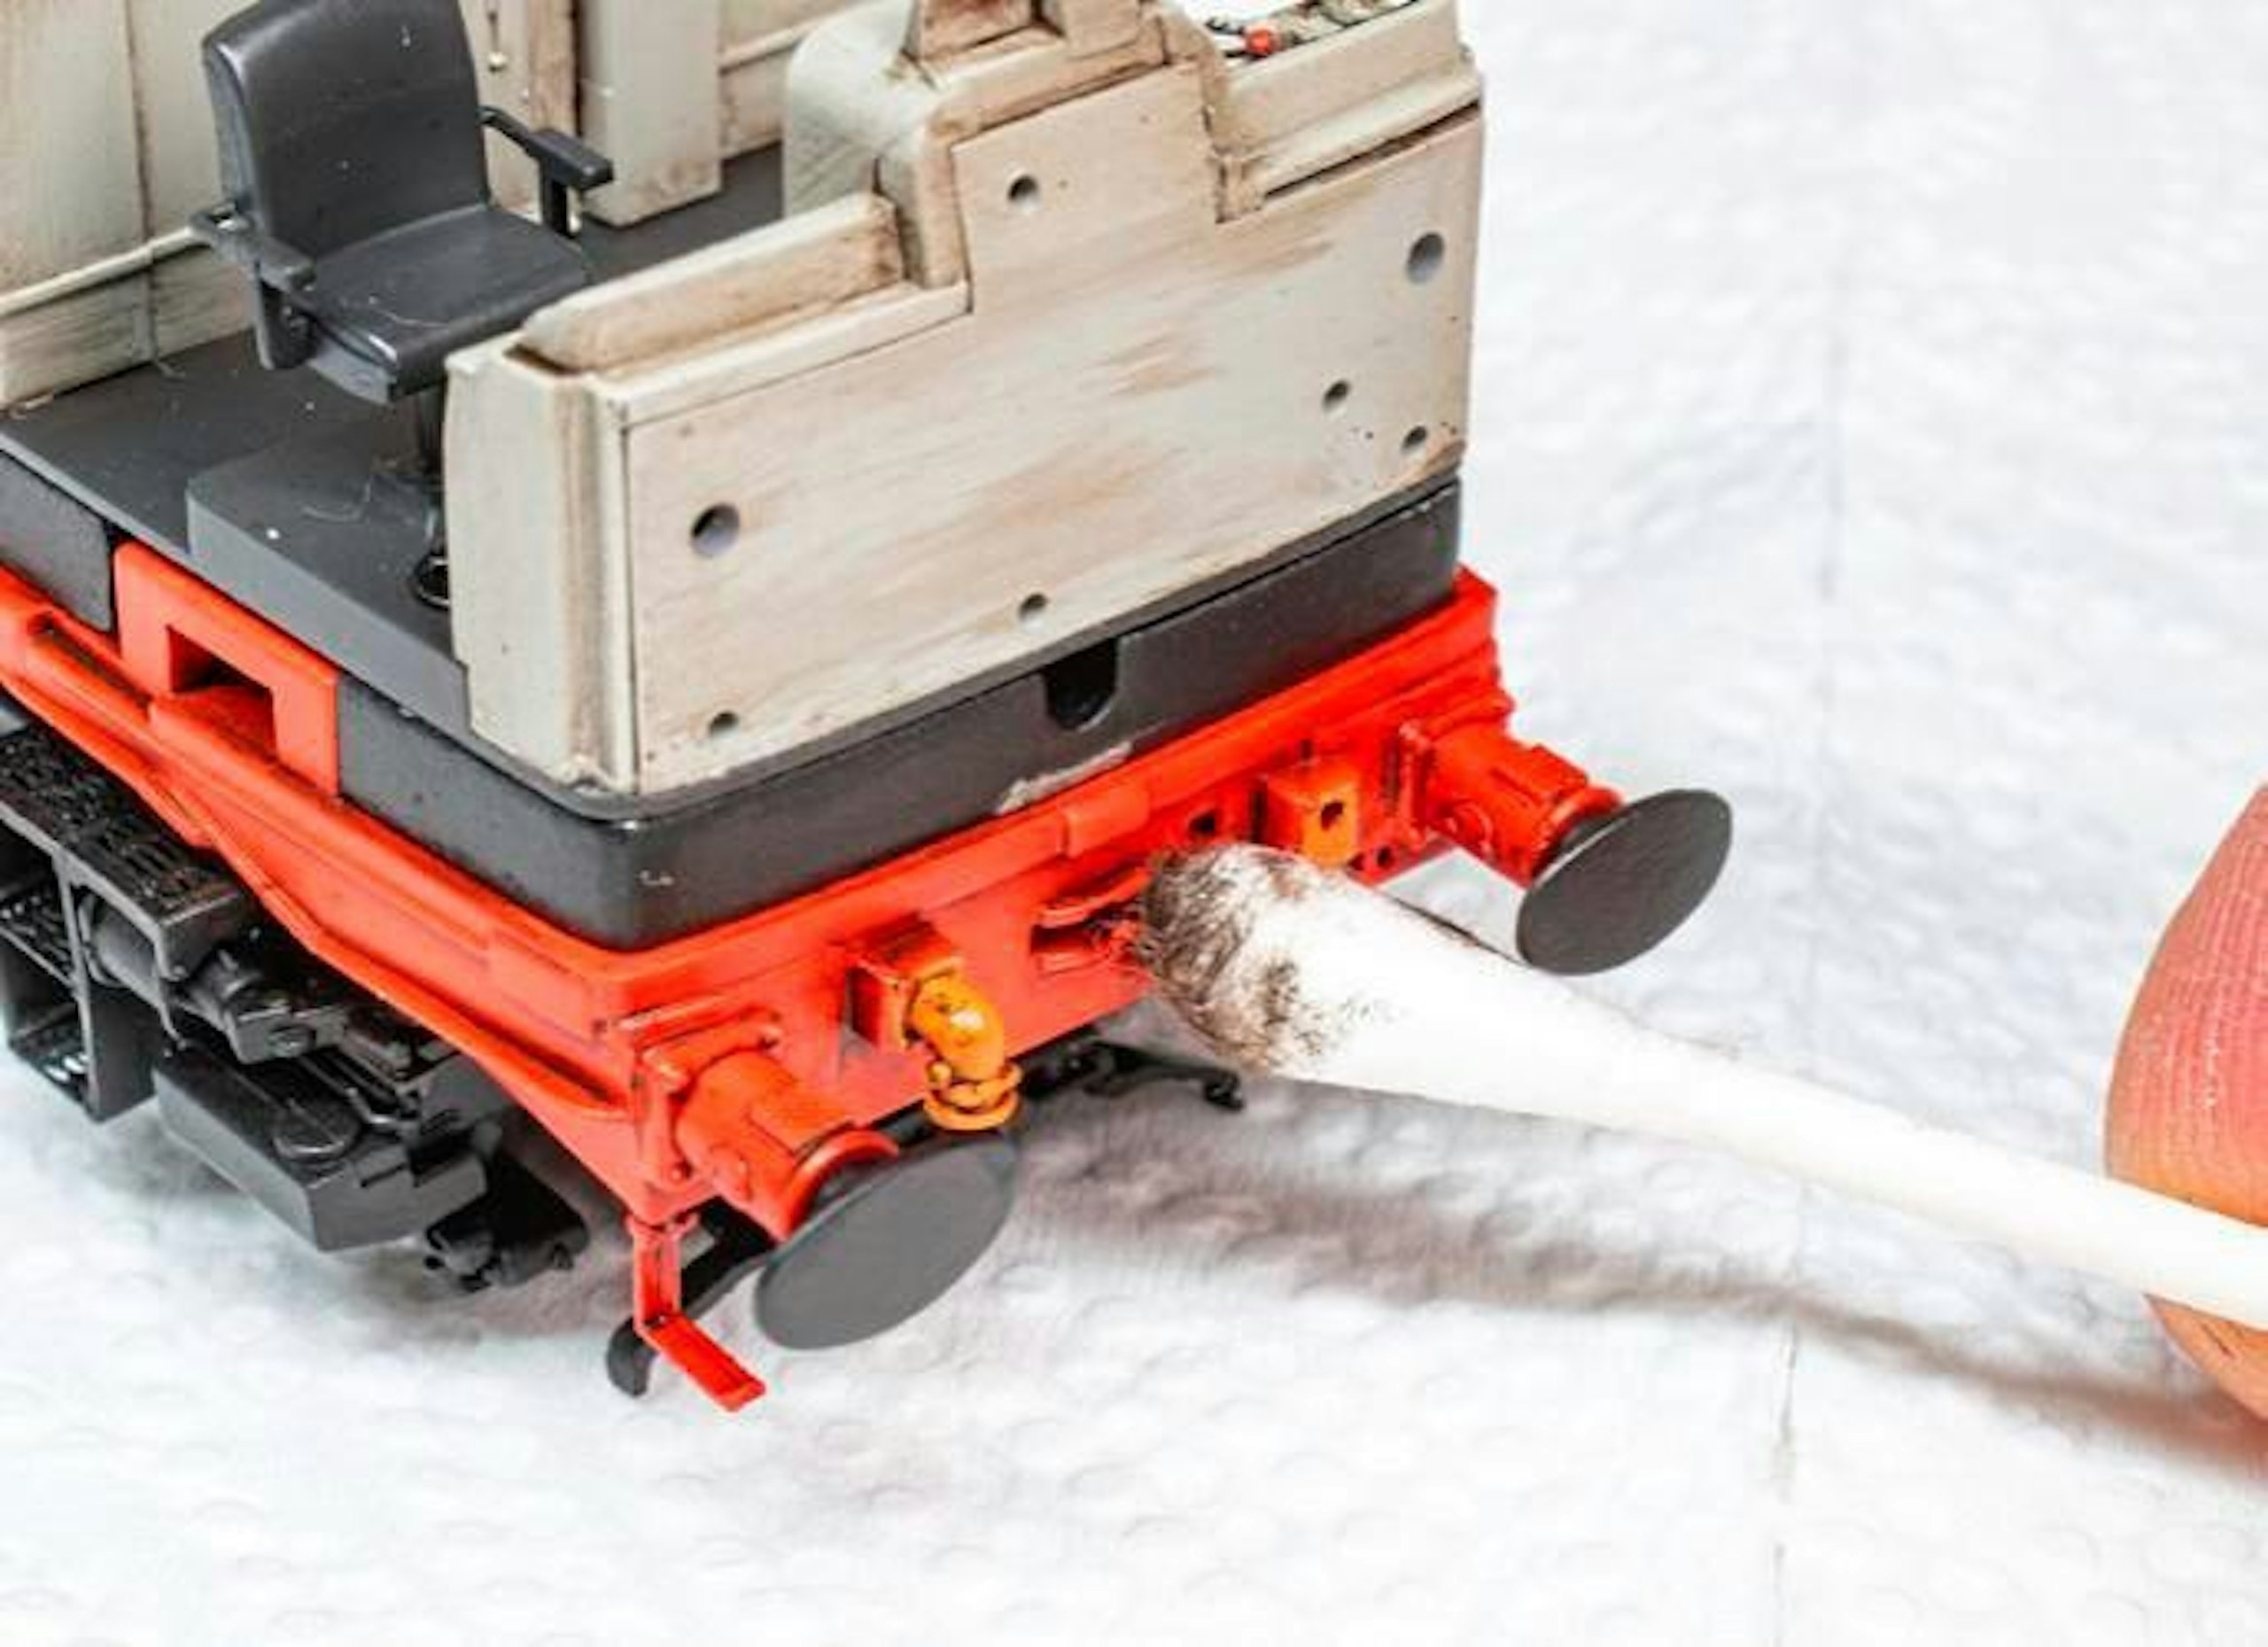
11 The red bufferbeams were treated with the wash, allowing the pigment to settle in all the nooks and crannies. The detail, especially on the buffershanks, now begins to ‘pop’. This is easier to do now before brake pipes are installed.
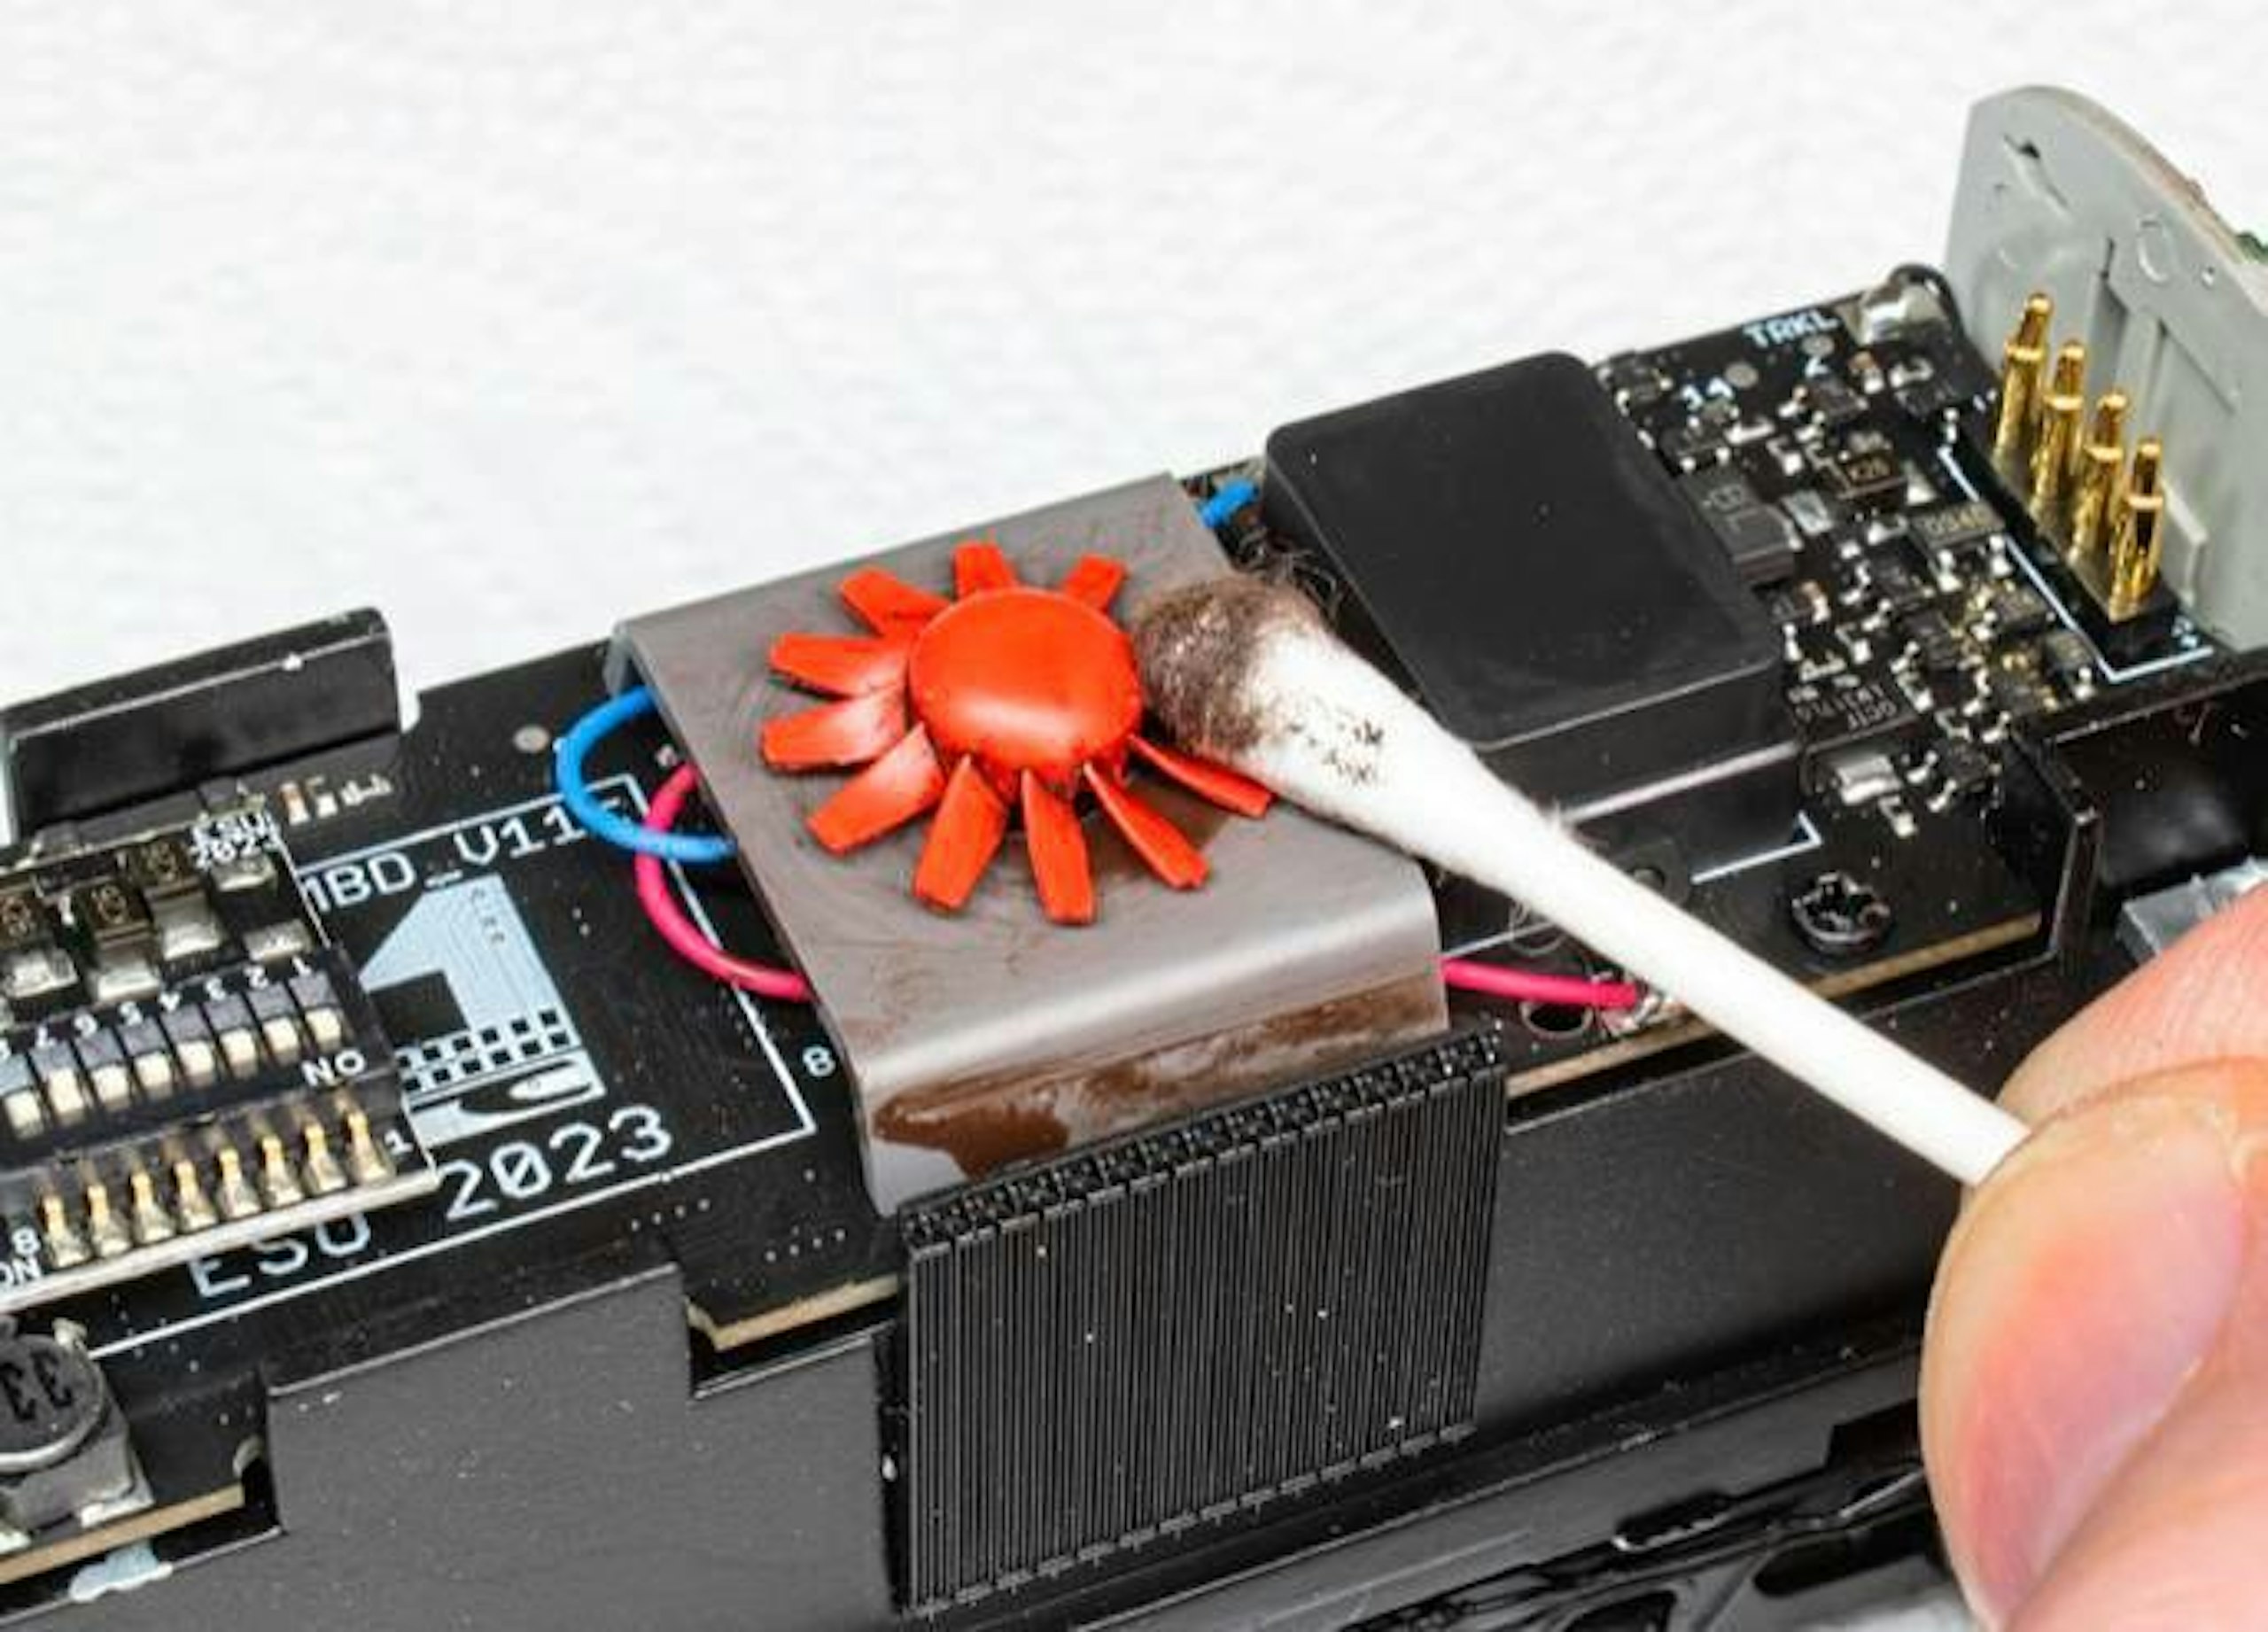
12 The pristine red fan is visible through the rooftop grille, so it needed toning down with some of the weathering wash blend, leaving pigment between the blades.
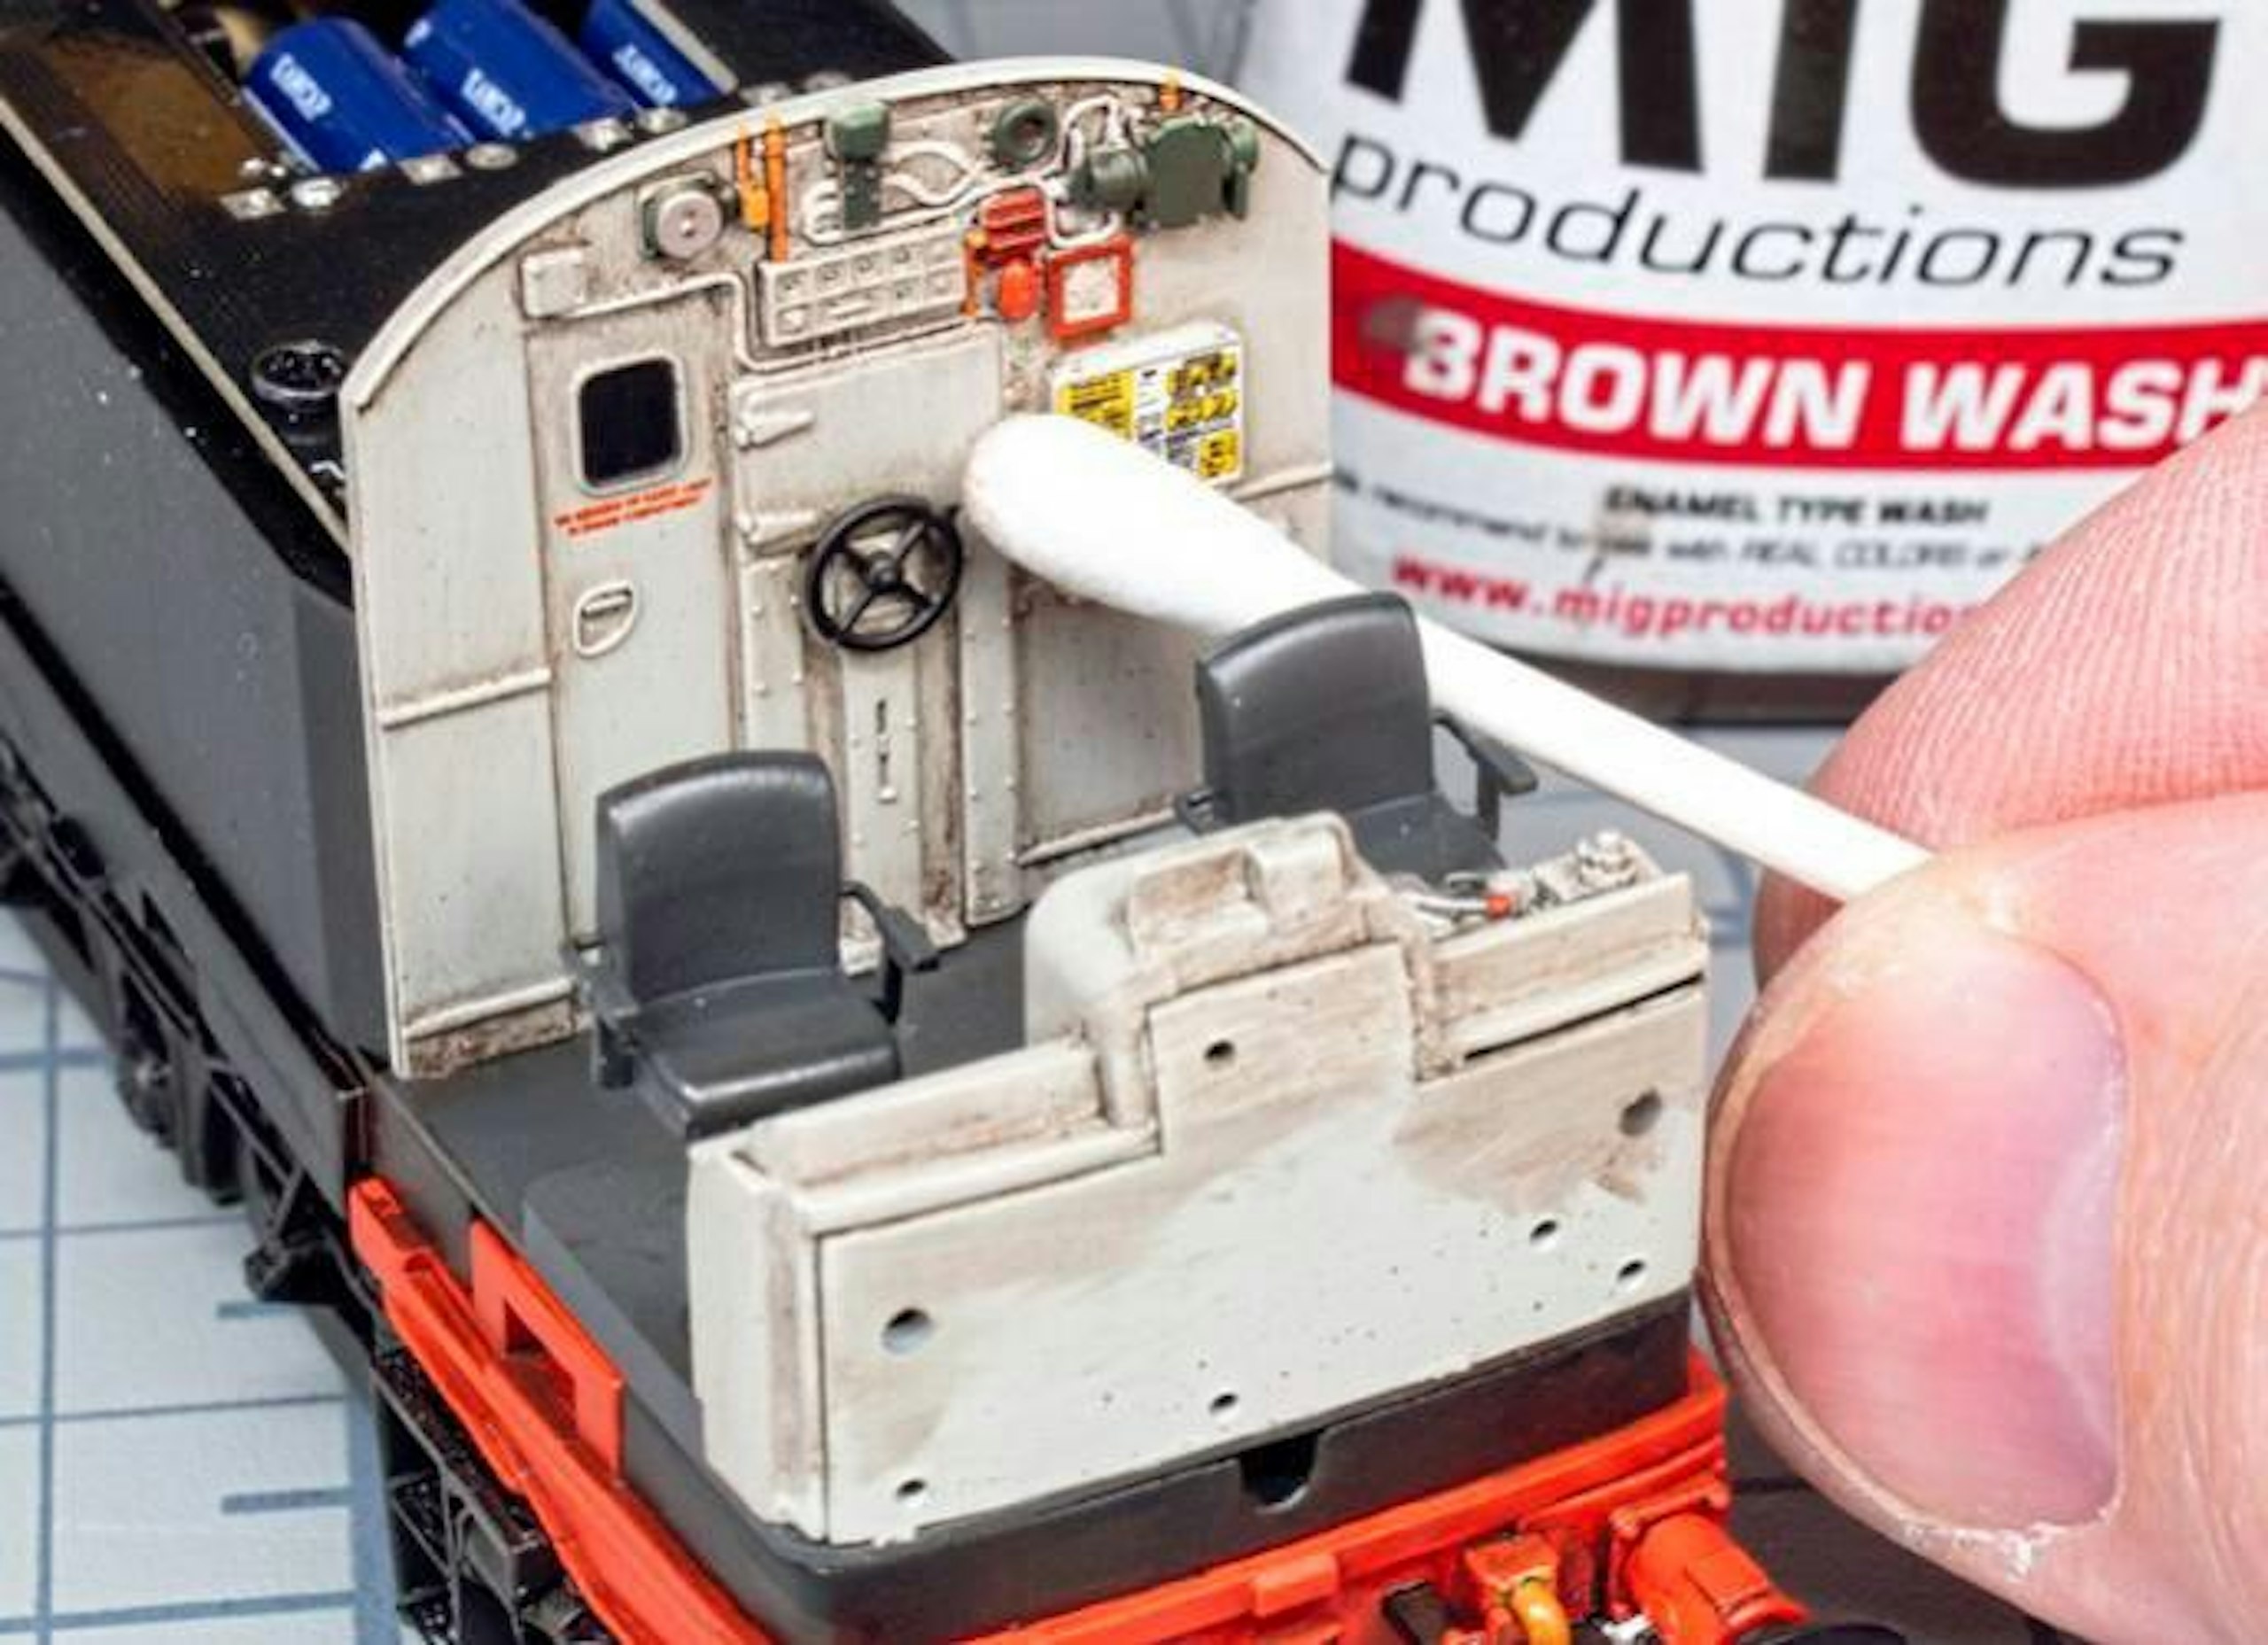
13 Accurascale did a fantastic job of modelling the cab interiors, and they look even better with the aid of the weathering wash, brushed on and wiped away, thus enhancing all that lovely detail. Cabs were seldom spotless.
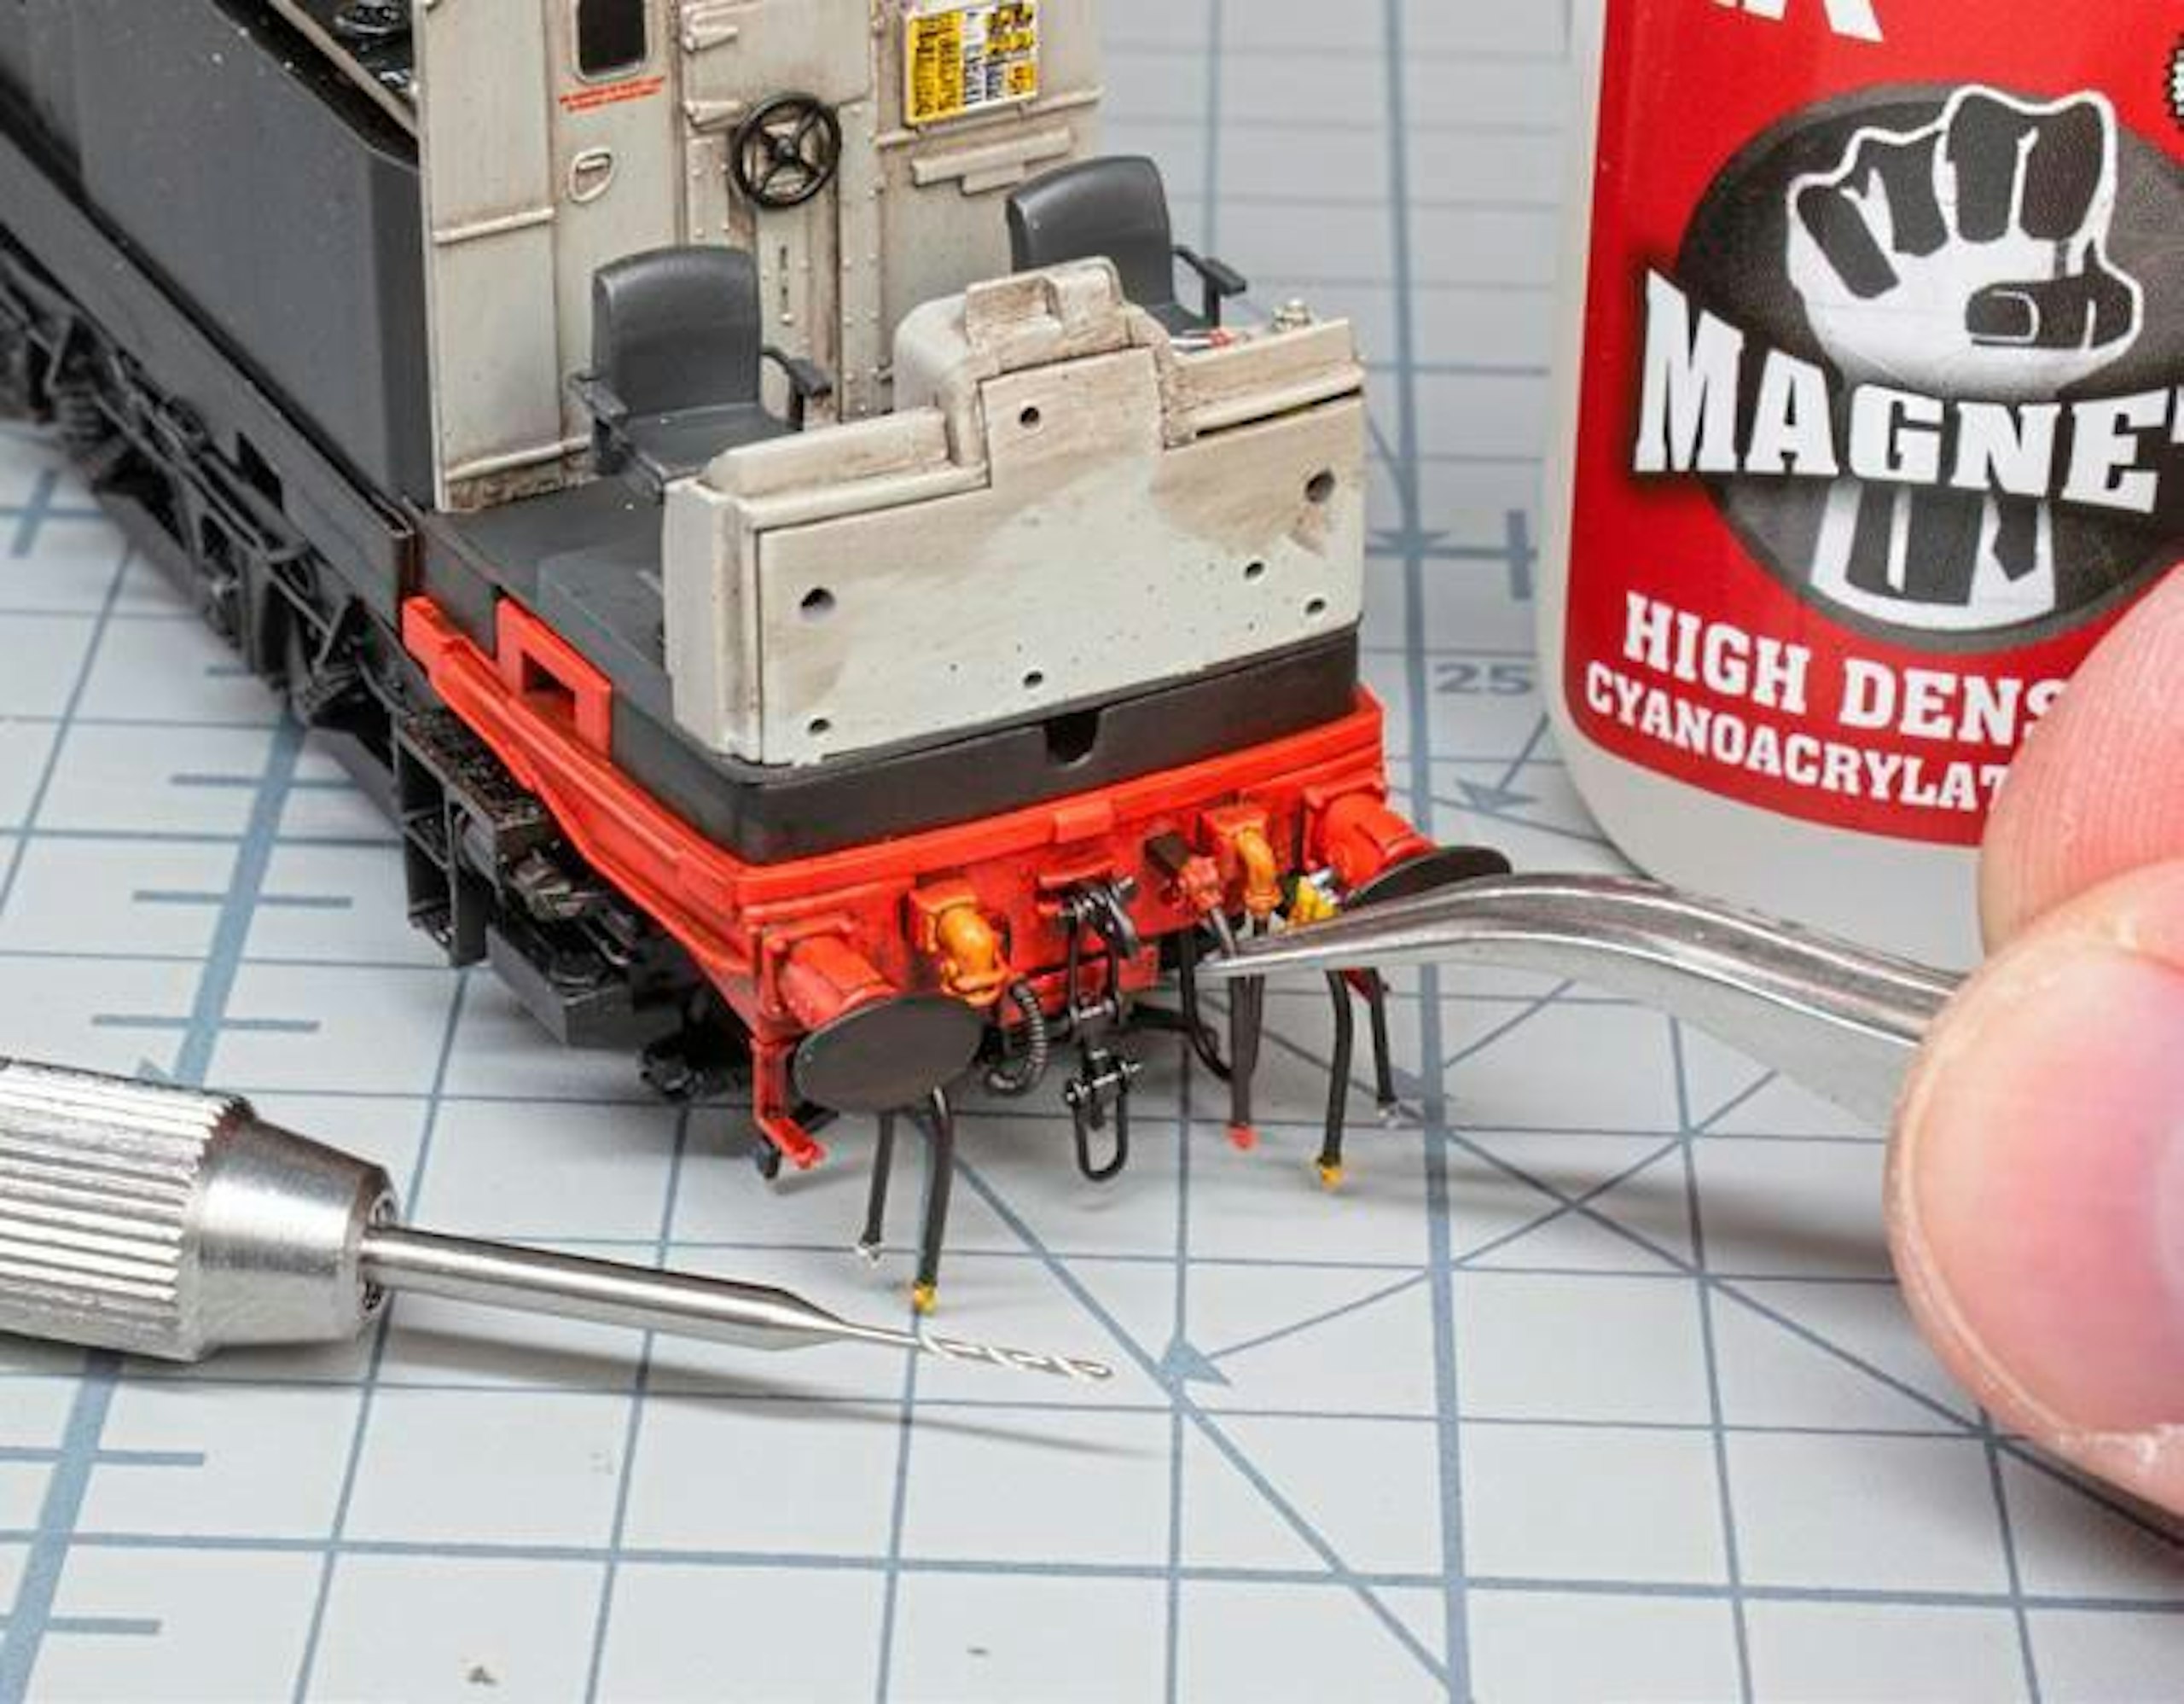
14 Now’s a good time to install the bufferbeam detail if suitable for your layout. A few of the mounting holes needed re-drilling slightly to allow a good fit for the brake hoses. Cyano glue holds them securely.
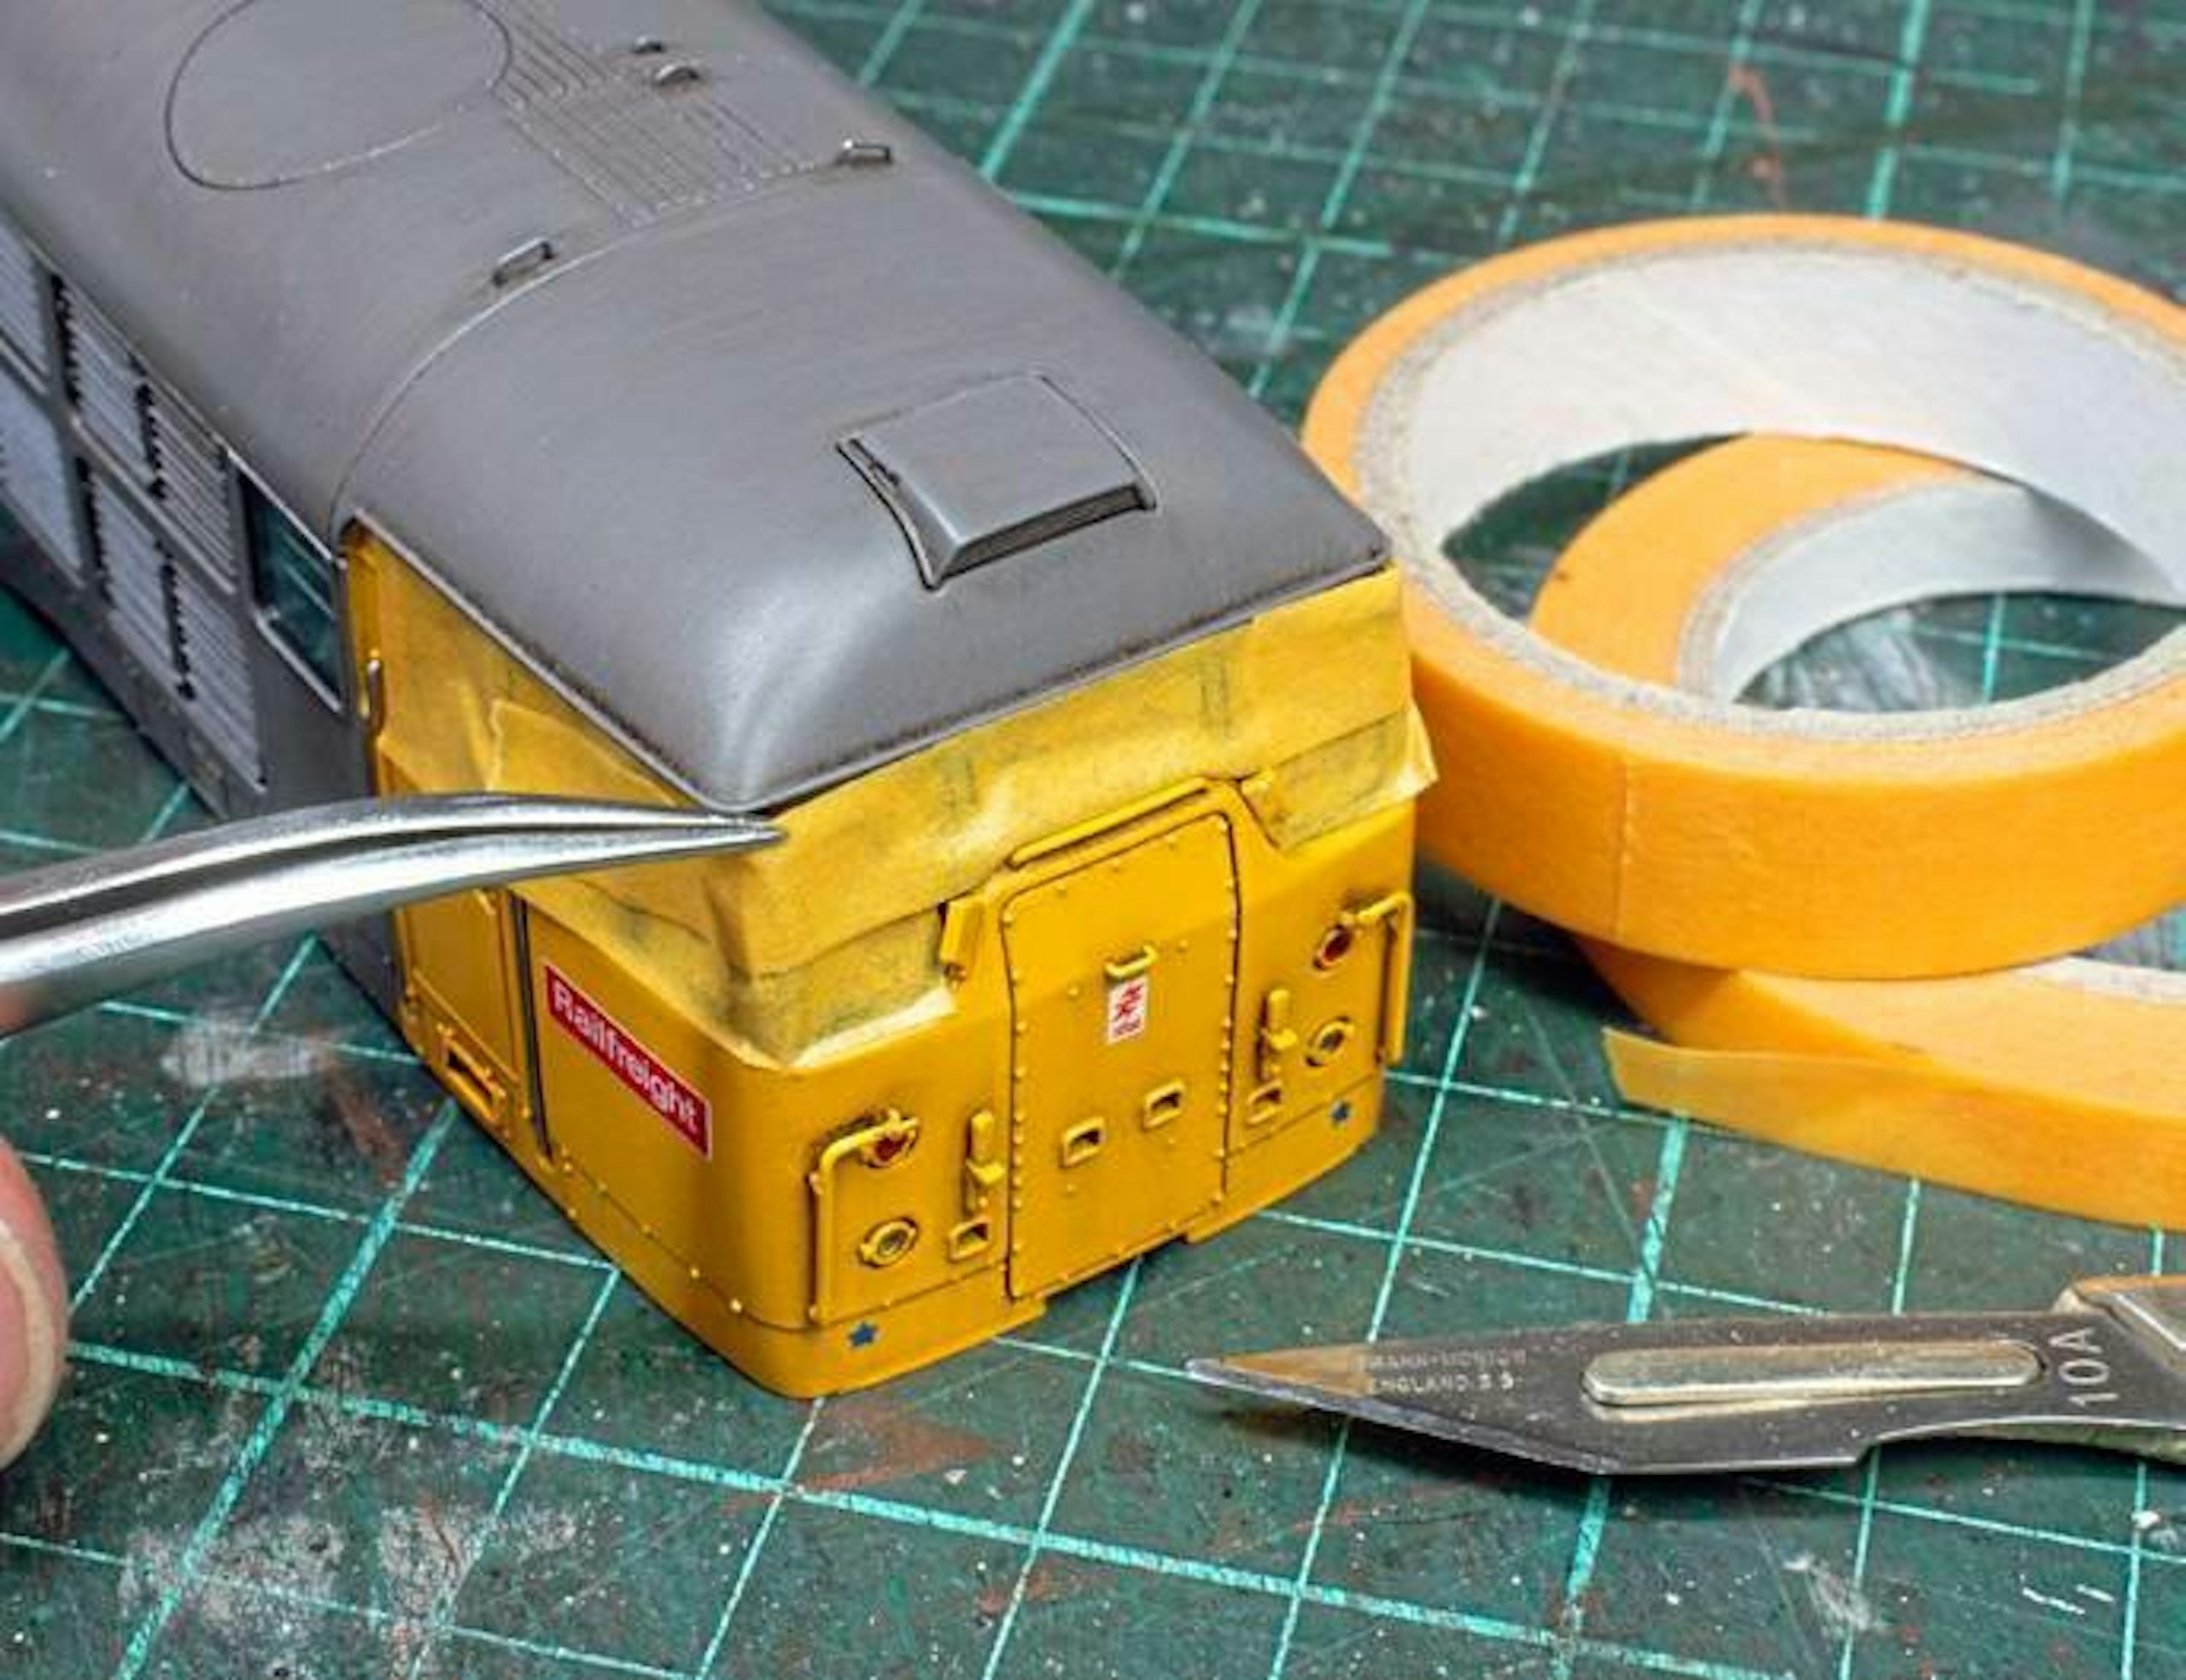
15 Airbrushing will follow to add extra finesse to the weathering, so masking the interior and exterior of the cab glazing will protect it from overspray. Use a low-tack, model-friendly tape to avoid damaging the paintwork or glazing.
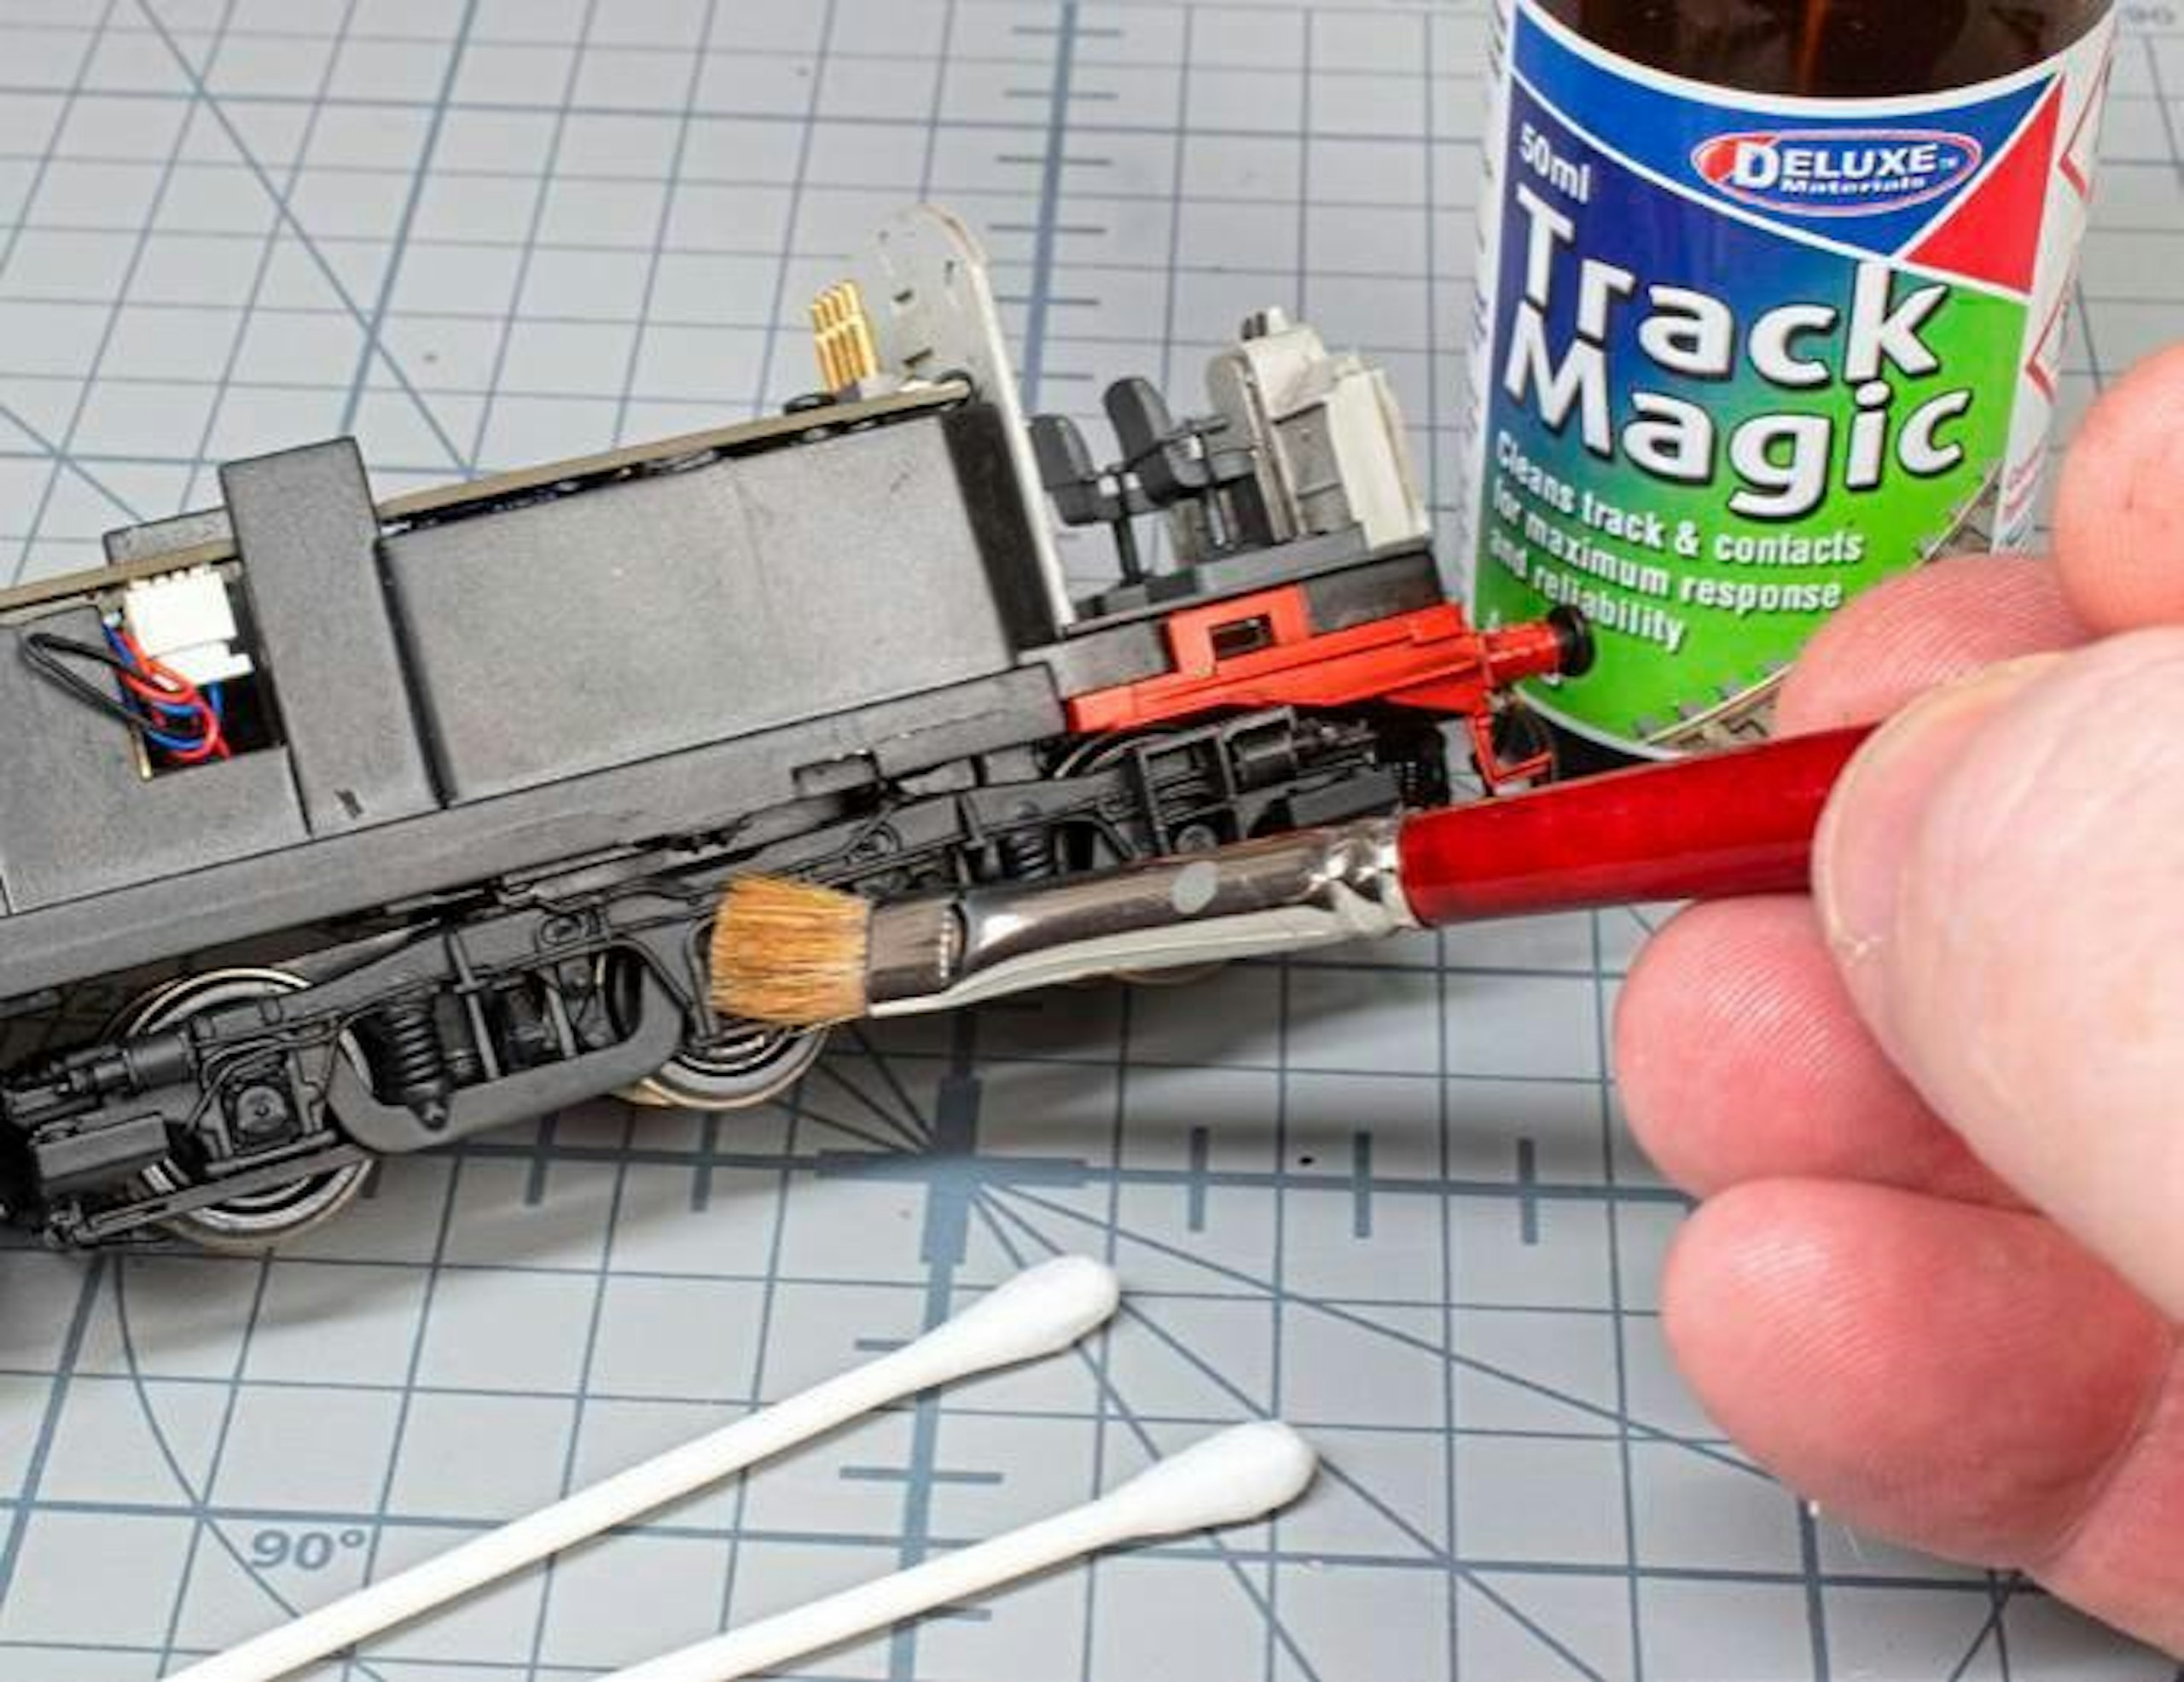
16 These models were spotless straight from the box, but if you see any traces of oil or grease, especially on the underframe, clean it away. Track Magic is ideal for this and is safe on most paint finishes too – but test it first, just in case!
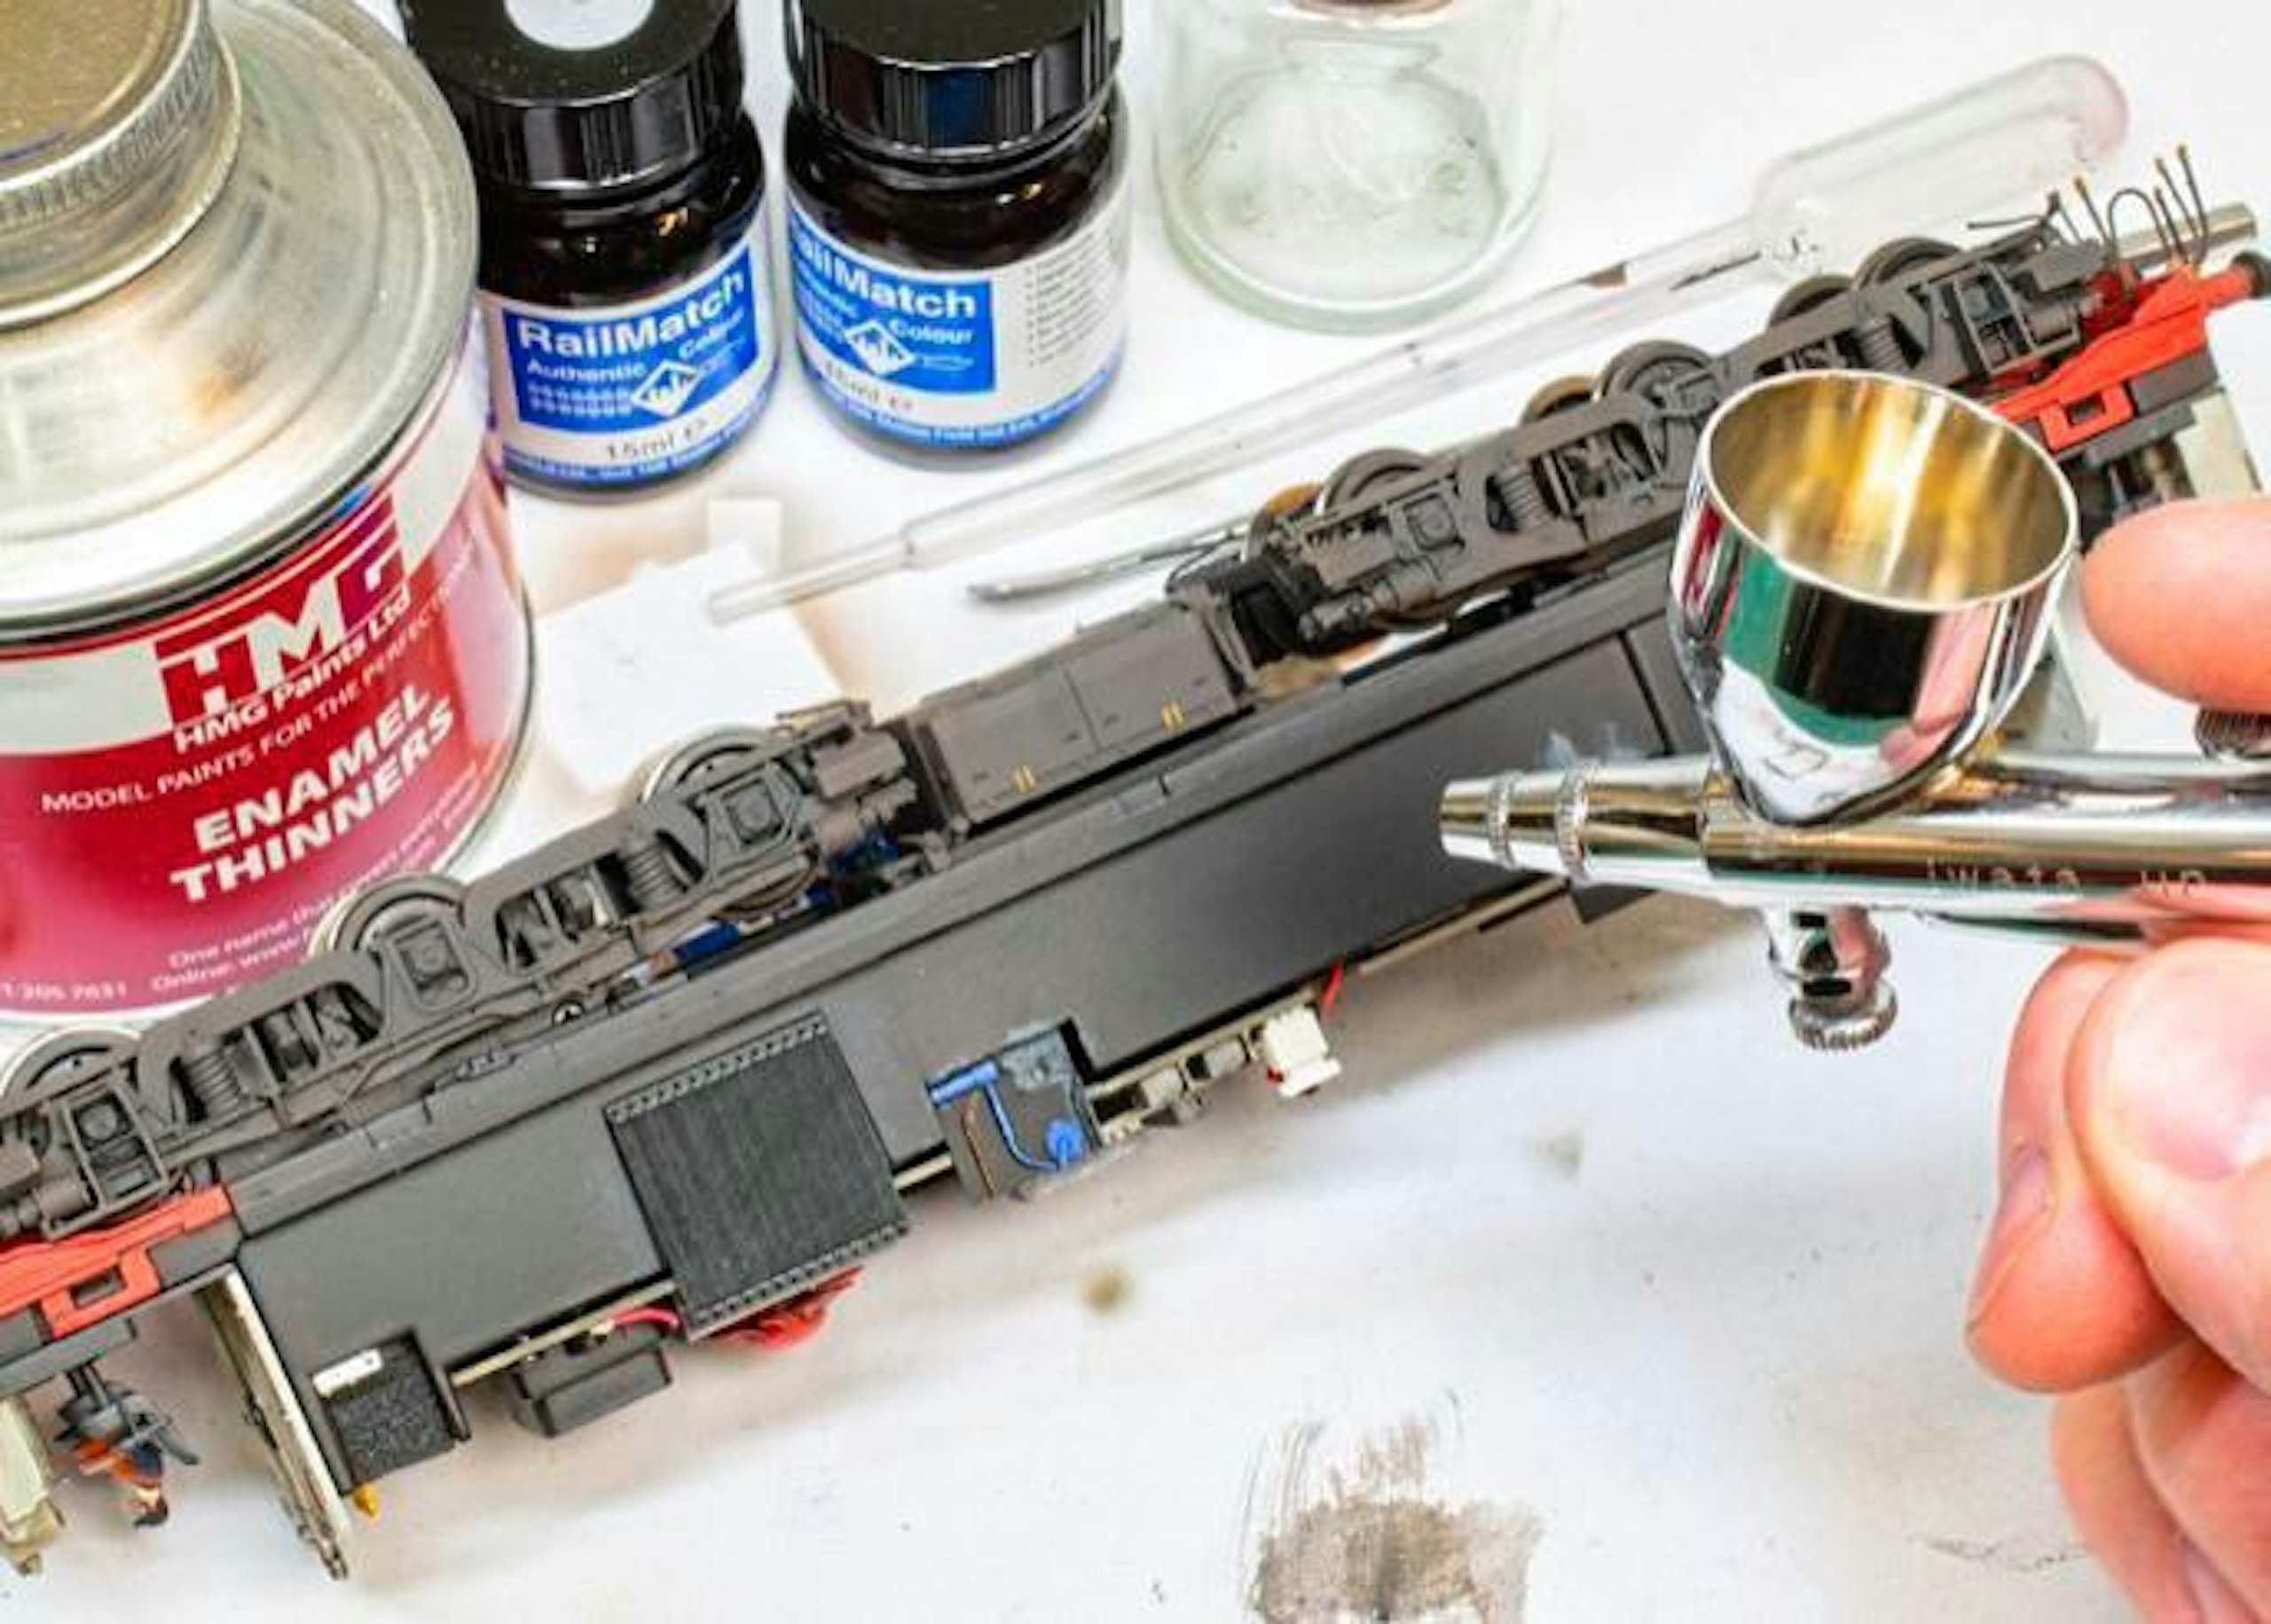
17 After thinning some RailMatch enamel Frame Dirt down to the consistency of skimmed milk, I set my compressor to around 15psi and loaded the airbrush. A fine mist was sprayed around the underframe.
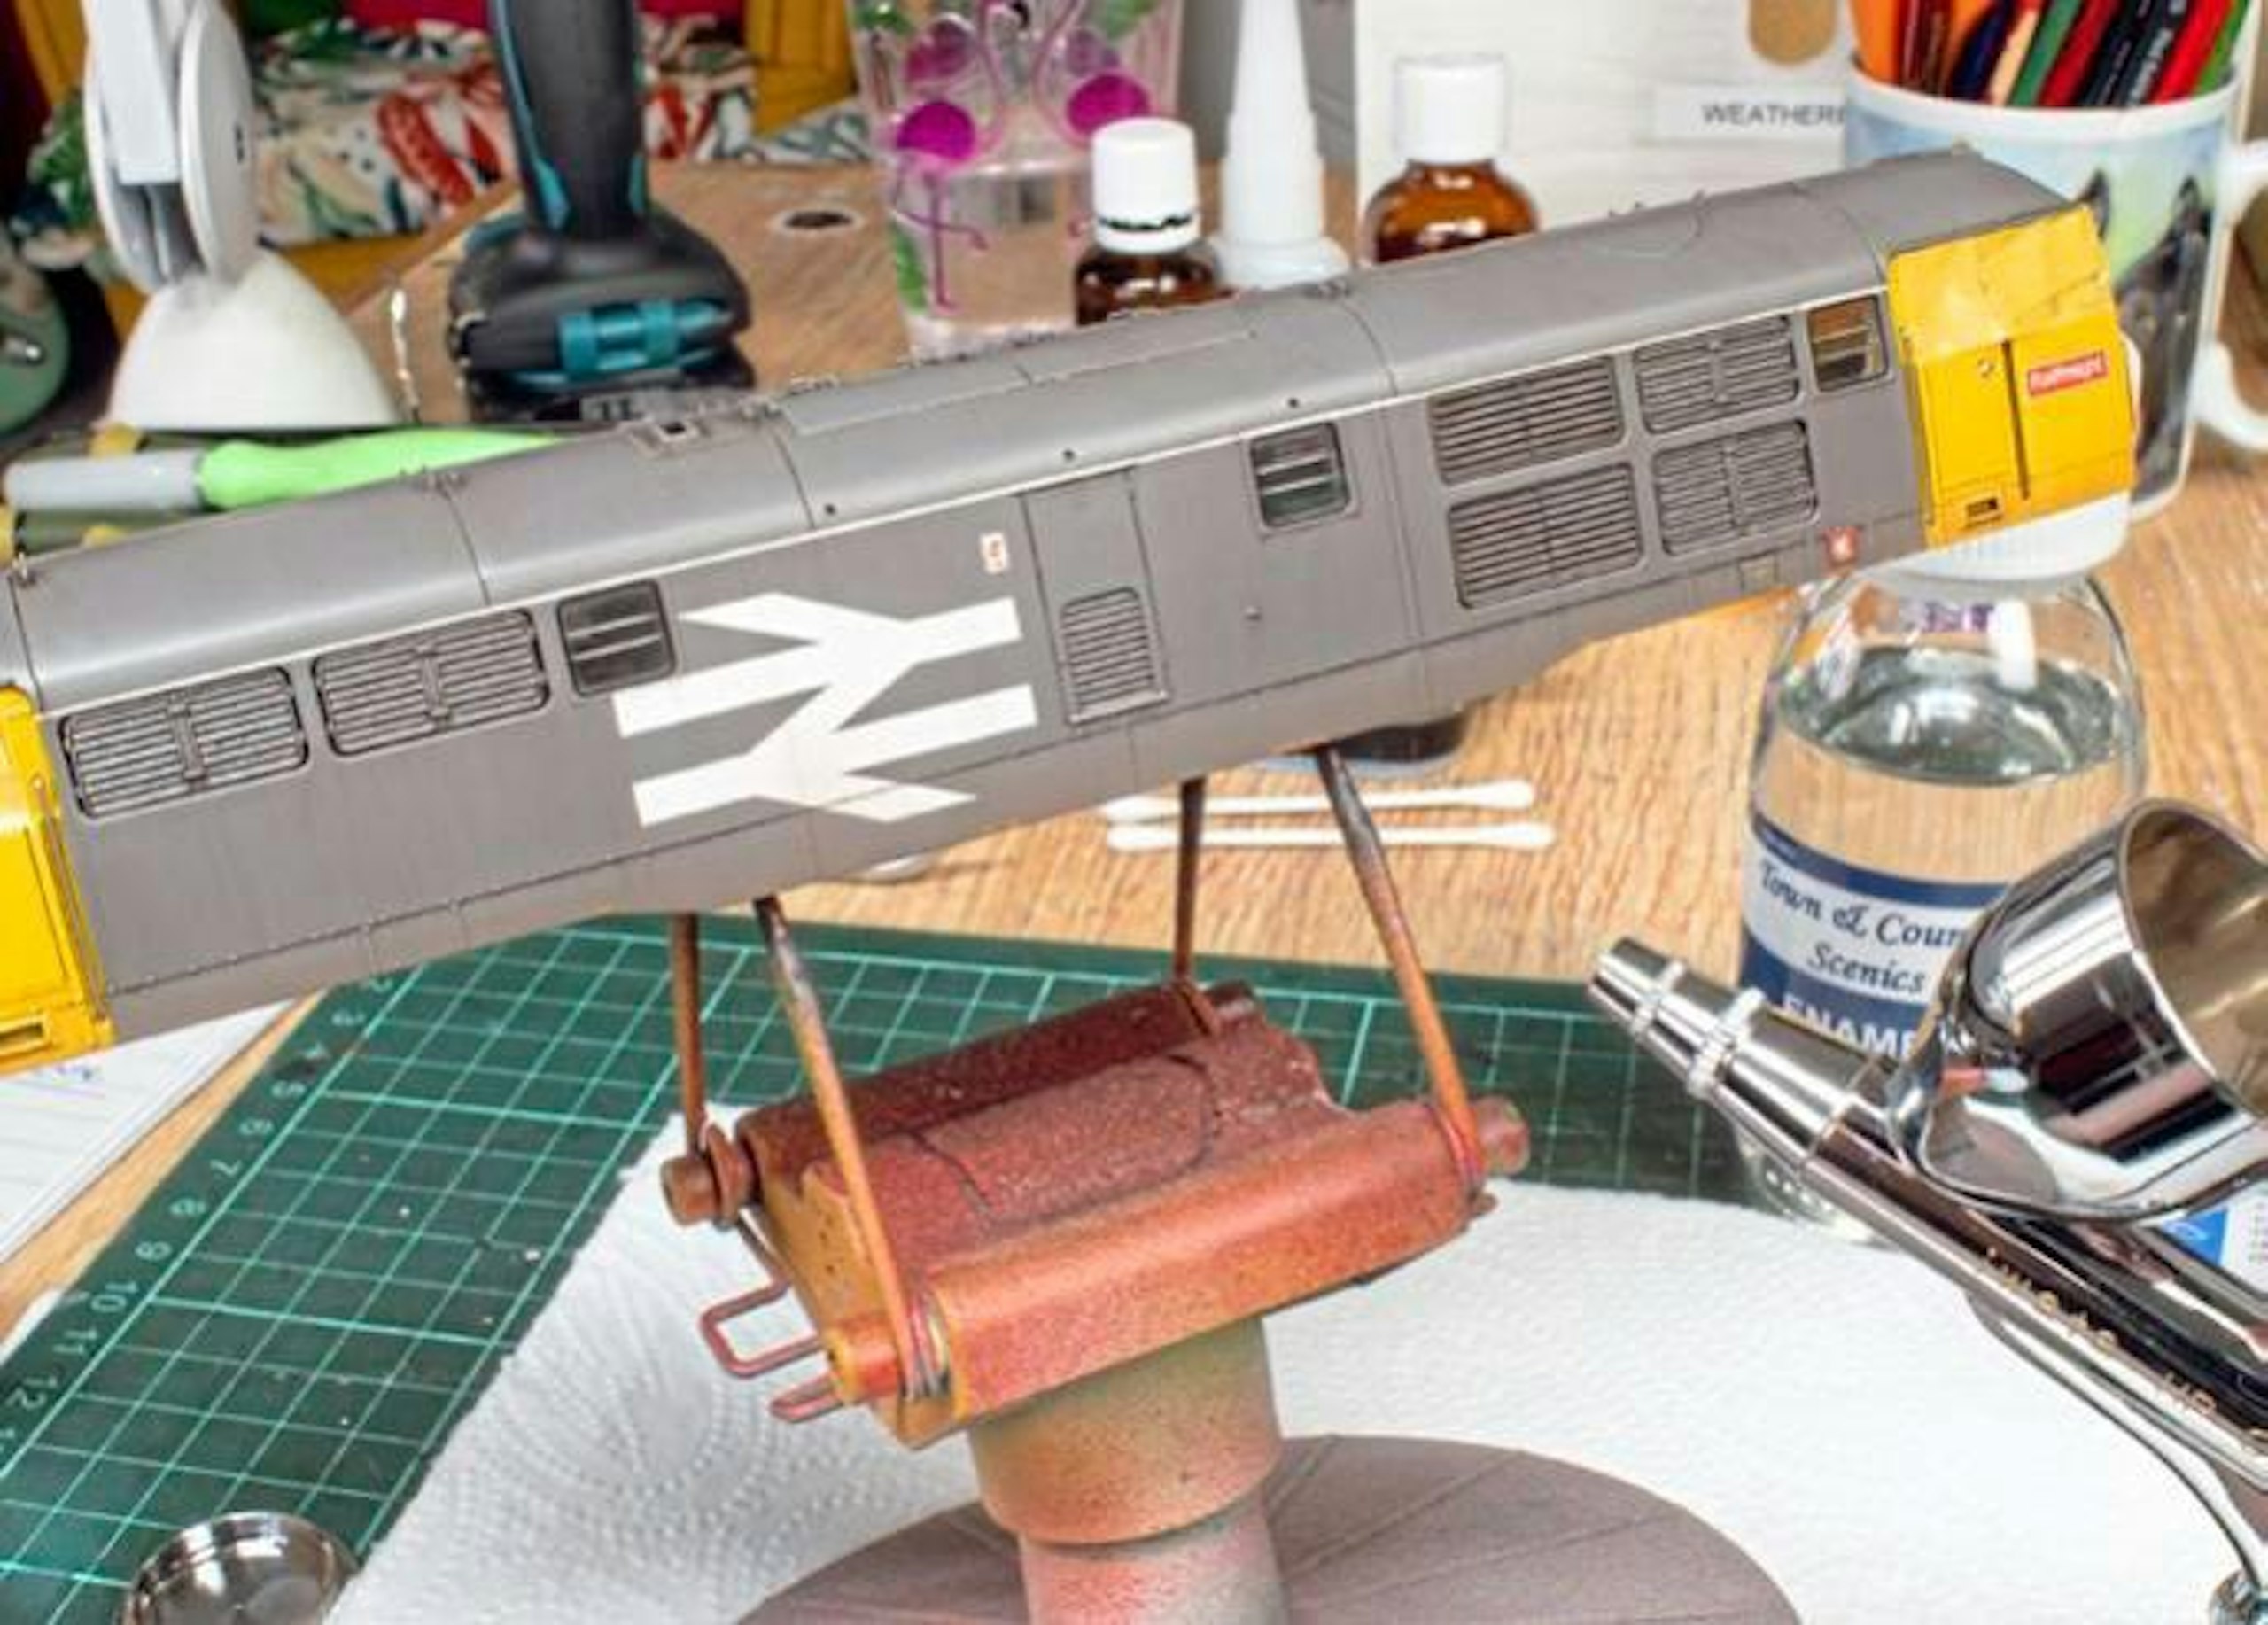
18 The Frame Dirt was also sprayed in a fine mist along the lower edges of the body, with the airbrush angled upwards to mimic how real dirt would be sprayed up from the rails. Subtlety was the aim, so the sprayed paint layer is minimal.
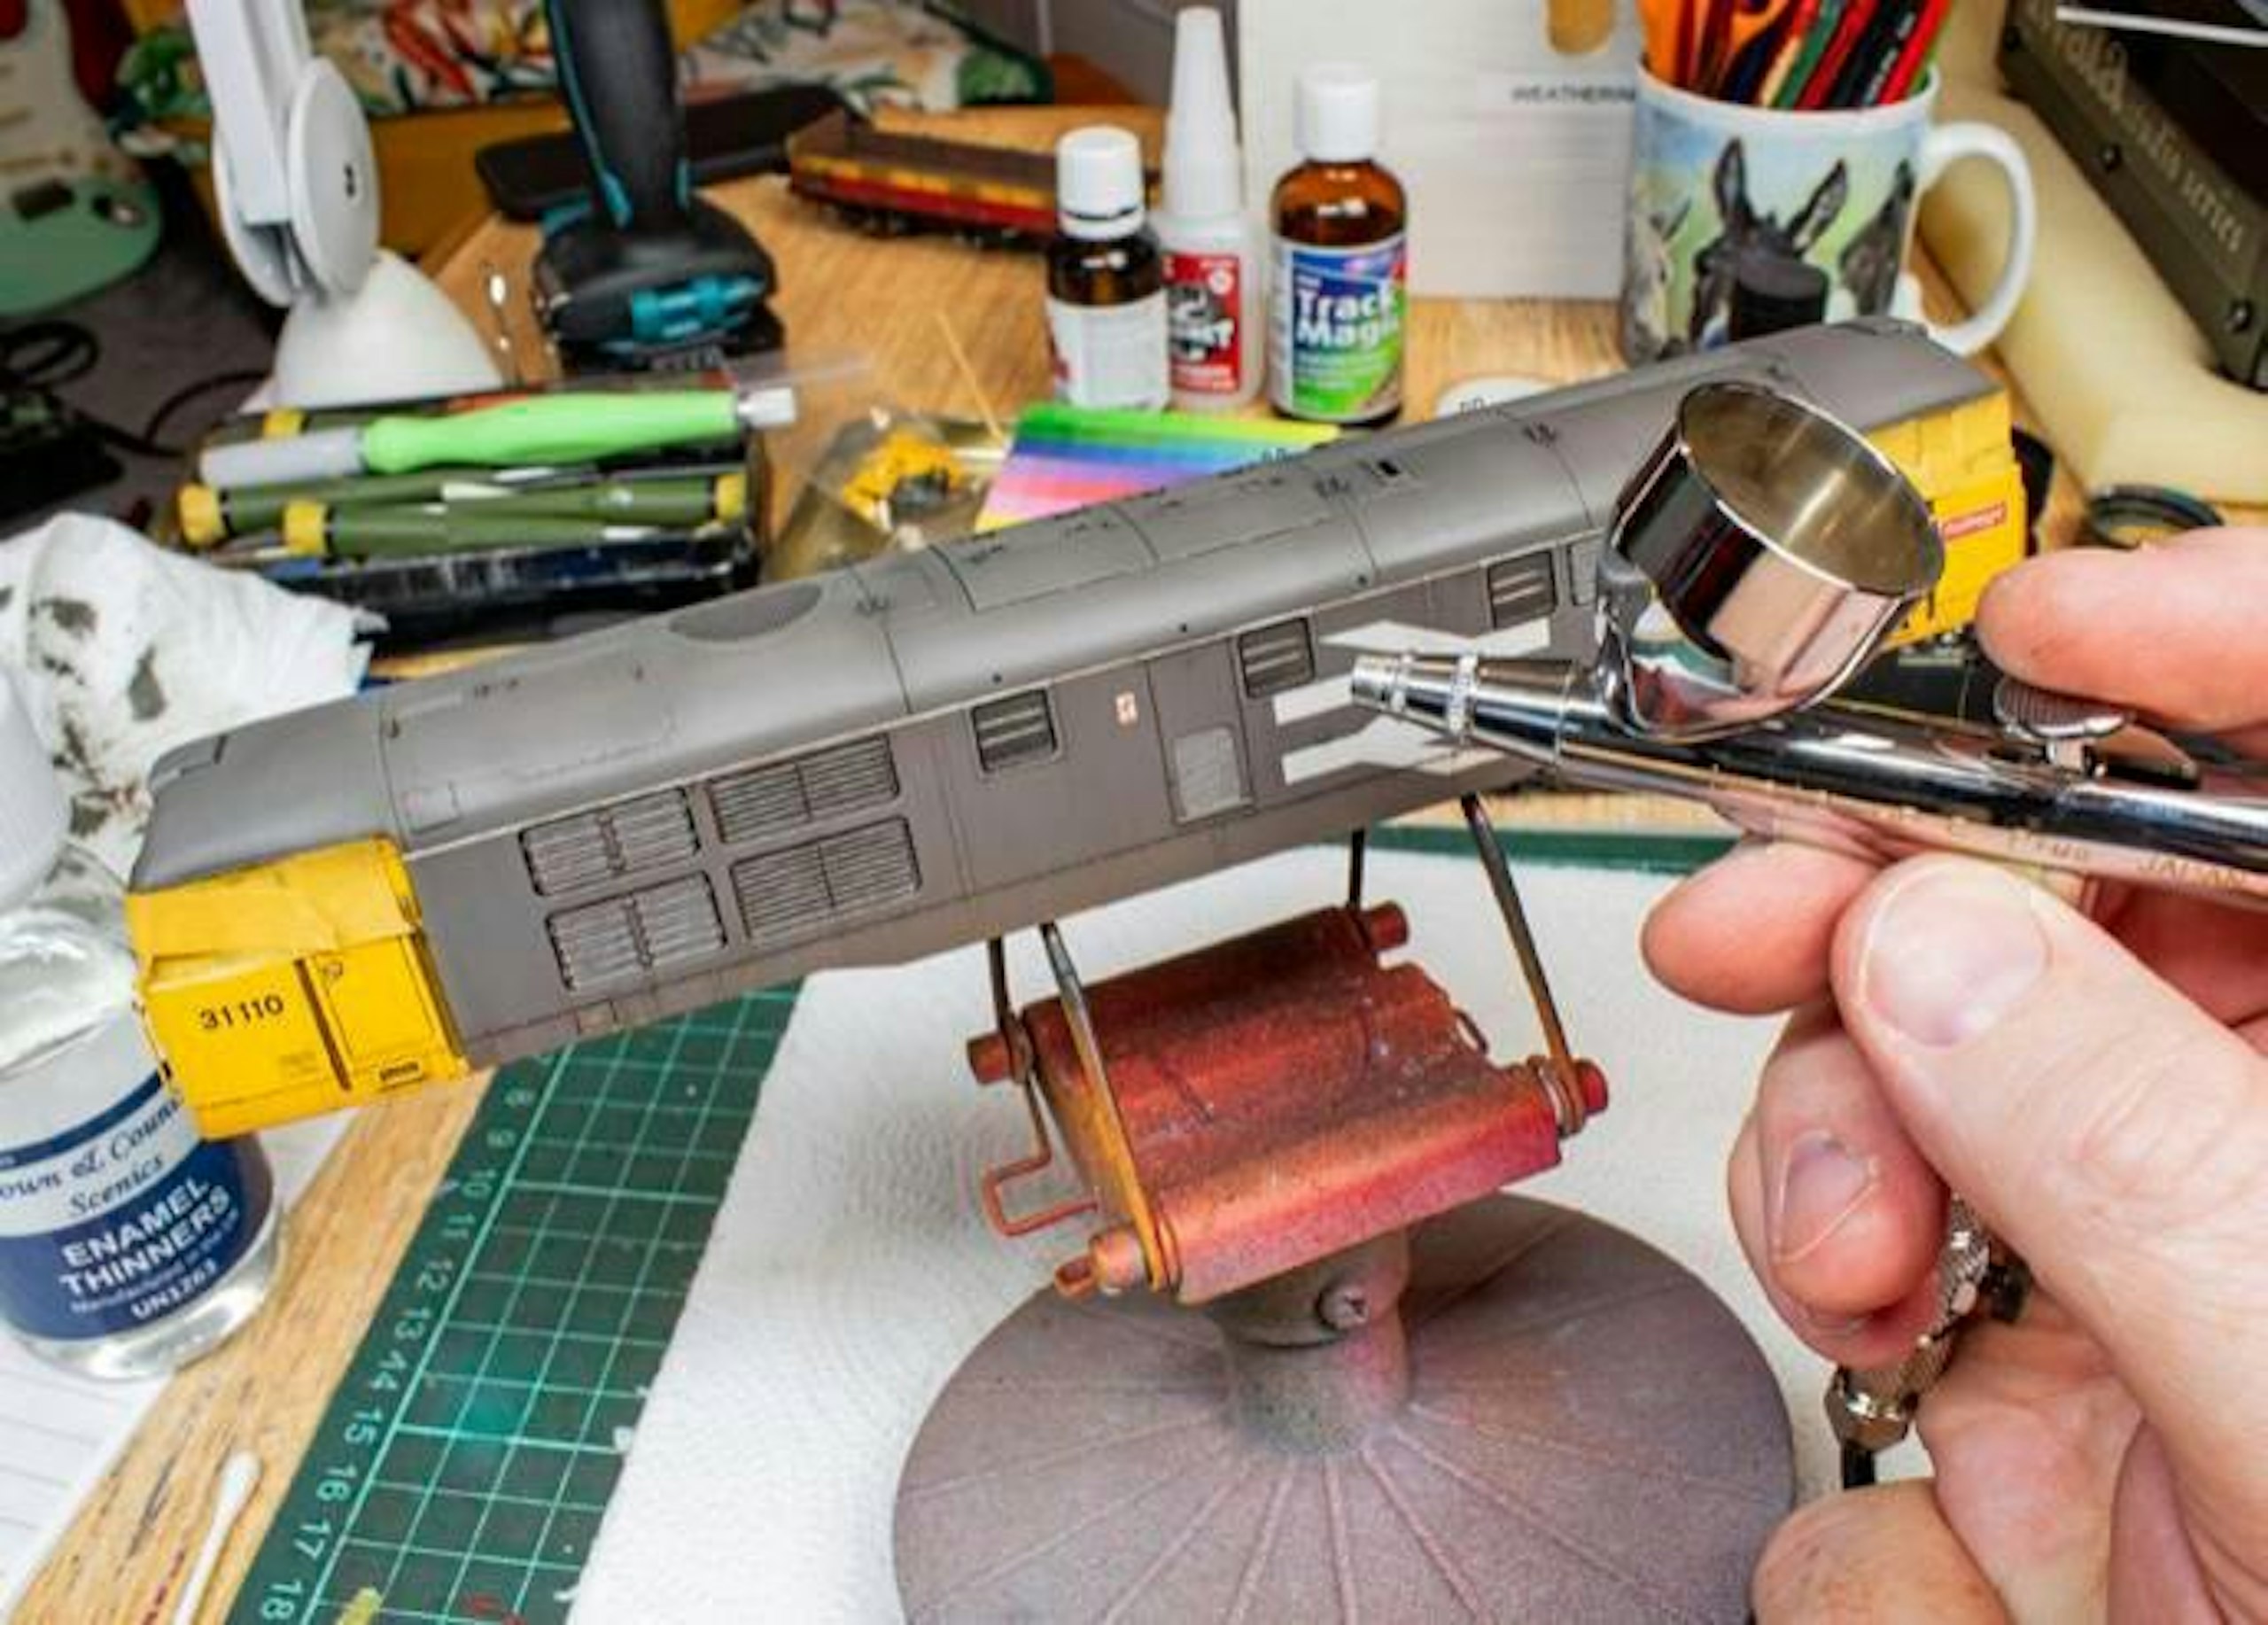
19 Moving to RailMatch Roof Dirt, I added some darker shading around the underframe and then moved to the body, aiming a very fine mist along the shoulder of the roof, following the white cant rail-level stripe.
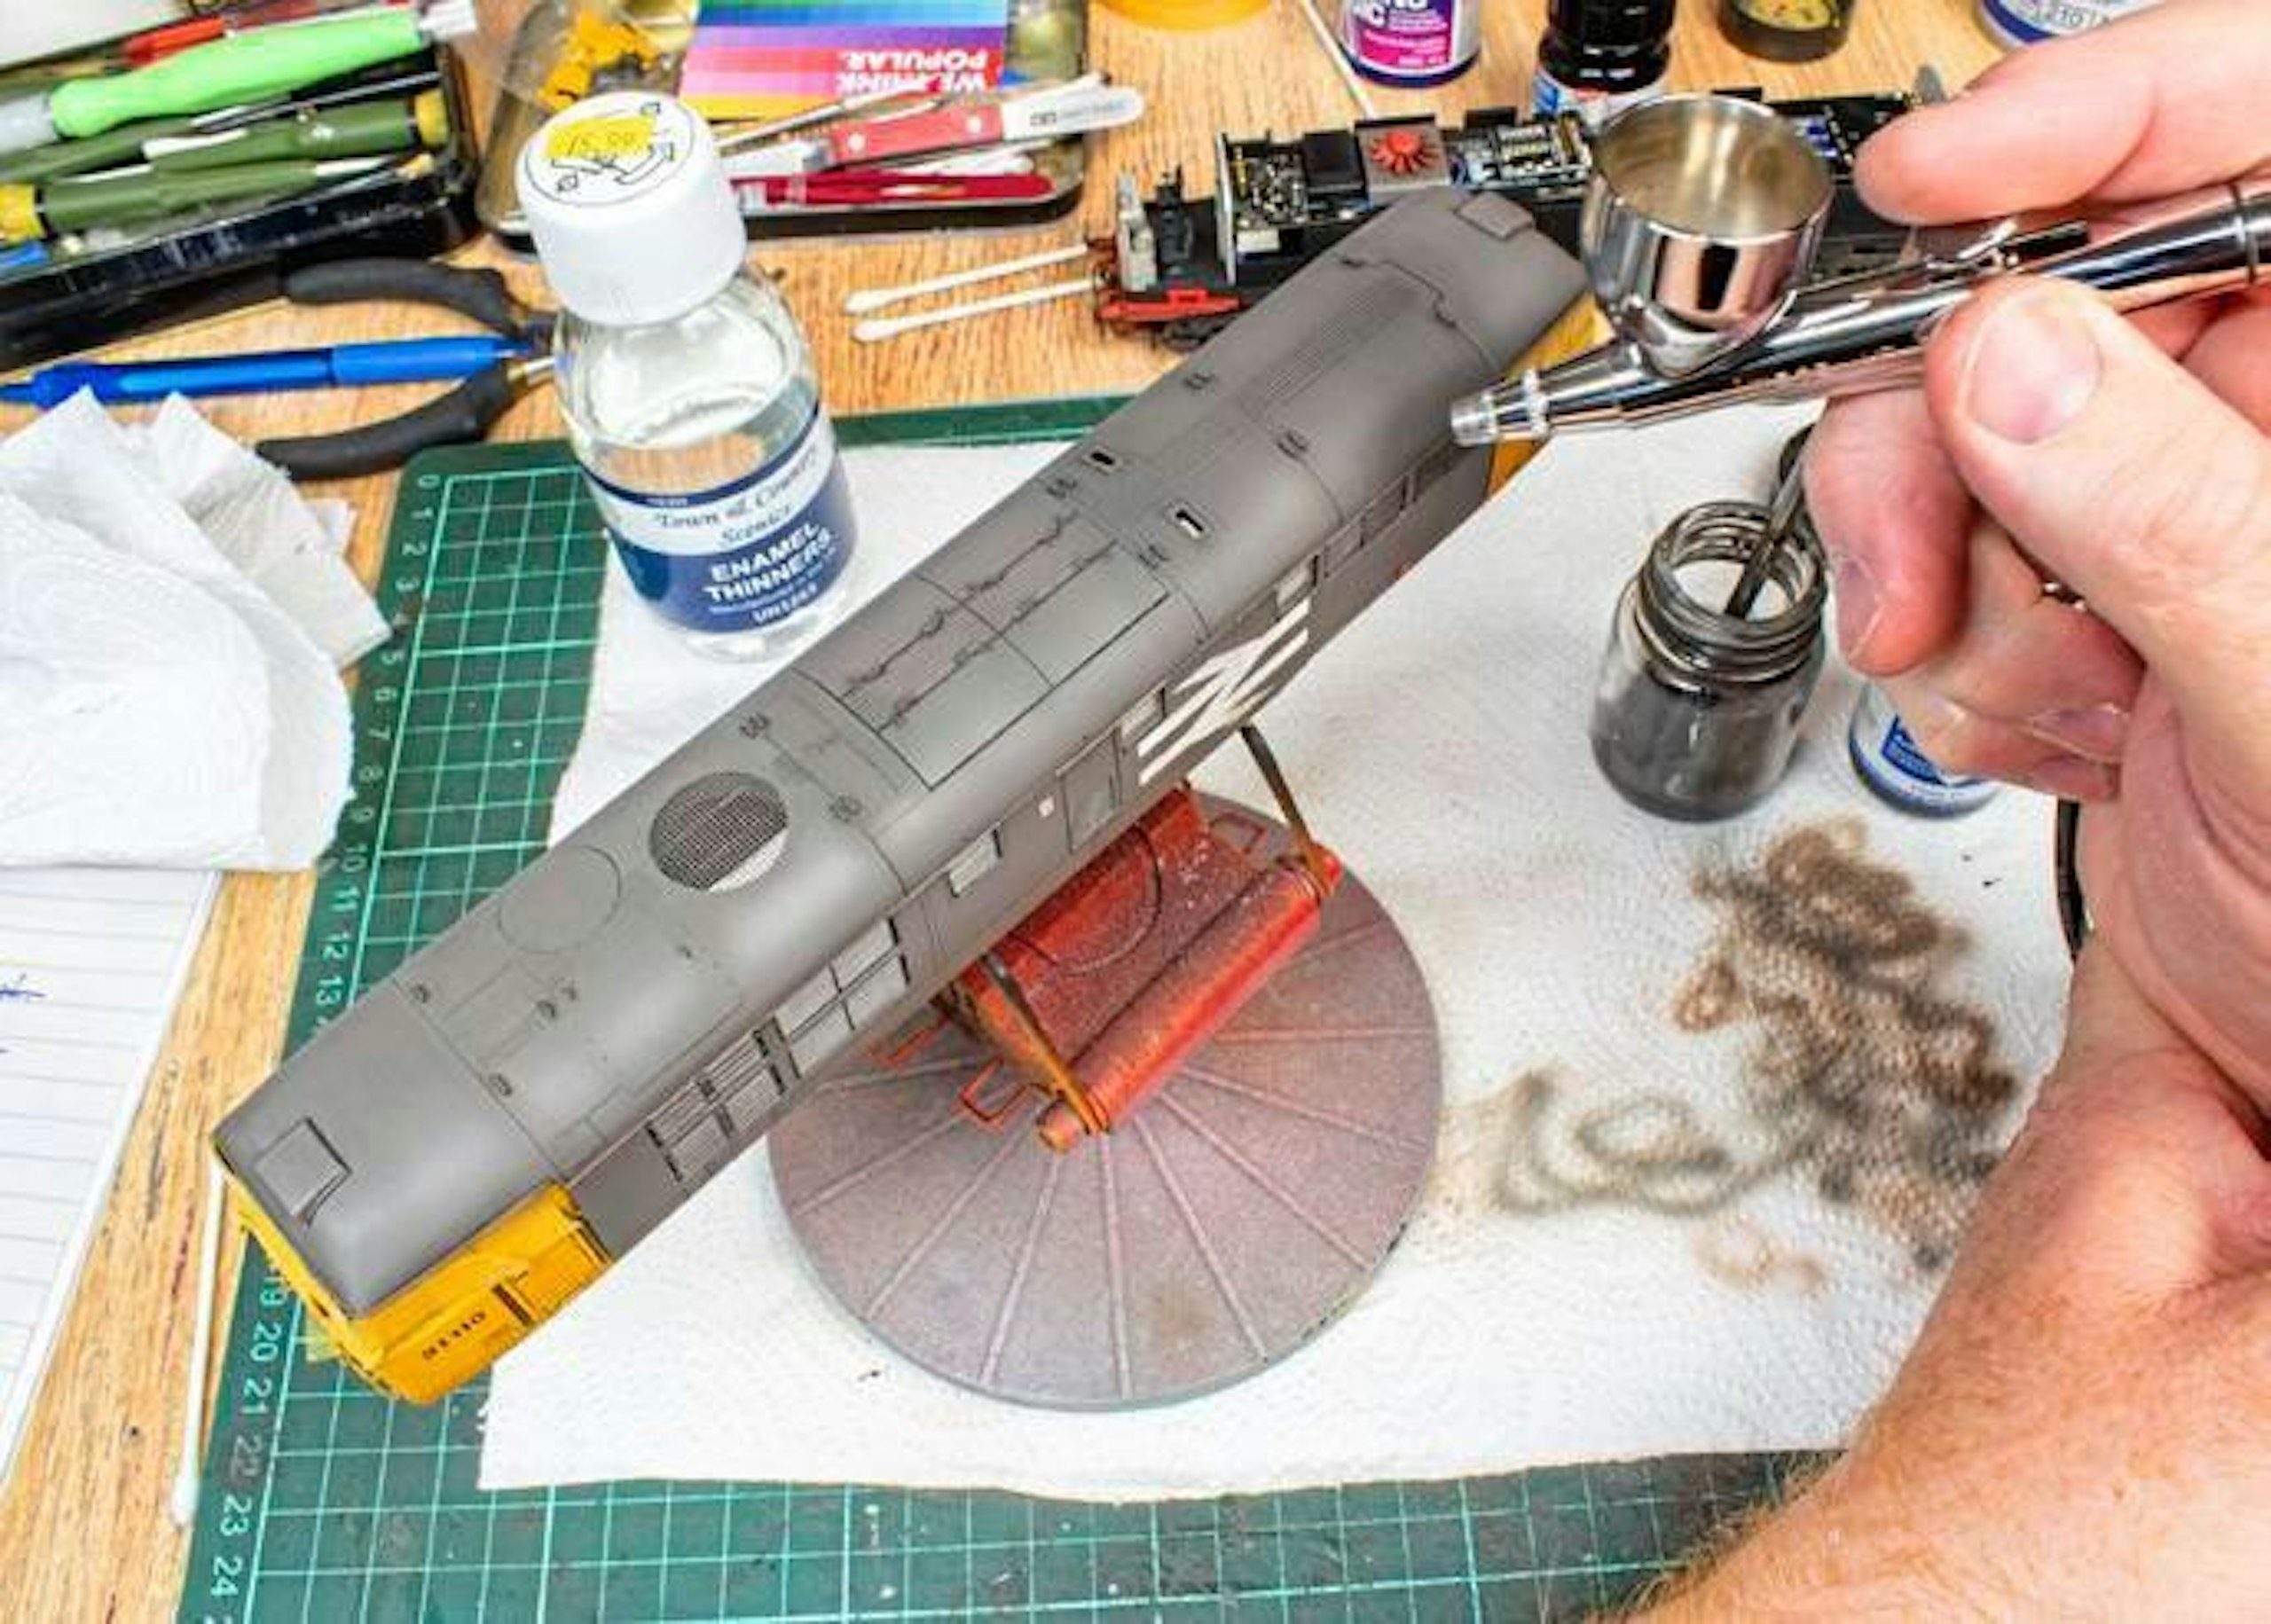
20 Working from above the model, the Roof Dirt paint was sprayed – again in a fine mist – around the various roof panels, walkways and the fan grille. Supporting your spraying hand with your other hand helps keep the airbrush steady.
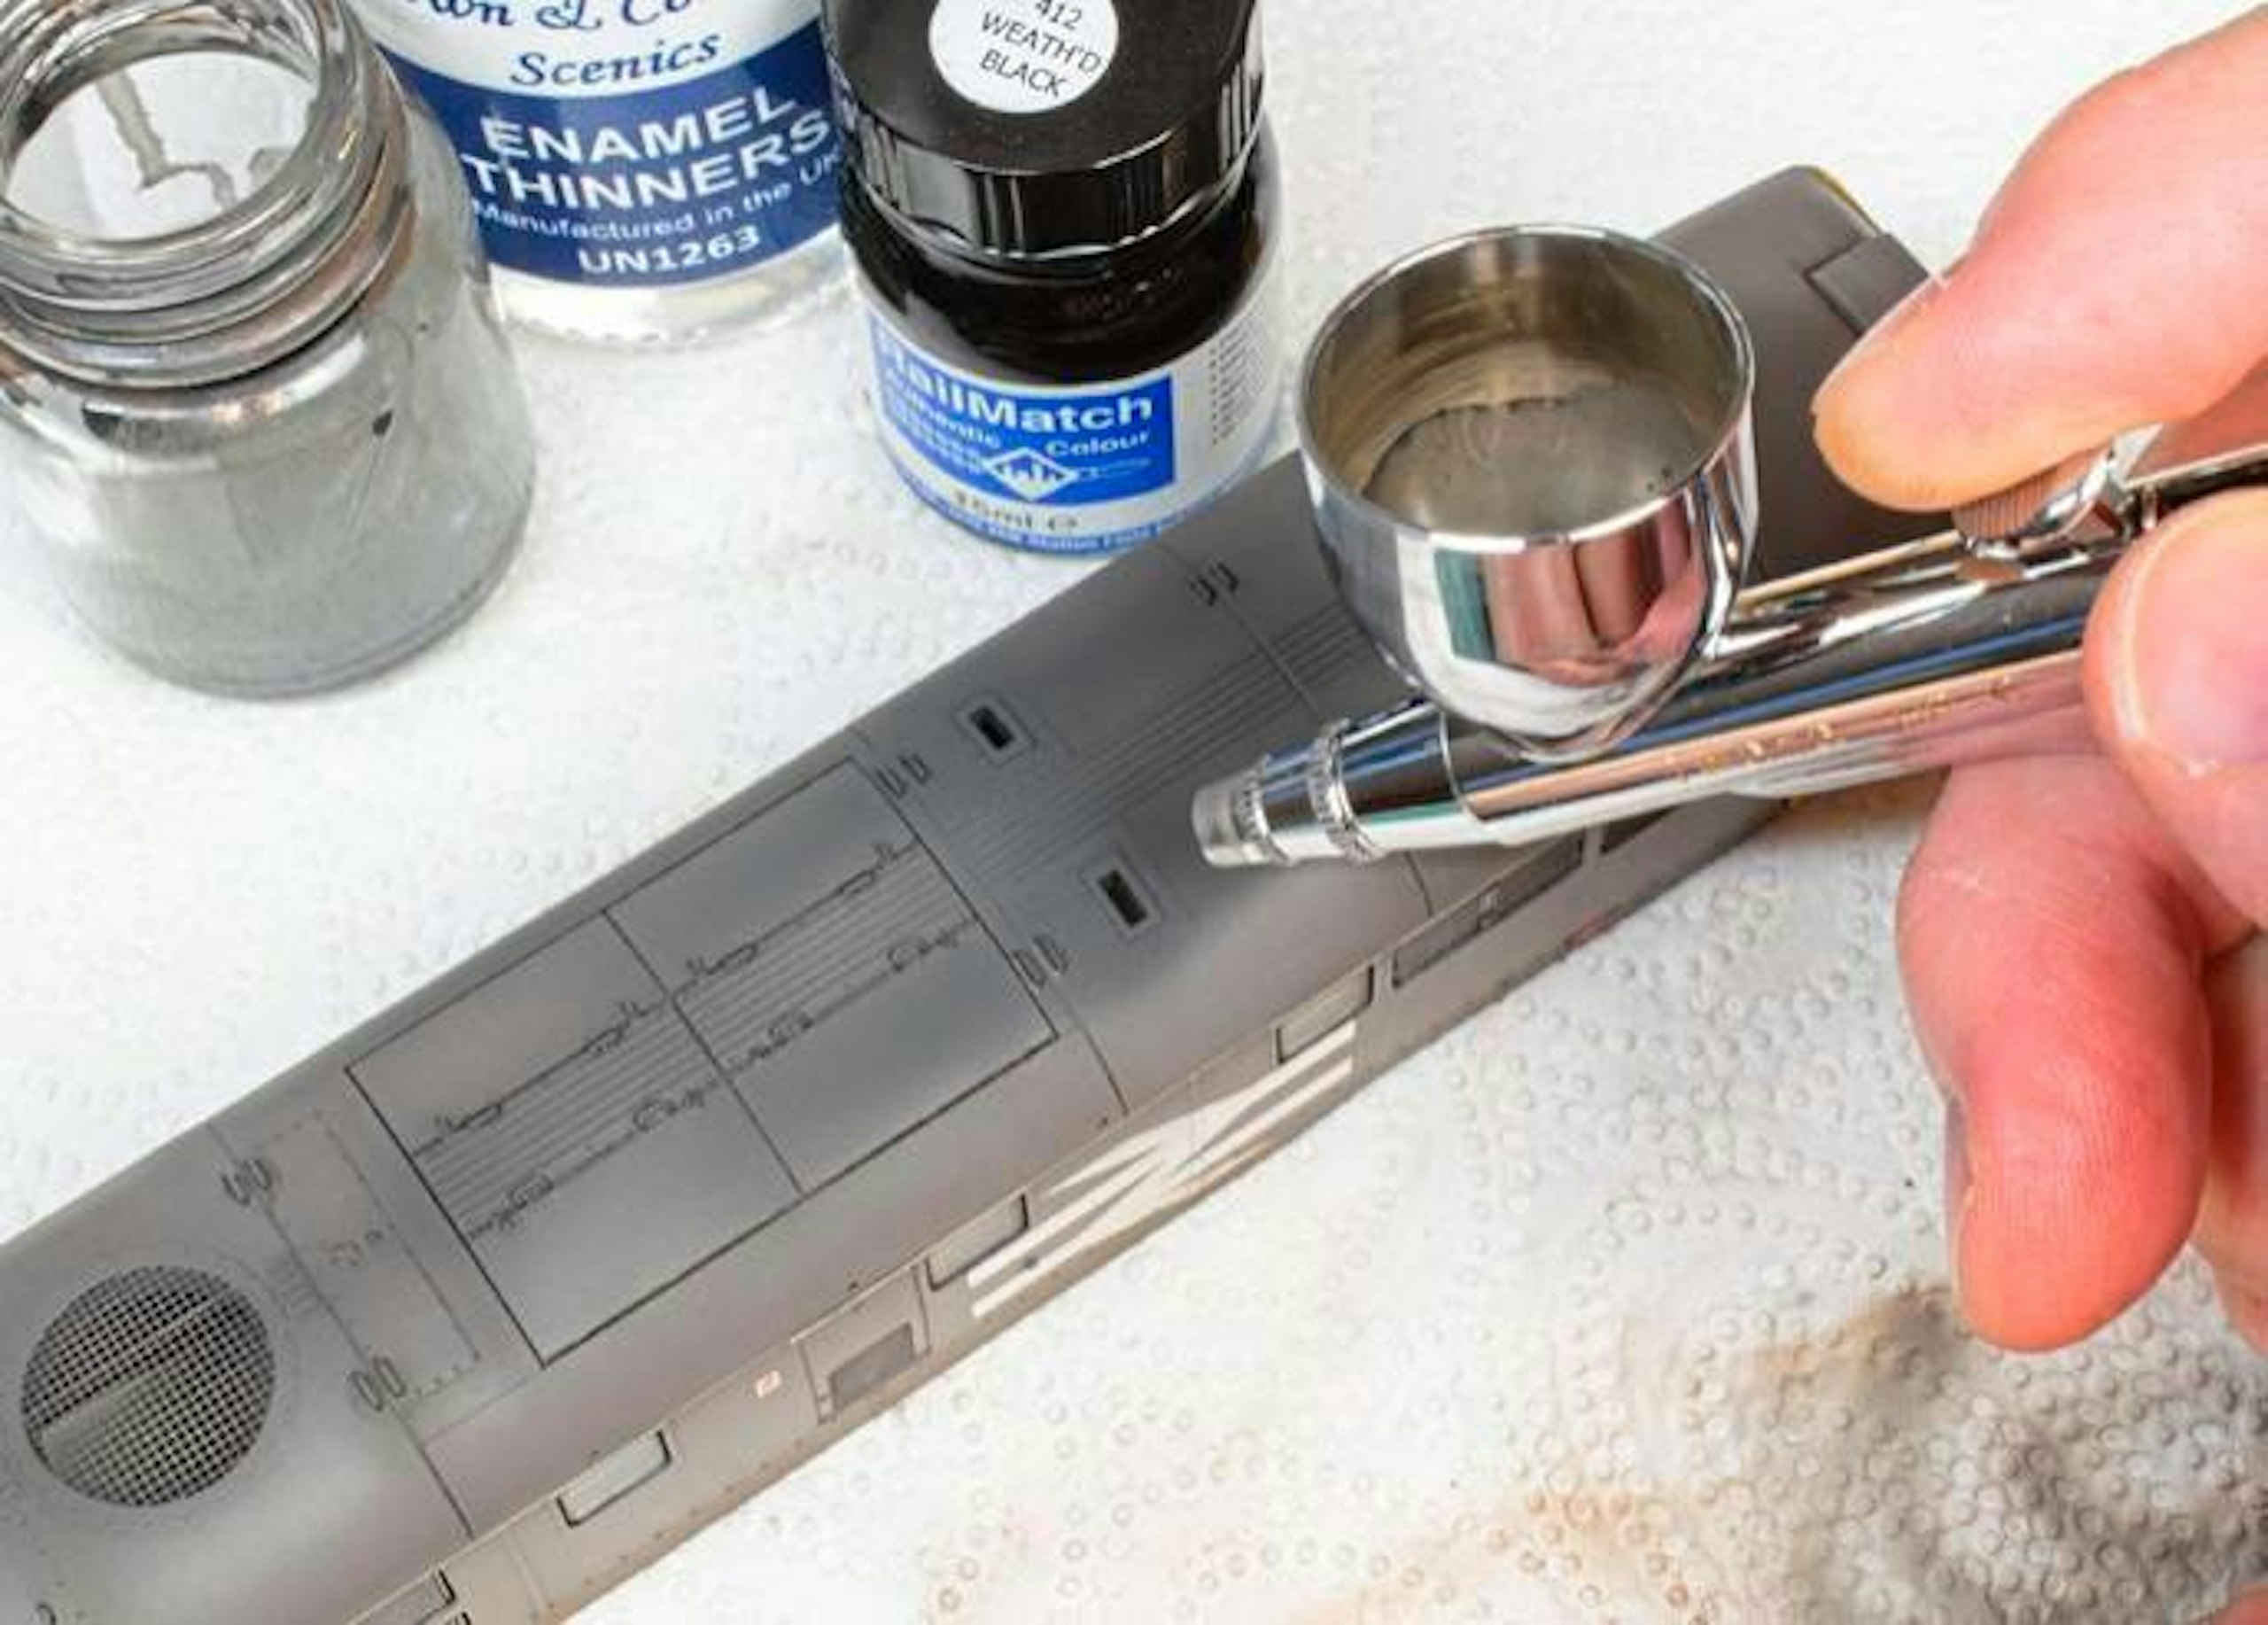
21 The final element in the airbrushing stage was a concentrated mist of RailMatch Weathered Black around the exhaust outlets, feathering the spray to suggest a diffusion of sooty deposits in both directions.
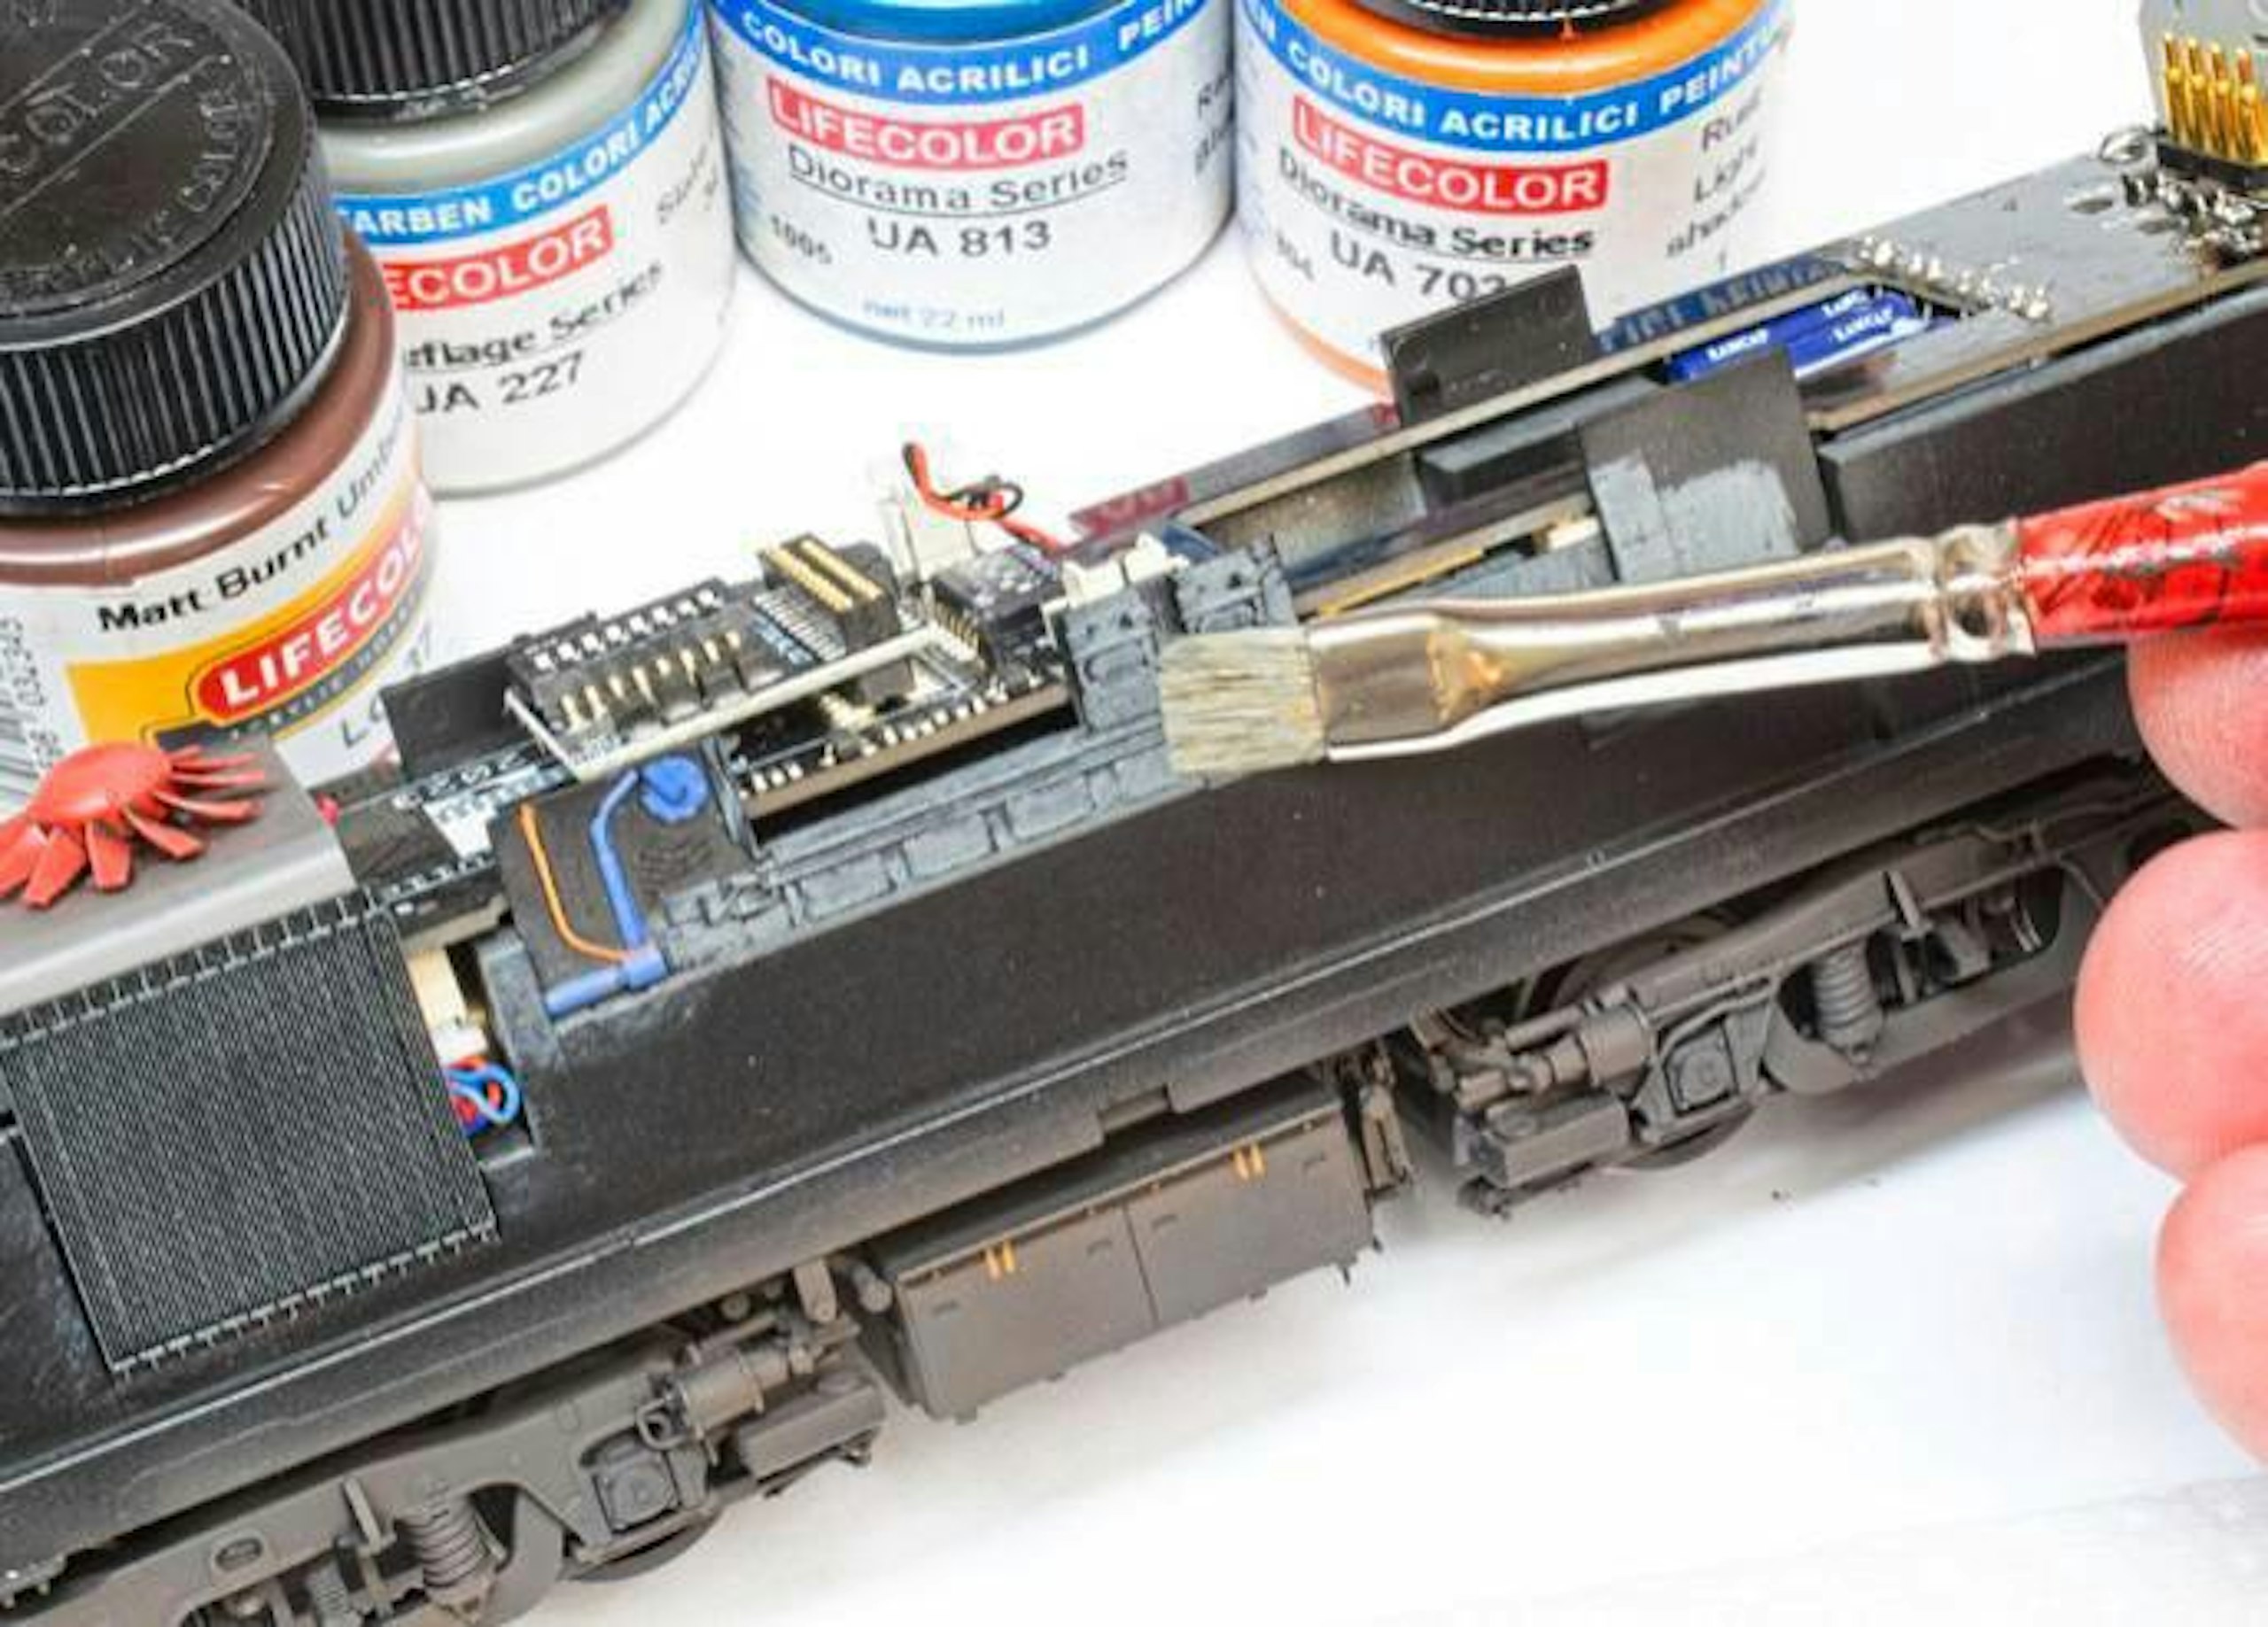
22 A welcome feature of Accurascale’s latest ‘31’ production run is the addition of interior detail to the chassis block, visible through the side windows, so I picked this out with a spot of dry-brushing with acrylic paints.
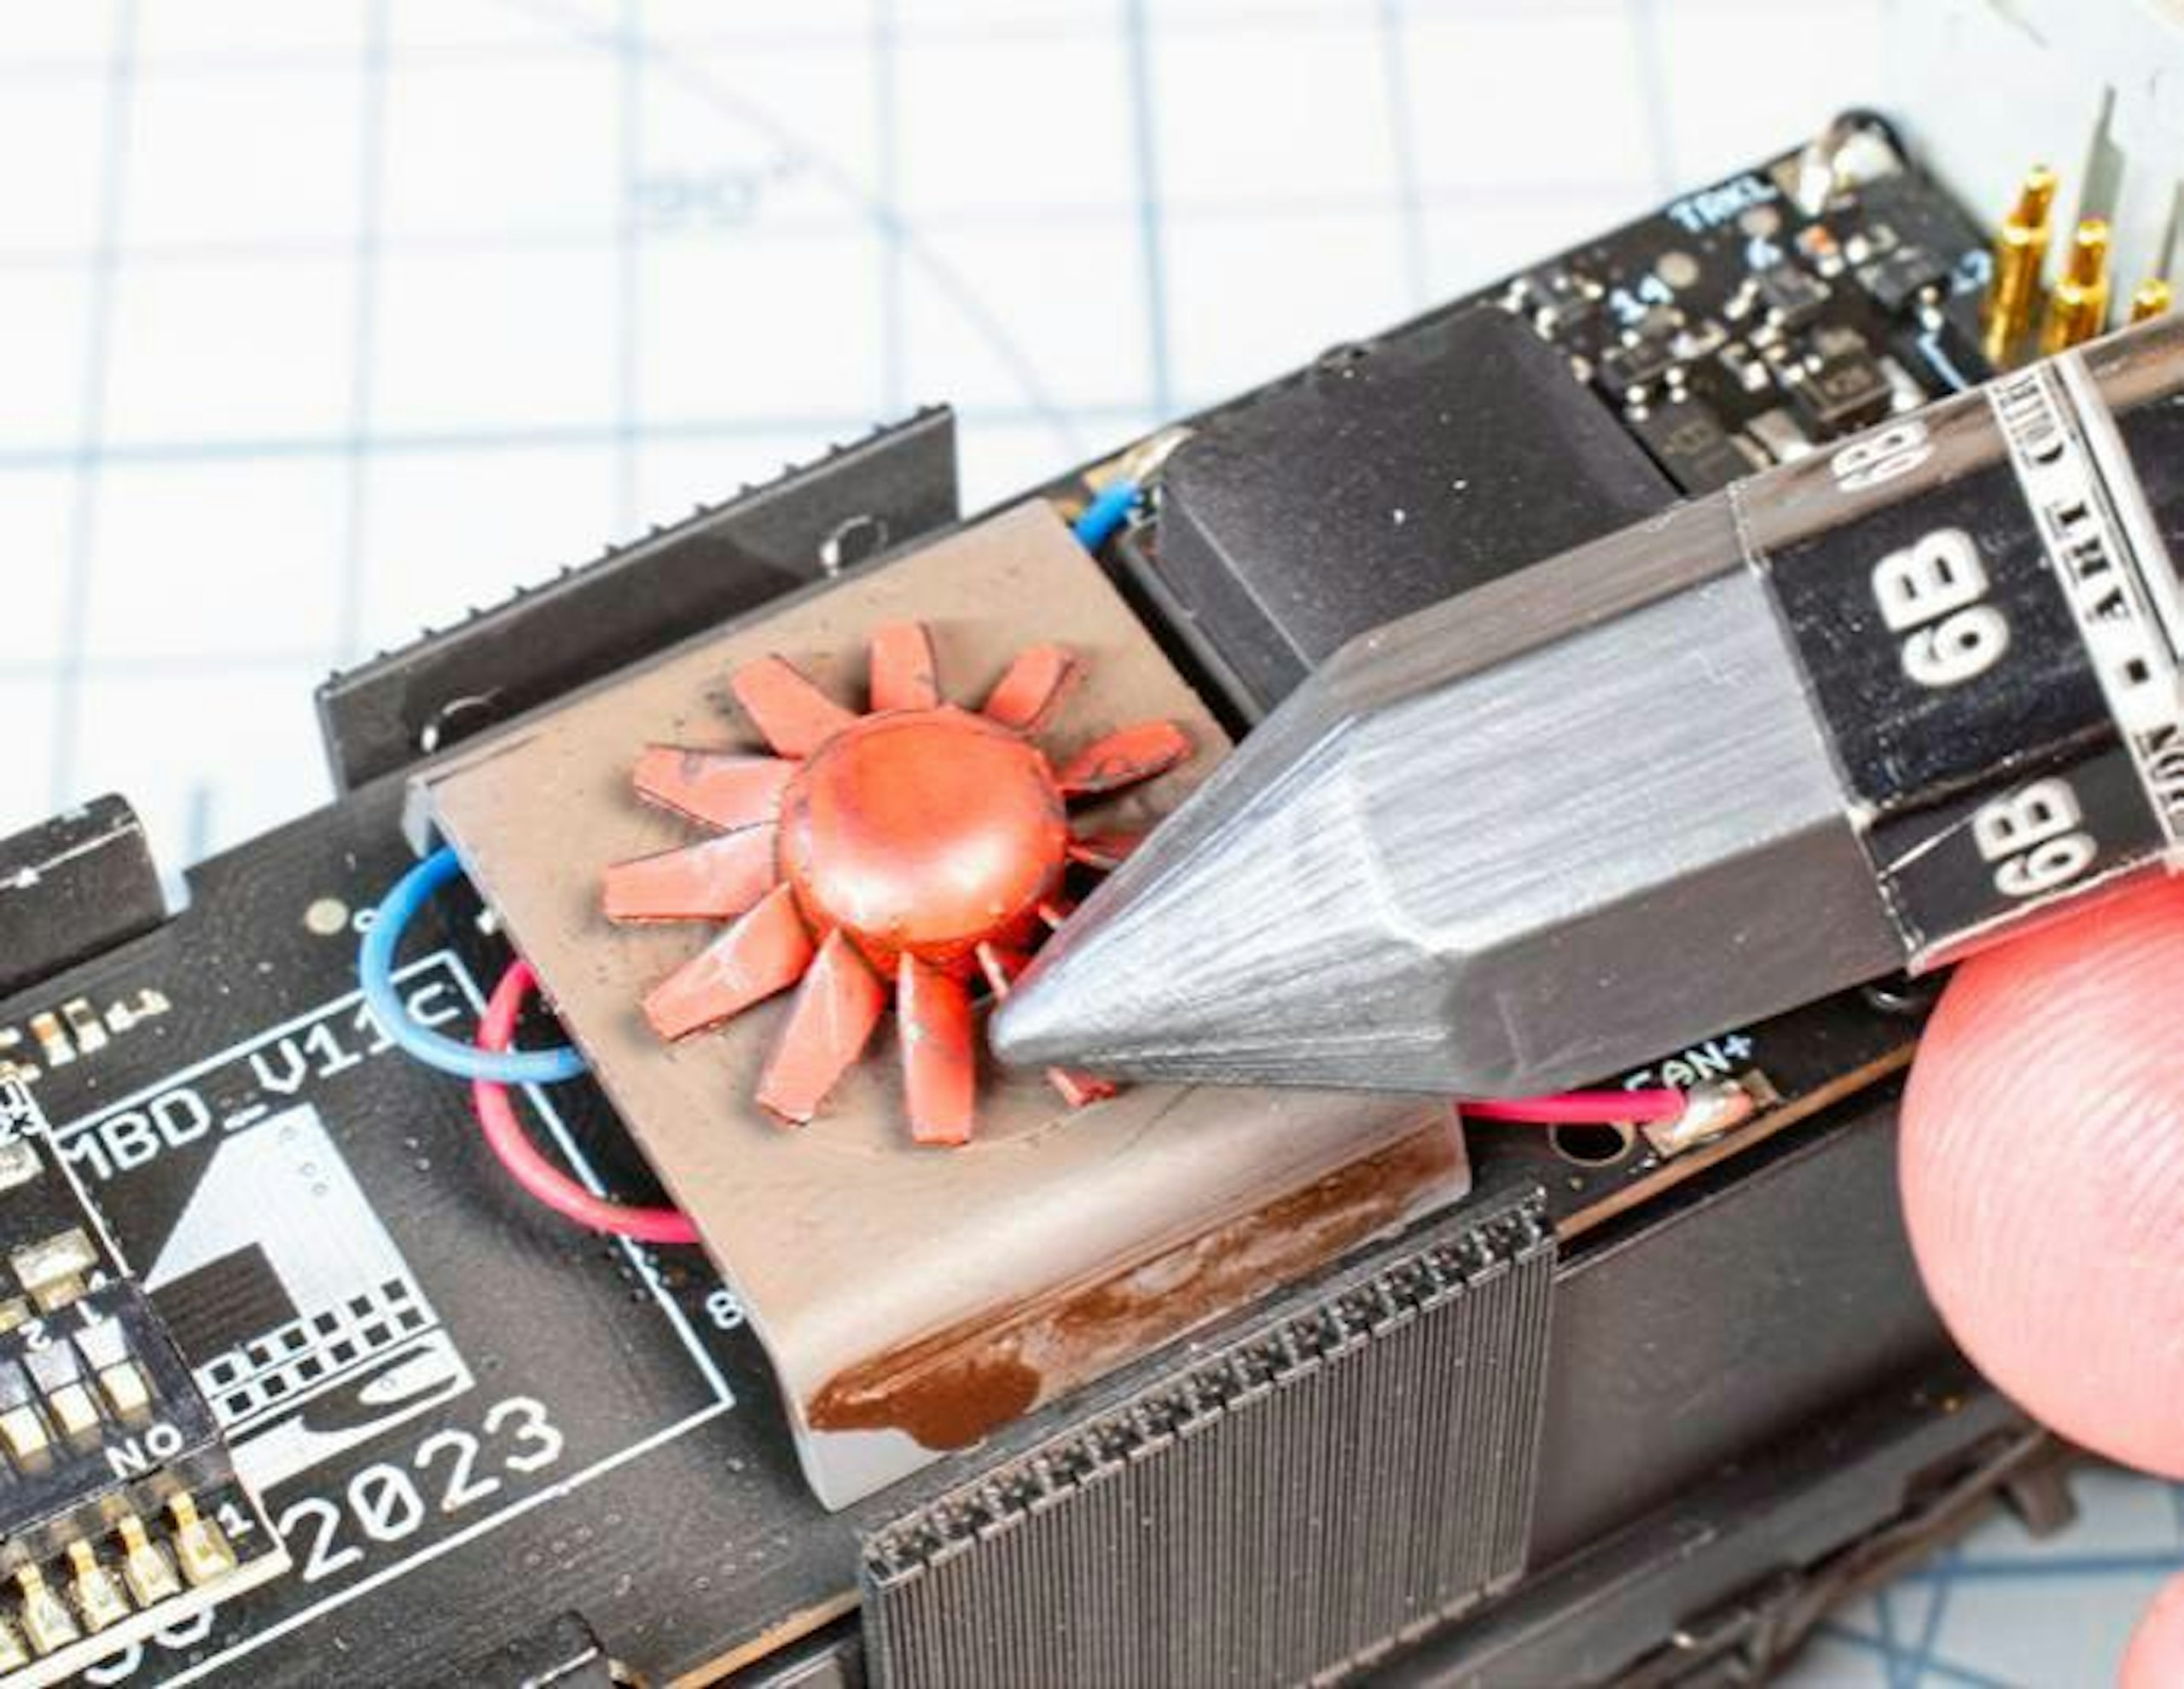
23 I distressed the weathered radiator fan with the tip of an artist’s graphite pencil, suggesting chipped paint on the blades and boss. Similar effects can be achieved with drybrushed metallic paint (a gunmetal shade works well).
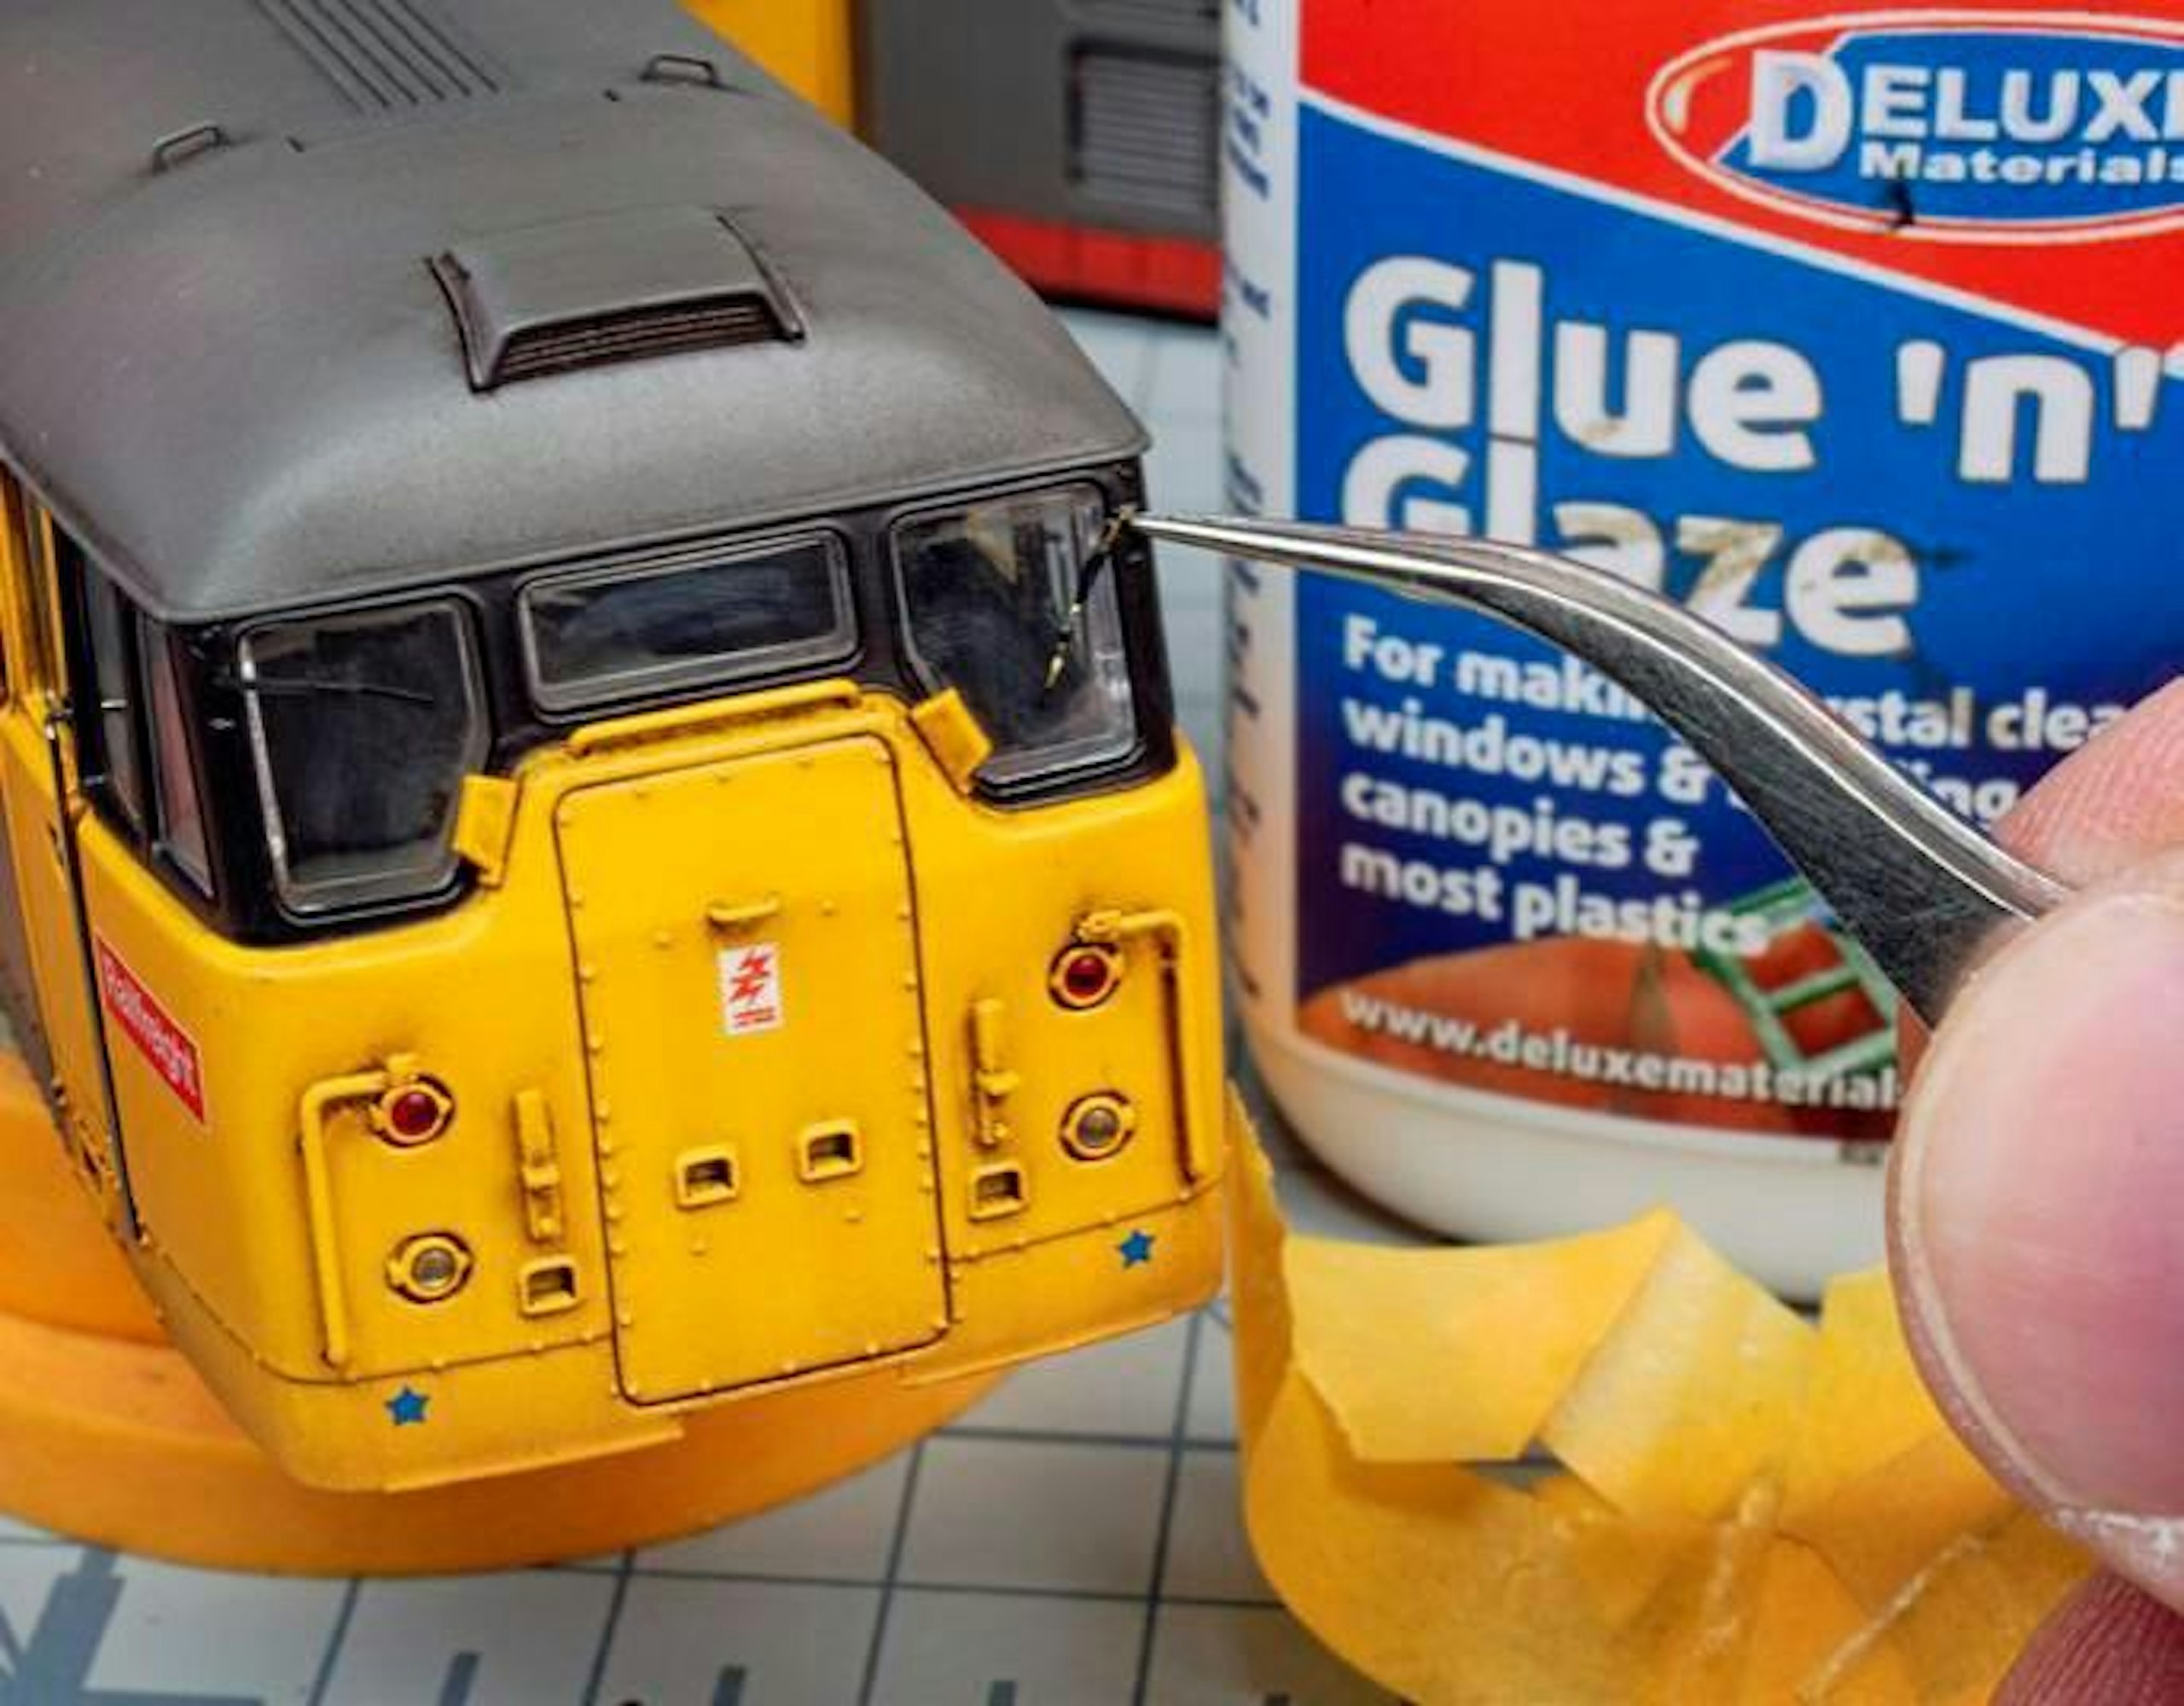
24 Be careful when removing the masking tape from the outside of the windscreens, as one of the wipers was dislodged on my model. I took the opportunity to fix it back in place (with Glue ‘n’ Glaze) in a different position to add variety.
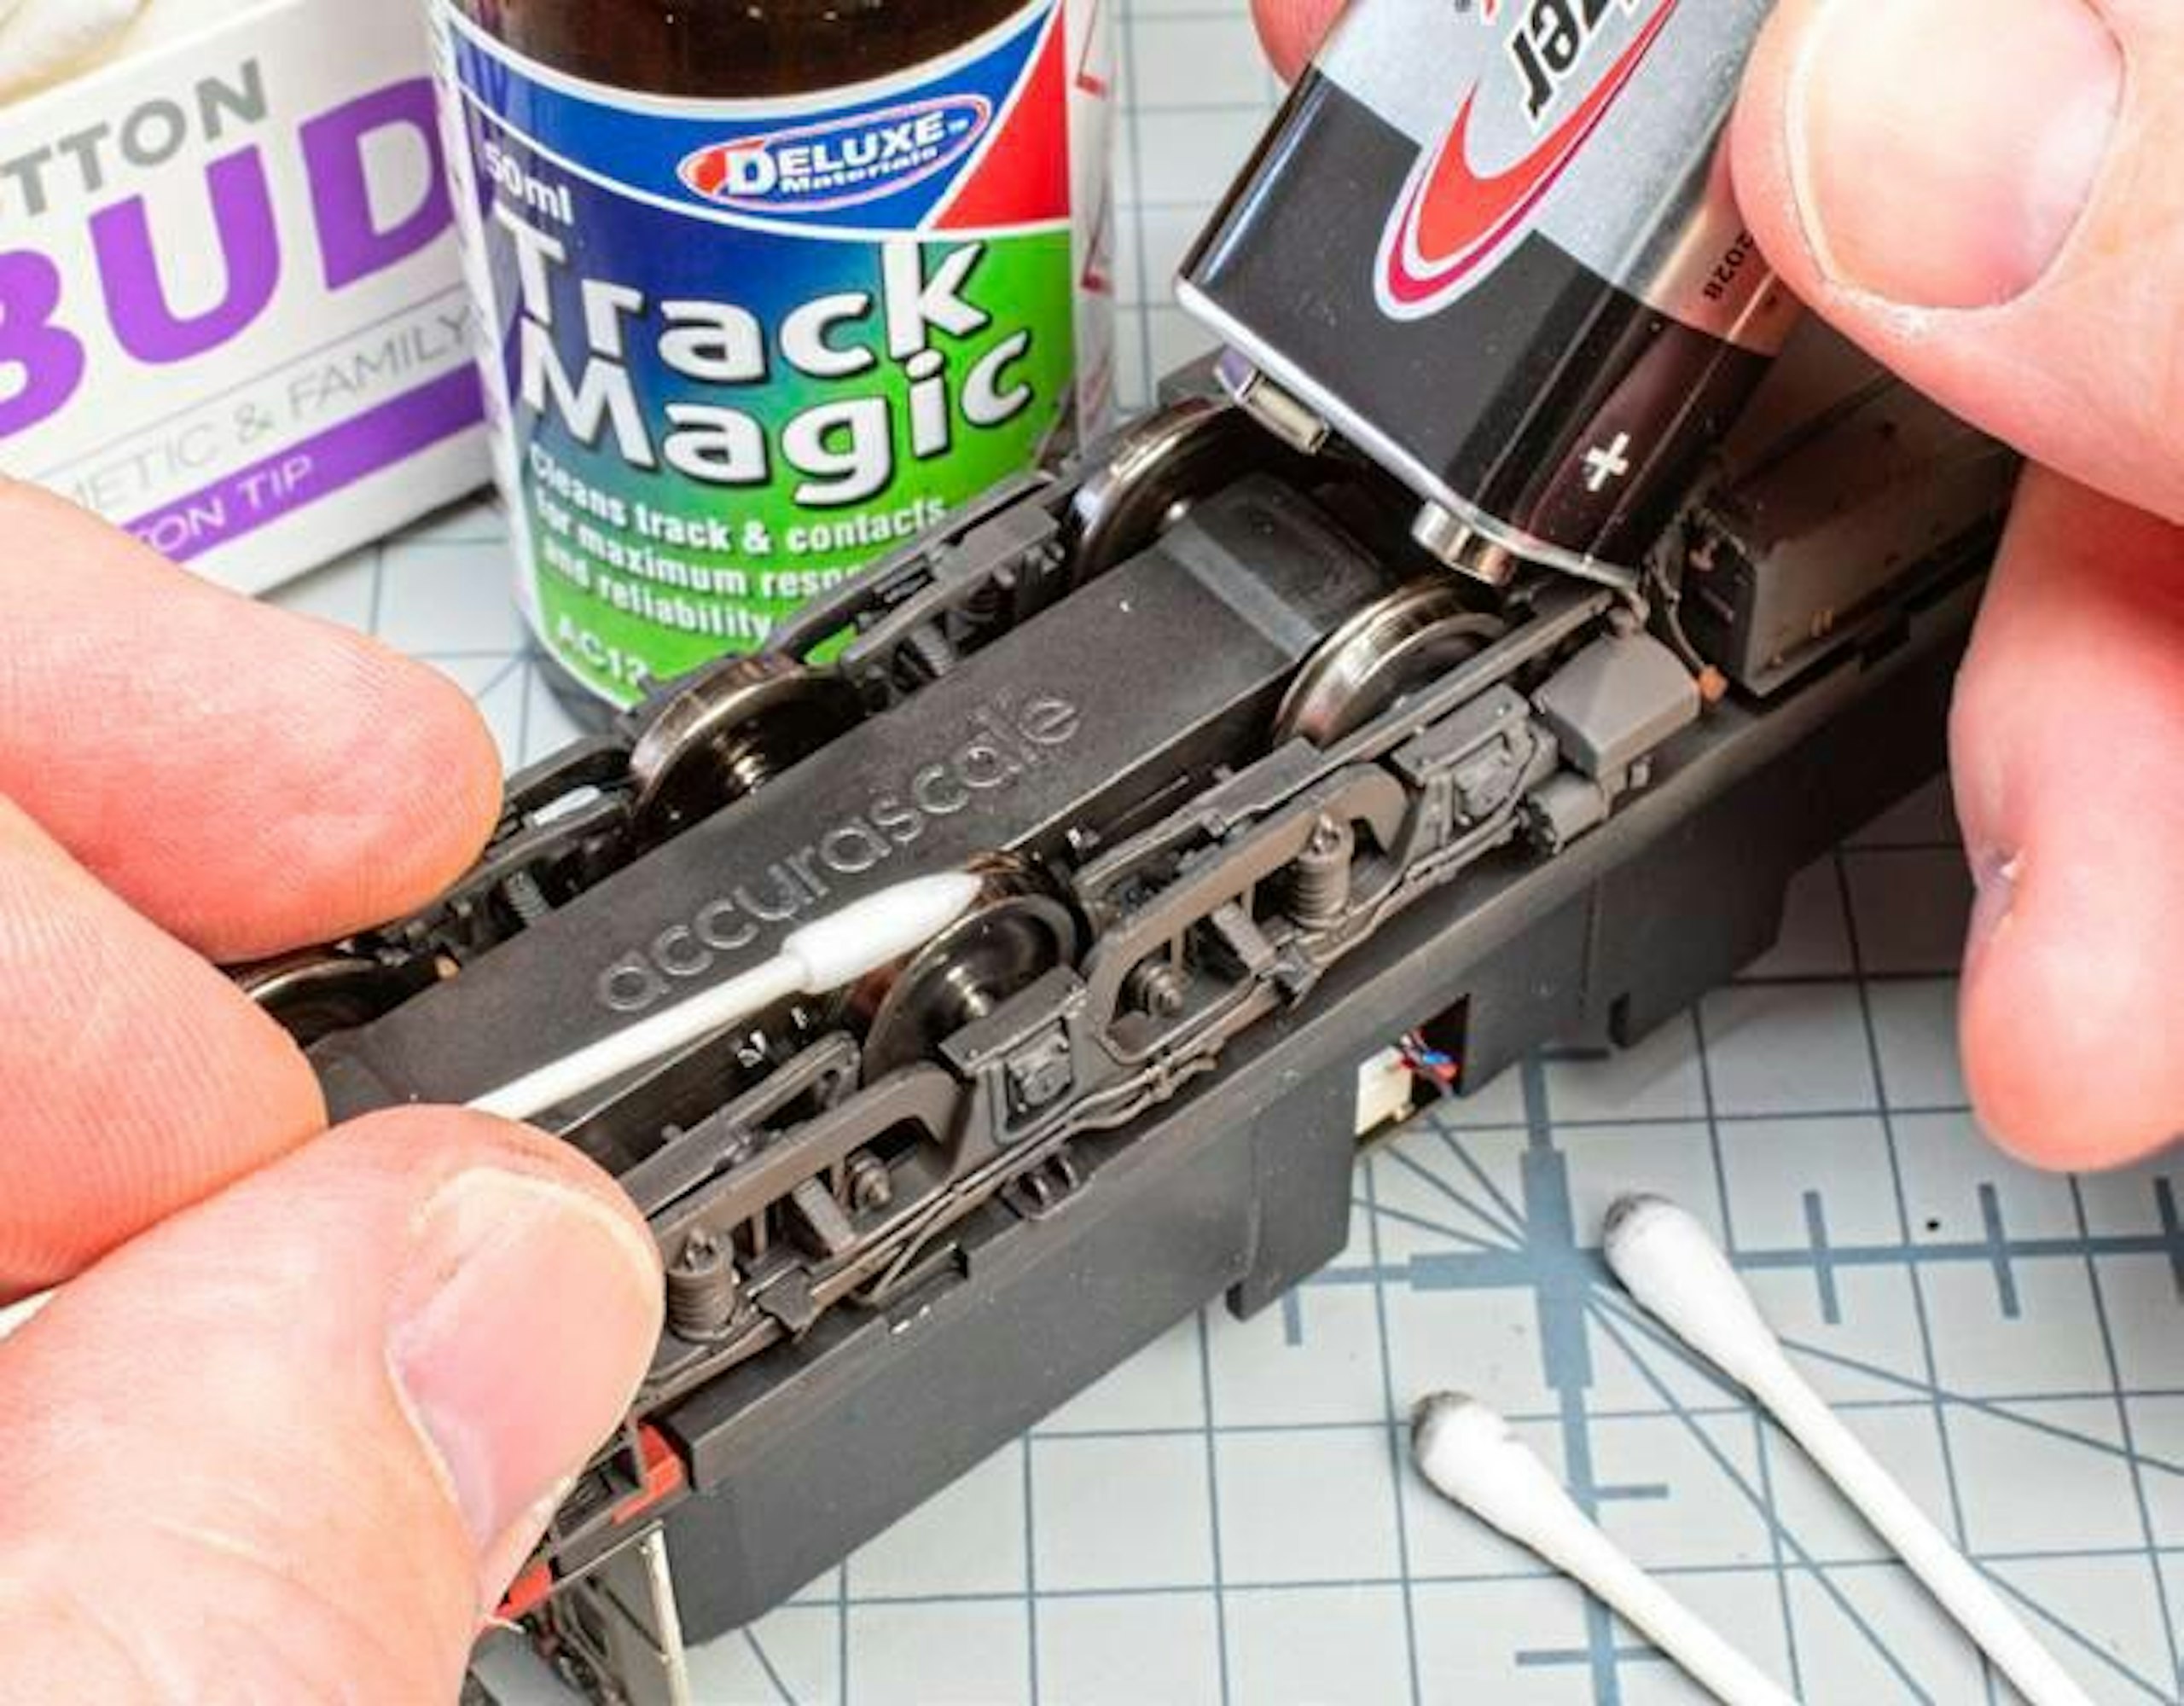
25 It’s essential to ensure the wheels are clean, especially after weathering. Track Magic cleaning fluid removes paint and contaminants with the aid of swabs. For non-DCC models, a 9V battery will power the mechanism.
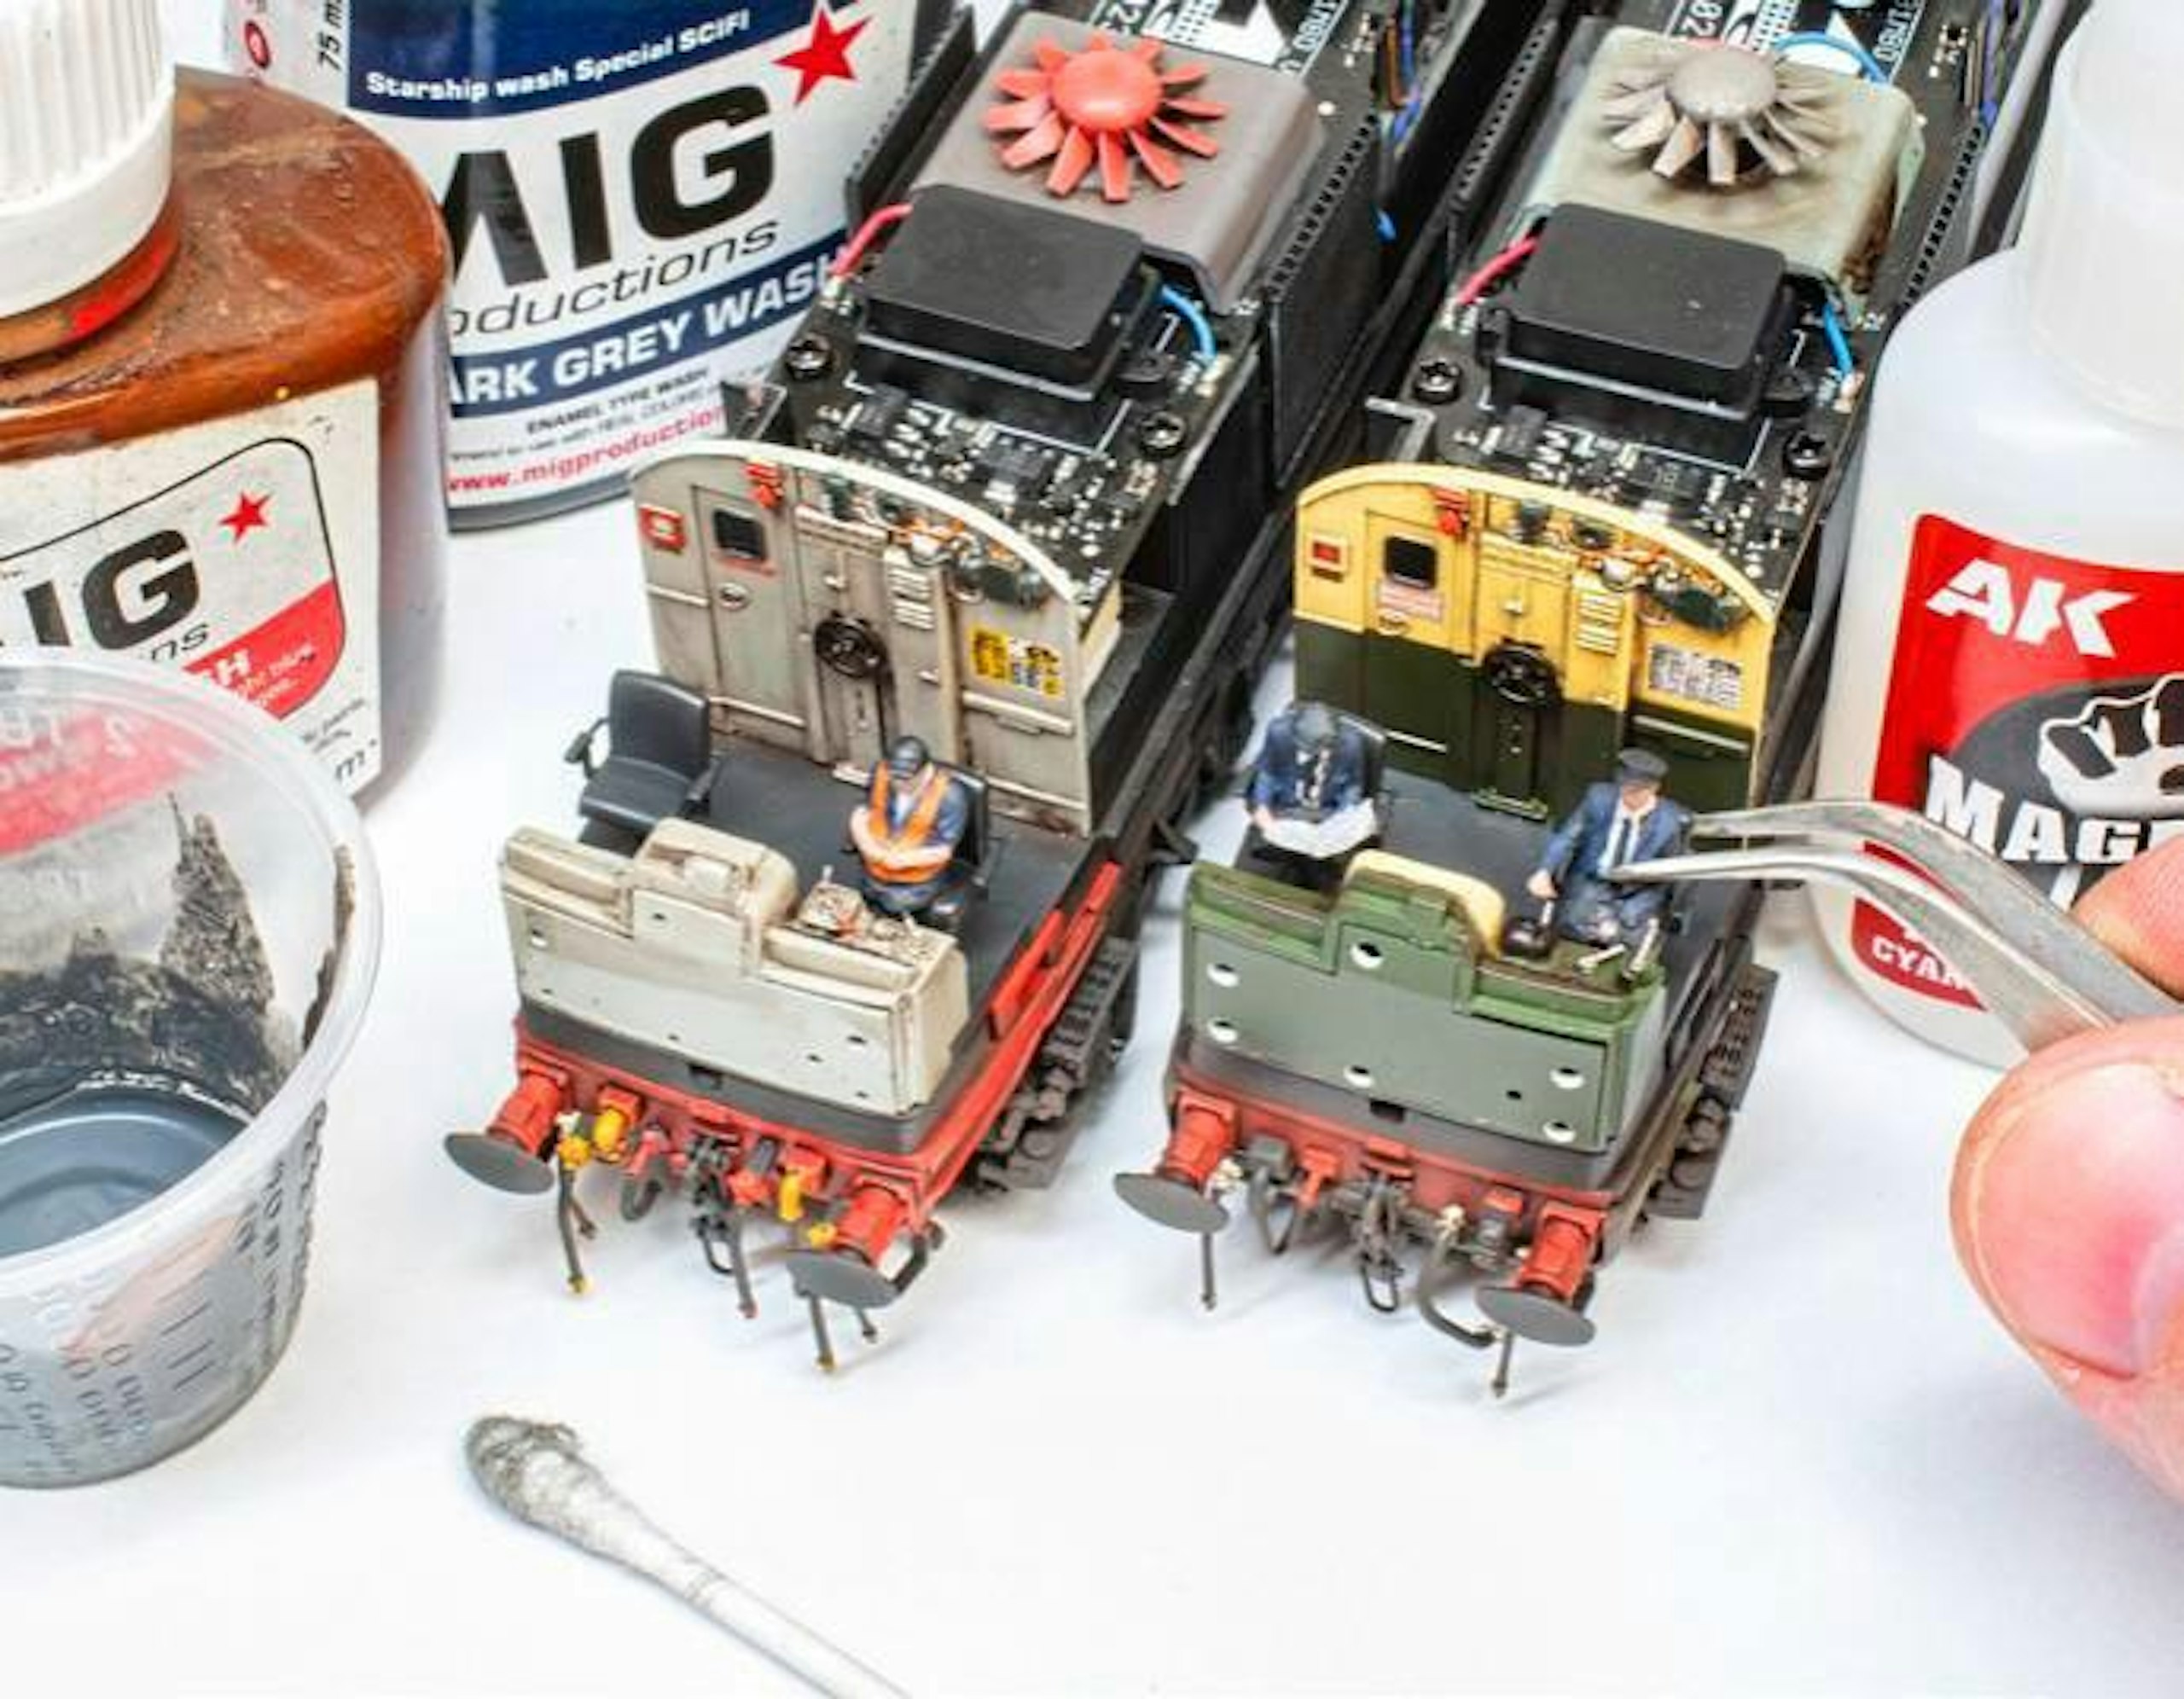
26 The finishing touch to the weathered cab interiors is a set of footplate crew. I employed a mix of Modelu and Preiser figures, painted in appropriate shades and fixed into place with a heavy-duty cyano glue for a reliable bond.
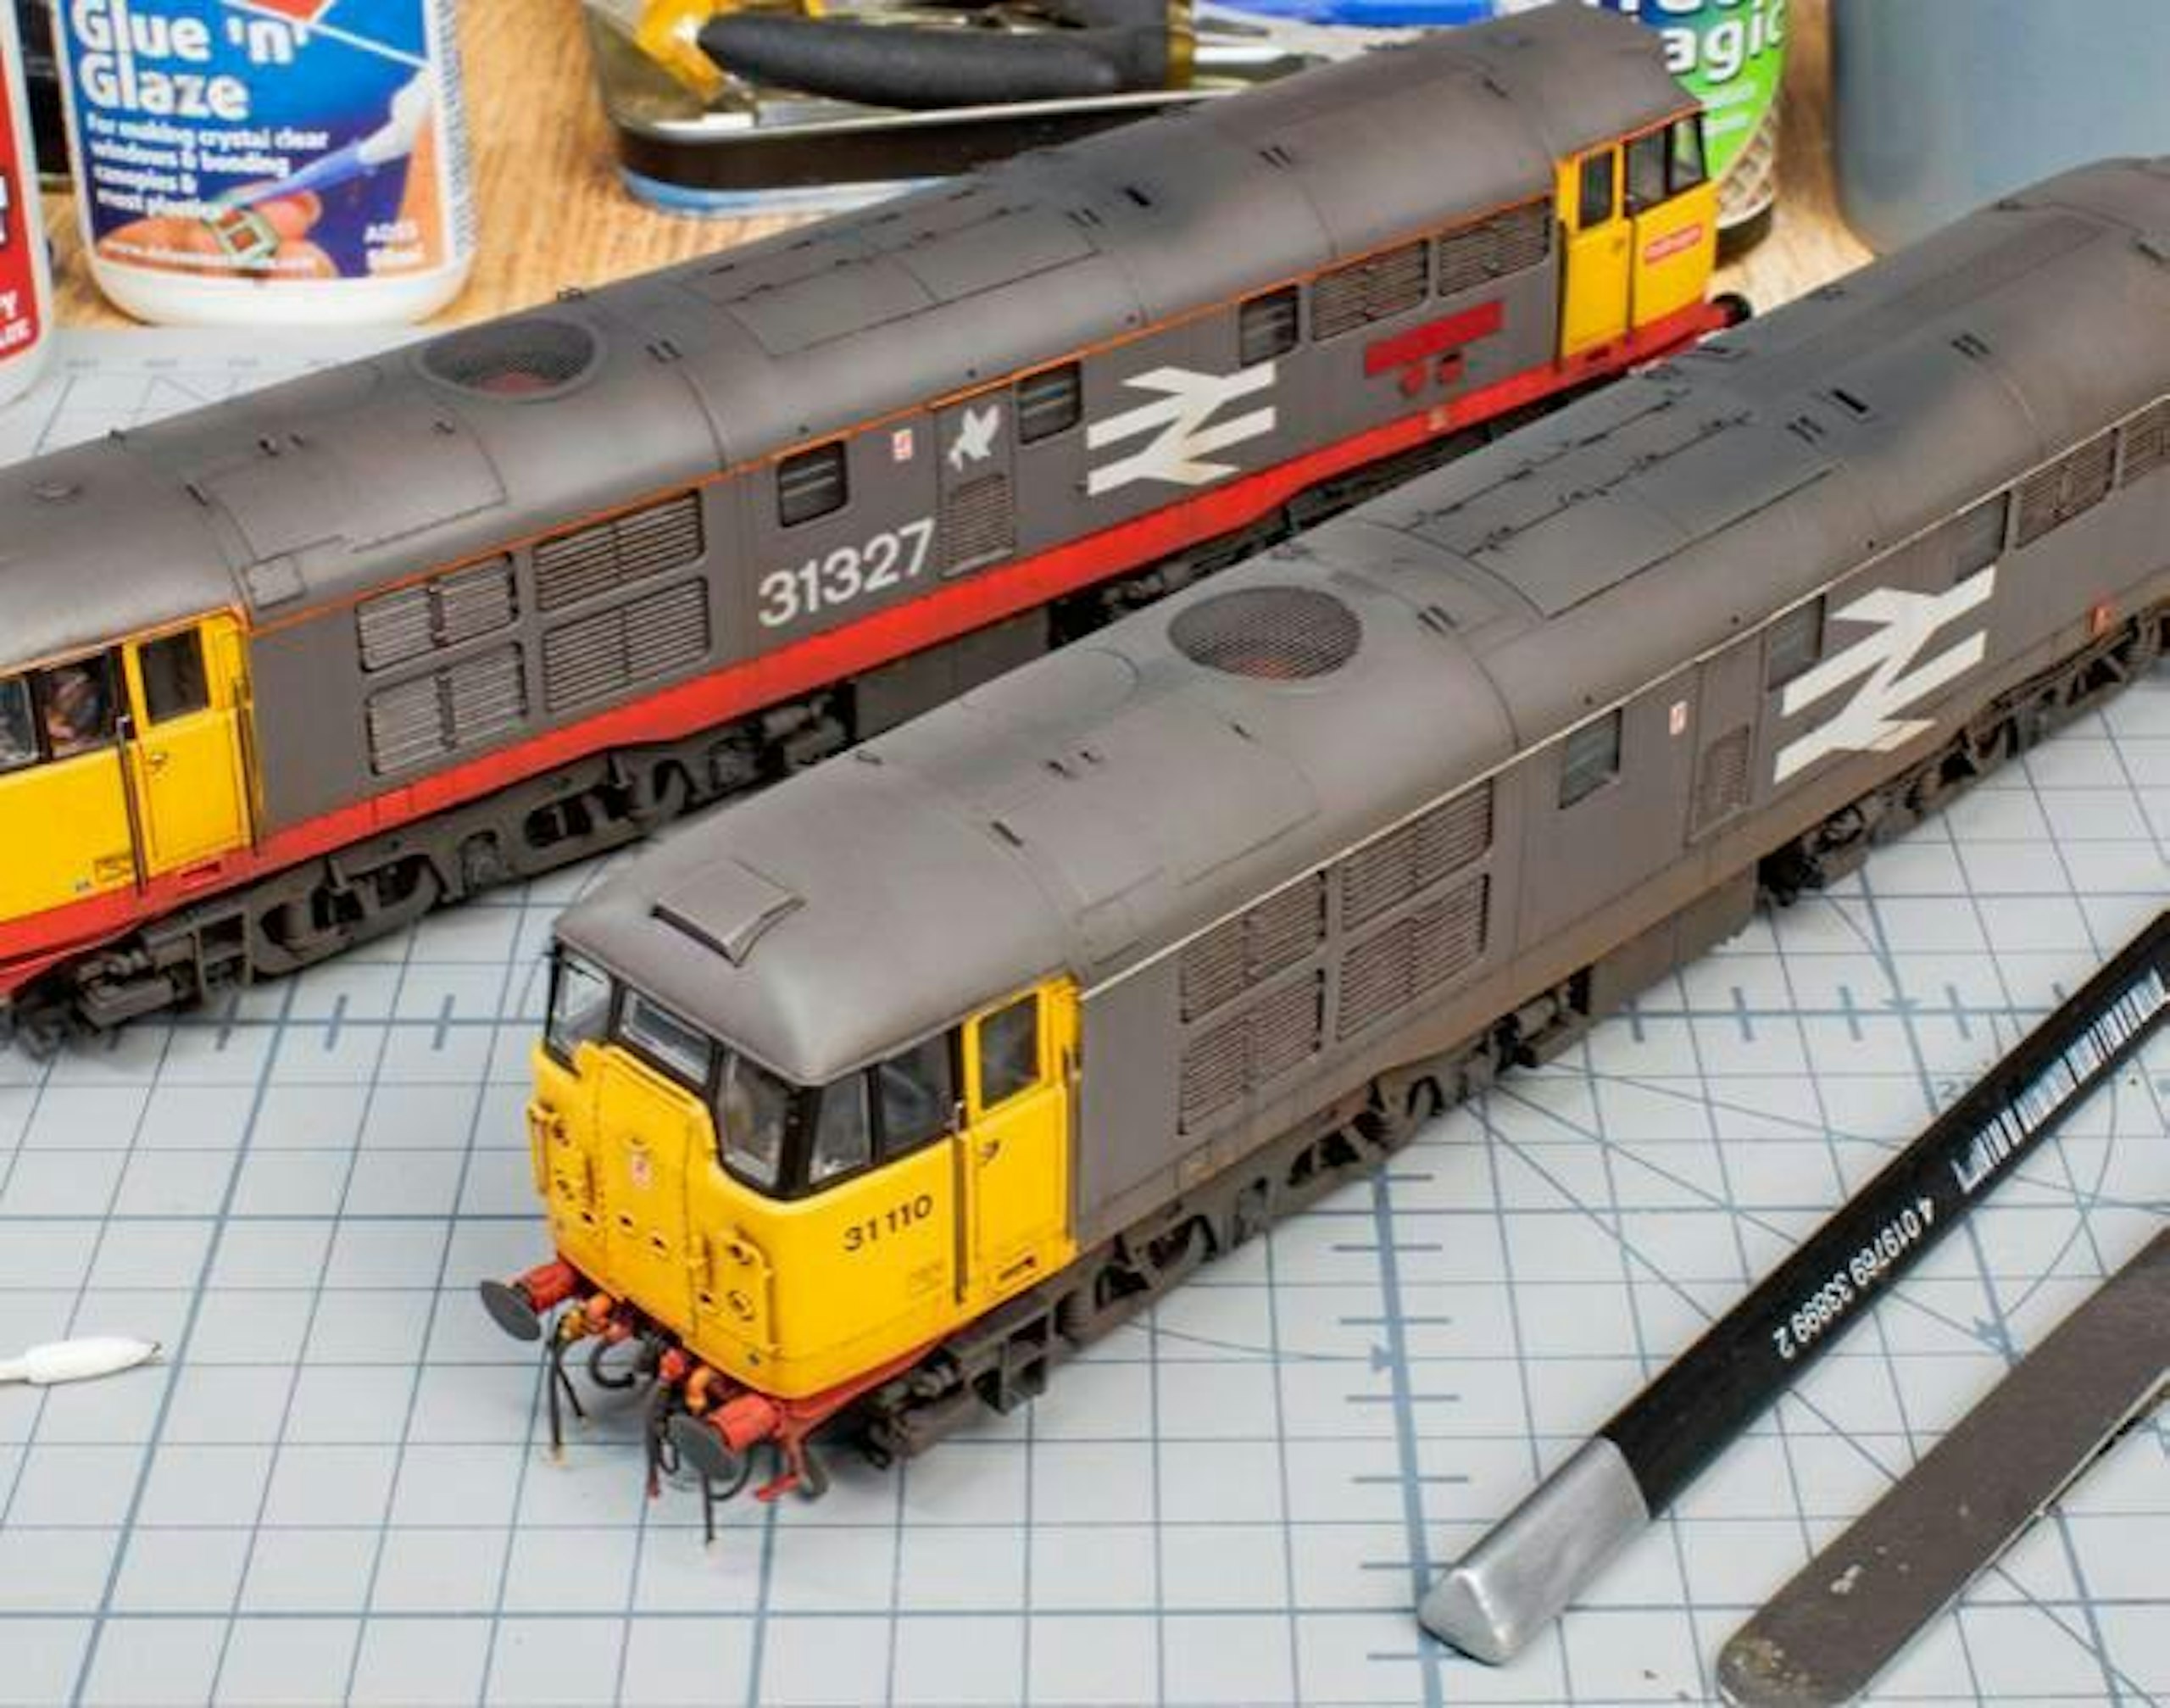
27 Once everything was fully dry (I allowed the fumes from the cyano glue used on the footplate crew 24 hours to evaporate), the bodies were refitted and any areas touched up by hand, as necessary.
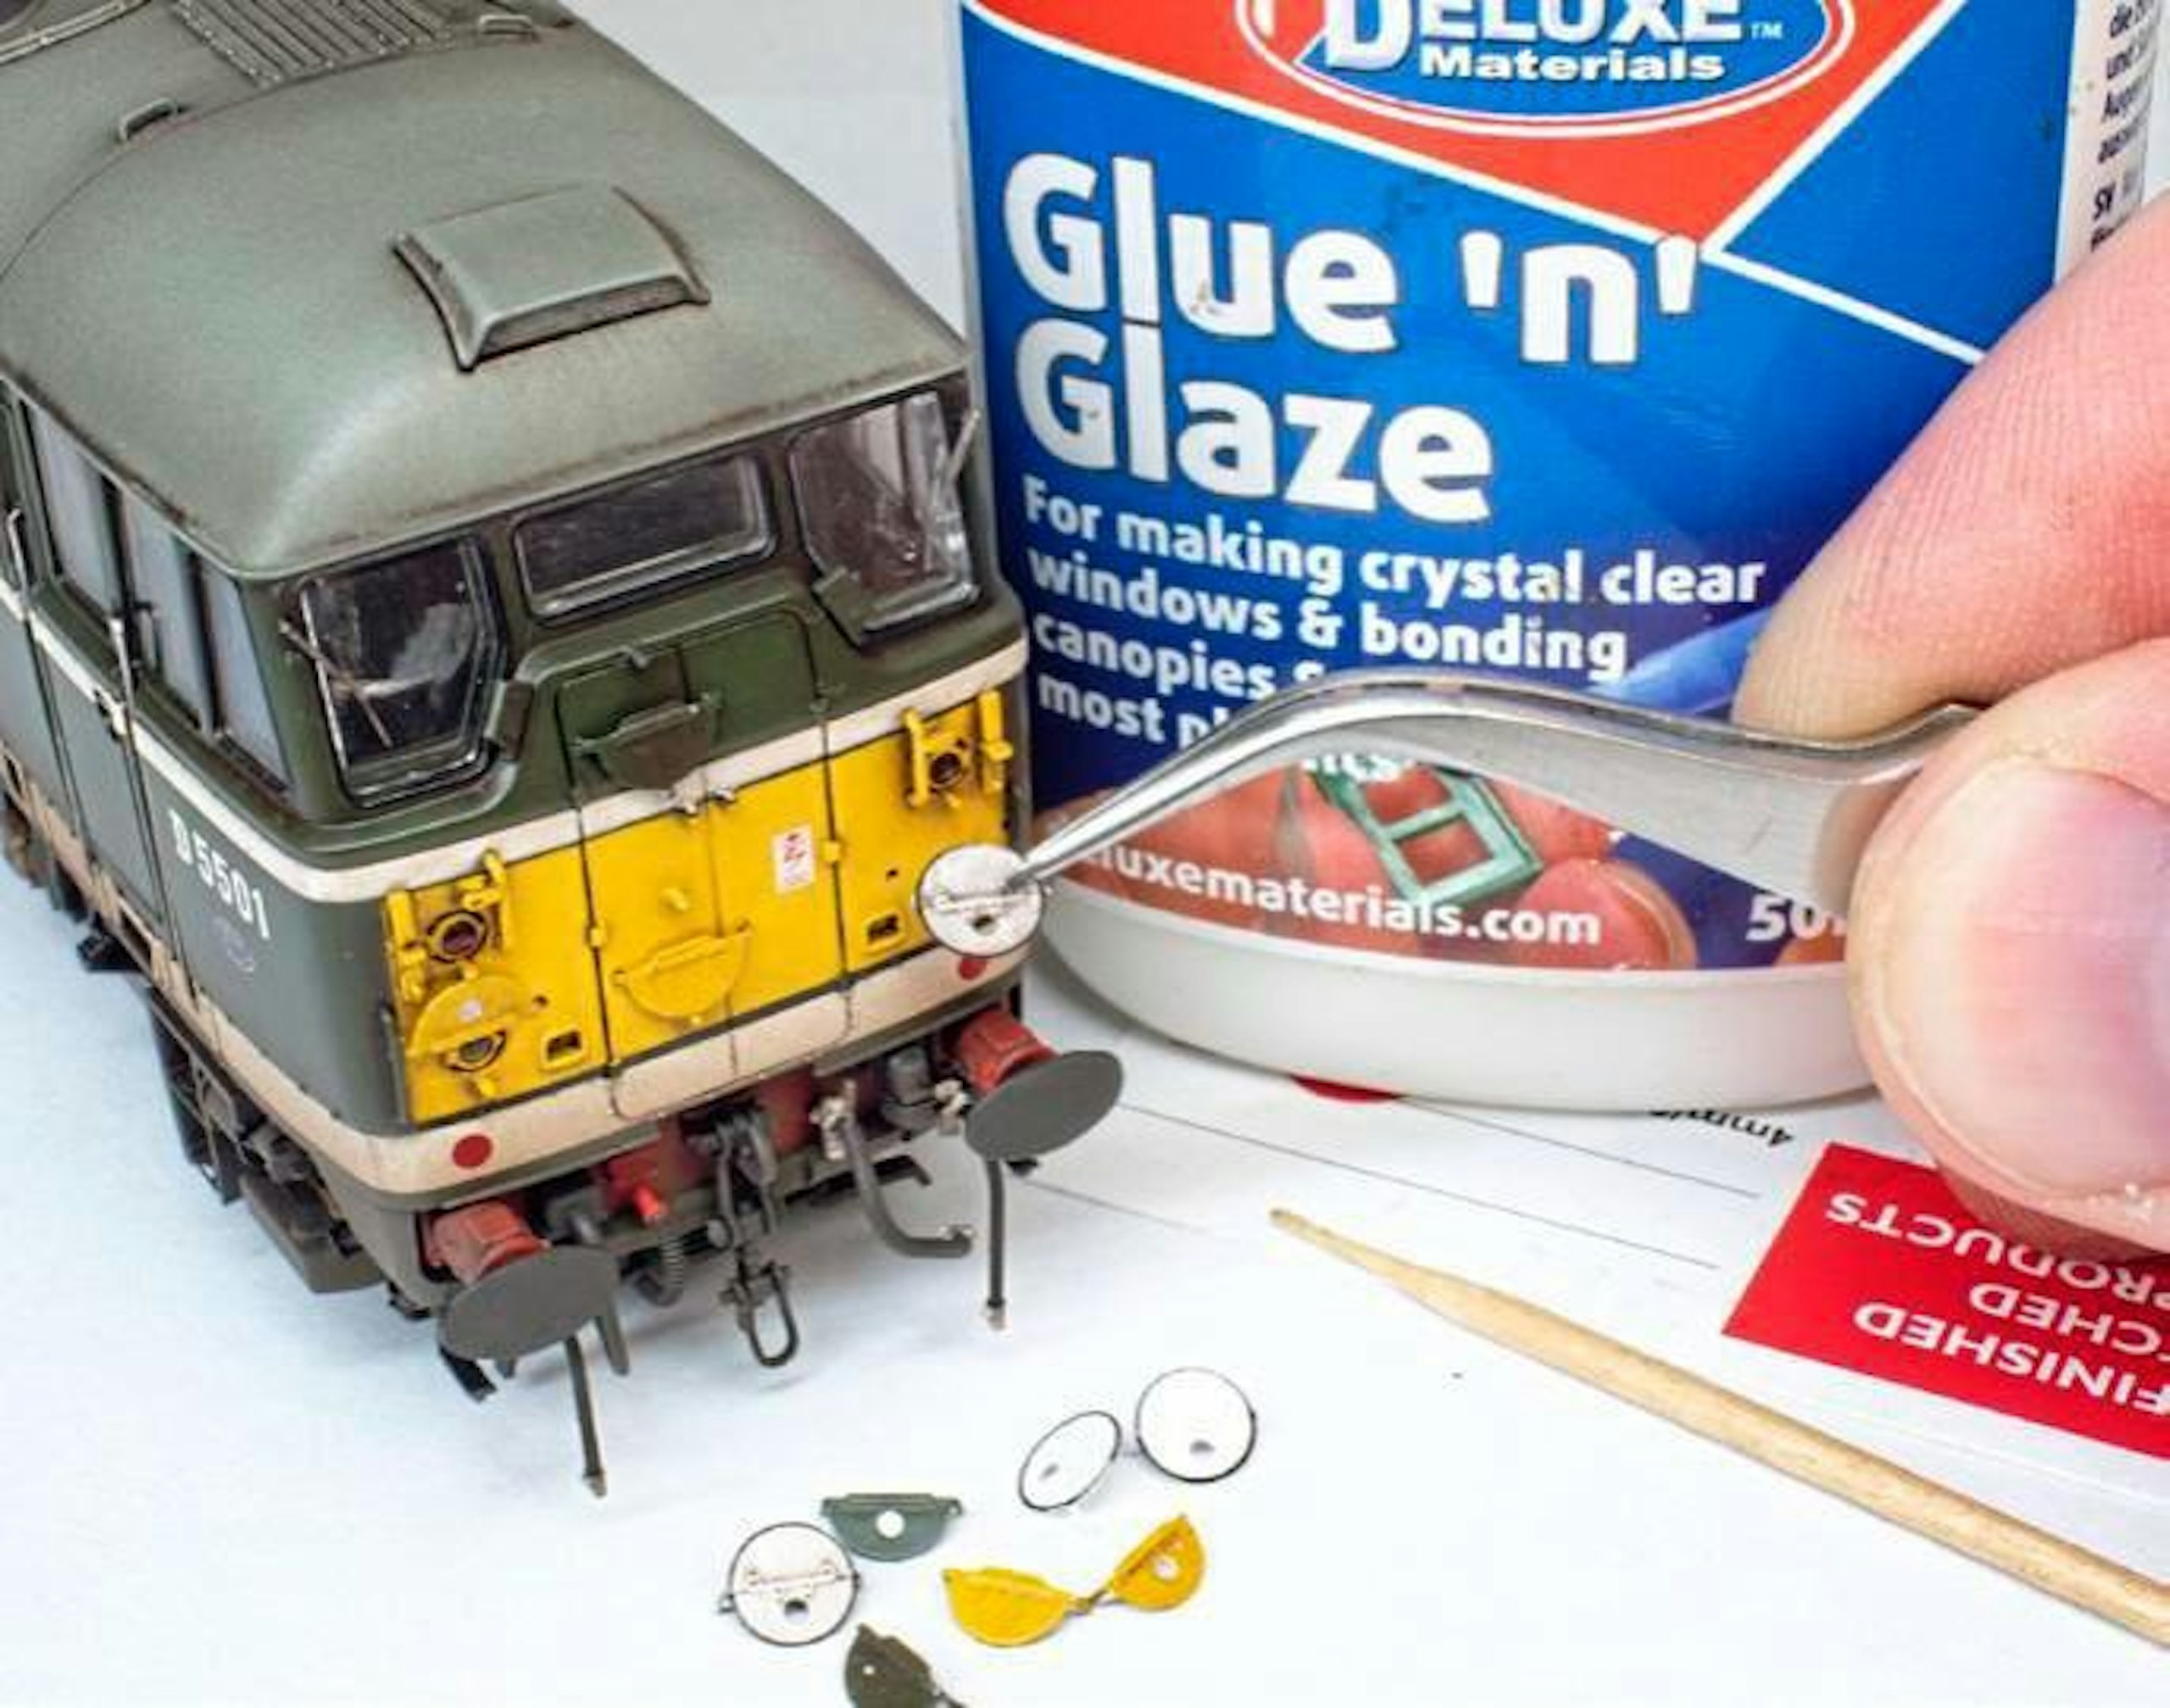
28 The green Class 30 needed the disc headcodes fitted. These had been pre-weathered with the enamel washes and were installed with Glue ‘n’ Glaze adhesive, making them easier to remove in future without damaging the paintwork.
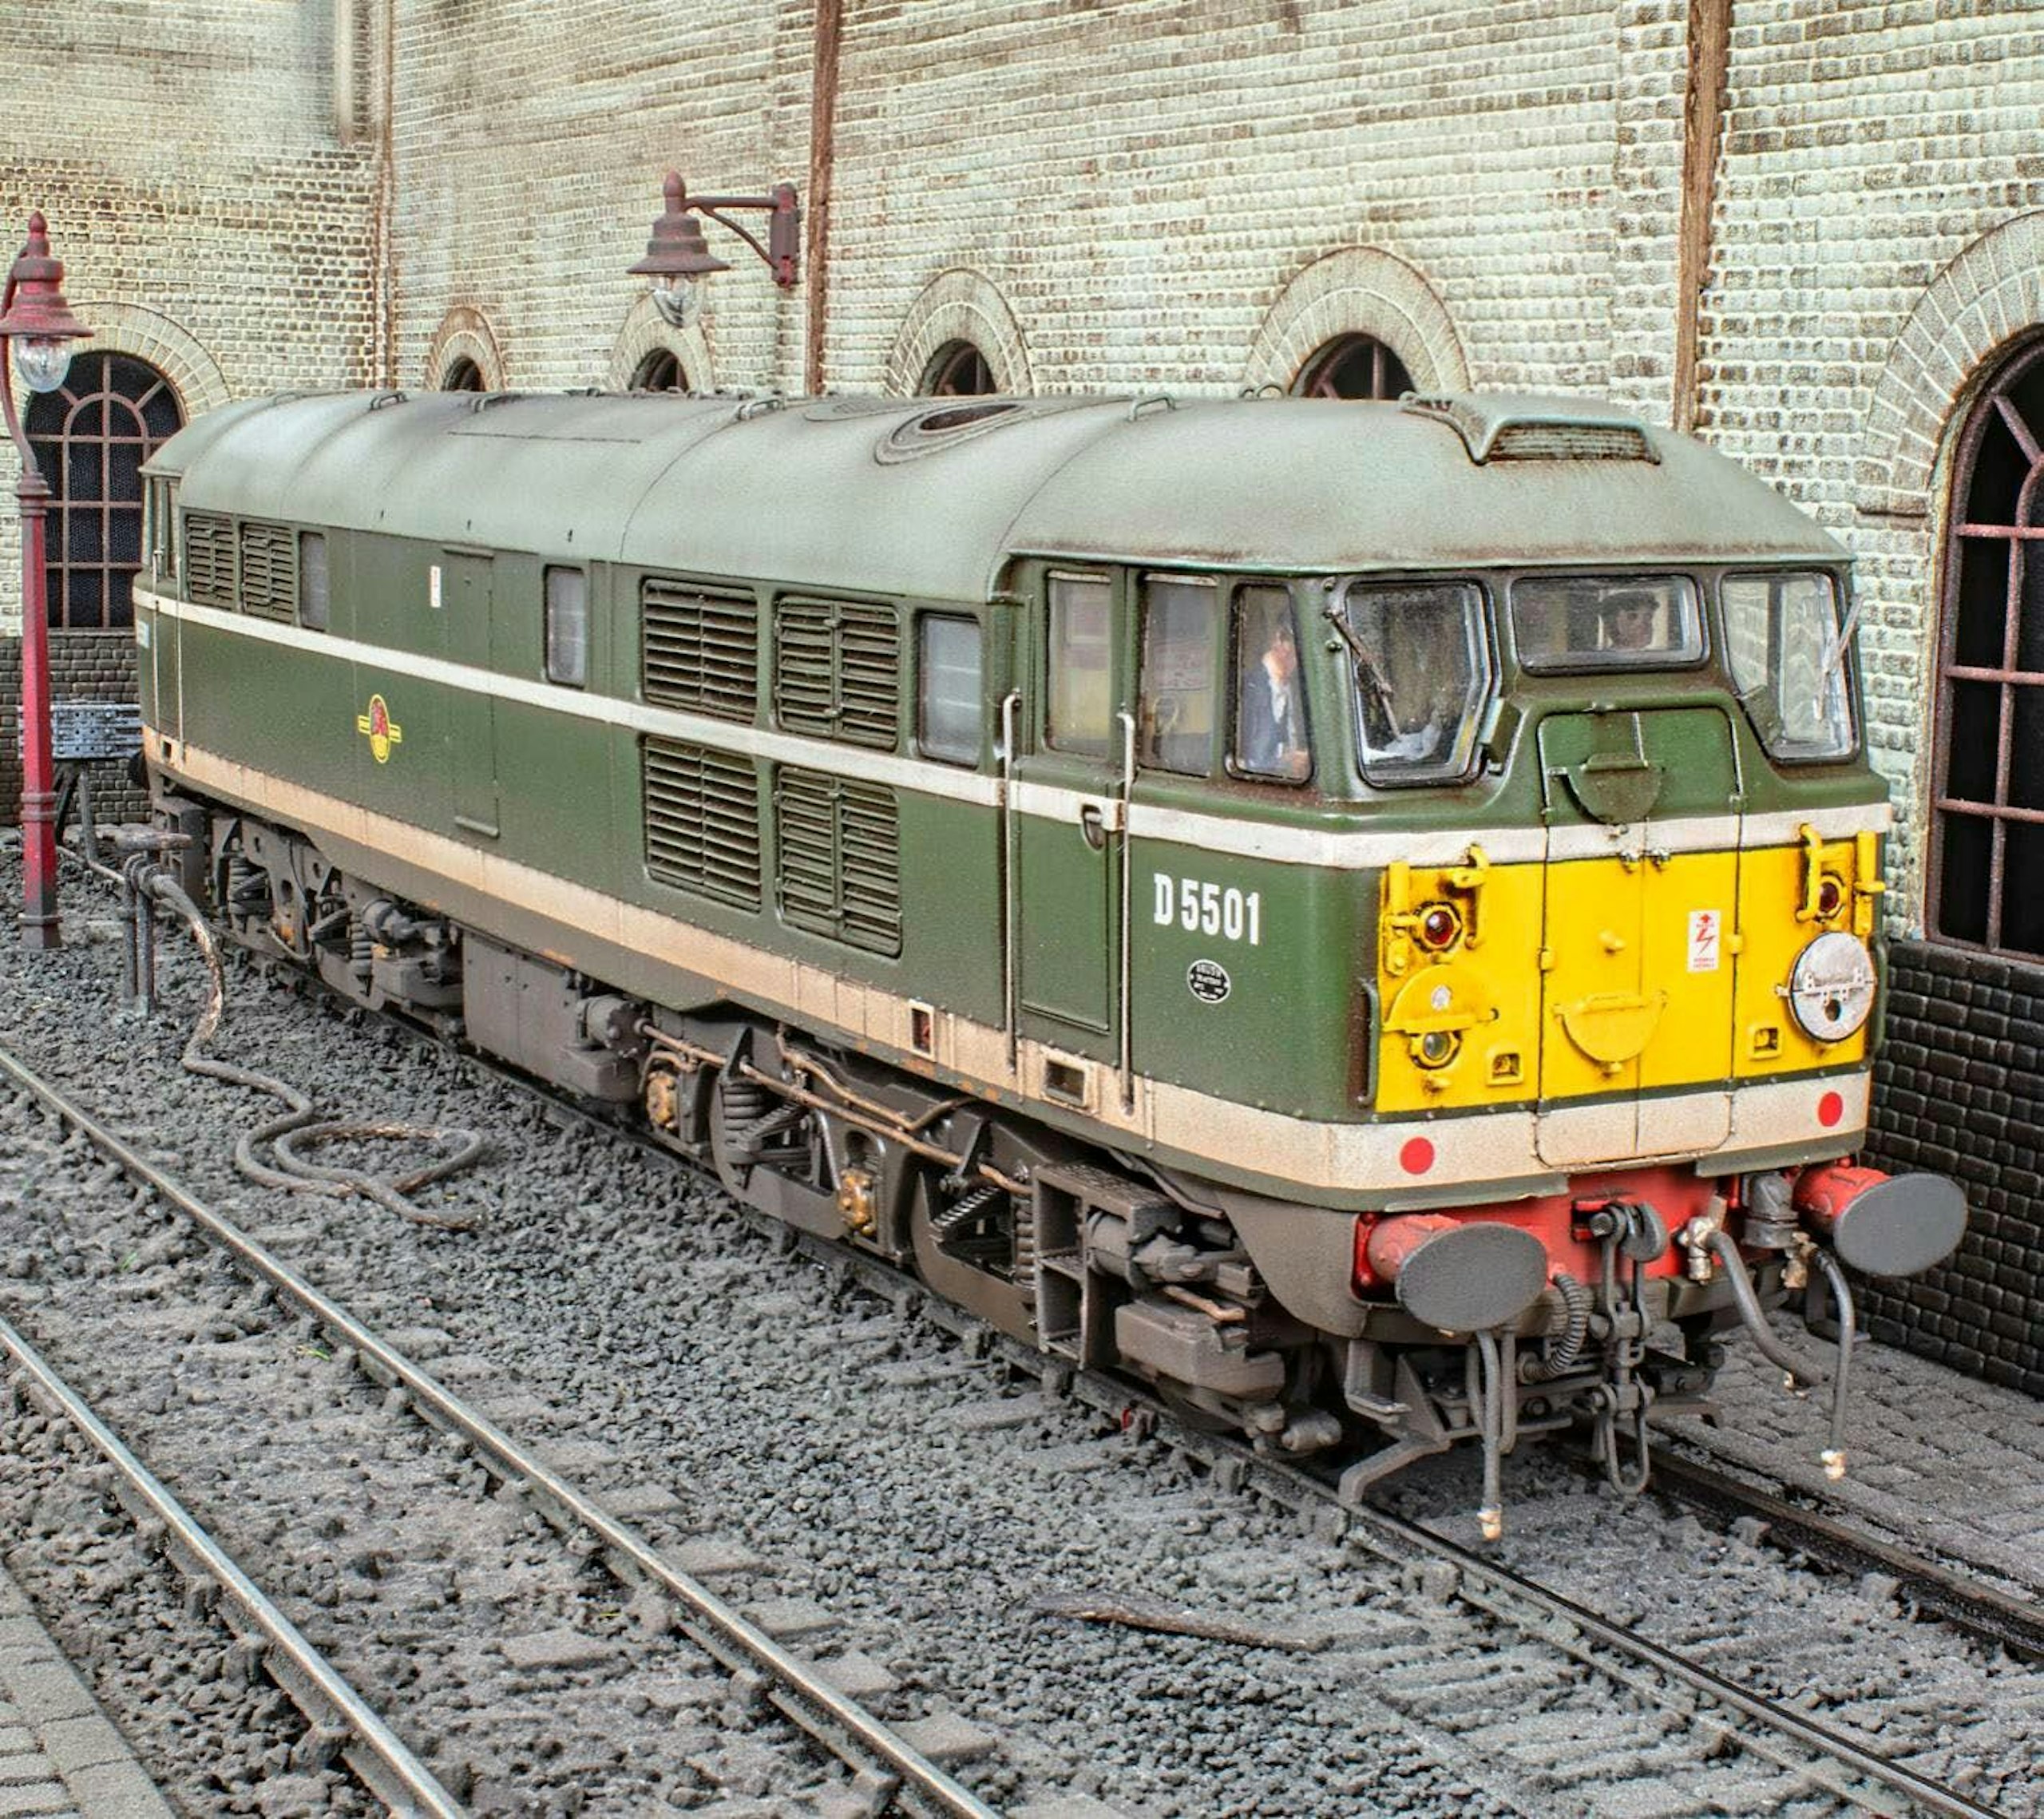
In its original, Mirrlees-powered Class 30 form, Accurascale’s model really comes alive after a weathering job.
Subscribe to a Model Rail Print+ Subscription today and you'll get instant digital access, PLUS FREE UK delivery so you will never miss an issue.