Workbench
The venerable English Electric Type 1s have been one of the UK’s most successful diesels, and George Dent recently tinkered with a couple of Bachmann models, rekindling happy memories in the process.
PHOTOGRAPHY: GEORGE DENT
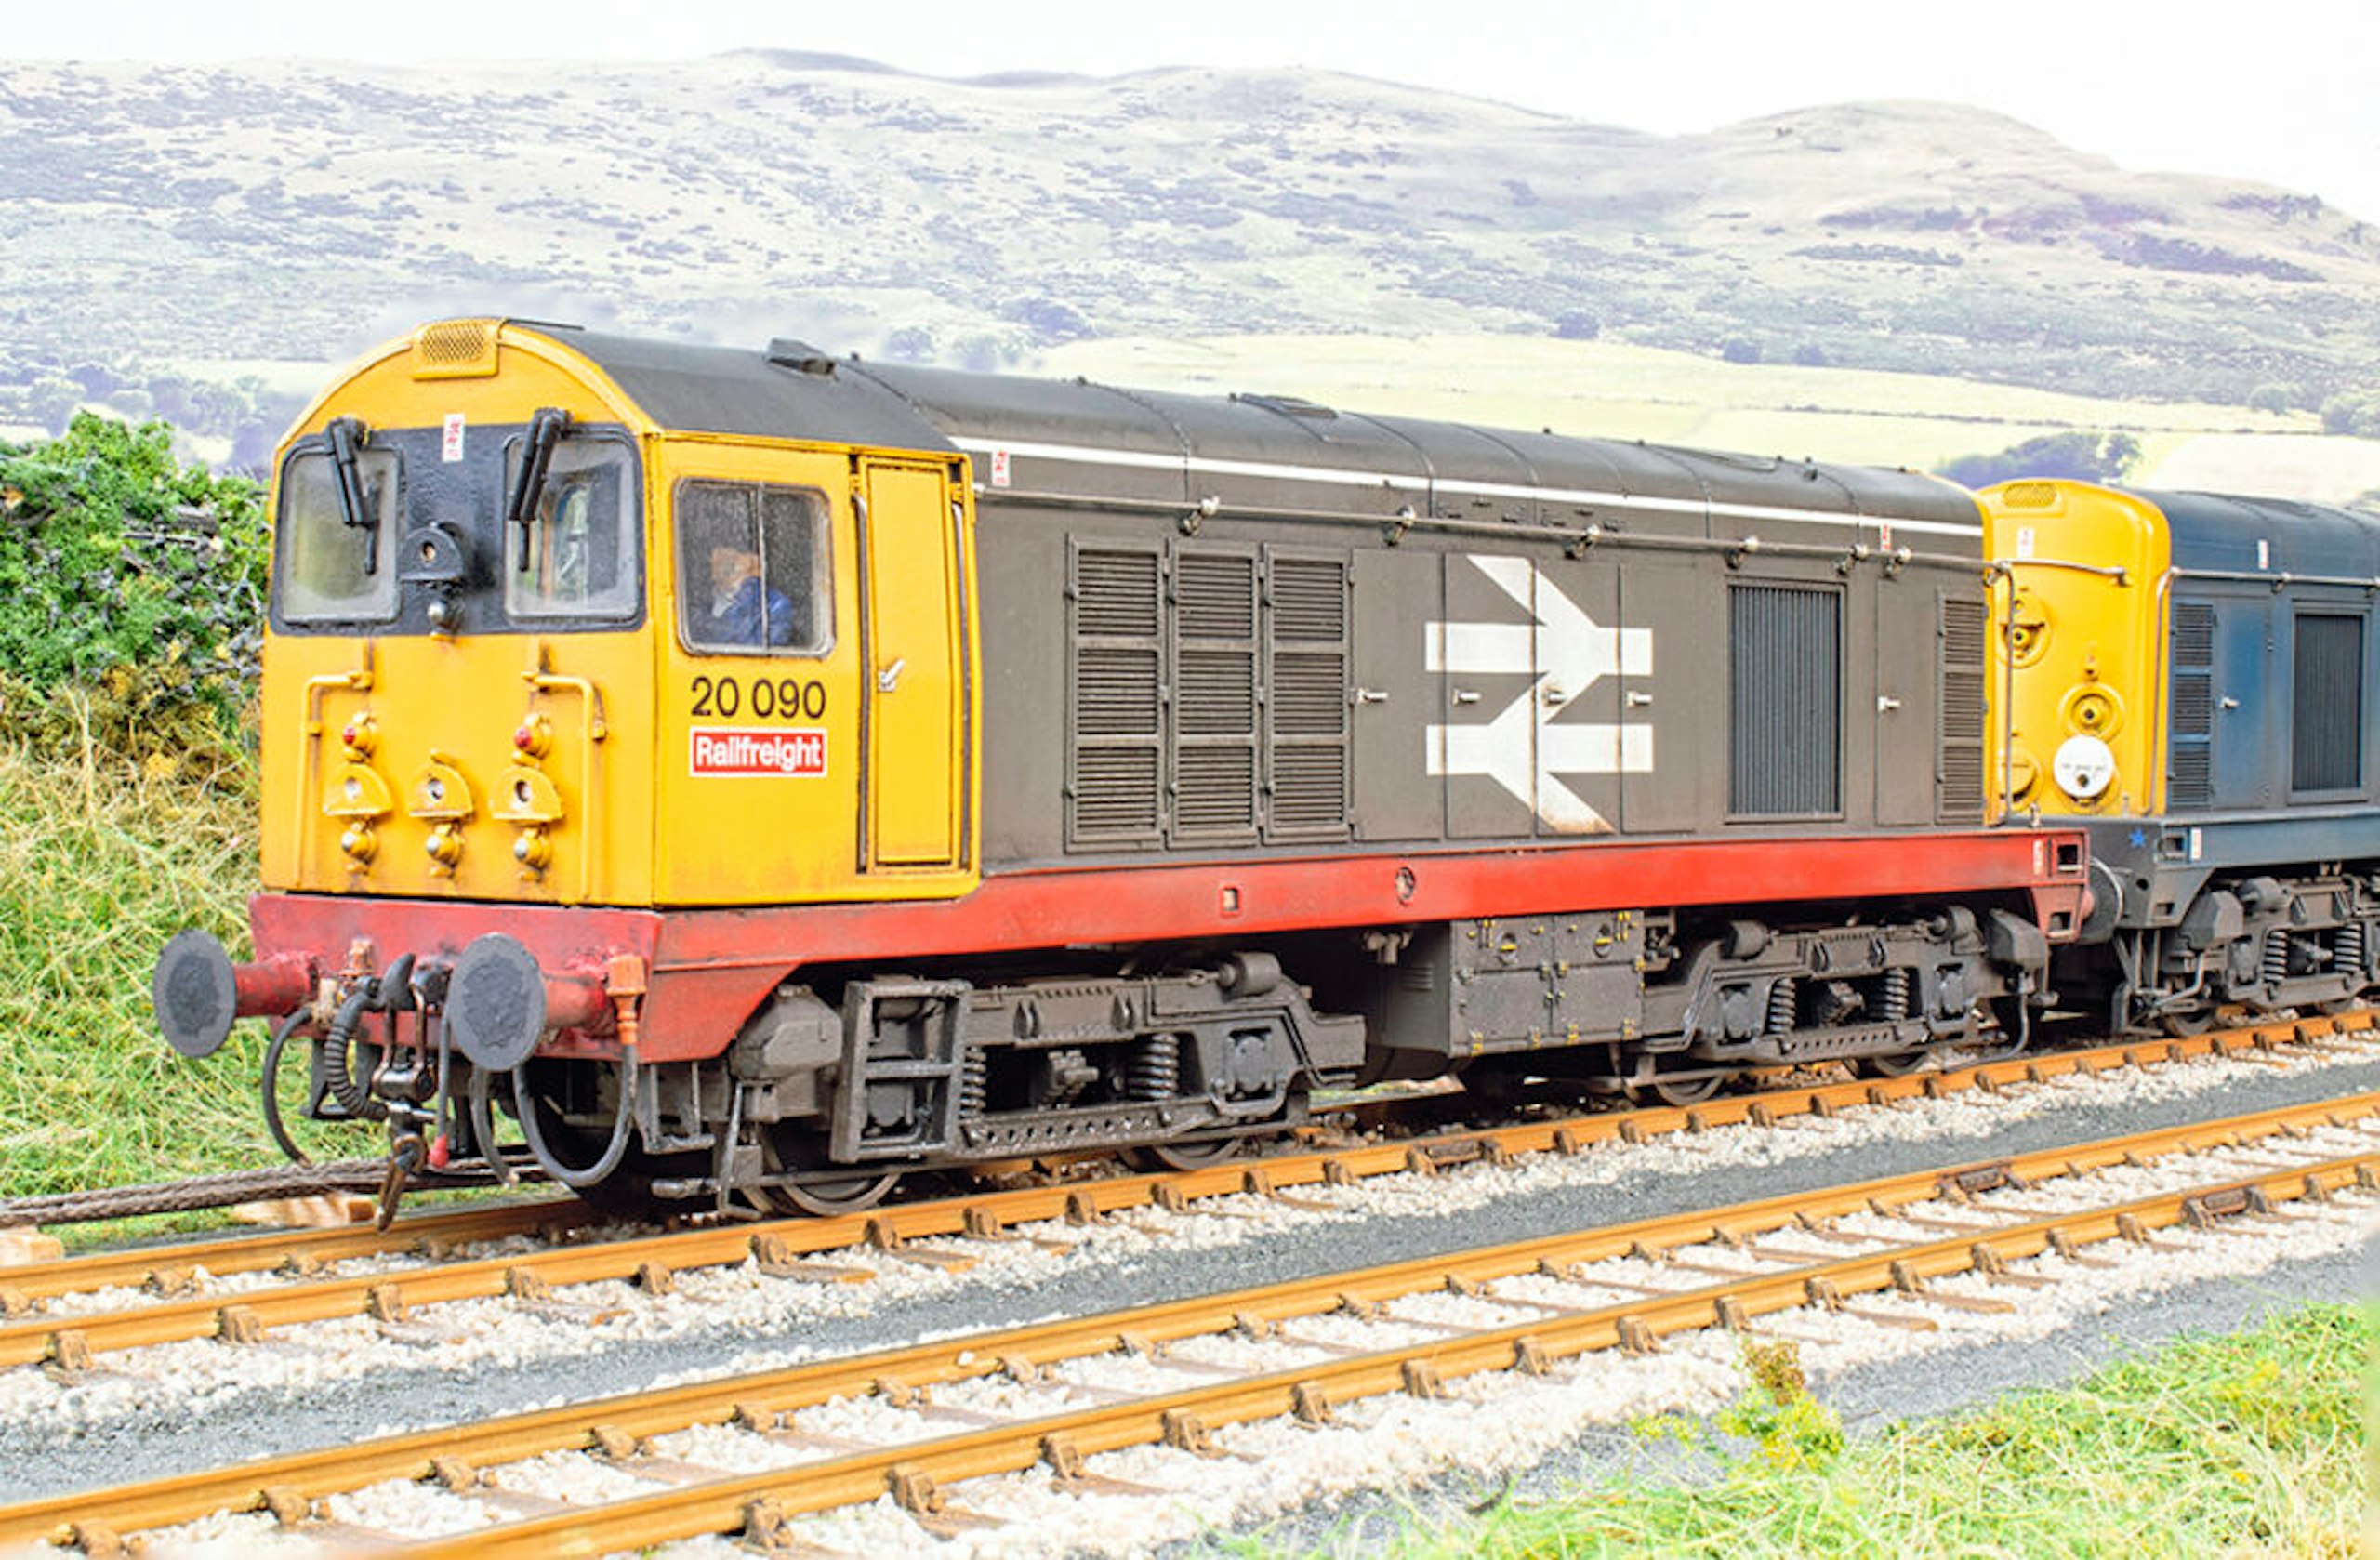

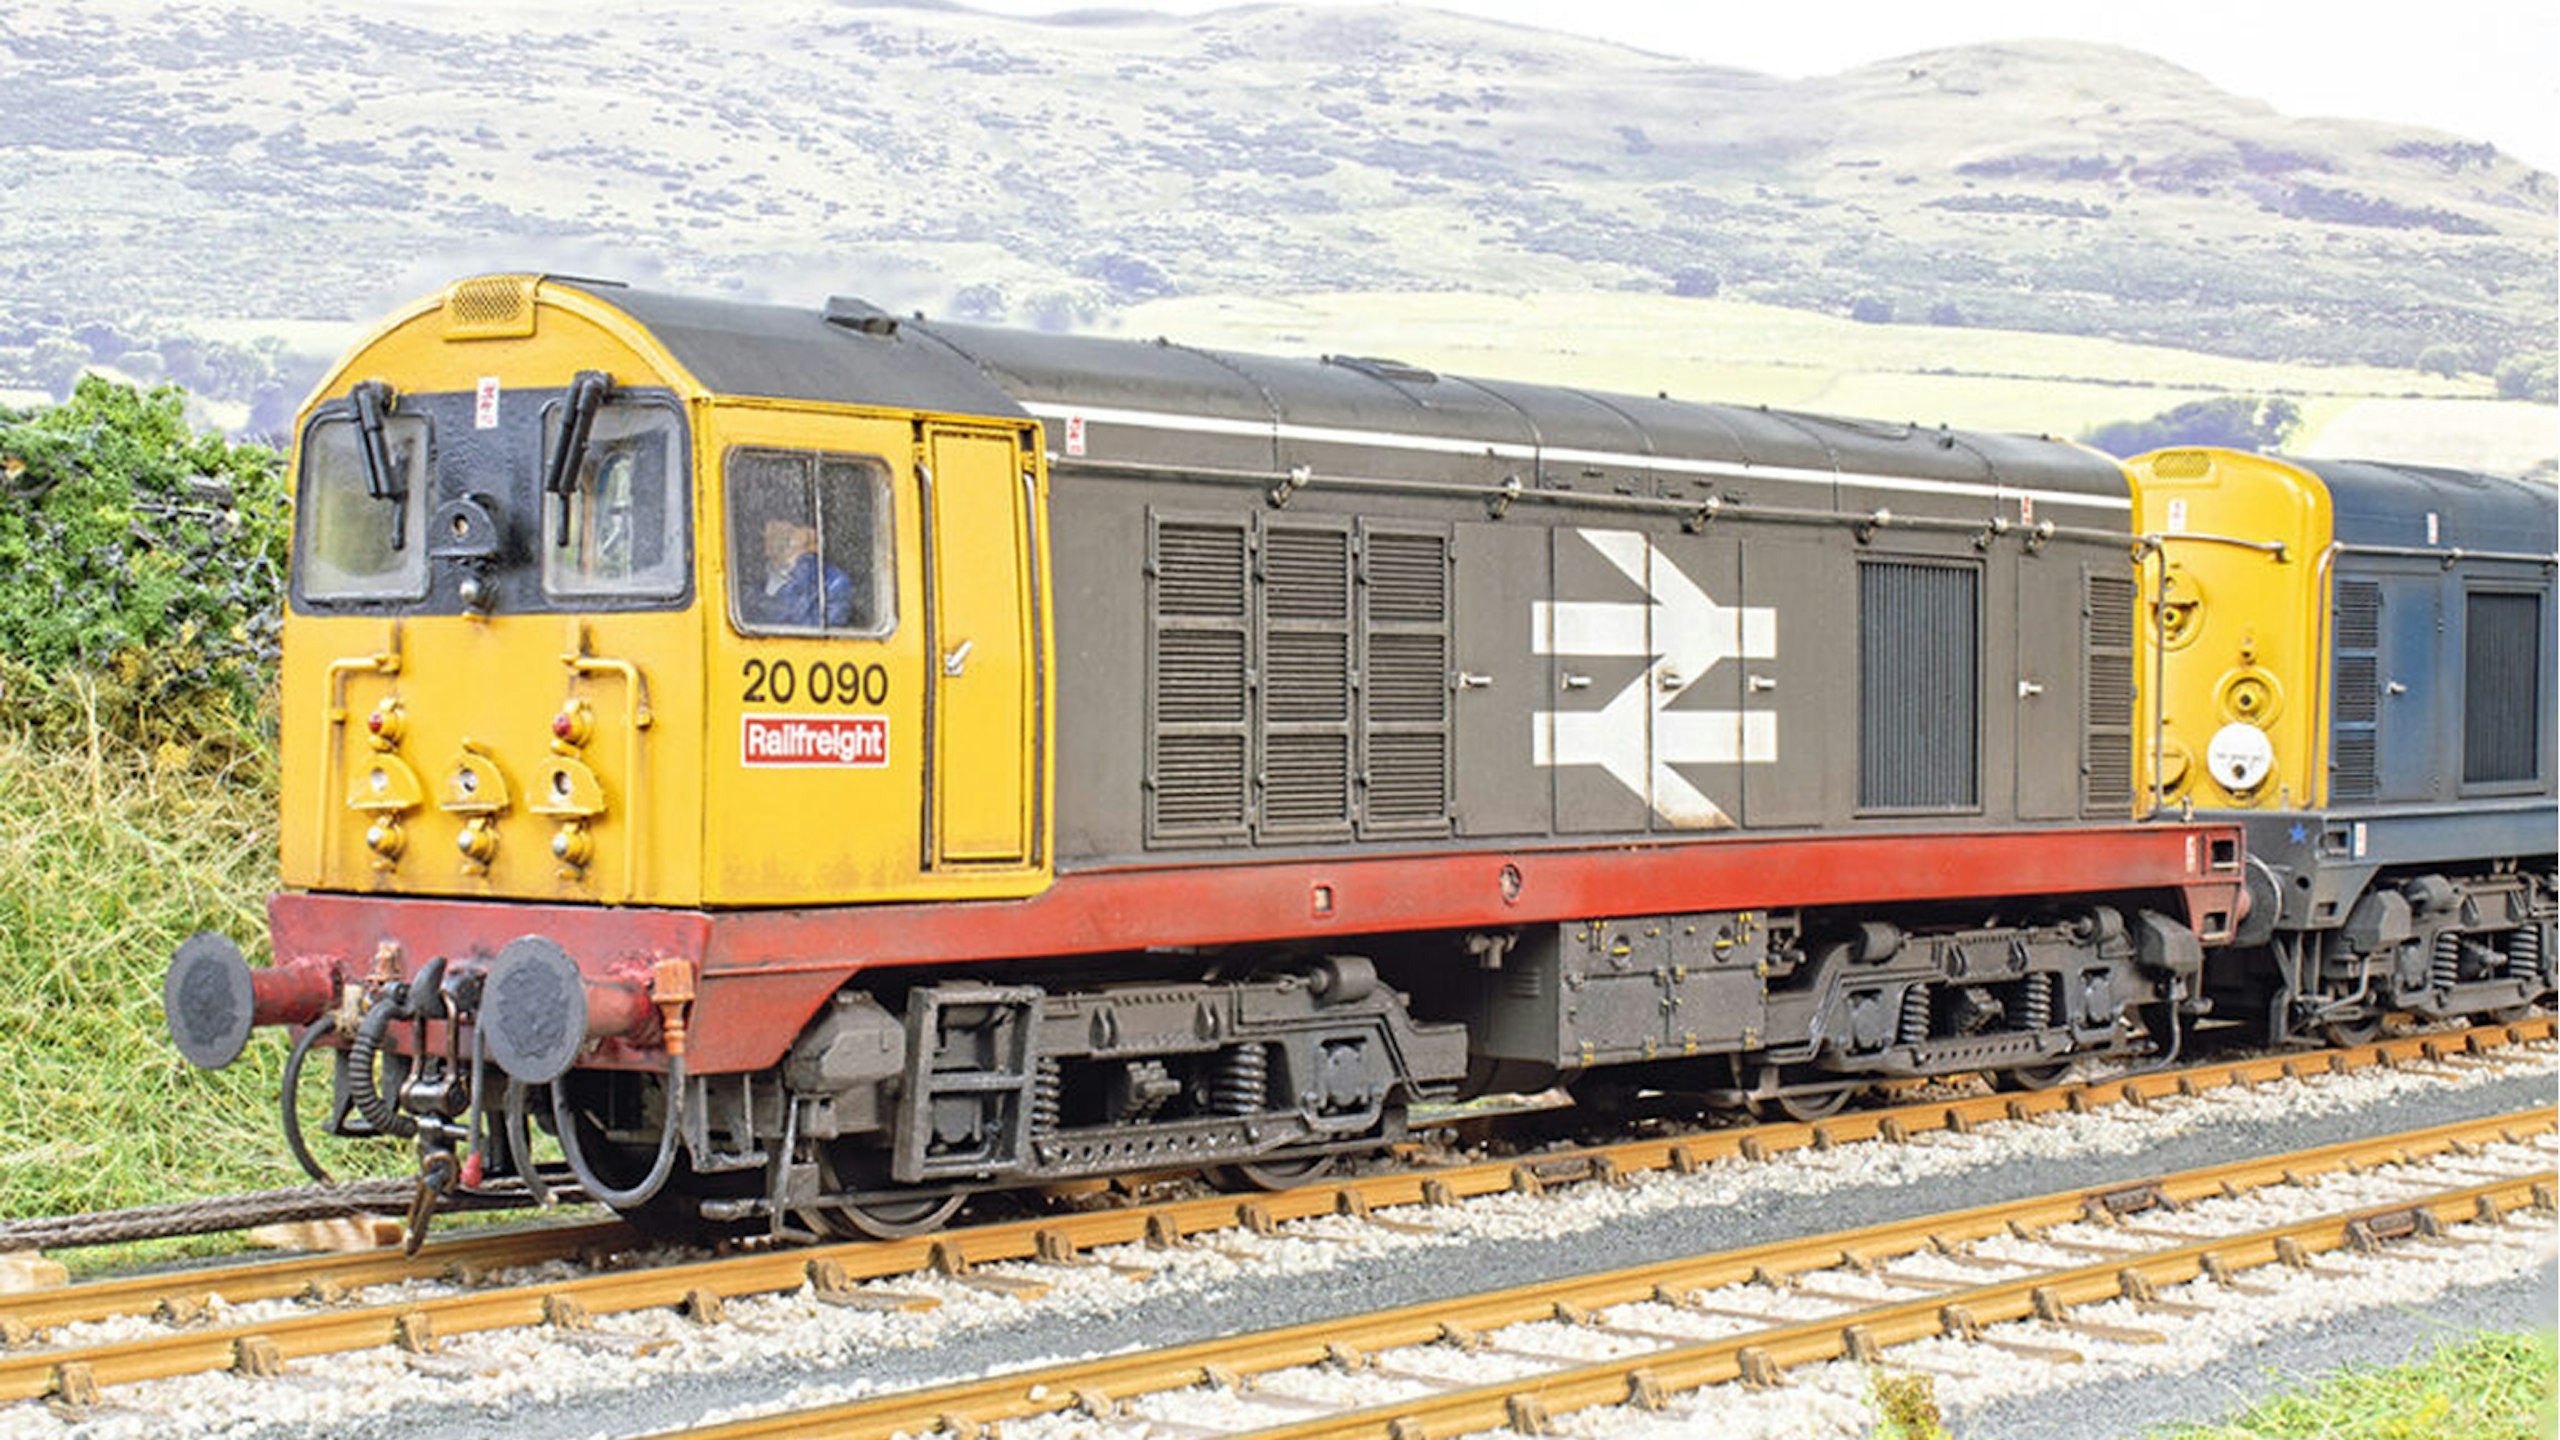
Bachmann’s Class 20 has been a staple of its Branchline ‘OO’ gauge range since 2004, with the tooling being gradually improved over the years to refine details, offer greater variations, and enhance the mechanical and electronic performance.
Eventually, the ‘20’ was re-tooled from the wheels up in 2022, offering a much more authentic product, and several options are provided in this year’s catalogue, taking in a host of detail variations and liveries.
The English Electric Class 20s were one of the most common ‘spots’ during my young trainspotting days, with pairs of shabby blue locomotives rumbling to and from Fiddler’s Ferry power station, near Widnes, delivering an endless supply of coal from collieries in the North West, Yorkshire, Midlands and North Wales. Once in a while, a colourful Railfreight version would stand out from the crowd, the bright red solebars and large BR logos marking a striking contrast to the ubiquitous blue. Although it may seem a little dated now, this livery retains a special place in my heart, so I’ve been determined to add one or two Railfreight ‘20s’ to my collection for a while.
Indeed, I’ve had 20090 in my ‘to-do’ pile for about six years now. I’d snapped it up for a bargain price when Bachmann’s re-tooled version first arrived, it being a release from the late 2010s. It may lack working lights, but to me, it still looks the part and runs beautifully, so it deserves a place in my fleet.
So, what would it need to bring it up to snuff? I’m not too interested in working lights and sounds when it comes to my own layout, so I was happy to stick with the analogue ‘spec’. However, it would need a convincing weathered finish, the addition of extra bufferbeam details, plus a footplate crew was essential.
Happily, the cab interiors of these slightly older ‘20s’ are easy to access, without the risk of damaging delicate LEDs and wiring. Simply spread the sides with your fingernails to release the locating clips and slide the cab upwards away from the bonnet and footplate section.
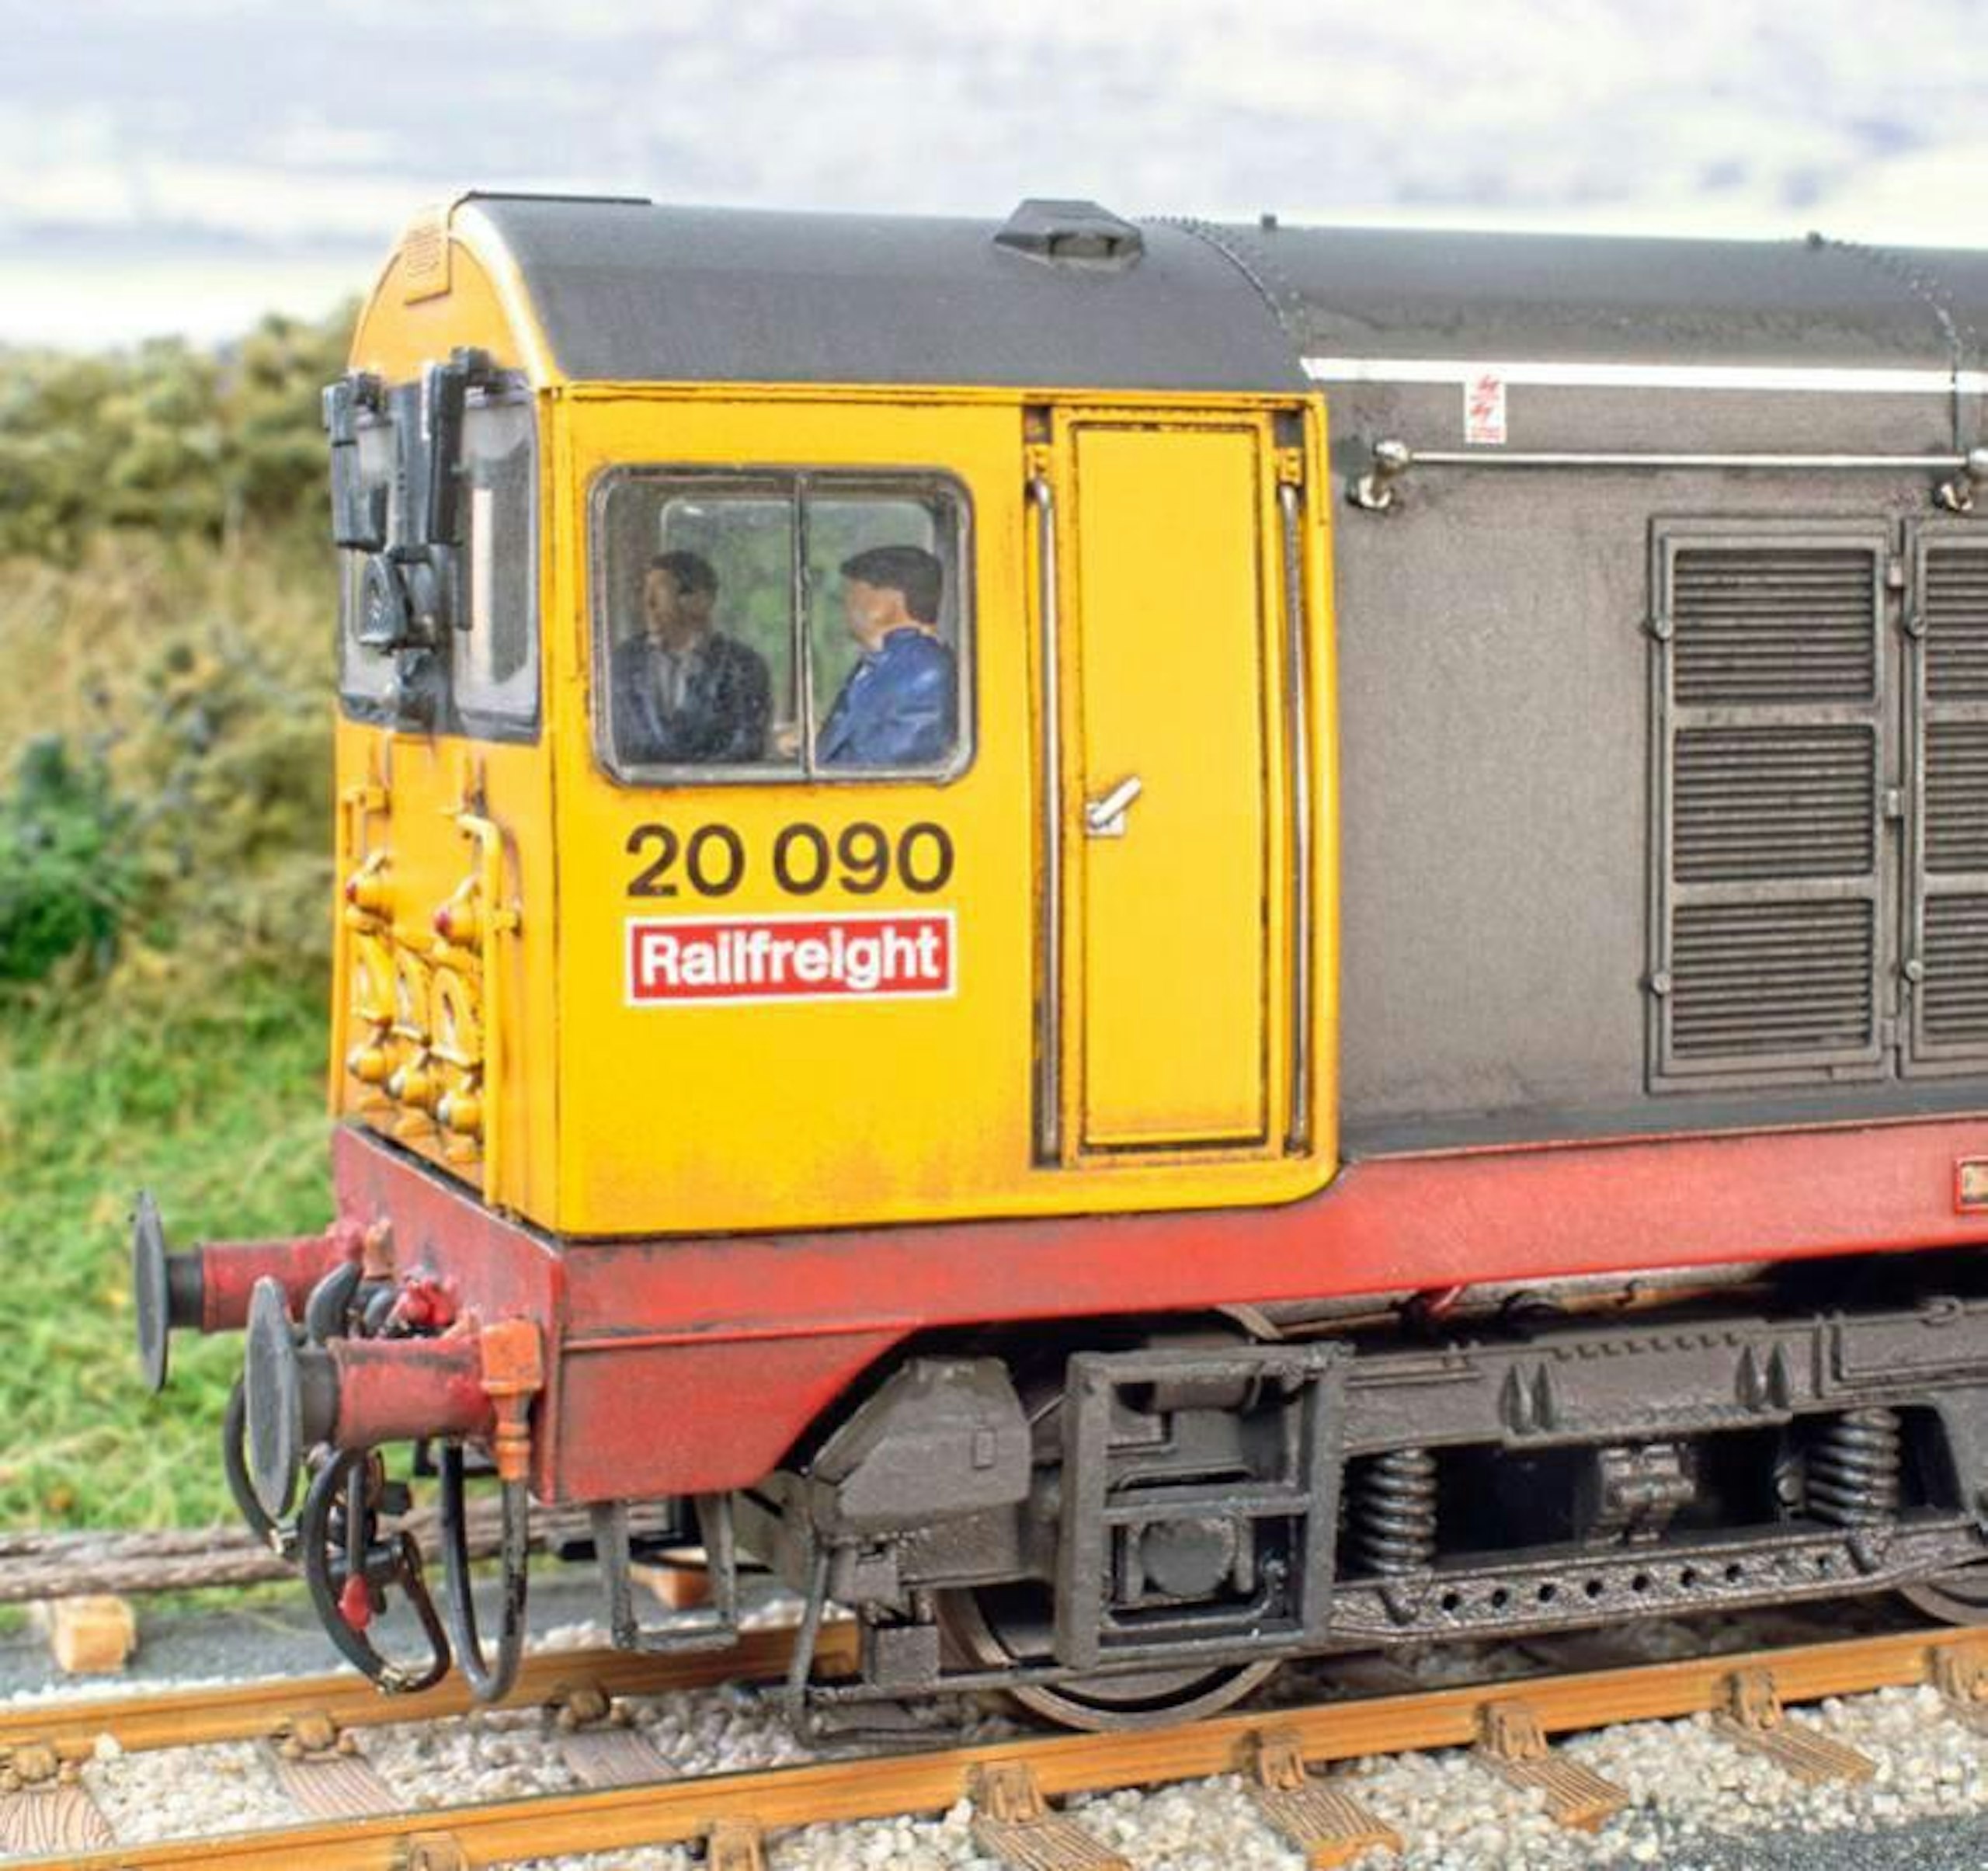
The addition of the Modelu crew helps bring the ‘20’ to life.
Adding a Modelu crew was child’s play, the figures being designed especially to fit onto the cab seats. The larger side windows of this particular ‘20’ afford a great view of the crew and interior, so I also weathered the cab consoles and bulkhead to ensure everything looked harmonious with the exterior.
Another key task was to add a radiator fan. Despite being a key feature of the Bachmann ‘20’ for years, the fans are missing from a few models I have from this period, thanks presumably to the expected provision of DCC sound speakers in this area. Shawplan offers a very nice set of etched brass parts to create an authentic radiator fan, along with a superior grille and surround. I passed on the prospect of modifying the roof and just built the fan, creating a simple mounting bracket for the interior from a scrap of brass strip.
With the fan in place, it’s a subtle but important improvement, given that we spend a lot of time looking down at our model trains.
I’m pleased with the finished model and, when placed beside a post-2022 Bachmann version, it still holds up well. The underframe is perhaps the most obvious area where the newer models excel, with a greater level of detail and finesse. And obviously, the working lights make a difference. The fit of the components is also enhanced, with less obvious gaps around the cabs in particular.
Working on BR blue 20057 (a 2022 release) in parallel with 20090 was interesting, therefore. Save for adding bufferbeam fittings and painting the blue radiator fan red, I concentrated mostly on the weathering work, which mirrored the approach on its Railfreight sister. I was a bit nervous about opening up the cab to fit a crew – and navigating the lighting system – so that’s a job for another day!
A quick trawl across the internet revealed the prices of pre-owned Class 20s ranged from £70 to £160, depending on their condition and age. The older the models, the less refined is the detail, but it’s worth shopping around as the ‘20’ provides an ideal basis for trialling your weathering and detailing techniques. Given that they usually worked in pairs, even a non-running model is worth considering, if the price is right, as it can be hauled as a dummy after disconnecting the drivetrain.
What you will need
SHOPPING LIST
● MIG enamel weathering washes and thinners, Tamiya cotton swabs
Availability: Scale Model Shop
Web: www.scalemodelshop.co.uk
● Shawplan • DP45-09 etched lamp brackets • EEDP20-00 Class 20 radiator roof fan & grille
Availability: Shawplan Model Products
Web: www.shawplan.com
● Ultramask masking film
● LifeColor acrylic paints
● Airbrushes and equipment
● Availability: The Airbrush Company
Web: www.airbrushes.com
● 3D-printed footplate crew for Bachmann Class 20
Availability: Modelu
Web: www.modelu3d.co.uk
● RailMatch enamel 402 Frame Dirt • 403 Roof Dirt • 412 Weathered Black • enamel thinners • Deluxe Materials Roket Rapid and Rocket Max cyano glues • Glue ‘n’ Glaze glazing adhesive
Availability: ModelGIANT
Web: www.gaugemasterretail.com
TOOLS
● Modelling knife and spare blades
● Cutting mat
● Tweezers
● Paintbrushes
● Cotton swabs
● Cocktail sticks
● Miniature screwdrivers
● Drill and bits
● Airbrush and equipment
STEP BY STEP
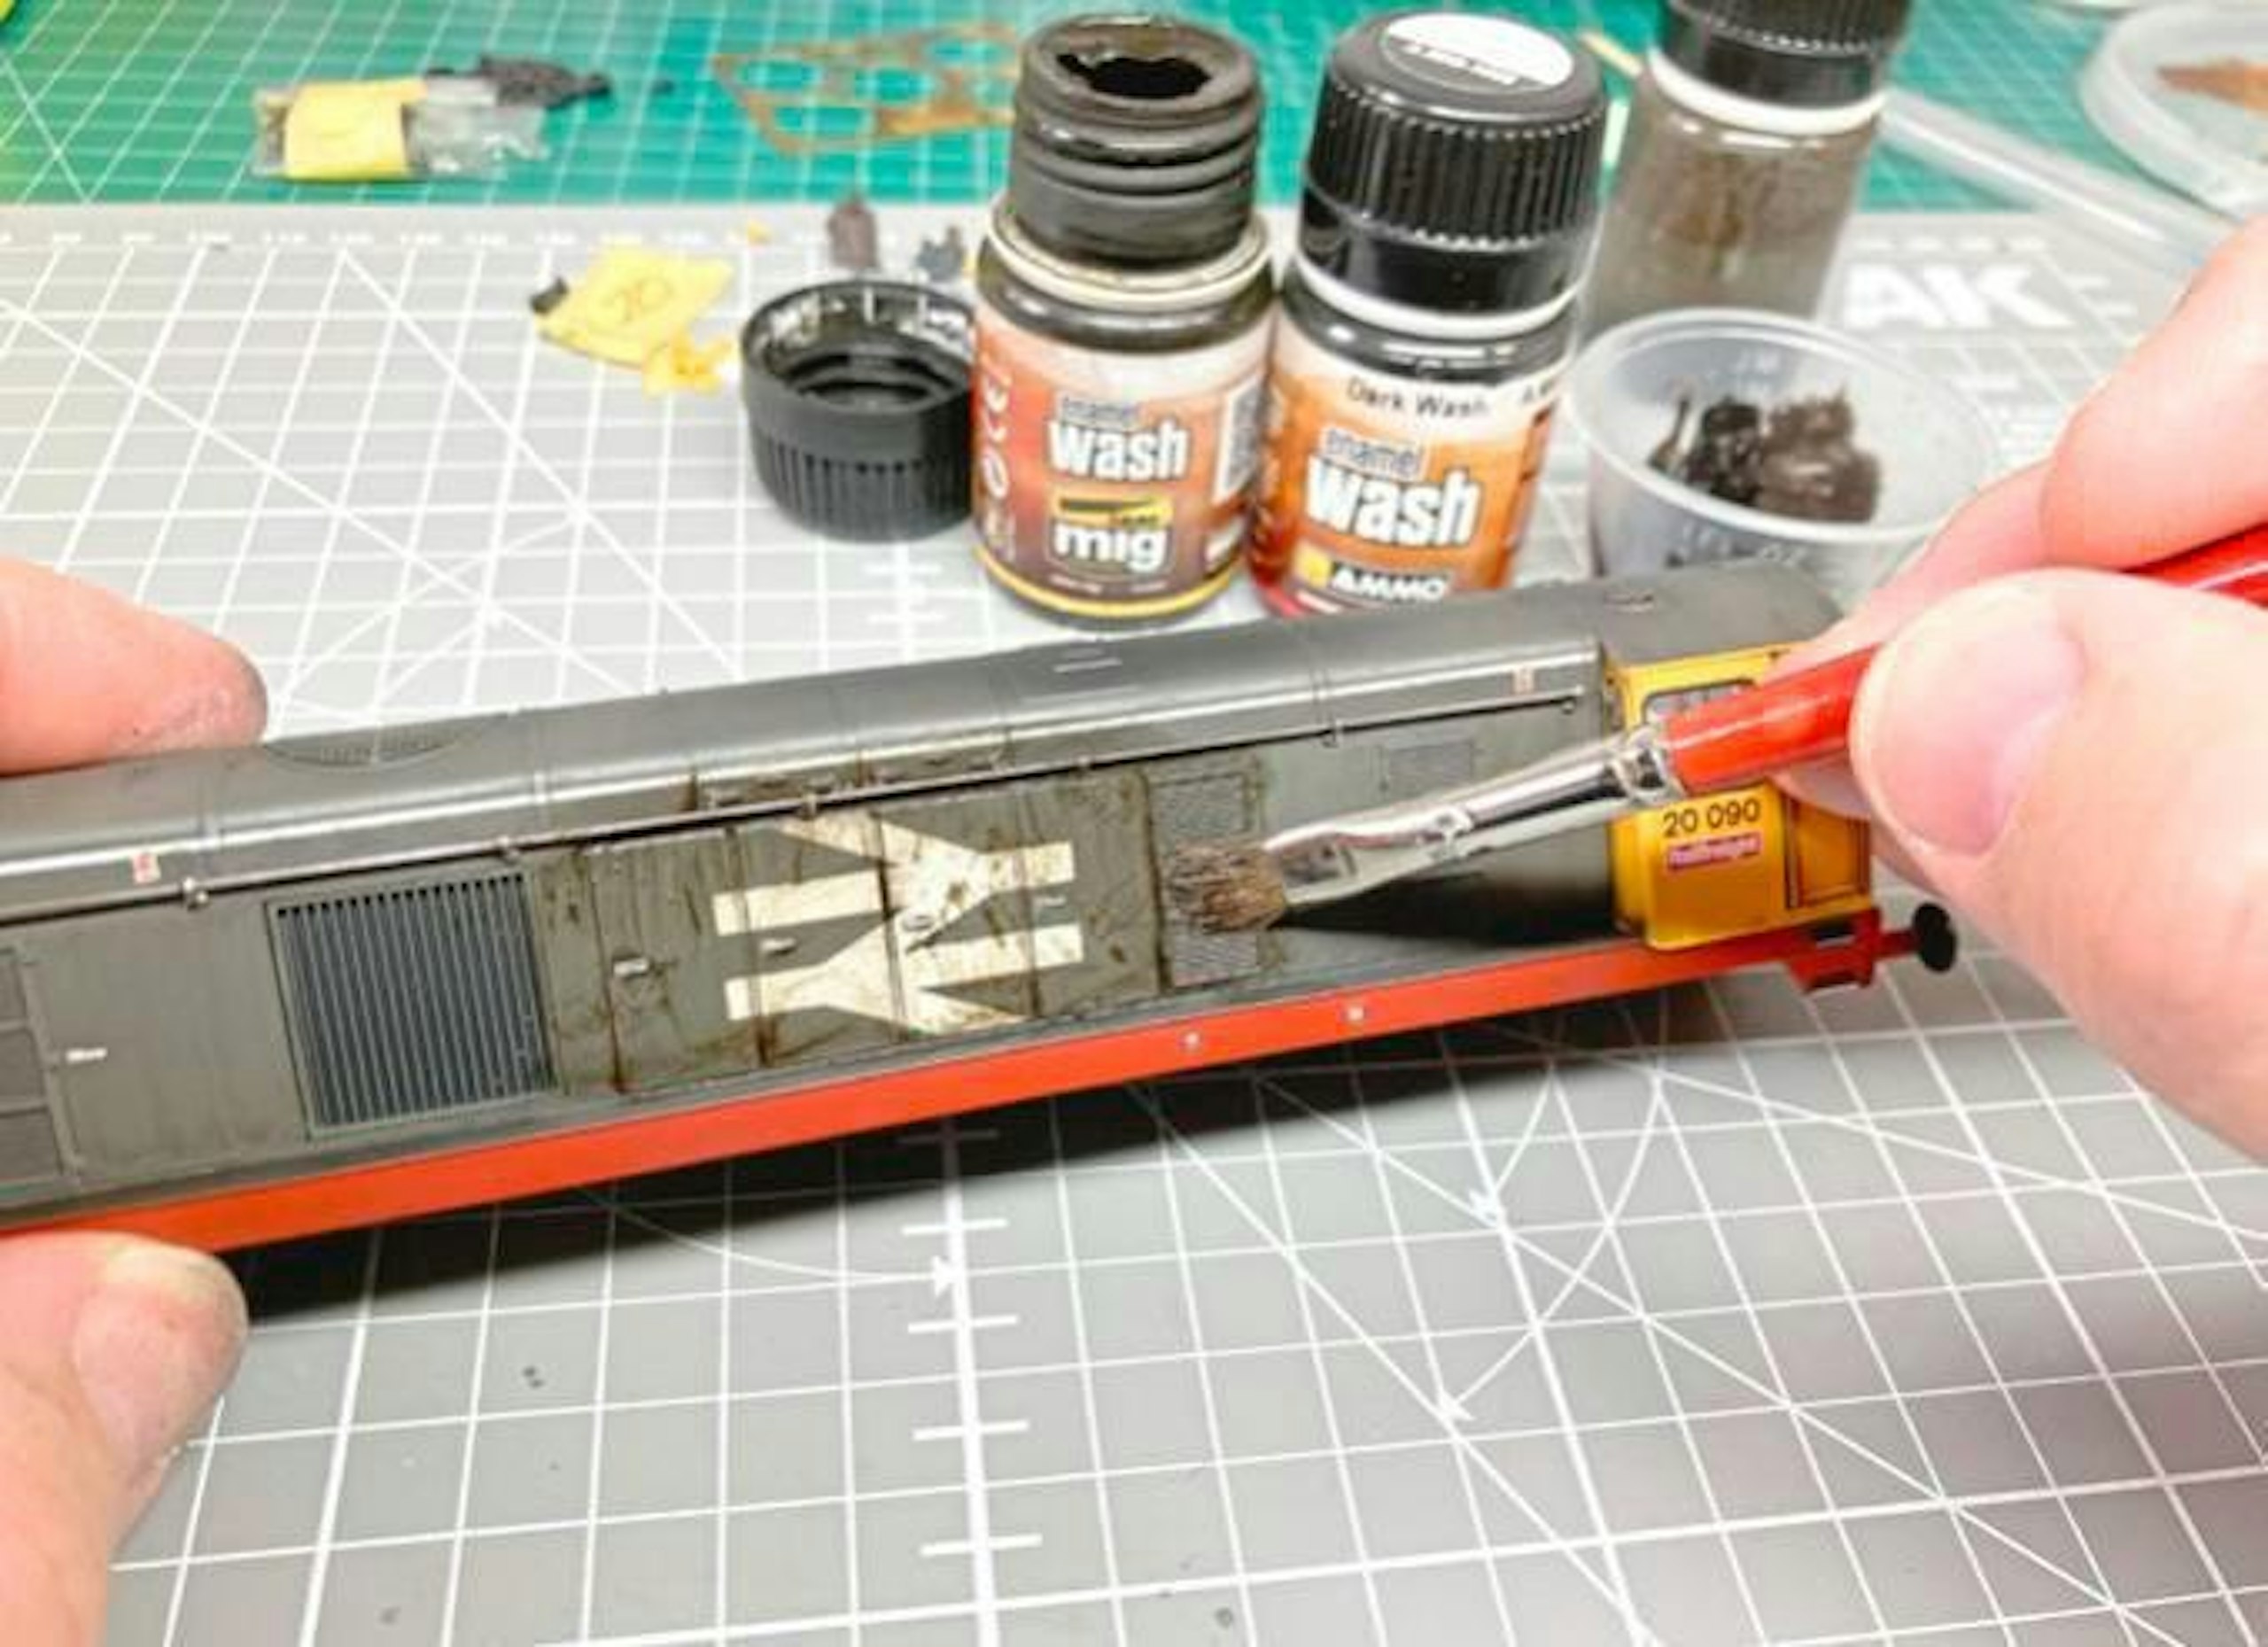
1 Having removed the body from the chassis, weathering began with a coat of blended enamel washes (Dark and Dark Brown shades), applied liberally with a flat brush, working on a few square inches at a time.
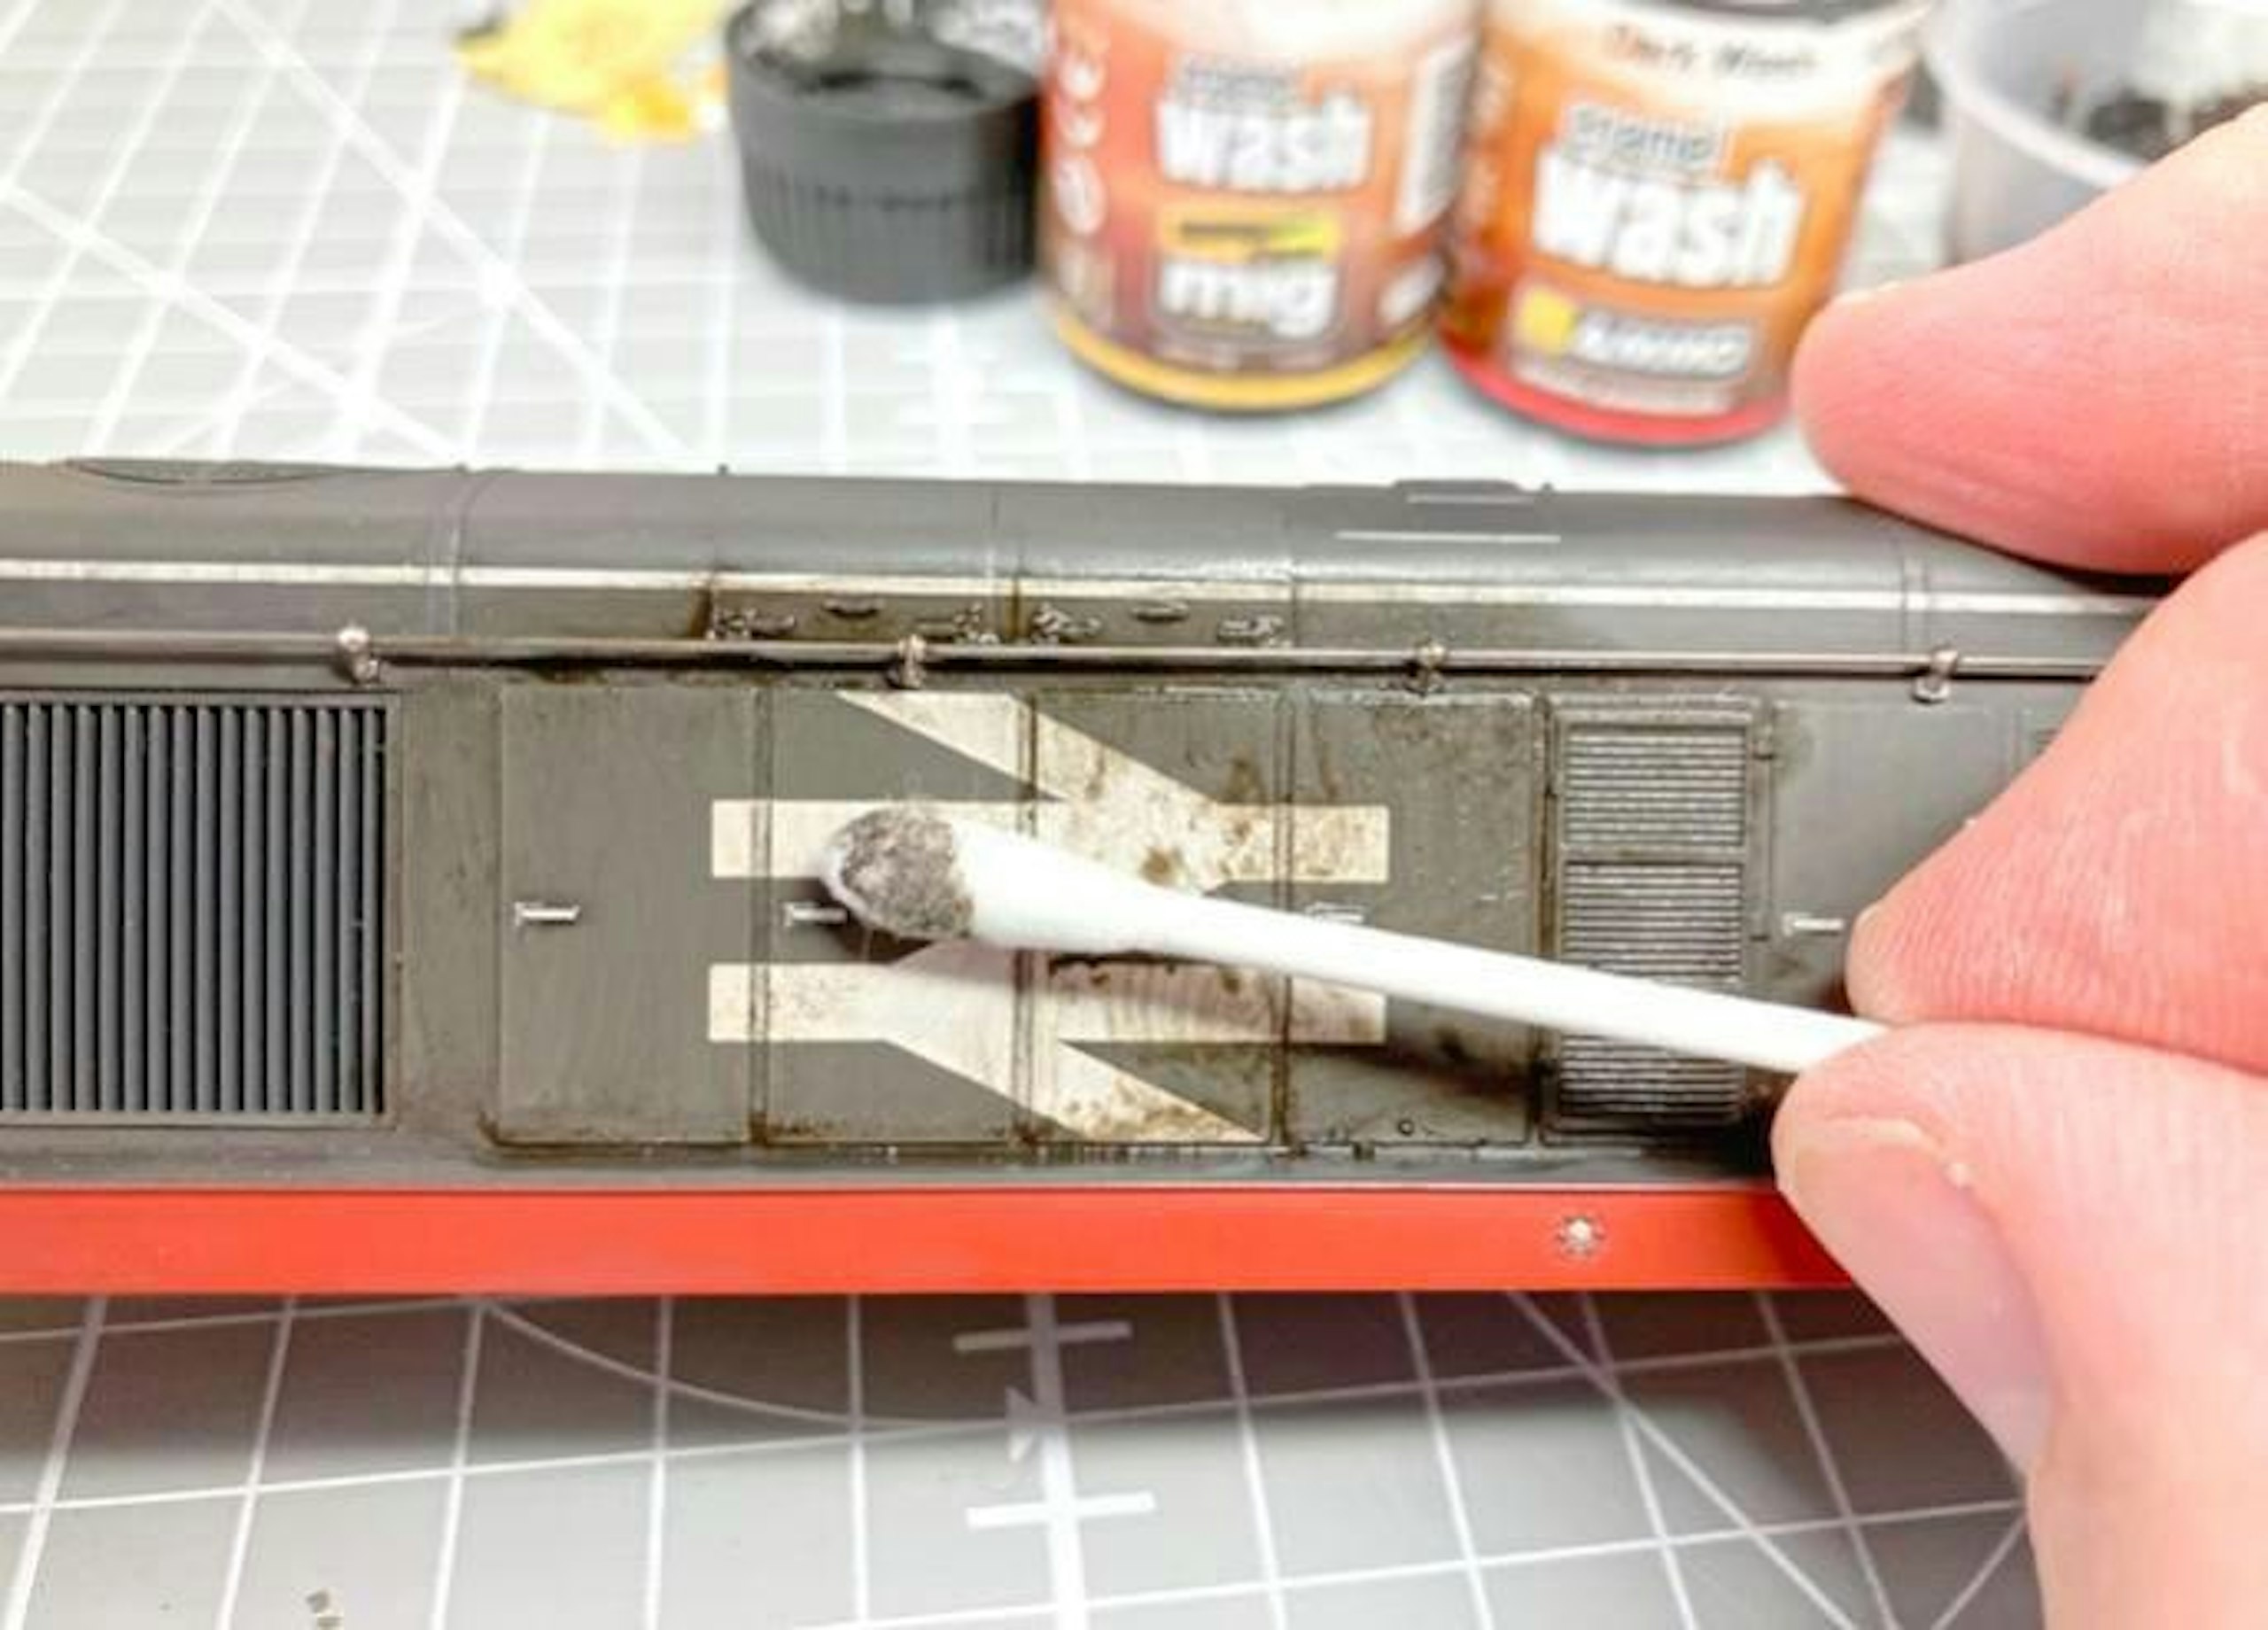
2 As the wash begins to dry out, use dry cotton swabs to wipe away most of the pigment, but leave traces of it within the recessed panel lines, louvres and around the raised door handles and details.
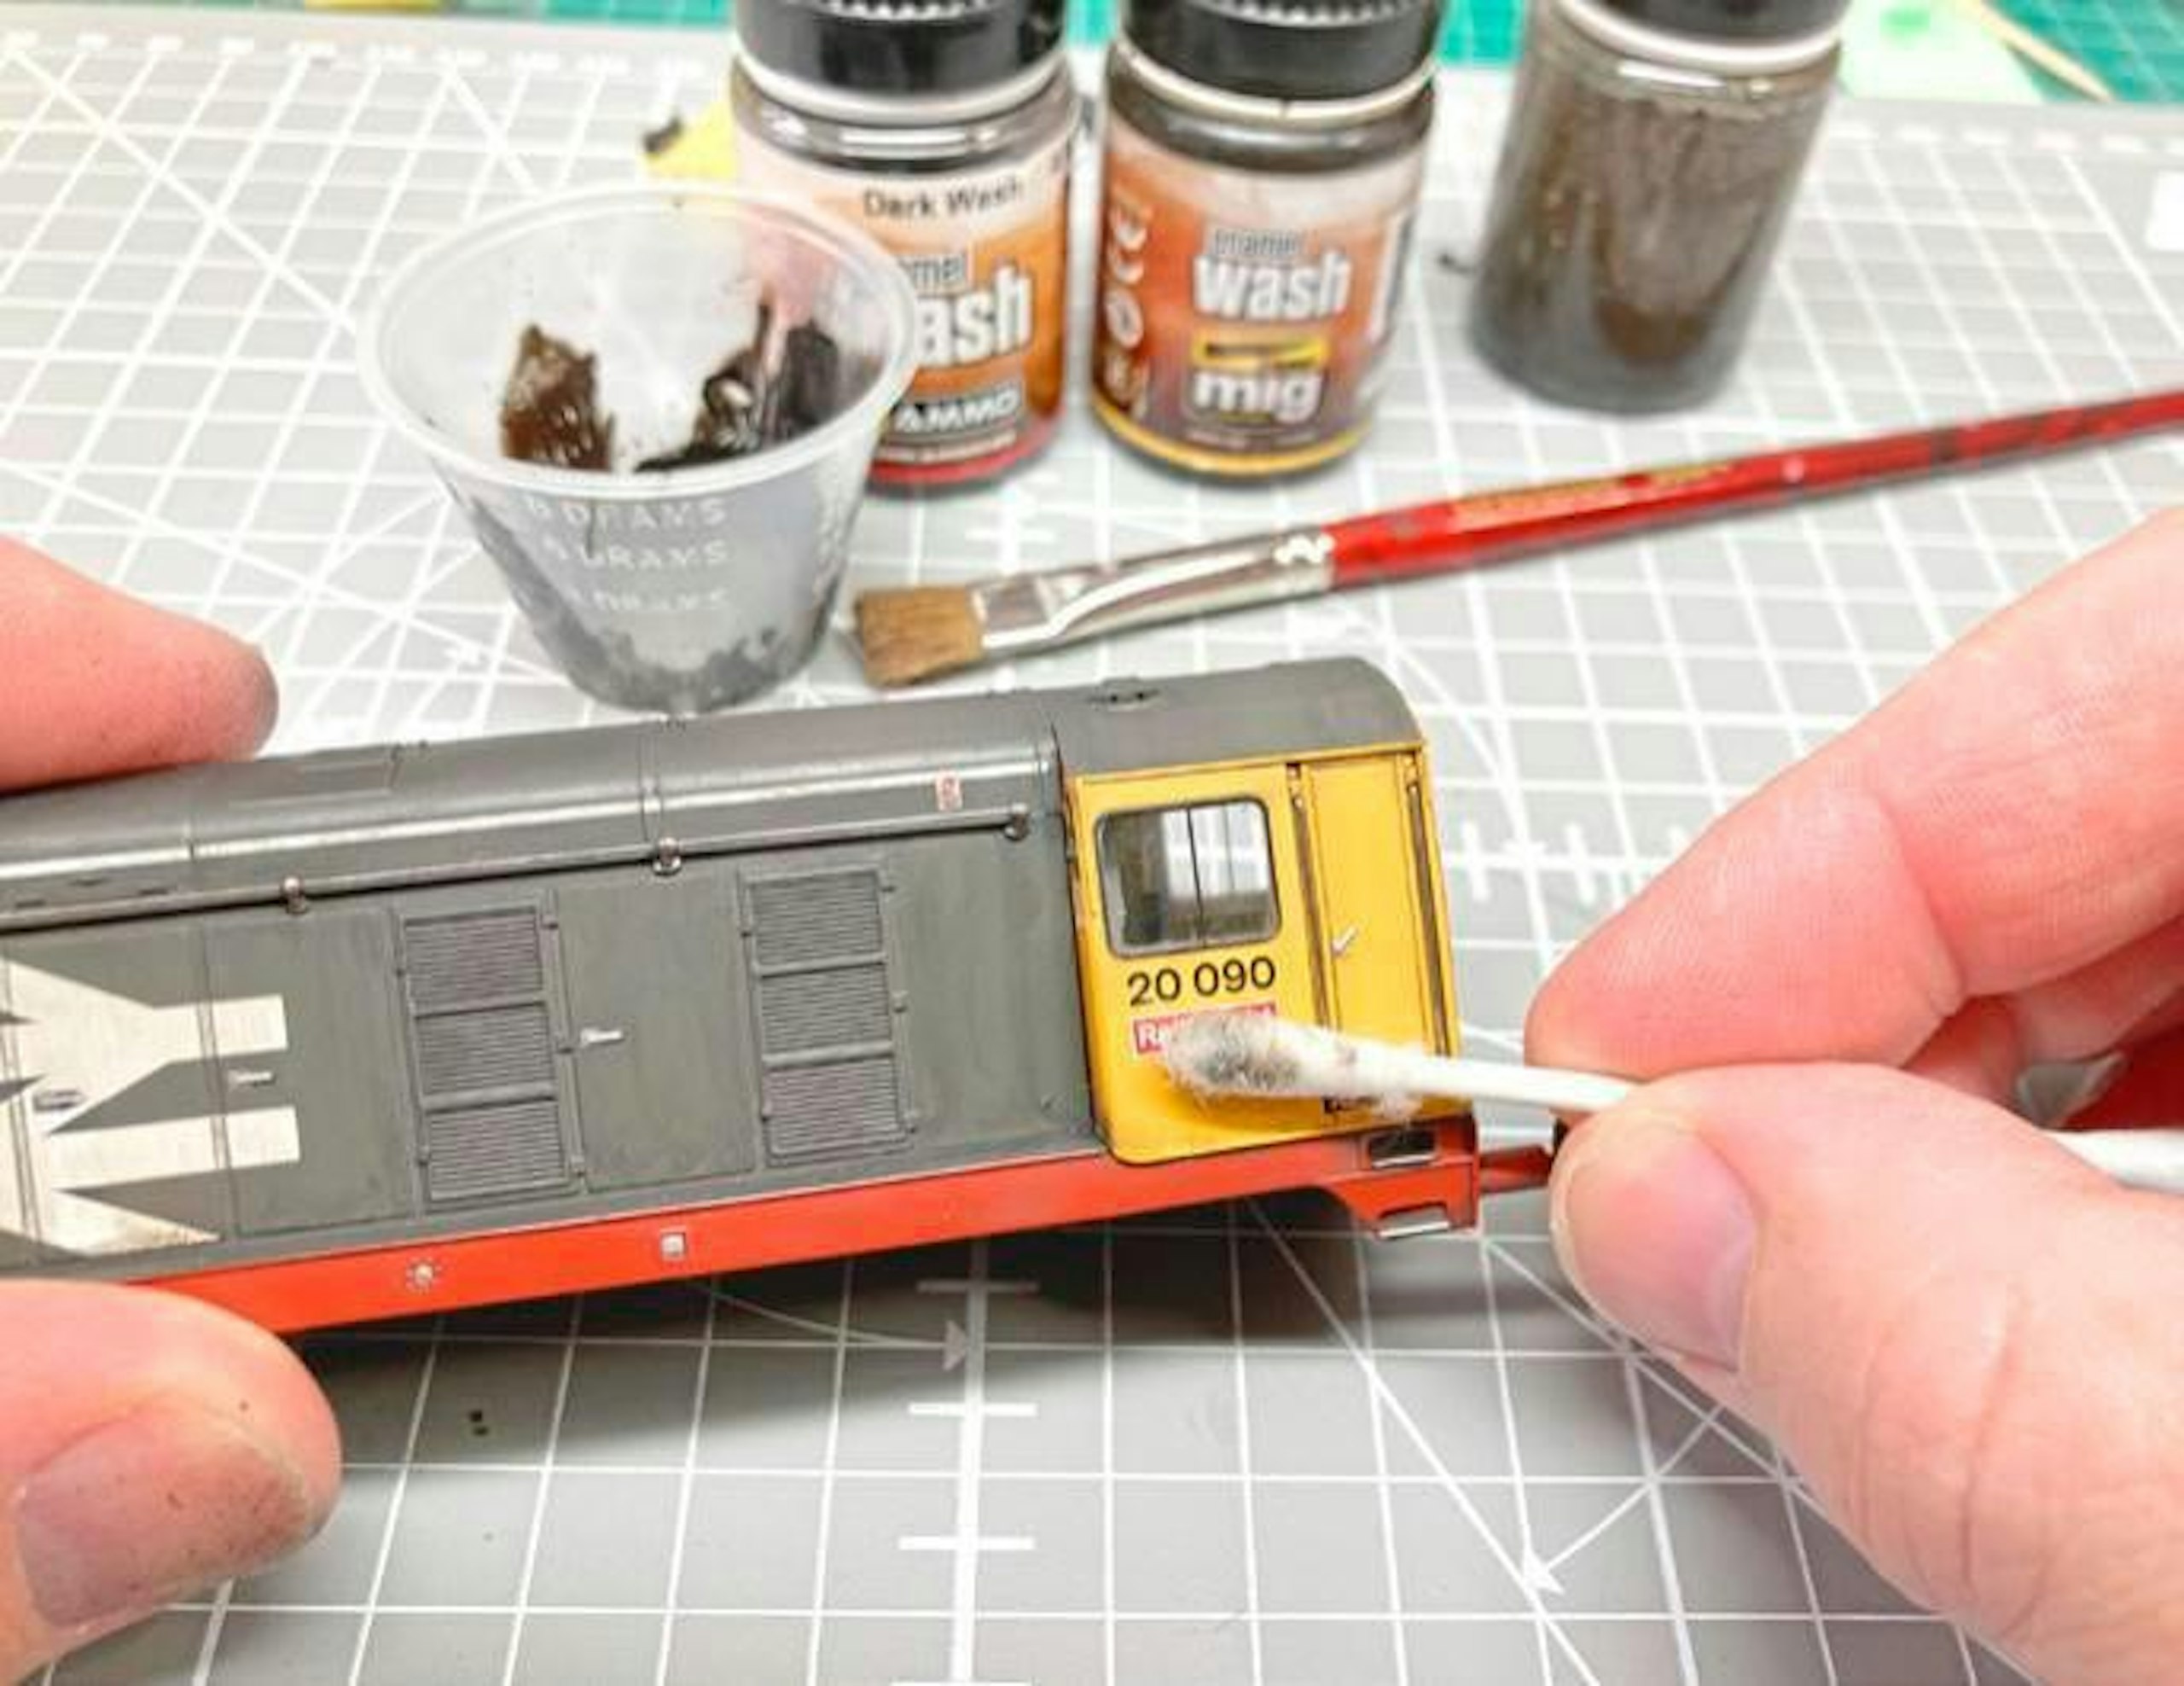
3 The ‘brush-on-wipe-off’ process was continued around the bodyshell. With a bit of care and practice, it’s possible to create effective streaking effects, which show up especially on lighter base colours.
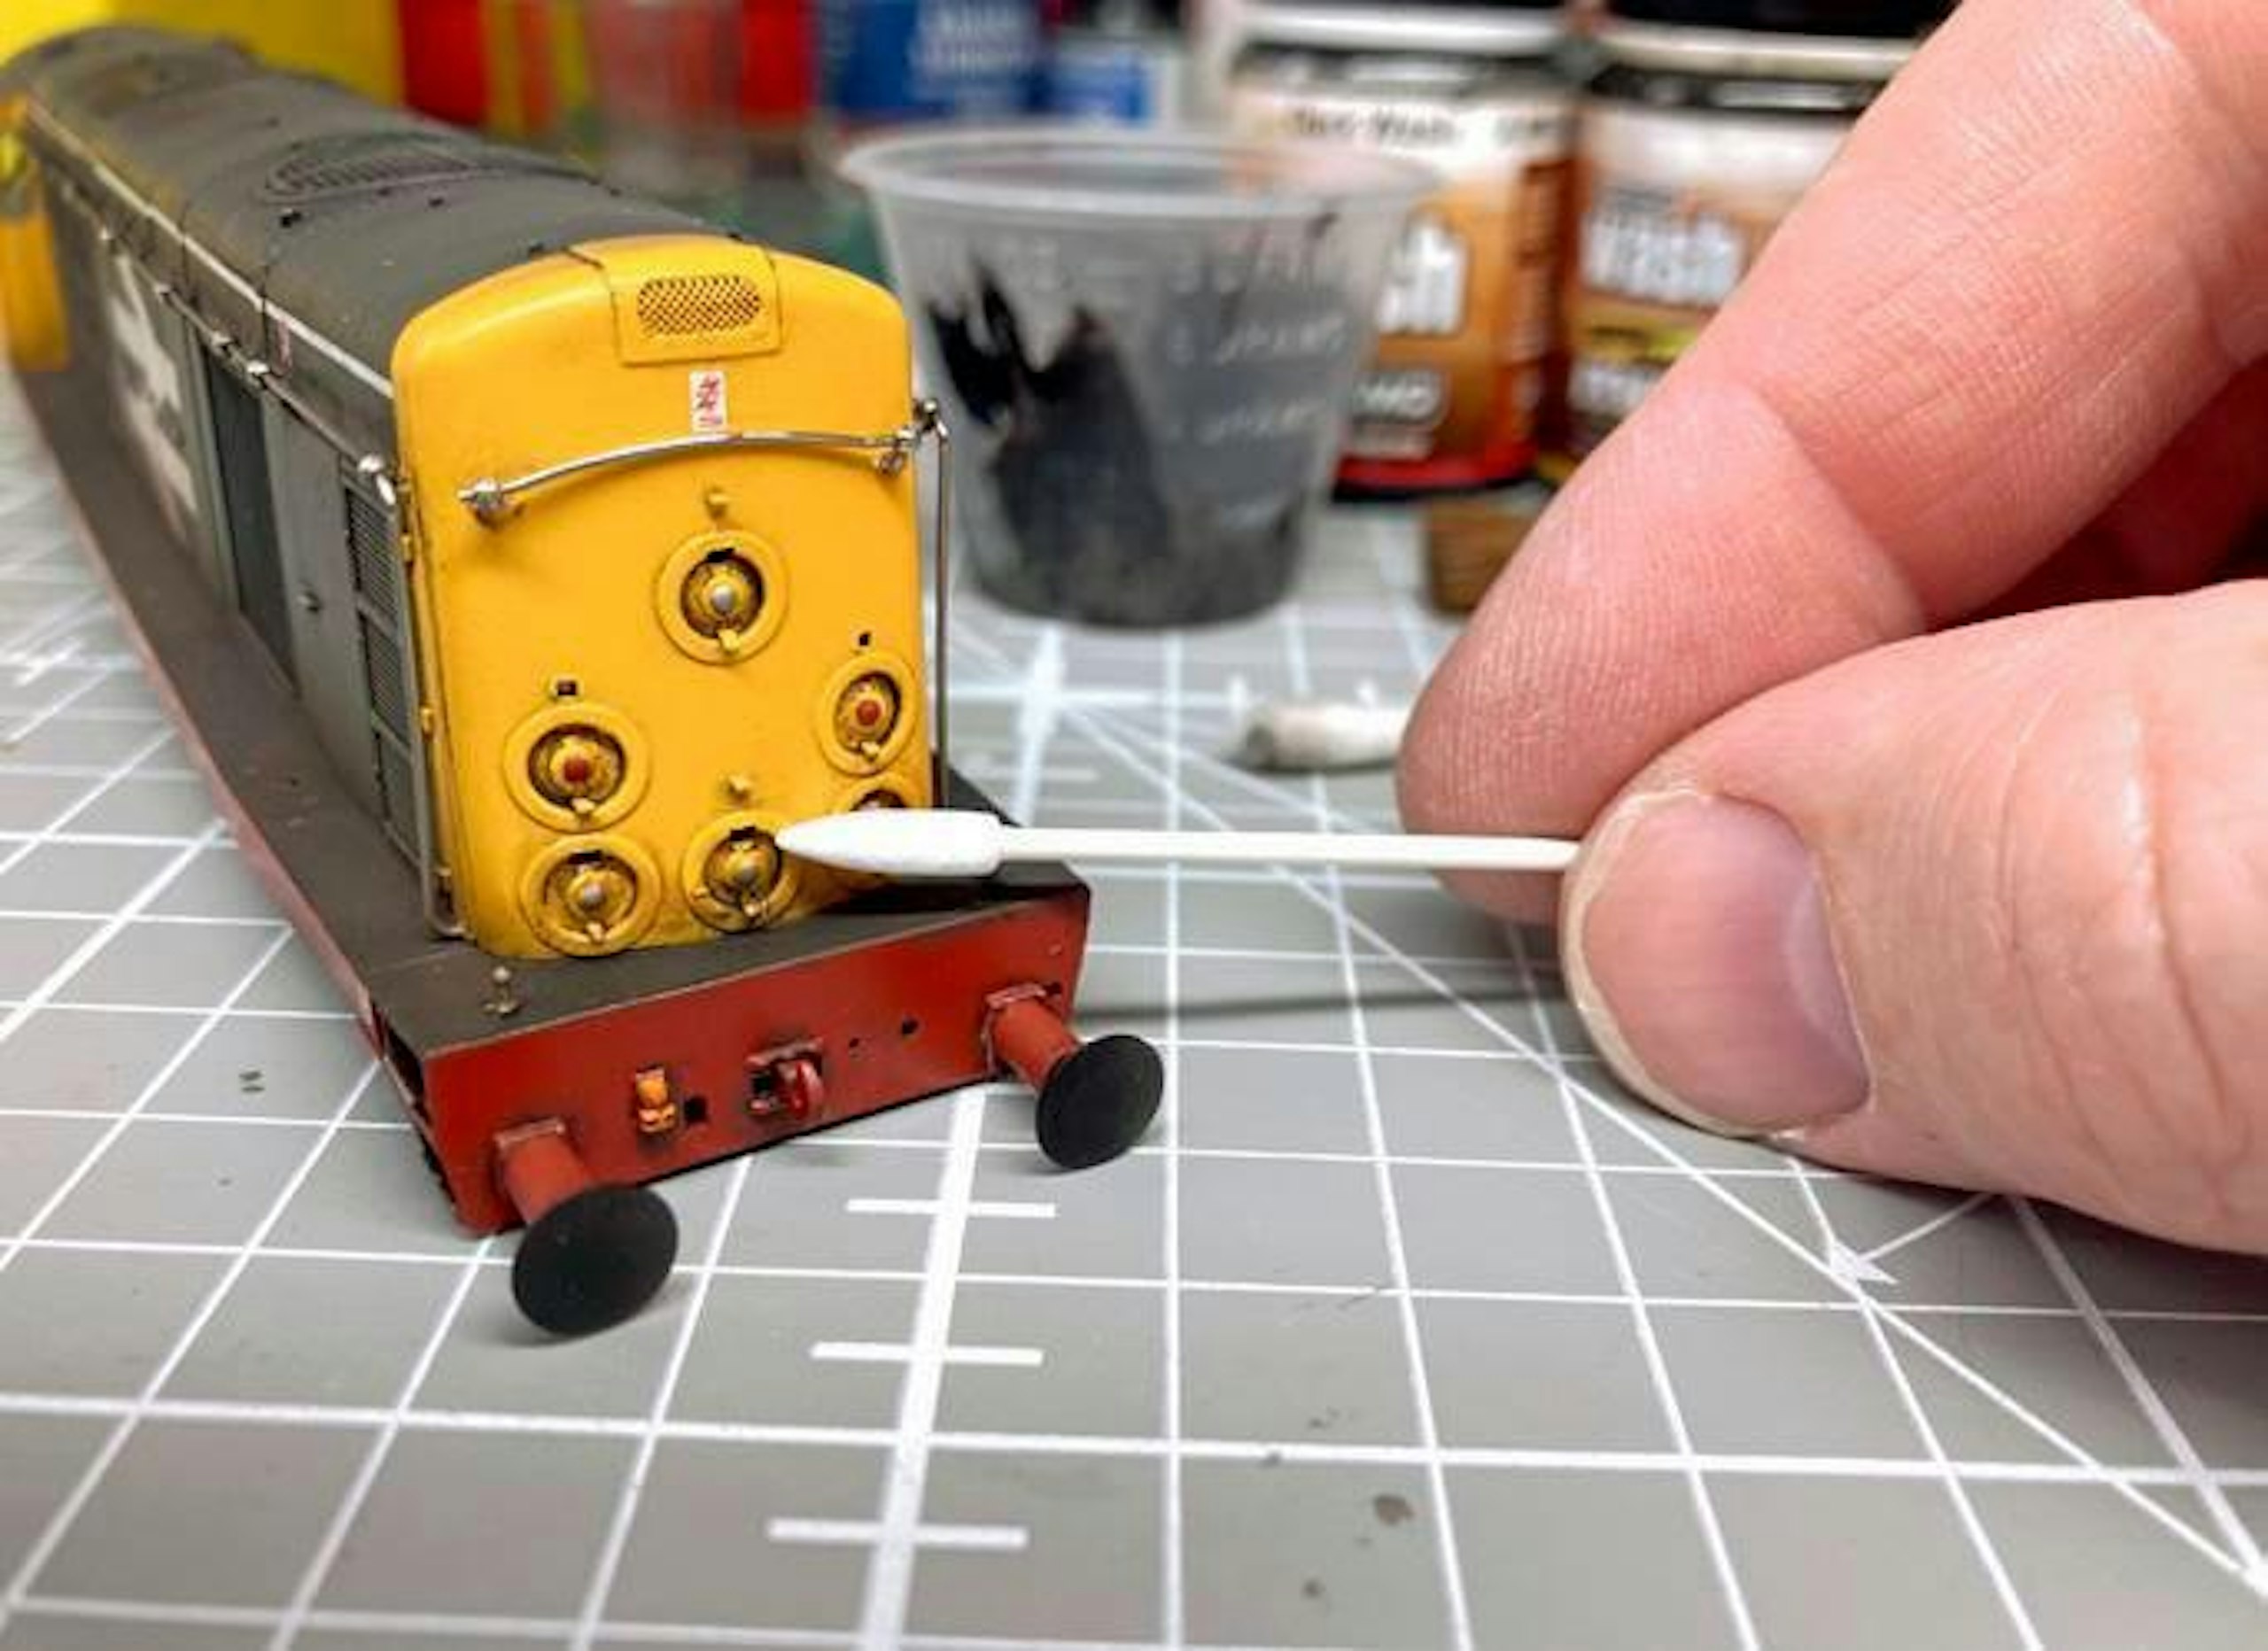
4 I was aiming to keep the yellow ends fairly clean, but it was important to add the wash into the recessed marker light panels and horn grille, which would retain grime more readily. This initial wash coat was left overnight to dry out fully.
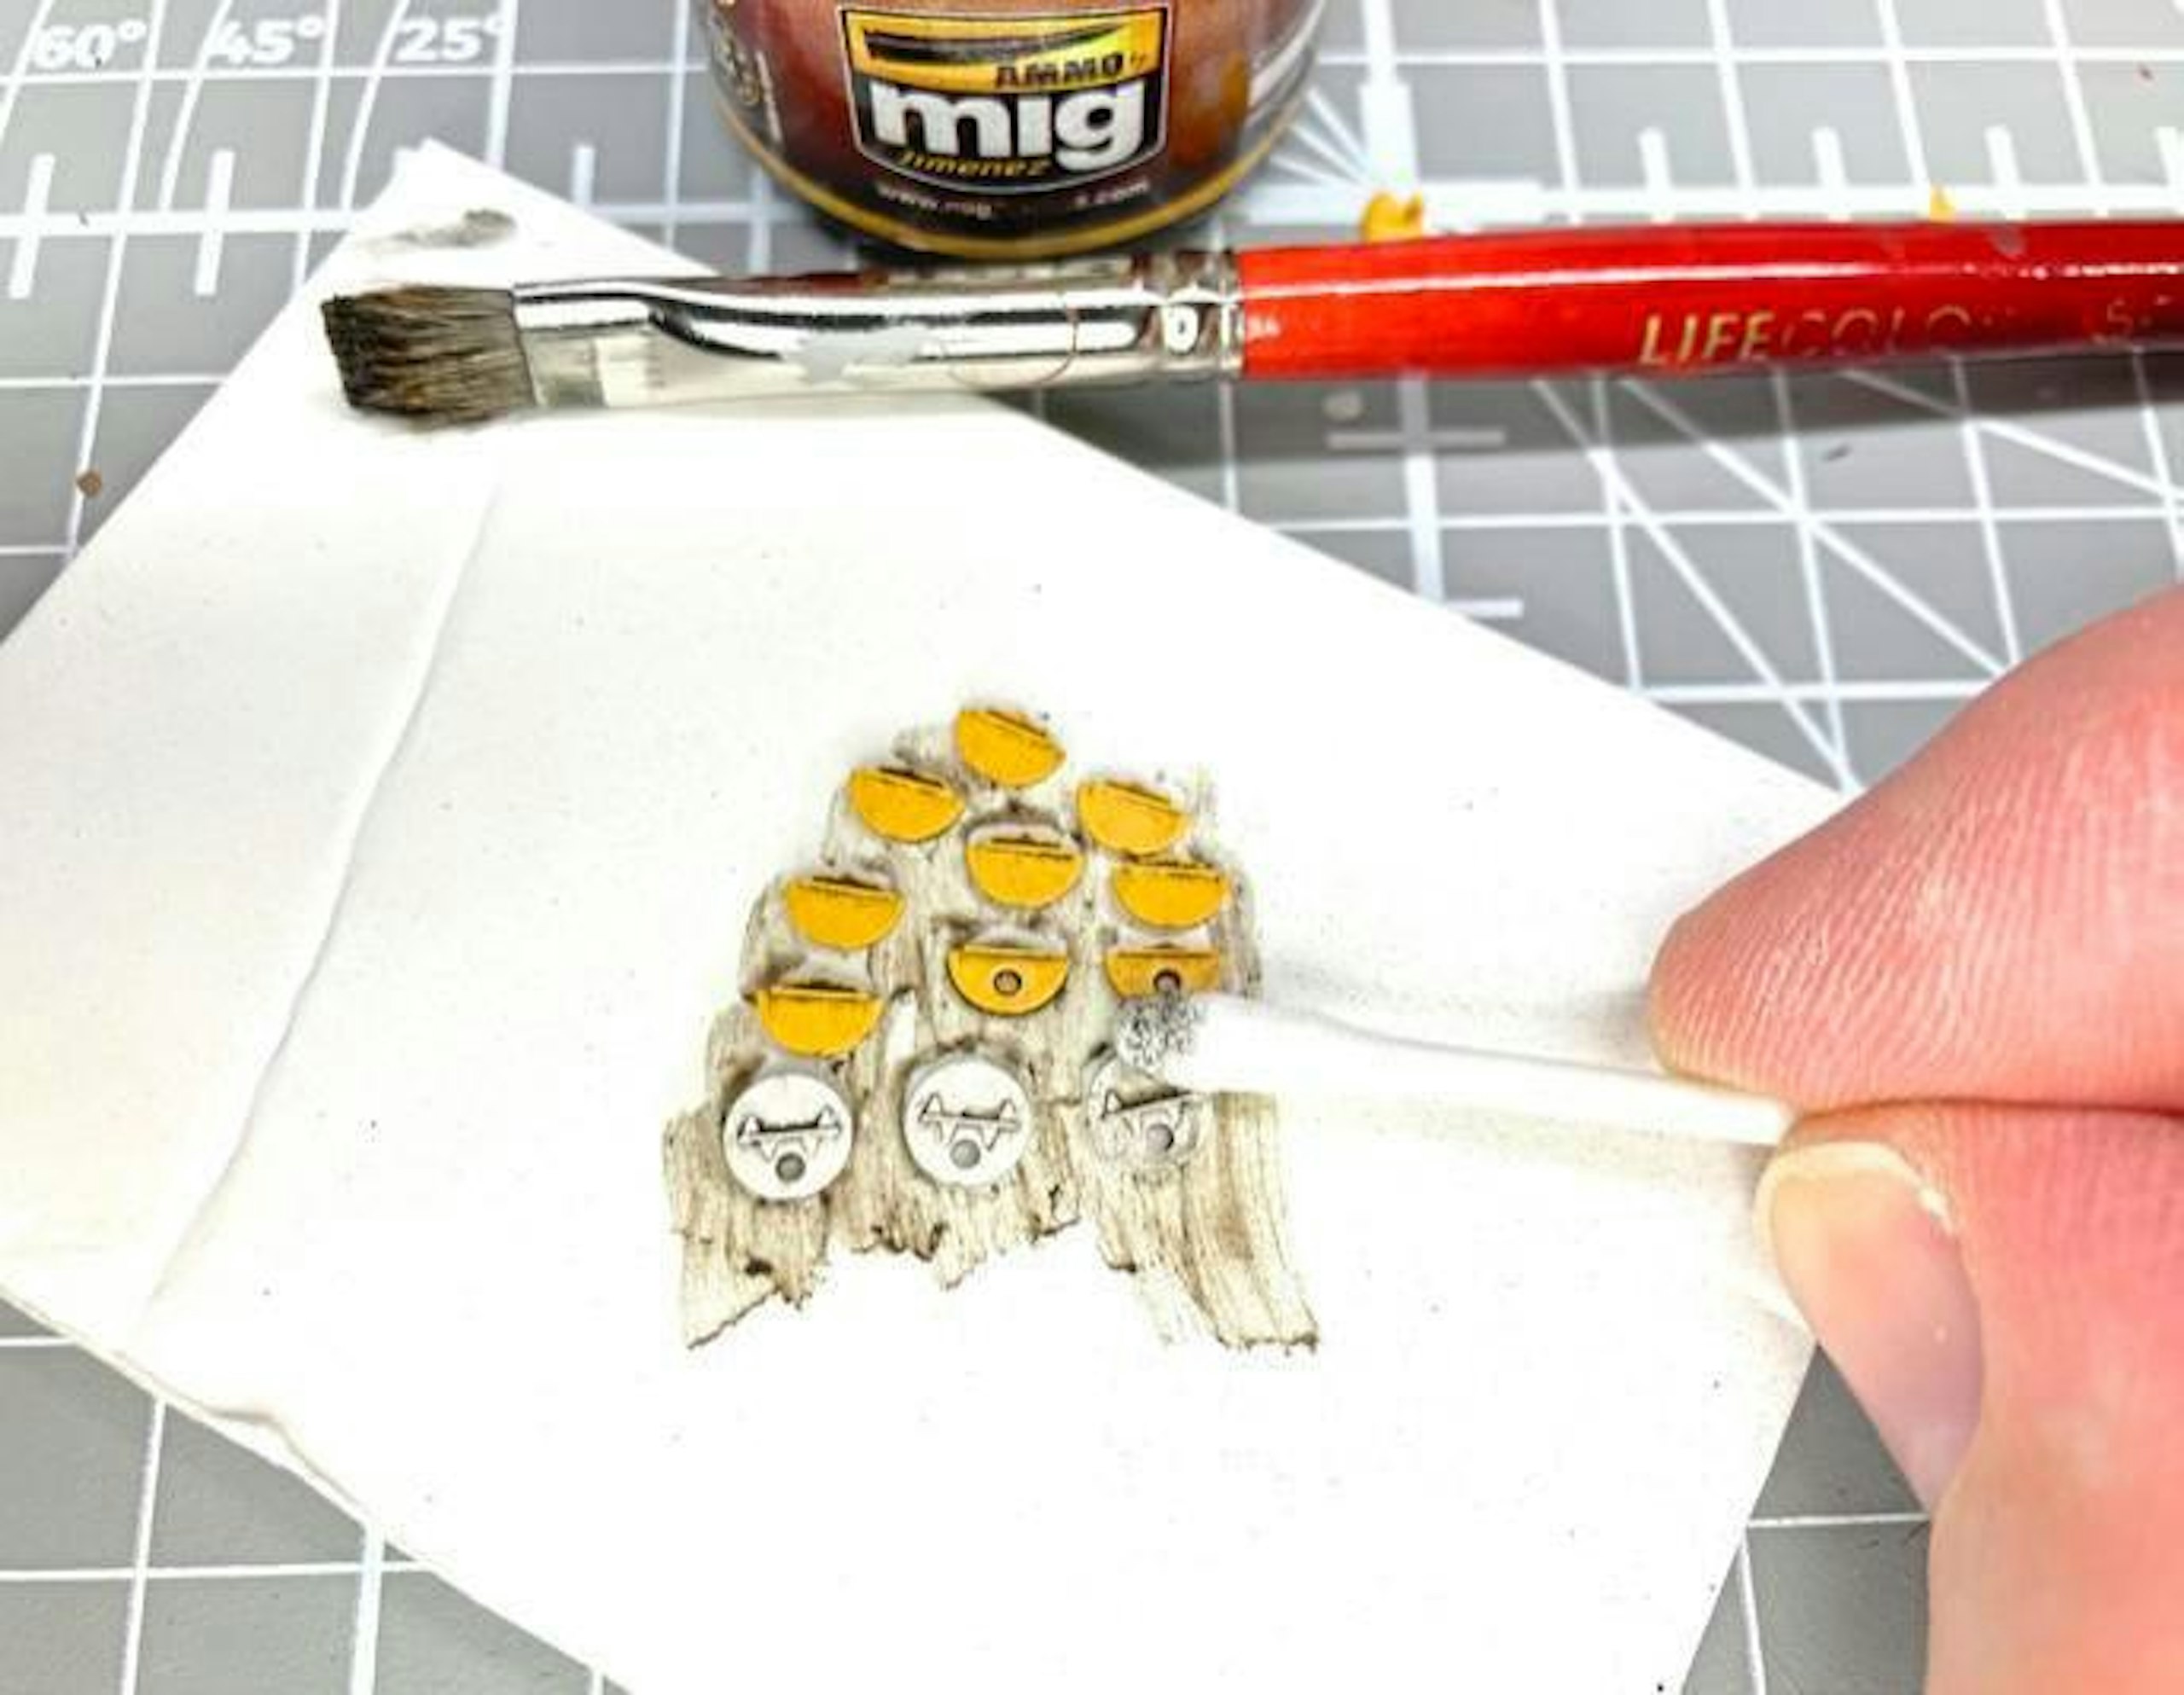
5 The supplied headcode discs were treated to the same weathering wash blend before installation. I pushed the locating pins into a scrap of foamboard to hold them still. The wash brings out the hinge detail nicely.
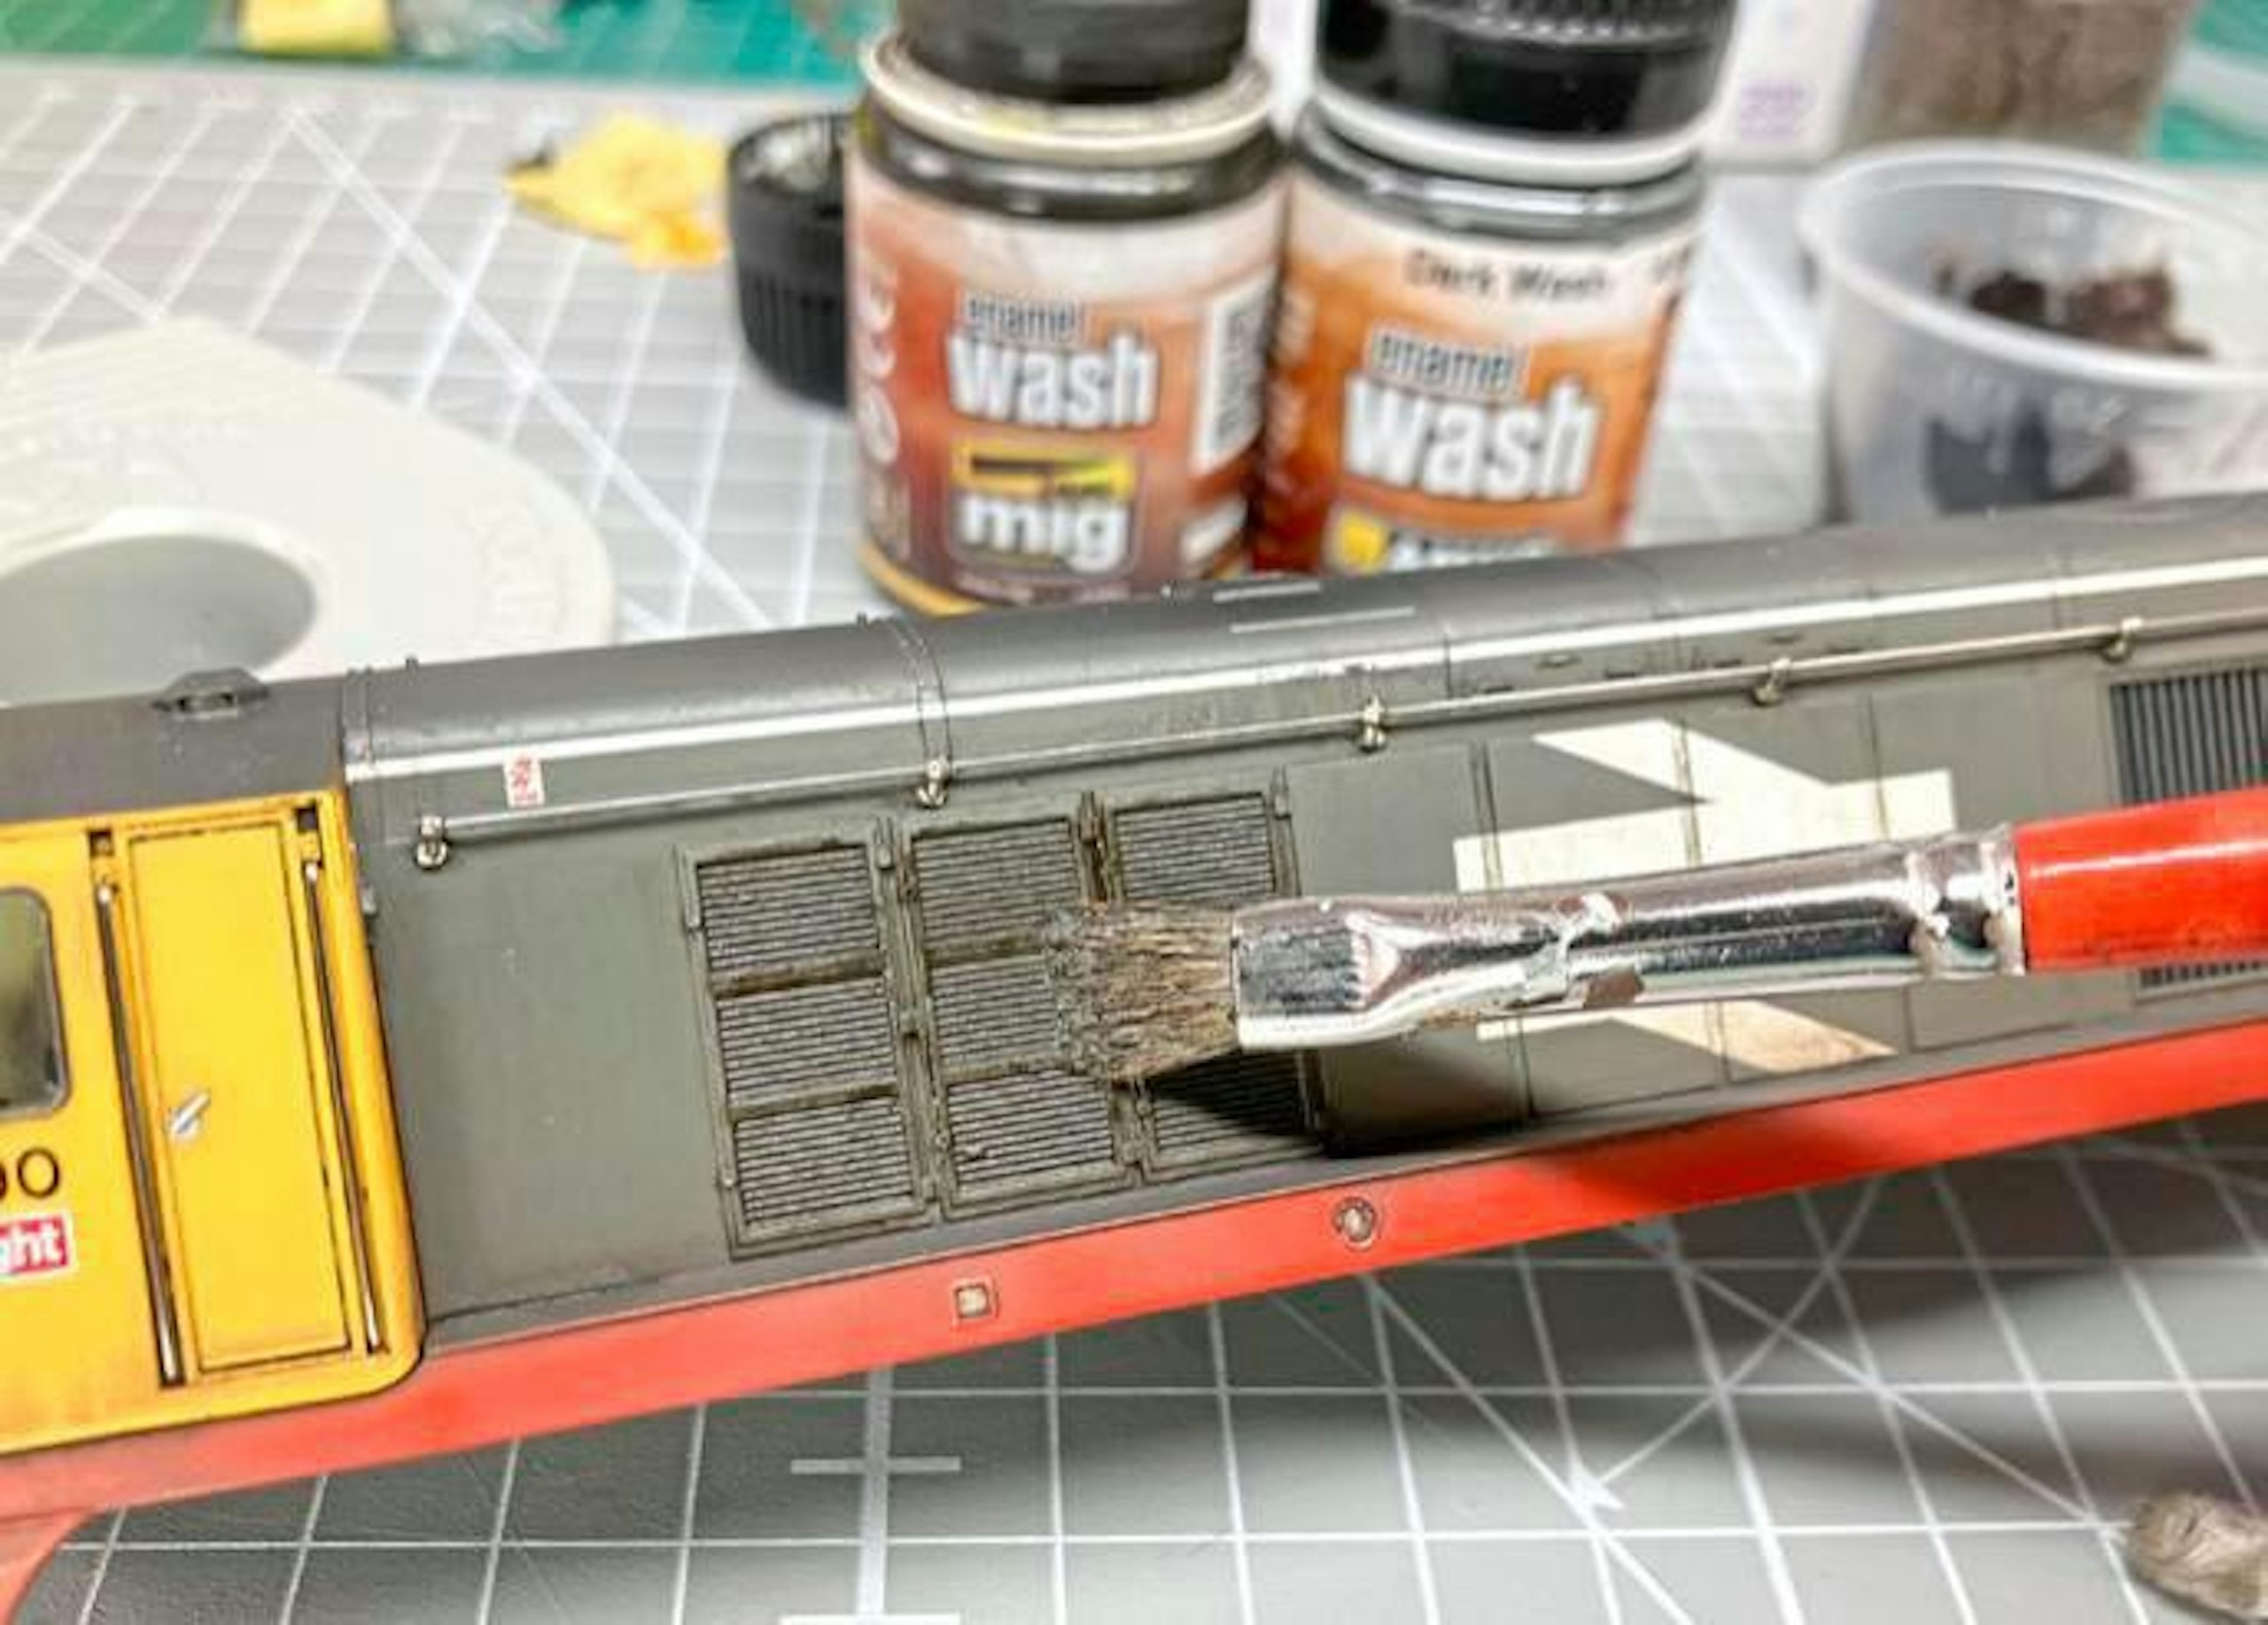
6 Next day, I decided the side grilles and louvre panels needed extra contrast, so I applied a much darker blend of enamel washes, targeting it more precisely, and only wiping away pigment that had strayed outside the grilles.
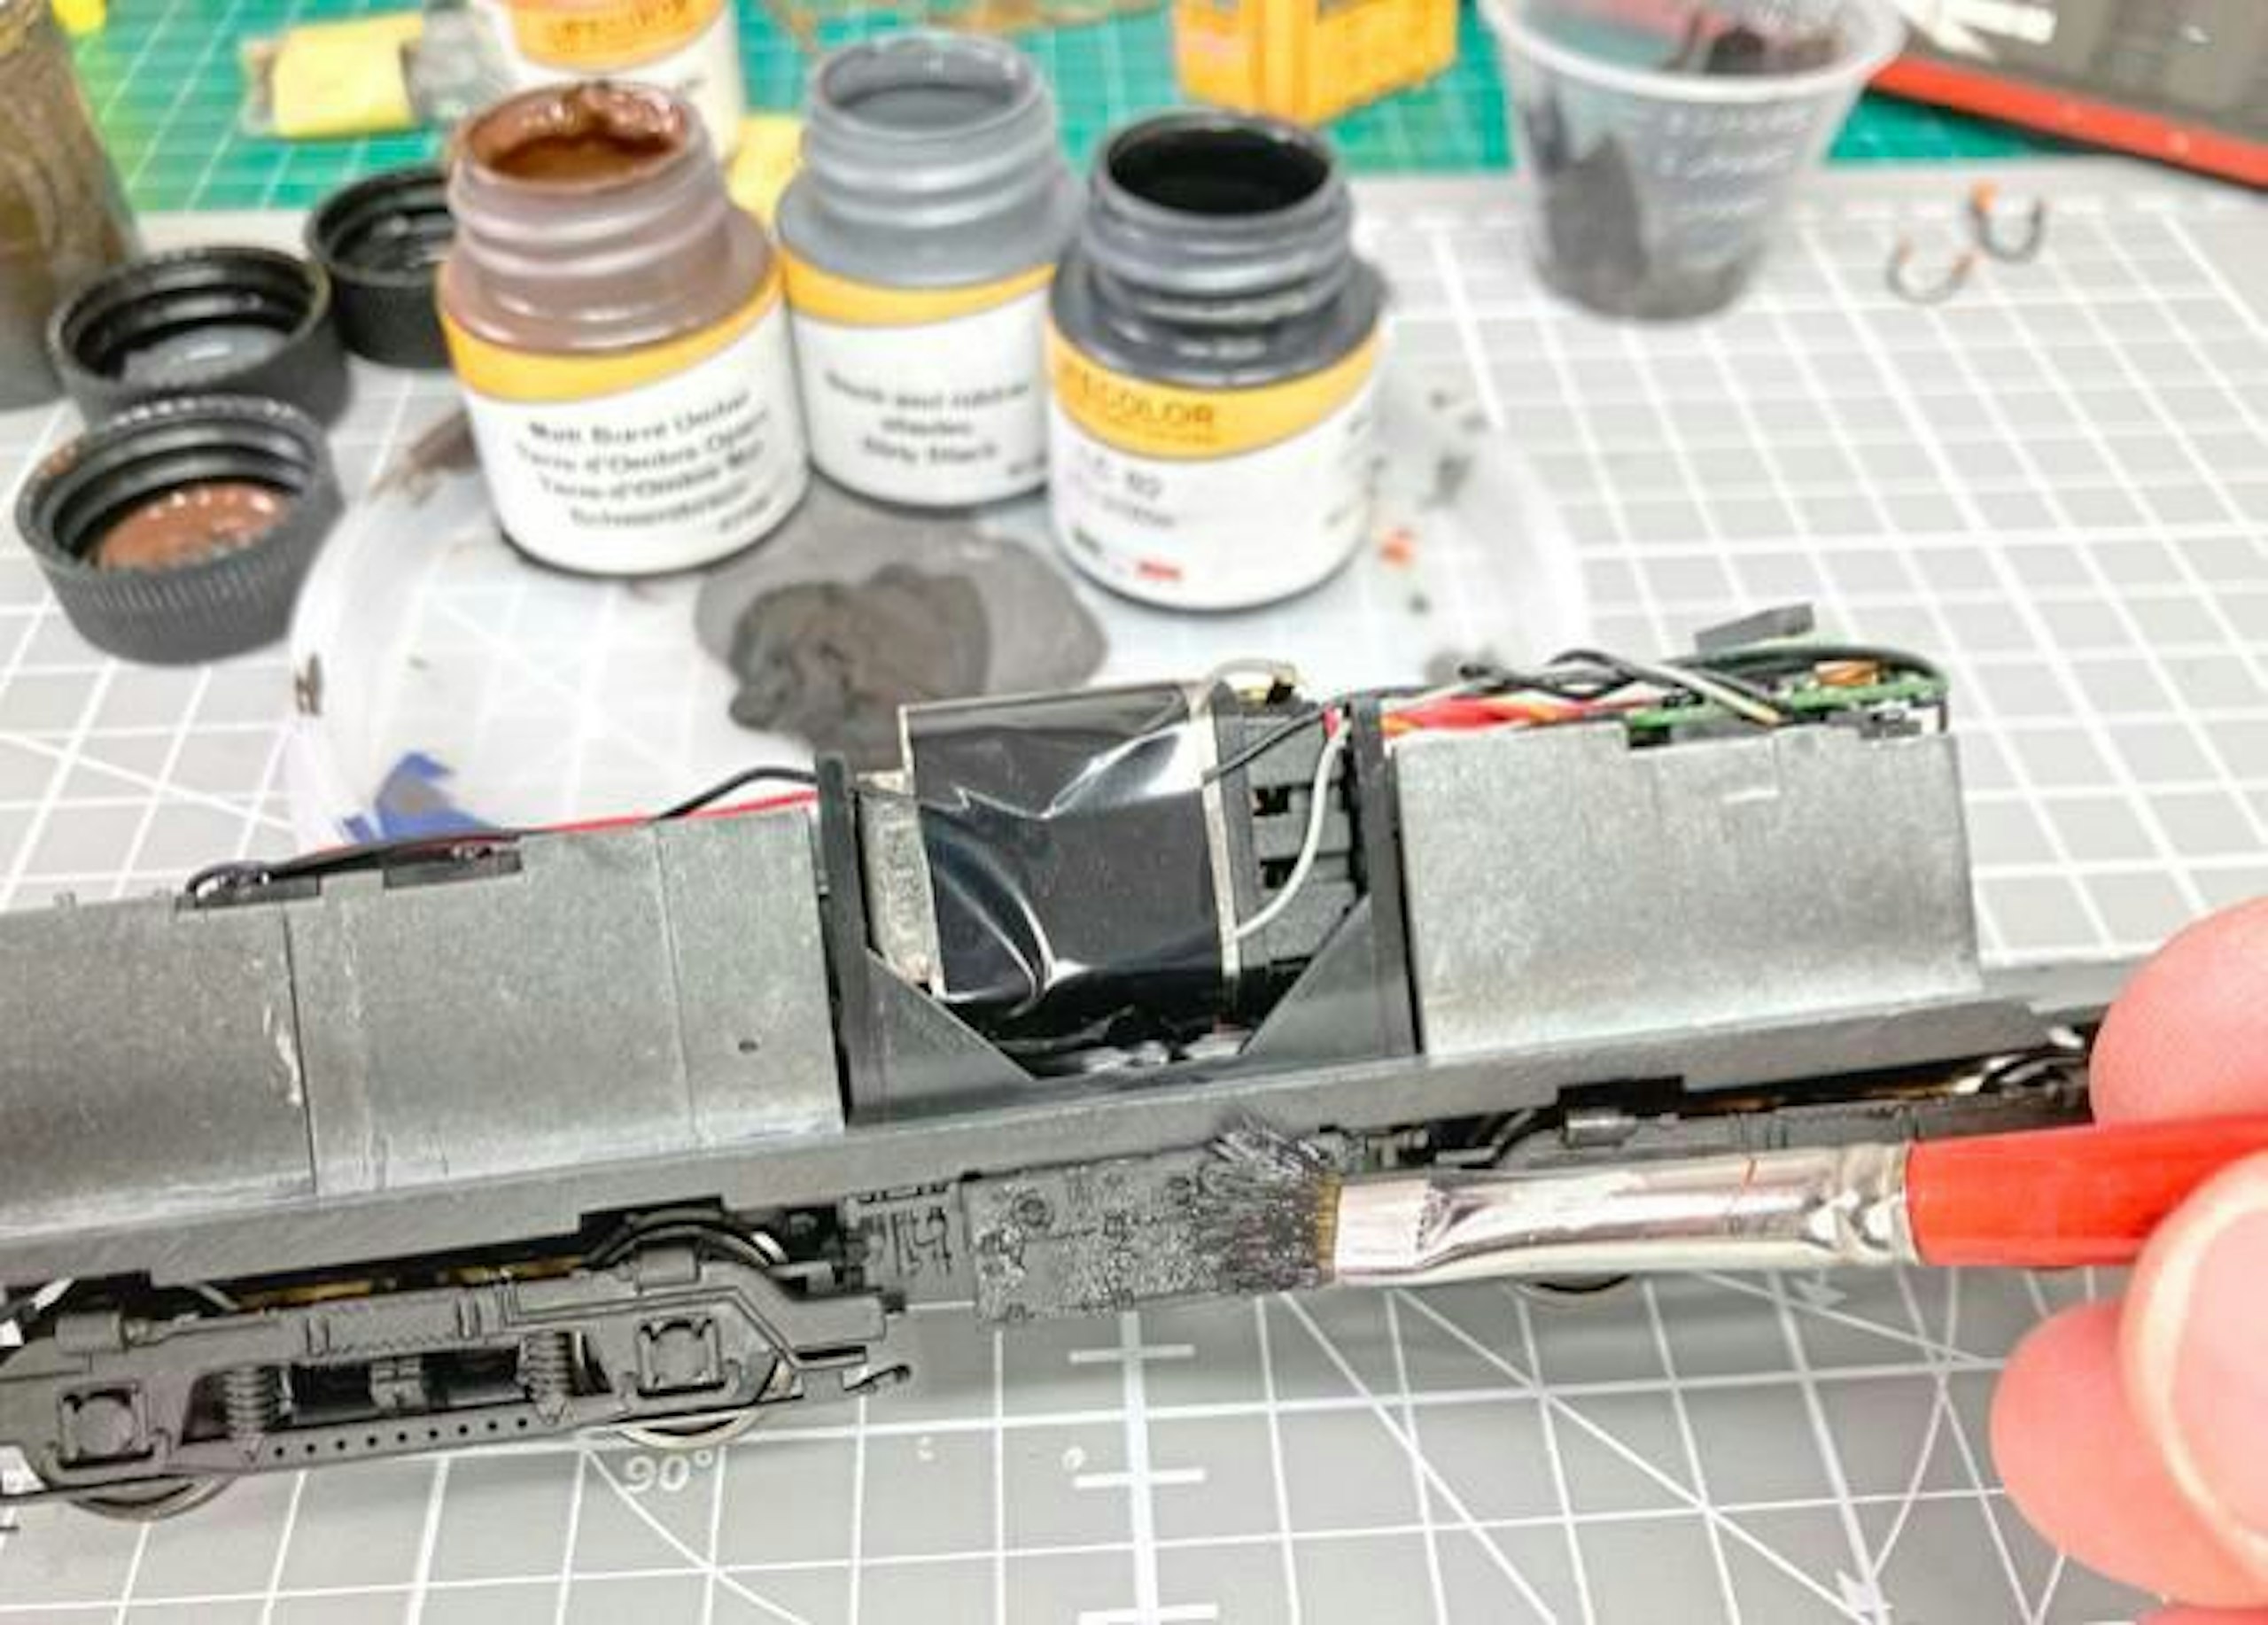
7 While the body dried again, attention turned to the chassis. After degreasing the bogie frames with an electrical contact cleaner fluid, I stippled the surfaces with a blend of black, dark brown and dark grey acrylic paints to add texture.
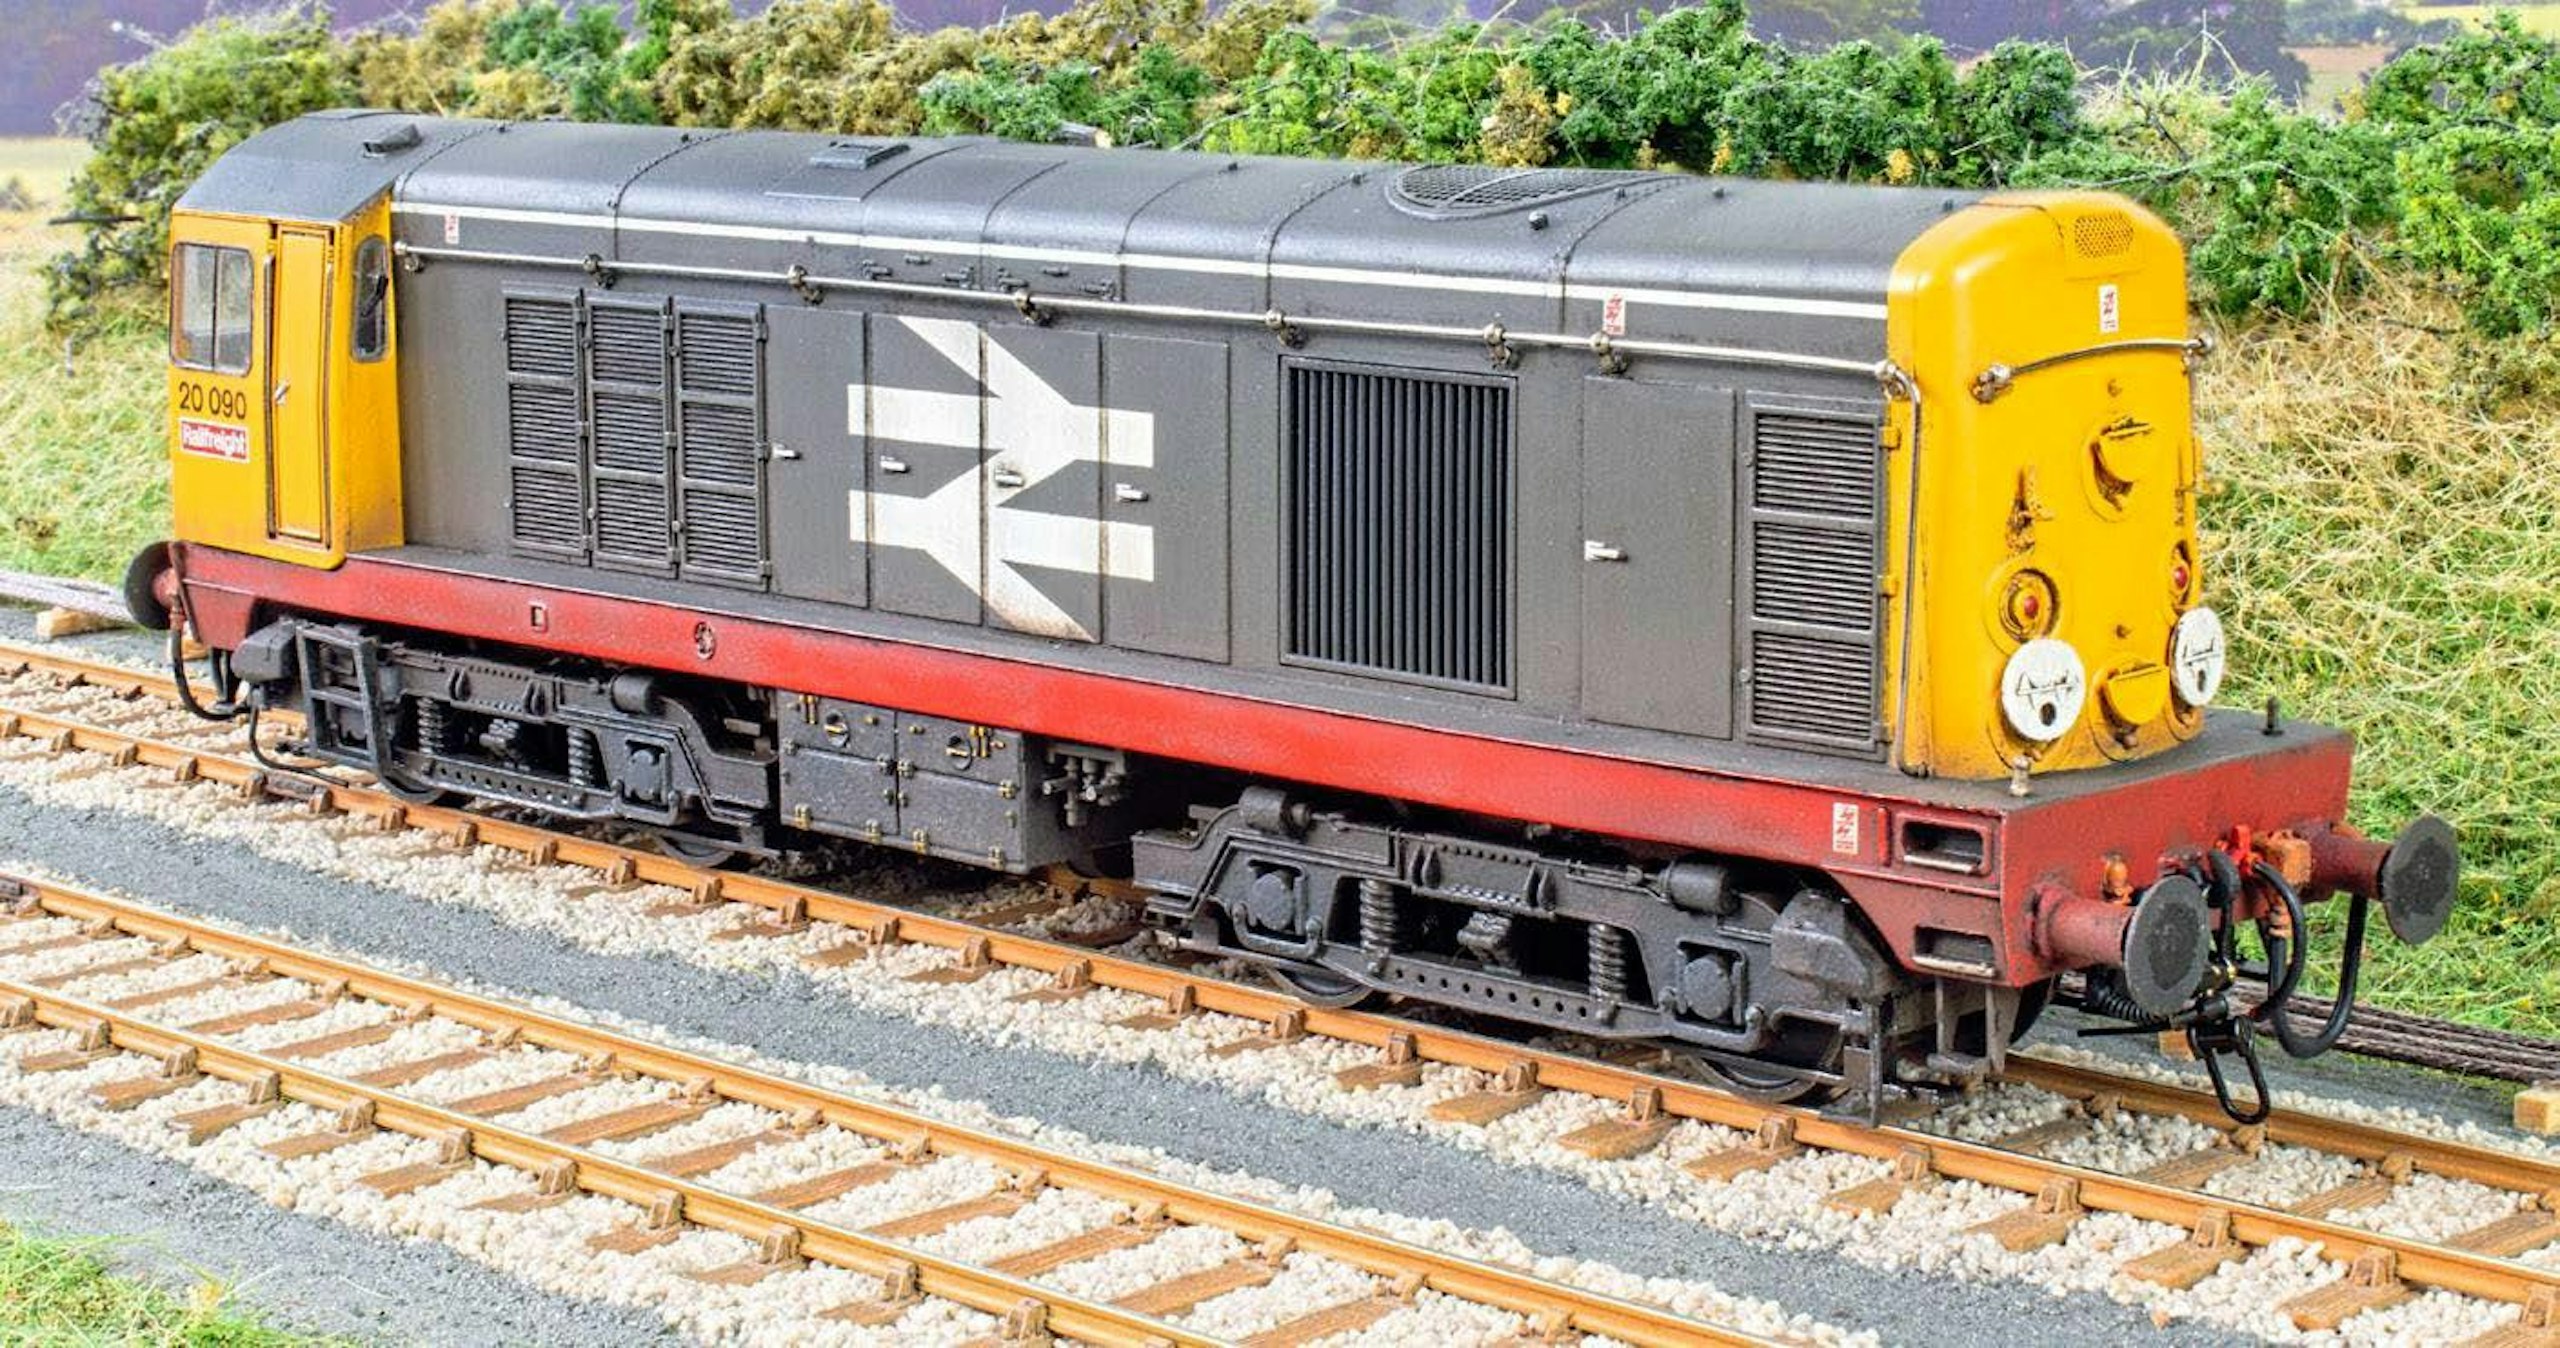
Older Bachmann Class 20s can be picked up on the pre-owned market for reasonable money, providing a great platform for detailing and weathering projects.
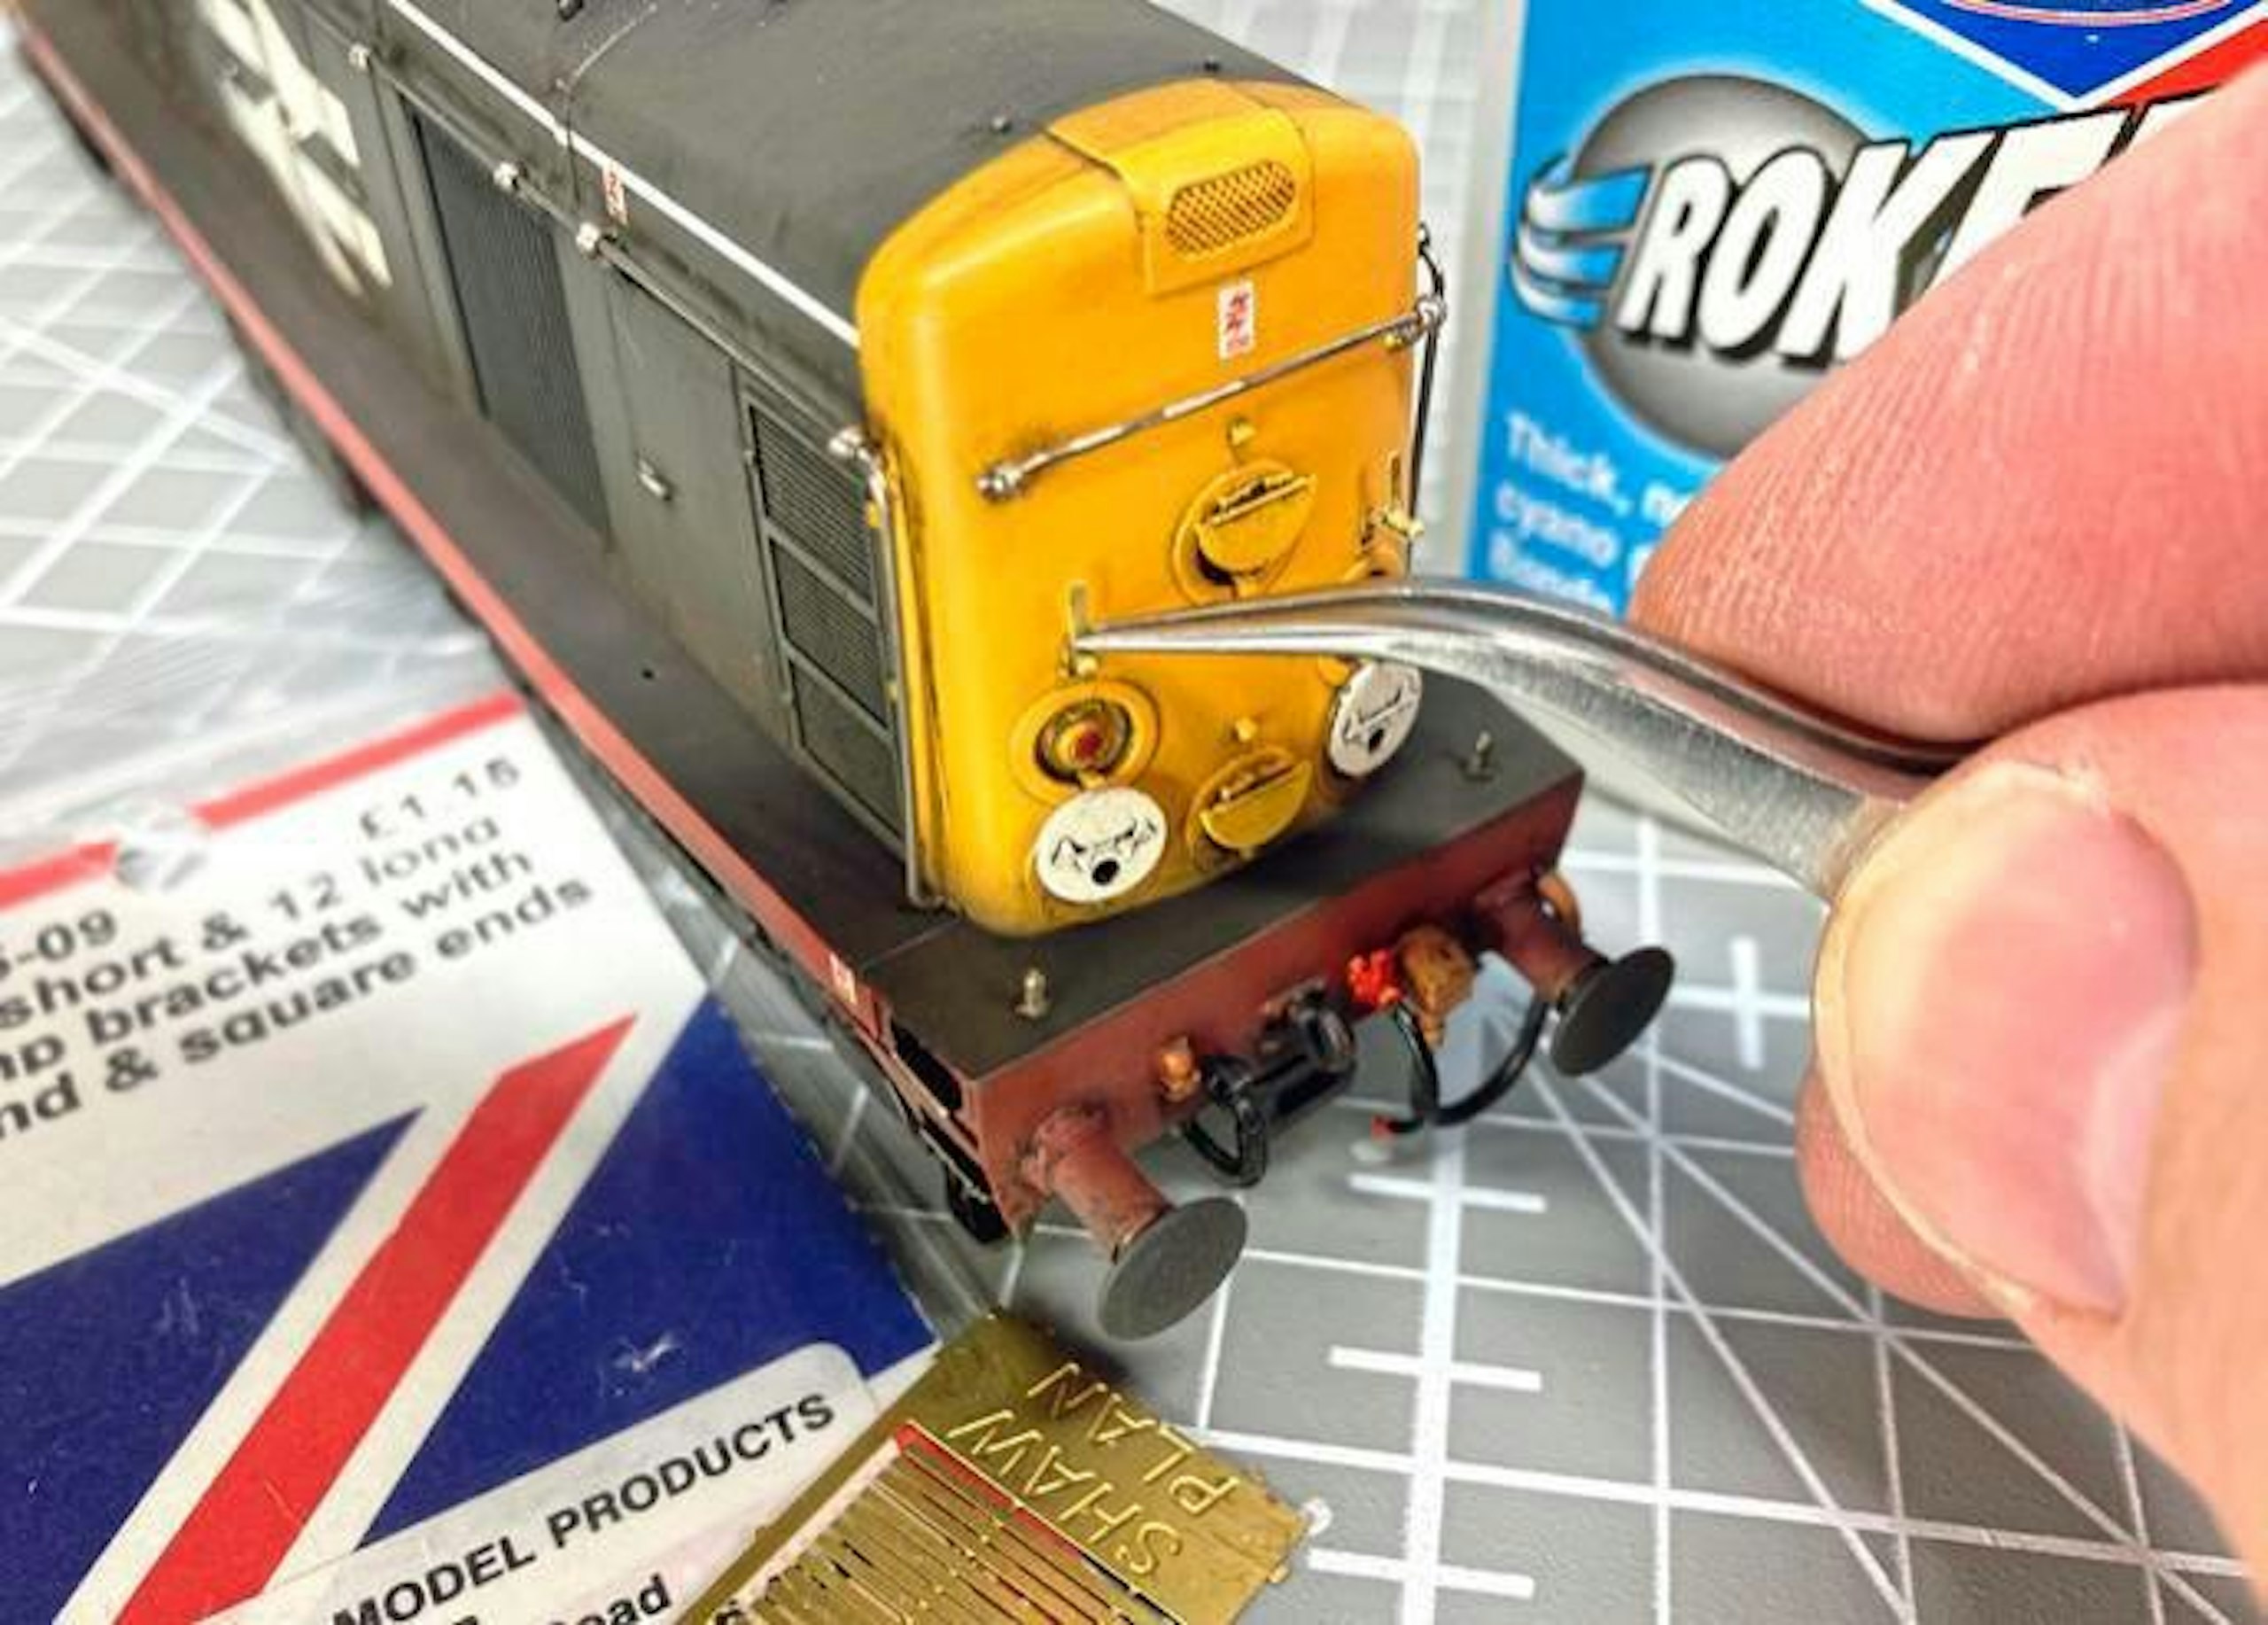
8 With the initial weathering stage complete, it was safe to install the headcodes disc and bufferbeam detail. I lost the nose-end lamp brackets, so I folded up replacements from Shawplan etched brass strips, slotted into the mounting holes.
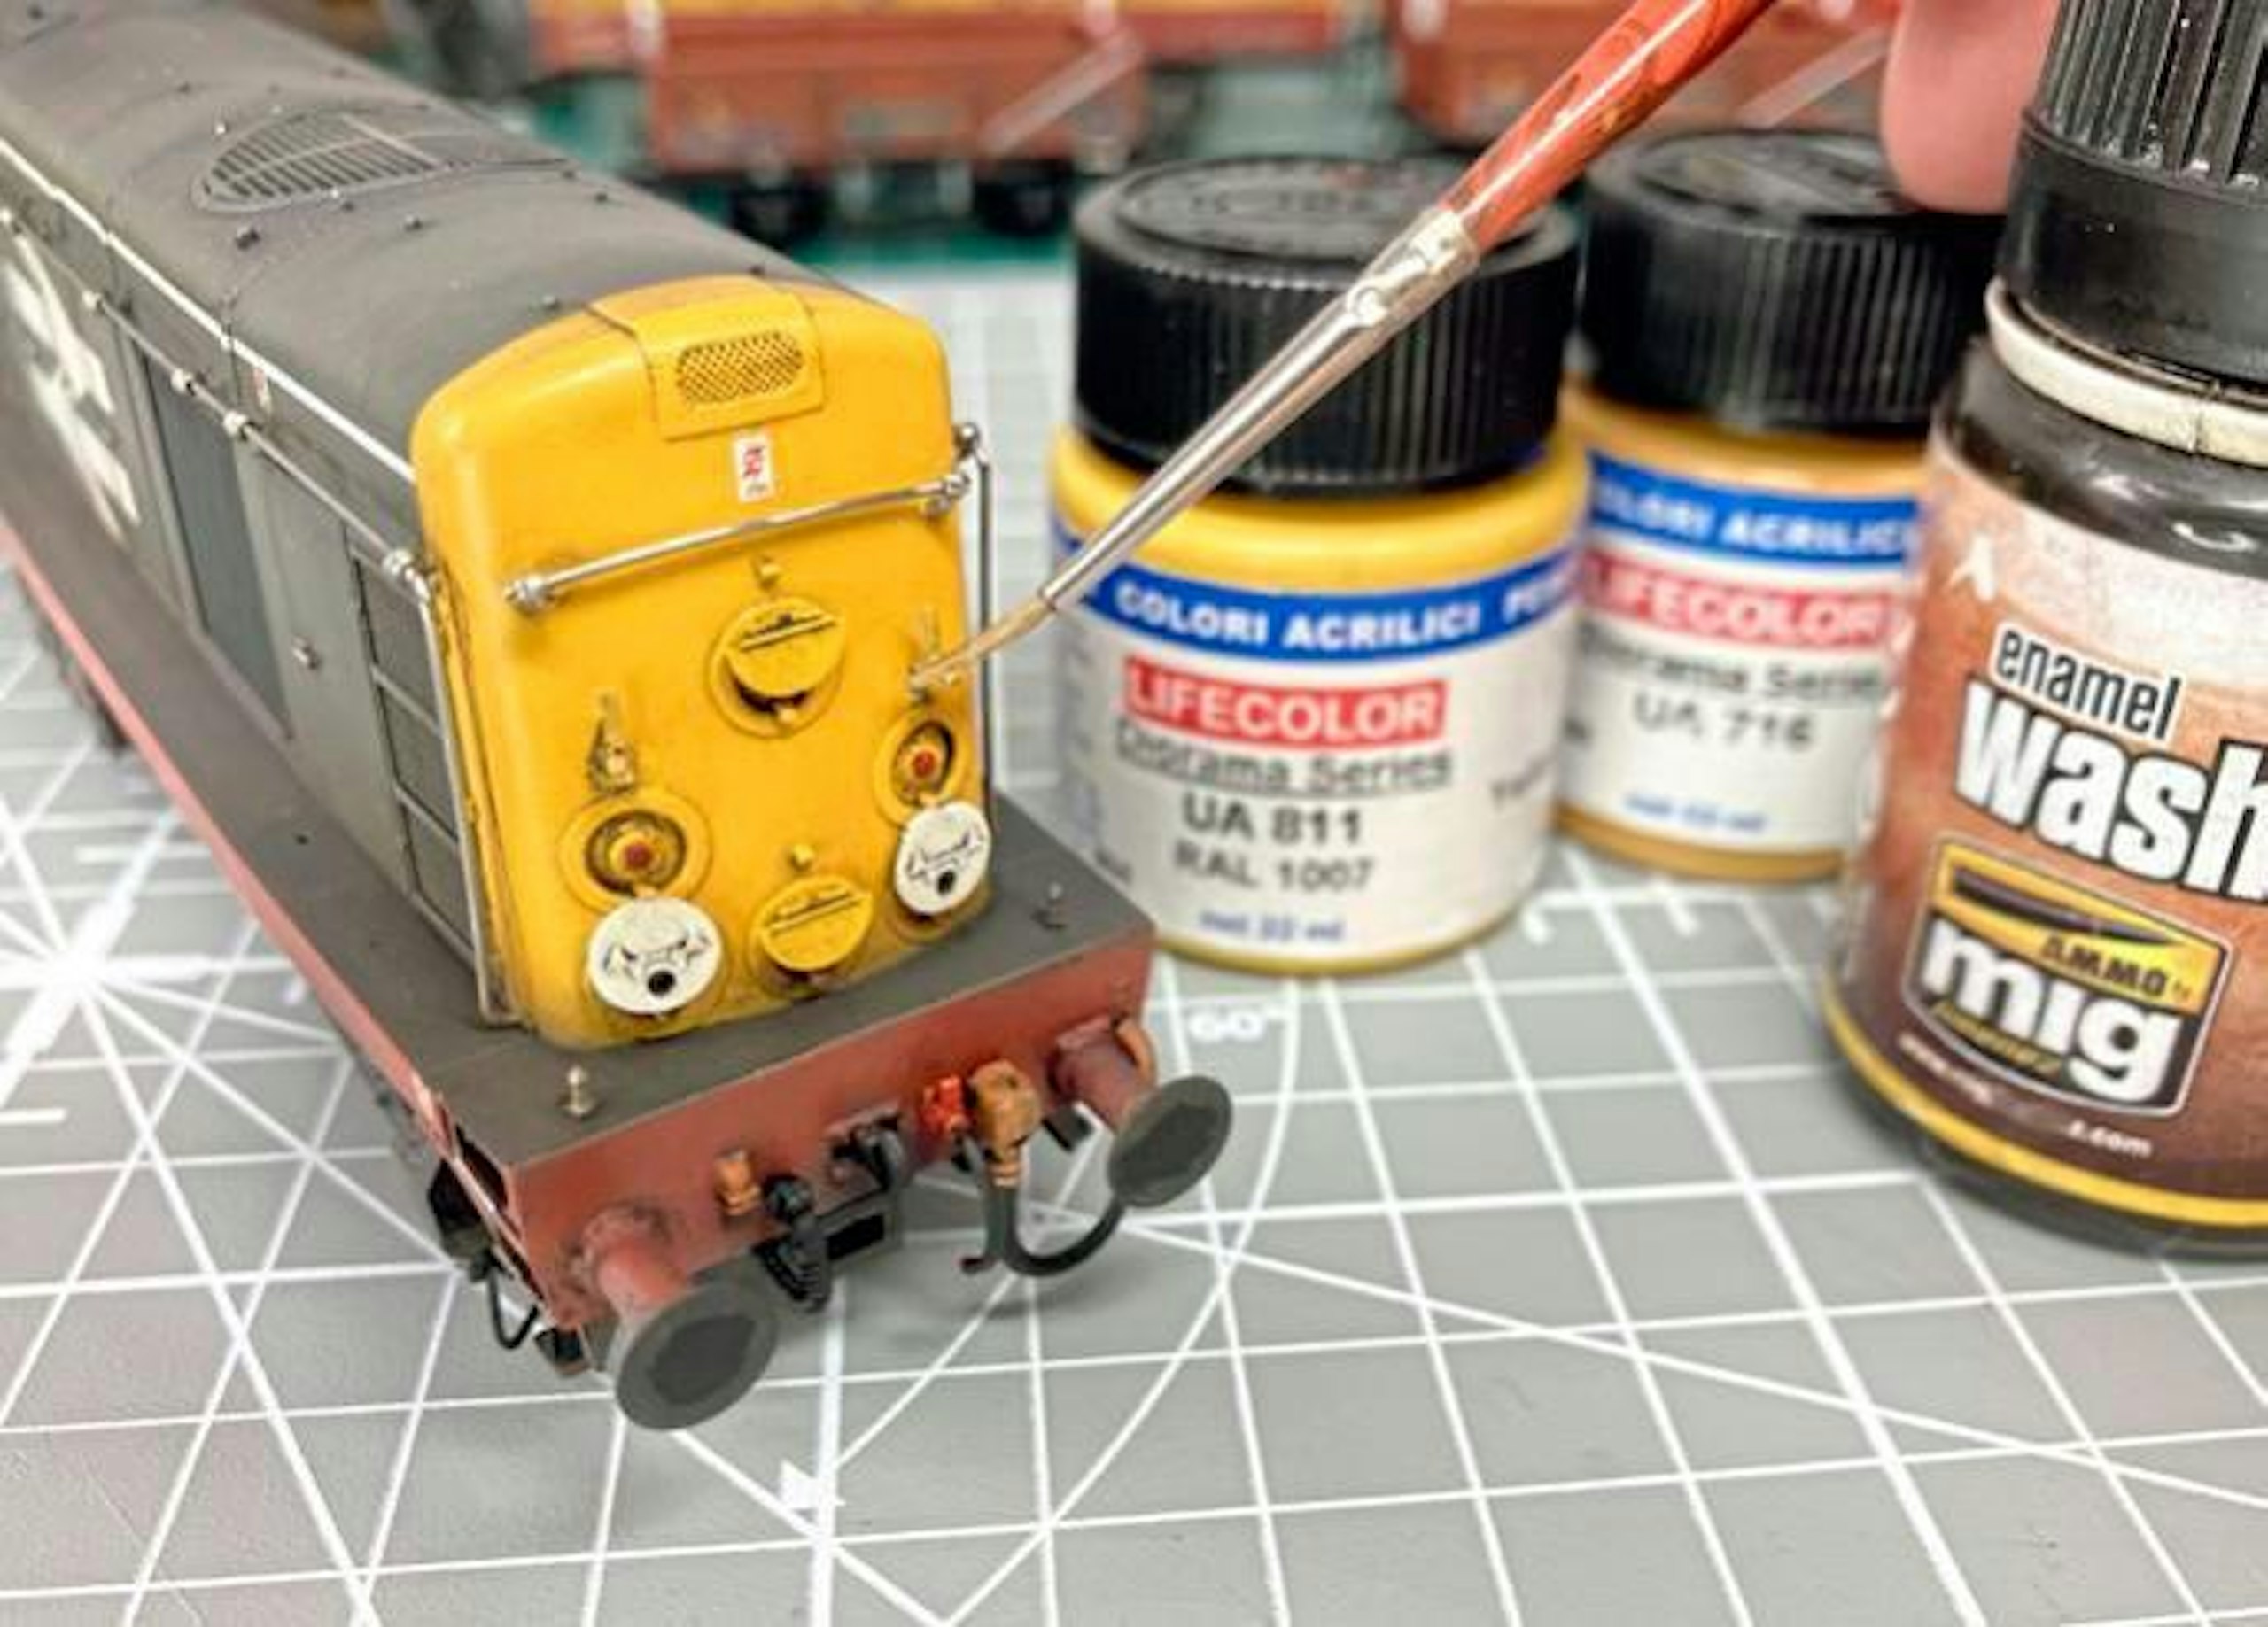
9 When the glue had set, the brass lamp brackets were touched in with paint (I mixed some LifeColor shades to a close match), then weathering wash was added to help them blend into their surroundings.
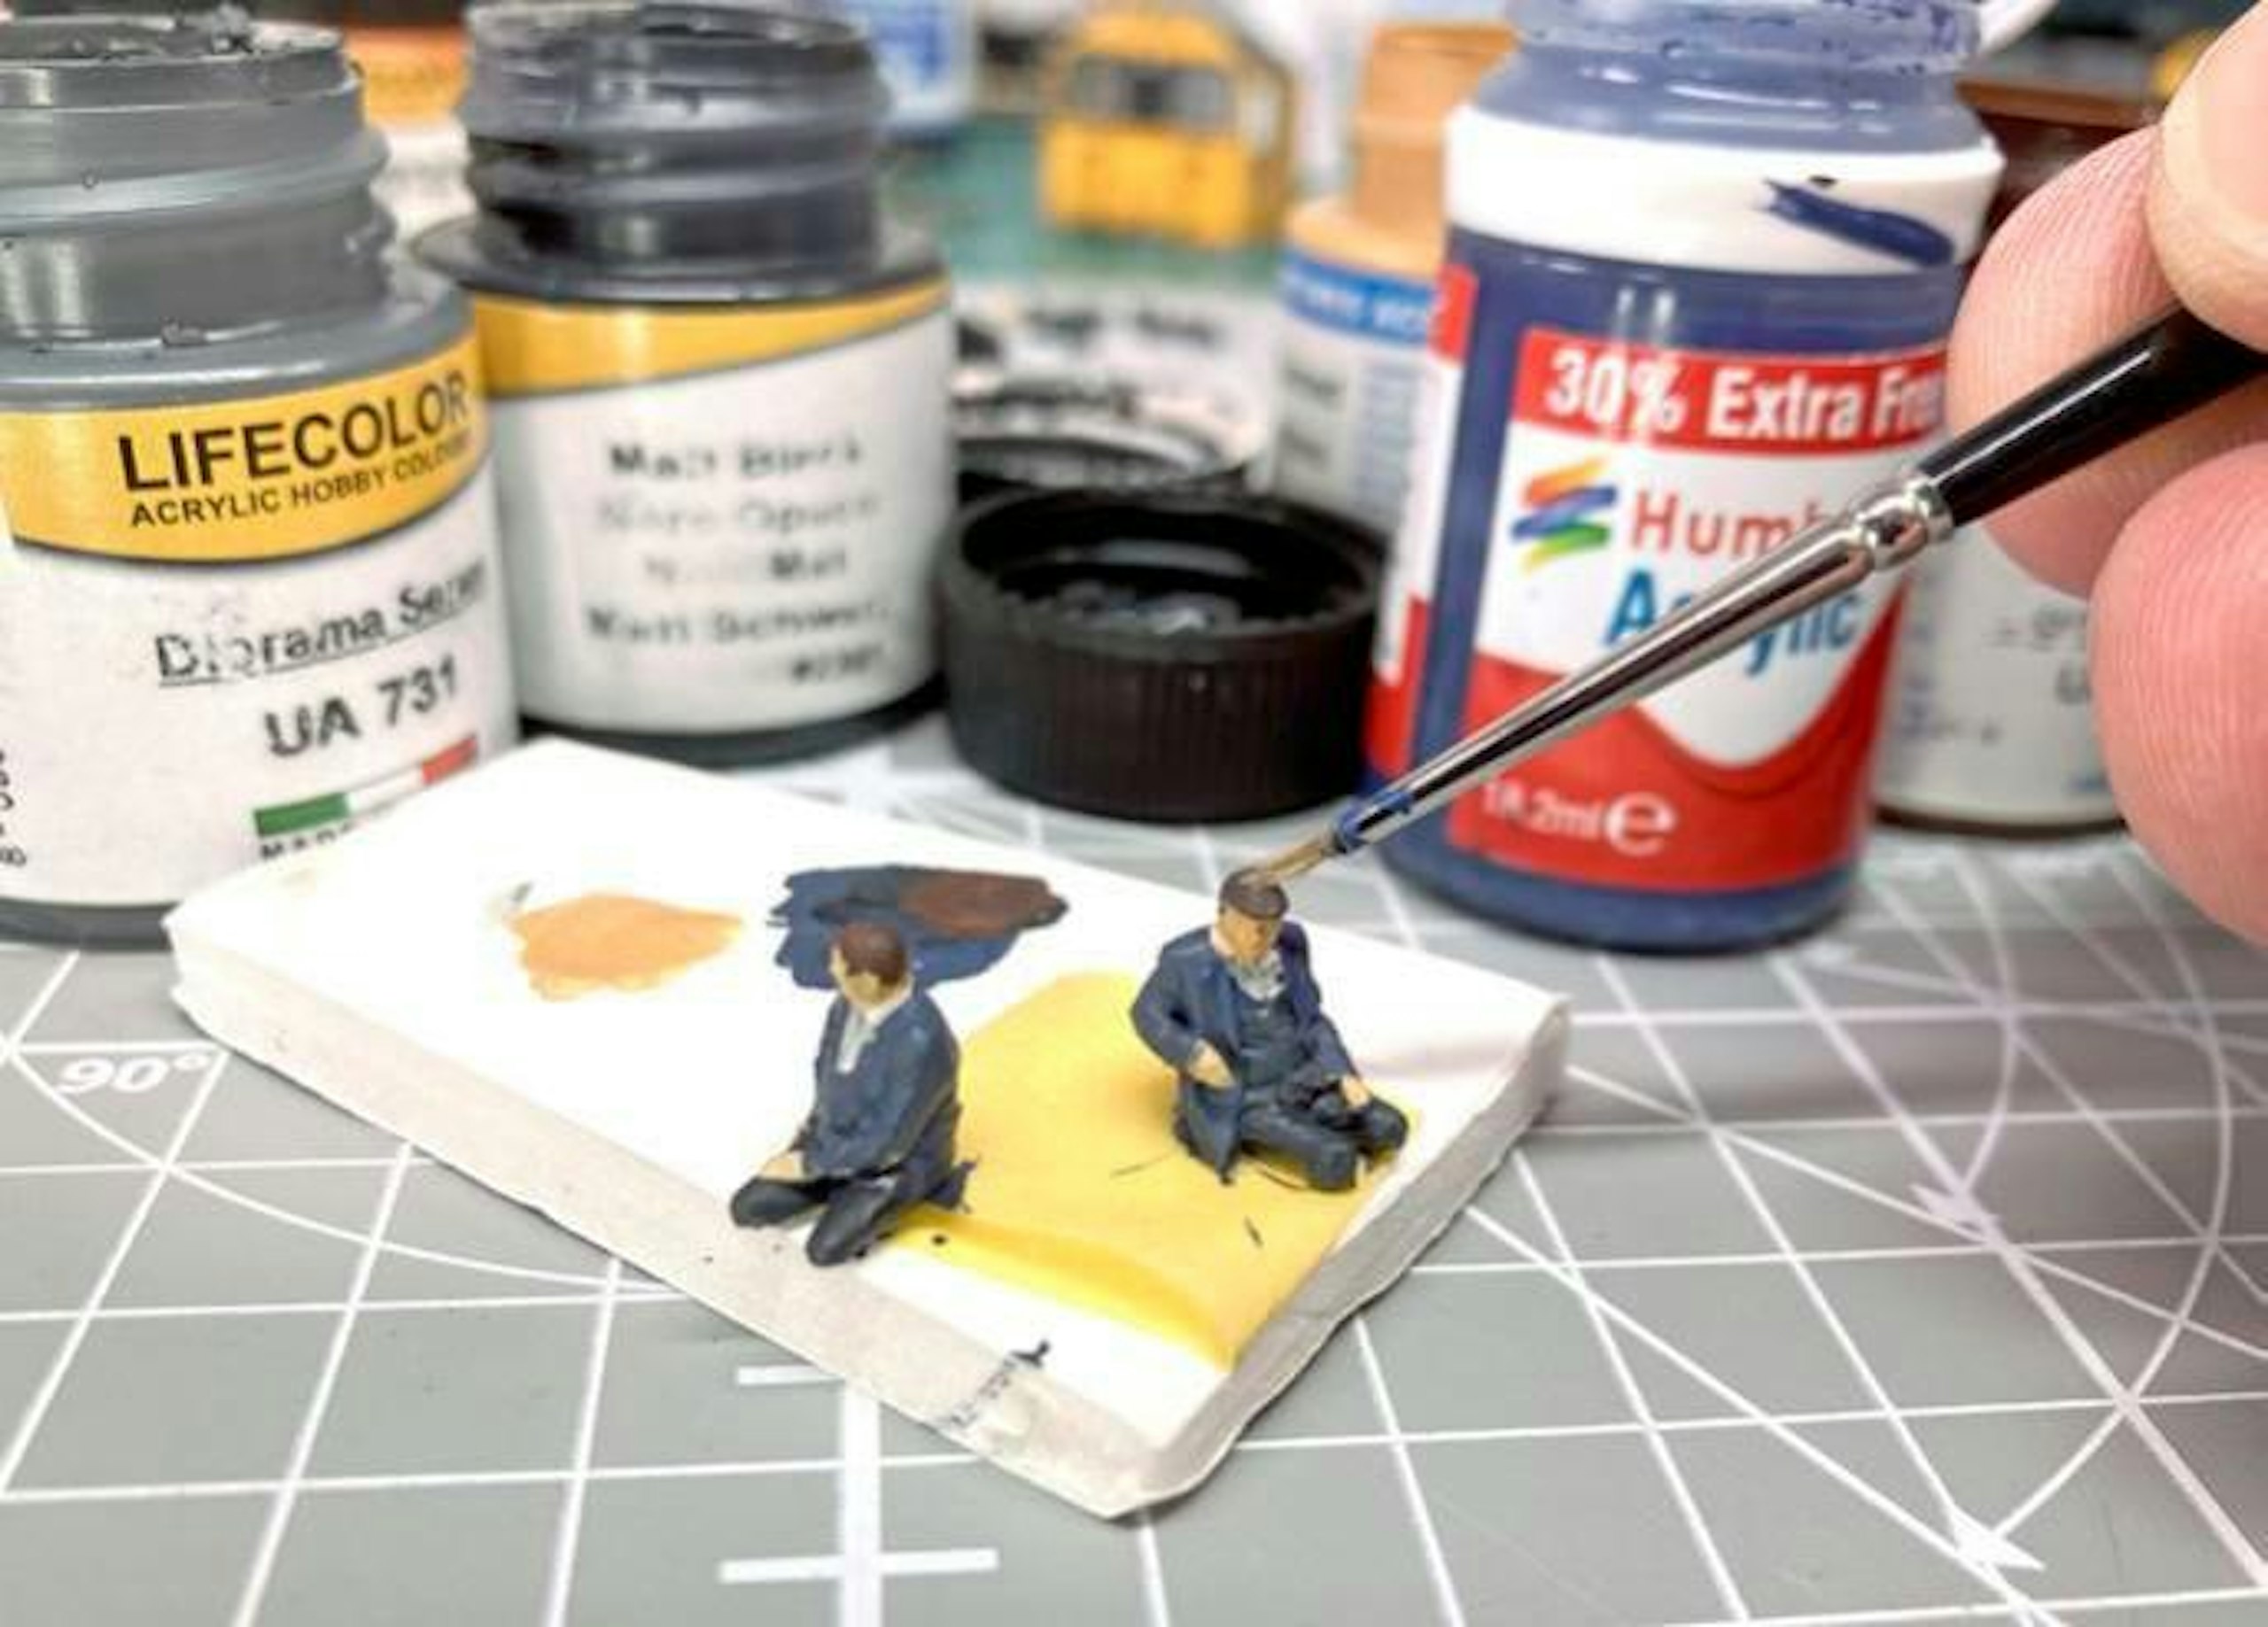
10 No working locomotive is complete without a footplate crew and this pair of figures is from the Modelu range, 3D-printed to fit into the Bachmann Class 20 cab. They needed painting first, though, in 1980s BR uniform colours.
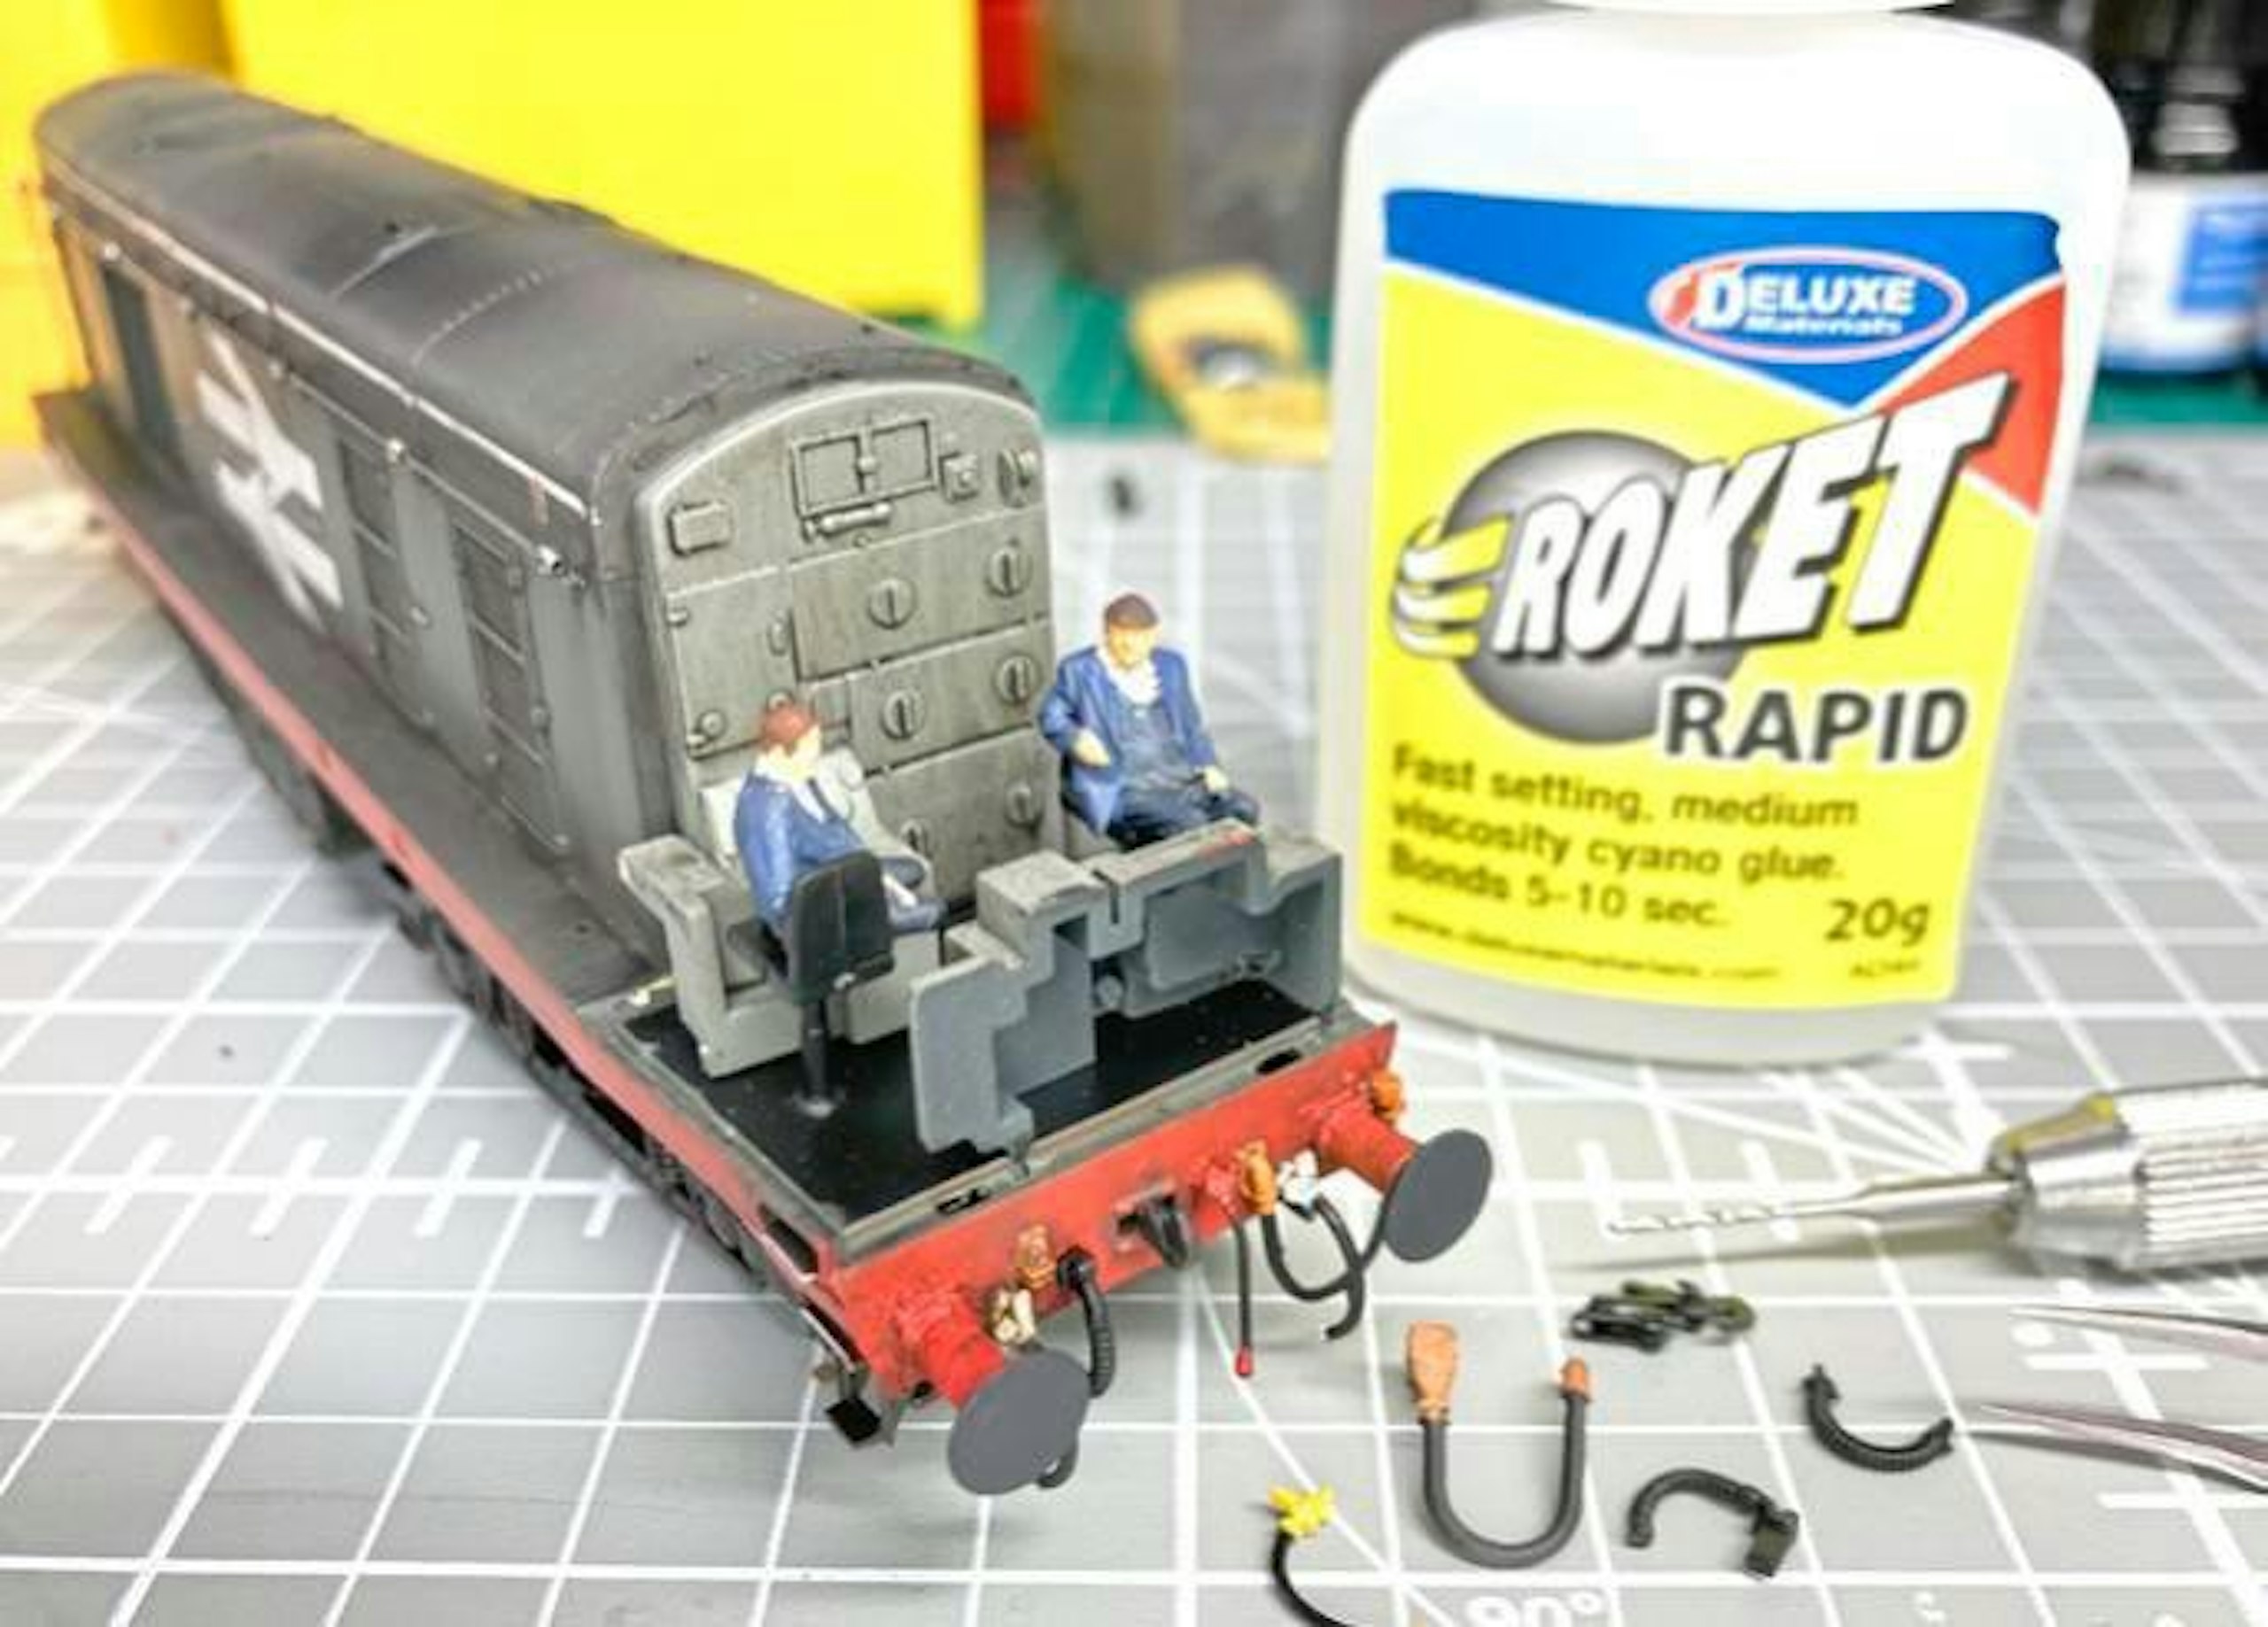
11 The crew fit effortlessly into the cab, which was pre-treated with weathering wash to take away the incongruous pristine appearance. This being an older Bachmann ‘20’, the cab was easier to remove.
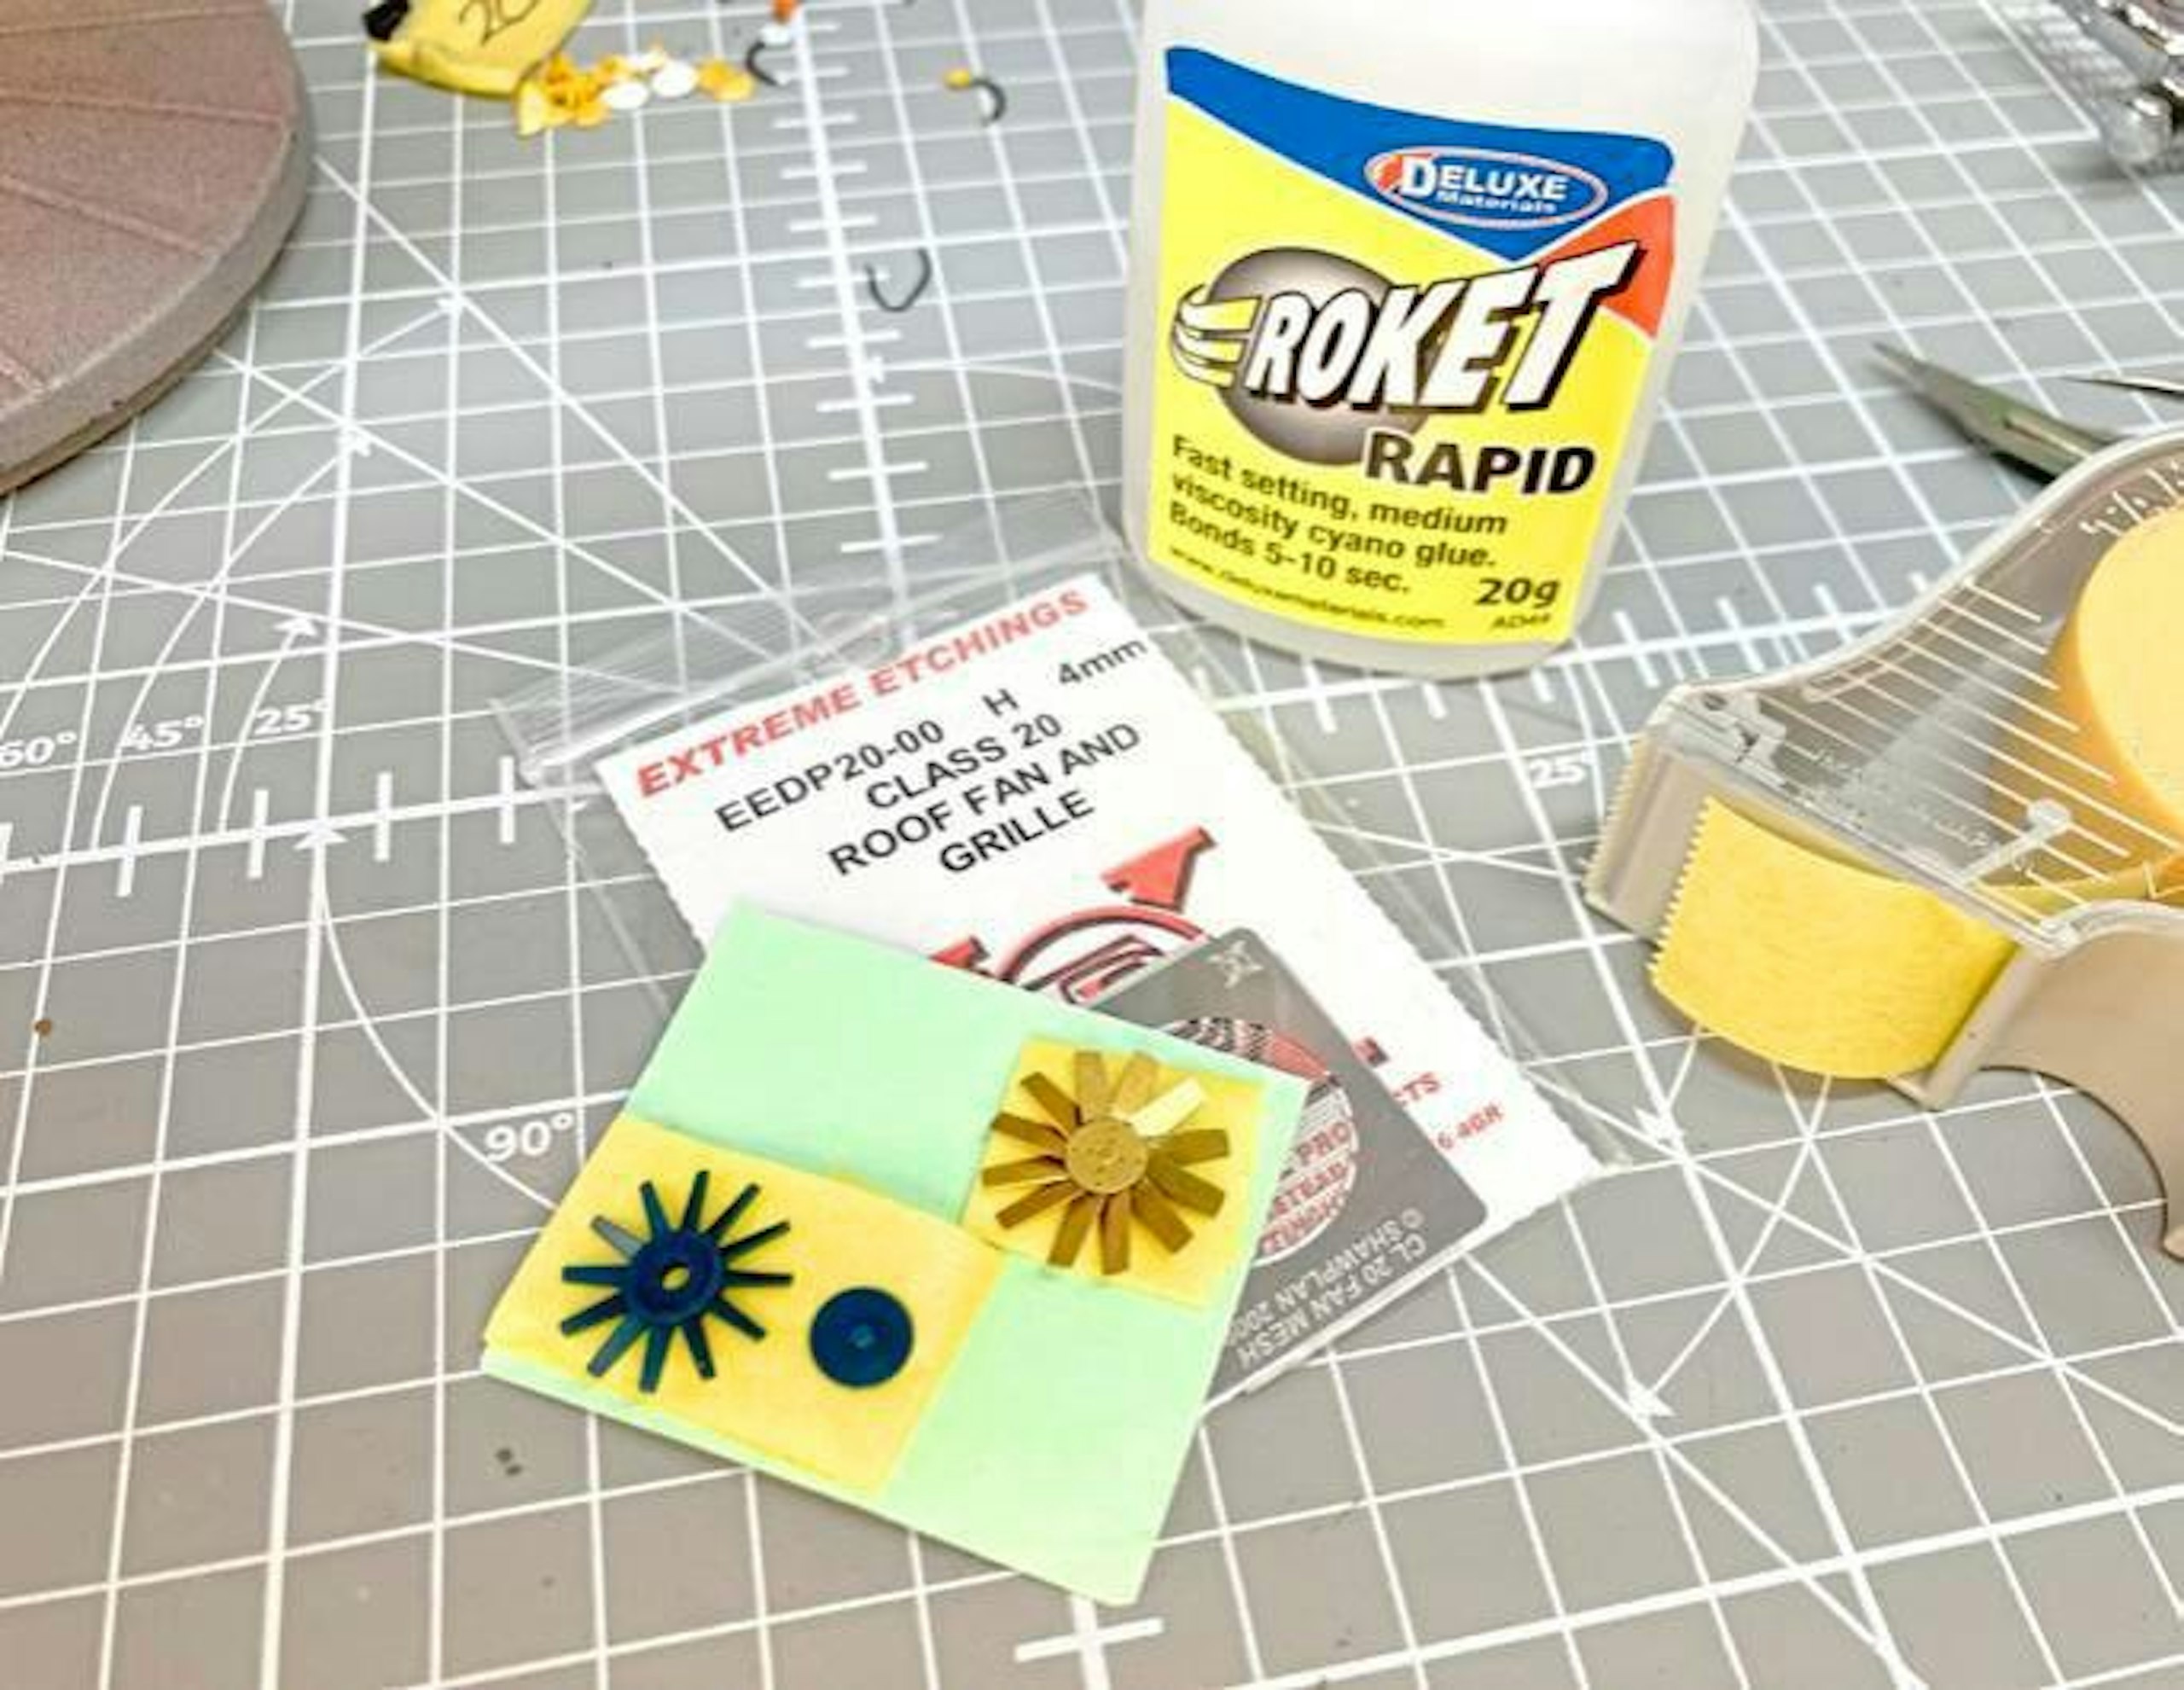
12 My Railfreight Class 20 lacked a radiator fan, so a Shawplan etched brass replacement was assembled (the parts bonded with cyano glue) and made ready for priming. I didn’t bother replacing the grille.
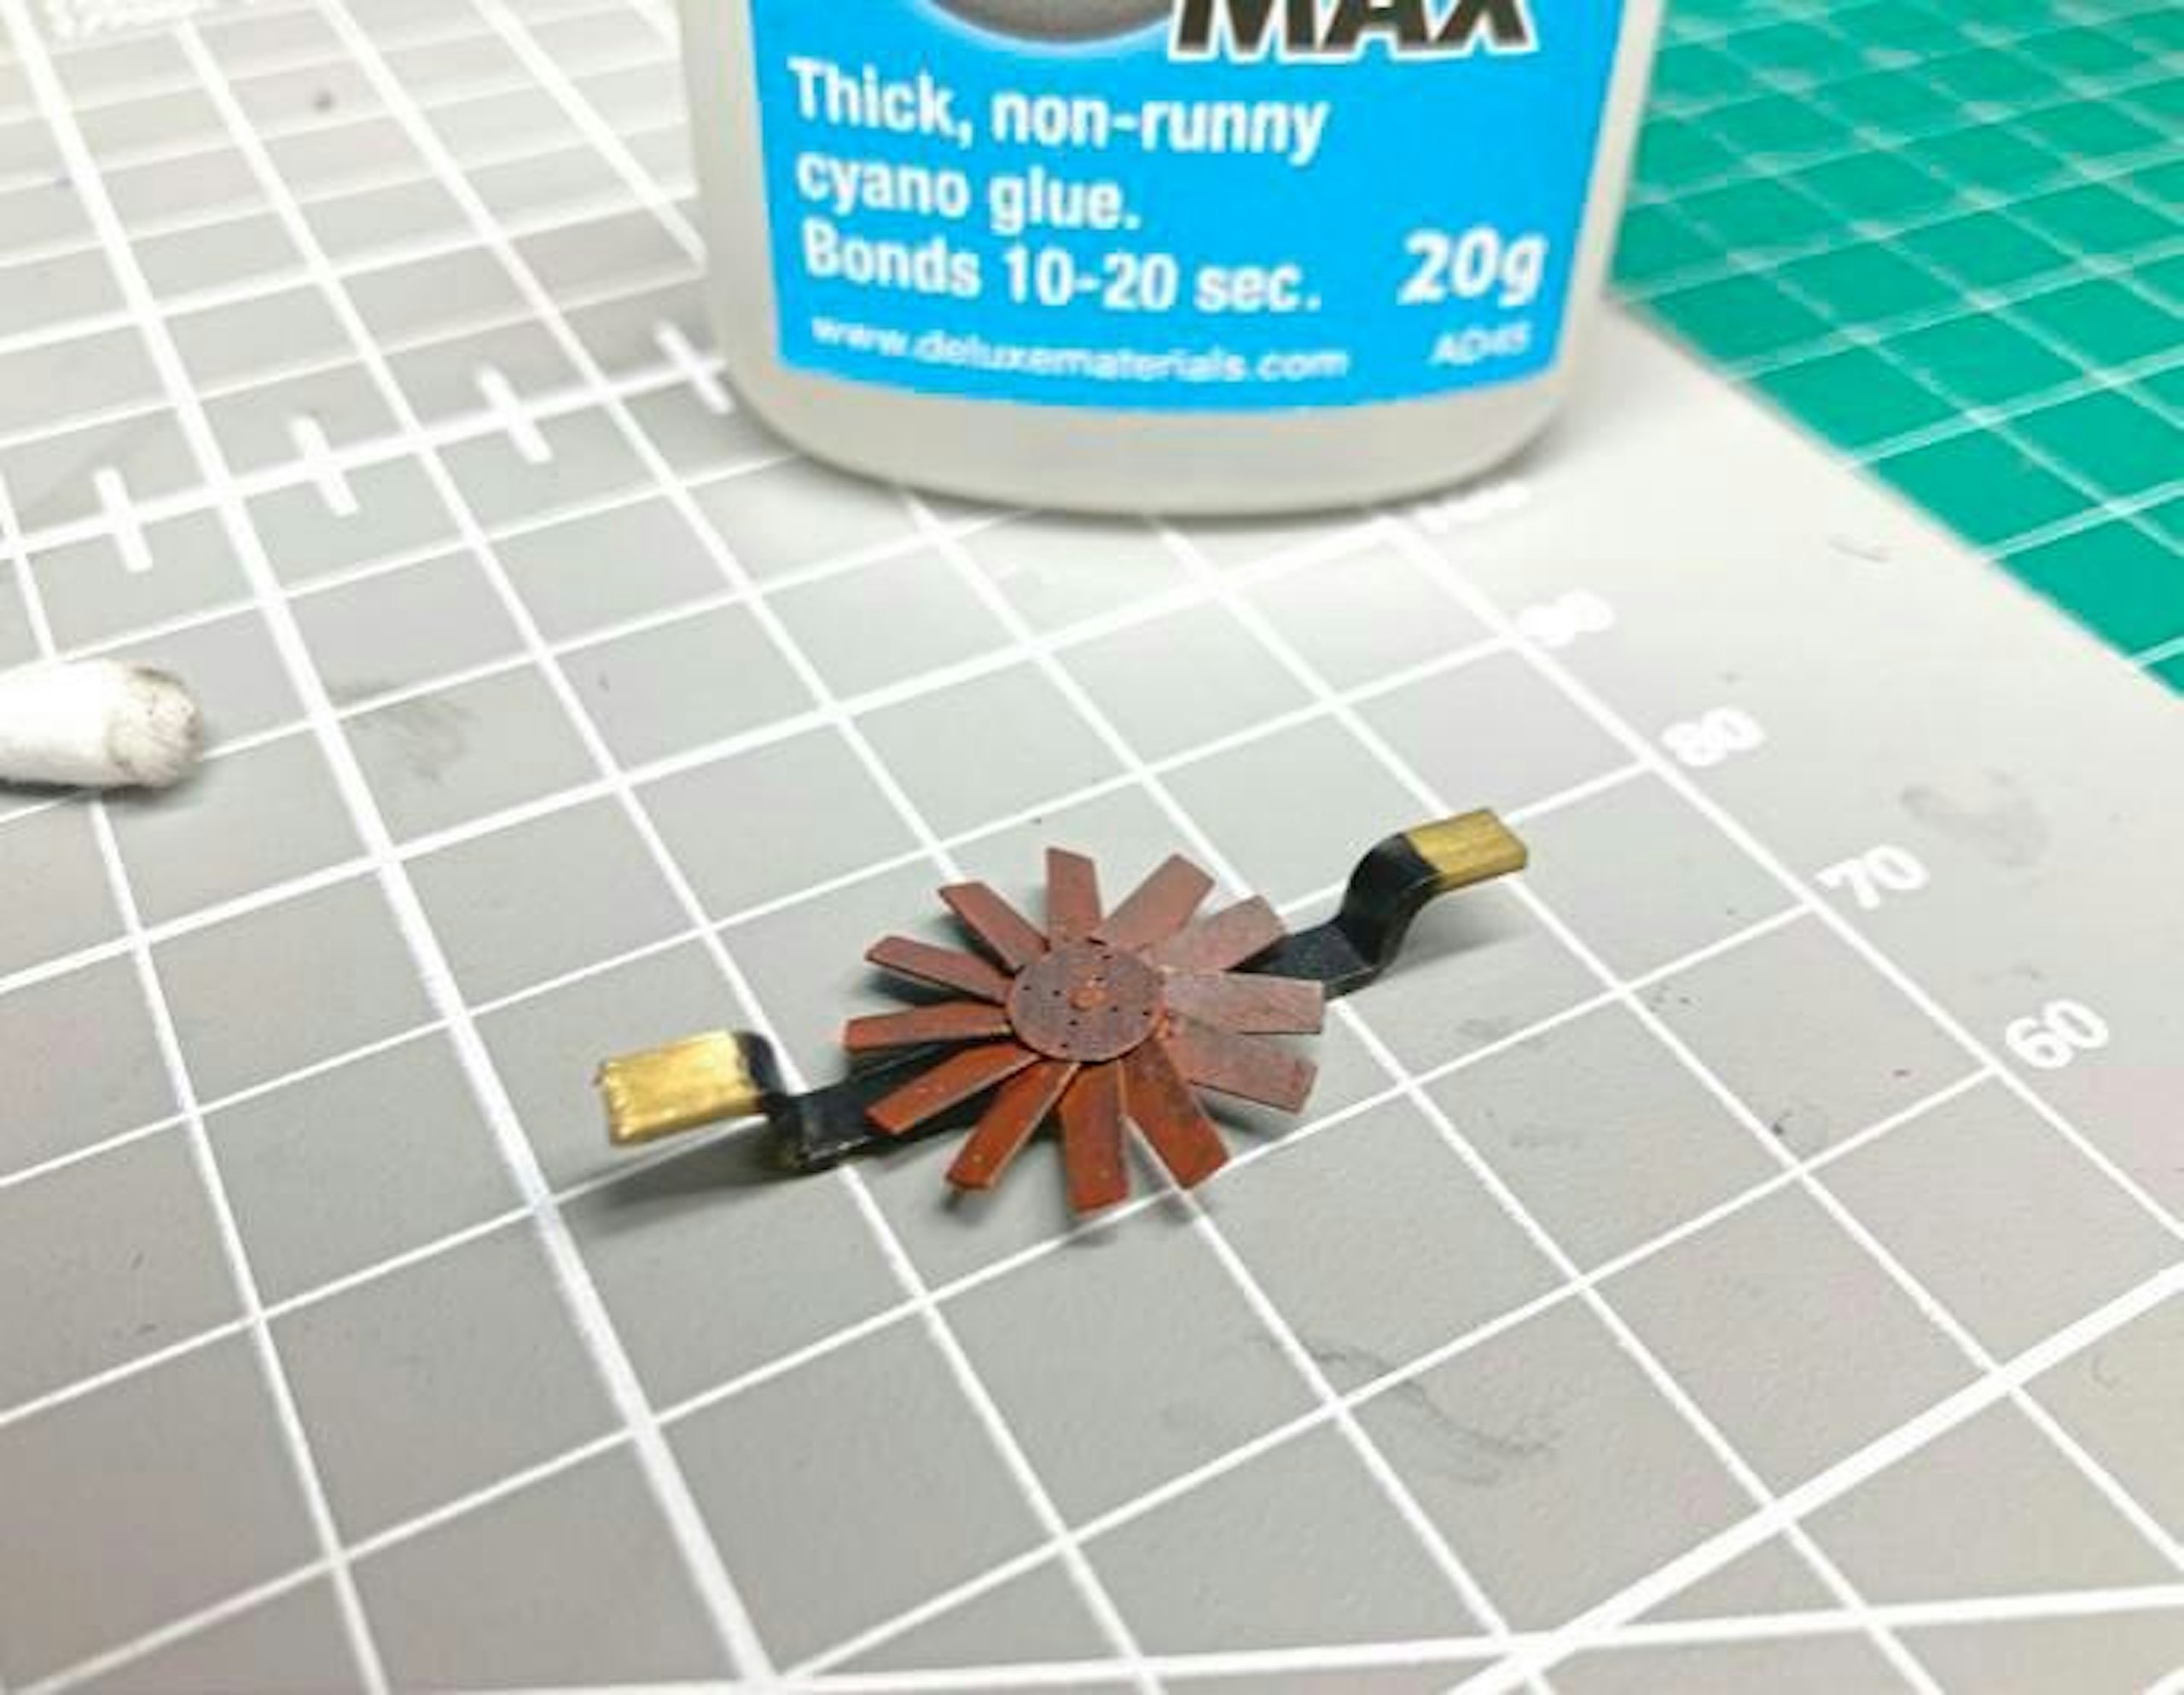
13 The brass fan was sprayed with red oxide primer then weathered with a dark enamel wash. I had to rig up a mounting bracket from thick brass strip, painted black, which was shaped to allow the fan to sit below the grille.
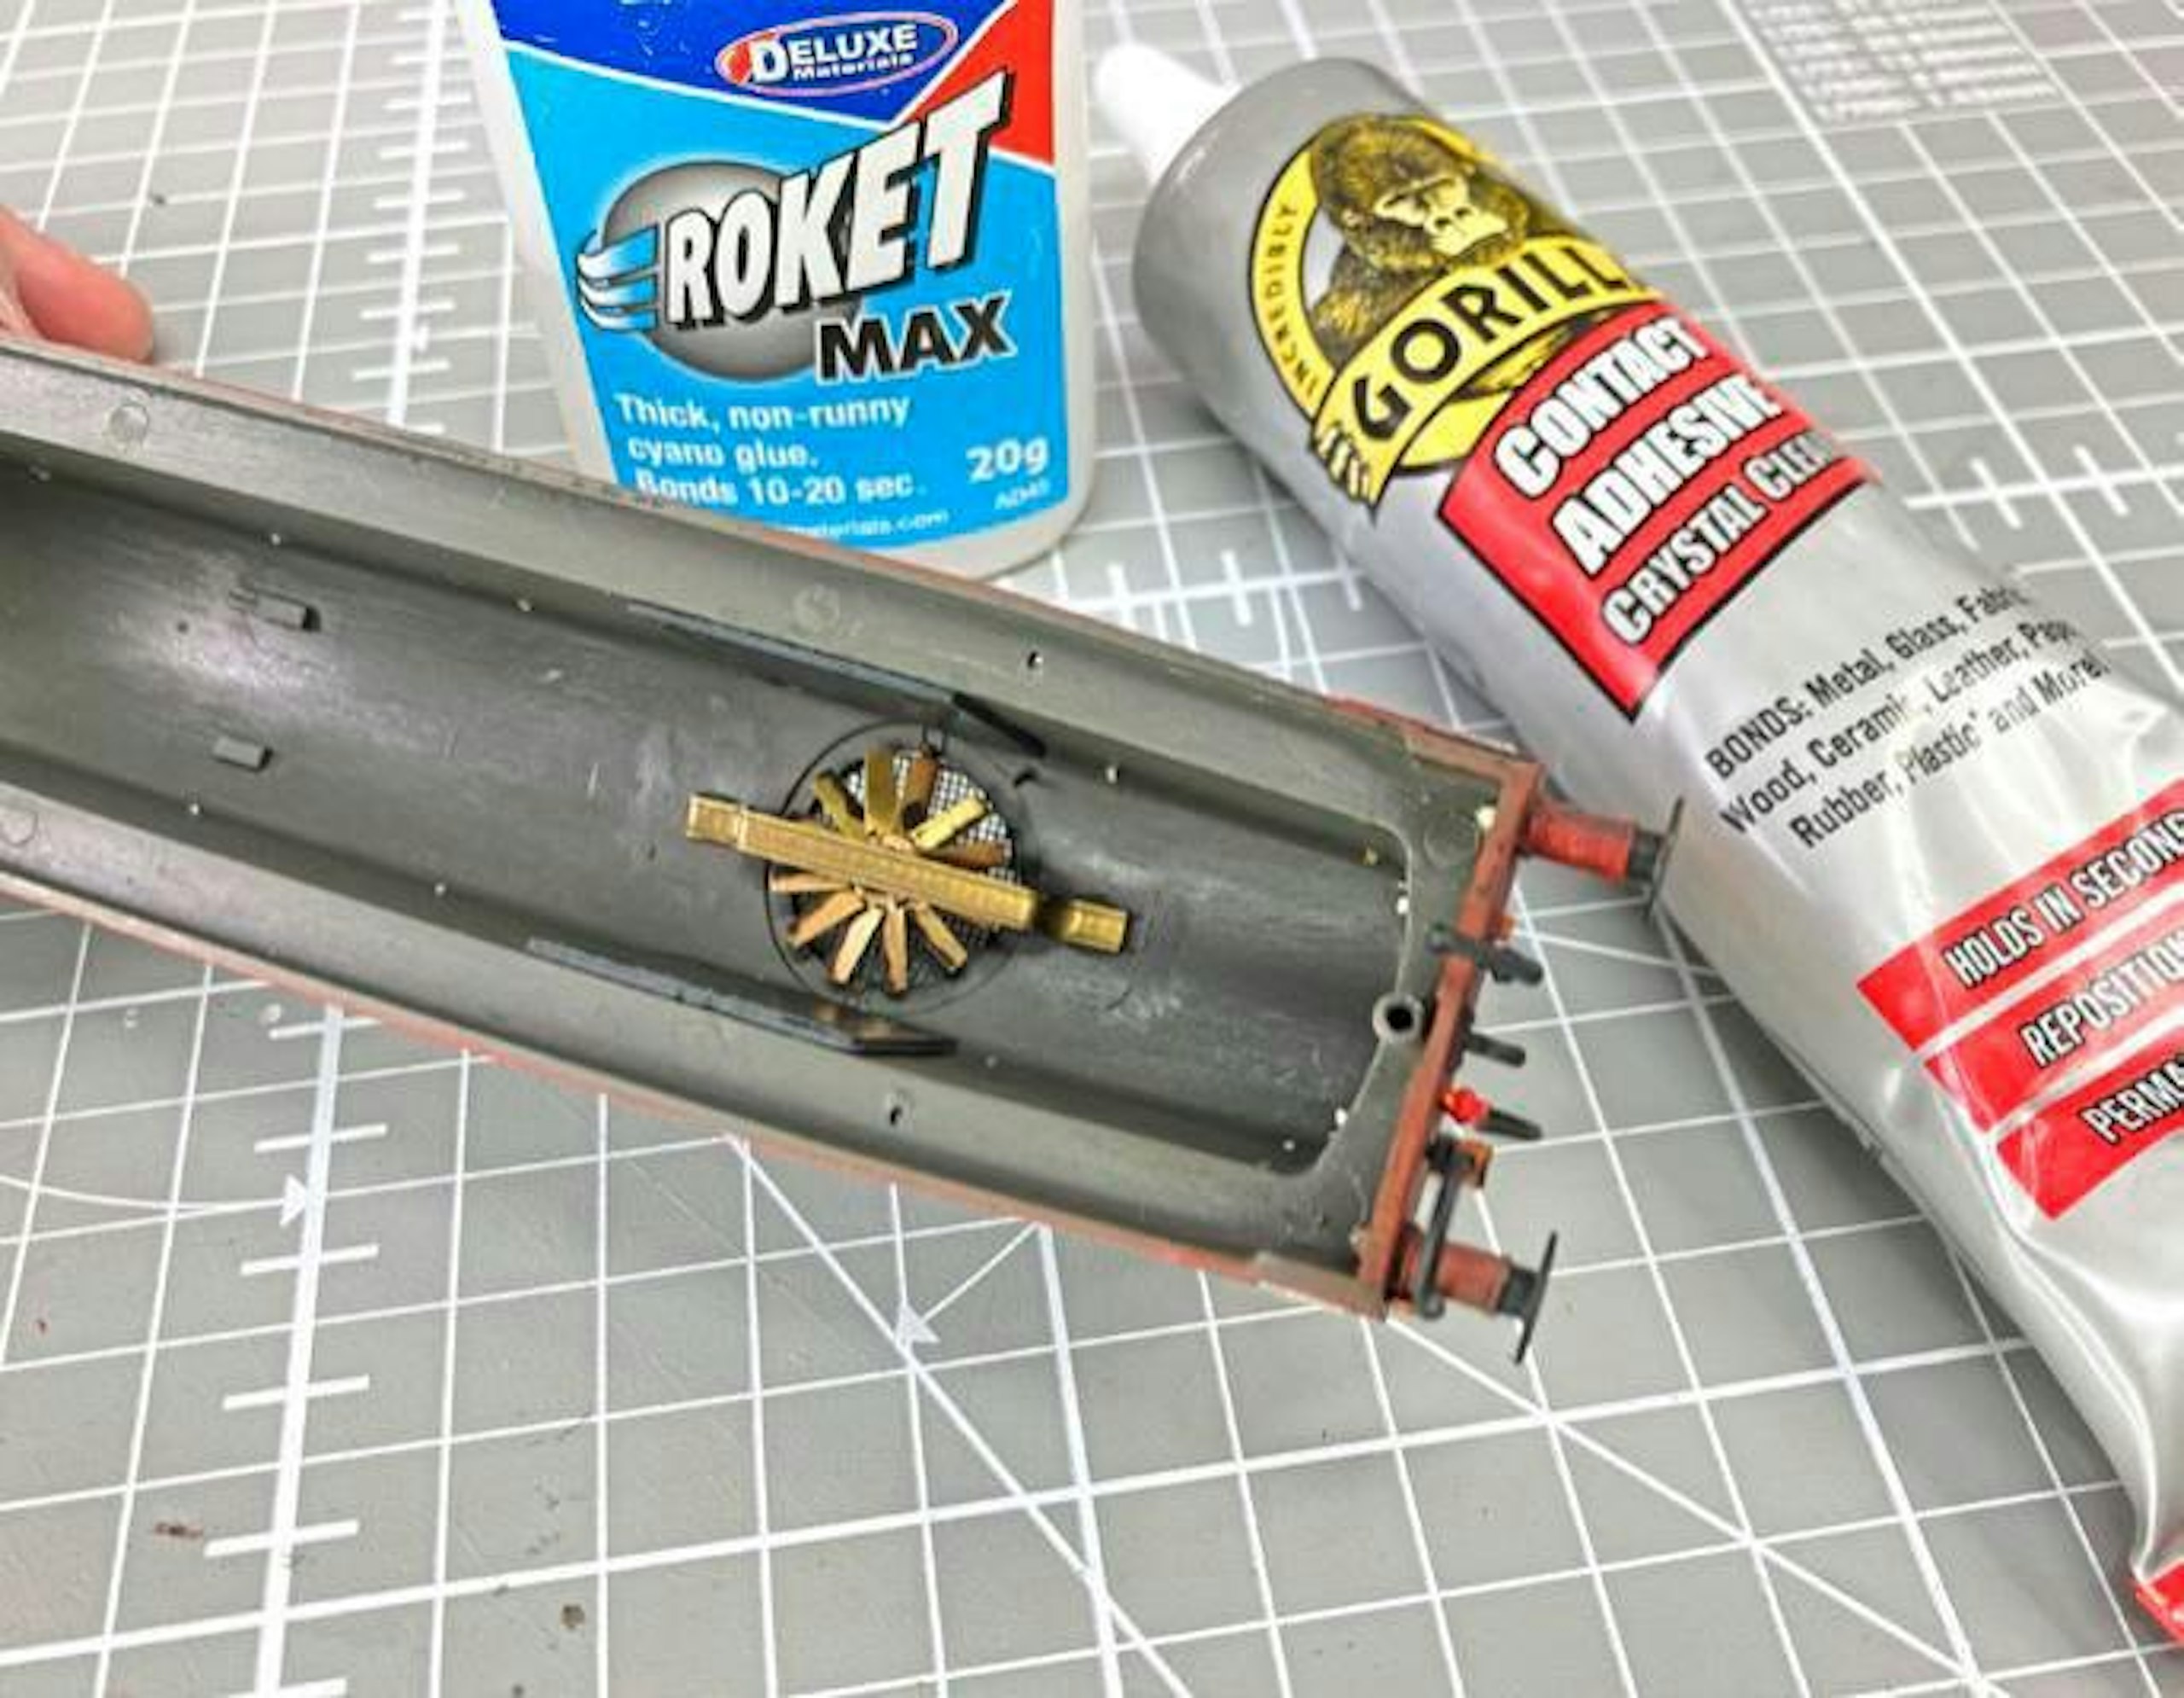
14 My makeshift bracket was fixed into position with slow-setting cyano glue, so I could check the alignment before it set. To provide a more resilient bond, I then spread some contact adhesive around the joints (a Dave Lowery tip!).
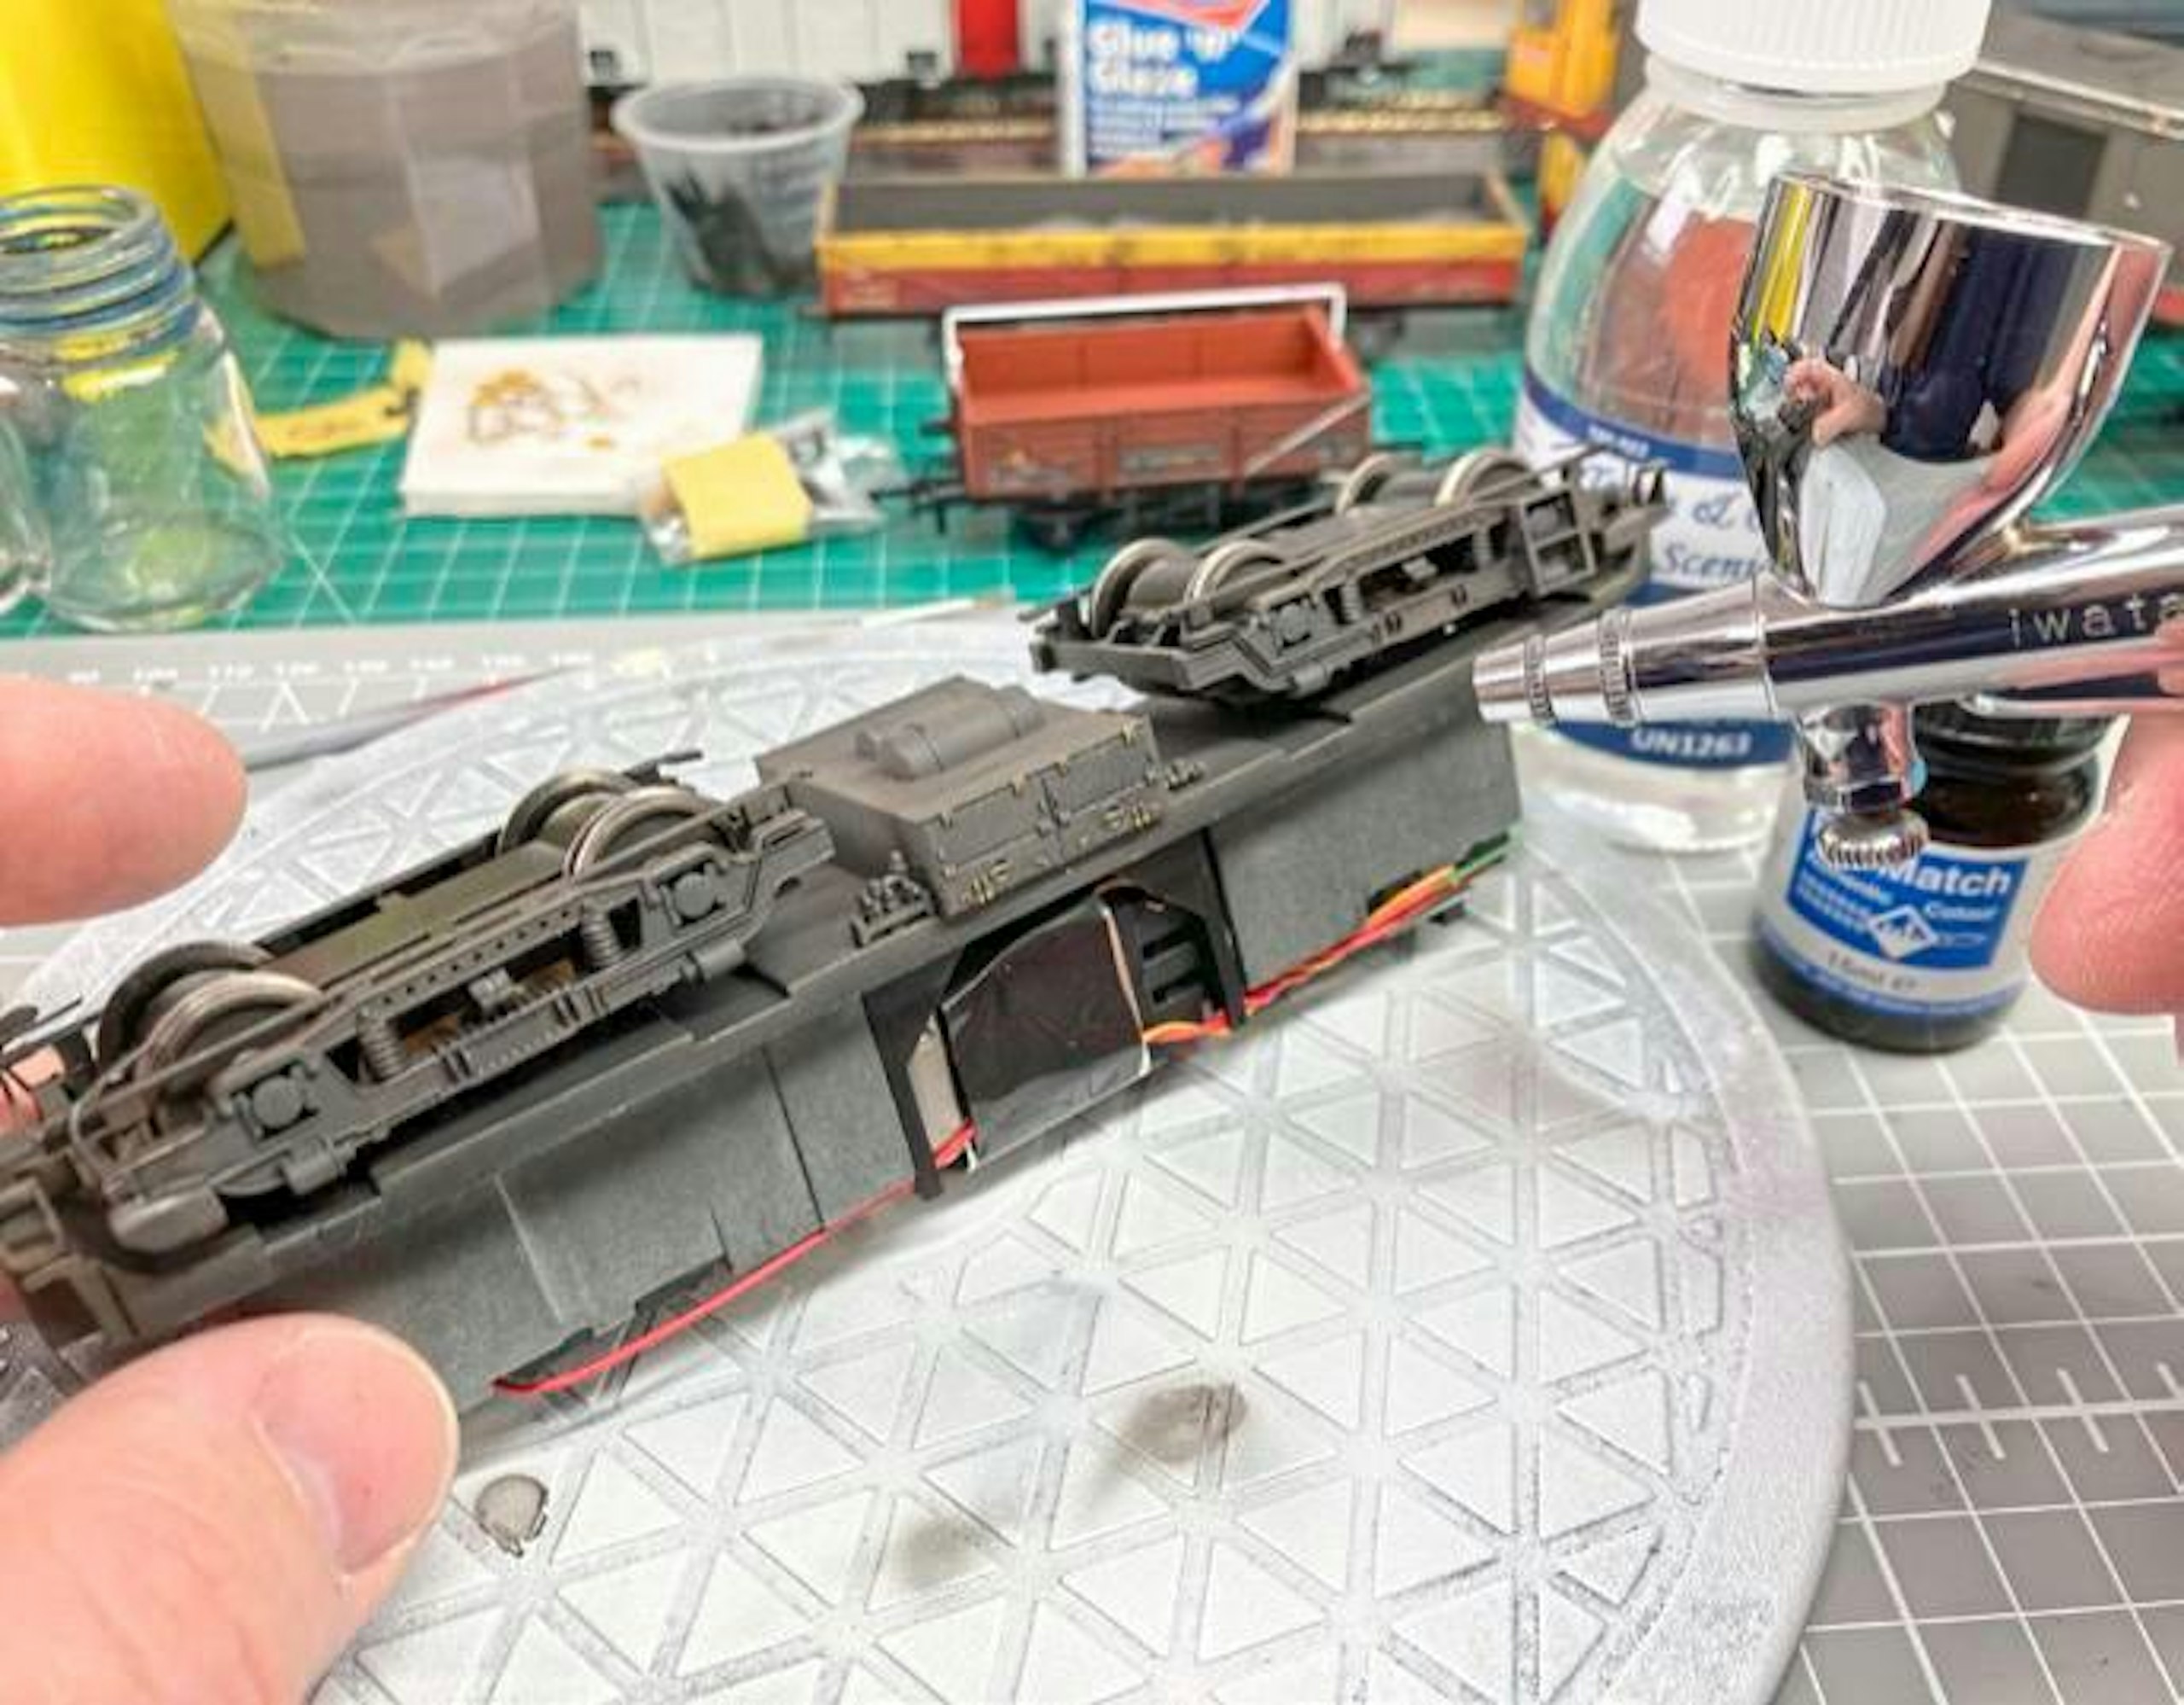
15 The final weathering stages involved an airbrush and thinned RailMatch enamel paints. First, Frame Dirt was misted gently over the chassis, working with the earlier acrylic coating to produce an authentic grimy finish.
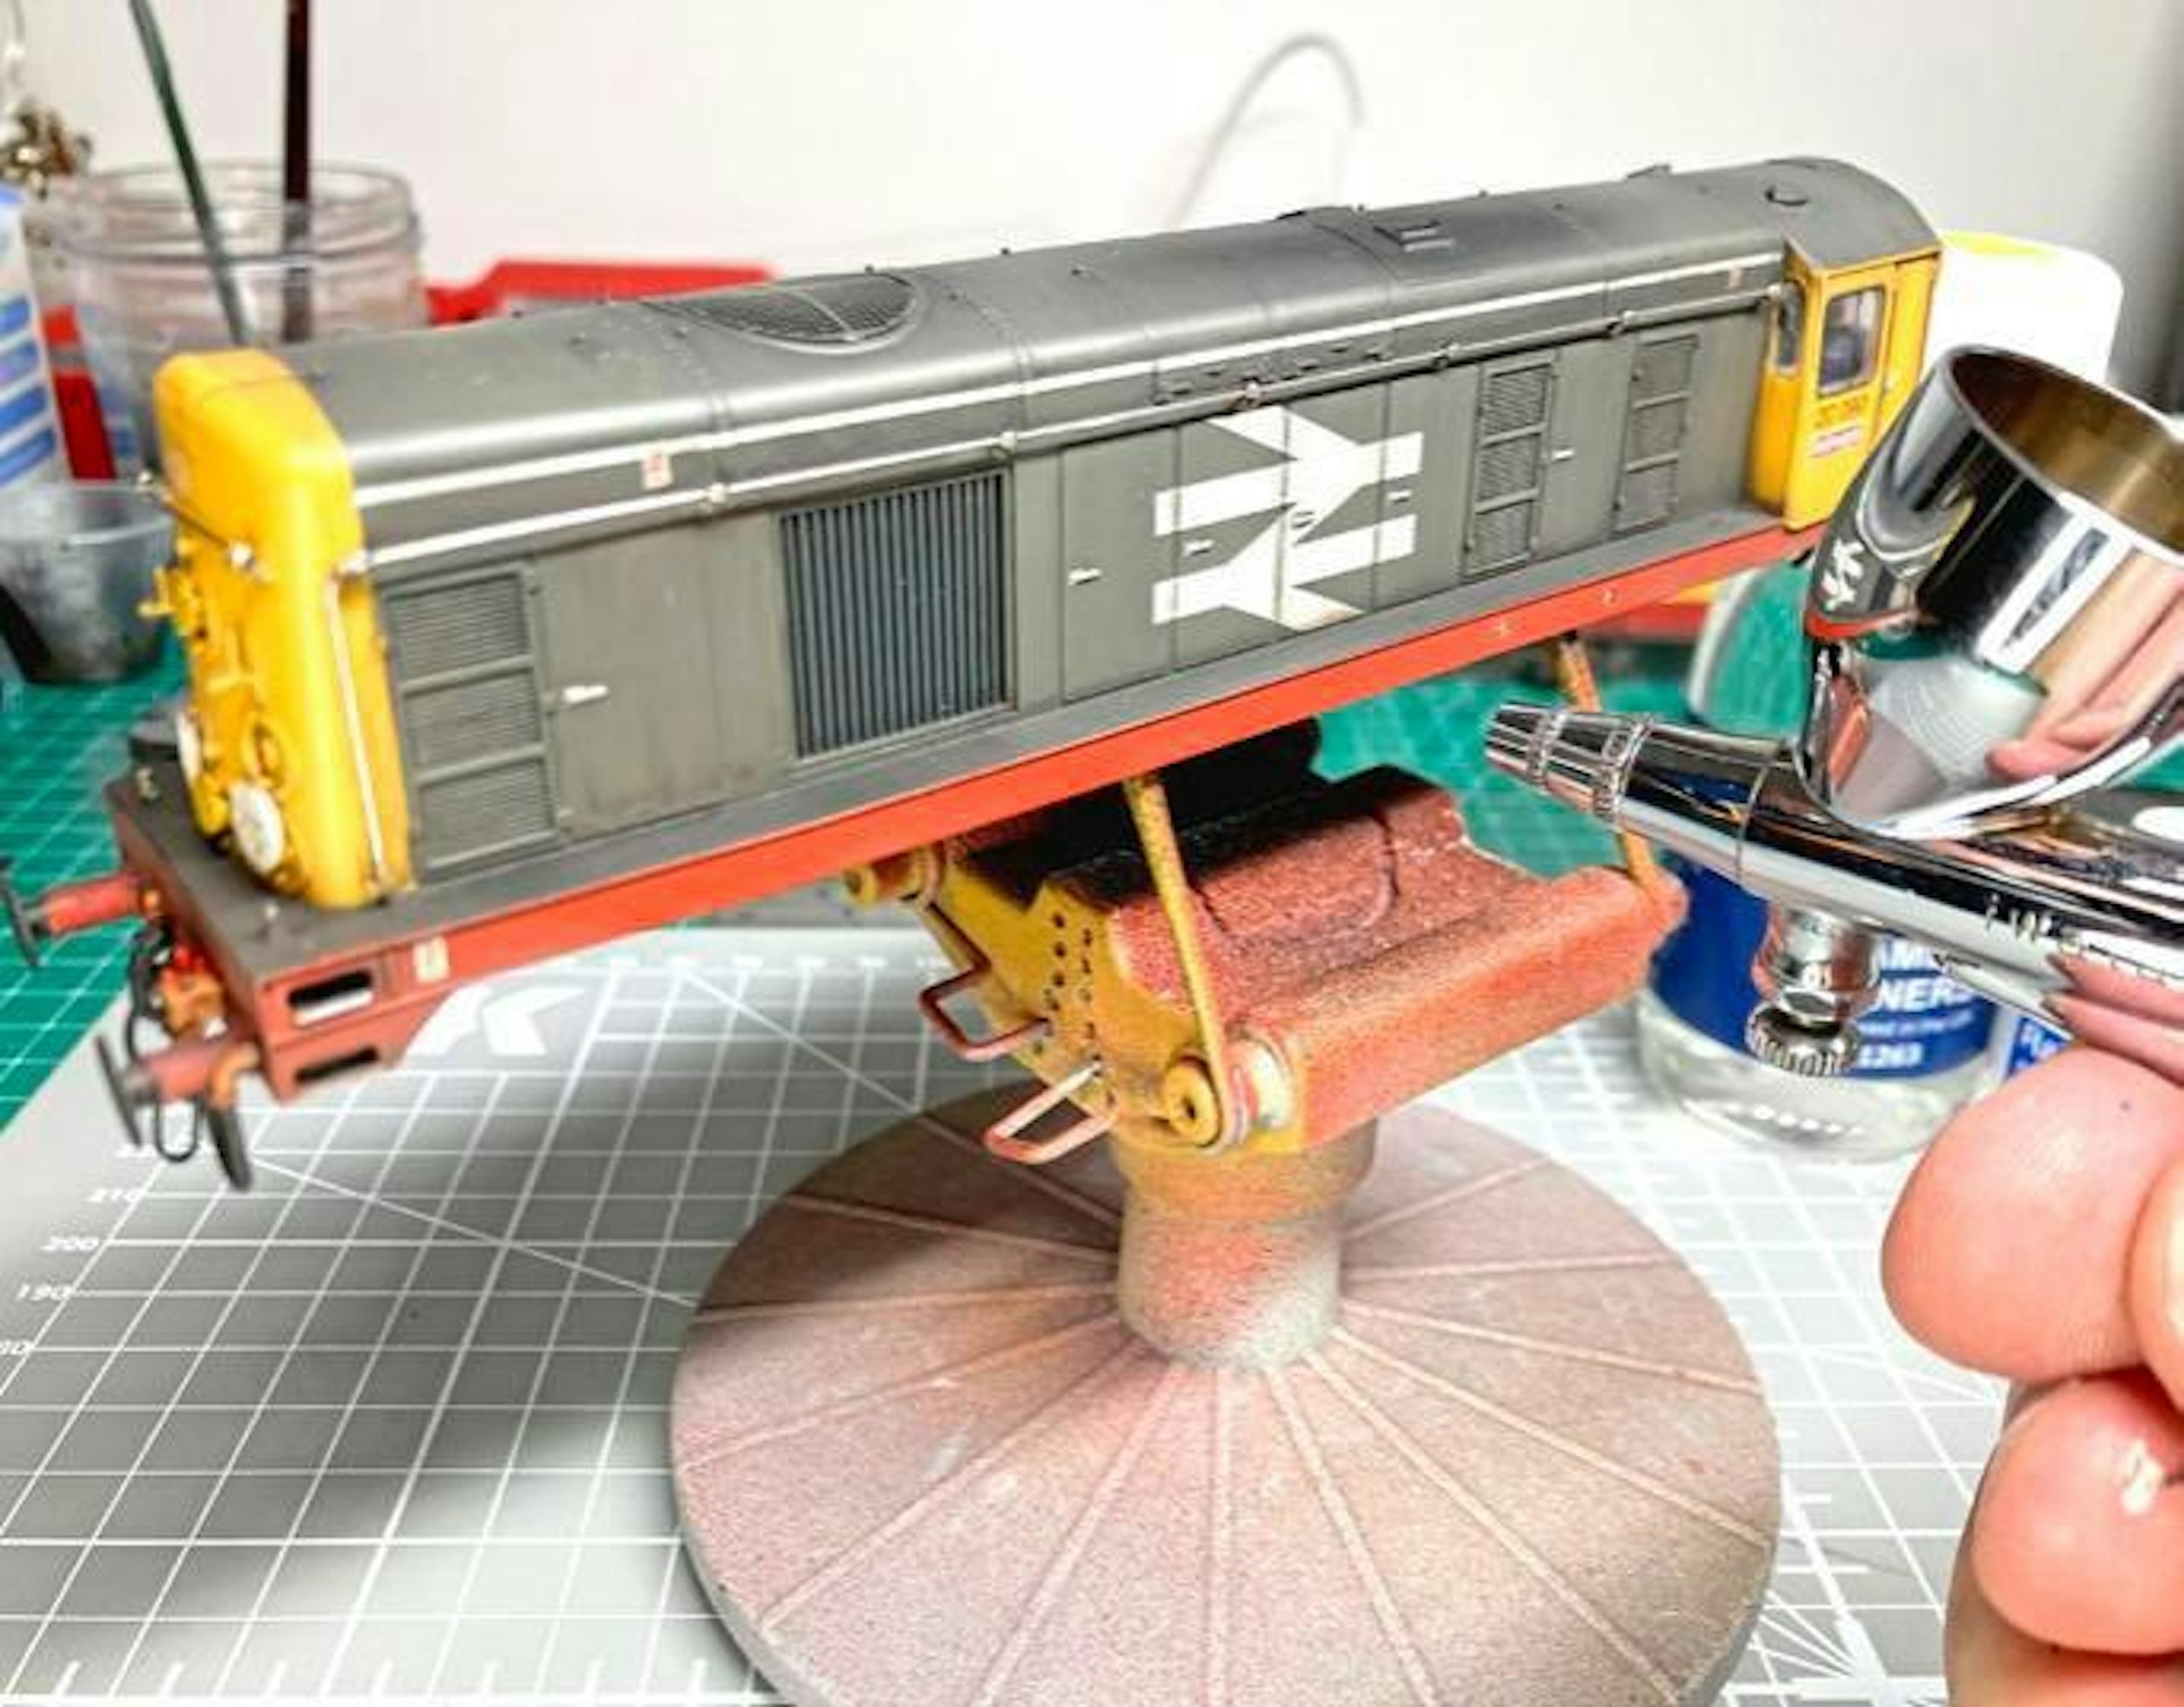
16 The Frame Dirt shade was also misted along the lower sides, bufferbeams, and down onto the flat running plate. Again, just the faintest wisp of paint is enough, spraying the thinned paint at around 15psi of air pressure.
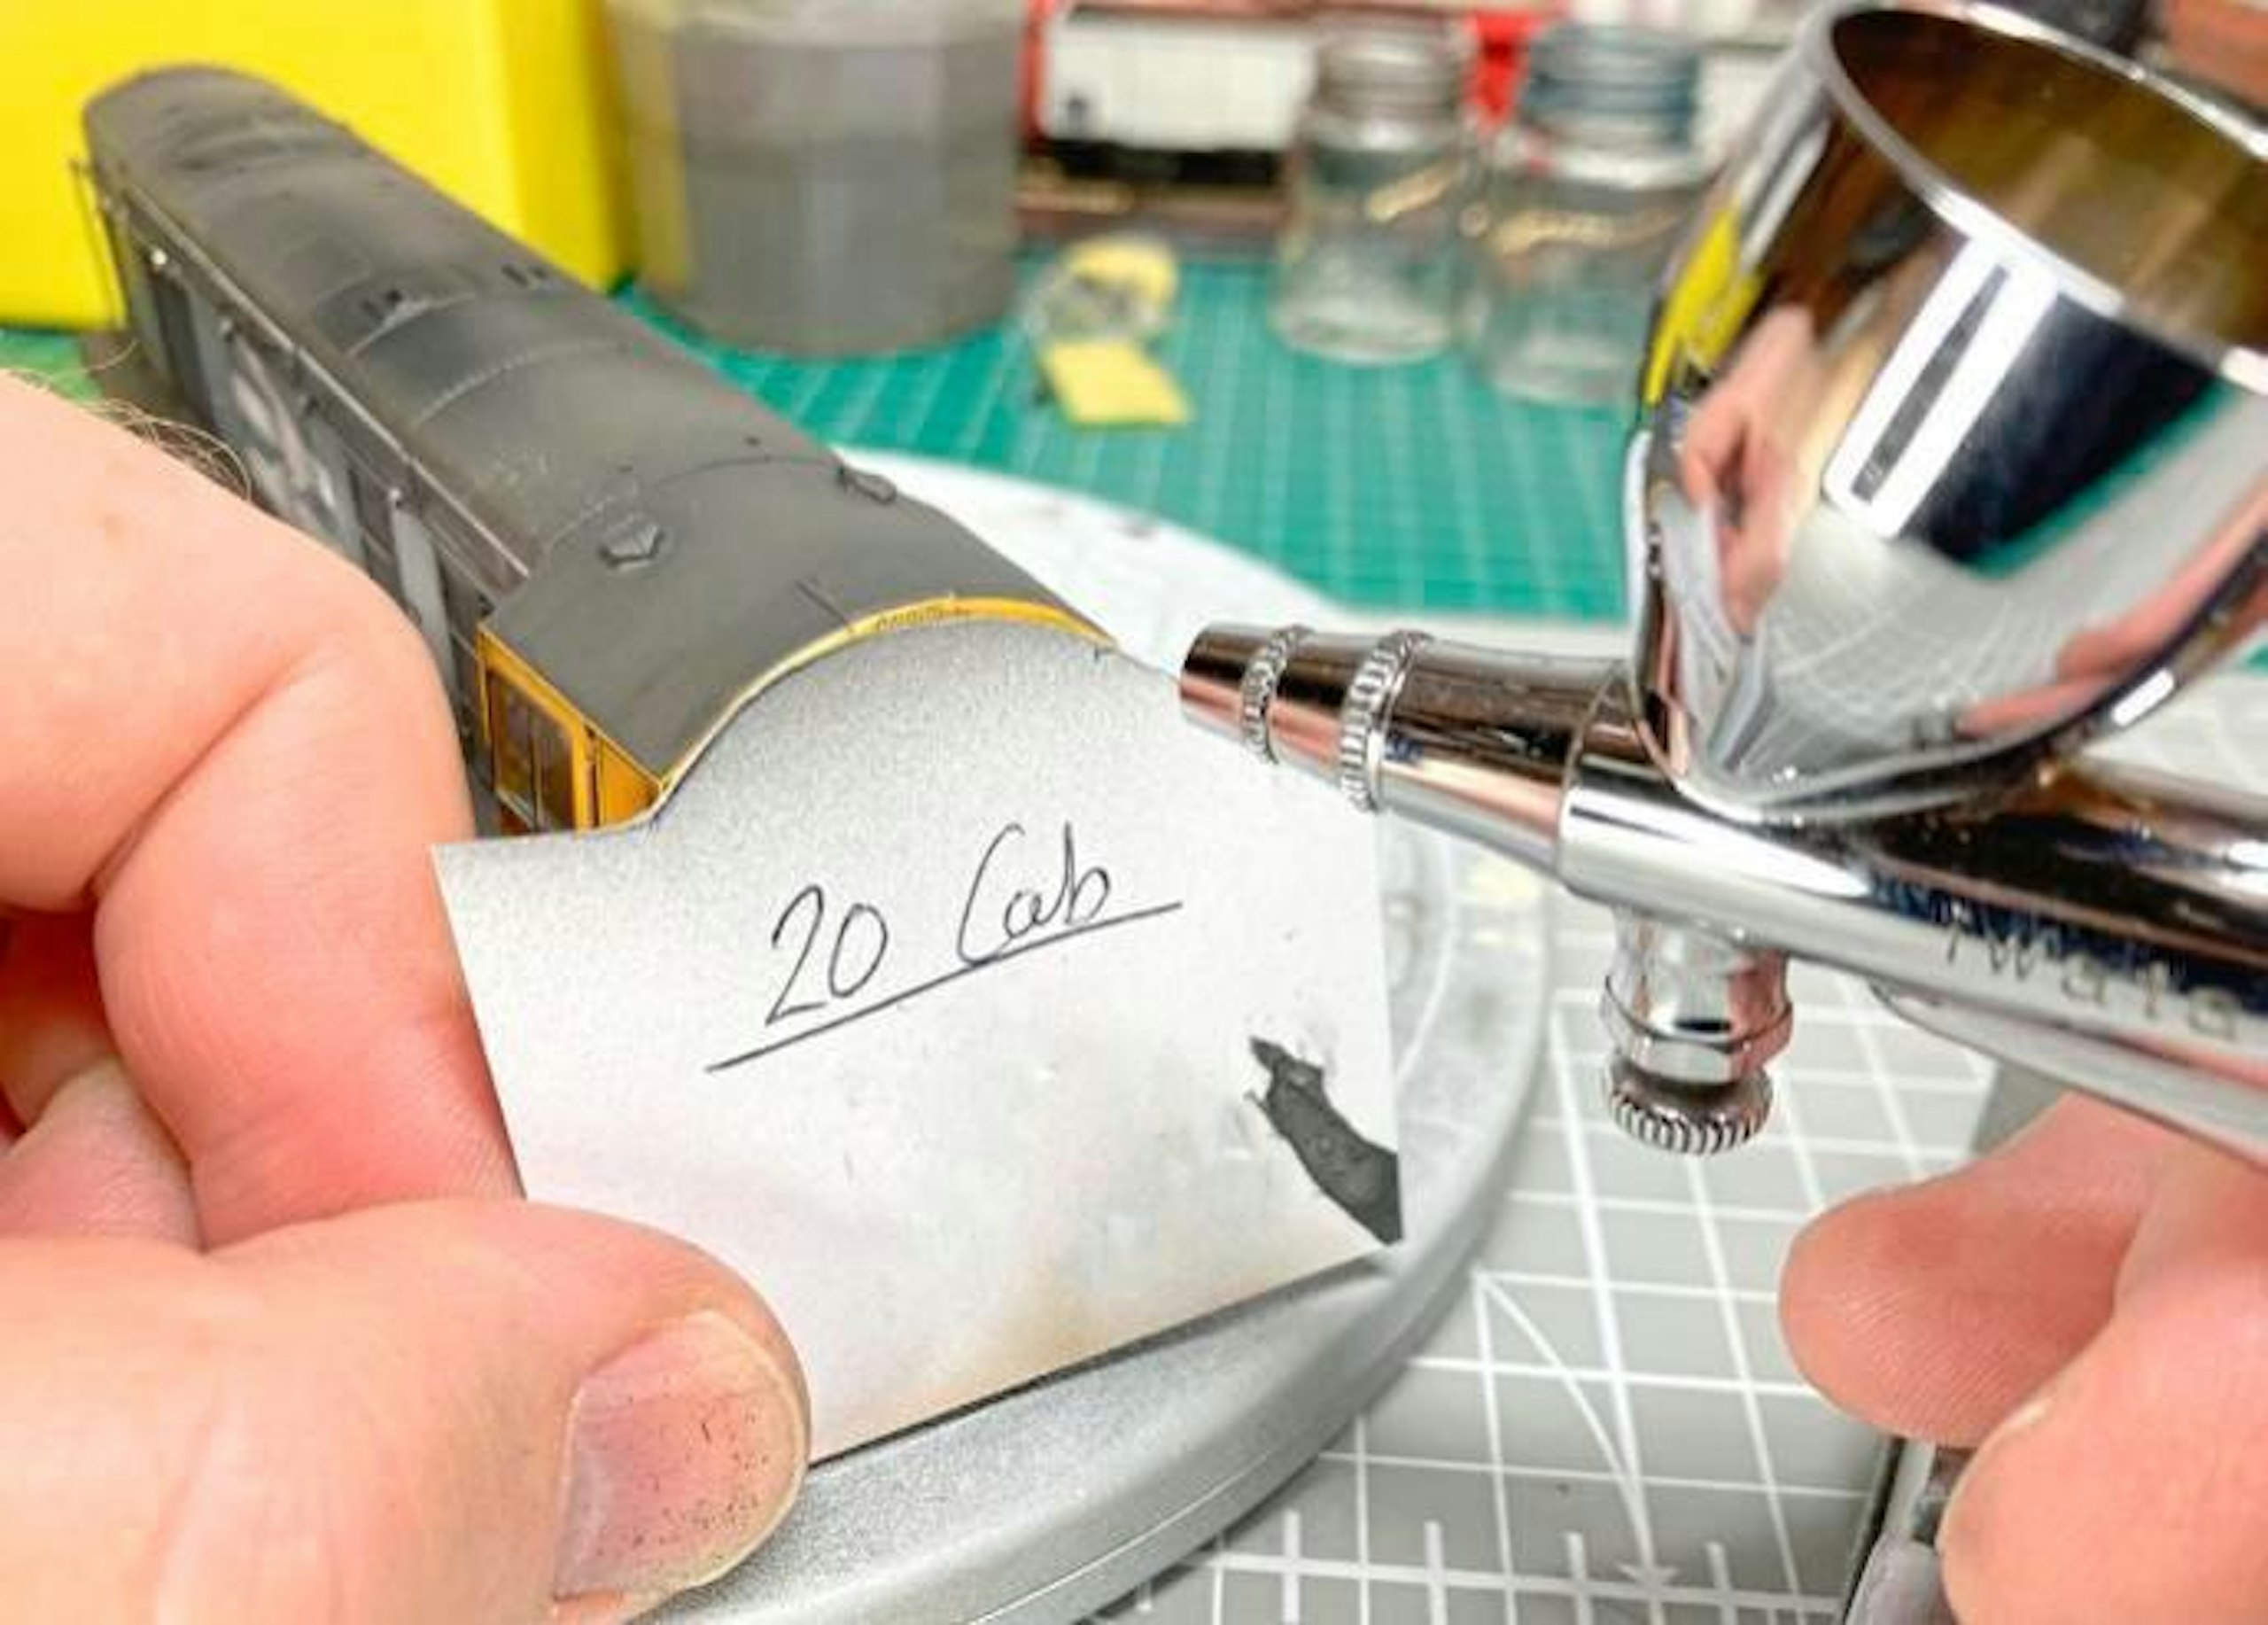
17 RailMatch Roof Dirt was misted over the upper areas of the bonnet and cab roof. To keep the cab ends fairly clean, I made a card template to match the roof profile. This produces a softer ‘edge’ to the weathering compared with tape.
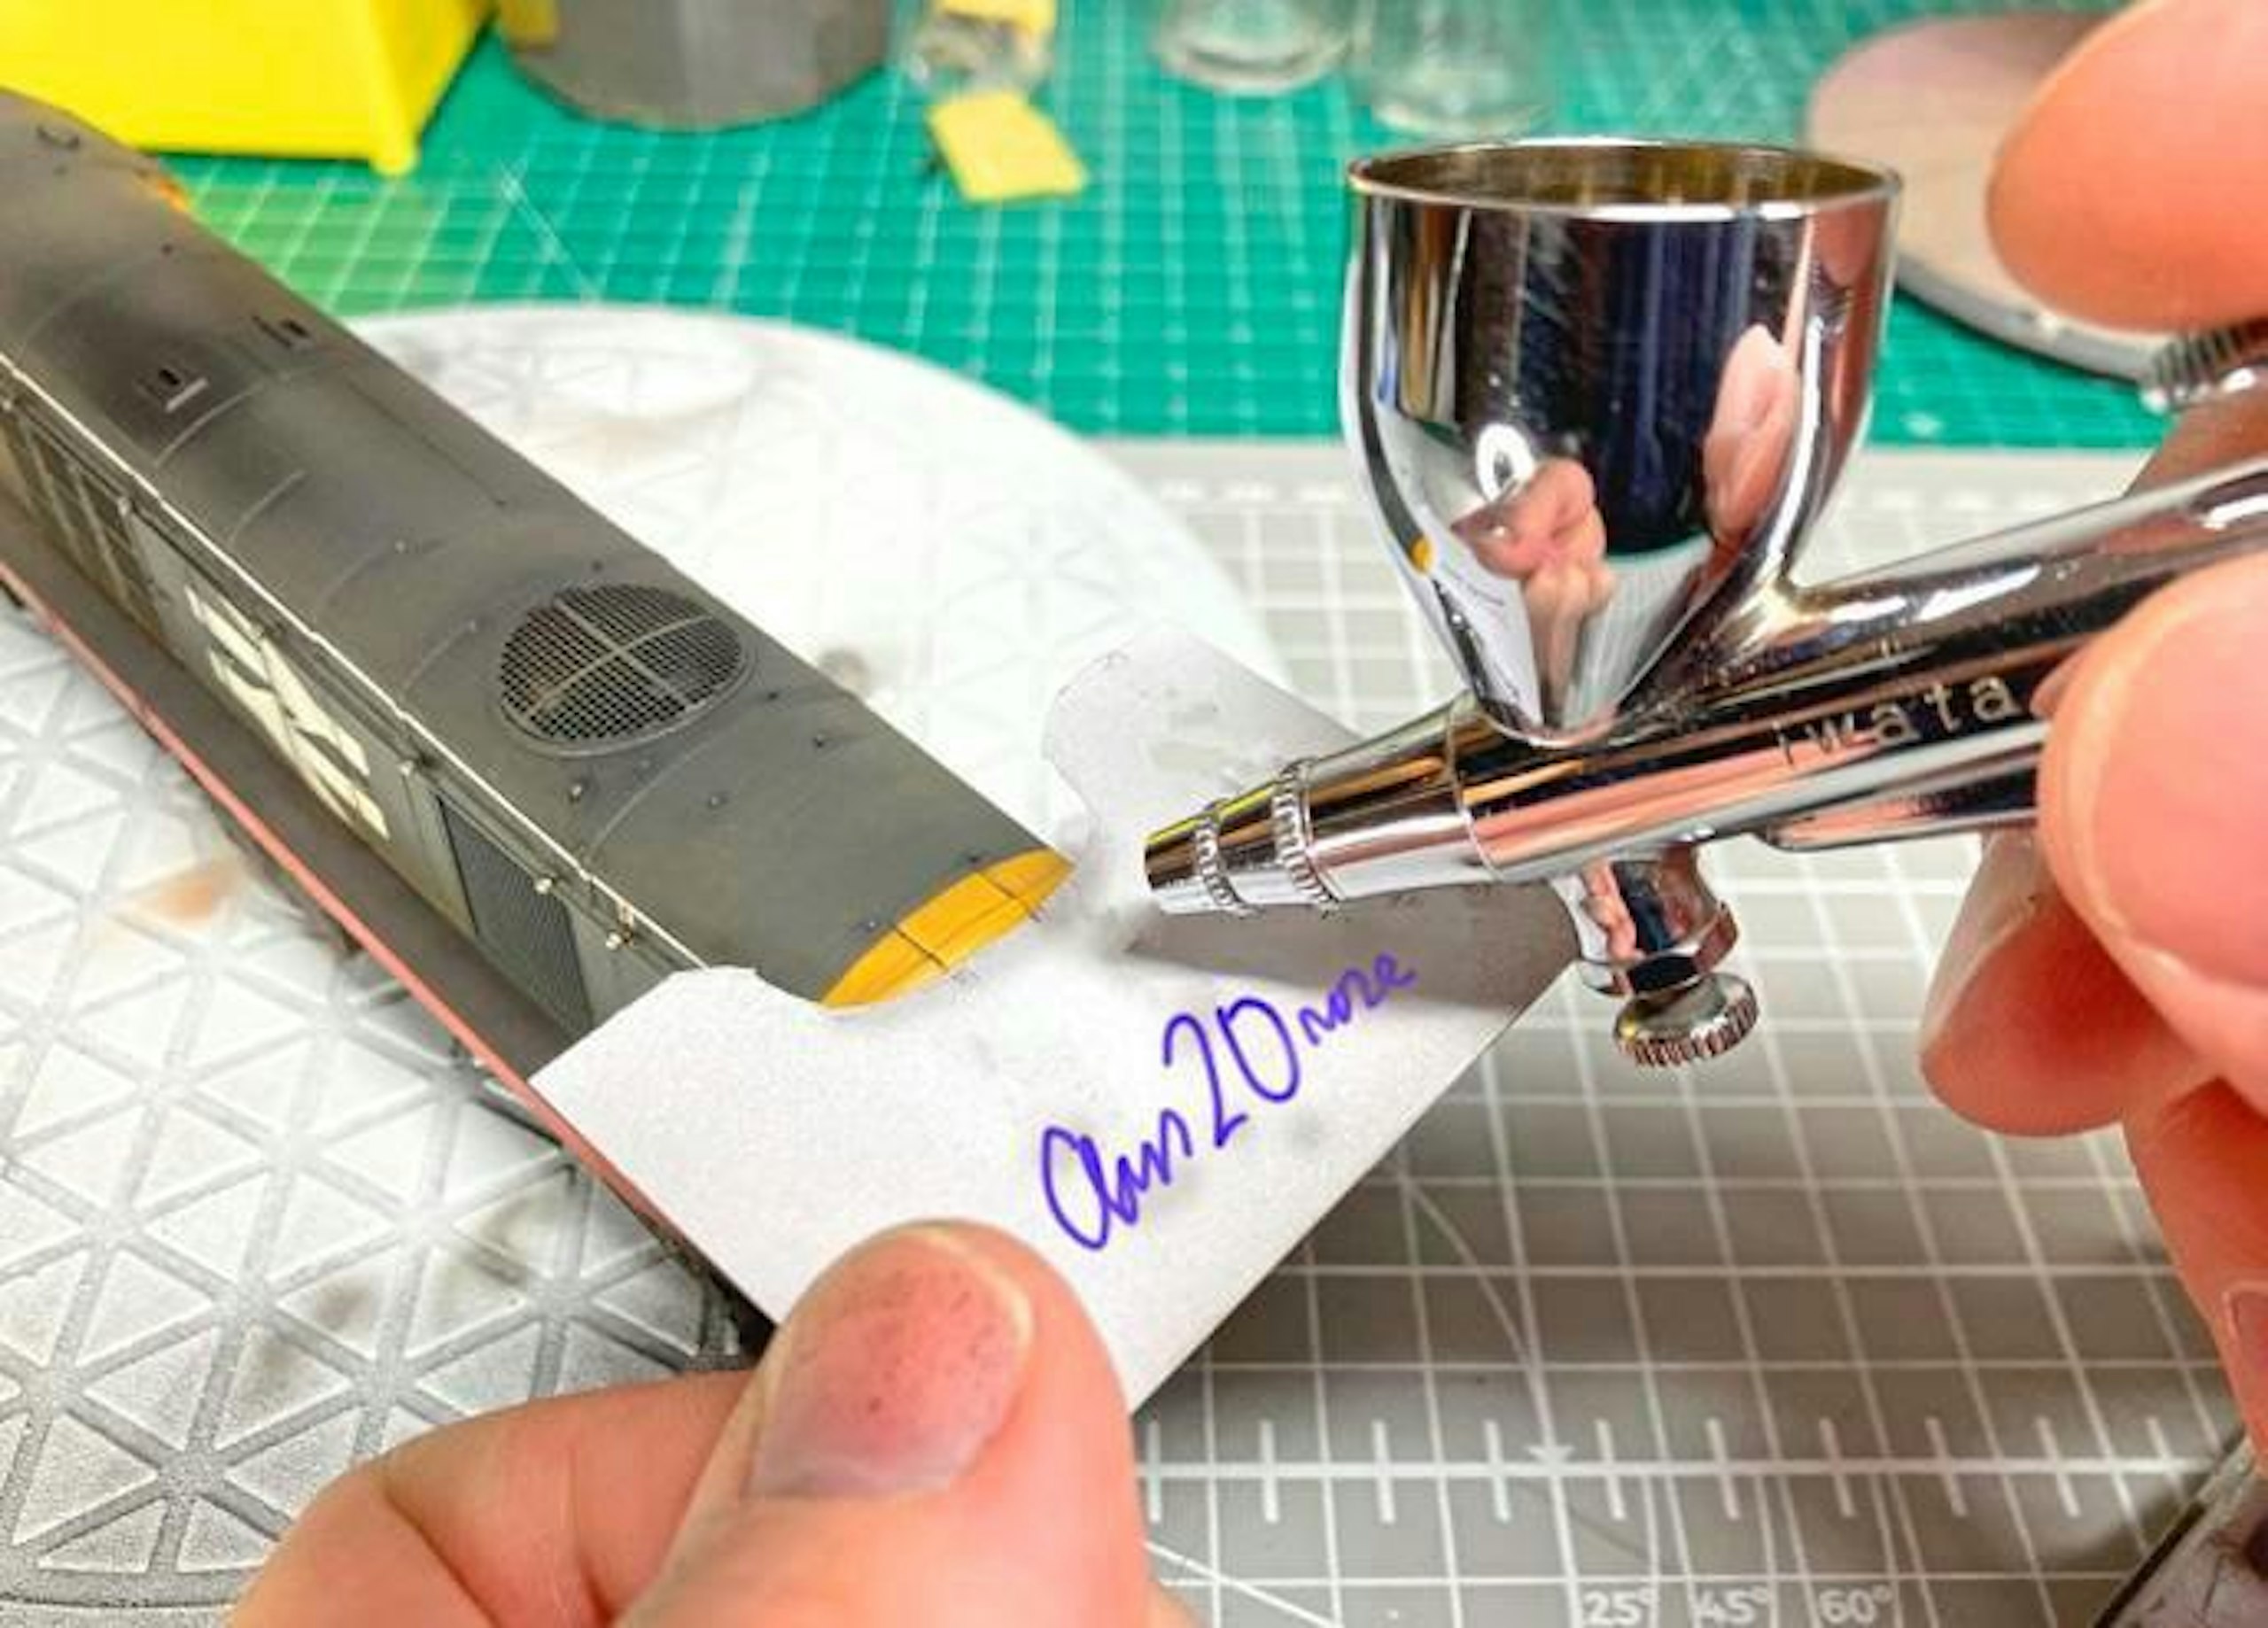
18 The straight edge of the card also protected the cab sides from overspray, especially the windows. The same approach was used at the nose end. I have a stash of these simple templates to suit different locomotive types.
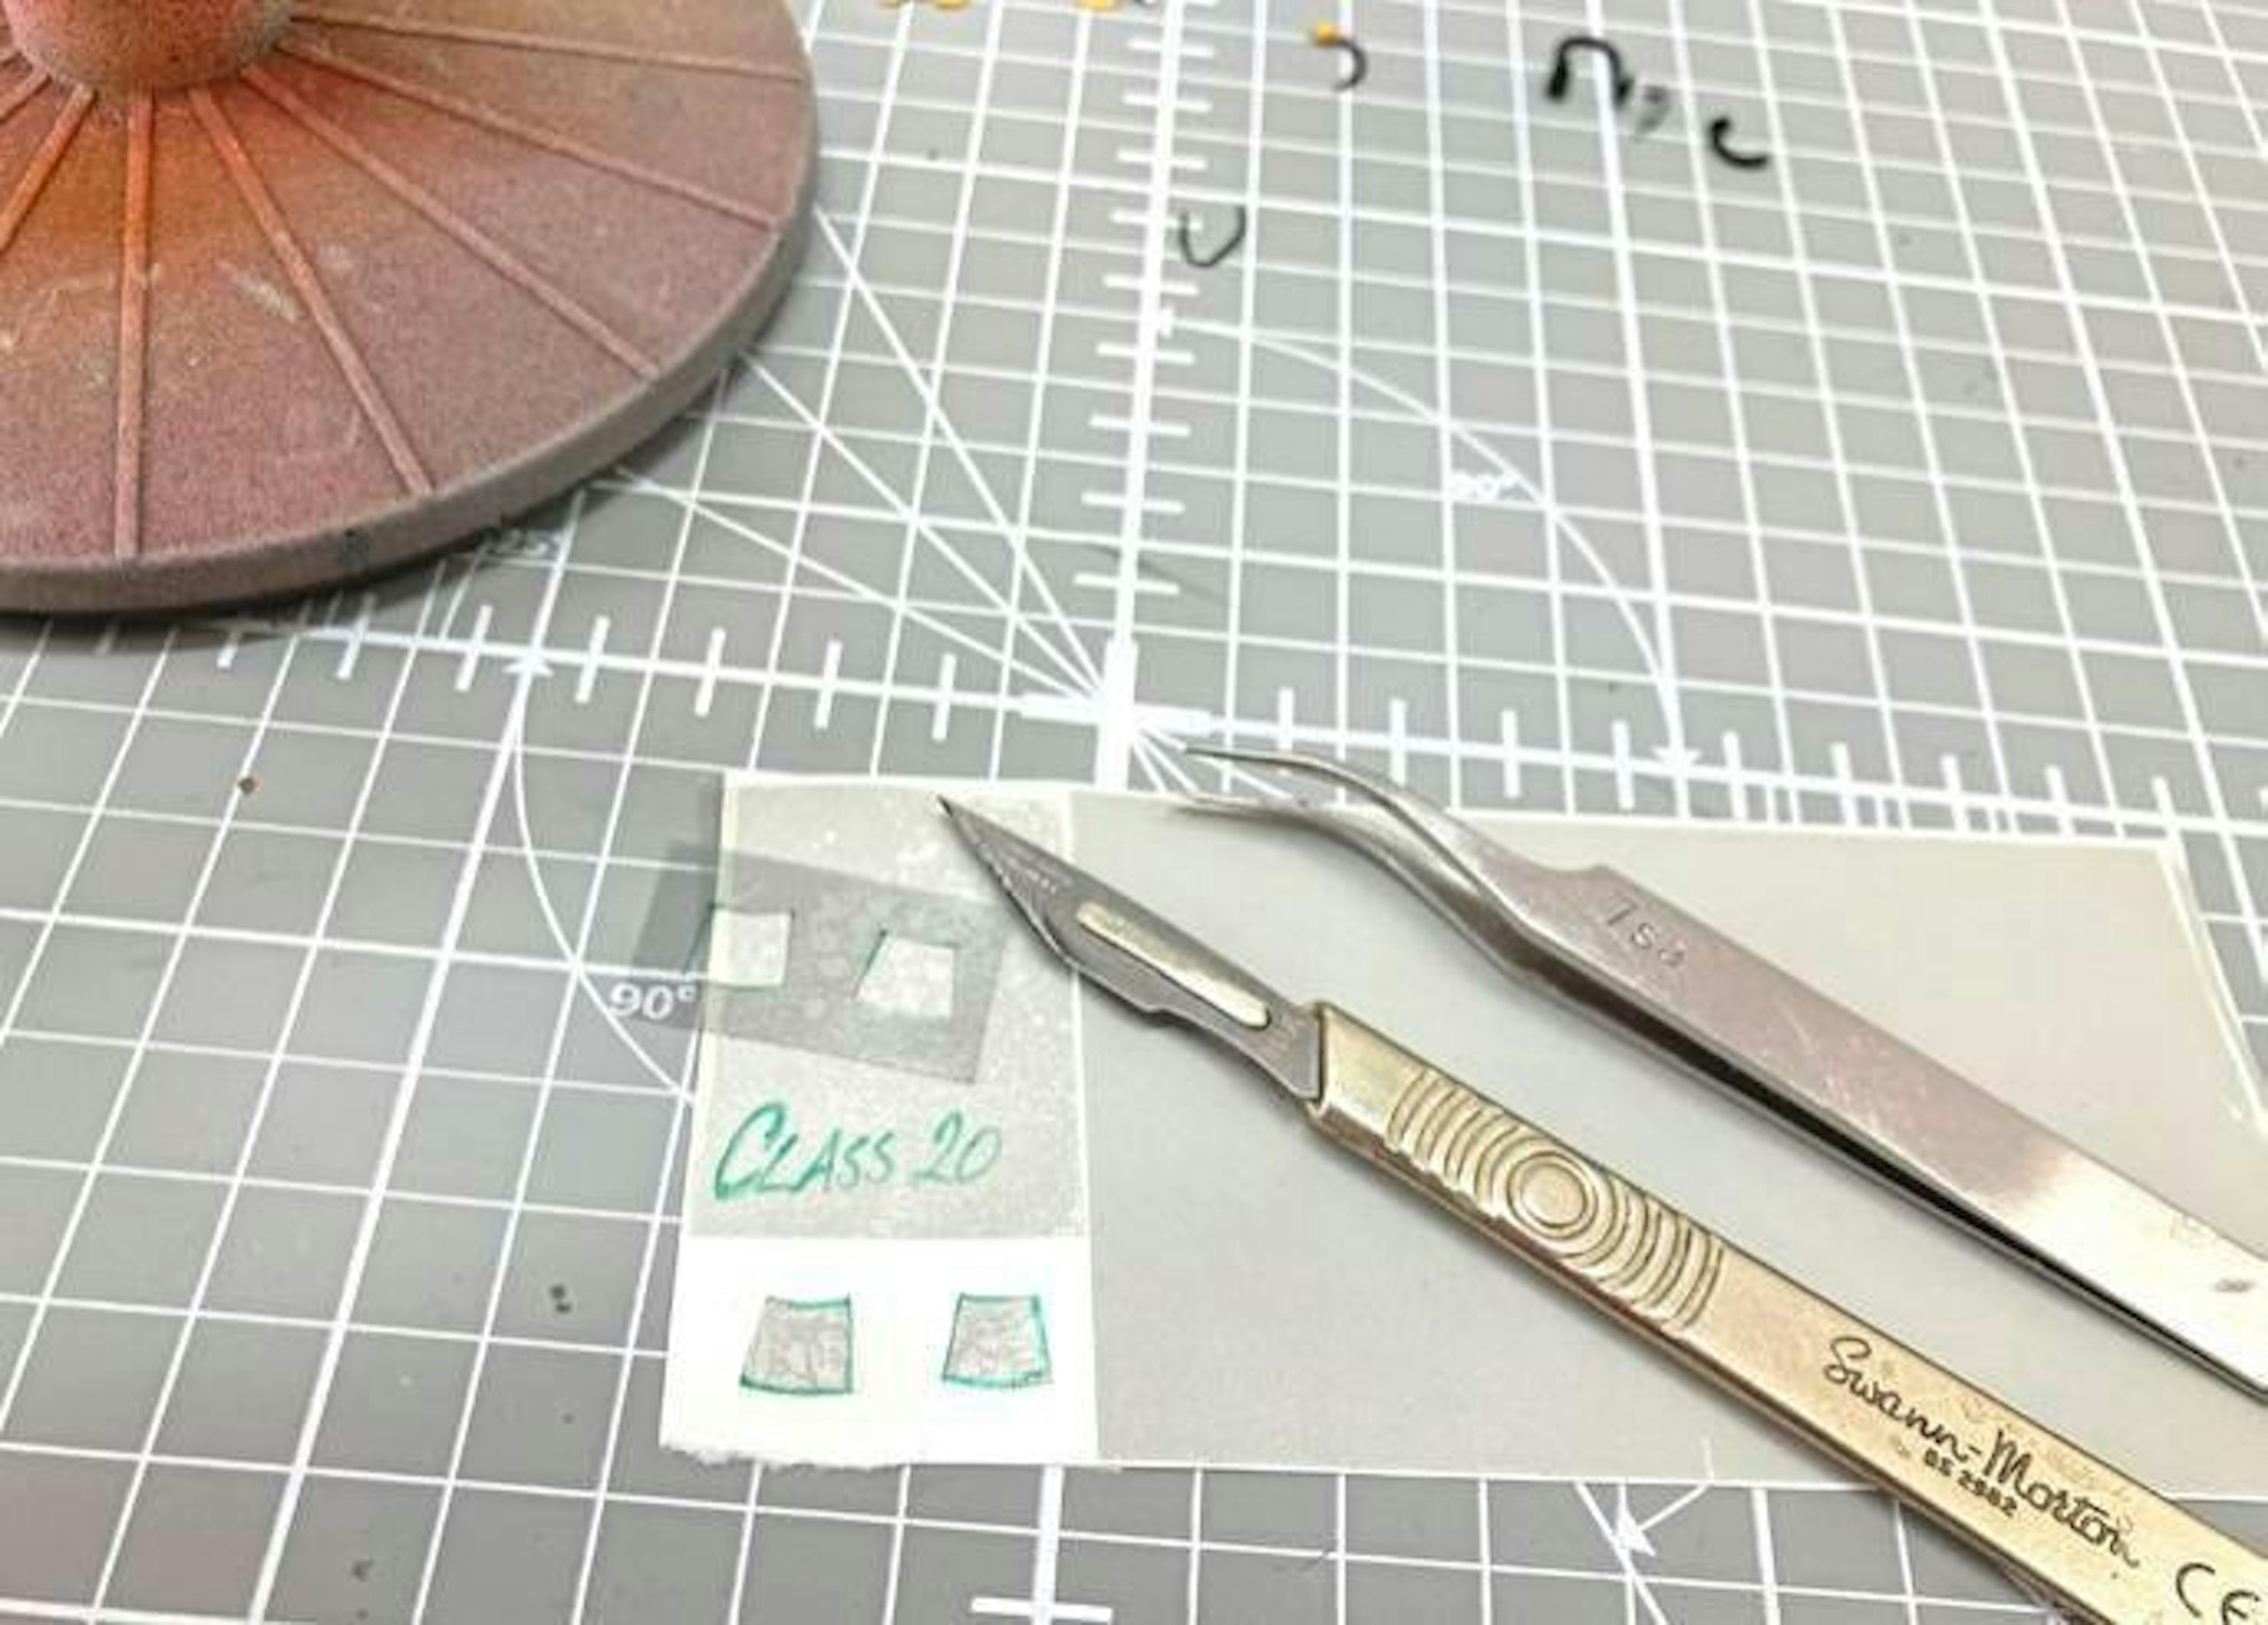
19 I wanted subtle dirt on the windscreens, so I cut some templates from Ultramask, a low-tack masking film, shaped to mimic the travel of wipers. The wipers on my model were loose, so I removed them to make this stage easier.
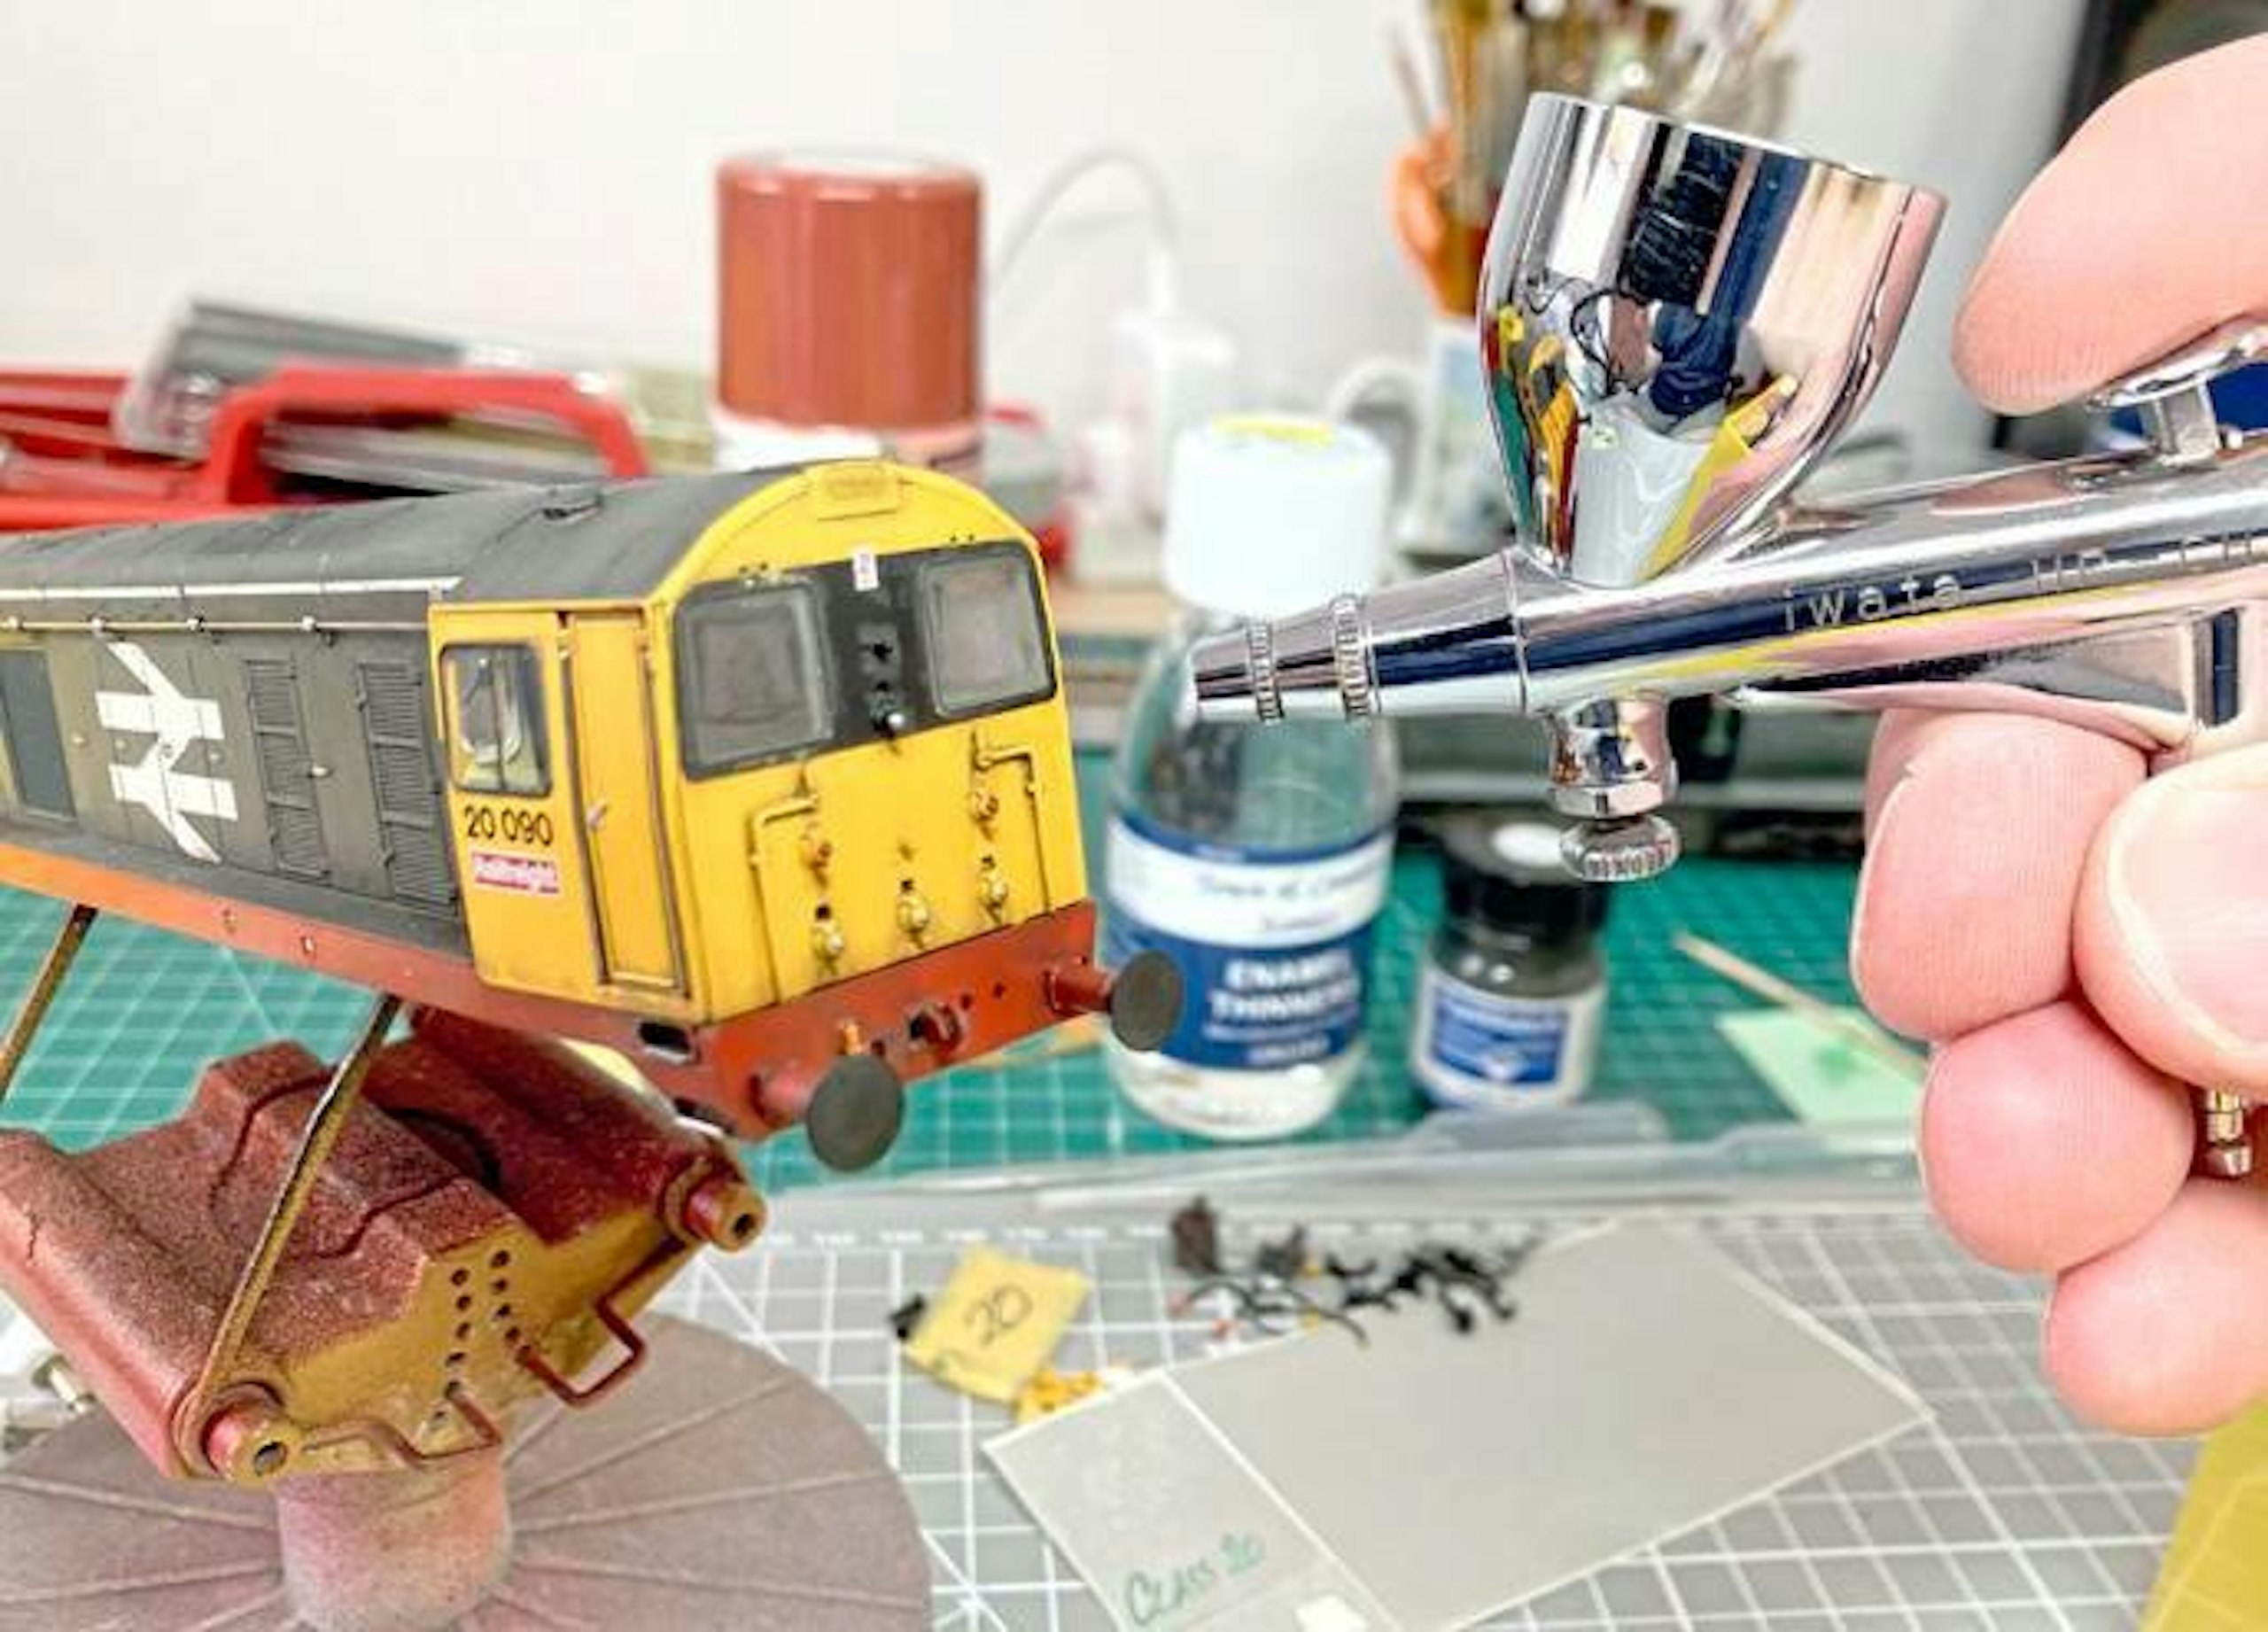
20 With the masking in place, I sprayed an ultra-light mist of Roof Dirt over the windows, testing the spray on a piece of paper beforehand. For a cleaner look, clear matt varnish can also look effective.
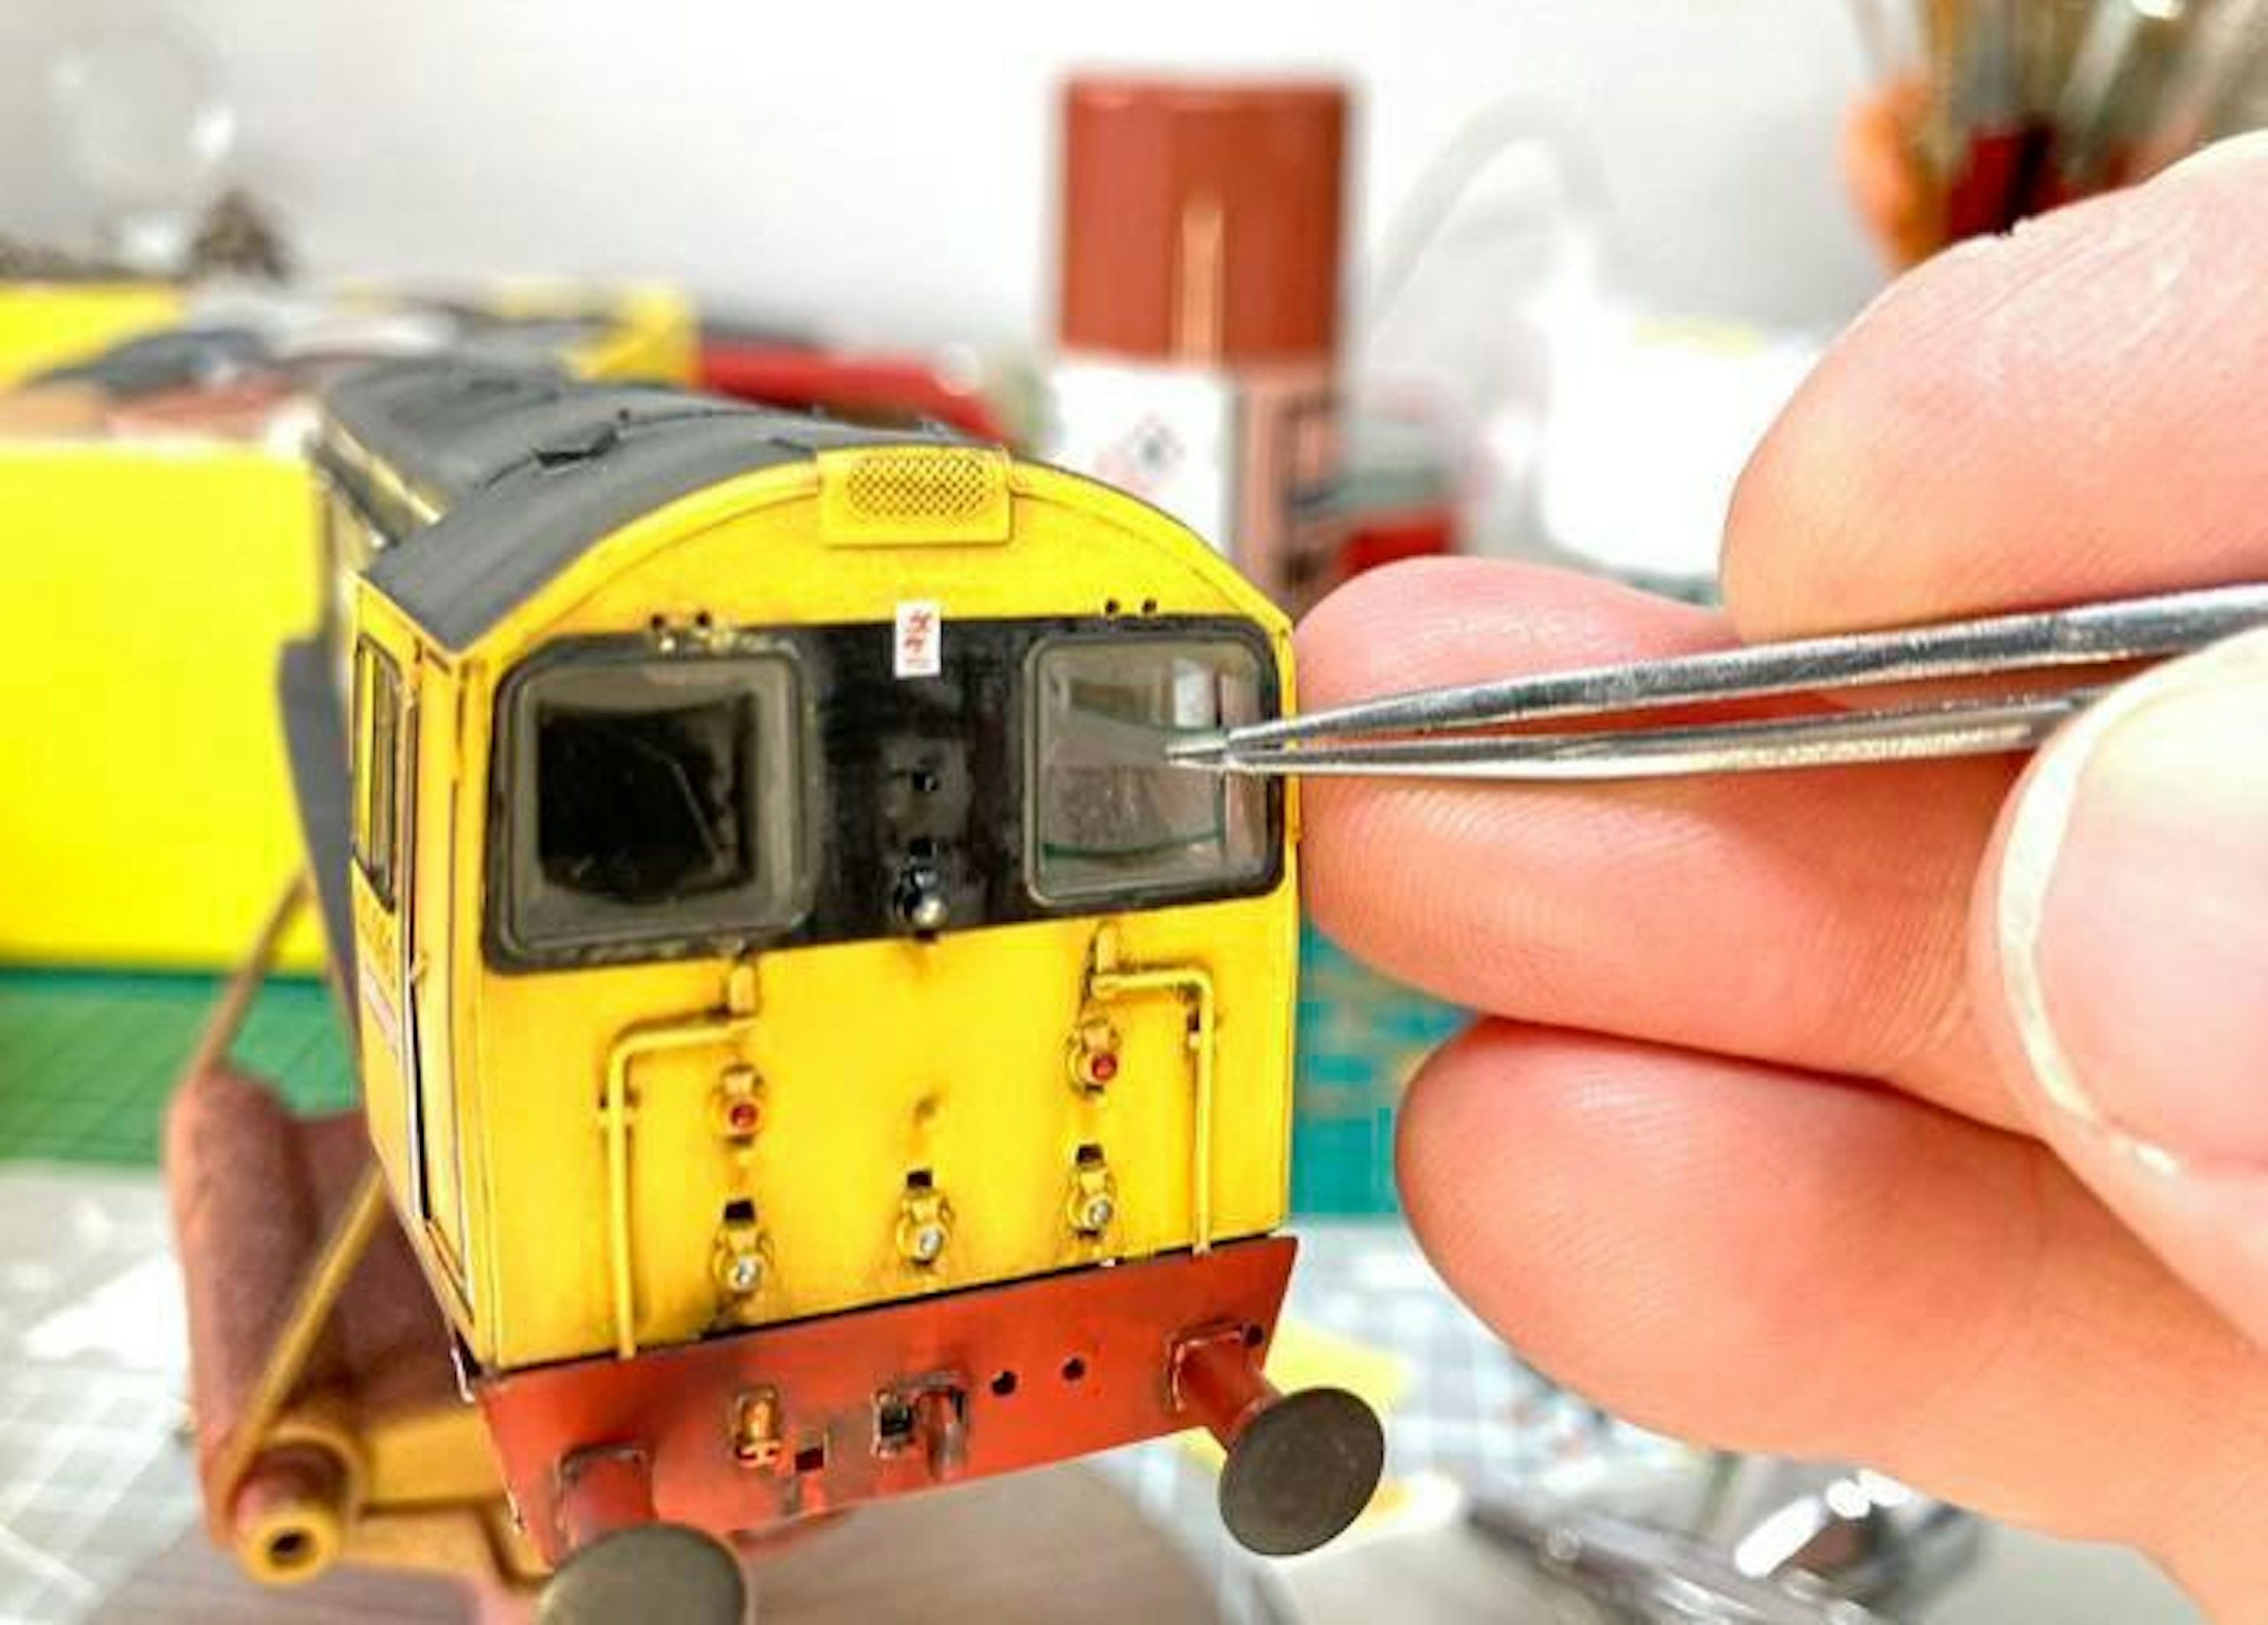
21 When the paint was dry, the masking film was gently removed, taking care not to scratch the glazing, revealing the wiper trails. The shaped masks can be re-used many times if placed back onto the backing sheet.
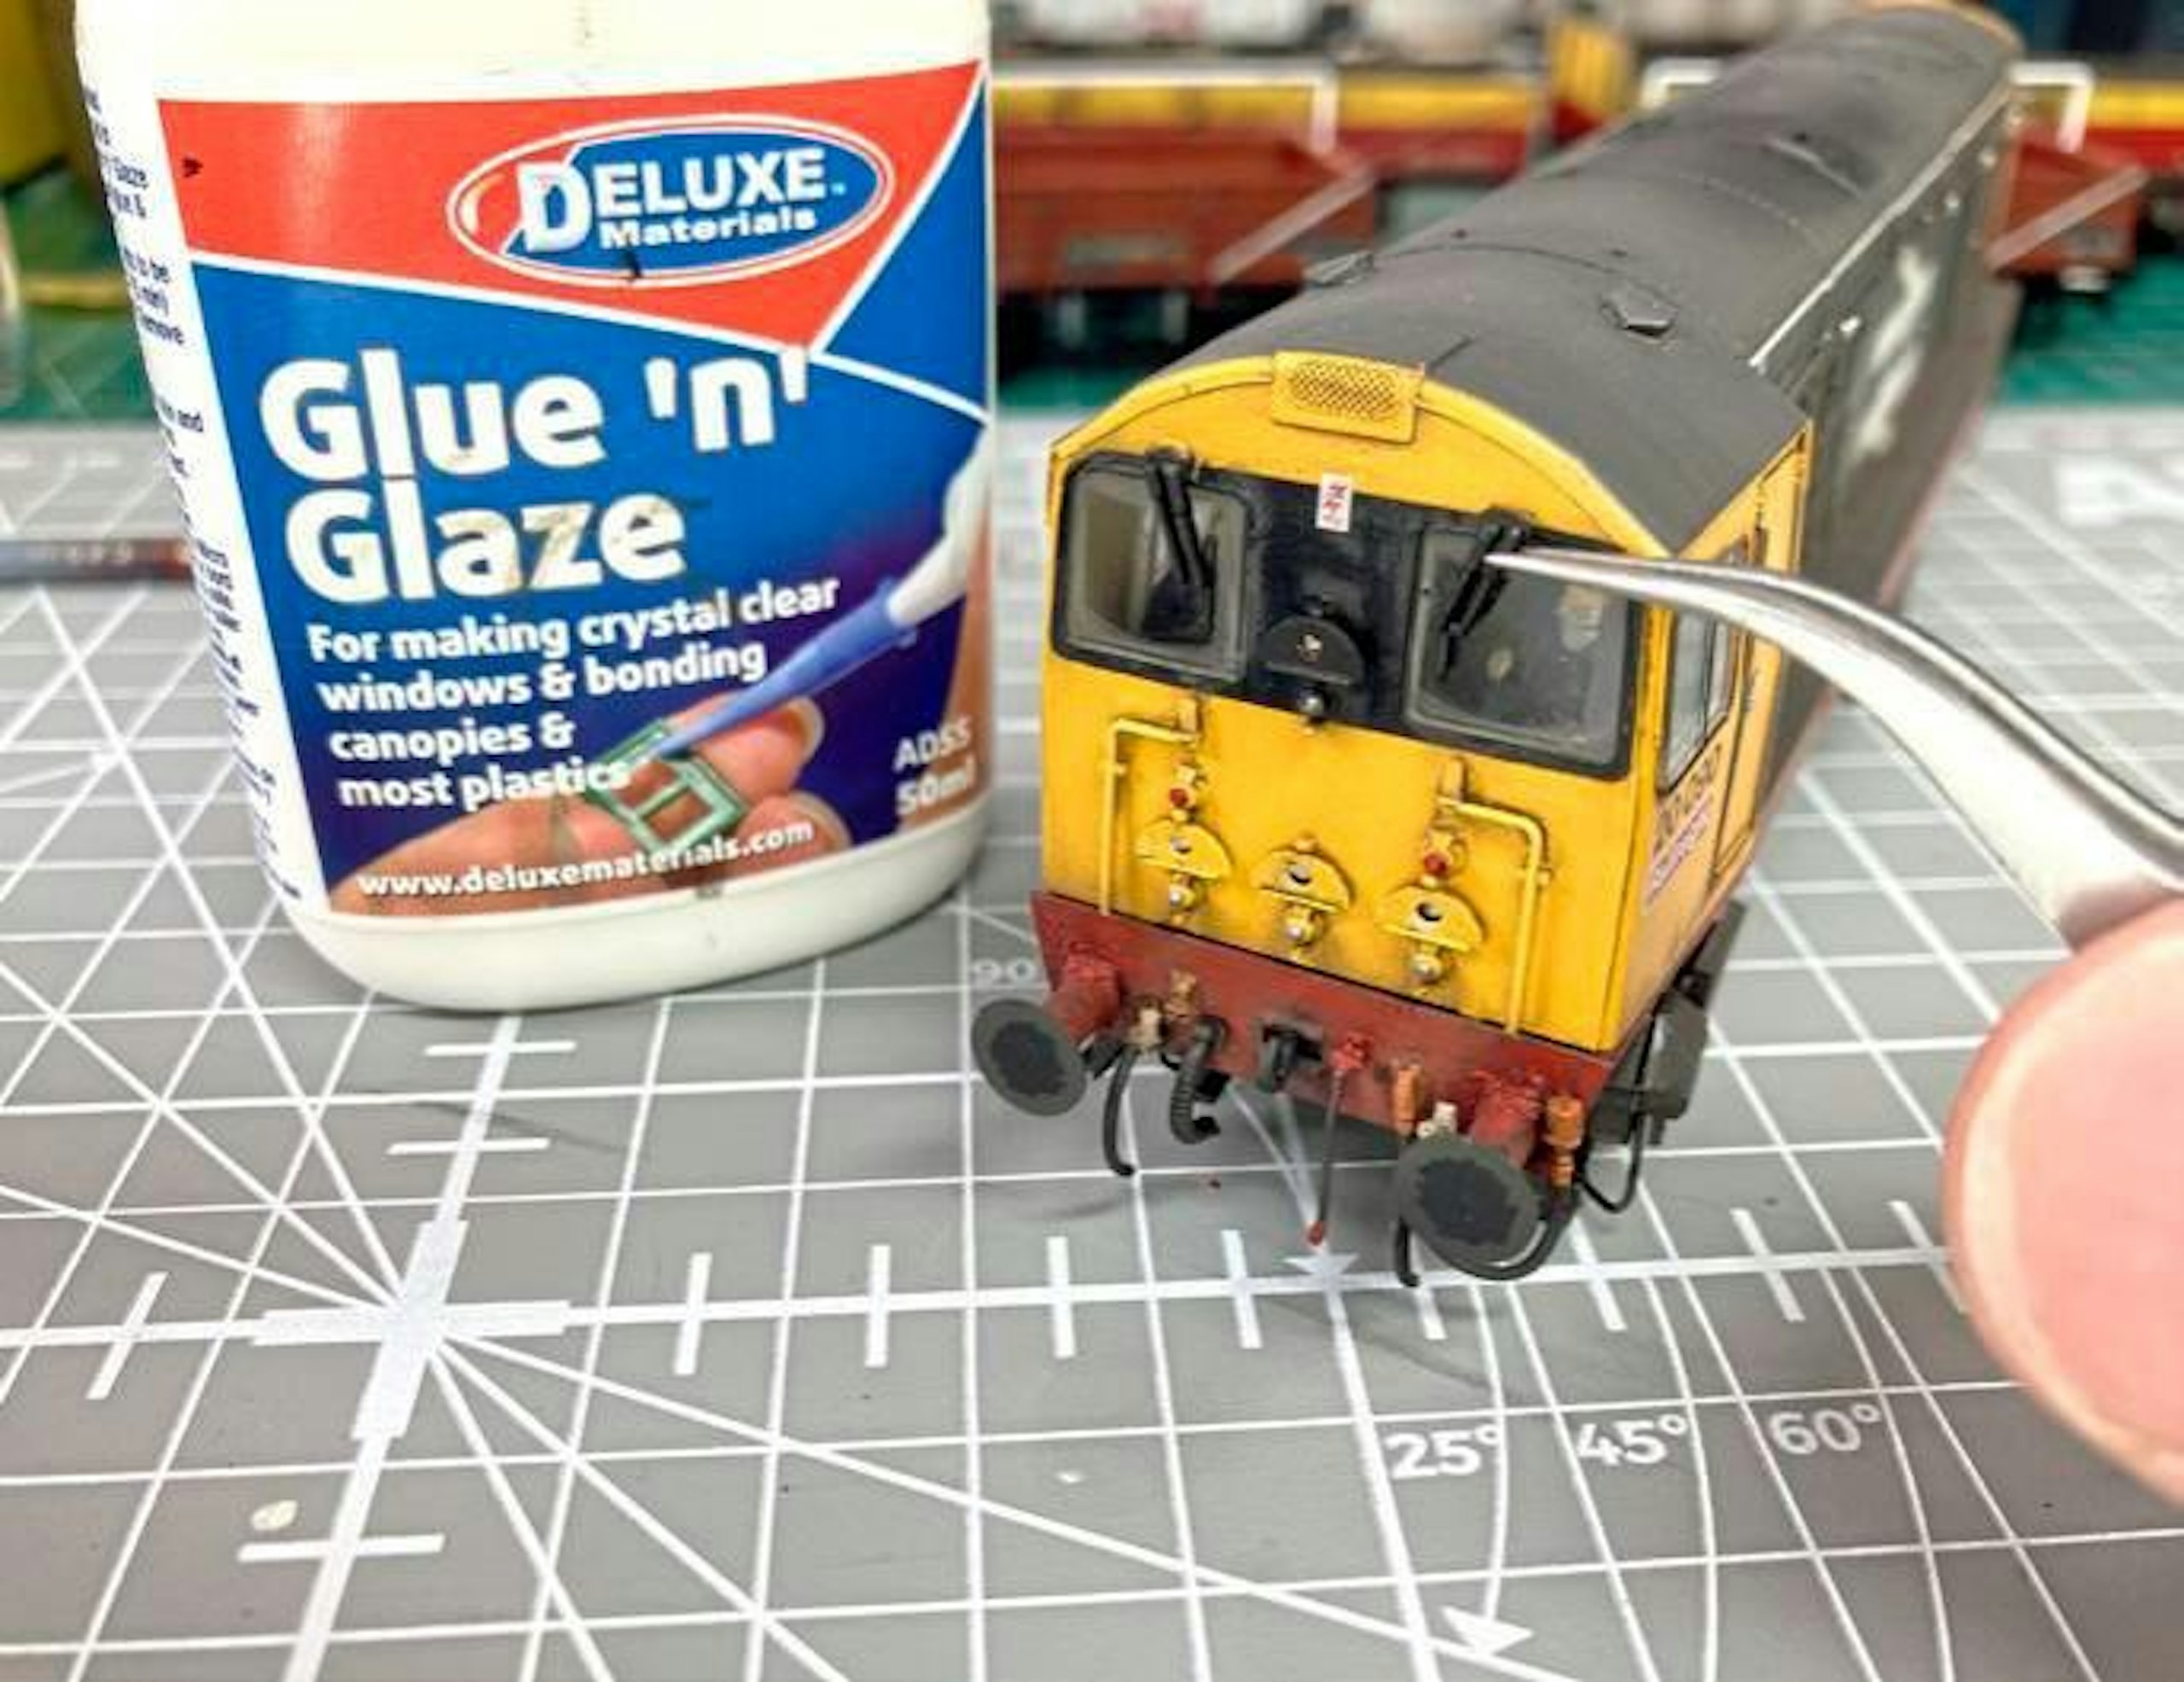
22 After cleaning the wheels and wiper contacts, the body was reunited with the chassis, and the model was test-run. When happy, the wipers (originally grey but repainted black) were installed with a clear glazing adhesive.
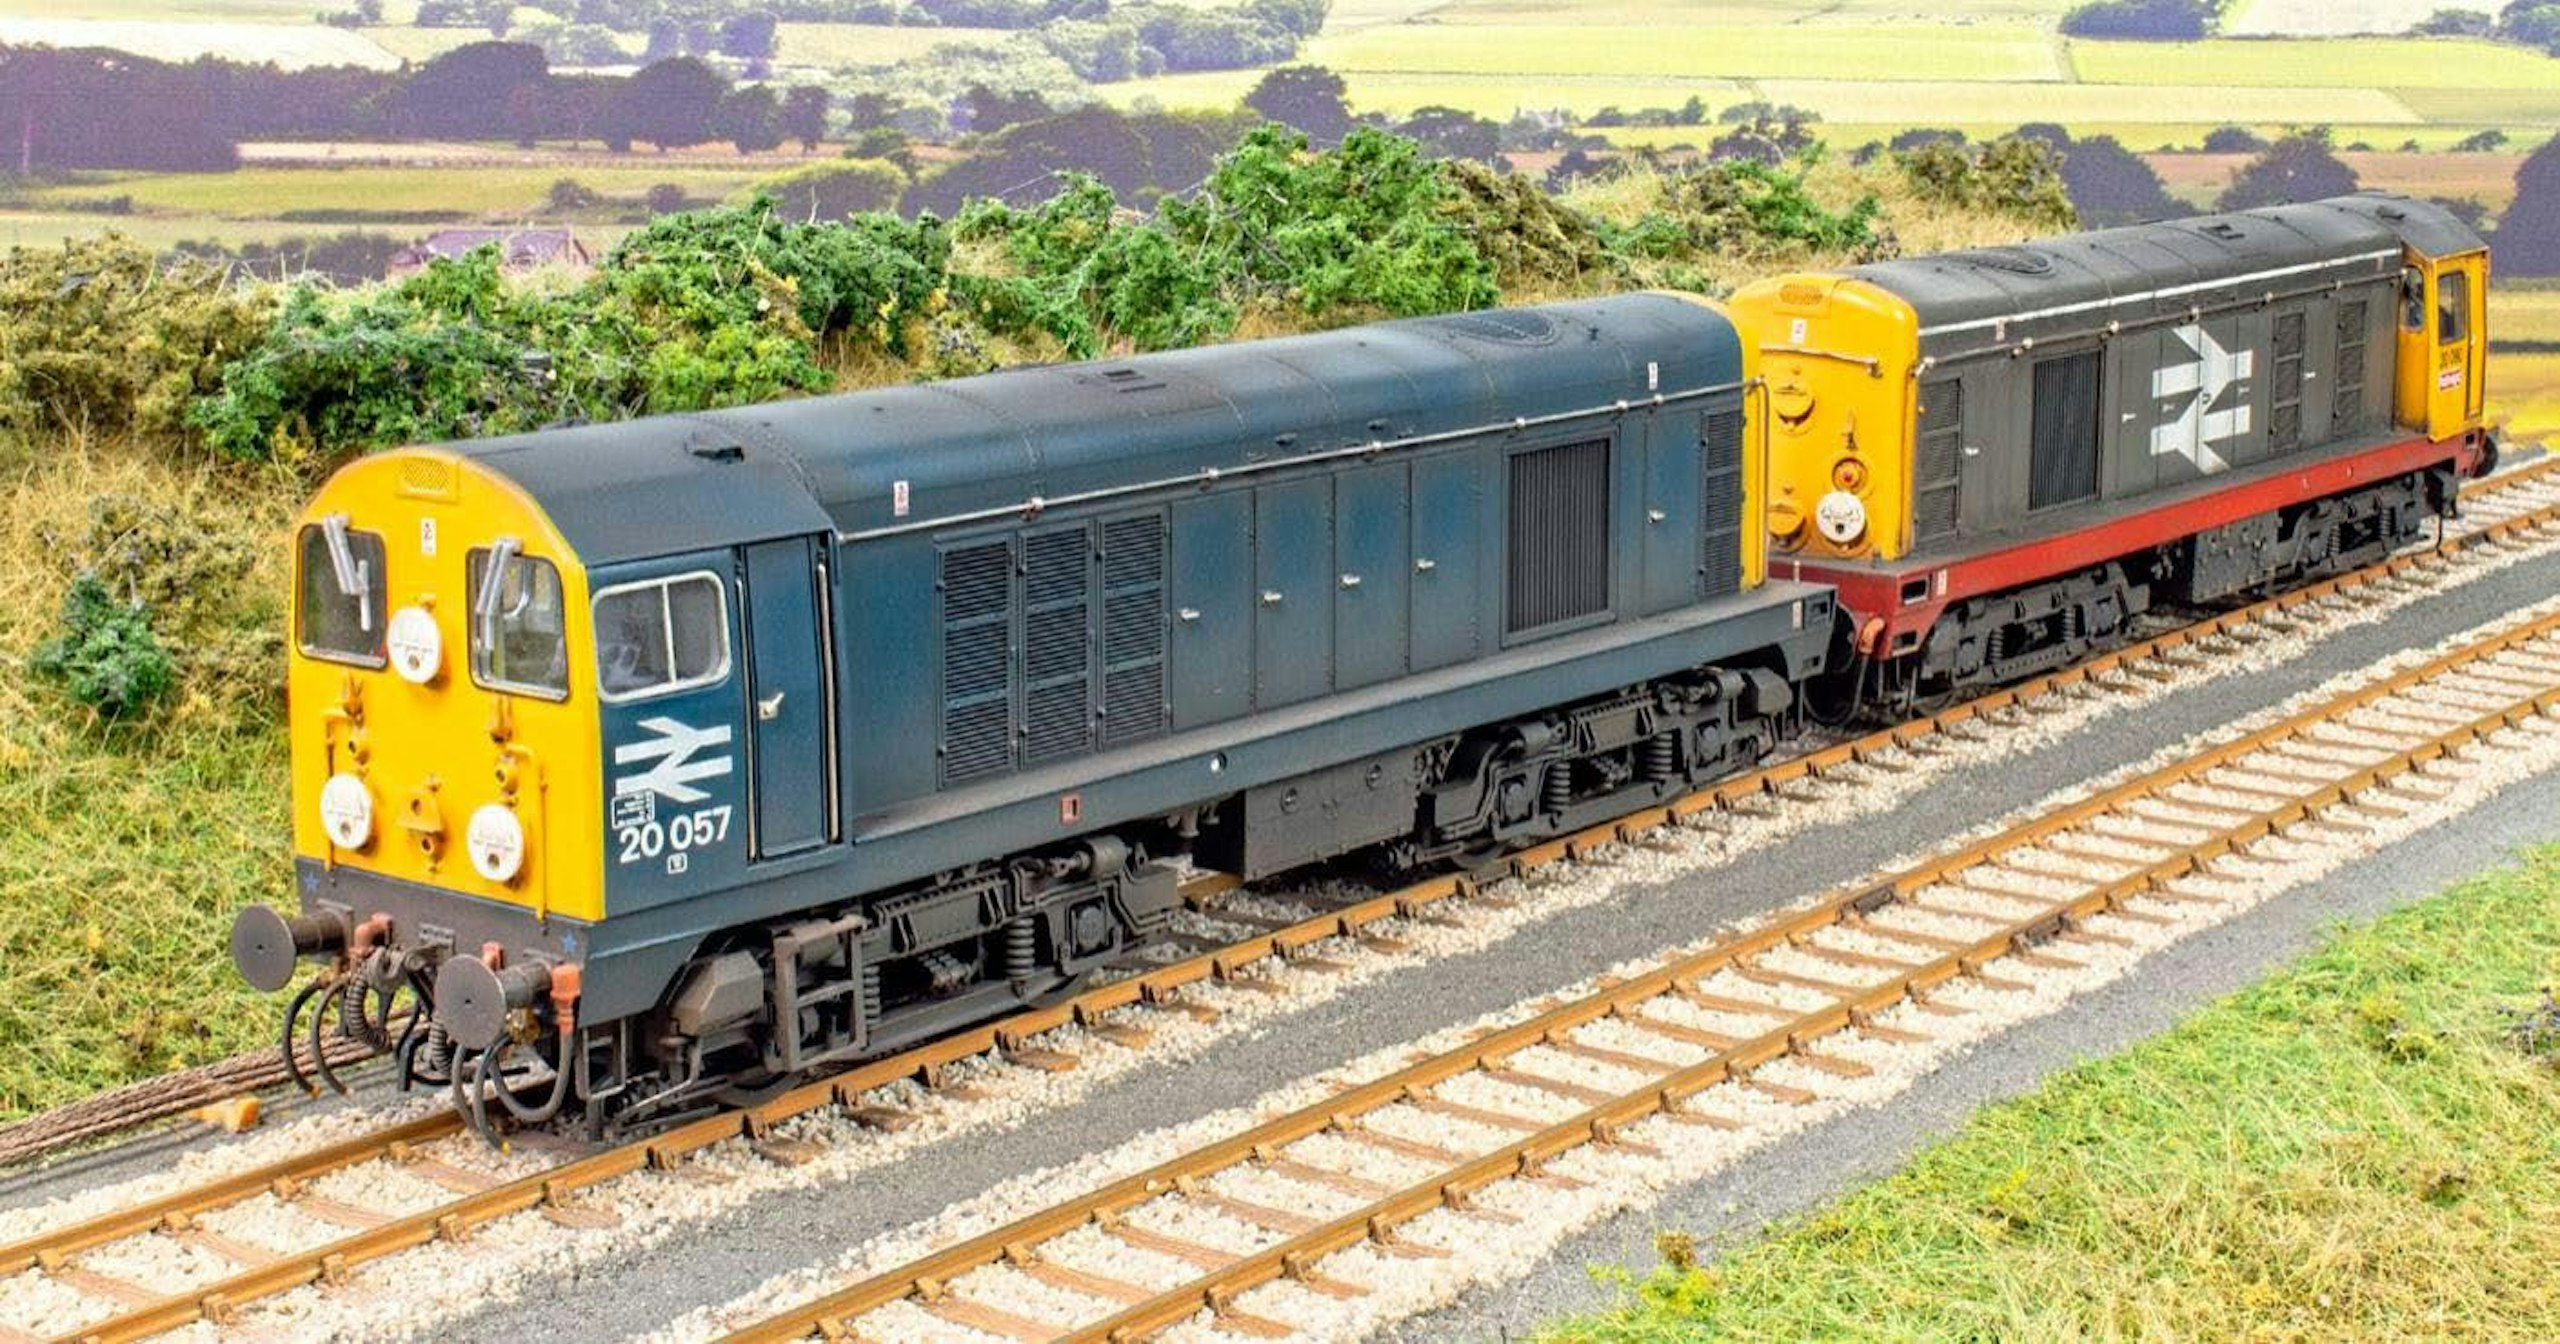
Class 20s usually work in pairs, so I’ve paired 20090 with Rail blue 20057, a post-2022 Bachmann model with an improved detail and electronic specification, meaning all I needed to do was weather it.
Bumping the buffers
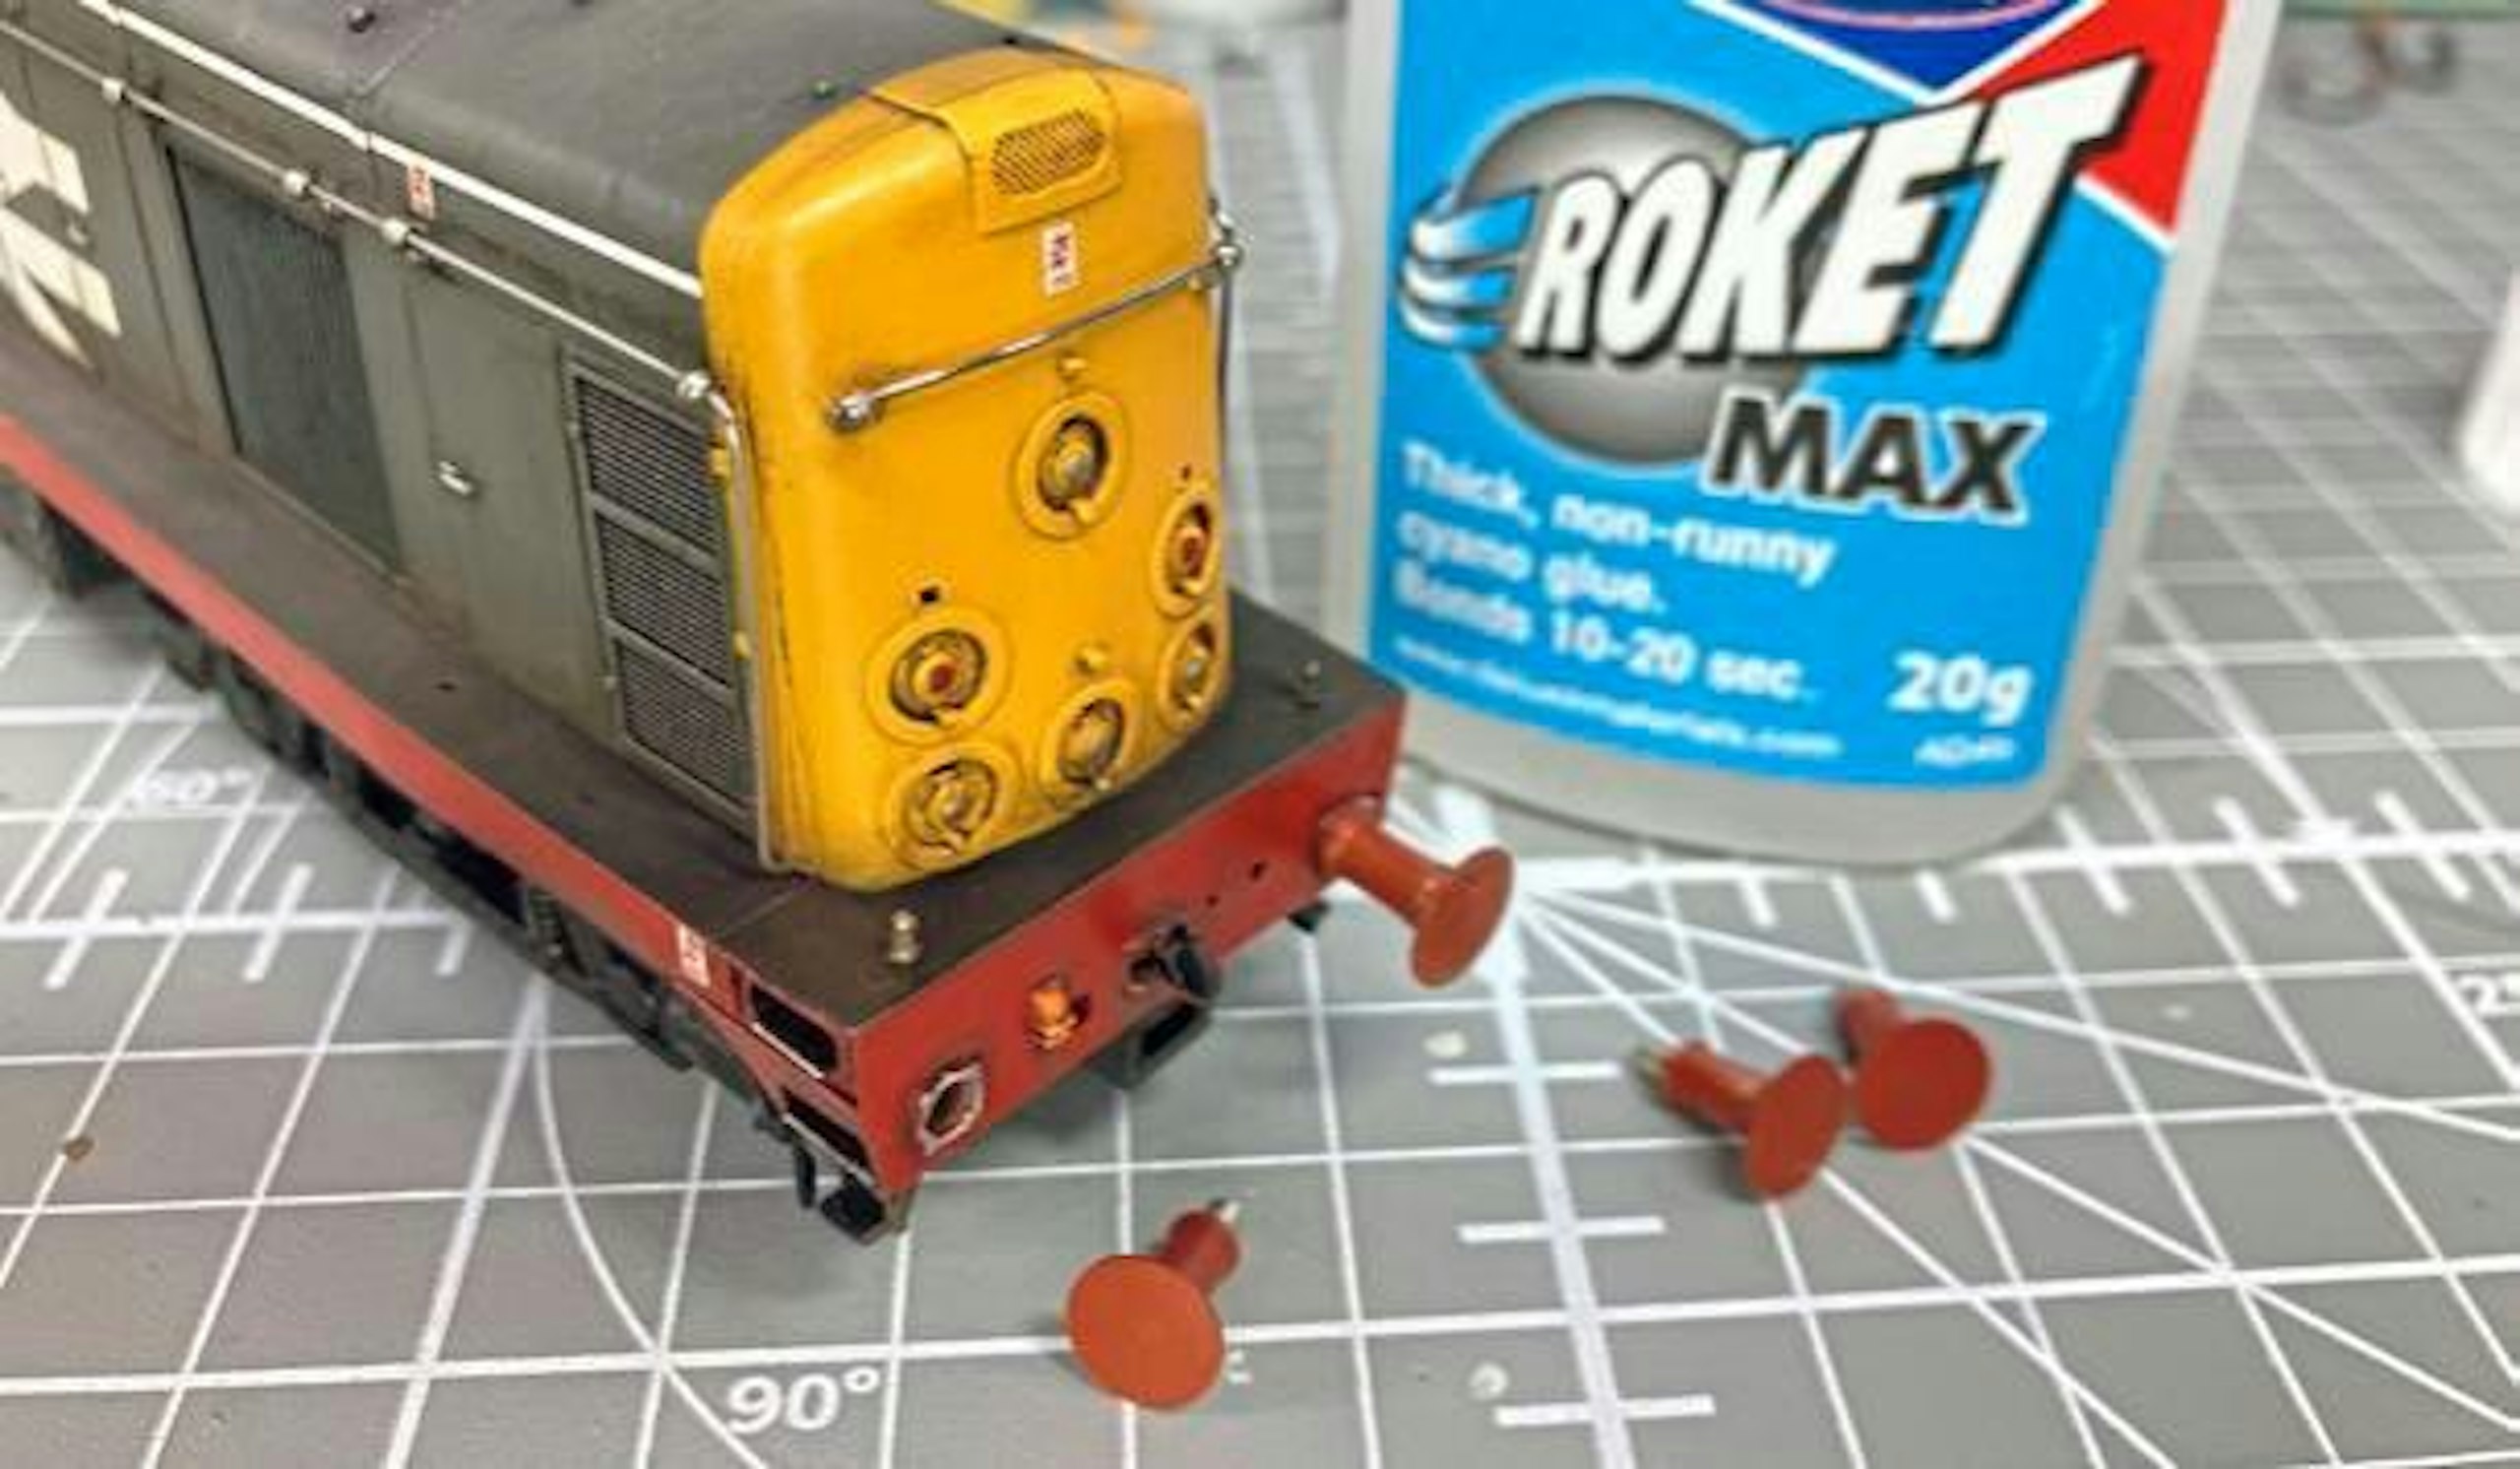
Things didn’t go exactly to plan with this project, as I managed to drop the bodyshell during the initial weathering stage, damaging a couple of the buffers. This was a blessing in disguise, as the original units looked a bit too ‘spindly’ to me. After removing the shanks, the mounting plates were gently filed to remove traces of old glue, then a set of turned brass replacements was installed.
The brass buffers came from the A1 Models range, which I’d had in stock for years, sprayed with red oxide primer before installation, fixing them in place with slow-setting cyano glue. I painted the bufferheads and spindles black once they were in place.
A1 Models buffers often turn up on traders’ stalls at exhibitions, but alternatives are available from the likes of Peter’s Spares or Wizard Models.
Web: www.petersspares.com www.wizardmodels.ltd
Subscribe to a Model Rail Print+ Subscription today and you'll get instant digital access, PLUS FREE UK delivery so you will never miss an issue.